Oracle EBS 11.5.10 安装文档 for Windows Server 2003
Oracle Predictive 11i Release for Windows NT 安装指南说

Hardware RequirementsOracle Predictive should be installed on a network-connected, NT server-class machine. Integrated Manager can be installed onnetwork-connected NT workstation.The hardware requirements for Oracle Predictive and Integrated Manager are as follows:Note:Oracle Campaign Plus must be installed to use OraclePredictive. Refer to Oracle Campaign Plus Installationdocumentation to install Oracle Campaign Plus.HardwareMinimum Requirement ComputerPentium 450 MHz with Y2K fixes Operating SystemMicrosoft Windows NT 4.0 (Service Pack 3) with Microsoft Internet Explorer 4.01 (workstation only) Hard Drive1 GB free space Other DrivesCD-ROM drive, or the ability to access a CD-ROM drive on the network Monitor256 color display RAM128 MB Miscellaneous Mouse or other pointing deviceNote:System size, number of users, and configuration maydirectly impact your individual requirements. Please confer withyour Oracle Consultant about your specific requirements.In addition, Oracle Predictive requires Voice Detection Units (VDU), which are housed in the Predictive server machine. The following Dialogic VDUs are supported by Oracle Predictive:Installation and maintenance of Oracle CRM application extensions will require the setup of Windows NT user accounts. These accounts will need administrator-level user rights to each server running an Oracle CRMapplication extension or a third party product for Oracle CRM that Oracle is responsible for installing or configuring. The creation of user accounts for administration of Oracle CRM services is the responsibility of the customer.A user account belonging to the built-in Administrator group and having the right to log on as a service should be sufficient. Oracle CRM useraccounts are usually local to an Oracle CRM application server. If this is the case, a user account will have to be created for each Oracle CRM application server. When performing maintenance on Oracle CRM application servers, you should always use the Oracle CRM user account set aside for that purpose.Software RequirementsTo use Oracle Predictive, Oracle Campaign Plus must be installed and operating. Refer to the Oracle Campaign Plus Installation documentation.Databases The Oracle CRM system database must be installed andconfigured prior to installation of Oracle Predictive. You will be required to enter database information during installation and configuration of Oracle Predictive.Oracle Predictive supports the following databases:Basic Operation (no answeringmachine messaging support)Enhances Operations (answering machine messaging support)DTI/481SC (two T1s x 48 channels)D/480SC-2T1 (two T1s x 48 channels)DTI/241SC (one T1 x 24 channels)D/240SC-T1 (one T1 x 24 channels)DTI/601SC (two E1s x 60 channels)D/600SC-2E (two E1s x 60 channels)DTI/301SC (one E1 x 30 channels)D/300SC-E1 (two E1s x 30 channels)LSI/161SC (16 analog channels)D/160SC-LS (16 analog channels)DatabaseRemote Communications with the Database Server Oracle 8i Oracle 8.16Open Database Connectivity (ODBC)ODBC drivers are required on each workstation running Oracle Predictive.The following ODBC drivers are supported:Client/Server CommunicationsOracle Predictive requires Gradient PC-DCE 32 v2.2.1. Oracle Predictive software communicates with Oracle CRM vertical applications over a local area network (LAN).Oracle Predictive is based on client/server architecture, in which some processes are distributed among two or more computers. To facilitate communication between machines, the software operates within a Distributed Computing Environment (DCE).Within the DCE, the DCE cell keeps track of DCE clients. When a DCE client boots, it reports itself to the DCE cell. Within the client/server architecture, when a client needs the services of a server, the DCE client informs the DCE cell and the cell connects the client to the server.The DCE cell must be located on a Windows NT server. It may reside on the same machine as another service with sufficient resources. Oracle DCE configuration scripts install the DCE directories required by the Oracle Predictive service.Computer-Telephony Integration (CTI) MiddlewareOracle Predictive supports the following CTI enablers:s CT-Connect 3.0sGenesys T-Server 5.0A PBX/ACD switch must be configured with its own proprietary CTI interface, typically via a TCP/IP interface, which is then converted to a higher-level CTI protocol/API via a third-party CTI vendor (for example, Dialogic CT-Connect). The table below shows what software versions of each ACD/PBX switch and CTI link are supported for Oracle Predictive.DatabaseODBC Driver Oracle 8i Oracle 8.00.05ACD/PBX Switch SwitchModelModel Version CTI Link CTI Link Version CTI Middleware *Alcatel 4400Release 3CCS Release 4.0CT-ConnectInstallation WorksheetsInstallation worksheets are designed to help you gather the information required to install Predictive. The information requested on the worksheet is entered during the installation process. To successfully install Oracle Predictive, please use the worksheet.Oracle Predictive Installation WorksheetPlease complete the following:s Identify the name of the DCE cell principal and the password for theDCE cell principal.s Identify the destination directory for the Oracle Predictive files. Choose one.s Accept the default, orsChoose a different destination directory: _______________________Aspect Call CenterVersion 7.0Event Bridge Version 7.0Prospect Version 7.01LucentDefinity G3Release 6Call Visor ASAI G3Version 4CT-Connect *LucentDefinity G3Release 6Call Visor ASAI G3Version 4Geotel ICM *NECNEAX 2400Version JO Info Link Release 2CT-Connect *NortelSymposium Call Center Version 1.5Symposium Link Version 5CT-Connect Nortel Meridian Options 11-81Release 24Meridian LinkLink 5CT-Connect *Rockwell Spectrum Release 7Access 2Release 2CT-Connect *Siemens, U.S.Hicom 300E V9006.5Call Bridge Release 4.0CT-Connect*Oracle expects to support these switches in 2000. Check with your Oracle representative.ACD/PBX Switch SwitchModelModel Version CTI Link CTI Link Version CTI Middlewares Identify the Oracle ODBC driver being used to access the Oracle CRMsystem database.s Specify the database driver parameters for the system databases.s OracleSystem database in TNSNAMES.ORA: _________________________s Identify the Windows NT administrator-level user account set up onthe server that will be used to administer Oracle Predictive.Installation TasksThe installation tasks are step-by-step instructions that guide you through the installation process. Many of the tasks are wizard-based. You shouldfollow them in the order presented to ensure that all steps needed to install Oracle Predictive are completed.Installing Oracle PredictiveThe Oracle Predictive module is installed on the designated server using Oracle Call Center Service selection on the installation CD.This procedure installs the Oracle Predictive module on the designated Windows NT server. Complete the following steps to install OraclePredictive.PrerequisitesBefore you can install Predictive, you must first install Campaign Plus, Gradient PC DCE, CT Connect, Internet Explorer 4.0, VDU Board, and Oracle 8i.Steps1.Place the installation CD in the CD-ROM drive of the designated OraclePredictive server.If the setup program does not start automatically, go to the rootdirectory on the installation CD and run setup.exe.The main setup program window appears.Note:Throughout this procedure, use of the default destination isstrongly recommended.2.Click Oracle Call Center Services .3.The setup program is initialized and the Welcome dialog box appears. Click Next .4.The Software License Agreement dialog box appears. Click Yes to accept the terms of the license agreement.5.The User Information dialog box appears. Type your name and company and then click Next . 6.The Choose Destination Location dialog box appears. The DestinationFolder area displays the default destination folder for the files. If this location does not exist, the setup program will create it for you.You have the following options:s Click Next to accept the default destination folder.sClick Browse to choose another destination folder or create a new destination folder and (when you return to the Choose Destination Location dialog box) then click Next .7.Select Custom setup and then click Next .8.From the Select Components box, first clear all check boxes then selectthe following components:s Oracle Predictives Oracle Directory Maintenances Oracle Service Monitor9.The Select Program Folder box appears, displaying the default programfolder. If the program folder does not exist, the setup program will automatically create it.Note:You will have the option of installing Oracle Call Center Services (that is, Oracle Call Center vertical application extensions), and Oracle Integrated Manager. When manually starting the setup program, be sure to select the main setup.exe so that all of the installation product options will be presented.Note:If you have previously installed Oracle Campaign Plus or Oracle IVR Integrator, the dialog box lists the previously installed components and asks if you wish to overwrite them. If you wish to use the same components in the same directory locations as the previous install, leave the check boxes unchecked and click Next .You have the following options:s Click Next to accept the default program folder.s Select another program folder in the Existing Folders box and click Next.s Type a new program folder in the Program Folders box and then click Next.10.In the Account box, type the login for the Windows NTadministrator-level user account set up on the server that will be used to administer Oracle Predictive and then click Next.11.Review the setup parameters summary. Click Next to accept. The setupprogram starts installing Oracle Predictive. It provides status of theinstallation. When the installation is finished the setup programprompts you to create ODBC system data sources.12.Click OK to bring up the ODBC Data Source Administrator.13.The ODBC Data Source Administrator appears. If you have not alreadydone so, use the ODBC Data Source Administrator to create ODBCsystem data sources for the Oracle CRM system database. Use the data source names identifies in the Worksheet for Oracle PredictiveInstallation.14.In the ODBC Data Source Administrator dialog box, click OK to saveyour data sources and close the ODBC Data Source Administratordialog box and return to the setup program; otherwise, click Close. 15.Select Yes, I want to restart my computer now option and remove theinstallation CD from the drive. Click Finish.After the computer restarts, the Oracle Predictive server installation is complete.Post-Installation Tasks1.Install Oracle Integrated Manager on the administrator’s andsupervisor’s workstations.Refer to Installing Oracle Campaign Plus documentation for moreinformation.2.Create Oracle Predictive services.Refer to the Oracle Predictive Concepts and Procedures documentation for more information.。
win10下oracle11g安装图文教程
win10下oracle11g安装图⽂教程本⽂为⼤家分享了oracle11g安装图⽂教程,供⼤家参考,具体内容如下
0、安装环境
1、安装包下载
2、安装
1)将2个压缩包解压到⼀个⽬录下,运⾏setup.exe
2) 出现下⾯提⽰,跳过
3) email和更新都不⽤填
4) 选择创建和配置数据库(这样数据库安装完成后,会默认创建数据库实例orcl)
5) 选择桌⾯类(适⽤于安装到pc上)
6) 设置安装路径、实例orcl的密码
7) 点击完成
8) 完成后点击⼝令管理
9) 默认sys和system⽤户可⽤,可以将scott⽤户解除锁定,并设置密码这样就可以⽤sys、system、scott这三个⽤户登录数据库
10) 完成安装
3、测试安装是否成功
1) 打开服务(cmd—>services.msc)
看到已经有oracle服务运⾏
将个服务改为⼿动启动(需要开启oracle时,⾃⼰启动服务,减少资源消耗)
只需启动OracleOraDb11g_home1TNSListener和OracleServiceORCL这两个服务,oracle就可以使⽤
2) 运⾏SQL Plus,通过⽤户名/密码能够登录数据库,说明安装成功
以上就是本⽂的全部内容,希望对⼤家的学习有所帮助,也希望⼤家多多⽀持。
oraclewin-xp安装详细说明步骤

Oracle数据库10gwin-xp安装图解
1.双击运行setup.exe文件出现如图所示界面,选择高级安装
2.单击下一步选择企业版安装
3.单击下一步选择路径(如果是win7这不需要改路径,一般改盘符就行了,不要改路径)
4.单击下一步出现如下图示有错误或未成功的地方选择用户已验证(否则安装会出错)
5.单击下一步出现如图选择创建数据库
6.单击下一步,选择一般用途
7.单击下一步
8.选择下一步,选择使用database control管理数据库选项
9.单击下一步,选择文件系统选项
10.单击下一步,选择不启用自动备份
11.单击下一步出现如下图示,给每个用户输入一个密码或者选择使用相同的密码,在这里建议选择‘这些账户都使用不同的口令’
12.单击下一步,出现如图所示,点击安装
13.点击安装出现如图所示图示,等待安装的完成,安装时间的长短和个人pc的配置有关。
14.出现如下图示,继续等待安装
15.下图为正在执行安装界面
16.出现如下图所示,选择口令管理,如果没有选择口令管理数据库可能不能用
17.依次解锁sys,system,scott,tsmsys等常用用户的密码
18.点击确定出现如下图示,点击确定
19.
20.出现如下图示,说明安装完成
21.点击退出,点击是
22.点击开始选择程序如图所示sqlplus
23.输入用户名,密码和主机字符串
24.点击确定出现如下图所示说明安装成功
25.运行cmd命令,输入sqlplus,一次输入用户名,密码出现如下图所示说明安装完成。
windows xp下安装oracle 11g.docx

Oracle Database 11g在Windows XP下的安装步骤1、找到下载目录下的Oracle11g第2版-11.2.0.1.0-win32.ISO,打开目录双击setup.exe图标。
2、经过一段命令提示符和安装启动界面后变可以进行Oracle的正式安装。
如下图所示:电子邮件处填写自己的e-mail,这个不用多说。
但需要注意的是要将My Oracle Support口令上的勾点掉,然后点击下一步。
3、默认情况下点击下一步进入下一阶段。
4、一般情况下选择桌面类,如果要在Windows Server上安装的话选择服务器类,然后点击下一步。
在此我们选择桌面类。
5、选择安装配置并建立管理口令(口令一定要记住)。
注意:输入管理口令时一定要遵循口令规则,规则如下:管理 (SYS) 口令管理口令是与 SYS 数据库权限相对应的口令。
最低口令要求如果不满足下列要求, 安装将不会继续:1)口令不能超过 30 个字符。
2)空口令不能被接受。
3)用户名不能为口令。
4)SYS 帐户口令不能为 change_on_install。
(不区分大小写)口令建议提示输入口令时, 请遵循这些准则。
Oracle 建议您指定的口令:1)至少包含一个小写字母。
2)至少包含一个大写字母。
3)至少包含一个数字。
4)长度至少为 8 个字符。
5)使用可包括下划线 (_), 美元符号 ($) 和井号 (#) 字符的数据库字符集。
6)如果包含特殊字符 (包括以数字或符号作为口令的开头), 请将口令加双引号。
7)不应为实际单词。
6、执行先决条件检查。
出现失败情况的话将右上角的全部忽略选上,然后点击下一步。
7、确认无误后点击完成。
8、点击完成后进入产品的安装,请耐心等待。
9、100%后会出现以下界面,之后只要进行默认操作即可。
品味人生1、很多时候,看的太透反而不快乐,还不如幼稚的没心没肺。
2、睡吧,合上双眼,世界就与我无关。
——顾城《生命幻想曲》3、你来人间一趟,你要看看太阳,和你的心上人,一起走在街上。
Oracle 11g for Windows的安装与配置
Oracle 11g for Windows的安装与配置数据库管理系统的安装与升级是一项比较复杂的任务。
为了使Oracle 11g数据库系统可以安装在多种平台上,Oracle提供的Oracle Universal Installer(Oracle通用安装工具,OUI)是基于Java技术的图形界面安装工具,利用它可以完成在不同操作系统平台上的、不同类型的、不同版本的Oracle数据库软件的安装。
无论是Windows NT/XP/2003、Sun Solaris、HP UNIX、Digital UNIX、VMS还是OS/390都可以通过使用OUI以标准化的方式来完成安装任务。
本节主要介绍如何在Windows平台上安装和配置Oracle数据库服务器。
Oracle 11g数据库服务器由Oracle数据库和Oracle例程组成。
安装数据库服务器就是将管理工具、网络服务、实用工具、基本的客户机软件等部分,或者将相应的文件从安装盘复制到计算机硬盘的文件夹结构中,并创建数据库、配置网络、启动服务等。
Oracle 11g数据库服务器有两种安装方式:高级安装和基本安装。
由于基本安装比较简单,配置参数较少,用户只需要按照Oracle 11g的安装步骤要求一步一步往下安装就可以了,而高级安装较为复杂。
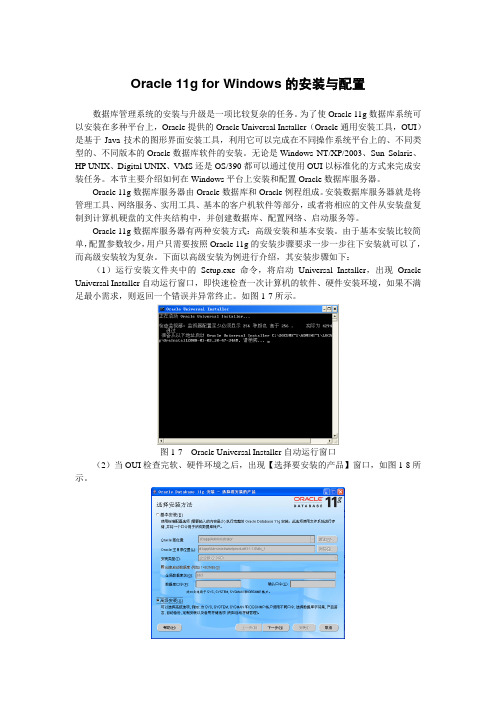
下面以高级安装为例进行介绍,其安装步骤如下:(1)运行安装文件夹中的Setup.exe命令,将启动Universal Installer,出现Oracle Universal Installer自动运行窗口,即快速检查一次计算机的软件、硬件安装环境,如果不满足最小需求,则返回一个错误并异常终止。
如图1-7所示。
图1-7 Oracle Universal Installer自动运行窗口(2)当OUI检查完软、硬件环境之后,出现【选择要安装的产品】窗口,如图1-8所示。
图1-8 选择要安装的产品如果想快速地安装Oracle 11g数据库,可以单击【基本安装】单选按钮,再输入数据库登录密码,然后单击【下一步】按钮开始基本安装。
Windows下oracle客户端安装使用方法

Windows下oracle客户端安装使用方法1. 下载完整的oracle客户端(不是oracle instantclient)并安装(1)在windows下ORACLE_HOME环境变量是通过注册表设置的,其值指向oracle客户端所在的目录。
在安装oracle客户端时,要确保ORACLE_HOME未被设置set ORACLE_HOME=(2)自定义安装时一般要选上database utiltites、oci、sqlplus等选项(3)win7下,oracle在注册表中的位置为HKEY_LOCAL_MACHINE\SOFTWARE\Wow6432Node\ORACLE,内容如下:[HKEY_LOCAL_MACHINE\SOFTWARE\Wow6432Node\ORACLE]"inst_loc"="C:\\Program Files (x86)\\Oracle\\Inventory"[HKEY_LOCAL_MACHINE\SOFTWARE\Wow6432Node\ORACLE\KEY_OraClient10g_home1]"ORACLE_HOME"="D:\\oracle10.2.0.1""ORACLE_HOME_NAME"="OraClient10g_home1""ORACLE_GROUP_NAME"="Oracle - OraClient10g_home1""ORACLE_BUNDLE_NAME"="Enterprise""NLS_LANG"="SIMPLIFIED CHINESE_CHINA.ZHS16GBK""StatementCacheSize"="0""SQLPATH"="D:\\oracle10.2.0.1\\dbs""MSHELP_TOOLS"="D:\\oracle10.2.0.1\\MSHELP"[HKEY_LOCAL_MACHINE\SOFTWARE\Wow6432Node\ORACLE\KEY_OraClient10g_home1\]"TraceFileName"="C:\\ODPNET.trc""TraceLevel"="0""TraceOption"="0""StatementCacheSize"="0"2. tnsnames.ora 设置正确才能使用TNS进行连接, tnsnames.ora 文件放置在%ORACLE_HOME%/network/admin,文件内容大致如下:ORCL =(DESCRIPTION =(ADDRESS_LIST =(ADDRESS = (PROTOCOL = TCP)(HOST = 192.168.2.1)(PORT = 1521)))(CONNECT_DATA =(SERVER = DEDICATED)(SERVICE_NAME = test)))3. 客户端的使用问题(1)我在win7下安装10.2.0.1客户端后,运行sqlplus会出现以下错误:SP2-1503: 无法初始化Oracle 调用界面SP2-0152: ORACLE 不能正常工作以管理员方式运行sqlplus这个问题就解决了。
Windows安装oracleg教程完整版

Windows安装oracleg教程完整版Oracle是一种常用的关系型数据库管理系统,可以在Windows操作系统上安装和使用。
下面是Windows安装Oracle 11g的完整版教程。
1.前提条件在安装Oracle 11g之前,确保满足以下条件:- 操作系统:Windows 7、8或10(推荐64位操作系统)-内存:至少4GB的RAM-硬盘:至少10GB的可用空间-其他要求:管理员权限、网络连接和管理员密码3. 安装Oracle 11g2)在接受许可协议页面上,选择“是”,然后点击“下一步”。
3)当要求选择安装类型时,选择“自定义”以进行自定义安装,并点击“下一步”。
4)在选择安装位置页面上,选择要安装Oracle软件的位置。
建议将其保留默认设置,然后点击“下一步”。
5)在选择配置选项页面上,选择“创建和配置数据库”以进行数据库安装和配置。
然后点击“下一步”。
6)在选择数据库配置类型页面上,选择“典型配置”以进行基本的数据库安装和配置。
然后点击“下一步”。
7)在指定数据库标识页面上,输入数据库的全局名称(SID)。
您还可以选择自定义数据库ID(DBID)。
然后点击“下一步”。
8)在指定管理密码页面上,为数据库管理员(SYS)用户设置密码。
确保选择“无法在启动时启用强密码验证(不推荐)”选项,以便简化设置。
然后点击“下一步”。
9)在指定数据库存储选项页面上,选择默认文件位置,然后点击“下一步”。
10)在指定备份和恢复选项页面上,选择是否启用自动备份和恢复。
然后点击“下一步”。
11)在指定配置选项页面上,选择“使用向导配置网络”选项,并点击“下一步”。
12)在选择配置路径页面上,选择默认路径并点击“下一步”。
13)在执行操作页面上,将显示已执行的操作的摘要。
检查并确认配置,然后点击“下一步”。
14)Oracle安装程序开始安装和配置数据库。
请等待安装过程完成。
15)安装成功后,点击“完成”关闭安装程序。
Oracle_biee_11g安装文档

OBIEE 11G 入门指南V1.0目录1 Oracle BIEE 11G 安装指引 (3)1.1配置要求31.2安装Oracle Repository Creation Utility (3)1.3安装Oracle BIEE 11G 91.4验证安装是否成功152 创建资料档案库(RPD)文件 (16)2.1创建数据源连接162.2创建资料档案库文件162.3在BIEE服务中运行RPD文件。
(18)3 卸载与重新安装 (18)3.1BIEE知识库删除与创建 183.2删除BIEE instance 193.3重新配置BIEE instance (21)4 旧版RPD文件和主题升级 (24)本文档适合已经学习使用过Oracle BIEE 10G的用户使用。
1Oracle BIEE 11G 安装指引1.1配置要求1、数据库要求在Oracle Database 11g Release 2(11.2.0.1.0)以上的版本(字符集为UTF8)。
2、使用固定的IP地址,不能使用DHCP获取动态IP地址,关闭系统服务“DHCP client”。
3、检查C:\WINDOWS\system32\drivers\etc目录中的host和host.txt文件,仅保留内容127.0.0.1 localhost,去掉其余映射,否则在安装或创建BIEE服务过程中会出现coreapplication_obips1服务无法启动。
4、安装Oracle Repository Creation Utility 11.1.1.3.3。
在oracle网站/technetwork/middleware/bi-enterprise-edition/downloads/ bus-intelligence-11g-165436.html可以下载。
5、浏览器IE7.0以上。
1.2安装Oracle Repository Creation Utility步骤:1. 运行BIN文件夹下面的RCU.BAT2.点击创建,创建组件方案并添加到数据库中3填写主机名,端口,服务器名,用户及密码。
- 1、下载文档前请自行甄别文档内容的完整性,平台不提供额外的编辑、内容补充、找答案等附加服务。
- 2、"仅部分预览"的文档,不可在线预览部分如存在完整性等问题,可反馈申请退款(可完整预览的文档不适用该条件!)。
- 3、如文档侵犯您的权益,请联系客服反馈,我们会尽快为您处理(人工客服工作时间:9:00-18:30)。
Oracle EBS 11.5.10 安装文档for Windows Server 2003
——谨此献给勇敢挑战ebs的朋友们。
准备工作
硬件配置:P4 1.6,512MB,160G(20G操作系统,140G给安装文件与EBS)
环境:Windows Server 2003 R2,虚拟内存最小1.5G。
从Oracle官方网站下载安装包,语言包只选了简体中文,全部下载完毕后一共30G。
安装vc++ 6.0,中文英文无所谓。
安装mk toolkit 8.0,ITPUB中能够找到,26个文件下的非常不容易。
安装完毕后,重新启动计算机,使环境变量设置生效。
安装ebs
安装文件目录结构(所谓Stage):
点击运行RapidWiz.cmd
注:这里直接点击,是没有主机名参数的,安装程序使用默认的主机名称(我的机器是AppServer,我的电脑的属性中能够看到)。
注意:必须保存好该配置文件。
如果安装过程中遇到问题退出,然后重新继续安装时需要使用该文件。
Host/Domain Check失败,是因为没有正确设置hosts文件。
在c:\windows\system32\drivers\etc\中找到hosts文
件,增加一新行(IP地址[tab]完整主机名)。
主机名的域名部分和安装时设置的要相同。
System Utilities Check失败原因是,安装MK Toolkit和VC98的完全目录名中都含有空格。
当安装程序把这些名称作为变量给CMD批处理命令使用时,CMD会解析错误。
所以Oracle安装文档把MK Toolkit命名成MKS是有道理的,但是她确没有说清楚。
VC和MKS的安装路径名去除空格后,问题解决。
Gnumake.exe很少找到直接可以下载的。
只能下载源代码,然后自己编译发行成EXE文件。
源文件到
/pub/gnu/make/下载,下载3.81版本,因为3.79和3.80下载都不能成功编译发行。
发行完后在winrel目录中找gnumake.exe,复制到c:\mks\mksnt目录中。
删除系统中所有与Oracle系统有关的文件(包括注册表,c盘中的oracle目录,按照了部分的d盘oracle目录),但不要删除安装文件。
然后卸载VC,MKS。
重新启动系统。
重新安装VC,装完后注销。
登录再安装MKS。
把gnumake.exe复制到MKS\MKSNT目录中。
重新启动计算机后再安装,问题就没有了。
不知道为什么。
第2阶段,最后系统安装暂停,等了好久没有任何进度变化,硬盘灯也不闪动。
很多朋友也遇到过这个问题,基本都是退出然后restart模式安装二次后都能解决。
也有朋友提示是应用服务器没有正常启动的原因。
我进系统服务查看,OracleDiscoverer4i_VIS服务是自动启动的,但是一直没有启动,我手动启动了它。
然后重新restart,问题解决了。
现在是第4阶段。
终于等到1236个文件都解压完成。
突然出现这个提示,是不是非常叫人郁闷?不用管它,直接“确定”,继续正常安装。
点击Connect to Oracle Applications 11i,测试你辛苦的成果。
点击Finish结束安装。
Win2003系统服务设置:
因为不测试EBS时完全不用打开系统服务,所以我把所有与EBS有关的服务全部设置为“手动”启动。
正常情况下只需要打开以下服务:
启动顺序
1. OracleVISOra806_2TNSListener80APPS_VIS
2. OracleVIS_db920_RDBMSTNSListenerVIS
3. OracleServiceVIS
4. OracleFormsServer-Forms60VIS_appserver
5. OracleConcMgrVIS_appserver
6. Oracle Reports Server [Rep60_VIS]
7. Oracle Apache Server VIS_appserver
到此标准EBS系统已经安装完毕。
中文补丁:
打中文包请参考《安装11i中文语言包-徐冰.doc》,再次感谢这位兄弟。
总结:
1、从开始安装,到中文环境正常使用,一共花了6天时间,前后3个星期。
其中,
标准系统装了3遍,2天;
解决客户端无法打开FORM问题,1天;
中文补丁一遍(非常幸运没有遇到问题),2天;
解决客户端中文显示问题,1天。
2、安装过程需要注意:
MKS、VC98的安装路径不能含有空格。
GNUMAKE.EXE直接下载3.81版本,编译可以一次通过。
需要事先在hosts文件中配置好IP地址与完整主机名的对应。
如果是安装VISION DEMO,则系统默认字符集是American_America.UTF8。
保存好安装配置文件,如果使用RESTART安装需要使用。
安装过程莫明其妙出现暂停情况(经常发生),不要担心,退出安装,然后采用RESTART重新安装可以恢复到暂停的步骤继续安装,前面的工作不会重复进行。
运行adadmin之前,需要先运行APPSORA.cmd,设置环境变量。
3、建议:
当安装到step 2 of 5时出现RW-50004错误,建议重新安装OS(我是删除所有与ORACLE有关的文件、注册表,MKS,VC98,甚至是环境变量),然后重新安装EBS。
建议使用英文的操作系统,这样打开ORACLE管理工具不会出现乱码。
如果是个人做实验,最好使用系统默认的密码设置。
4、其它提示:
APPSORA.cmd的路径是D:\oracle\visappl\APPSORA.cmd;
AutoPatch的程序名称是adpatch;
客户端浏览器要关闭屏蔽弹出窗口的功能,否则FORM不能弹出使用。
如果服务器有防火墙,使用EBS的时候则关闭之。
Win2003系统服务中,涉及MKS的服务都可以设置为手动。
EBS最基本的7个服务全部起来后,win2003共消耗1.5G的虚拟内存,所以主机至少配置1G物理内存。
512MB 的情况下系统像狗爬一样慢,根本没法使用。