Fibox样本中文版
法医鉴定试剂盒Identifiler中文用户手册

AmpFlSTR® Identifiler™PCR扩增试剂盒中文用户手册中文手册非Applied Biosystems公司官方文件,仅供国内用户参考。
所有资料以英文原版手册为准。
英文原版手册可以从上免费下载。
目录1 引言 (3)1 试剂盒概况 (3)2 试剂盒特点 (3)3 试剂盒位点 (3)4 试剂盒成分 (4)5 保存方法 (4)6 订购信息 (5)7 软件配置 (5)2 310和377升级 (6)1 310 升级 (6)2 377升级 (8)3 PCR扩增 (10)1 试剂配制 (10)2 DNA制备 (10)3 PCR反应 (10)4 310操作(Mac系统) (11)1 软件要求 (11)2 运行设置 (11)3 光谱校正 (12)4 电泳操作 (12)5 GeneScan数据分析 (13)6 Genotyper基因分型 (13)7 关机步骤 (13)5 3100操作 (14)1 软件要求 (14)2 光谱校正 (14)3 PCR扩增 (15)4 电泳样品准备 (15)5 电泳参数 (15)1引言1.A mpFlSTR Identifiler试剂盒概况新一代法医鉴定及亲子鉴定试剂盒A m p F l S T R I d e n t i f i l e r P C R扩增试剂盒是一个多重短串联重复序列(S T R)检测试剂盒。
它采用美国应用生物系统公司(ABI)最新的五色荧光、一个泳道技术,可以同时扩增和同时检测16个STR位点(15个4核苷酸重复位点加上A m e l o g e n i n性别判定标记)。
5色荧光中,6-F A M(兰色)、V I C(绿色)、N E D(黄色)和P E T(红色)用于标记样品,L I Z(橙黄色)用于标记G e n e S c a n-500分子量内标。
AmpFLSTR Identifiler PCR扩增试剂盒包含美国C o m b i n e d D N A I n d e x S y s t e m(C O D I S)所要求的全部13个位点,另外增加2个位点:D2S1338和D19S433。
REF54_中文样本

标准功能用于逻辑编程,例如电气操作联锁、 继电器同时具有9 个传感器输入。电流传感
5
设计(续)
6
REF541 / 543 / 545 馈 线 终 端
1MRS 755420
器( R o g o w s k i 线圈)或电压传感器可以被 连接到任意传感器输入口上。接线图详见 有 关 图 纸 。需 要 订 货 时 ,请 注 明 模 拟 量 输 入 的类型。
电流保护既可以用Rogowski 线圈也可以用常 CAP501 和 CAP505 整定软件支持 DR-Col-
规的 CT。同样,电压保护可以用电压传感器也 lector工具。
可以用常规的 PT。
电能质量监测功能
关于功能分级和保护功能的详细资料可以参考 电能质量监测功能可以测量电压和电流的总谐
“订货”章节中的表“功能分级,保护功能”。 波畸变率 (THD)以及电流的总需量谐波畸变
10 个(使用传感器)模拟量通道。所使用的通
通讯功能
道数量取决于继电器的配置和所使用的互感器
R E F 5 4 _ 馈线终端支持五种通讯规约: 或传感器的匹配类型。
IEC_103,SPA,LON,DNP 3.0 和 Modbus。
除了常规的 CT 和 PT 外,ABB 公司开发的
标准功能
传感器能同时用在 REF54_ 馈线终端上,
通道之间也是隔离的。模拟量输出可以用作测 量或计算信息传到盘表或 P L C 等。
三个 ● 用于设备控制的按钮(合,分,对象选 择)
LED 指示灯 馈线终端具有 8 个 LED 指示灯,用继电器配置 工具软件可以对 LED 进行参数化。可以任意设 定 LED 的颜色(绿、黄、红)、所关联的信号 和常亮/常暗状态,并具有三种信号驱动模式: 信号不保持、信号保持常亮和信号保持闪烁。 报警信号可由远方、就地或者通过使用馈线终 端的逻辑来复归。
OPEN BOX中文使用说明书
OPEN BOX中文使用说明书
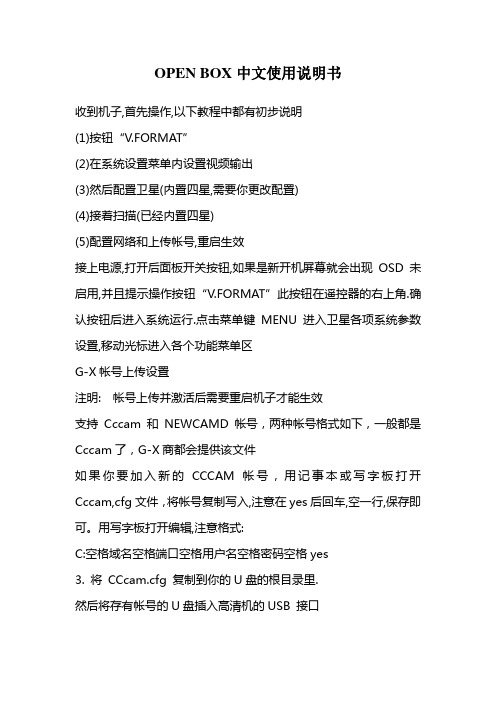
收到机子,首先操作,以下教程中都有初步说明
(1)按钮“V.FORMAT”
(2)在系统设置菜单内设置视频输出
(3)然后配置卫星(内置四星,需要你更改配置)
(4)接着扫描(已经内置四星)
(5)配置网络和上传帐号,重启生效
接上电源,打开后面板开关按钮,如果是新开机屏幕就会出现OSD未启用,并且提示操作按钮“V.FORMAT”此按钮在遥控器的右上角.确认按钮后进入系统运行.点击菜单键MENU 进入卫星各项系统参数设置,移动光标进入各个功能菜单区
G-X帐号上传设置
注明: 帐号上传并激活后需要重启机子才能生效
支持Cccam 和 NEWCAMD 帐号,两种帐号格式如下,一般都是Cccam 了,G-X商都会提供该文件
如果你要加入新的CCCAM帐号,用记事本或写字板打开 Cccam,cfg 文件,将帐号复制写入,注意在yes后回车,空一行,保存即可。
用写字板打开编辑,注意格式:
C:空格域名空格端口空格用户名空格密码空格yes
3. 将 CCcam.cfg 复制到你的U盘的根目录里.
然后将存有帐号的U盘插入高清机的USB 接口
遥控器菜单 "menu" 进入 Cccam 设置 ,选择Cccam Plug Setting
点击 OK进入
选择 read CC cam.cfg From USB 确认点击遥控器
新版本改为” Update Files BY USB”基本操作类似.点击OK 即可复制帐号到机子
这样就会读取U盘帐号,读完后看到帐号列表,选择下面相应颜色键(绿色键)激活管理帐号 , 点OK确认。
伊利亚 aroma达人种草汁Open-Box 实况中文版精选edu 用于植物整营说明书

ASPIREARM-1210Create your perfect environment with Ellia Essential Oils and Diffusers.Our beautiful diffusers gently lift the aroma of Ellia Essential Oils into the air to help you reduce stress, boost mental clarity, and soothe your body and mind. Ellia Diffusers are beautiful, functional centerpieces that add natural style to your home.5. Aroma MistYour diffuser has two mist options. Press mist, intermittent mist (30 seconds on, 30 seconds off), which will run for up to 20 hours. Press a third time to turn the mist off. Press and hold runs out of water, it will automatically shut off.Color-Changing LightPress again to stop on a preferred color. Press a third time to turn the light off. Press and hold at any time to turn the light off.Light BrightnessWhile the light is on, press again for low light. Press a third time for bright light.CR2025 to A B C EFDCLEANING AND CARE1. Before cleaning the unit, turn the power off and make surethe adapter is unplugged from the diffuser and outlet.2. Remove the outer cover from the base. Next, remove theinner cover.3. Carefully pour any remaining water and essential oilout of the reservoir, from the drain side, opposite the airoutlet. Be sure not to empty the reservoir near the air outletin order to avoid malfunction.To Clean the SurfaceClean the surface of your diffuser with a clean, damp, softcloth as often as needed.To Clean the Reservoir and Ultrasonic MembraneWe recommend wiping the reservoir with a clean, damp, softcloth at least once every 2 weeks.NOTE: Depending on your usage, and the amount of essentialoil you use, you may want to clean the reservoir and ultrasonicmembrane more frequently for best performance.For the most thorough clean, pour a 50/50 mixture of vinegarand water into the reservoir, then soak for five minutes. Brushreservoir walls, base, and ultrasonic membrane clean with asoft-bristle brush (not included) and rinse. NEVER touch theultrasonic membrane with your fingers, as the natural oils inskin can damage the membrane.Clean the membrane once every two to three weeks,depending on your usage.Clean and dry the unit before extended periods of inactivity.Ellia AspireAroma-2Aroma-3Aroma-4Aroma-5Device settingsRELAXATION SOUNDSAROMAMOOD LIGHTTIMERSETTINGSCarrier12:00 PMABCEDTROUBLESHOOTINGCONTACT USQuestions or concerns? We're here to help. Contact a Consumer Relations representative by phone or email to help answer any questions. Please be sure to have the model number of your product available.For Service in the USAemail: ******************phone: 248.863.3160 Monday to Friday, 8:30am - 7:00pm ESTFor Service in Canadaemail: *************************phone: 1.888.225.7378 Monday to Friday, 8:30am - 5:00pm ESTMood LightPress once to turn on the color-changing light. Choose your desired color and brightness of light. Tap the camera icon to access the camera match screen.TimerChoose the runtime for your diffuser. It will automatically shut off when the time has elapsed.Camera MatchPoint and shoot your camera at a color from your surroundings. That color will be matched through your mood light.SettingsAccess additional information about Ellia Aroma Diffusers and Essential Oils.THE ELLIA ™FAMILYOur range of eco-inspired products are designed to complement your lifestyle and decor. Once you try an Ellia diffuser, you’ll want one for every room in your home. Add to your own Ellia collection or buy a thoughtful gift for someone.Browse the entire product family at .ONE YEAR LIMITED WARRANTYFor detailed warranty instructions, visit: To obtain warranty service on your Ellia product, contact a Consumer Relations Representative by the telephone number or email address for your country of residence. Please make sure to have the model number of the product available. For Service in the USAemail: ******************phone: 248.863.3160Monday to Friday, 8:30am - 7:00pm ESTFor Service in Canadaemail: *************************phone: 1.888.225.7378Monday to Friday, 8:30am - 5:00pm ESTFCC AND IC STATEMENTSThis device complies with part 15 of the FCC Rules. Operation is subject to the following two conditions: (1) This device may not cause harmful interference, and (2) this device must accept any interference received, including interference that may cause undesired operation.This equipment has been tested and found to comply with the limits for a Class B digital device, pursuant to part 15 of the FCC Rules and ICES 003. These limits are designed to provide reasonable protection against harmful interference in a residential installation.This equipment generates, uses and can radiate radio frequency energy and, if not installed and used in accordance with the instructions, may cause harmful interference to radio communications.However, there is no guarantee that interference will not occur in a particular installation.If this equipment does cause harmful interference to radio or television reception, which can be determined by turning the equipment off and on, the user is encouraged to try to correct the interference by one or more of the following measures:• Reorient or relocate the receiving antenna.• Increase the separation between the equipment and receiver.• Connect the equipment into an outlet on a circuit different from that to which the receiver is connected.• Consult the dealer or an experienced radio/TV technician for help.Changes or modifications not expressly approved by HoMedics could void the user's authority to operate this equipment.This product has been tested and complies with the requirements for Federal Communication Commission, Part 18 and ICES 001. Although this product is tested and complies with FCC, it may interfere with other devices. If this product is found to interfere with another device, separate the other device and this product. Conduct only the user maintenance found in this instruction manual. Other maintenance and servicing may cause harmful interference and can void the required FCC compliance.IMPORTANT SAFETY INSTRUCTIONSWHEN USING ELECTRICAL PRODUCTS, ESPECIALLY WHEN CHILDREN ARE PRESENT, BASIC SAFETY PRECAUTIONS SHOULD ALWAYS BE FOLLOWED, INCLUDING THE FOLLOWING:READ ALL INSTRUCTIONS BEFORE USING• Always place diffuser on a firm, flat surface. A waterproof mat or pad is recommended for use under the diffuser. Never place it on a rug or carpet, or on a finished floor that may be damaged by exposure to water or moisture.• Always unplug the unit from the electrical outlet immediately after using and before cleaning• DO NOT reach for a unit that has fallen into water. Unplug it immediately.• DO NOT place or drop into water or other liquids.• DO NOT use water above 86° Fahrenheit.• Use this unit only for its intended use as described in this document, the quick start guide and user guide.• Do not use attachments not recommended by Ellia or HoMedics; specifically any attachments not provided with this unit.• NEVER drop or insert any object into any opening.• DO NOT place the diffuser near heat sources, such as a stove.• Always keep the cord away from high temperature and fire.• To disconnect, turn unit off, then remove the plug from the outlet.• DO NOT use outdoors. For indoor use only.• Never cover the unit while it is operating.• If the cord sustains damage, you must stop using this product immediately and contact Ellia consumer relations (see Warranty section for consumer relations contact information).• Perform regular maintenance on the ultrasonic membrane.• Never use detergent to clean the ultrasonic membrane.• Never clean the ultrasonic membrane by scraping with a hard object.• Do not attempt to adjust or repair the unit. Servicing must be performed by professional or qualified personnel.• Stop using this unit if there is an unusual noise or smell.• Unplug this unit when not in use for a long period of time.• Do not touch the water or any parts of the unit that are covered by water while the unit is on or plugged in.• Do not wash, adjust, or move this unit without first unplugging it from the electrical outlet.• Keep this unit out of reach of children.Attention California Residents:WARNING: This product contains che micals known to the State of California to cause cancer, birth defects and other reproductive harm.。
FastStart Essential DNA Green Master-中文说明书-BioRad版本 copy

FastStart Essential DNA Green MasterVersion 04 (2013年10月)适用货号:06 402 712 001 5×1 ml (5×100次反应,20μl体系)06 924 204 001 10×5 ml (10×500次反应,20μl体系)产品保存条件:-15~ -25℃,避光保存注意:该使用指南为简易版,在实际使用时请查阅正式英文说明书。
1. 产品概述产品描述管号/管盖色标签用途保存条件1 绿色FastStartEssential DNAGreen Master;2×conc. ● 2×预混液, 即用型●含FastStart Taq DNA聚合酶,反应缓冲液,dNTPs, SYBRGreen I, MgCl2-15~ -25℃,避光保存;试剂首次融解后可置2~8℃保存一月*2 无色H2O, PCR grade 调整最终反应体系-15~ -25℃*请避免将该产品反复冻融。
反应液制备后(加入引物和模板后),可在室温稳定放置24h,需避光放置。
产品应用FastStart Essential DNA Green Master采用了热启动聚合酶以提高qPCR反应的灵敏度和特异性,预混液包含了基于SYBR Green I检测模式的qPCR和两步法qRT-PCR进行DNA定量检测所需的所有试剂(除了引物与模板)。
试剂的Mg2+浓度已经优化,通用于不同的引物和模板特性,实验中无须优化。
结合UDG酶的使用,可在实验中防止PCR扩增产物的交叉污染。
该试剂适用于不需要ROX校正的实时荧光定量仪器。
2. 产品使用方法2.1 实验前准备实验最佳反应条件(包括DNA模板量、PCR引物浓度、扩增温度程序、循环次数) 应根据不同的模板/引物而异。
样本准备• 请使用纯度、浓度经优化摸索且不含PCR抑制物的DNA模板(如,基因组DNA、质粒DNA、cDNA)。
PFC软件fishtank讲解(中文版)汇总

fishtank--巴西实验与双轴压缩实验说明许多同学可能都对这部分很疑惑,这部分在manual中显得比较神秘,原因很简单,是因为这不风的程序代码比较复杂。
仅仅et2.fis一个文件就长达30多页。
但实际上我们在调用这些函数的时候,不需要逐一去看。
我们要做的是理解每个函数的功能及函数间的参数传递。
我将部分稍做整理如下,对部分文件和函数进行了初步解读:一:文件实例中提供了不同类型实验的文件,以AGC.dvr为例。
这个文件看起来很怪,其实很简单。
可以用txt或其他文本编辑器打开。
也可以令存为txt文件。
其中A表示材料类型,G表示实验精度,gross;c表示粒子的接触模型,为contact-bond。
打开这个文件,其文件编辑和普通的建模文件没两样。
这个文件开始就调用了三个fish函数文件,分别是md.fis, et2.fis, flt.fis。
(稍后详细说明这三个文件)。
就是参数设置,包括文件自动运行后保存的文件名的赋值,与具体fish函数中参数的赋值。
在agc.dvr文件运行后将生成以下文件:agc-bal.sav 生成的粒子集合,没有运算agc-pck.sav 接上一步调整模型粒子大小,达到近似无摩擦状态的平衡agc-iso.sav 进一步调整并赋值粘结模型,是模型达到各向同性应力状态agc-flt.sav 消除模型的中的浮动粒子,默认值为接触数小于2的粒子;agc-spc.sav 生成最终模型接下来就是调用agc_ex.dvr 文件进行压缩实验了;这个文件将巴西圆实验与双轴压缩实验一同解决了,都用的同一个样本,即前面生成的文件agc-spc.sav 中的模型。
在这个dvr文件中调用了两个dvr文件,即:_brazil1.dvr 和 _btw.dvr。
这两个文件分别是调用巴西圆测试功能函数与双轴压缩功能函数。
生成的文件分别为:巴西测试:agc_bt0.sav 巴西测试条件初始化agc_bt1.sav 巴西测试结果双轴压缩:agc_nn_bw0.sav 测试条件初始化agc_nn_bw1.sav 测试结果这里的nn表示围呀的大小,在manual中,粒子的围压为0,所以保存的文件就是agc_00_bw0.sav和agc_00_bw1.sav到此为止,基本上将运行中相关文件和运行的大致过程说完。
Foxit Reader 企业定制版 用户手册说明书

福昕阅读器(企业定制版)用户手册Copyright © 2013 Foxit Corporation. All Rights Reserved.未经福昕公司授权,禁止以任何形式复制、转移、散布或储存本文档。
Anti-Grain Geometry - Version 6.0Copyright (C) 2002-2005 Maxim Shemanarev ()在所有副本中的版权提示允许的情况下,您可以复制、使用、修改、出售和散布该软件。
此软件不含任何隐藏条款,对于使用本软件所产生的任何后果,均由用户本人承担。
目录第1章简介 (1)关于手册 (1)福昕阅读器(企业定制版)概述 (1)福昕阅读器(企业定制版)插件 (1)第2章使用入门 (3)安装福昕阅读器(企业定制版) (3)更新福昕阅读器(企业定制版) (6)卸载方法 (7)工具栏模式 (7)第3章特色功能介绍 (12)组策略 (12)使用XML编辑器 (12)RMS保护器 (12)第4章附录 (27)键盘快捷键 (27)命令行 (29)联系我们 (31)福昕阅读器(企业定制版)用户手册第1章简介关于手册欢迎使用福昕阅读器(企业定制版)——您阅读和打印PDF文档的最佳选择!福昕阅读器(企业定制版)是在福昕阅读器(个人版)的基础上开发而成,升级了个人版的功能,提高了用户体验。
本用户手册仅介绍了福昕阅读器(企业定制版)的特色功能,其他基础功能信息,请参阅“福昕阅读器6.0_手册”。
福昕阅读器(企业定制版)概述福昕阅读器(企业定制版)是PDF文档阅读器和打印器,具有令人难以置信的小巧体积,启动迅速,您只需下载安装包,解压后运行setup文件,然后按照安装向导安装即可。
福昕阅读器(企业定制版)支持创建、编辑和保护PDF文档功能,使用方便快捷、价格经济实惠。
除了基本的PDF阅读功能外,福昕阅读器(企业定制版)还支持许多高级功能,包括RMS保护、组策略编辑对象管理、XML表单管理等。
Farpoint-中文手册

For Windows Forms 5.0使用指南使用指南简介1产品网站/tools 技术支持论坛使用指南简介Spread for Windows Forms 是一个综合性的、用于微软.NET 平台的Windows Forms 应用程序开发的表格控件。
它集成了丰富的表格功能、工作表功能,并可以与多种数据源进行绑定。
一个Spread控件可以处理多达20 亿个工作表,每个工作表可以有20 亿行和20 亿列,并且支持跨工作表的数据引用和跨工作表的公式引用。
Spread 控件已经被业界公认为功能最为强大的表格控件。
Spread 在中国也有了超过10 年的使用历史,得到了许多软件开发人员的认可。
随着5.0 版本的推出,Spread 增加了对于图表功能的支持。
通过超过85 种不同类型的图表和内置的用户界面,为创建和定制图表提供了全面支持,丰富了数据的展示方式。
同时,Spread 与Excel 文件的兼容性得到了进一步的提升。
虽然Spread 产品附带了大量的文档和示例代码,但不可否认的是,对于初次接触Spread 的中国软件开发人员来讲,有时难免会觉得Spread 入门不太容易。
本使用指南旨在帮助软件开发人员较快地了解和运用Spread 的常用功能。
开发人员可以在了解Spread 整体功能的基础上,循序渐进地学习单元格操作、行列操作和工作表操作。
每个操作都附带了具体的C#和VB 代码,读者可以直接运行例子代码进行联系并查看效果。
在表格数据操作的基础上,本指南也针对高级数据操作、图形图表、以及和其他数据格式的交换方面做了进一步的介绍,并且在最后提供了常用词汇的中英文对照表,方便读者查看。
对于项目管理人员和技术主管来讲,通过对本指南中Spread 主要功能的概览,可以帮助他们决策Spread 是否适合于其项目的需要。
有关Spread 产品的更多信息,请访问:Spread 产品网站/toolsSpread 技术支持论坛目录2产品网站/tools 技术支持论坛目录使用指南简介 (1)1. 从例子入门:创建CHECKBOOKREGISTER (4)1.1 添加S PREAD 控件到C HECKBOOK 工程 (4)1.2 设置行和列 (5)1.3 设置单元格类型 (7)1.4 添加公式 (10)2. SPREAD 产品介绍 (12)2.1 产品概述 (12)2.2 基本功能介绍 (13)2.3 S PREAD 5.0 FOR W INDOWS F ORMS 的主要新增功能 (17)3. 单元格操作 (19)3.1 设置单元格类型 (19)3.2 设置单元格的颜色 (21)3.3 合并单元格 (23)3.4 锁定、解锁单元格 (24)3.5 给单元格添加批注 (26)3.6 设置公式 (28)4. 行列操作 (31)4.1 设置行列数 (31)4.2 移动行列 (31)4.3 调整行高、列宽 (33)4.4 冻结行列 (34)4.5 使用分组 (36)4.6 定制行头、列头的文字 (37)4.7 设置多行行头、多列列头 (39)5. 工作表操作 (42)5.1 使用当前工作表 (42)5.2 设置背景色或背景图 (42)5.3 增加工作表 (44)5.4 删除工作表 (45)5.5 移动工作表 (46)5.6 显示或隐藏工作表 (46)5.7 添加标题和子标题 (47)6. 高级数据操作 (50)目录3产品网站/tools 技术支持论坛6.1 数据绑定示例 (50)6.1.1 把Spread添加到一个数据绑定项目 (50)6.1.2 设置数据库链接 (50)6.1.3 指定需要使用的数据 (50)6.1.4 创建数据集 (52)6.1.5 把Spread绑定到数据库 (52)6.1.6 设置单元格类型,改善显示效果 (53)6.2 数据排序 (54)6.3 数据过滤 (55)6.3.1 允许数据过滤 (55)6.3.2 使用数据过滤 (56)7. 使用图形 (58)7.1 创建图形对象 (58)7.2 设置图形属性 (58)7.3 图形旋转 (59)7.4 图形缩放 (59)7.5 图形移动 (60)7.6 图形锁定 (60)8. 使用图表 (61)8.1 创建图表对象 (62)8.2 使用图表设计器 (68)8.3 绑定图表 (69)8.4 允许用户改变图表 (70)9. 与其他数据格式交互 (72)9.1 打开E XCEL 文件 (72)9.2 保存为E XCEL 文件 (74)9.3 导出PDF (75)10. SPREAD WIN 5 中英文术语对照 (77)从例子入门:创建Checkbook Register 4产品网站/tools 技术支持论坛1. 从例子入门:创建Checkbook Register1.1 添加Spread 控件到Checkbook 工程创建一个新的Visual Studio .NET 工程并命名为Checkbook。