《Petrel培训》PPT课件
合集下载
Petrel作断层与层面精品PPT课件
用welltop控 制
3、时深转换
形成深度域层面
4、make zones
检查网格
有两处可对网格进行质量控制:一是网格化后尽量保持其合理,上下面都要 调平,一是作完层后在属性里建立Geometrical modeling 。
点击
新生成文件夹
双击
写在最后
经常不断地学习,你就什么都知道。你知道得越多,你就越有力量 Study Constantly, And You Will Know Everything. The More
1、做等T0层面:
点击
剥蚀或连 续沉积接 触关系, 据实际
默认
时间域 不能加
输入控制层 面:地震时
间域面
据断层多少米以内 不参与计算
某一层面内,可以设置 那些断层不参与
设置 segment
生成时间 域层面
2、建立速度模型
点击
显示速度场
时间域 用welltop控
层面
制
显示速度场
时间域 层面
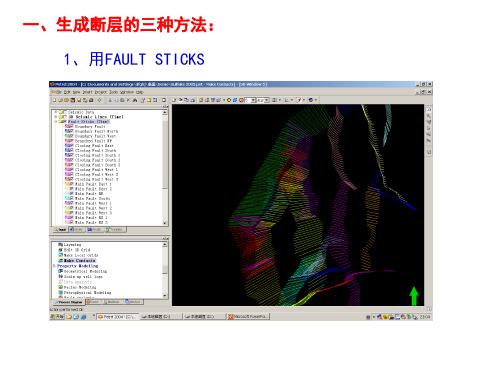
一、生成断层的三种方法: 1、用FAULT STICKS
2、用FAULT POLYGONS 生成断层
打开
POLYGONS 生 成断层
生成结果
调节
3、用层面生成断层
打开顶面 SURFACE
选1点 拾取
打开底面 SURFACE
自动拾取
在点上吸
观察断层已生成
断层间的相互关系
如何建立削截断层
建边界 新建I、J趋势方向
1、选定断层为边界用 全部定 义完
2、把没有边界的部分用 建立 边界段
显示点 点变大变小
3、把工作区以外已选边界部分, 用 定为非边界
Petrel官方地震解释培训M7_Depth_Conversion

2. Set V0 to Well TDR – Surface/ Constant 3. Set k to Well TDR – Surface/ Constant
1
3 2
Velocity modeling - Output
1. Open the Output tab 2. Click on the data types needed as output
• Define velocity model
1. Define velocity intervals (usually between time interpretation surfaces)
2. Define velocity functions (automatically calculated or userdefined)
1
3
2
5
4
Depth convert Seismic data
1. Make sure the correct Velocity Model is active (Bold name). 2. Right click on the 3D volume and select ’Depth convert by active velocity model’. 3. Alternatively, from the Process tab, under Geophysics, open the General Depth Conversion process. 4. Click on the 3D volume name in the Input tab and drop it into the dialog box using the Append selected
1
3 2
Velocity modeling - Output
1. Open the Output tab 2. Click on the data types needed as output
• Define velocity model
1. Define velocity intervals (usually between time interpretation surfaces)
2. Define velocity functions (automatically calculated or userdefined)
1
3
2
5
4
Depth convert Seismic data
1. Make sure the correct Velocity Model is active (Bold name). 2. Right click on the 3D volume and select ’Depth convert by active velocity model’. 3. Alternatively, from the Process tab, under Geophysics, open the General Depth Conversion process. 4. Click on the 3D volume name in the Input tab and drop it into the dialog box using the Append selected
Petrel入门培训速模型地震属性提取

对SEGY熟悉的选择
第12页/共29页
对SEGY不熟悉的选择
Input-insert-new seismic survey folder→SEGY seismic data(*.*)→seiemic (default)(原始地 震数据)
第13页/共29页
地震属性重采样
Geometrical modeling→选择seismic resampling
第5页/共29页
创建层面
设置: • 设置到断层的距离
过程 – 设置
第6页/共29页
创建层面
设置: • 设置井矫正
过程 – 设置
第7页/共29页
速度模型
第8页/共29页
速度模型
第9页/共29页
时深转换
第10页/共29页
地震属性提取 及重采样
第11页/共29页
加载地震特型数据*.sgy
1、Input-insert-new seismic survey folder→SEGY Import with presetparameters (*.*)
第14页/共29页
地震属性提取
第15页/共29页
地震属性提取
第16页/共29页
地震属性镂空显示
第17页/共29页
地震属性播放
手动切 剖面
播放
步长
Line号
第18页/共29页
选中后修改Line号
做连井地震剖面
第19页/共29页
做连井地震剖面
投影距离
第20页/共29页
在剖面上显示时间域的构造面
第21页/共29页
在解释窗口显示时间域的构造面
第22页/共29页
在解释窗口显示时间域的构造面
Petrel官方地震解释培训M3_Reconnaissance 共22页
2 1
Ctrl + C 3
Ctrl + V
Create and edit color palettes
1. To change the name, double click on the color palette and go to the Info tab. Change the name in the Name box
3
4
Random Intersections - definitions
1
2
3
4
1. Seismic intersection (Random line). Is a vertical
and randomly aligned intersection that extends through the seismic volume without any bends. Can also be tilted (turn off ). Insert by right mouse button click the seismic volume
1
2
3
Display multiple seismic views on the same screen
Options to tile horizontally or vertically
Interpretation is updated interactively between windows
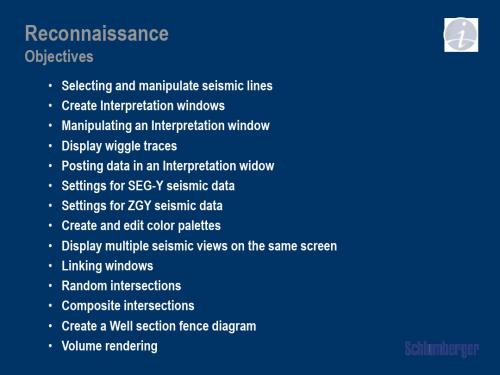
Reconnaissance
Objectives
• Selecting and manipulate seismic lines • Create Interpretation windows • Manipulating an Interpretation window • Display wiggle traces • Posting data in an Interpretation widow • Settings for SEG-Y seismic data • Settings for ZGY seismic data • Create and edit color palettes • Display multiple seismic views on the same screen • Linking windows • Random intersections • Composite intersections • Create a Well section fence diagram • Volume rendering
petrel培训

Petrel技术讲座
孙海涛
勘探开发研究院 二○一三年五月
一、数据格式 二、井数据加载 三、地震数据加载 四、任意剖面显示
X
井头文件
测井曲线
井轨迹
井分层数据
基准面:1500m
中键加左键放大,中键拖拽。
加井轨迹
全选,查看对应关系
加载井曲线
全选核对井名
Rt Rxo Ild Ilm Ils Rd Rs RMLL CON AC DEN CN GR SP CAL K TH U KTH NGR
true formation resistivity. 地层真电阻率 flushed zone formation resistivity 冲洗带地层电阻率 deep investigate induction log 深探测感应测井 medium investigate induction log 中探测感应测井 shallow investigate induction log 浅探测感应测井 deep investigate double lateral resistivity log 深双侧向电阻率测井 shallow investigate double lateral resistivity log 浅双侧向电阻率测井 micro lateral resistivity log 微侧向电阻率测井 induction log 感应测井 acoustic 声波时差 density 密度 neutron 中子 natural gamma ray 自然伽马 spontaneous potential 自然电位 borehole diameter 井径 potassium 钾 thorium 钍 uranium 铀 gamma ray without uranium 无铀伽马 neutron gamma ray 中子伽马
petrel软件详细教程ppt课件

单井纵向排列,保存为一个文件,文件名为 well top . prn
精品课件
23
其它数据
断点深度 2334 2116.2 2699.4 1342.5 1394.8 1553.1 2155.4 1865.4
Fault point
属性 horizon horizon horizon horizon horizon horizon horizon horizon
Petrel 基本操作讲解
山东省油气勘探开发工程技术研究中心
精品课件
1
提纲
一、Petrel软件介绍及基本功能 二、前期数据整理介绍
三、建模基本操作流程
精品课件
2
软件介绍及基本功能
精品课件
3
软件介绍及基本功能
▪ 强大的 3D 可视化工具 ▪ 地层对比 ▪ 地震解释 ▪ 2D网格化 ▪ 高级断层建模 ▪ 创建3D断层网格 ▪ 3D岩相和岩石物理属性建模 ▪ 3D井位设计 ▪ 数据分析,体积计算,绘图和生成报告 ▪ 断层属性分析和流体界面模拟 ▪ 模拟数据的后期处理
数据格式
精品课件
30
格
式
Ok
对
应
Ok for all
精品课件
31
点击显示
精品课件
32导入分层文件夹来自精品课件33ok
选择文件
格式(默认)
精品课件
34
格式选取
Ok for all
精品课件
35
点击显示
精品课件
36
ok 导入断点文件
选择文件 格式(默认)
精品课件
与分层数据导入 方法格式一样
37
精品课件
4
连井剖面地层对比
Petrel官方地震解释培训M3_Reconnaissance

Selecting and manipulating seismic lines
• Manipulate plane (M) icon • Player at bottom of window (seismic
volume must be active) • Function bar icons (Seismic
1. Settings for ZGY seismic data displayed in a 3D window, Style tab, activates a ZGY style sub-tab
2. Bump mapping shades intersections based on amplitudes
interpretation process must be active)
Select active seismic line (K)
Select inline intersection (L)
Select crossline intersection (shift + L)
Step through volume
2. Decimate when dragging intersections effects the display of seismic lines when moved with the Manipulate Plane tool
3. Enhance intersection resolution is purely an interpolation of seismic between neighbouring data
1. Display a seismic line in an
Interpretation window
新编文档-Petrel官方地震解释培训M4_Well_Ties_Synthetics-PPT精品文档-精品文档

1
2. Make expression Sonic_despiked=DT
3. Use sonic as template 4. Sample MD from log
and select DT as input 5. Click Enter
2
3
4
5
Log editing - Despike
1. From Global well logs Right click on Sonic_despiked and select Log editor
Sonic Log
T.D.R.
Tim e
1 2
Dept h
Well time/depth relation
1. Well TDR is defined by generating global time log(s)
2. Open Settings for Global time.
3. Rearrange the priority list using the blue up/down arrows. Mark (green tick) objects to select from
3. a) Set Neighborhood exines are used, set number of traces
4. Select Taper window type
5. Alternative type of seismogram is loaded from file
4. Click on Execute to generate the global time log
2
5. Click on Shared
checkshots, select
- 1、下载文档前请自行甄别文档内容的完整性,平台不提供额外的编辑、内容补充、找答案等附加服务。
- 2、"仅部分预览"的文档,不可在线预览部分如存在完整性等问题,可反馈申请退款(可完整预览的文档不适用该条件!)。
- 3、如文档侵犯您的权益,请联系客服反馈,我们会尽快为您处理(人工客服工作时间:9:00-18:30)。
2699.2 2702.5
2121 2128 2134
2158 2177 2225
Horizon Horizon Horizon Horizon Horizon Horizon
Horizon Horizon Horizon Fault Fault Fault Fault Fault Fault
•
Horizon表示正常,fault断失,多层一样的深度表示不整合
55
ppt课件
56
透视
ppt课件
57
提取属性数据
ppt课件
58
ppt课件
59
ppt课件
60
ppt课件
61
ppt课件
62
ppt课件
63
ppt课件
64
ppt课件
65
ppt课件
66
地层与断层的解释
ppt课件
67
速度
ppt课件
68
ppt课件
69
ppt课件
70
时间面
ppt课件
71
87
Pillar gridding
ppt课件
88
Make horizon
ppt课件
89
S2-9-----s2-10的厚度
ppt课件
90
厚度点
ppt课件
91
ppt课件
92
形成需要的厚度
• 形成 • 2-9 • 2-10 • 2-11-2 • 2-11-4 • 2-11 • 2-12-3 • 2-13 • 之间的厚度
ppt课件
93
Insert horizon by isochore
ppt课件
94
First :s2-9------2-11
ppt课件
95
Sub horizon ok
ppt课件
96
ppt课件
97
ppt课件
98
ppt课件
99
ppt课件
100
ppt课件
101
ppt课件
102
ppt课件
103
井分层矫正
ppt课件
79
井矫正结果
前
ppt课件
后
80
• 将时间面矫正到深度域方法1 • 将时间面矫正到深度域方法2
ppt课件
81
时间面到深度面方法2
• 把时间面乘以速度面(/2000),得到深度构造 面.
• 将断层多边形,附到对应的深度构造面
ppt课件
82
• Split断层线,删除部分断层
S2-14
X47X59
S2-14
X47-19
F_west_south
X47-30
F_east
X47-35
F_east
X47-31
F_west_south
X47-44
F_east
X79
F_east
Horizon
2045 2258.8 2199.4
2036 2036 2082.2
Horizon 2538.4
ppt课件
22
剖面对比
ppt课件
23
ppt课件
24
ppt课件
25
测井曲线合并道
ppt课件
26
将某井作为摸版
ppt课件
27
应用该摸版到所有井
ppt课件
28
ppt课件
29
插入一条离散的曲线
ppt课件
30
将新建离散的曲线加入某井
ppt课件
31
设置该曲线的顶底深度
ppt课件
32
对该曲线重采样
测井曲线标准化
• 对x47x66 y72-312 x47x50 y72-306 x4725 x47-35 x47x46 x47x49 x47x49 x47x33 x47-28 x47-19 x47x62
ppt课件
33
打开计算器
ppt课件
34
计算新曲线
ppt课件
35
ppt课件
36
设置岩性符号
ppt课件
37
6月28号培训计划
• 加载地震数据 • 地震数据操作
– 数据加载 – 属性提取 – 数据体透视 – 地震解释
• 加载地震解释数据(断层数据\层位数据) • 构造建模 • 断层建模(根据断层polygon建模) • Make Horizon
速度面
ppt课件
72
速度模型
ppt课件
73
速度模型
ppt课件
74
• 将时间面矫正到深度域方法1 • 将时间面矫正到深度域方法2
ppt课件
75
ppt课件
76
将某层well top与时间面同时显示
加入一口井轨迹
ppt课件
77
单井平均矫正
以该井为依据,将时间面统p一pt课校件正到分层数据处
78
ppt课件
钻遇及深度 断点及深度
16
ppt课件
17
ppt课件
18
User类型表示忽略
ppt课件
19
用z值标识分层数据 ppt课件
20
创建分层模式
• Zone改名
Es2-1
es2
Es2-2
Es2-3-1
Es2-3
Es2-3-2
Es2-3-3
ppt课件
21
剖面对比
• 建立连井剖面图 • 充填\设置比例\层拉平 • 创建和编辑分层 • 测井曲线合并道 • 新建曲线
ppt课件
15
分层数据格式
• X47-20
• • • • • • • 12-115 • • • • • • • • •
S1-1
2057.2
X47-19
S1-1
X47-20
S1-6
X47-19
S1-6
Y72-20
S1-1
X47-4
S1-1
X47X55
S1-1
S2-14
2337.2
X79
S2-14
X47X50
• 井数据
ppt课件
1
加载井数据
• 井头文件 • 井轨迹数据 • 测井曲线数据 • 井分层数据
ppt课件
2
井头数据
• 建立新工区 • Insert ->New Well Folder
ppt课件
3
加入井数据
ppt课件
4
ppt课件
5
ppt课件
6
加载井数据
• 井头文件 • 井轨迹数据 • 测井曲线数据 • 井分层数据
ppt课件
7
ppt课件
8
井轨迹文件
定义数据位置
定义数据格式
ppt课件
Ctrl+Shift拖动放大 截断井轨迹
9
ppt课件
10
加载井数据
• 井头文件 • 井轨迹数据 • 测井曲线数据 • 井分层数据
ppt课件
11
ppt课件
12
ppt课件
13
ppt课件
14
加载井数据
• 井头文件 • 井轨迹数据 • 测井曲线数据 • 井分层数据
ppt课件
83
构造建摸
• Define a model • Fault model • Pillar gridding • Make horizon • Make zone • Layering
ppt课件
84
创建一个断面
ppt课件
85
创建端面
ppt课件
86
Pillar gridding
ppt课件
ppt课件
38
ppt课件
39
ppt课件
40
ppt课件
41
ppt课件
42
ppt课件
43
ppt课件
44
ppt课件
45
ppt课件
ppt课件
47
ppt课件
48
Segy裁减体
ppt课件
49
拖动裁减体
ppt课件
50
ppt课件
51
ppt课件
52
ppt课件
53
ppt课件
54
ppt课件