德国博朗180剃须刀说明书中文版
PHILIPS 电动剃须刀 说明书(10)
4 Rinse the outside of the appliance. 5 Close the shaving unit and shake off excess water. Never dry the shaving unit with a towel or tissue, as this may damage the shaving heads. 6 Open the shaving unit again and leave it open to let the appliance dry completely. You can also clean the hair chamber withoutsh supplied. Every six months: shaving heads 1 Open the shaving unit, pull it off the shaver and remove the retaining frame.
8
English
Every day: shaving unit and hair chamber 1 Switch off the shaver, remove the powerplug from the wall socket and pull the appliance plug out of the shaver. 2 Press the release button (1) and open the shaving unit (2). 3 Clean the shaving unit and the hair chamber by rinsing them under a hot tap for some time. Make sure the inside of the shaving unit and the hair chamber have been cleaned properly.
博朗电动牙刷4731说明书

博朗电动牙刷4731说明书
在现在的洗护用品市场,一些高科技的洗护用品琳琅满目,很多东西由以前的手动都变为现在的电动了。
比如剃须刀就是由手动变为电动的,而且还有很多品牌。
再就是人人都离不开的牙刷,传统的牙刷都是手动,现在的电动牙刷已经占据了整个洗漱市场,可以说大人小孩儿,人人都有一款必备的电动牙刷,在众多的品牌中,博朗电动牙刷很受欢迎。
那么关于博朗电动牙刷的使用说明是什么呢?
博朗的电动牙刷使用说明书有以下几点:第一,在使用的时候先在浸湿的刷毛上挤上一些牙膏,然后将刷毛对准牙龈线放在牙齿上面,打开开关轻轻加压,然后在牙齿间来回慢慢移动,使刷毛达到清洁牙缝的效果。
第二,值得注意的是打开牙刷的电源之后,先将牙刷头的刷毛按45度的角放在牙齿上。
第三,如果博朗的电动牙刷有3 0秒的计时功能,可以将口腔分为若干个区域,利用牙刷30秒的定时功能来清洁每个区域。
注意事项:
初次使用电动牙刷,可能会有酥痒或强烈震动的感觉,随着使用次数增加会逐渐习惯。
电动牙刷可用于烤瓷牙或全瓷牙,但应在牙冠粘结后24-48小时后才可使用。
儿童使用电动牙刷前最好咨询医生的意见。
建议每次使用电动牙刷前,都要好好检查刷头与刷柄连接牢不牢固,以免刷头弹出来弄伤口腔。
以上就是关于博朗电动牙刷的使用说明,希望能够给大家带来一定的帮助。
Braun Series 9 说明书

9395cc 9394cc 9390cc 9385cc 9384cc 9381cc 9380cc 9376cc 9375cc 9370cc 9365cc 9360cc 9355s9350s9345s9340s9335s9330s9325s9399sType 5793 99161149517Series 910a* 15a15bEnglishOur products are designed to meet the highest standards of quality, functionality and design. We hope you enjoy your new Braun product.Read these instructions completely, they contain safety information. Keep them for future reference.ImportantYour appliance is provided with a power supply, which has an inte-grated transformer (Safety Extra Low Voltage). Do not exchange or tamper with any part of it, otherwise there is risk of an electric shock. Only use the power supply provided with your appliance. If the appliance is marked 492, you can use it with any Braun power supply 492-XXXX.This appliance is suitable for cleaning under running water and use in a bathtub or shower. For safety reasons, it can only be operated cordless. Detach the shaver from the power supply before using it with water.Do not use if the appliance, the foil or the power supply are dam-aged.This appliance can be used by children aged from 8 years and above and persons with reduced physical, sensory or mental capabilities or lack of experience and knowledge if they have been given supervision or instruction concerning the safe use of the appliance and understand the hazards involved. Children shall not play with the appliance. Cleaning and user maintenance shall not be made by children unless they are older than 8 years and super-vised.WarningKeep power supply, charging stand* and Clean & Charge Station* dry.Clean&Charge Station*To prevent the cleaning fluid from leaking, ensure that the Clean & Charge Station is placed on a flat surface. When a cleaning cartridge is installed, do not tip, move suddenly or transport the station in any way as cleaning fluid might spill out of the cartridge. Do not place the station inside a mirror cabinet, nor place it on a polished or lacquered surface.The cleaning cartridge contains a highly flammable liquid so keep it away from sources of ignition. Do not expose to direct sunlight and cigarette smoking nor store it over a radiator.Do not refill the cartridge and use only original Braun refill cartridges.*not with all models1 Foil & Cutter cassette2 Cassette release buttons3 Multi Head Lock switch4 On / off buttondisplay**5 Shaver5a Travel lock5b Replacement indicator for Foil & Cutter cassette5c Status segments5d Minutes left display5e Cleaning indicator*5f Plug reminder5g Battery icon*trimmer6 Precisioncontacts7 Shaver-to-station8 Release button for precision trimmer9 Shaver power socket10 Power supply**10a Charging stand*/**11 Travel case* not with all models (see display box)** design can differFor electric specifications, see printing on the power supply.•A full charge takes 1 hour and provides up to 60 minutes of cordless shaving time. This may vary depending on your beard growth and ambient temperature.•Recommended ambient temperature for charging is 5 °C to 35 °C, for storage and shaving it is 15 °C to 35 °C. The battery may not charge properly or at all under extremely low or high temperatures.•Do not expose the appliance to temperatures higher than 50 °C for extended periods of time.•When the shaver is connected to an electrical outlet, it may take some minutes until the display illuminates.•Connect the shaver to an electrical outlet by snapping the power supply (10) into the power socket of the shaver (9) / the charging stand (10a). For cc models plug into the station power socket (see chapter «Clean & Charge Station»).•For first-time charge, charge continuously for at least 1 hour.•The actual charge status is shown on the display.•The display information is dependent on the model.•Some models only show icons during charging or operation. On other modelsa series of icons is also shown after the shaver has been turned off.UsageMake sure that the shaver is disconnected from the power supply. Press the on / off button (4) to operate the shaver.Tips for a perfect shave1. Position the shaver at the right angle (90°) to your skin.2. Stretch your skin slightly with your hand.3. Shave against the direction of your beard growth.Multi Head Lock switch (head lock)The shaver head can be locked in five positions to shave hard-to-reach areas (e.g.•Slide the Multi Head Lock switch (3) down to lock the shaver head.•Move the shaver head manually to your desired position.•For automatic cleaning in the Clean & Charge Station the head lock needs to be released.Precision trimmerThe trimmer can be used to trim sideburns, moustache or beard.•Press the release button (8) and slide the trimmer (6) upwards.Travel lockThe shaver can be locked to avoid unintended starting of the motor (e.g. for storing in a suitcase).•Press the on / off button (4) for 5 seconds to lock / unlock the shaver. This is confirmed by a beep sound and the lock icon appearing / disappearing on the display.Foil replacementTo maintain 100% shaving performance, replace the Foil & Cutter cassette (1), when the foil replacement indicator lights up (and no status segments are visible).•To remove the Foil & Cutter cassette press the release buttons (2).•Press the on / off button for 10 seconds to reset the counter.•Afterwards you need to unlock the shaver (see chapter «Travel lock»).•On some shaver models the replacement indicator will reset automatically after7 shaves.Cleaning under running waterEspecially important after foam or gel usage•Switch on the shaver cordless and rinse the shaver head under hot running water until all residues have been removed. You may use liquid soap without abrasive substances. Rinse off all foam and let the shaver run for a few more seconds.•Next, switch off the shaver, press the release buttons (2) to remove the Foil & Cutter cassette (1) and let it dry.•If you regularly clean the shaver under water, apply a drop of light machine oil on top of the Foil & Cutter cassette once a week.The shaver needs to be cleaned under running water after each foam or gel usage!Cleaning with a brush•Switch off the shaver. Remove the Foil & Cutter cassette (1) and tap it out on a flat surface. Using the brush, clean the inner area of the pivoting head. Do not clean the cassette with the brush as this may damage it!The Clean & Charge Station has been developed for cleaning, charging, lubricating,12 Station power socket13 Lift button for cartridge exchange14 Station-to-shaver contacts15 Clean & Charge Station display15a L evel indicator15b Status light15c Cleaning program indicators*16 Start button17 Cleaning cartridge* not with all models (see display box)•Remove the protection foil from the C & C display.•Press the lift button (13) at the rear side of the C & C to lift the housing.•Hold the cleaning cartridge (17) down on a flat, stable surface (e.g. table).•Carefully remove the lid from the cartridge.•Slide the cartridge from the rear side into the base of the station until it snaps in.•Slowly close the housing by pushing it down until it locks.•Using the power supply (10), connect the station power socket (12) to an electrical outlet.Important: The shaver needs to be dry and free from any foam, gel or soap residue!•Insert the shaver in the C & C upside down, with the front showing and head lock (3) released.•The contacts (7) on the back of the shaver need to align with the contacts (14) in the C & C. Push the shaver backwards in the correct position. A beep sound confirms that the shaver sits properly in the C & C.•Only C & C with cleaning program selection: The C & C analyses the hygiene status. The status is shown by the cleaning program indicators (15c) in the C & C display (15). Charging the shaver in the C & CCharging will start automatically when the shaver has been inserted properly. Cleaning the shaver in the C & CWhen the cleaning indicator lights up on the shaver display, insert the shaver into the C & C, as described above.Cleaning programs (not with all models)short / economical cleaningnormal level of cleaningcleaningEach cleaning program consists of several cycles, where cleaning fluid is flushedAutomatic cleaningStart the cleaning process by pressing the start button (16). If status light (15b) does not shine (C & C switches to stand-by after ca. 10 minutes), press start button twice. Otherwise, cleaning will not start.Depending on your model and/or program selected, the cleaning time takes up to3 minutes and afterwards a fan runs. During this time the status light (15b) blinks. After cleaning, drying and charging is completed, all indicators turn off.Hold the C & C with one hand and tilt the shaver slightly to the front to release it. When the level indicator (15a) lights up permanently red, the remaining fluid in the cartridge is sufficient for about 3 more cycles. When the level indicator blinks red, the cartridge needs to be replaced – about every 4 weeks when used daily.After having pressed the lift button (13) to open the housing, wait for a few seconds before removing the used cartridge to avoid any dripping. Before discarding the used cartridge, make sure to close the openings using the lid of the new cartridge, since the used cartridge will contain contaminated cleaning solution.The hygienic cleaning cartridge contains ethanol or isopropanol (specification see cartridge), which once opened will naturally evaporate slowly. Therefore, each cartridge, if not used daily, should be replaced after approximately 8 weeks. The cleaning cartridge also contains lubricants for the shaving system, which may leave residual marks on the outer foil frame and the cleaning chamber of the C & C. These marks can be removed easily by wiping gently with a damp cloth and do not impact the shaver and its performance in any way.Braun recommends changing your shaver’s Foil & Cutter cassette every 18 months to maintain your shaver’s maximum performance.Available at your dealer or Braun Service Centres:•Foil & Cutter cassette: 92S/92M•Cleaning Cartridge: CCR•Braun Shaver cleaner sprayProduct contains batteries and/or recyclable electric waste. For environment protection, do not dispose of in household waste, but for recycling take toelectric waste collection points provided in your country.The cleaning cartridge can be disposed of with regular household waste.。
Bosch 电器用品说明书

R e g i s t e ry o u rn e w d e v i c eo nM y B o s c h no w a n dg e t f r e e b en e f i t s:b o sc h-h o me.c o m/w e l c o m e HobPKE6..CA.,PKF6..CA1.[en]User manualPKF6..CA..PKE6..CA.2Ø = cmSafety en 3Table of contents1Safety (3)2Preventing material damage (4)3Environmental protection and saving en-ergy (5)4Familiarising yourself with your appliance (6)5Basic operation (6)6Cleaning and servicing (7)7Disposal (8)8Customer Service.................................................81 SafetyObserve the following safety instructions.1.1 General information¡Read this instruction manual carefully.¡Keep the instructions, the appliance passand the product information safe for futurereference or for the next owner.¡Do not connect the appliance if it has beendamaged in transit.1.2 Intended useOnly a licensed professional may connect ap-pliances without plugs. Damage caused by in-correct connection is not covered under thewarranty.Only use this appliance:¡To prepare meals and drinks.¡Under supervision. Never leave the appli-ance unattended when cooking for shortperiods.¡In private households and in enclosedspaces in a domestic environment.¡Up to an altitude of max. 2000 m abovesea level.Do not use the appliance:¡With an external timer or a separate remotecontrol. This does not apply if operationwith appliances included in EN 50615 isswitched off.1.3 Restriction on user groupThis appliance may be used by children aged8 or over and by people who have reducedphysical, sensory or mental abilities or inad-equate experience and/or knowledge,provided that they are supervised or have been instructed on how to use the appliance safely and have understood the resulting dangers.Children must not play with the appliance.Children must not perform cleaning or user maintenance unless they are at least 15 years old and are being supervised.Keep children under the age of 8 years away from the appliance and power cable.1.4 Safe use WARNING ‒ Risk of fire!Hot oils and fats ignite very quickly.▶Never leave hot oil or fat unattended.▶Never use water to put out burning oil or fat.▶Switching off the hotplate.▶Extinguish flames carefully using a lid, fire blanket or something similar.The hotplates become very hot.▶Never place combustible items on the hob.▶Do not store any objects on the hob.The appliance will become hot.▶Do not keep combustible objects or aero-sol cans in drawers directly underneath the hob.The hob switches off automatically and can no longer be operated. It may switch on unin-tentionally at a later point.▶Switch off the circuit breaker in the fuse box.▶Call the after-sales service.Hob covers can cause accidents, for example due to overheating, catching fire or materials shattering.▶Do not use hob covers.WARNING ‒ Risk of burns!The hotplates and surrounding area (particu-larly the hob surround, if fitted) become very hot.▶Never touch the hot surfaces.▶Keep children at a safe distance.The hotplate heats up but the display does not work.▶Switch off the circuit breaker in the fuse box.▶Call the after-sales service.Unsuitable safety devices or child hob guards may result in accidents.▶Only use safety devices, such as child hobguards, which have been approved by us.en Preventing material damage4The appliance becomes hot during operation.▶Allow the appliance to cool down beforecleaning.WARNING ‒ Risk of electric shock!Incorrect repairs are dangerous.▶Repairs to the appliance should only becarried out by trained specialist staff.▶Only use genuine spare parts when repair-ing the appliance.▶If the power cord of this appliance is dam-aged, it must be replaced with a specialconnection cable, which is available fromthe manufacturer or his Customer Service.If the appliance or the power cord is dam-aged, this is dangerous.▶Never operate a damaged appliance.▶Never operate an appliance with a crackedor fractured surface.▶Call customer services. → Page 8An ingress of moisture can cause an electricshock.▶Do not use steam- or high-pressure clean-ers to clean the appliance.The insulation on cables of electrical appli-ances may melt if it touches hot parts of the appliance.▶Never bring electrical appliance cables intocontact with hot parts of the appliance.WARNING ‒ Risk of injury!Saucepans may suddenly jump due to liquid between the saucepan base and the hotplate.▶Always keep hotplates and saucepanbases dry.WARNING ‒ Risk of suffocation!Children may put packaging material over their heads or wrap themselves up in it and suffocate.▶Keep packaging material away from chil-dren.▶Do not let children play with packaging ma-terial.Children may breathe in or swallow small parts, causing them to suffocate.▶Keep small parts away from children.▶Do not let children play with small parts.2 Preventing material damageATTENTION!Rough pot and pan bases will scratch the ceramic.▶Check your cookware.Boiling pans dry may damage cookware or the appli-ance.▶Never place empty pans on a heated hotplate or al-low to boil dry.Incorrectly positioned cookware can cause the appli-ance to overheat.▶Never place hot pots or pans on the controls or thehob surround.Damage can occur if hard or pointed objects fall ontothe hob.▶Do not let hard or pointed objects fall onto the hob.Non heat-resistant materials will melt on heated hot-plates.▶Do not use oven protective foil.▶Do not use aluminium foil or plastic containers. 2.1 Overview of the most common damage Here you can find the most common types of damage and tips on how to avoid them.Damage Cause Measure Stains Food boiling over Remove boiled-over food immediately with a glass scraper.Stains Unsuitable cleaning products Only use cleaning products that are suitable for glass ceramic.Scratch es Salt, sugar or sand Do not use the hob as a work surface or storage space.Scratch es Rough pot or pan bases Check your cookware.Discol-ouration Unsuitable cleaning products Only use cleaningproducts that are suitablefor glass ceramic.Discol-ouration Pan abrasion,e.g. aluminium Lift pots and pans tomove on the hob.Blisters Sugar or food with a high sugar contentRemove boiled-over foodimmediately with a glassscraper.Environmental protection and saving energy en 53 Environmental protection and saving energy3.1 Disposing of packagingThe packaging materials are environmentally compat-ible and can be recycled.▶Sort the individual components by type and disposeof them separately.3.2 Saving energyIf you follow these instructions, your appliance will useless energy.Select the cooking zone to match the size of yourpan. Centre the cookware on the hob.Use cookware whose base diameter is the same dia-meter as the hotplate.Tip: Cookware manufacturers often give the upperdiameter of the saucepan. It is often larger than thebase diameter.¡Unsuitable cookware or incompletely covered cook-ing zones consume a lot of energy.Cover saucepans with suitable lids.¡Cooking without a lid consumes far more energy.Lift lids as infrequently as possible.¡When you lift a lid, a lot of energy escapes.Using a glass lid¡You can see into the pan through a glass lid without having to lift it.Use pots and pans with flat bases.¡Uneven bases increase energy consumption.Use cookware suited to the quantity of food.¡Large items of cookware containing little food need more energy to heat up.Cook with little water.¡The more water contained in cookware, the more energy is required to heat it up.Turn down to a lower heat setting early on. Use a suit-able ongoing cooking setting to continue cooking.¡If you continue cooking with an ongoing cooking setting that is too high, you'll waste energyTake advantage of the hob's residual heat. Withlonger cooking times switch off the hotplate5-10 minutes before the end of cooking.¡Unused residual heat increases energy consump-tion.en Familiarising yourself with your appliance 64 Familiarising yourself with your appliance4.1 Control panelYou can use the control panel to configure all functionsof your appliance and to obtain information about theoperating status.Hotplate controls The hotplate controls are permanently fixed in place.They must not be removed. Forcibly removing the hot-plate controls leads to them being destroyed.4.2 HotplatesYou can find an overview of the different activations ofthe hotplates here.If you operate the activations, the relevant displays lightup.Switching off: Turn the hot-plate switch to 0 and reset.Never turn the hotplateswitch past the symbol to0.Notes¡Dark areas in the glow pattern of the hotplate arepart of the technical design. They do not affect thefunctionality of the hotplate.¡The hotplate regulates the temperature by switchingthe heat on and off. The heat may also switch onand off when on the highest setting.–This protects easily damaged components fromoverheating.–The appliance is protected from electrical over-load.–Better cooking results are achieved.¡With multi-circuit hotplates, the heating of the innerfilament circuits and the heating of the activations may switch on and off at different times.4.3 Hotplate display and residual heatindicatorThe hob has a hotplate display and a residual heat in-dicator. The display lights up when a hotplate is warm.DisplayMeaning Hotplatedisplay Lights up during operation, shortly after switching on.Residualheat indic-ator Lit up after cooking when the hotplate is still warm.Note: You can keep small dishes warmor melt cooking chocolate.5 Basic operation5.1 Switching the hob on or off You can switch the hob on and off with the hotplateswitch.5.2 Setting the hotplatesYou can use the hotplate control to adjust the heat out-put of the hotplate.Heat setting1Lowest setting Heat setting 9Highest setting The symbol in the display panel indicates the hotplatewhich the display refers to, e.g. for the right rear hot-plate.Cleaning and servicing en75.3 Recommended cooking settingsYou can find an overview of different foods with appro-priate heat settings here.The cooking time will vary depending on the type,weight, thickness and quality of the food. The ongoingcooking setting depends on the cookware used.Cooking tips¡To bring food to the boil, use heat setting 9.¡Stir thick liquids occasionally.¡Food that needs to be seared quickly or that initiallyloses a lot of liquid during frying should be fried insmall portions.¡Tips for saving energy when cooking. → Page 5MeltingFood Ongoing cooking setting Ongoingcookingtime inminutesButter, gelatine 1-Heating or keeping warm Stew, e.g. lentil stew 1-Milk 11-2-1Prepare the dish without the lid.Poaching or simmering Dumplings 1, 23-420-30Fish 1, 2310-15White sauce, e.g. béchamel 13-61Bring the water to the boil with the lid on.2Continue to cook the dish without a lid.Boiling, steaming or braising Rice with double the volume of water 315-30Potatoes boiled in their skin 3-425-30Boiled potatoes 3-415-20Pasta, noodles 1, 256-10Stew, soup 3-415-60Vegetables, fresh or frozen 3-410-20Food in a pressure cooker 3-4-1Bring the water to the boil with the lid on.2Continue to cook the dish without a lid.Stewing Beef olives 3-450-60Pot roast 3-460-100Goulash 3-450-60Frying with little oilFry food without a lid.Escalope, plain or breaded 6-76-10Chops, plain or breaded 16-78-12Steak, 3 cm thick 7-88-12Fish or fish fillet, plain orbreaded 4-58-20Fish or fish fillet, breaded andfrozen, e.g. fish fingers 6-78-12Stir fry, frozen 6-76-10Pancakes 5-6-1Turn the dish several times.6 Cleaning and servicingTo keep your appliance working efficiently for a longtime, it is important to clean and maintain it carefully.6.1 Cleaning products You can obtain suitable cleaning products and glass scrapers from customer service, the online shop or a retailer.ATTENTION!Unsuitable cleaning products may damage the sur-faces of the appliance.▶Never use unsuitable cleaning products.Unsuitable cleaning products ¡Undiluted detergent¡Detergent intended for dishwashers¡Abrasive cleaners¡Aggressive cleaning products such as oven sprayor stain remover¡Abrasive sponges¡High-pressure or steam jet cleaners 6.2 Cleaning the glass ceramic Clean the hob after every use to stop cooking residuesfrom getting burnt on.Note: Note the information on unsuitable cleaningproducts. → Page 7Requirement: The hob has cooled down.1.Remove heavy dirt using a glass scraper.2.Clean the hob with a cleaning product for glassceramic.Follow the cleaning instructions on the productpackaging.Tip: You can achieve good cleaning results if youuse a special sponge for glass ceramic.6.3 Cleaning the hob surround Clean the hob frame after use if dirty or stained.Notes ¡Note the information on unsuitable cleaningproducts. → Page 7¡Do not use the glass scraper.1.Clean the hob frame with hot soapy water and a softcloth.en Disposal8Wash new sponge cloths thoroughly before use. 2.Dry with a soft cloth.7 DisposalFind out here how to dispose of old appliances cor-rectly.7.1 Disposing of old applianceValuable raw materials can be reused by recycling.▶Dispose of the appliance in an environmentallyfriendly manner.Information about current disposal methods areavailable from your specialist dealer or local author-ity.(waste electrical and electronic equip-ment - WEEE).The guideline determines the frame-work for the return and recycling of used appliances as applicable throughout the EU.8 Customer ServiceIf you have any queries on use, are unable to rectifyfaults on the appliance yourself or if your applianceneeds to be repaired, contact Customer Service.Function-relevant genuine spare parts according to thecorresponding Ecodesign Order can be obtained fromCustomer Service for a period of at least 10 years fromthe date on which your appliance was placed on themarket within the European Economic Area.Note: Under the terms of the manufacturer's warrantythe use of Customer Service is free of charge.Detailed information on the warranty period and termsof warranty in your country is available from our after-sales service, your retailer or on our website.If you contact Customer Service, you will require theproduct number (E-Nr.) and the production number(FD) of your appliance.The contact details for Customer Service can be foundin the enclosed Customer Service directory or on ourwebsite.8.1 Product number (E-Nr.) and productionnumber (FD)You can find the product number (E-Nr.) and the pro-duction number (FD) on the appliance's rating plate.The rating plate is located on the appliance certificate.Make a note of your appliance's details and the Cus-tomer Service telephone number to find them againquickly.Thank you for buying a Bosch Home Appliance!Register your new device on MyBosch now and profit directly from:•Expert tips & tricks for your appliance •Warranty extension options •Discounts for accessories & spare-parts •Digital manual and all appliance data at hand •Easy access to Bosch Home Appliances Service Free and easy registration – also on mobile phones:/welcomeLooking for help? You'll find it here.Expert advice for your Bosch home appliances, help with problems or a repair from Bosch experts.Find out everything about the many ways Bosch can support you: /serviceContact data of all countries are listed in the attached service directory.*9001596004*9001596004 (001215)en Robert Bosch Hausgeräte GmbH Carl-Wery-Straße 3481739 München GERMANY Valid within Great Britain:Imported to Great Britain by BSH Home Appliances Ltd.Grand Union House Old Wolverton Road Wolverton, Milton Keynes MK12 5PT United Kingdom。
博朗耳温计中文说明书
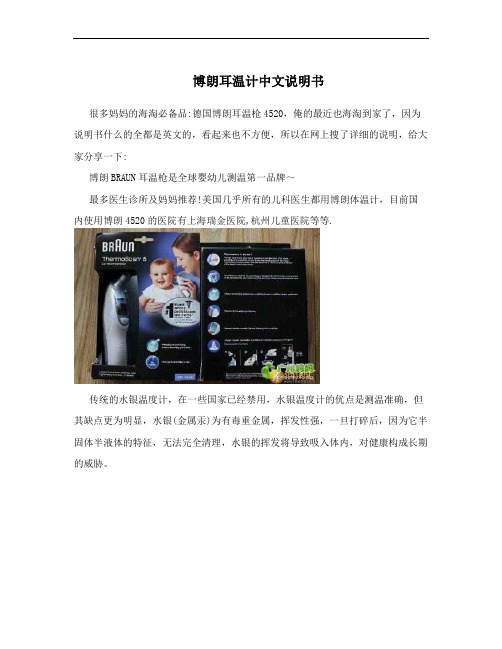
博朗耳温计中文说明书很多妈妈的海淘必备品:德国博朗耳温枪4520,俺的最近也海淘到家了,因为说明书什么的全都是英文的,看起来也不方便,所以在网上搜了详细的说明,给大家分享一下:博朗BRAUN耳温枪是全球婴幼儿测温第一品牌~最多医生诊所及妈妈推荐!美国几乎所有的儿科医生都用博朗体温计,目前国内使用博朗4520的医院有上海瑞金医院,杭州儿童医院等等.传统的水银温度计,在一些国家已经禁用,水银温度计的优点是测温准确,但其缺点更为明显,水银(金属汞)为有毒重金属,挥发性强,一旦打碎后,因为它半固体半液体的特征,无法完全清理,水银的挥发将导致吸入体内,对健康构成长期的威胁。
电子体温计很好的解决了水银温度计的缺点,但应用在宝宝身上可就难以操作了,几乎没有一个宝宝能够接受一个探头长达2分钟以上的刺激,大概只有等宝宝睡着了,才能正常的测温。
现在好了德国博朗”一秒耳温计”,只需往宝宝耳朵里一放,一秒钟不到,温度多少立刻精确显示,不论躺着还是坐着都可以用,孩子无痛苦~德国博朗4520耳温计是BRAUN系列产品的最高端型号一秒体温计,人体工程学外型,手感舒适.全新护耳柔垫设计,更小的测量口径,柔软而温和,更适合婴幼儿,为你的全家健康保驾护航~, 舒适适合全家大小使用,最温和的体温测量工具;, 安全全新设计柔软侦侧头,安全不伤耳道;, 快速测量体温,仅需一秒;, 准确经医院使用测试证明,测温准确., 一秒八次测温–耳套检测警示, Flexible tip(4000 系列独有)柔软弹性探头, 更小测量口径,测量更准确, 耳套自动弹出装置, 贴心凸纹按钮设计,测量不滑手, 保留前8次温度记忆, ExacTemp技术(4000系列独有)配合回馈系统:有指示灯光和声音提示测得正确温度,提示是否没有正确放置., 使用时间更长1.产品包装清单一个硬盒保护安放支架+送的21个耳套+耳温计一个+5号电池两节2.电池说明刚买的产品中含有电池,但是电量不是很足,可以用1-2个月,建议1-2月后换电池,电池是5号电池。
braun剃须刀清洗流程

braun剃须刀清洗流程
Braun剃须刀清洗流程。
Braun剃须刀是男士日常护理的重要工具,但是使用一段时间后,剃须刀很容易积累污垢和细菌。
因此,定期清洗剃须刀是非常重要的。
下面将介绍Braun剃须刀的清洗流程,帮助您轻松保持剃须刀的清洁和卫生。
首先,准备清洗工具。
您需要准备热水、中性洗涤剂和小刷子。
确保这些工具都是干净的,以免再次污染剃须刀。
接下来,拆卸剃须刀头部。
根据您的剃须刀型号,可能需要按下按钮或者旋转头部来取下刀头。
确保在拆卸过程中小心操作,避免损坏剃须刀。
然后,清洗剃须刀头部。
将剃须刀头部放入热水中浸泡几分钟,然后使用中性洗涤剂和小刷子彻底清洁刀头和刀网。
确保每个部分都清洗到位,去除污垢和残留的须发。
接着,清洗剃须刀主体。
用湿布擦拭剃须刀主体,并确保没有水滴残留在剃须刀上。
避免直接将剃须刀浸入水中,以免损坏电路和电池。
最后,干燥和组装剃须刀。
使用干净的毛巾将剃须刀头部和主体擦干,然后将刀头重新安装到主体上。
确保每个部分都安装到位,以免影响剃须刀的使用效果。
通过以上清洗流程,您可以轻松保持Braun剃须刀的清洁和卫生。
定期清洗剃须刀不仅可以延长剃须刀的使用寿命,还可以避免因细菌滋生而对皮肤造成伤害。
希望以上内容对您有所帮助,祝您使用愉快!。
博朗s9pro使用说明
博朗s9pro使用说明博朗s9pro使用说明书产品简介一、博朗s9pro设定范围1、设定值(SV):同等温度范围值2、加热侧比例带(P):1-量程或0.1-量程(温度输入)*13、制冷侧比例带(PC):加热侧比例带1-1000%4、积分时间(I):1-3600sec*25、微分时间(D):1-3600sec*36、限制积分动作生效范围(ARW):比例带的1-100%*47、加热侧比例周期1-100sec*58、制冷侧比例周期1-100sec*69、不感带-10°—10或-10.0 —+10oC[*F](温度输入),量程的-10—+10。
0%(电压/电流输入)*710、如果比例带设定为oC[﹡F]即成ON—OFF动作11、如果积分时间设定为0sec,即成PD动作12、如果微分时间设定为0sec,即成PI动作13、如果限制积分动作生效范围设定为0%,D动作则成OFF14、电流输出时不需设定周期15、电流输出时不需设定周期16、如果不感带设定为负,则成重叠二、博朗s9pro控制动作PID控制(ON—OFF.P.PI.PD控制)自动演算功能(AT)1、自调方式:限制周期法2、AT周期3、自主校正设定改变时,自主校正即建立加热/制冷PID控制动作除外,控制输出4、继电器接点输出:250VAC 3A(带负荷)1a连接电气性:超过300000次,额定负荷b)电压脉冲输出:0—12VDC(负荷电阻:超过600Ω)5、电流输出:4-20maDC(负荷电阻:超过600Ω)6、闸流控制管驱动用触发器输出:零测法中容量驱动7、闸流控制管输出:额定0.5A(环境温度低于40℃)温度报警三、博朗s9pro报警点:双报警(分别设定)报警种类:偏差报警(上限,下限,上下限,范围内)过程值输入报警(上限,下限)设定值输入报警(上限,下限)可以选择待机机能(设定值报警除外)控制环断线报警(LBA)LBA设定时间:0.1—200.0min不能设定为0.0minLBA不感带:0—9999oC[﹡F](温度输入)0—量程(电压/电流输入)如果设定为0,LBA不动作。
ct5cc中文说明书
°Cool TecType 5676 5676CT6cc CT5cc CT4cc CT4s CT3cc CT2cc CT2s613 English 18Braun GmbH Frankfurter Straße 145 61476 Kronberg/Germany 92388020/XI-12Co olT ec1236875141716a 159416b18131011a12a 12c12b 12d11b11cCT6cc CT5cc CT4cc CT3cc CT2ccCT5cc CT4cc CT4sCT6cc CT3cc CT2cc CT2s+CT4s CT2sCT5ccEnglishOur products are designed to meet the highest standards of quality, functionality and design. Thank you for your trust in Braun’s quality and we hope you enjoy your new Braun shaver.This shaver cools the skin to give you a cooling sensation for a pleasant shave.Please read the use instructions carefully and completely before using the appliance.1 Foil & Cutter cassette2 Cooling element3 Cooling on/off switch4 Shaver display5 On/off switch6 Long hair trimmer7 Shaver-to-shell/station contacts8 Release button for long hair trimmer9 M odel number10 Special cord set11a Brush11b Pouch11c Protection cap12a Charging shell12b Shell power socket12c Stand for charging shell12d Shell-to-shaver contactsFirst use and ChargingPrior to first use connect the shaver to an electrical outlet using the charging shell as described below or for models CT6cc/CT5cc/CT4cc/CT3cc/CT2cc the Clean&Charge station (see Chapter «Automatic Clean&Charge station description»).Note: The shaver can only be charged via the charging shell or the Clean&Charge station. Models CT4s/CT2s must not be used with the Clean&Charge station.Charging shell (see fig. B)• Click the charging shell (12a) onto the stand (12c - models CT4s/CT2s only). Using the special cord set (10), connect the shell power socket (12b) to an electrical outlet.• Place the shaver into the charging shell. The contacts (7) on the back of the shaver need to align with the contacts (12d) in the charging shell.A beep sound confirms that the shaver sits properly in the station.• The shaver will be automatically charged. Charging and basic operating information• A full charge provides up to 45 minutes of shaving time (up to 15 minutes with activated cooling function). This may vary according to your beard growth and environmental temperature.• Recommended ambient temperature for charging is 5 °C to 35 °C. The battery may not charge properly or at all under extreme low or high temperatures. Recommended ambient temperature for shaving is 15 °C to 35 °C.• Do not expose the appliance to temperatures higher than 50 °C for extended periods of time.• When the shaver is connected to an electrical outlet, it may take some minutes until the displayCharge statusDuring charging the symbol in the on/off switch (5)blinks green. When fully charged, it will light up for a few seconds, provided the shaver is connected to an electrical outlet.Low chargeThe symbol in the on/off switch (5) shines red when the battery is running low. You should be able to finish your shave. When switching off the shaver a beep sound reminds you of the low charge status. Cleaning StatusThe lock symbol lights up when the shaver has been locked to avoid unintended starting of the motor (e.g. for storing it in a suitcase).Using the shaver (see fig. A)Press the on/off switch (5) to operate the shaver. Tips for a perfect dry shaveFor best results, Braun recommends you to follow 3 simple steps:1. Always shave before washing your face.2. At all times, hold the shaver at right angles(90°) to your skin.3. Stretch your skin and shave against thedirection of your beard growth.CoolingNote: The cooling sensation experienced may differ from person to person. It is influenced by personal and environmental factors (e.g. skin, environmental temperature).To activate the cooling function, press the cooling switch (3) during shaving. The symbol in the cooling switch shines blue. For best cooling per-formance, we recommend to wait a few seconds after the cooling function has been activated.Then continue shaving as usual.The symbol in the cooling switch (3) starts blinking when the battery is running low and there is not enough energy left for the cooling function. You should be able to finish your shave with activated cooling function.You can deactivate the cooling function by pressingLong hair trimmerTo trim sideburns, moustache or beard, press the release button (8) and slide the long hair trimmer (6) upwards.3 seconds the shaver is locked. This is confirmed by a beep sound and the lock symbol in the display. Afterwards the display turns off.• Deactivation: By pressing the on/off switch for3 seconds the shaver is unlocked again.Manual cleaning of the shaver(see fig. C/D)The shaver is suitable for cleaning under running tap water. Detach the shaver from the power supply before cleaning it in water.• Switch the shaver on and rinse the shaver head under hot running water. You may use liquid soap without abrasive substances. Rinse off all foam and let the shaver run for a few more seconds. • Next, switch off the shaver, remove the Foil & Cutter cassette and let it dry.• If you regularly clean the shaver under water, then once a week apply a drop of light machine oil on top of the Foil & Cutter cassette.Alternatively, you may clean the shaver using a brush:• Switch off the shaver. Remove the Foil & Cutter cassette (1) and tap it out on a flat surface. Using a brush, clean the inner area of the pivoting head. Do not clean the cassette with the brush as this may damage it!Clean&Charge station(models CT6cc/CT5cc/CT4cc/CT3cc/CT2cc)The Clean&Charge station has been developed for cleaning, charging, lubricating, disinfecting and storing your Braun shaver.13 Station power socket14 Lift button for cartridge exchange15 Station-to-shaver contacts16a Level indicator16b Status light17 Start button18 Cleaning cartridgeInstalling the Clean&Charge station (see fig. E)• Remove the protection foil from the Clean&Charge station display.• Press the lift button (14) at the rear side of the Clean&Charge station to lift up the housing.• Hold the cleaning cartridge (18) down on a flat,• Carefully remove the lid from the cartridge.• Slide the cartridge from the rear side into the base of the station until it snaps into place.• Slowly close the housing by pushing it down until it locks.• Using the special cord set (10), connect the station power socket (13) to an electrical outlet.Charging the shaver in the Clean&Charge station Insert the shaver head down into the Clean&Charge station.Important: The shaver needs to be dry and free from any foam or soap residue!The contacts (7) on the back of the shaver need to align with the contacts (15) in the Clean&Charge station. Push the shaver in the correct position.A beep sound confirms that the shaver sits properly in the station. The Clean&Charge station will automatically charge the shaver.Cleaning the shaverstation, upside down and with the front showing.Start automatic cleaningStart the cleaning process by pressing the start button (17). If the status light (16b) does not shine (Clean&Charge station switches to stand-by after about 10 minutes), press the start button twice. Otherwise cleaning will not start.For best shaving results, we recommend cleaning after each shave.The cleaning program consists of several cycles, where cleaning fluid is flushed through the shaver head. The cleaning time takes 3 minutes. During this time the status light of the Clean&Charge station blinks.Leave the shaver in the station for drying. It takes several hours until remaining moisture evaporates depending on the climatic conditions. Afterwards the shaver is ready for use.After completing the cleaning and charging session, the indicators of the Clean&Charge station turn off.Removing the shaver from the Clean&Charge station (see fig. F)Hold the Clean&Charge station with one hand and tilt the shaver slightly to the front to release it.Cleaning Cartridge / Replacement (see fig. G) When the level indicator lights up permanently red, the remaining fluid in the cartridge is sufficient for about 3 more cycles. When the level indicator blinks red, the cartridge needs to be replaced After having pressed the lift button (14) to open the housing, wait for a few seconds before removing the used cartridge to avoid any dripping. Before discarding the used cartridge, make sure to close the openings using the lid of the new cartridge, since the used cartridge will contain contaminated cleaning solution.The hygienic cleaning cartridge contains ethanol or izopropanol (dependent on country – specification see cartridge), which once opened will naturally evaporate slowly into the surrounding air.Each cartridge, if not used daily, should be replaced after approximately 8 weeks to ensure optimal disinfection.The cleaning cartridge also contains lubricants, for the shaving system which may leave residual marks on the outer foil frame and the cleaning chamber of the Clean&Charge station after cleaning. These marks can be removed easily by wiping gently with a damp cloth.Braun recommends changing your shaver’s Foil & Cutter cassette every 18 months to maintain your shaver’s maximum performance.Available at your dealer or Braun Service Centres:• Foil & Cutter cassette: 40S/40B• Cleaning cartridge Clean&Charge: CCRThis product contains rechargeable batteries.In the interest of protecting the environment, please do not dispose of the product in the household waste at the end of its useful life. Disposal can take place at a Braun Service Centre or at appropriate collection points provided in your country.The cleaning cartridge can be disposed of with regular household waste.Subject to change without notice.For electrical specifications, see printing on thespecial cord set.21。
飞利浦剃须刀使用说明书
- 清洁系统必须放在稳定、平 坦的水平表面上,以防漏液。
- 如果清洁系统采用清洁滤 芯,在使用清洁系统进行清 洁或为剃须刀充电之前,应 始终确保滤芯仓已关闭。
- 清洁系统准备就绪时,切勿 移动,以免清洁液漏出。
1
4222.002.5978.1
在在水水龙头龙下头冲下洗剃冲须洗刀头剃部须件刀头部件
S1202,
S1204322)2。.002.5978.1_cHR.indd 1
21
08-09-
立即扫码进入官网公众号注册 2
33ᄼhᬣr.
1 2
1
2
1 2
充电
1
3
4
21
1x
1. 入会好礼倾情赠(额外一年
延保,共3年保修期)
- 该表格中所显示的“有害物质”在产品正常使用情
请耐心等
况下不会对人身和环境产生任何伤害。
待直到充
- 该表格中所显示的“有害物质”及其存在的部件向
电指示
消费者和回收处理从业者提供相关物质的存在信
灯灭,然
息,有助于产品废弃时的妥善处理。
后就可以
正常开启 运行了 (S1201,
首次充电,当您首次为剃须刀充电时,请充满3小时,以 激活最佳电池容量.
危险 - 保持电源部件干燥 (图 1)。 - 警告符号注释: 禁止在打开
的水龙头下进行清洗 (图 1)。
警告 - 要给电池充电,请仅使用产
品随附的可拆卸电源部件 (S1201, S1202, S1203: A00380/A00390, S2302, S2303 : HQ8505)。 - 电源部件中包含一个变压器。 请勿自行更换电源部件的插 头,否则将导致严重后果。 - 本产品也可以由 8 岁或以上 年龄的儿童以及肢体不健全、 感觉或精神上有障碍或缺乏相 关经验和知识的人士使用, 但前提是有人对他们使用本 产品进行监督或指导,以确 保他们安全使用,并且让他 们明白相关的危害。 切勿让 儿童玩弄本产品。 不要让儿 童在无人监督的情况下对本 产品进行清洁和保养。 - 将剃须刀手持部分与电源软 线分开后,才能在水龙头下 清洗手持部分。 - 使用前,请务必检查产品。 请勿使用损坏的产品,否则可 能对人体造成伤害。 请务必 用原装型号更换损坏的部件。 - 本产品包含的电池不可更换。 - 切勿拆开本产品更换充电 电池。