Istorage服务器安装和使用指南
服务器SATA企业级固态硬盘安装指南说明书
100-gigabyte,2.5-inch,SATA Enterprise solid-state drives (SSDs)can be used as storage devices in servers that support them.This guide describes the pre-installation considerations and tasks involved in installing an SSD in a server,as well as device specifications and known issues.Before You BeginRefer to the product documentation for the server into which you will install the SSD for the following platform-specific information:■Ensure that your system supports Serial ATA (SATA).■Verify that the configuration you intend to use is supported on your platform.For example,do not mix SSDs with other drive types without first verifying that such a configuration is supported by the server into which you will install the SSD.Preparing for Installation1.Before you install the SSD,verify that you have all of the hardware and information that will be required for the SSD installation,including the following:■If your server does not have a standard 2.5-inch drive tray into which you can install the SSD,you will receive an SSD that is pre-installed in a bracket,enabling it to fit properly into the drive tray.■Obtain hardcopy or PDF versions of the service manual and product notes for the server into which you will install the SSD.Those documents will provide the platform-specific information you need to install the SSD into your specific server model.2.Familiarize yourself with the following safety guidelines to ensure that the system,the SSD,and the installer are protected during installation.■Keep the drive in the protective antistatic container until you are ready to install the SSD.■Handle the SSD with care.Do not touch the connectors.■Do not remove the encasement or disassemble the drive,as such actions void the warranty.100-Gigabyte, 2.5-Inch, SATA Enterprise Solid-State DriveInstallation and Specifications GuideInstalling an SSD1.Update the firmware,which might include patches,as available and described in the instructionsprovided with the patch.2.If required,power off the server for the installation of an SSD.In most systems,drives are hot-swappable,meaning they can be replaced without powering down the server.Refer to the product documentation for your server for detailed information.For some servers and configurations,you might need to power off the system.In other cases,you might need to take the drive offline,while leaving the system running.3.If required,re-route the system hard drive cabling as described in the system service manual.4.If you are installing an SSD into a drive tray that was previously occupied by another drive,remove theexisting drive as described in the product documentation for the server.5.Install the SSD into the drive tray as described in the product documentation for the server.6.If you removed power from the system,restore power as described in the product documentation for theserver.Product SpecificationsCategory SpecificationCapacity100GBDimensions100mm x70mm x7mmNAND Flash components Enterprise Multi-Level Cell(eMLC)NAND Flash memoryBandwidth Sustained sequential read:up to270MB/sSustained sequential write:up to210MB/sForm factor 2.5"industry standard hard drive form factorCompatibility SATA Revision2.6compliant with SATA1.5Gb/s and3Gb/s interface rates Voltage5V SATA supply railOperating temperature0˚C to+70˚CDownloading Patches and UpdatesTo download patches and updates from My Oracle Support,follow this procedure.1.Sign in to My Oracle Support:https://2.At the top of the page,click the Patches&Updates tab.3.Search for software and patches in one of two ways:■If you have a patch number:a.Under the Patch Search section,click the Search tab.b.In the Patch Name or Number field,enter the patch number.For example,10272123or141474-01.c.Click Search.■If you do not have a patch number:a.Under the Patch Search section,click the Search tab,and then click the Product or Family(AdvancedSearch)link.b.Check Include all products in a family.c.In the Product field,start typing the product name.Select the product name when it appears.d.In the Release field,expand the product name,check the release and patches you want to download,and then click Close.e.Click Search.4.Select the patch you want to download.5.Click ReadMe for a patch description and installation instructions.6.Click Download for a single patch,or Add to Plan to download a group of patches.Known IssuesReview the following information concerning known issues at time of release.Capacity of the Device Shows8MBOn a system that contains either an Intel100GB SSD drive(SSDSA2BZ100G3)or300GB SSD drive (SSDSA2BZ300G3),it is possible for a rare failure mode to occur immediately following a power-on of the system or hot-plugging of the said drives.While SSD drives may fail for a number of reasons,with this particular failure the following symptoms will be observed:■The capacity of the device shows8MB instead of100GB or300GB■The device serial number shows“BAD_CTX00000115”instead of a valid serial numberAs a result of this specific failure other typical side effects may also be observed:■If the device is a boot device,the system may indicate that no boot device is found.■Whether or not the device is a boot device,other indications of a device failure may occur.For example, failure to mount,I/O errors on read,RAID or ZFS messages that a device has failed,etc.This failure mode has only been seen on a small number of devices in a laboratory environment,and has been very difficult to reproduce.It is therefore important to inform Oracle that this particular failure has been encountered for further investigation.The Workaround section below explains how to identify if a failing SSD drive has experienced this particular failure mode.Workaround–At present,there is no workaround to avoid this issue.Follow the instructions below to see if the device has encountered this rare condition.Contact your authorized Oracle Service provider for assistance,and in order to confirm whether this is indeed CR7087398-BAD_CTX00000115.Please do not attempt to erase or reformat the device,as Oracle may request the device be returned for further analysis.It is strongly recommended these devices be used in a redundant(RAID)environment,with backups performed at regular intervals,as this failure mode(as well as others)can result in the loss of all data on the device.To determine if your device has encountered this rare condition,follow the instructions below based on your operating system.▼Solaris1.Become root.2.Type the following:prtconf-Dv|grep-in bad_ctxIf the system returns“xxxx:VALUE='BAD_CTX00000115”,where xxxx is the line number in the output of prtconf,then a device has encountered this issue.In this case,proceed to Step3.If there is no output as previously described,there are no devices in the system with this issue,and no further steps are necessary.3.If the output from Step2is“xxxx:VALUE='BAD_CTX00000115”,then redirect the prtconf output to a textfile by typing the following:prtconf-Dv>output.txt4.Open the output.txt file with a text editor and search for the word“BAD_CTX”.5.Within the device instance,look for the value in Device Minor Nodes->dev_link.The value shown is the name of the device with this issue,as shown in the following example:▼Oracle Enterprise Linux (OEL)OEL comes with a utility called Disk Utility that can be found under Applications -->System Tools.Follow this procedure.1.Start Disk Utility.2.In the left window,under the various storage controllers,find the Intel SSD under suspicion and click it.Drive details will be displayed in the right window.3.In the Model field,verify that “INTEL SSDSA2BZ100G3”is displayed (for 100GB drives)or “INTELSSDSA2BZ300G3”is displayed (for 300GB drives).4.Verify the Serial Number field contains the value “BAD_CTX 00000115”.▼Other Linux (Without Disk Utility)1.Find the utility called hdparm,which normally ships with most Linux distributions.2.Become root.3.Type the following,where devname is the actual device name of the Intel SSD.hdparm -i <devname>4.In the output,verify that the model number field contains “INTEL SSDSA2BZ100G3”(for 100GB drives)or “INTEL SSDSA2BZ300G3”(for 300GB drives).5.Verify the Serial Number field contains the value “BAD_CTX 00000115”.Device Minor Nodes:dev=(89,0)dev_path=/pci@0,0/pci8086,2e11@1/pci1000,3150@0:devctlspectype=chr type=minordev=(89,1)dev_path=/pci@0,0/pci8086,2e11@1/pci1000,3150@0:scsispectype=chr type=minordev_link=/dev/cfg/c8sd, instance #35 (driver name: sd)System software properties:name=’ddi-devid-registrant’ type=int items=1value=00000001name=’sd_max_xfer_size’ type=int items=1value=00400000Driver properties:name=’inquiry-serial-no’ type=string items=1 dev=nonevalue=’BAD_CTX 00000115’▼Windows1.Right-click on My Computer,then click Manage.2.Under Storage,click Disk Management.3.In the middle bottom window,scroll until you see the suspected drive.If a drive shows“Unknown8MB Not Initialized”or“8MB Unalloc”with8MB shown as the whole device capacity,it is likely the drive is in the“BAD_CTX00000115”condition.Related DocumentationDocumentation for this product is available at:/documentationFeedbackProvide feedback on this document at:/goto/docfeedbackSupport and AccessibilityDescription LinksAccess electronic support through My Oracle Support https://For hearing impaired:/accessibility/support.htmlLearn about Oracle’scommitment toaccessibility/us/corporate/accessibility/index.htmlCopyright©2011,Oracle and/or its affiliates.All rights reserved.Copyright©2011,Oracle et/ou ses affiliés.Tous droits réservés.Part No.: E23248-02Mfg No.: 7039768October 2011。
机架式网络Storage示例说明书
希捷“8 - 盘位”机架式网络存储
2/17 /16
30
以太网 电源线(2 根)
您还可以连接: 另一以太网连接线以获得冗余或性能。 鼠标、键盘和 VGA 监视器以行维护。
布置
1. 打开理线架上的面板并穿过连接线。保持一定松弛以确保外部连接和在轨道上滑动网络存储。
希捷“8 - 盘位”机架式网络存储
2/17 /16
2/17 /16
22
1. 识别 LED 和 LED 按钮
内部机箱
1. 磁盘 LED
希捷“8 - 盘位”机架式网络存储
2/17 /16
23
LED 行 为
常规 LED 行为
下方颜色列表将帮助您识别网络存储的常规状态:
颜色 蓝色常亮 蓝色闪烁 红蓝闪烁 红色闪烁 红色常亮 紫色常亮 紫色闪烁
状态 就绪 启动;关机;活动 RAID 同步;软件更新 警告 错误 更新硬件 通信已丢失
3. 提起顶盖。
希捷“8 - 盘位”机架式网络存储
2/17 /16
34
插入硬盘
重要信息:确保您在接触磁盘前正确接地。
1. 按磁盘的锁扣以打开卡扣。
希捷“8 - 盘位”机架式网络存储
2/17 /16
35
2. 将磁盘置于网络存储的硬盘导轨上。将磁盘轻轻推离 SATA 连接以确认磁盘在导轨上正确对齐。
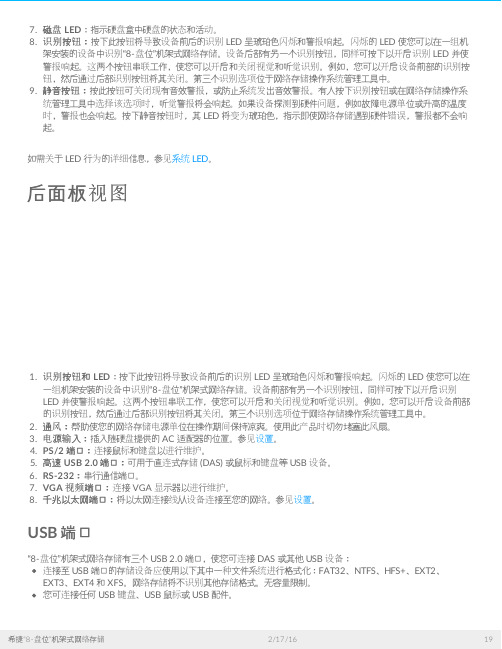
USB 端口
“8-盘位”机架式网络存储有三个 USB 2.0 端口,使您可连接 DAS 或其他 USB 设备: 连接至 USB 端口的存储设备应使用以下其中一种文件系统进行格式化:FAT32、NTFS、HFS+、EXT2、 EXT3、EXT4 和 XFS。网络存储将不识别其他存储格式。无容量限制。 您可连接任何 USB 键盘、USB 鼠标或 USB 配件。
服务器安装方案

服务器安装方案一想到服务器安装方案,我的思绪就像打开了闸门的洪水,瞬间涌了出来。
这个过程包含了太多的细节和技术要点,我得一点一点梳理清楚。
是准备工作。
想象一下,你站在一个空荡荡的机房的中央,周围是冷冽的空气和精密的设备。
你需要准备的是一张详细的机房布局图,各种服务器硬件,包括CPU、内存、硬盘等,还有网络设备、电源线、网线等。
还要考虑到服务器的操作系统、应用软件和数据库的安装需求。
1.1确定服务器位置根据机房布局图,选择合适的位置安装服务器。
这个位置要考虑到服务器的散热、网络接入和电源供应等因素。
一般来说,服务器最好放置在离网络设备和电源较近的位置。
1.2检查硬件设备在安装之前,要仔细检查服务器硬件设备是否完好。
包括CPU、内存、硬盘等关键部件,确保它们没有损坏,接口完好。
是服务器硬件的安装过程。
2.1安装CPU打开服务器机箱,将CPU插入主板上的CPU插槽。
注意,要确保CPU的方向正确,不要强行插入。
插入后,用螺丝固定CPU风扇,确保散热良好。
2.2安装内存将内存条插入主板上的内存插槽。
内存插槽通常有多个,要确保内存条插入到底,听到“咔哒”一声表示安装到位。
2.3安装硬盘将硬盘安装在服务器机箱内部的硬盘架上,用螺丝固定。
然后,将硬盘数据线连接到主板上的硬盘接口。
2.4安装电源模块将电源模块安装在服务器机箱内部,用螺丝固定。
然后,将电源线连接到主板上的电源接口。
2.5连接网络设备将网线一端插入服务器网卡接口,另一端连接到交换机或路由器上。
确保网络通畅。
是服务器软件的安装。
3.1安装操作系统根据需求选择合适的操作系统,如WindowsServer、Linux等。
将操作系统安装盘放入光驱,启动服务器,按照提示完成安装。
3.2安装应用软件在操作系统安装完成后,安装所需的应用软件。
例如,如果服务器用于网站托管,可以安装Apache、MySQL、PHP等软件。
3.3配置网络配置服务器的IP地址、子网掩码、默认网关等网络参数,确保服务器可以正常访问网络。
IBM TotalStorage DS4000 存储服务器和存储扩展机箱快速入门指南说明书
®
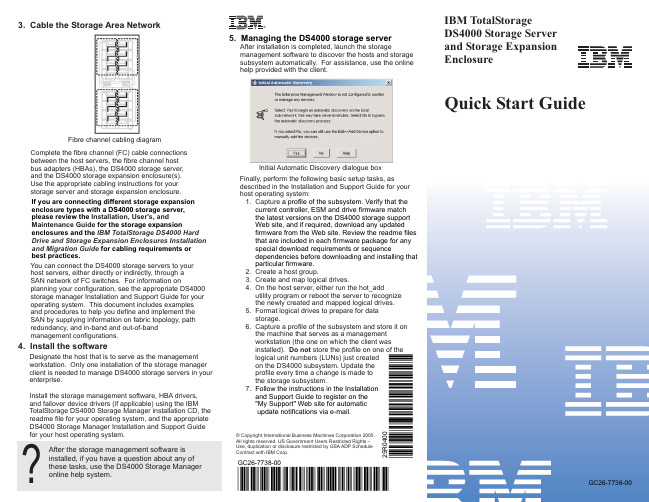
5. Managing the DS4000 storage server
After installation is completed, launch the storage management software to discover the hosts and storage subsystem automatically. For assistance, use the online help provided with the client.
GC26-7738-00
*07GC26-7738-00*
25R0400
*1P25R0400*
GC26-7738-00
Before you begin
Before you begin the installation procedure, unpack the carton and verify that your shipment contains all the required components. Be sure to read the Safety Guide first, and review the other documentation provided with your shipment, before attempting to install any components.
1. Capture a profile of the subsystem. Verify that the current controller, ESM and drive firmware match the latest versions on the DS4000 storage support Web site, and if required, download any updated firmware from the Web site. Review the readme files that are included in each firmware package for any special download requirements or sequence dependencies before downloading and installing that particular firmware.
SChinese说明书
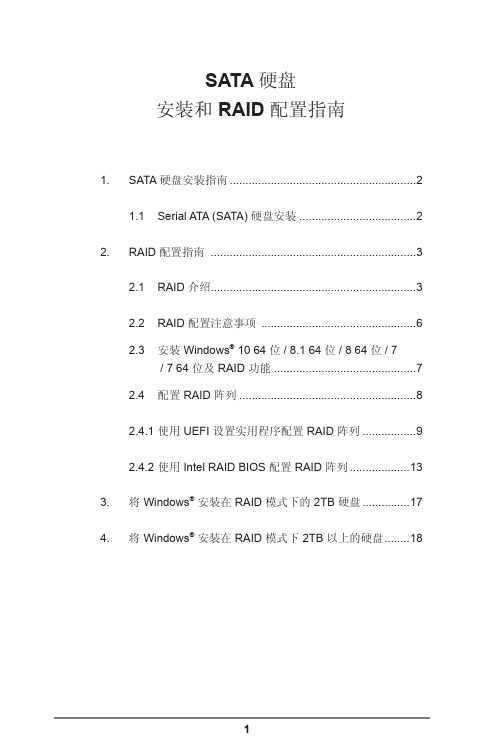
SATA 硬盘安装和 RAID 配置指南1. SATA硬盘安装指南 (2)1.1 Serial ATA (SATA) 硬盘安装 (2)2. RAID配置指南 (3)2.1 RAID 介绍 (3)2.2 RAID 配置注意事项 (6)2.3安装 Windows® 10 64 位/ 8.1 64 位/ 8 64 位/ 7/ 7 64 位及 RAID 功能 (7)2.4配置 RAID 阵列 (8)2.4.1使用 UEFI 设置实用程序配置 RAID 阵列 (9)2.4.2 使用 Intel RAID BIOS 配置 RAID 阵列 (13)3. 将 Windows®安装在 RAID 模式下的 2TB 硬盘 (17)4. 将 Windows®安装在 RAID 模式下 2TB 以上的硬盘 (18)1. SATA 硬盘安装指南1.1 Serial ATA (SATA) 硬盘安装Intel 芯片集支持 Serial ATA (SATA) 硬盘及 RAID 功能,包括RAID 0、RAID 1、RAID 5、RAID 10 及 Intel 快速存储技术。
请根据主机板所采用的 Intel 南桥芯片集,仔细阅读本指南内的RAID 配置。
您可以将 SATA 硬盘安装在本主板上,作为内部存储设备使用。
本节将指导您如何以 SATA 端口创建 RAID。
2. RAID 配置指南2.1 RAID 介绍本主板采用 Intel 南桥芯片集。
此芯片集集成支持 RAID 0 /RAID 1/ Intel 快速存储技术 / RAID 10 / RAID 5 功能及 4 条独立 Serial ATA (SATA) 通道的 RAID 控制器。
本节将介绍 RAID的基本知识,并提供进行 RAID 0 / RAID 1/ Intel 快速存储技术 /RAID 10 / RAID 5 设置的指南。
RAID“RAID”是“独立磁盘冗余阵列”的缩写,是一种将两个或更多硬盘组成一个逻辑单元的方法。
--IP SAN存储系统用户手册

Stor OS iSCSI/NAS 存储系统使用手册( Version 2.6)目录第一章内容提要: (6)第二章:安装和使用 (7)2.1 概览 (7)2.2 安装 (7)2.3 硬件接口,指示灯功能说明 (7)2.4 开机和关机 (9)2.5 产品使用快速指南 (10)第三章:存储管理中心 (11)3.1系统监视 (11)3.2 存储管理 (15)3.2.1 概览 (16)3.2.2 系统完全重设 (17)3.2.3 虚拟存储池的添加 (18)3.2.4 ISCSI存储管理 (19)3.2.5 DVR存储空间创建、更改和删除 (20)3.2.6 存储空间统计 (23)3.3 空间管理 (24)3.3.1 概览 (24)3.3.2 iSCSI空间分配信息 (24)3.3.3 iSCSI空间管理命令 (25)3.4 iSCSI用户管理 (31)3.4.1 概览 (32)3.4.2 iSCSI用户管理――开启界面 (33)3.4.3 iSCSI用户管理――关闭界面 (35)3.4.4 iSCSI用户管理――快照界面 (37)3.4.5 iSCSI用户管理――CHAP界面 (39)3.4.6iSCSI用户管理――端口配置 (42)3.4.7 iSCSI用户管理实例 (43)3.4.7 iSCSI分配说明 (46)3.5 文件服务管理 (47)3.5.1 概览 (47)3.5.2 使用NAS空间的操作步骤 (48)3.5.3 配置NAS服务器 (50)3.5.4 用户管理 (51)3.5.5用户组管理 (54)3.5.6 创建网络盘操作 (57)3.5.6 更改网络盘操作 (61)3.5.7 删除网络盘操作 (63)3.5.8 NAS空间分配实例 (63)3.5.9 镜像同步功能(可选) (67)3.5.10 病毒防护 (69)3.6 快照管理 (70)3.6.1 概览 (70)3.6.2建立快照(snapshot) (70)3.6.3使用快照(snapshot) (71)3.6.4 关闭快照访问 (72)3.6.5 删除快照 (72)3.7 网络管理 (73)3.7.1 概览 (73)3.7.2 绑定管理 (73)3.7.3网口管理 (76)3.7.4 路由管理界面 (77)3.7.5 DNS配置界面 (78)3.7.6 开启/关闭界面 (80)3.7.7 管理网口的使用 (80)3.7.8 预留带宽 (81)3.7.9 通讯测试 (82)3.8 系统管理 (82)3.8.1 概览 (82)3.8.2 系统注册 (83)3.8.3 系统密码管理 (83)3.8.4 Email报警 (84)3.8.5 SNMP-Trap (85)3.8.6 SNMP (85)3.8.7 系统时间修改 (86)3.8.8 系统配置 (86)3.8.9 系统更新 (87)3.8.10 功能注册 (87)3.9 日志管理 (88)3.9.1 概览 (88)3.9.2 查看系统日志 (88)3.9.3 搜索系统日志 (89)3.9.4 下载操作系统日志 (90)3.10 帮助 (91)3.10.1 概览 (91)3.10.2 软件下载 (92)第四章:建立对NAS共享空间的连接 (93)4.1 概览 (93)4.2 共享空间简介 (93)4.3 连接协议说明 (93)4.4 共享空间连接 (94)4.4.1 共享空间连接介绍 (94)4.4.2 Windows下连接访问NAS (95)4.4.3 Linux下连接访问NAS (98)4.4.4使用Http协议连接访问 (101)4.4.5快照(snapshot)连接访问 (102)4.4.6 WORM连接访问 (103)4.4.7 MacOS下连接访问NAS (103)第五章:WINDOWS系统建立ISCSI连接 (104)5.1 概览 (104)5.2 使用微软iSCSI软件建立连接 (104)5.2.1 安装微软的iSCSI initiator软件 (105)5.2.2 使用微软iSCSI initiator软件 (106)5.2.3 使用CHAP的iSCSI连接 (110)5.3 映射Stor OS的iSCSI存储为本地磁盘 (113)5.3.1 微软磁盘管理基本概念 (113)5.3.2 映射为本地基本磁盘 (116)5.3.3 映射为本地动态磁盘 (119)5.3.4 升级本地基本磁盘为本地动态磁盘 (122)5.4 分区,分卷,格式化 (124)5.4.1基本磁盘的分区和格式化 (125)5.4.2动态磁盘的分卷和格式化 (130)5.4.3动态磁盘的卷的扩展 (134)5.4.4使用命令行的方式(Diskpart.exe)扩展数据卷 (139)第六章:LINUX系统建立ISCSI连接 (143)6.1 概览 (143)6.2 Linux下iSCSI构架应用范围 (143)6.3 Linux下iSCSI的连接 (143)第七章:系统异常处理 (149)7.1 系统故障 (149)7.1.1 系统故障报警状态 (149)7.1.2 故障处理方法 (149)7.2 RAID子系统故障 (149)7.2.1 系统故障报警状态 (150)7.2.2 故障处理方法 (150)第八章:DVR使用存储说明 (151)8.1 存储分配 (151)8.2 DVR基本操作 (155)8.2.1 开机 (155)8.2.2 登录及修改用户名密码 (156)8.2.3 DVR网络配置 (158)8.2.4 DVR连接 (161)第九章:备注 (164)第十章:常见问题讲解 (165)第一章内容提要:∙安装和使用∙存储管理中心详解∙建立对Stor OS的共享空间的连接∙Windows系统建立对Stor OS的iSCSI连接∙Linux系统建立对Stor OS的iSCSI连接∙系统异常处理∙备注∙常见问题讲解图例以下图例将用于本用户使用手册中;注意:提示的信息应该特别重视;用下面的图示表示;警告:包含提示信息,如不遵从,将导致数据丢失或设备故障;用下面的图示表示;危险:包含提示信息,如不遵从,将导致设备损坏或人员伤害;用下面的图示表示;第二章:安装和使用2.1 概览本章主要介绍的内容有:1. 存储设备的安装2. 存储设备开关机的方法3. 存储设备使用快速指南2.2 安装1. 首先将硬盘安装在硬盘托架上,插入存储机箱。
服务器安装方法步骤
服务器安装方法步骤服务器是一种用于存储、管理和提供数据和服务的计算机设备。
在搭建服务器的过程中,正确的安装方法是至关重要的。
本文将为您介绍服务器安装的详细步骤,以帮助您顺利完成搭建工作。
步骤1:选择合适的服务器硬件在开始安装服务器之前,您需要根据您的需求选择合适的服务器硬件。
服务器硬件的选择包括以下几个方面:•处理器:根据服务器的负载和性能需求选择适当的处理器。
常见的处理器品牌包括Intel和AMD,您可以根据您的预算和性能需求进行选择。
•内存:内存是服务器性能的关键因素之一。
根据您的应用程序和数据量的大小,选择足够的内存容量来保证服务器的正常运行。
•存储设备:选择适当的存储设备来存储和管理数据。
常见的存储设备包括硬盘驱动器(HDD)和固态驱动器(SSD)。
•网络适配器:服务器需要可靠的网络连接,选择支持高速网络连接的网络适配器。
步骤2:选择操作系统选择合适的操作系统是服务器安装的重要一步。
常见的服务器操作系统包括Linux、Windows Server和Unix。
根据您的需求和对特定操作系统的熟悉程度,选择适用于您的服务器的操作系统。
一般来说,Linux操作系统广泛用于服务器领域,因为它具有稳定性、灵活性和开源性的优势。
Windows Server则适用于需要与Windows环境无缝集成的应用程序。
步骤3:准备安装媒介在安装服务器之前,您需要准备好安装媒介。
这里有两种常见的安装媒介:•光盘/刻录盘:如果您选择了物理服务器,您可以将操作系统光盘或刻录盘插入服务器的光驱中。
然后,通过BIOS设置在服务器启动时从光盘/刻录盘启动。
•USB闪存驱动器:如果您选择了虚拟服务器或对物理服务器进行远程安装,您可以将操作系统镜像文件写入USB闪存驱动器,然后通过BIOS设置在服务器启动时从USB启动。
步骤4:配置BIOS设置在安装服务器之前,您需要进入BIOS设置界面,进行必要的配置。
以下是一些常见的BIOS设置:•引导顺序:确保服务器从正确的安装媒介(光盘或USB闪存驱动器)启动。
User_iSCSI_Stor OS_Configration_intro
Stor OS iSCSI 存储系统应用配置说明一.RAID创建二.虚拟存储池添加访问2004管理页面,点击“存储管理”。
就需要按照下图的操作步骤进行阵列的添加:点击“虚拟存储池管理”在可用RAID阵列中选中阵列。
图一:虚拟存储池页面点击“添加阵列”会弹出确认弹出框,点击确定。
图二:添加虚拟存储池等候1-3分钟,会显示执行结果。
图三:添加成功显示到此添加虚拟存储池完成。
如果有多个RAID阵列,可以一个一个进行添加,也可以全部选中统一进行添加到虚拟存储池。
三.空间Lun卷划分空间管理主要是方便管理员对ISCSI空间进行LUN的分配、创建、扩展、重命名,删除及。
图四:ISCSI空间创建页面图3-4-1是Stor OS存储系统的iSCSI空间管理页面,管理员可以在本页面中对iSCSI空间进行LUN的分配、创建、扩展、重命名,删除及克隆。
3.1 iSCSI空间管理命令管理员可以使用LUN管理命令来进行LUN的管理工作。
该部分包括如下功能:创建新的LUN管理员可以通过创建界面创建新的存储空间LUN输入新的LUN的大小(小于当前iSCSI存储系统的剩余空间大小)和一个正确格式的LUN的名称,以及选择LUN的块大小,再进行阵列选择(若不进行选择的话就默认已有阵列全选),最后点击按钮来完成该操作(如图3-4-2所示)。
该操作执行的结果会在页面下方的“LUN表格”中显示。
如果显示成功,存储部分当前配置将被更新(如图3-4-3所示)。
如果显示失败,该操作就不会被执行。
按钮可以清空该输入框中的未执行的信息。
图五:Stor OS iSCSI空间管理创建LUN图六:Stor OS iSCSI空间管理界面完成LUN的创建扩展LUN实现LUN的扩展,来满足不断增长的存储应用需求。
只有使用状态为“空闲”的LUN才能被扩展。
管理员可以通过点击LUN信息表中的图标切换到LUN扩展界面,在扩展界面中输入LUN的新容量,点击按钮完成扩展操作。
安装和配置Citrix服务器及客户端
安装和配置Citrix服务器安装环境:宿主机:Dell2850 Intel Xeon 3.0G Memory 4G HD SCSI 10000r/m 73G RAID1虚拟机:VMware Workstation 5.51 Intel×2,Memory 1G HD SCSI 20G (Citrix)宿主机上安装的是MS Windows2003 SP1,上面除虚机外还装有一套eFAX软件;虚拟机上一共有三个虚机,一台是作标准应用的,一台Citrix,一台作为终端登录机。
宿主机系统无所谓,主要是能装好VM软件就OK。
第一步,安装Windows2003这是最重要的一步,打开虚机的时候,不能用以前装过的克隆,也不能用已经装好的OS,一定要重新安装,为什么呢?在虚机开机安装的时候,一定要进入CMOS,把要安装这台虚机的系统时间改到很久以后,比如像我一样改成2020年。
具体原因先这里卖个关子。
好了,剩下的时间就是开始像平时一样安装Windows2003,其中有设置时间的地方,应该是2020年,千万不要改。
安装完成后,可以把新出的SP2安装上,由于SP2没有像SP1一样改了Windows2003的内核,只是一个补丁集,所以没有关系。
全部安装完成后,不要去网上Update,为什么呢?你的系统时间和标准时间不对,MS是不让你更新的。
第二步,配置服务器的必要服务Windows2003 SP2安装好重启后,需要装上一些额外的服务,包括,IIS,终端服务器和终端服务器授权,如下图:在选终端服务器时,它是提示你去掉Internet Explorer增强的安全配置的,去掉它也好,省得打开个网页费半天功夫。
这时点下一步开始安装,基本都按默认的来,需要改的地方如下图:这表示我们可以在剩下的120天内试用它,全部安装后,把时间改回现在,就可以用上个N年,这就是一开始改系统时间的目的。
之后一路回车,完成,然后按要求重启。
服务器基本安装及调试(一)2024
服务器基本安装及调试(一)引言概述:本文将介绍服务器基本安装及调试的步骤和注意事项。
服务器是现代计算机网络中的关键组件,其性能和稳定性直接影响着网络应用的效果。
因此,在服务器的安装和调试过程中,应该特别注意细节,以确保服务器正常运行。
正文内容:一、硬件准备1.选择合适的服务器硬件:根据实际需求和预算,选择适合的服务器硬件,包括处理器、内存、硬盘等。
2.安装服务器主板:将服务器主板安装到机箱中,并连接正确的电源线。
3.插入内存条和CPU:确保内存条和CPU插入到正确的插槽中,并固定牢固。
4.连接存储设备:根据需求选择合适的存储设备,并将其连接到服务器主板上。
5.连接其他硬件:根据实际需求,连接其他硬件设备,如网卡、光驱等。
二、操作系统安装1.选择合适的操作系统:根据实际需求选择合适的操作系统,如Windows Server、Linux等。
2.安装操作系统:根据操作系统的安装指南,按照步骤进行操作系统的安装,并设置相应的参数。
3.配置网络连接:在操作系统安装完成后,确保网络连接正常,并配置正确的IP地址和网络设置。
4.安装驱动程序:根据服务器硬件的需求,安装相应的驱动程序,以确保服务器硬件的兼容性和稳定性。
5.进行系统更新:安装完成后,及时进行系统更新,以获取最新的功能和安全性修复。
三、服务器调试1.检查硬件连接:检查各硬件组件的连接是否牢固,如数据线、电源线等。
2.检查系统启动:确保服务器能够正常启动,并检查操作系统及相应服务是否正常工作。
3.测试网络连接:进行网络连接测试,确保服务器能够正常访问网络,并与其他设备进行通信。
4.性能测试:使用相关性能测试工具,对服务器进行性能测试,包括CPU、内存、硬盘等性能指标的测试。
5.安全性检查:检查服务器的安全性设置,包括防火墙、远程访问权限等,以确保服务器的信息安全。
总结:本文介绍了服务器基本安装及调试的步骤和注意事项。
在服务器安装过程中,硬件的选择和连接、操作系统的安装和设置都是关键步骤。
- 1、下载文档前请自行甄别文档内容的完整性,平台不提供额外的编辑、内容补充、找答案等附加服务。
- 2、"仅部分预览"的文档,不可在线预览部分如存在完整性等问题,可反馈申请退款(可完整预览的文档不适用该条件!)。
- 3、如文档侵犯您的权益,请联系客服反馈,我们会尽快为您处理(人工客服工作时间:9:00-18:30)。
Istorage服务器安装和使用指南准备一台服务器。
注意:安装程序会将系统盘上的所有分区删除,原来的数据会都丢失,有用的数据要先备份。
先下载安装光盘iso,然后刻录成一张光盘,将启动光盘放入光驱中,让光盘引导系统启动。
系统启动完毕,提示输入用户名和密码。
默认情况下用户名是root,密码是123,用户可以用passwd root命令修改密码1.执行par命令,看系统上的磁盘名称,如下图:关键看Name一项,不带数字的是表示磁盘,带数字的表示磁盘的分区,例如sda表示第一个磁盘,sda1表示第一个磁盘的第一个分区,sdb表示第二个磁盘,他没有分区。
2.如果要安装的系统盘上有分区,执行clear_disk 磁盘名,如要安装的是刚才看到的sda盘,就执行clear_disk sda,会看到类类似下图的结果:可以看到磁盘sda的分区都被删除了,这个时候要重启服务器。
然后在安装系统。
3.安装系统:安装命令介绍:install 磁盘名磁盘缓存大小(GB)根据你的实际情况,选择不同的安装参数,。
例如,Linux下的磁盘名规范:IDE硬盘,IDE盘的主通道的主盘是hda,从盘是hdb,从通道的主盘是hdc,从盘是hdd,你看看你的盘怎么接的就知道了。
如果是SATA或SCSI硬盘,磁盘名一般是sda如果还不清楚,安装前执行par,看看是否有:hda,hdb,hdc,hdd或sda,sdb ,sdc的名称。
例子:IDE硬盘,一般执行install hdaSATA或SCSI硬盘,一般执行install sda4. 重启服务器:取出光盘,执行reboot命令重启服务器。
5. 注册服务器:执行管理客户端istorage。
exe,输入ip,默认没有密码,进去了可以修改密码,登陆服务器,如下图:注意,服务器的默认ip为192。
168。
0。
251,如果你的网络不是192。
168。
0网段的,在你的客户端计算机上加一个这个网段的ip(windows的网络tcp/ip配置的高级中可以添加多个的),就可以了。
选注册功能,生成服务器注册信息文件,发给okstor,获得注册码,在输入注册码,看关于中的用户数是否对,要刷新一下。
注册成功后,要重启服务器,注册才能够有效。
执行管理客户端istorage。
exe,输入ip,默认没有密码,进去了可以修改密码,登陆服务器,如下图:选管理客户端的网络配置功能:如果只有一个网卡,就配置eth0;如果有2个网卡,可以2个网卡配置不同的IP(最好是不同的网段,比如配置192。
1 68。
0。
251,192。
168。
1。
251;2个网卡配置一个网段的不同IP,并行效果不好);如果想2个网卡绑定一个IP,勾上“双网卡绑定”,服务器自动配置双网卡绑定功能,扩展网络带宽,也提高服务器的可靠性。
选管理客户端的用户管理功能:主要是用来设定服务器的管理员密码,管理客户端登陆是用这个密码,管理客户端初始没有密码。
超级客户端IP,是用作采用超级客户端方式更新游戏的,比如设置为192。
168。
0。
1,那这个IP的客户端,每次登陆就自动是管理员用户,详细见后面的游戏更新说明,如下图:Iscsi客户端的超级用户administrator也使用这个密码,不能够修改用户名,就是下图的密码,iscsi客户端的默认密码也是administrator当服务器有升级程序时,我们会提供一个服务器升级程序包。
在此处选中升级程序包,即可升级服务器,升级后要重启服务器。
日志功能,是提取服务器的日志,取系统日志是提取Linux操作系统的日志,取服务日志是提取iscsi服务器的日志。
日志是服务器运行的记录,主要是服务器出现问题时分析用的。
如果服务器没有问题,建议经常“清除服务器日志”,免得占用服务器的空间。
选管理客户端的工具功能:本系统采用”内存写缓存+磁盘写缓存”,两级写缓存技术,来实现超级保护功能。
内存写缓存是本产品的一个关键技术,能够大大提高服务器性能,传统的超级保护是采用磁盘做缓存,而客户端刚写的数据很快要读,而且很可能多次读,这大大影响磁盘的性能,而且客户端写的数据是没有必要长期保存的,所以我们采用内存写缓存技术。
另外,在内存不够的情况下,本系统还支持磁盘写缓存。
经过测试,100个客户端,一般写缓存的数据只有几百MB,有写windows的iscsi 软件,看起来写的数据超过1G,其实,为了提高重复写的性能,那里面有很多重复的数据,真正有效数据不超过1G的。
服务器采用共享写缓存技术,所有客户端共享写缓存,操作系统保留内存数: 是配置Linux操作系统最小保留的内存,例如,你服务器有2G的内存,操作系统保留内存数为8 00MB,那么写内存就最大为2G-800MB=1。
2GB,这是最大写缓存数,如果写缓存没有用这么多,多于的操作系统还是可以用的,这是为了保证操作系统的内存使用不受影响。
单个客户端最大写缓存数:是配置单个客户端的最大写缓存,防止一个客户端占用太多的写内存,建议配置为50-5000MB之间。
当一个客户端写超过限制,后写的覆盖先写的,恶意写服务器的人,会看到先写的文件不见了,当然,玩游戏100MB肯定用不了的。
建议服务器配置大一些的内存。
另外,建议定期升级服务器上的网络游戏。
服务器工作线程数是设置服务器读盘的线程个数,主要是看服务器的游戏盘个数,一般设置比游戏盘个数多一些,比如你4个游戏盘,可以设置为6-8个线程。
“记录流量大的客户端信息到系统日志”是在服务器的平均流量很大(比如5MB,一般是1-2MB的),而玩游戏还卡时,记录流量大的客户端信息,用来分析是否哪个占用太多的带宽,看看这个客户端在做什么,是否正常。
选管理客户端的共享管理功能:共享管理是用来配置服务器的共享方式和磁盘,istorage系统(包括Linux)占用系统盘80MB,系统盘多于的空间可以用来共享,需要选中共享系统盘选项,如果系统盘很小如40G,觉得没有什么用处,而另外接了多个打的数据盘,系统盘也可以不共享,免得客户端看到共享很多磁盘。
一般建议采用物理磁盘方式共享,这种方式是将各个磁盘独立共享,以前有的windo ws文件系统格式(如ntfs,fat32)的磁盘,作数据盘共享,上面的游戏可以直接使用,不需要重新安装。
注意:系统因为安装了Linux操作系统,上面的分区和数据将被全部删除,重新创建分区,系统占用160MB,其它的空间将分一个数据分区,可以共享,这个分区共享后,客户端看到的是一个没有分区的裸盘,你要采用iscsi的超级用户(daministrator),在一个客户端登陆服务器,看到服务器的共享的裸盘后,进行分区格式化,并安装游戏。
本系统还支持软RAID,如果你没有硬件RAID,想提高服务器的磁盘性能,你可以采用软RAID方式,目前支持常用的RAID0、RAID1、RAID5和ShareRaid0,RAID0、RA ID1和RAID5是Linux系统自带的RAID,ShareRaid0是我们开发的,针对网吧游戏共享设计的,性能最好,比一般的硬件RAID性能好要好的,建议采用ShareRaid0。
RAID5有数据冗余,但是性能比RAID0差一点,而且少一个磁盘的存储空间(作数据冗余用),好处是一个盘坏了,数据不丢失,但是磁盘坏的概率很低的,一般没有必要。
而且要求多个大小最好一样,负责按照最小的磁盘空间使用,大的磁盘多余的空间将被浪费。
用来查看系统的连接信息“客户端超时设置”,是设置客户端连接服务器后,多久没有访问服务器上的游戏了,就断开这个客户端,释放资源,一般默认180分钟,不需要修改。
“延时重启服务器”,是希望过多久后,服务器自动重启。
比如你现在是下午4点,升级了服务器程序,现在人多,希望夜晚12点服务器在自动重启,就设置8小时(12-4=8)后重启。
“定时重启服务器”,是设置每到某个时间,服务器都重启一次。
比如希望每个星期一、三、五早上4点重启,就设置如下图:注意,这个时间是按照服务器上的时间来计算的,一定要在bios中把服务器的时间设置准确。
常用RAID支持:(要求用单独的一个硬盘安装系统和作为写缓存,RAID磁盘用来做共享用)3ware 5/6/7/8xxx ATA-RAIDMylex DAC960/DAC1100 PCI RAID ControllerHighpoint序列RAID卡:RocketRAID 100 /133RocketRAID 454 /464RocketRAID 1520RocketRAID 1544/1542RocketRAID 1640RocketRAID 1810/182XRocketRAID 222XRocketRAID 2310/232XPromise序列RAID卡:PDC40518 Promise SATAII150 TX4PDC20575 Promise SATAII150 TX2plusPDC20579 Promise SATAII150 579PDC40718 Promise SATA300 TX4PDC20775 Promise SATA300 TX2plusPDC20779 Promise SATA300 779主板自带的RAID功能:Adaptec HostRAID ASRHighpoint HPT37XHighpoint HPT45XIntel Software RAIDJMicron JMB36xLSI Logic MegaRAIDNVidia NForcePromise FastTrackSilicon Image MedleyVIA Software RAIDSATA盘,或者基于下列芯片的RAID卡:3ware 9xxx SATA-RAIDAHCI SATAServerWorks Frodo / Apple K2 SATAIntel PIIX/ICH SATANVIDIA SATAPromise SATA TX2/TX4Pacific Digital SATA QStorPromise SATA SX4Silicon Image SATASiS 964/180 SATAULi Electronics SATAVIA SATAVITESSE VSC-7174 SATASCSI盘,或者基于下列芯片的RAID卡:7000FASST SCSIACARD SCSIAdaptec AIC7xxx / AIC79xx U320 / I2O RAIDAdaptec AHA152X/2825Adaptec AHA1542Adaptec AACRAIDAlways IN2000 SCSILSI Logic New Generation RAID Device DriversBusLogic SCSI supportDMX3191D SCSIDTC3180/3280 SCSI??EATA ISA/EISA/PCI (DPT and generic EATA/DMA-compliant boards) EATA-PIO (old DPT PM2001,PM2012A)Future Domain 16xx SCSI/AHA-2920AIntel/ICP (former GDT SCSI Disk Array) RAID ControllerGeneric NCR5380/53c400 SCSI PIOGeneric NCR5380/53c400 SCSI MMIOIBM ServeRAIDInitio 9100U(W)Initio INI-A100U2WNCR53c406a SCSISYM53C8XX Version 2 SCSIIBM Power Linux RAID adapterQlogic FAS / ISP / ISP2100 / ISP2200 / ISP2300 / ISP2322 / ISP63xx ho stSymbios 53c416 SCSITekram DC395(U/UW/F) and DC315(U) SCSITekram DC390(T) and Am53/79C974 SCSITrantor T128/T128F/T228 SCSIUltraStor 14F/34FUltraStor SCSIWorkbit NinjaSCSI-32Bi/UDE支持多种共享配置方式:注意:针对现在网吧服务器共享的特点,我们设计了一个适合网吧共享的ShareRaid技术。