MAGMA第二章hpdc预处理
第5章MAGMA结果分析

“Calculate feeding”必须选择 “yes”来创建结果文件
Committed to Casting Excellence
结果分析 固化判据‘FSTIME’ 固相分数时间
¬ MAGMASOFT® 补缩有效性到标记文件是使用数值的 ¬ 如果有50%的输入结果文件那将被命名为FSTIME_50
¬
正常自定义0到1,必要时0至0.1或0到0.001
Committed to Casting Excellence
结果分析
固化判据 ‘COOLRATE’ 冷却速率
¬ 显示局部冷却速率 ¬ 冷却速率是确定微观结构的重要因素
¬ 较高冷却速率下的良好的微观结构
¬
如果还有潜热大量的释放出来,
那高冷却速率的区域的热能扩散到紧挨着他们的低梯度的区域。 ¬ 单位被作为温度/秒展示
第5章
MAGMASOFT® 基本训练
结果分析
Committed to Casting Excellence
MAGMASOFT®
结果分析
Committed to Casting Excellence
MAGMASOFT® 操作流程
CAD Model
CAD建模
Preprocessor 预处理
Meshing
结果分析 充填时间 ‘FILLTIME’
¬ 在几秒钟内显示局部充填时间 ¬ 实时的在自定义标尺上显示每一熔体呈现时间
¬ 上下调整用户标尺的充填时间以作进一步的评估 ¬ 一个结果文件中允许对充填顺序评估
¬
不规则区域往往空气和夹杂包裹其中 ¬ 值越大,越最后填充 ¬ 气泡出现如同淡浅色围绕的一种暗色
结果分析 固化判据‘FSTIME’固相分数时间
magma中文手册
magma中⽂⼿册MAGMASOFT?4.0Manual Part one1.介紹(Introduction) ………………………………1.1MAGMASOFT? 可以提供你什麼?………………1.2如何成功的使⽤MAGMASOFT?………………1.3MAGMASOFT?的⽂件結構………………………1.4拼字跟⽤法………………………………………1.5疑問………………………………………………2.安裝(Installation)……………………………2.1 系統需求2.2 MAGMA安裝………………………………2.3 啟動MAGMASOFT? 執照………………2.3.1 擷取系統資訊………………………………2.3.2 從Email讀取系統和執照檔………………2.3.3 ⼿動輸⼊系統鑰匙………………………………2.3.4 ⼿動輸⼊執照鑰匙………………………………2.3.5 從檔案讀取系統鑰匙……………………………2.3.6 從檔案讀取執照鑰匙……………………………2.4 管理浮動執照………………………………2.4.1 顯⽰連結………………………………2.5 MAGMASOFT? 的專案………………………………2.6 MAGMASOFT? 的畫⾯………………………………2.7滑⿏鍵盤的⽤法………………………………3.專案管理(Project Administration)3.1開啟專案(Open project)………………………………3.2 產⽣新的專案(Create project)………………………3.3 產⽣新的版本(Create Version)…………………………3.4 刪除結果(Delete Result)…………………………3.5 刪除版本(Delete Version)……………………………3.6 刪除專案(Delete project)……………………………3.7專案資訊(Project info)………………………………4.前處理器(Preprocessor)4.1 開始幾何建構………………………………………4.2 管理幾何資料(Sheets)………………………………4.3 幾何資料庫(Geometry database)………………………4.4 輸⼊CAD資料(Importing CAD Data)…………………4.5 定義⾓度及精度(Definition of Angles & Accuracy)………4.6 選擇畫⾯(View options)………………………………4.7建構指令(Construction commands)……………………4.8操作指令(Manipulation commands)……………………4.9控制點(Control Point)………………………………4.10⽀援幾何功能(Support functions)………………………5.網格化(Mesh Generation)5.1 概論(Overview)………………………………5.1.1格⼦⼤⼩ / ‘wall thickness’………………………5.1.2格⼦再細化/ ‘accuracy’, ‘element size’……………5.1.3格⼦的修飾/ ‘smoothing’………………………5.1.4個⼦的外觀/ ‘aspect ratio’………………………5.2材料群的選⽤與網格化的改善………………………5.3產⽣網格(Generate mesh)……………………………5.4檢查網格(Check enmeshment)………………………5.4.1觀看網格(view mesh)…………………………5.4.2觀看網格品質(view mesh quality)………………6.模擬計算(Simulation)6.1 概論(Overview)………………………………6.1.1 充填(Mold filling)………………………………6.1.2 凝固(Solidification)…………………………6.1.3 充填和凝固………………………………6.1.4 批次⽣產(Batch production)……………………6.2 模擬參數定義(Defining simulation parameters)…………6.2.1 材料 / ‘Material definition’………………………6.2.2 熱傳導係數/ ‘Heat transfer definition’…………MAGMAshakeout選項…………………………6.2.36.2.4 充填 / ‘filling’………………………………6.2.5 注湯速率/ ‘pouring rate’………………………6.2.6 凝固 /‘solidification’……………………………6.2.7 批次⽣產/ ‘batch production’……………………6.3 模擬的開始與控制(Simulation control)…………………6.4 錯誤訊息(Error and Warning messages)…………………7. 選項與模組7.1模組………………………………7.2 選項………………………………1介紹(Introduction)鑄造就是將⾦屬液倒⼊模⽳中成形的⼀種⽣產技術,也是⼀種從設計到成品最快速的⽅法之⼀。
(完整word版)MAGMASOFT4.4使用手册
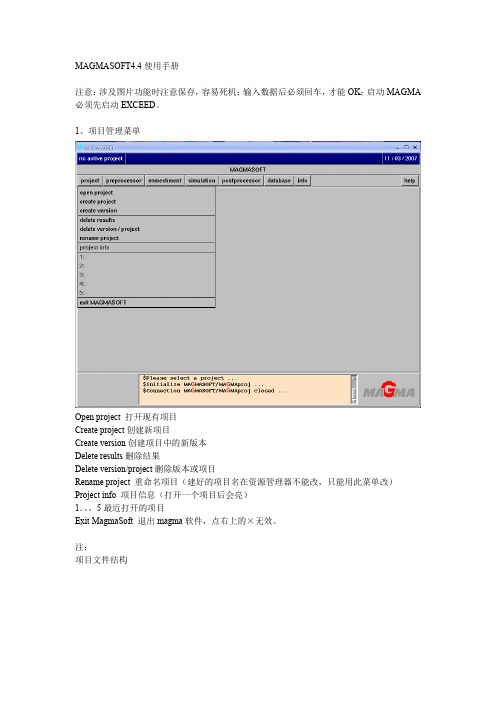
MAGMASOFT4.4使用手册注意:涉及图片功能时注意保存,容易死机;输入数据后必须回车,才能OK;启动MAGMA 必须先启动EXCEED。
1、项目管理菜单Open project 打开现有项目Create project创建新项目Create version创建项目中的新版本Delete results删除结果Delete version/project删除版本或项目Rename project 重命名项目(建好的项目名在资源管理器不能改,只能用此菜单改)Project info 项目信息(打开一个项目后会亮)1.。
5最近打开的项目Exit MagmaSoft 退出magma软件,点右上的×无效。
注:项目文件结构MAGMA Structure:magma自带推荐项目文件夹结构CMD 可自定义操作的批处理文件,或做好保存SHEETS 几何文件,分图层PAR 模拟参数记录文件Customer Structure:用户自定义项目文件夹结构(是在自带推荐项目文件夹结构上增加)定义文件C:\magma-v4.4\v4.4\lib\cnf\customer.cfg,在文件夹末尾增加User Structure:用户项目文件夹结构(是在用户自定义项目文件夹结构上增加)Copy C:\magma-v4.4\v4.4\lib\cnf\customer.cfg C:\magma-v4.4\MAGMAsoft\user.cfg在文件夹末尾增加C:\magma-v4.4\MAGMAsoft是当前magma用户的home目录,域帐户无此配置,默认项目信息infoMemo内容可以修改和增加,image可以import一张图片,bmp不支持2、前处理Load SLA:输入STL几何体Load SHEET:输入已保存的几何图层READ cmd:读取批命令(批命令参阅命令输入窗口指令,可以查阅part1手册3-8)注:Z轴正向与重力方向相反,必须在模型建立时设定好,MAGMA前处理中无法修改。
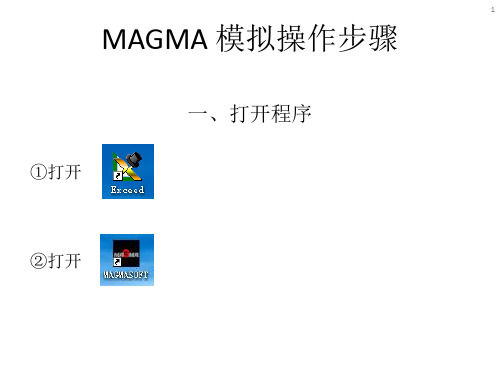
MAGMA 模拟操作步骤
35
15.
该步为凝固结果存储设置,与上一步相同。 设置完成点OK进入下一步。
五、模拟参数设置(simulation)
36Βιβλιοθήκη 16.按图示设置 完成后点OK
五、模拟参数设置(simulation)
37
17.
按图示设置
完成后点start 开始模拟。
三、预处理(preprocessor)
10
⑨检查各对象材料代号:(见右图)
依次点击各对象,提示框会出现相应
材料代号。
cover:23
ejector:22
inlet:10
biscuit:25
ingate:20
cast:1
如出现错误,则点Return返回主界面修改,
检查则返回主界面即可。
三、预处理(preprocessor)
中时为放大,未选中时为缩小
删除对象:选中对象后,点Edit > DEL SEL
三、预处理(preprocessor)
4
①将STL文件放入项目文件夹中(例如:D:\XXX\XXX\V01)
②点主界面上的preprocessor,进入预处理界面
命令输入框
提示框
三、预处理(preprocessor)
5
设置完成,点OK进入下一步。
五、模拟参数设置(simulation)
32
12.
点options,设置为time即可,点OK进入下一步。
五、模拟参数设置(simulation)
33
13.
如需使用半固态模拟,只需 将thixocasting改为为yes即可, 否则直接点OK进入下一步。
五、模拟参数设置(simulation)
Magma操作流程

19
黄色单元
INLET的被划分为3层如何分辨?
蓝色单元
20
三.simulation(模拟参数输入及计算)
根据产品选择是否需要压力计算
批量生产预测 压力预测 后处理准备
选择完OK到下一步
21
1.material definitions(材料组材料定义)
计算填充 填充效率
一般设置为90%或95%
喷雾过程设置
可设置上下模同时完成一动作
模拟结果输出 参数记录设置
47
19.Spray definitions(喷雾定义)
要求:喷雾与吹气 的总时间应≦合 模时间(实际打货 时只能小于那是 因为喷头需要上 升动作的时间)。
48
20.Storing data definitions(存储数据定义)
38
10.Core open definitions(开模定义)
选择要求:薄壁产品通常会选择Biscuit;厚壁零件通常会选择Cast。
39
11.Channel definitions(冷却运水定义)
模具冷却条件的控制:通常会选择Time(0-3600的意思是:冷却水道是一直开着的) 。
冷却水无间断地开着
定义好OK到下一步
23
3.heat transfer definitions(热传导系数定义)
浇铸合金材料的展开图从inlet到biscuit选择“c7000”定义热传导系数
定义好OK到下一步
24
二.HPDC calcularor(高压压铸模拟参数计算)
OK到下一步
25
1.Geometry data(几何参数)
9
magmasoft后处理查看
MAGMASOFT®Version 4.4MAGMAviewerViewing Presentations of MAGMASOFT®Simulation ResultsManual2MAGMA VIEWER 4.4 M ANUALThis manual supports MAGMASOFT® 4.4. No part of this document may be reproduced in any form or by any means without prior written consent of MAGMA GmbH.The use of the software described herein is restricted by a license agreement between MAGMA GmbH and the licensee.MAGMA and MAGMASOFT®, MAGMAiron, MAGMAdisa, MAGMAwheel, MAGMAhpdc and sim-ilar names are registered trademarks of MAGMA GmbH. The trademarks of all other products in this document are claimed as the trademarks of their respective owners.The information in this document is subject to change without notice.The information in this publication is believed to be accurate in all aspects; however, MAGMA does not assume responsibility for any consequential damages resulting from its use. The infor-mation contained herein is subject to change. Such changes may be incorporated through revi-sions and / or new editions.© Copyright 2006MAGMA G IESSEREITECHNOLOGIE G MB HK ACKERTSTRASSE 11D-52072 A ACHENG ERMANYT EL.: +49 / 241 / 88 90 1- 0F AX: +49 / 241 / 88 90 1- 60I NTERNET: E-MAIL: MAIL@MAGMASOFT.DET ABLE OF C ONTENTS3 Table of Contents1Introduction (5)1.1What is MAGMAviewer (5)2Licensing Procedure (7)3User Interface (11)3.1Short Overview – First Steps (11)3.2Importing a Presentation (12)3.3Functions – Overview (20)3.3.1General Handling (20)3.3.2Slide and Tree Navigation (20)3.3.3Files (21)3.3.4Windows (21)3.3.5Views (22)3.3.63-D Tools (22)3.4Example for a Presentation Tree (23)3.5Models and Animations (24)3.6Running Animations and/or Image Sequences (24)4Table of Figures (27)4MAGMA VIEWER 4.4 M ANUALC H. 1: I NTRODUCTION5 1Introduction1.1What is MAGMAviewerMAGMAviewer is a free software tool that allows running a presentation of MAGMASOFT® results quickly and easily within companies as well as with customers, suppliers, and designers. MAG-MAviewer enables the presentation of results composed with the MAGMAcomposer.A presentation created with MAGMAcomposer can only be displayed in MAGMAviewer after the data has been exported from MAGMAcomposer and packed into a MPZ file. You must then import this file into the MAGMAviewer.In the following, the term "presentation" is applied to a sequence of any number of MAGMASOFT®result images and further objects that have been generated from simulation results and composed to the presentation within the MAGMAcomposer. Usually, such a presentation is a collection of 3-D and 2-D results, 3-D and 2-D animations, and text elements.The file formats that are used by MAGMAviewer/MAGMAcomposer for storing and further pro-cessing of presentations are proprietary formats. This means that they can be used within MAG-MAviewer/MAGMAcomposer and MAGMASOFT® only, but not in any other presentation software.A full explanation of how a presentation is created is supplied in the MAGMAcomposer 4.4 Man-ual.6MAGMA VIEWER 4.4 M ANUALC H. 2: L ICENSING P ROCEDURE7 2Licensing ProcedureWhen you open the MAGMAviewer program for the first time, you will be prompted to enter the license information – normally sent by E-mail after submitting the download request on the MAG-MASOFT® website (Fig. 2-1 and Fig. 2-2).Fig. 2-1: Viewer licensing window8MAGMA VIEWER 4.4 M ANUALFig. 2-2: Viewer licensing window and license informationIf your licensing procedure fails, an error message appears and MAGMAviewer will terminate (Fig. 2-3 and Fig. 2-4).C H. 2: L ICENSING P ROCEDURE9Fig. 2-3: Viewer licensing window after invalid licensing procedureFig. 2-4: Licensing procedure failedThe main interface of the MAGMAviewer opens if your license information was correct (Î Fig. 3-1, page 11).10MAGMA VIEWER 4.4 M ANUAL3User Interface3.1Short Overview – First StepsAfter the MAGMAviewer has been opened, the main interface of MAGMAviewer appears (Fig. 3-1).Fig. 3-1: Main MAGMAviewer window (no presentation started)In order to display a presentation (that has been created with MAGMAcomposer) in the MAGMA-viewer software, the data has to be imported first of all, i.e. all necessary data and files have to beunpacked (similar to extracting ZIP files) and saved to the hard disc. Once the presentation has been imported (a presentation file in MP format is available on your disc), it can simply be opened.ÖTo open a presentation, click on the folder symbol or choose 'File' Î 'Open'. The main inter-face of MAGMAviewer appears like in Î Fig. 3-9, page 18.3.2Importing a PresentationÖTo import a presentation: Choose 'File' Î 'Import' or click on the Import symbol.ÖThe MAGMAviewer Import Wizard opens. In the following, you find all wizard windows with explanations.Fig. 3-2: Importing a presentation, step 1Fig. 3-3: Importing a presentation, step 2ÖChoose the presentation that you want to import (Fig. 3-3).Fig. 3-4: Importing a presentation, step 3A short summary appears that includes the directory and the file name (Fig. 3-5).Fig. 3-5: Importing a presentation, step 4If the chosen directory for the import already exists, "Next>" in Fig. 3-5 is not active, and the fol-lowing error message appears:Fig. 3-6: Error message during importÖIf you get this error message, confirm with "OK". The window in Fig. 3-5 appears. Click on "<Back", change the directory and proceed as described to continue with the import. Other-wise click on "Cancel" to cancel the import process.Fig. 3-7: Importing a presentation, step 5ÖAfter you have clicked on "Next>" in Fig. 3-5, the program unpacks all necessary data and files (Fig. 3-7).Fig. 3-8: Importing a presentation, step 6ÖClick on "Finish" to finish the Import Wizard. If you activate "Open Presentation <name>.mp"(default setting), the imported presentation will be opened immediately (Fig. 3-9).Fig. 3-9: MAGMAviewer main window with opened presentation (title slide)Fig. 3-10: MAGMAviewer main window with opened presentation (image slide)The elements and their contents of the main interface are as follows:Main window Display of entered text and/or selected graphical objectsMenu bar Pull-down menus with the MAGMAviewer functionsTool bar Buttons for quick access to the MAGMAviewer functionsPresentation tree Hierarchical structure of the components of the presentation (chapters)and their individual slides. Use the plus and minus signs to unfold andminimize the tree.3.3Functions – Overview3.3.1General HandlingThe functions of MAGMAviewer are available via the following access modes. You can often choose from several access modes (e.g. choose the menu entry or the quick access button for the desired function).•Menu entries •Buttons •Key shortcuts •Pop-up menus (right mouse button)3.3.2Slide and Tree NavigationThe arrows located in the status bar to the left and right of the slide title have the following actions assigned (starting from the left):•Change to the first slide of the presentation and display of its contents •Change to the previous slide and display of its contents •Change to the next slide and display of its contents •Change to the last slide and display of its contents Status bar Information on the presentation, active slide, navigation tools (Î Ch.3.3.2, page 20, Î Ch. 3.6, page 24)!Not all access modes are always explained in this manual. Quite often, it is referred toone mode only.C H . 3: U SER I NTERFACE 213.3.3FilesFunctions of the buttons (from the left to the right, including "tool tip" and corresponding menu en-try):3.3.4Windows•Open presentation (Ctrl+O)'File' Î 'Open'Opens an existing presentation •Import'File' Î 'Import'Imports a presentation •Sidebar left'Window' Î 'Sidebar left'Shows presentation tree on the left of the main window •Sidebar right'Window' Î 'Sidebar right'Shows presentation tree on the right of the main window •No sidebar'Window' Î 'No sidebar'No presentation tree is shown22MAGMA VIEWER 4.4 M ANUAL3.3.5ViewsThese functions are available for models and animations only.3.3.63-D ToolsThese functions are available for models and animations only.With these functions, you assign certain actions to the mouse:•Show an isometric view (F5)'Window' Î 'Sidebar left'Shows model/animation in isometric view •Show a top view (F6)'Window' Î 'Sidebar right'Shows model/animation from above •Show a front view (F7)'Window' Î 'No sidebar'Shows model/animation from the front •Show a right view (F8)'Tools' Î 'View / Right'Shows model/animation from the right•No actions 'Tools' Î '3D' Î 'No actions'(No action)•Activate rotate 'Tools' Î '3D' Î 'Rotate'Rotates view by clicking and dragging the mouse •Activate panning 'Tools' Î '3D' Î 'Translate'Pans (moves) view by clicking and dragging the mouse •Activate zoom 'Tools' Î '3D' Î 'Zoom'Zooms view by clicking and dragging the mouse •Zoom to fit all'Tools' Î '3D' Î 'Fit all'Zooms view to fit the main windowC H. 3: U SER I NTERFACE233.4Example for a Presentation TreeFig. 3-11 shows a sample presentation tree.Fig. 3-11: Presentation treeAs you can see, each slide has an individual symbol assigned in the presentation tree. There are slides containing text only (title slide or text slide), slides containing graphical objects only, and slides containing both. Furthermore, each of the various graphical objects has an individual sym-bol allocated to allow an easy distinction (Fig. 3-12).24MAGMA VIEWER 4.4 M ANUALFig. 3-12: Icons of various graphical objectsFurther details about the different objects can be found in Ch. 3.1, page 19 of the MAGMAcom-poser 4.4 Manual.3.5Models and AnimationsGenerally speaking, each model corresponds to an image, and each animation corresponds to a sequence. Images and sequences can "only" be displayed or run within MAGMAviewer, but not edited any further. Models, on the other hand, are equipped with additional internal information and can be processed with the View and 3D functions that are explained in Î Ch. 3.3.5, page 22 and Î Ch. 3.3.6, page 22. The same holds true for animations. This means that – like in the post-processor of MAGMASOFT® – you can e.g. freely choose the view, angle, and any zooming area as you wish.3.6Running Animations and/or Image SequencesFig. 3-13: Status bar for animations and/or image sequencesFig. 3-13 shows the status bar for slides containing animations and/or image sequences. You can use the slider to select individual results within the animation / image sequence.If you want to run the animation, proceed as follows:C H. 3: U SER I NTERFACE25•Click on the arrow on the left. The images of the animations and/or image sequences areplayed, and the slider moves from the left to the right with those time steps that you have de-fined via the input field on the right. Whilst the animation is running, a pause button appears instead of the arrow.•If you want the animation or the image sequence to be paused, click on the pause button.Whilst the animation is paused, the play arrow appears instead of the pause button. If you click on the arrow, the animation continues.•If you want to stop the animation, click the rectangle placed next to the arrow. If you click on the arrow again, the animation will start from the beginning.•If you want to repeat the animation in an infinitive loop, activate 'Loop' (click on the checkbox, the box must be ticked). If you want to deactivate the loop, untick the box.•You can define the time steps between the images of the animation (in milliseconds) via the small arrows or the input field on the right of the bar. If you choose 'Auto' (like in Fig. 3-13), the animation runs as fast as the capacity of your computer allows.•If you run an animation that is based on models ('Animation' entry in the result browser), you can edit all images during the animation with the View and 3D functions, e.g. rotate, pan, and zoom.26MAGMA VIEWER 4.4 M ANUALC H. 4: T ABLE OF F IGURES27 4Table of FiguresFig. 2-1: Viewer licensing window (7)Fig. 2-2: Viewer licensing window and license information (8)Fig. 2-3: Viewer licensing window after invalid licensing procedure (9)Fig. 2-4: Licensing procedure failed (9)Fig. 3-1: Main MAGMAviewer window (no presentation started) (11)Fig. 3-2: Importing a presentation, step 1 (12)Fig. 3-3: Importing a presentation, step 2 (13)Fig. 3-4: Importing a presentation, step 3 (14)Fig. 3-5: Importing a presentation, step 4 (15)Fig. 3-6: Error message during import (15)Fig. 3-7: Importing a presentation, step 5 (16)Fig. 3-8: Importing a presentation, step 6 (17)Fig. 3-9: MAGMAviewer main window with opened presentation (title slide) (18)Fig. 3-10: MAGMAviewer main window with opened presentation (image slide) (19)Fig. 3-11: Presentation tree (23)Fig. 3-12: Icons of various graphical objects (24)Fig. 3-13: Status bar for animations and/or image sequences (24)28MAGMA VIEWER 4.4 M ANUAL Notes。
Magmasoft软件高压铸造(HPDC)课件

Calculating a Shot Profile / 'HPDC calculator'
Geometry data
• biscuit: the melt volume that stays and solidifies in the shot chamber after plunger movement (plunger end position). Be consists of volumes 'Biscuit' and 'Inlet'. • runners: volume of running and gating system sum of volumes 'Gating' and 'ingate'. • molten metal ladled:sum of 'biscuit', 'runners' and 'cavity+overflow'
压铸模拟课件
李高峰
Geometry Modeling
• Model the overflows and the casting as material group 1 ('Cast Alloy'). If modeled as material group 'Gating' or 'Ingate', the calculation of the shot profile will be done incorrectly. overflow 溢流包 • Total volume of 'Inlet' and 'Biscuit' should be equal to volume of the biscuit of actual casting. This ensures that the thermal history of die in the region of biscuit is correctly modeled. If combined 'Inlet' plus 'Biscuit' volume is bigger than the volume of shot sleeve at the end of the first shot phase (i.e.shot sleeve is 100% filled), filling simulation will not start. • The enmeshment of 'Inlet' and 'Biscuit' should result in a minimum of 2 layers of elements along the length of 'Inlet' and 3 layers along the length of 'Biscuit'.
鸣志M2DC驱动器用户手册

2.3 电机型号介绍 ........................................................................................................................ 13 2.3.1 电机铭牌说明.............................................................................................................................. 13 2.3.2 电机型号说明.............................................................................................................................. 13 2.3.3 电机规格及尺寸 .......................................................................................................................... 14
- 1、下载文档前请自行甄别文档内容的完整性,平台不提供额外的编辑、内容补充、找答案等附加服务。
- 2、"仅部分预览"的文档,不可在线预览部分如存在完整性等问题,可反馈申请退款(可完整预览的文档不适用该条件!)。
- 3、如文档侵犯您的权益,请联系客服反馈,我们会尽快为您处理(人工客服工作时间:9:00-18:30)。
QQ:734313578学 有 所 成学有所成PDF 文件使用 "pdfFactory Pro" 试用版本创建 小 蜜 蜂目录:2.1 预处理主要的功能解说。
2.2 铸造系统导入前的注意事项。
2.3 铸造系统在MAGMASOFT ®预处理 里材料分配、导入顺序、更改。
2.4 冷却系统和排气系统。
2.5 追踪粒子、冷却曲线、热电偶、 模拟结果表明线。
有此图标表示用 键盘输入且每次 输完后都要按回 车确定。
学 有 所 成有此图标表示用 鼠标左键点击。
小 蜜 蜂PDF 文件使用 "pdfFactory Pro" 试用版本创建 n 模拟充型和凝固过程需要事先的几何形状的铸造工艺可在三维计算机文件中的一个已知的格式。
这个 几何建模的第一步是当您想要使用的计算方法来模 拟和优化铸造系统。
MAGMASOFT ®提供两个选项来 获取几何的铸造系统:1. 第一个选项可让您阅读的几何形状的CAD数据文件。
学 有 所 成MAGMASOFT ®支持STL接口(导入CAD数据) 。
2. 铸造的形状也可以在MAGMASOFT ®采用综合性的几何造型创建。
此工具包括易于使用的功能,可迅速 画出简单的或复杂的铸造系统。
小 蜜 蜂PDF 文件使用 "pdfFactory Pro" 试用版本创建 2.1 预处理主要的功能解说1. 预处理主界面 2. 导入表 3 . 导入STL或STA数据 4. 创建新表 5. 选择表 6. 删除表的内容 7. 将所有表存为1张表 8. 编辑CMD 9. 编辑CMD窗口 10.导入CMD 11. 设置单位 12.设置圆精度和角度 13.视图选项 14.视图局部放大 15.视图局部缩小 16.局部显示材料组 17.旋转视图 18.画几何图标 19.几何模型结构 20.画圆柱体 21. 画长方体 22.取消构建命令 23.快速选择 24.取消选择几何图素 25.复制/镜像几何图素 26.平移/旋转几何图素 27.删除几何图素 28.测量点和距离学 有 所 成小 蜜 蜂PDF 文件使用 "pdfFactory Pro" 试用版本创建 预处理主界面主菜单 先创建项 目或打开 项目,然 后在 MAGMA SOFT ®主 界面选择 ‘preproce ssor’功能 。
出现如 左边的界 面。
用鼠标左键 点击这三个 区域显示历 史信息,再 点击退出。
视图0 x/y平面视图1 z/y平面 菜 单 栏学 有 所 成视图2 x/z平面视图3 3D视图小 蜜 蜂键盘输入窗口信息窗口PDF 文件使用 "pdfFactory Pro" 试用版本创建 导入表按此按钮返 回上一个目 录学 有 所 成打开表 取消打开表 选择‘<projectname>.geo’文件确定 打开。
所有预处理数据都存在 ‘<projectname>.geo’文件里。
您可以在任何时候再次导入您已经建立并存在硬盘上的 表。
如果所需的文件是在不同的目录中,您应该指定文 件名和路径。
允许相对路径和绝对路径。
小 蜜 蜂PDF 文件使用 "pdfFactory Pro" 试用版本创建 导入STL或STA数据按此按钮找到 STL或STA文 件。
学 有 所 成l请注意,使用LOAD SLA功能目前选择单位(‘cm’, ‘mm’, ‘inch’ ...)。
MAGMASOFT® 默认单位毫米。
l请不要在预处理复制STL文件,因为非常费时,但他 们总是导入为好。
l请注意,每个导入的STL文件是自动加载到一个单独 的表。
小 蜜 蜂PDF 文件使用 "pdfFactory Pro" 试用版本创建 创建新表学 有 所 成当您打开预处理, ‘sheet 0 ’会自动显示。
您可以选 择‘NEW SHEET’创建新表,连续号码自动分配 到新的工作表。
小 蜜 蜂PDF 文件使用 "pdfFactory Pro" 试用版本创建 选择表显示正激活的第几张表学 有 所 成如果你有导入几张表,您可以切换使用表功能‘NEXT SHEET’和‘PREV SHEET’。
Ø 如果你先点击‘ NEXT SHEET’功能,再点击 ‘ACTIVE SHEET’功能 ,那么下一张表被 激活。
Ø 如果先点击‘PREV SHEET’,再点击‘ACTIVE SHEET’功能 ,那么上一张表被 激活。
小 蜜 蜂PDF 文件使用 "pdfFactory Pro" 试用版本创建 删除表的内容学 有 所 成您有可能删除表的内容,以便使工作表所有的 要素在此被删除。
a) 选择‘FREE SHEET 0’功能,内容‘sheet 0 ’ 被删除。
b) 选择‘FREE ACTIVE’功能,目前正在使用 的表内容将被删除。
小 蜜 蜂PDF 文件使用 "pdfFactory Pro" 试用版本创建 将所有表存为1张表您可以合并所有MAGMASOFT ® 打开的表,存储为 ‘sheet 0 ’。
这是非常有用的,如果您已经建立了几个项 目,采用单独表和现在想将它们合并到完整的几何形状 。
这一步是至关重要的,如果你想完成几何输入并启动 网格生成。
该表保存为enmeshment必须命名为 '<project name>.geo' ,必须保存在目录中的当前项目 版本!学 有 所 成小 蜜 蜂PDF 文件使用 "pdfFactory Pro" 试用版本创建 编辑CMD学 有 所 成进入编辑 CMD窗 口小 蜜 蜂PDF 文件使用 "pdfFactory Pro" 试用版本创建 编辑CMD窗口学 有 所 成小 蜜 蜂PDF 文件使用 "pdfFactory Pro" 试用版本创建 导入CMD几何数据或追踪粒子等等都 可用CMD文件导入。
学 有 所 成导入CMD 文件小 蜜 蜂PDF 文件使用 "pdfFactory Pro" 试用版本创建 设置单位学 有 所 成单位栏在MAGMASOFT ®您可以使用 不同的单位。
您所选择的单位 取决于铸造系统的尺寸。
默认 的单位是‘毫米’ 。
每个导入的 图您可以选择不同的单位。
MAGMASOFT ®在同一个模拟 铸造系统的单位必须统一。
小 蜜 蜂PDF 文件使用 "pdfFactory Pro" 试用版本创建 设置圆精度和角度学 有 所 成MAGMASOFT ®默认角度是360 度。
MAGMASOFT ®在一些建 图的功能需要定义旋转角度。
角度栏 MAGMASOFT ®默认圆精度 是16。
意思是你看到的一个圆 是16个线段组成的。
精度数值 越大圆越细。
圆精度:set acc 28按回车确定。
表示圆精度28。
角度:set ang 270按回车确定。
表示角度270。
圆精度栏小 蜜 蜂PDF 文件使用 "pdfFactory Pro" 试用版本创建 视图选项学 有 所 成<ZOOM X2> 表示视图放大 2陪; <ZOOM X3> 表示视图放大 3陪。
用鼠标左键 任选此菜单 里的一个视 图就可全屏 显示。
自动调整视图开或关<ZOOM/2>表示视图缩小2陪; <ZOOM/3>表示视图缩小3陪.Zoom view 1 2.5按回车确定, 表示‘视图1’放大‘2.5’陪。
Zoom view 0 0.5按回车确定, 表示‘视图0’缩小 ‘0.5’陪。
小 蜜 蜂PDF 文件使用 "pdfFactory Pro" 试用版本创建 视图局部放大Ø 您可指定某个区域视图放大。
如下Zoom IN表示 放大视图。
步骤进行: ① 在菜单领域中选择‘ Zoom ’ ,按钮 变成黑色。
如右图所示。
② 移动鼠标的光标移动到第一点的对 角线,按住Ctrl + Shift键并点击鼠标 左键,再松开Ctrl + Shift键。
③ 移动鼠标的光标移动到另一点的对 角线界定局部放大视图的区域。
再 次按住Ctrl+Shift键并用鼠标左键单 击。
学 有 所 成小 蜜 蜂PDF 文件使用 "pdfFactory Pro" 试用版本创建 视图局部缩小Ø 您可指定某个区域视图缩小。
如Zoom OUT表 示缩小视图。
下步骤进行: ① 在菜单领域中选择‘ Zoom ’ ,使这 一功能领域不再有黑色背景。
如 右图所示。
② 移动鼠标的光标移动到第一点的 对角线,按住Ctrl + Shift键并点击 鼠标左键,再松开Ctrl + Shift键。
③ 移动鼠标的光标移动到另一点的 对角线界定局部缩小视图的区域。
再次按住Ctrl+Shift键并用鼠标左键 单击。
学 有 所 成小 蜜 蜂PDF 文件使用 "pdfFactory Pro" 试用版本创建 局部显示材料组使用鼠标,您可以显示所有材料 组或不显示。
使用键盘可以显示 指定的材料组。
学 有 所 成所 有 边 界 条 件 都 显 示所 有 B E 线 都 显 示所 有 都 不 显 示所 有 都 显 示所 有 材 料 组 都 显 示例如有4条冷却运水,第1、2 条显示而第3、4条不显示。
操作如下: Show mat on 7.1 7.2 off 7.3 7.4 sel 按回车,然后按Esc键 确定。
其中显示和不显示可以单独 操作。
小 蜜 蜂PDF 文件使用 "pdfFactory Pro" 试用版本创建 旋转视图绝对旋转视图Rotabs view 2 -10 45 20 按 回车确定。
例如:‘VIEW2’ X轴旋转-10度,Y 轴旋转45度,Z轴旋 转20度。
操作步骤如 图所示。
旋转视图只 是视觉旋转 ,而不 是几何图素旋转。
学 有 所 成Rotrel view 2 -10 45 20 按 回车确定。
视图恢 复原状相对旋转视图小 蜜 蜂PDF 文件使用 "pdfFactory Pro" 试用版本创建 画几何图标点或直线图标 圆图标 长方形图标学 有 所 成小 蜜 蜂PDF 文件使用 "pdfFactory Pro" 试用版本创建 几何模型结构<projectname>.geoSheetoSheet1Sheet(n)学 有 所 成MacroVolume 1Volume (n)Surface1 Edge 1Surace(n)小 蜜 蜂Edge (n) Point(n)Point1PDF 文件使用 "pdfFactory Pro" 试用版本创建 用鼠标画圆柱体图解用鼠标右键确定第3、4点在另 一个视图定义 高度。