测光表SEKONIC-858D使用手册
SEKONIC L的308BII Flashmate说明书
EXPOSURE METEROperating Instructionsq Operating instructionsSAFETY PRECAUTIONSThis manual uses the following safety labels for and that you must follow.WARNING Indicates hazards or unsafe practices that can result in severe personal injur r y or death.Indicates hazards or unsafe practices that can r r esult inpersonal injury or damage to your L-308Bll exposure meter.Indicates an operation note or limitation you must use. Please readthe notes to avoi d an incorrect L-308BII operation.NOTE(S) Provides the reference information and related functions that are useful for your L-308Bll operations.WARNINGCONTENTSSAFETY PRECAUTIONS (i)CONTENTS (ii)1. Parts Designations ......................................................................................2. Display . (2)2.1 LCD panel (2)3. Mode Selection (3)3.1 Switching between incident light metering and reflected light metering (3)3.2 How to fit the Lumidisc (3)3.3 How to remove the Lumidisc (3)4. Light-receiving Method (4)4.1 Incident light metering (4)4.2 Reflected light metering .... (4)5. Preparation for Measurement (5)5.1 Inserting the battery (5)5.2 Battery check (5)5.3 Auto Power-off (5)5.4 Measurement mode setup (5)5.5 Setting up film speed (ISO) (6)5.6 Setting up shutter speed (T) (6)5.7 Setting up number of frames per second (f/s) (6)6. Ambient Light Measurement (7)6.1 Mode Selection (7)6.2 Measurement of E V (Exposure Value ) (7)7. Flash Measurement with cord (8)7.1Setting up of the flash measurement with cordand making measurement in this mode (8)8. Flash Light Wireless Measurement (9)8.1 Flash light wireless measurement (9)9. How to use the Lumidisc (10)9.1 How to measure light contrast (10)9.2 Using the L-308BII as an illuminance meter (10)10. Specifications (11)11. Instructions and Maintenance Notes.. 12ii11. Parts DesignationsPower buttonLumisphere(Light receiving element) Lens (Light receiving element)Up/Down buttonIS0 button Synchro terminal cap(Accessory)Lumidisc (Accessory) How to fasten a strap 1Lumisphere ISynchro terminal Strap eyeletBattery casecoverMeasuring2. Display2.1 LCDpanelMode selectionAmbient light measurementFlash measurement without cordFlash measurement with cordIS0 film speed display. See Page 6.Press theIS0 button, and is displayed.mode symbols are switched in the following sequence: qAperture/EV/Battery/Others “b.c” Battery capacity See Page 5.Aperture value (Indicated by a number anddots )Exposure value (Indicated by a number and dots ) See Page 7.E.u Under exposureE.o Over exposureShutter speed/film frame count/film speed display. See Page 6.Shutter speed Shutter speed in seconds Number of frames per second Film speed is displayed if the IS0 button is pressed.One full stop is shown by 9 bars.A single bar indicates one tenth stop.23. Mode SelectionYour L-308Bll can measure both incident and reflected light in both ambient light and flash light (electronic flash or flash bulb) modes. You can switch the modes as follows:[Ligh$xec#ng[Measured light] [Mode/display m ethod]see Page 7.3.1 Switching between incident light metering and reflected lightmeteringSlide the lumisphere and stop it at the clicking position of “a” or “b” (See Fig.1 and 2).LumispherebFig. 1 Incident light metering Fig.2 Reflected light metering Fig. 3 Caution: 1Slide the lumisphere by pushing the part as shown in Fig. 3.3.2 How to fit the LumidiscSlide the Lumisphere to the right for reflected light metering.(See Fig. 5)of the lumidisc aslant in the groove (A) of L-308Bll. (See Fig. 6). Then depress the strap eyelet (C) toward the L-308Bll body. (See Fig. 7)umisphereFig. 4 Lumidisc Fig. 5 Fig. 6 Fig. 73.3 How to remove the LumidiscTake reverse procedures described above to remove the Lumidisc.Caution: You may break the lumidisc if you do not take care when fitting and removin g,3Light-receiving Method4.1 Incident light meteringHold L-308BII close to the subject, point the lumisphere towards the camera, and measure the incident light intensity, (Fig. 8)Fig.8Caution: Do not fit the Lumidisc next to the Lumisphere when you take incident light metering. Otherwise, the Lumidisc will affect the exposure in proper reading.4.2 Reflected light meteringYou can meter the reflected light of the object by pointing the L-308Bll’s lens at the object from the camera’s position. (Fig. 9).Fig. 9Caution:If you measure from the camera position, the entire object is measured in average.If you want to measure only a part of the object, do it at as close a position aspossible to the part measured. Take care so that the part measured may not beshadowed by the meter, etc.45. Preparation for Measurement5.1 Inserting the batteryUse a 1.5-volt, type-AA battery.Use a manganese dry cell (R6P) or an alkaline one (LR6).Never use any of other types.To remove the battery case cover simply slide it in thedirection of the arrow.Insert the battery in the battery case aligning the polarities asindicated on the inside of the case. (Fig. 10)Slide the battery case cover along the unit to close it. Checkthat the cover is securely closed.5.2 Battery checkDepress the POWER button, and the LCD panel (“b.c” messageand bar marking displays the current battery level.The battery level is indicated by a number of bars for onesecond. Then, the LCD panel automatically switches to thenormal measurement mode.NOTES l You can sustain battery level display by holding down the Power button.l When the battery level is indicated by only two or three dots, prepare a new battery.When the battery capacity drops below the limit, the “b.c” display blinks and thendisappears.5.3 Auto Power-offTo save battery capacity, the L-308Bll is automatically turned off (and all readings are erased) 4 minutes after your last operation.Press the mode selection button to select the desired measurement mode.Mode switching sequence:Measurement modeMeasurement mode with cord Measurement mode without cord5NOTEholding down the IS0 button, the display is toggled between EV and F values(Fig. 12 and 13). If it is toggled after measurement, the measurement data isautomatically recalculated and redisplayed.Fig. 12Fig. 135.5 Setting up film speed (ISO)Press the IS0 button, and a film speed value isdisplayed (Fig. 14).Set up the film speed by pressing the Up or Down buttonwhile holding down the IS0 button. If you press the Up Fig. 14button, the speed increases; if you press the Down button it decreases. If you hold down the Up/Down button for more than one second, the speed changes continuously.NOTE l You can set up the film speed either before or after measurement.5.6Setting up shutter speed (T)Set up the shutter speed used by pressing the Up or Downbutton (Fig, 15). If you press the Up button, the speedincreases; if you press the Down button it decreases.If YOU hold down the Up/Down button for more than onesecond, the speed changes Fig. 15N O T E S r the case of ambient light, you can set up the shutter speed in a range of 60 and 1/8000 sec.In the case of flash light, you can set up the synchronizing shutter speed in a rangeof 1 and 1/500 sec.After 1/500 see, 1/75 1/80 1/90, and 1/100sec. are displayed in order. You canselect any one you want.5.7Setting up number of frames persecond (f/s)The film frame counts are displayed after 1/8000 set ofshutter speed in the ambient light mode. Choose any countyou want (Fig.16).Fig 16N O T E S l The f/s count options are: 8, 12, 16, 18, 24, 25, 30, 32, 64,and 128. These values represent those used with the shutter angle 180 degrees.l This setting up is used for a motion picture camera only.66. Ambient Light Measurement 6.1 Mode SelectionPress the mode selector to enter the ambient light measurement mode.Set up the film and shutter speeds.Press the measuring button, and the aperture value isdisplayed (Fig. 17).Fia. 17NOTES Fig. 17 shows the shutter speed 1/125, and aperture F2.0+3/10 measured.l In the ambient light measurement mode, light measurement is continuously conducted while the measuring button is kept depressed.l If you changed the film speed (ISO) or the shutter speed (T) value aftermeasurement, the measurement value is automatically recalculated and displayed again.l E.u (underexposure error) or E.o (overexposure error) is displayed if the metering range is exceeded. If E.u was displayed, reduce the shutter speed; if E.o was displayed, increase it. (Fig. 18) (Fig. 19)Fig. 186.2Measurement of EV (Exposure Value)Press the mode selector to enter the EV measurementmode. Press the measuring button, and the EV value isdisplayed (Fig. 20).Fig. 19Fig. 20NOTE l “EV” represents a specific amount of light, and is a combination of a shutter speedand an aperture value.77.. Flash Measurement with cord 7.1 Setting up of the flash measurement with cord and makingmeasurement in this modePress the mode selector to enter this mode (Fig. 21).Fig.21Caution: l Set up the shutter speed which has been already set up on your camera.l If you measure the flash bulb light, make sure that the shutter speed set is within the synchronizing range.Connect the synchro cord to the L-308Bll’s synchroterminal (Fig. 22).-JFig. 22Caution:Press the measuring button, and the flash fires and theaperture value is displayed (Fig. 23).N O T E Sically recalculated and redis* Synchro cord (optional):A 5-meter-long synchro cord with three plugs is availablefor synchronous metering between your L-308Bll, thecamera and the flash unit. It is very convenient as nocord replacement is required during shooting pictures.The L-308Bll is also equipped with a connector terminallock for securing cable connection.To flash unit To camera88. Flash Light Wireless Measurement(Measurement without using the syrchro cord)8.1 Flash light wireless measurementPress the mode selector to enter this mode (Fig. 24).Set up the film and shutter speeds.Fig. 24 Caution: Set up the shutter speed which has been already set up on your camea.Press the measuring button. After releasing it,markblinks showing that your L-308BII is in a stand-by mode(Fig.25); this holds for about 90 seconds.displays an aperture value (Fig.26). After firing, thestand-by mode holds for another 90 seconds, You canFig. 25 repeat measuring so long as the mark is blinking.If the mark goes out, press the measuring button again tomake another measurement.Caution:NOTESount is small relative toflash measurement withow to use the Lumidisc9.1 How to measure light contrastSee page 3 ‘3.2 How to fit the Lumidisc’.Select the light mode you are going to use with the modeselector.Hold the L-308BII close to the subject and point theLumidisc toward the main light source (turn off theauxiliary light source). Take reading.source (turn off the main light source).Compare the difference in brightness between the main and auxiliary light sources, anddetermine the contrast.(Example)If you read F16 for the main light source and F8 for auxiliary light source, thedifference between them is two F stops. Then you will obtain 4:1 contrast as shownin the above table.N O T E l To obtain exposure, hold the L-308Bll close to the subject and point theLumisphere towards the camera with the main light and auxiliary light on.9.2 Using the L-308B II as an illuminance meterSelect the EV metering mode and set the film speed at IS0 100.L-308Bll parallel to the subject and take reading.Determine the brightness level using the following conversion table.EV to lx conversion table(Example) If you read EV9 _,the approx. illuminancevalue is 1800lx.1010. SpecificationsType l Digital exposure meter for ambient and flash meteringLight-receiving method l Incident and reflected light metering systemLight-receiving section l Incident light: Lumisphere, Lumidiscl Reflected light: Lens (light receiving angle of 40°)Light receiving element l Silicon photo diodeMetering systems Shutter speed-priority meteringl Flash light:With synchro cordWithout synchro cordMeasuring range l Ambient light:EVO to EV19.9 (at 0.1 EV step)(IS0 100) Flash: F1.4 to F90 + 0.9 stop (at 0.1 AV step)Repeat accuracy EV or lessCalibration constant l Incident light metering:C = 340 (lumisphere), C = 250 (lumidisc)Reflected light metering: K = 12.5Display range l IS0 (film speed): 3 to 8000 (at 1/3 SV step)l T (shutter speed):Ambient light:60 sec to 1/8000 sec (at 1 TV step)f/s (frames/sec): 8, 12, 16, 18, 24, 25, 30, 32, 64, 128Opening angle: 180 degreesFlash: 1 sec to 1/500 sec (at 1 TV step), and 1/75,1/80,1/90,1/100l Aperture:0.5 to 90.9 (at 0.1 AV step)EV (Exposure Value): -5 to 26.2Other function l Out-of-range metering:“E.u” (underexposure) or “E.0”(overexposure) warning indication l Battery checkl Auto power-offBattery used A single type-AA battery (Alkaline or manganese), 1.5VOperating temperature l 0°C to +4O°CrangeStorage temperature . -20°C to +60°CrangeDimensions l Approx. 63W x 110H x 22D mmWeight l Approx. 80 g (without battery)Standard accessories l Soft case, strap, lumidisc, soft case for lumidisc, synchro terminal cap,AA batteryThe specifications and appearance of the L-308Bll are subject to change without notice due to improvement.1111. Instructions and Maintenance Notes Caution:l To avoid damaging your L-308611, never drop it or subject it to impact.Avoid keeping your L-308Bll in places of high temperature or humidity.l Avoid excessive temperature changes, otherwise condensation will occur,resulting in malfunctionl Remove the battery if your L-308Bll is not to be used for a long time. MAINTENANCE NOTESl Keep the surfaces of the lumisphere, lens and Lumidisc clean and free from dust, foreign particles and scratches.l Wipe off dirt with a soft or silicon cloth,Never use solvent such as thinner or benzine.。
哥森迪吉闪光灯测光表使用说明书
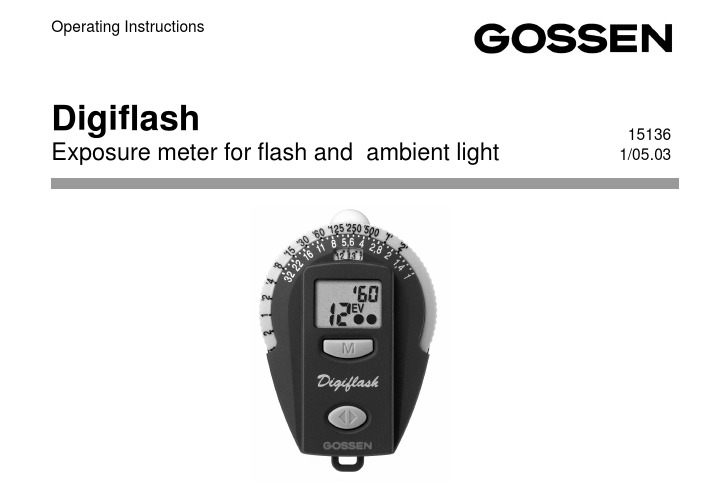
DigiflashExposure meter for flash and ambient light15136 1/05.03Operating InstructionsDisplaySetting windowExp. timesShutter speed scaleDiffuserAperture/f-stops scaleFunction buttonEyelet for carrying strapMeasuringkeySocket for tripodCameramounting clipContents1The functioning of the Digiflash . 4 1.1Preparation and self-test (4)1.2Incident light and reflected light (5)1.3Duration of read-out in display (5)2Functions of the Digiflash (6)2.1Setting the film speed (6)2.2Exposure measuring ambient light . 7 2.2.1Read-out of the values measured .. 7 2.3Flash measurement (8)2.3.1Setting the sync speed (meas. time) 8 2.3.2Measuring (8)2.3.3Fill-in Flashes (9)2.4Taking a measurementoutside the measuring range 102.5Contrast measurements (10)2.6Setting correction values (11)2.7Function TIMER (12)2.8Watch/Alarm clock (13)2.9Measuring temperatures (15)2.9.1Min./Max. temperatures (15)3Service and repairs (16)4Technical data ............................ 17The Digiflash is a small but smart GOS-SEN exposure meter, with digital read-out, for ambient light and flash. The Digiflash is made to exacting GOSSEN calibration standards for high precision measure-ments. The trendy styling and logical func-tioning make it easy and comfortable to operate. Key features:•Incident and reflected light meas. mode •Measuring of ambient and flash light •µP controlled•Digital LCD read-out in the display in 1/3 stop increments•Contrast readout in 1/3 EV steps •Storage of the measuring results •Indication of all suitable combinations of shutter speeds and f-stops•Signal "range over" or "range under"•Automatic battery check•Countdown timer for long exposures •Function Watch/Alarm clock •Measuring temperatures1The functioning of the Digiflash 1.1Preparation and self-testBatteryThe Digiflash is powered by a 3 V Lithium battery, type CR 2032. When the battery is running low, BAT appears in the display.–The battery should be replaced as soon as possible. When BAT is shown alone in the display, the battery will need to be replaced before further measurements are possible.–To replace the battery, pull out the battery compartment located under the eyelet for the carrying cord.–Remove the old battery and insert the new one. Observe the "+" and "–" polarity!–Close the battery compartment Attention! The Digiflash is provided with a battery memory of 10 seconds. If the battery is removed briefly or replaced only within those ten seconds, the values stored in memory will be maintained. Otherwise changing the battery or pressing one of the buttons will cancel all the individually stored values.Self-TestAfter the new battery has been inserted, the microcomputer will carry out a self-test. Every display segment appears in the display panel. The self-test takes 10 sec-onds. It can be interrupted before by press-ing any button.After the self-test, the standard settings willbe shown as set by the factory.Standard settingsISO100/21°COR0ambient EV8 t1/125flash EV121.2Incident light and reflected light Incident light methodFor the incident mode, the diffusor is to be shifted to the left and placed in front of the measuring aperture. Taking measurements using the incident light mode in particular produces in most cases perfectly exposed shots. In this mode, the DF measures from the subject towards the camera. This guar-antees that the tone quality of the picture is equivalent to that of the subject. This is es-pecially important for very bright or dark subjects. Even under very difficult lighting conditions, as e.g. with subjects which have a lot of contrast, the incident light mode is a more reliable way of producing well ex-posed pictures.Reflected light methodFor the reflected mode, the diffuser must be shifted to the right. Care must be taken, that the light sensor is entirely free.The measurement is taken from the position of the camera towards the subject. In this method, only the light reflected from the subject is detected by the meter. Therefore, the measuring values always depend on the reflection capacity of the subject. As a result of this, bright subjects are reproduced darker and therefore not properly exposed. Consequently, this mode is conveniently used, when the suject does not show too high contrasts between bright and dark areas.1.3Duration of read-out in displayThe Digiflash will always display the last function used. The meter does not automatically switch off, as the power consumption is extremely low.2Functions of the Digiflash Press the function button for selecting the individual functions of the Digiflash.Each time the button is pushed, the next function will be activated.The display panel will show the functions in the following sequence:•Ambient light•Flash light•Timer•Watch•Alarm clock•TemperatureThe next function will only be activated after the Function button has been released. When the Function button is kept pressed down for more than two seconds, the settings of that function are displayed and can be adjusted as desired.2.1Setting the film speed–Select the function "Exposure ambient light" and hold down the function button until the OK-signal sounds. The display will show ISO, blinking.–Use the measuring key M to select the desired film speed.When holding the key M pressed down, the film speed will automatically beincreased. When getting close to thedesired ISO value, release the key Mand set the desired film speed by pushing the key in individual steps.Each time you push the key, the filmspeed is increased by a 1/3 stop.–Confirm the speed you selected by pushing the Function button until the OK-signal sounds and the Digiflash re-turns to the function "Exposure ambient light". The film speed is shown in the up-per right corner of the display.If the film speed is changed, the measure-ment read-out stored in the memory will be immediately converted to the new ISO settings.The film speed selected will stay storedin memory until it is changed in the way described above.The film speed selected will be valid both for ambient and flash light.2.2Exposure measuring ambient light –Use the Function button to select the function …Exposure measuring ambient light“.–The measurement is taken by briefly pressing down the measuring key M.2.2.1Read-out of the values measured The EV value measured will appear in the display. The values will be indicated in1/3 - stop increments by one dot, the 2/3 - stop increments by two dots.–Transfer that EV value from the display to the setting window in the calculator rings and place it precisely under the red indi-cator line.–All the suitable combinations of aperture (f-stops) - t (shutter speeds) can now be seen at the upper part of the circular scales (see previous example).2.3Flash measurement2.3.1Setting the sync speed(measuring time)–Press the function button for selecting the function …flash measurement“. A small stroke in front of the sync time will appear in the display to signal …flash metering“.–Keep the function button pressed down until the ok signal sounds. The display will now show the sync speed blinking.–Use the measuring key to input the desi-red sync speed, in the range of 1 sec to1/500 sec. and confirm by pressing the function button.2.3.2Measuring–Push the measuring key.The Digiflash is ready to measure for30sec, as long as …F“in the display is on.–Trigger the flash.–Transfer the value measured from the display to the window in the printed sca-les above and set it precisely under the red indicator line.–Read the f/stop in the upper part of the scale opposite the sync speed you had preselected (for 1/90 read between 1/60 and 1/125).2.3.3Fill-in FlashesYou will find the right combination in two steps:First you take a reading of the background in the function …ambient light“. Transfer the EV value from the display to the setting win-dow above. Then set the corresponding combined shutter speed and f/stop to your camera, while taking care that the shutter speed must be equal to the flash sync speed.In the second step, you determine the fill-in flash by measuring the flash in the incident mode. From the shadow area of the subject you direct the Digiflash towards the came-ra in such a way that the meter will only re-ceive the fill-in flash and the stray light, but definitely not the main light source.The resulting EV value should be lower by 1to 2 stops than the EV value for the ambi-ent light. If not, adjust the power of the flash unit or change the distance to get the desi-red EV value.2.4Taking a measurementoutside the measuring rangeThe Digiflash will not produce any useable readings outside its measuring range:in the display Eu (too dark) or E n (too bright) will appear. 2.5Contrast measurements–Use the Function button to select the function "Exposure ambient light".–Keep the measuring key M pressed down and the meter will switch over to contrast measurement. Continue holding downthe key to measure various other areas in the subject. In the display, the difference between the individual results of theadditional measurements and the firstmeasuring value will be indicated in EV.A new metering will be made approx.2times a second.After you have released the measuring key M, the value of the first exposure measure-ment will reappear.2.6Setting correction valuesIn order to deliberately change the exposure of your photos, you may adjust the factory calibration.–Remove the battery from the Digiflash and press one of the buttons (battery memory will be deactivated). Put the bat-tery back in the compartment. The meter will then make the self-test.–During this test, keep the measuring key and also the function button pressed down until the accoustic signal sounds. Release the key to enter the CORRECTION function.Use the measuring key M to enter or change the correction value.Press the function button again and hold it down until the OK signal sounds to return the meter to the normal measuring func-tions.The EV in the display will blink to remind you that the standard factory calibration has been changed. Input of the correction in1/3-stops in the range of ± 3 EV.For cancelling the correction value, remove the battery from the compartment and then put it back again.In case of over-exposure a positive correction, in case of under-exposurea negative correction value should be set.2.7Function TIMERA timer function is provided in the Digiflash, useful for long exposure or other timings ranging from one second to thirty minutes.–Use the function button to select the function TIMER and hold it down until the OK-signal sounds. The display shows the last value used. The read-out will show the "minutes" and will flash to allow the countdown timer to be adjusted.–Use the key M to enter the desired time in minutes.–Confirm by pushing the function button. The read-out "seconds" in the display will flash. –Enter the "seconds" of the desired length of time. Confirm by pressing and holding the function button until the OK-signal will sound. The timer will now be in the Start/ Stop function.–Push the key M to start the timer.The display will show the remaining time of the count-down. In addition to that,during the last 10 seconds of the count-down, interrupted signals can be heard.At the end of the set time, a continuedsignal will sound.–To pause the count-down, push the measuring key; pressing it again will restart the count-down.The timer will work in the background so that you can use other measurements.2.8Watch/Alarm clockWATCH – Setting the time–Use the function button to select the function WATCH and hold the key down until the OK-signal will sound.12/24 will flash.–With the function button select either 12hours (AM/PM) – 24hour display.–Confirm with the function button.The read-out "hours" will flash.–Use the key M to set the hours and confirm with the function button.The read-out "minutes" in the display will flash.–Use the key M for setting the minutes. To confirm settings hold down the function button until the OK-signal is heard. ALARM CLOCK–Use function button to enter the function "ALARM CLOCK" and hold it presseddown until the OK-signal will sound.The time of the alarm clock is set in the same way as the watch.–Hold the function button until the OK-signal sounds.–The alarm is activated or deactivated with the measuring button.–When the alarm is activated it is shown in the display with a bell symbol.–When the alarm is sounded it will soundeach second for 1 min. It can be stopped by pressing either the measuring key orthe function button.2.9Measuring temperatures–Use the function button to select the function TEMPERATURE and hold the button pressed down until the OK-signal sounds. To change between °C or °F read-outs, press and hold the function button until the display changes.The Digiflash will indicate the actual ambi-ent temperature. The temperature probe is incorporated in the meter housing.As a result, the temperature measurement may be affected if you are holding the meter in your hand. If you attach the Digiflash with the clip to your camera, these errors can be avoided.2.9.1Min./Max. temperaturesWhen repeatedly pressing the measuring key, the minimum (Lo) and maximum (Hi) temperature values will be indicated. The minimum and maximum values indicated are those that have been measured since the last cancellation operation.The min. and max. temperature values stored in memory can be cancelled by pressing the measuring key until the OK-signal sounds. The temp. measurements are repeated automatically every two min. providing always the actual values. These min. and max. temp. values will make it pos-sible for you to check, whether your films may have been exposed to excessive high temperatures and have been damaged.3Service and repairsIn the event that your Digiflash is not work-ing to your complete satisfaction, please send it to:GOSSEN Foto- und Lichtmeßtechnik GmbH Thomas-Mann-Str. 16-20D - 90471 Nürnbergor to the GOSSEN agency in your country.4Technical dataExposure meterMeasuring modes Ambient lightFlash light (non cord)Incident light methodReflected lightmethodContrast measurem. Light sensor sbc photo diode Meas. range ambient light(when ISO 100/21°)EV 0 to 18Shutter speeds1/2000 s to 4 min Apertures f/1 to f/32Meas. range flash light(when ISO 100/21°)f/2 to f/32Synch speeds (Measuring times)1 to 1/500 sec. incl. 1/90 sec.Correction values± 3 stops Film speeds ISO 6 to 3200in 1/3 increments Measuring anglereflected light mode approx. 25°Timer 1 sec to 30 minWatch adjustable to 12 hrs(AM + PM) or 24 hrs Accuracy 5 min / yearThermometer adjustable to °C/ °F Measuring range–15 ... 70 °C or5 ... 160 °F Accuracy± 2 °C or ± 4 °FDisplay Digital read-out ofmeasuring valuesand analogue scales Duration of read-out The DF will alwaysdisplay the lastfunction used Battery 1 x 3V Lithiumbattery CR 2032 Operating temp.–10 °C ... 60 °C Dimensions75x50x23mm Weight40g incl. battery Accessories incl. Battery, carryingcase, cord,instruction manual Optional accessory Mounting clipfor camera shoesOrder code V069APrinted in Germany • Subject to change without notice GOSSEN Foto- und Lichtmeßtechnik GmbH Thomas-Mann-Str. 16-20D-90471 NürnbergPhone:+49 911 / 8602-181Fax:+49 911 / 8602-142。
色差仪使用说明书
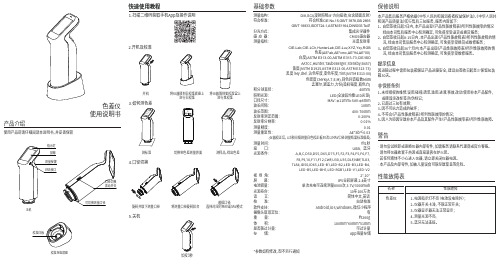
色差仪使用说明书产品介绍使用产品前请仔细阅读本说明书,并妥善保管基础参数测量结构: D/8,SCI(漫射照明/8°方向接收,包含镜面反射)符合标准: 符合标准CIE No.15,GB/T 3978,GB 2893 GB/T 18833,ISO7724-1,ASTM E1164,DIN5033 T eil7分光方式: 集成光学器件感 应 器: CMOS感应器测量指标: 光谱反射率 CIE-Lab,CIE-LCh,HunterLab,CIE-Luv,XYZ,Yxy,RGB 色差(ΔE*ab,ΔE*cmc,ΔE*94,ΔE*00) 白度(ASTM E313-00,ASTM E313-73,CIE/ISO AATCC ,Hunter ,TaubeBerger ,Stensby ,R457) 黄度(ASTM D1925,ASTM E313-00,ASTM E313-73) 黑度(My ,dM),沾色牢度,变色牢度,Tint(ASTM E313-00) 色密度CMYK(A ,T ,E ,M),同色异谱指数Milm 孟塞尔,遮盖力,力份(染料强度,着色力)积分球直径: 40mm 照明光源: LED(全波段均衡LED光源)口径尺寸: MAV:Φ11mm+SAV:Φ6mm 波长间隔: 10nm 波长范围: 400-700nm 反射率测定范围: 0-200%反射率分辨率: 0.01%测量精度: 0.01测量重复性: ΔE*ab≤0.03 (仪器校正后,以5秒间隔测量白色校正板30次以MAV口径测量结果标准偏差)测量时间: 约1秒接 口: USB ,蓝牙光源条件: A,B,C,D50,D55,D65,D75,F1,F2,F3,F4,F5,F6,F7, F8,F9,10,F11,F12,CWF ,U30,U35,DLF ,NBF ,TL83, TL84,ID50,ID65,LED-B1,LED-B2,LED-B3,LED-B4, LED-B5,LED-BH1,LED-RGB1,LED-V1,LED-V2视 场 角: 2°,10°屏 幕: IPS全彩屏幕,2.4英寸电池容量: 单次充电可连续测量8000次,3.7V/3000mAh 光源寿命: 10年100万次语 言: 简体中文,英语校 准: 自动校准软件支持: Android,iOS,Windows,微信小程序摄像头取景定位: 有重 量: 约260g 体 积: 180mm*60mm*51mm 是否能过计量: 可过计量存 储: App海量存储*参数如有修改,恕不另行通知保修说明本产品售后服务严格依据《中华人民共和国消费者权益保护法》、《中华人民共和国产品质量法》实行售后三包服务,服务内容如下:1、 自您签收日起7日内,本产品出现《产品性能故障表》所列性能故障的情况 经由本司售后服务中心检测确定,可免费享受退货或换货服务;2、 自您签收日起8-15日内,本产品出现《产品性能故障表》所列性能故障的情况,经由本司售后服务中心检测确定,可免费享受换货或维修服务;3、 自您签收日起36个月内,本产品出现《产品性能故障表》所列性能故障的情 况,经由本司售后服务中心检测确定,可免费享受维修服务。
L-758测光表使用说明书(SEKONIC)
目录
安全注意事项 目录 1. 部件名称................................................................................................................1
1. 测光表部件 ......................................................................................................1 2. 附件 .................................................................................................................2 2. 液晶显示屏(LCD)的说明...................................................................................3 3. 准备使用................................................................................................................7 1. 扣上挂带 ..........................................................................................................7 2. 安装电池 ..........................................................................................................7 3. 检查电池电量...................................................................................................7 4. 在测量过程中或使用记忆功能时更换电池........................................................8 5. 自动关机功能...................................................................................................8 6. 设定ISO1的感光度...........................................................................................8 7. 设定ISO 2的感光度..........................................................................................8 8. 转盘上锁或解锁 ...............................................................................................9 9. 测量按钮和记忆按钮的配置 ...........................................................................10 4. 基本操作..............................................................................................................11 1. 入射光或反射光点测量 ..................................................................................11 2. 设定测量模式.................................................................................................12 3. 入射光测量模式 .............................................................................................13 4. 反射光测量模式(点测光) ...........................................................................14 5. 测量 .....................................................................................................................15 1. 测量现场光 ....................................................................................................15
激光测量仪的使用方法【干货技巧】

激光测量仪的使用方法内容来源网络,由“深圳机械展(11万㎡,1100多家展商,超10万观众)”收集整理!更多cnc加工中心、车铣磨钻床、线切割、数控刀具工具、工业机器人、非标自动化、数字化无人工厂、精密测量、3D打印、激光切割、钣金冲压折弯、精密零件加工等展示,就在深圳机械展.一、使用前的准备(一)电池的装入/更换打开仪器尾部的固定挡板。
向前推卡钮,向下将底座取下。
按住红色的卡钮推开电池盒盖。
安装或更换电池。
关闭电池盒盖,安装底座和卡扣。
当电池的电压过低时,显示屏上将持续闪烁显示电池的标志{B,21}。
此时应及时更换电池。
1、按照极性正确装入电池。
2、使用碱性电池(建议不要使用充电电池)。
3、当长时间不使用仪器时,请取出电池,以避免电池的腐蚀。
更换电池后,设置和储存的值都保持不变。
(二)多功能底底座固定挡板可以在下面的测量情况下使用:1、从边缘测量,将固定挡板拉出,直到听到卡入的声音。
2、从角落测量,将固定挡板拉出,直到听到卡入的声音,轻轻将固定挡板向右推,此时固定挡板完全展开。
仪器自带的传感器将辨认出固定挡板的位置,并将自动设置测量其准点。
(三)内置的望远镜瞄准器在仪器的右部有一个内置的望远镜瞄准器。
此望远镜瞄准器为远距离测量起到辅助的作用。
通过瞄准器上的十字丝可以精确地观察到测量目标。
在30米以上的测量距离,激光点会显示在十字线的正中。
而在30米以下的测量距离,激光点不在十字线中间。
(四)气泡一体化的水泡使仪器更容易调平。
(五)键盘1、开/测量键2、第二级菜单功能3、加+键4、计时(延迟测量)键5、等于[=]键6、面积/体积键7、储存键8、测量基准边键9、清除/关键10、菜单键11、照明键12、间接测量(勾股定律)键13、减-键14、BLUETOOTH(六)显示屏1、关于错误测量的信息2、激光启动3、周长4、最大跟踪测量值5、最小跟踪测量值6、测量基准边7、调出储存值8、储存常数9、主显示10、单位,包括乘方立方(2/3)11、顶的面积12、墙面积13、3个额外显示(如:测量中间值)14、BLUETOOTH蓝牙开/关15、第二级菜单功能开16、硬件故障17、间接测量-利用勾股定律18、间接测量-利用勾股定律-部分高度19、面积/体积20、带常数的测量21、电池充电量显示二、菜单功能(一)设置在菜单中可以改变设置,并将其长久保存,并在关机和更换电池后不改变。
测光表介绍和使用(为摄影棚准备)
测光表介绍和使用(为摄影棚准备)测光表是一种用来测量光的强度的仪器。
在摄影中测光表被用来确定适当的曝光时间。
在胶片感光度和快门速度已知的情况下测光表给出获得最佳曝光的光圈值。
测光表也被用来做照明来控制照明的亮度,或者被用作手持的仪器来确保光强符合一定的要求。
测光表-作用现代相机中的测光系统已经十分发达,为什么许多摄影家还要使用手持的、离开相机而独立的测光表呢?因为:1、中片幅以上的相机很少有性能完善的测光系统,较大片幅的相机大都没有测光系统。
2、比起相机内测光系统来,手持测光表可以有更灵敏、更精确的测光性能,例如可以测量到一档光圈的1/10,对于弱光更加灵敏。
测量角度也可以达到很小,例如1度,这也是常见的具有“点测光功能”的相机达不到的。
3、在有些场合,如风光、静物、产品、模特摄影中,移动相机去测光很不方便,而把相机留在三脚架上,手持测光表去测量、思考、判断要从容得多。
4、相机内测光系统只能测量反射光,而手持测光表还可以具有测量入射光和闪光的功能。
测光表-使用方法测光表是用来测量被摄体的反射光的亮度或光源照度的一种仪器。
根据感光片的感光度与摄影者创作意图的需要,用它来测量光线的亮度,确定光圈、快门速度的曝光组合。
常见测光表的使用大体上有五种方法:1、机位测光法机位测光法是在景物亮度分布较均匀的情况下,测光表同位于照相机取景方向对被摄体进行测光,所获得的亮度值是景物反射光的平均光值,依据这个亮度值来确定曝光,能较好地表现整个画面的影调。
此法常用于拍摄远景或全景风光片。
采用机位测光法,应注意景物亮度的分布,使测量范围内的景物明暗有适当的比例。
测光表的感应窗对应着主体物,避开(或少包括)亮度很亮的天空或反光很强的水面,否则测光表指数偏高,而实际曝光偏低,容易造成底片曝光不足。
在拍摄逆光景物时,要防止阳光直接射向测光表,不然也会因测光不准而造成曝光不足。
即使阳光没有直接射向测光表,也应按逆光景物的反差及暗部面积大小,酌情增加半级到一级曝光量。
电子照度计使用说明书
电子照度计使用说明书一、简介电子照度计是一种测量环境光照强度的工具,主要用于室内外照明设计、工业生产环境调节以及科学研究等领域。
本说明书将详细介绍电子照度计的使用方法、注意事项以及常见故障排除方法,帮助用户正确操作和维护照度计。
二、产品外观及功能1. 外观电子照度计外形简洁,手持轻便,方便携带。
通常由主机和显示屏构成。
显示屏上能直观展示光照强度数值,并提供单位切换、存储数据等功能按钮。
2. 功能电子照度计主要具备以下功能:(1) 测量范围广泛:适用于0-200,000勒克斯(Lux)范围的光照强度测量。
(2) 数据准确:采用高精度传感器,保证测量结果的准确性和可靠性。
(3) 单位切换:提供勒克斯(Lux)和尺度(Foot-Candle)两种单位切换,满足不同用户需求。
(4) 数据存储:照度计可存储一定数量的测量数据,并具备数据查询功能。
三、使用方法1. 准备工作(1) 打开电子照度计主机,确保电池电量充足。
(2) 确认照度计的测量范围满足被测光照强度的要求。
2. 测量操作(1) 将电子照度计指向待测光源,保持垂直角度,避免阳光或其他光源的干扰。
(2) 在显示屏上即可直观显示当前光照强度数值。
3. 单位切换(1) 按下单位切换按钮,可在勒克斯(Lux)和尺度(Foot-Candle)之间进行切换。
(2) 根据实际需求选择合适的度量单位,以方便数据的理解和应用。
4. 数据存储(1) 照度计可存储多组测量数据,方便用户查阅历史记录。
(2) 按下存储数据按钮,当前测量结果将存储在内置存储器中。
四、注意事项1. 在测量时,避免使照度计直接接触光源,以免影响测量结果的准确性。
2. 避免照度计受到强烈的震动或冲击,可影响其正常工作和测量精度。
3. 定期校准照度计,确保测量结果的准确性和可靠性。
4. 当长时间不使用照度计时,请关闭电源,以延长电池寿命。
五、常见故障排除1. 无法正常启动(1) 检查电池是否充电,如有必要更换电池。
测光表的使用方法
测光表的使用方法测光表的使用方法摄影学习资料 2010-02-24 23:59:54 阅读844 评论0 字号:大中小订阅本文引用自艺耕《【摄影】测光表的使用方法》引用艺耕的【摄影】测光表的使用方法有经验的摄影师在拍摄照片时可较准确地估计出自然光条件下的曝光时间,即使有些出入,只要曝光量在胶片的宽容度范围内,也能冲洗出合格的照片。
而对于追求高画质的摄影者来说,估计曝光难以满足准确曝光的需求。
对于大多数摄影者往往很难准确估计变幻莫测的自然光,尤其是照明情况特殊时,如一天的早晨和傍晚、夜间、室内、灯光下等。
因此,这时就需要使用测光表来确定被摄体准确的曝光量。
一、测光表的分类与特点测光表是用于准确测定被摄体所需曝光量的仪器。
根据其是自成一体还是与相机结合在一起分为手持测光表和机内测光表两类。
①手持测光表:自成一体,测光时需要手持进行测量。
手持测光表根据其测量光源的不同分为普通测光表(测量自然光和白炽灯等持续发光光源的亮度,图一A)和闪光测光表(测量闪光灯等瞬间发光光源的亮度,图一B)。
此外,手持测光表根据测光方式不同又分为入射式测光表和反射式测光表。
前者是测量投射光的照度,后者是测量被摄对象反射光的亮度。
现在设计的测光表兼有测量反射光和入射光两种功能。
其测光部位有一乳白罩,不加乳白罩时,测反射光亮度,加乳白罩后测入射光照度。
闪光测光表:有两种类型,一种是有一导线与闪灯连接,按动按钮后可触发闪光灯,同时测定闪光亮度,并将曝光组合值定格在液晶屏上。
另一种是没有导线与闪灯连接,使用时先打开测光表,然后手动触发闪光,便可测定闪光灯亮度及曝光EV 值。
现在的新式手持式测光表将测持续光源与测闪光光源亮度的功能合二为一,同一只测光表,既能测持续光源亮度,又能测闪光光源亮度。
②机内测光表:这是将测光表设计在相机内部的一种形式。
由于测光表设置在相机内,就免去了单独携带测光表的麻烦,而且可在取景同时进行测光,大大提高了测光效率。
- 1、下载文档前请自行甄别文档内容的完整性,平台不提供额外的编辑、内容补充、找答案等附加服务。
- 2、"仅部分预览"的文档,不可在线预览部分如存在完整性等问题,可反馈申请退款(可完整预览的文档不适用该条件!)。
- 3、如文档侵犯您的权益,请联系客服反馈,我们会尽快为您处理(人工客服工作时间:9:00-18:30)。
⌞ᝅ
或本手册如有更改,恕不另行通知。 ●● 本操作手册中的界面可能与您使用的测光表的实际显示不同。(颜色、字母等)
或对其充电(可充电电池除外)。它们可能会爆炸和引起火灾,造成严重伤害或损害 环境。
聚氯乙烯 (PVC) 电缆和电线注意事项
●● 操作本产品上的电线或与本产品一起销售的附件相关的电线时,会接触铅,加利福 尼亚州认为这种化学物质会引起癌症和先天缺陷或其他生殖危害。操作后请洗手。
ii
小心
●● 请勿用湿手操作本产品,或将其置于雨中或可能溅到水、淹没或接触水分的地方。 如果使用“有线闪光模式”,则有触电的危险。这也可能导致产品受损。
*1 世界上第一台手持式测光表(截至 2016 年 9 月,由 SEKONIC 调查。) *2 从 下载数据传输软件,并将其安装在电脑上。
URL: /support/downloads/dtssoftwareformacandwindows.aspx 要使用本软件,请使用 USB 线(迷你 B 型,市售)将电脑连接到 L-858D。 *3 曝光文档包含指示您正在使用的数码相机的每个典型特性(相机和测光表之间的曝光补正量、 裁剪点和动态范围)的信息。要创建曝光文档,必须提前进行拍摄,并使用数据传输软件。
[ 新功能和性能 ] 1 2.7 英寸液晶彩色触控面板
通过将常用功能分配到屏幕底部的功能按钮增强可操作性。 2 闪 光持续时间分析(1/40 至 1/55,500 秒,t0.1 至 t0.9,这能够以 0.1 为一档改变) 3 HSS(高速同步)模式下的曝光测量 4 改 善较低的光测量性能(从入射光测量时的 -5 EV 开始,从反射光测量时的 -1 EV 开
●● 未在“有线闪光模式”下使用测光表,或测光表未连接到电脑时,请确保同步终端 接口盖 c 和 USB 接口盖 a 牢固就位。如果未使用接口盖进行密封 , 测光表将 不再防水 , 水分可能会损坏测光表的电路。
●● 在任何情况下,请勿因改装或更换零部件而改造或拆卸本产品。如果产品出现故障, 请将任何维修服务交给合格和获得授权的人员。否则,测量结果可能受到影响并且 / 或者产品可能损坏。
●● 在更改模式或进行选择时轻轻点击测光表的 LED 面板。使用尖头钢笔或铅笔可能会 划伤 LCD 屏幕或损坏产品。
●● 婴幼儿可能会无意中抓住挂带并晃动本产品,因此请将其放在他们接触不到的地方, 因为测光表可能会因撞击而损坏。
●● 请注意,携带产品时挂带不会松动,因为跌落时测光表可能会受损。 ●● 此挂带采用聚酯纤维制成。
测光表
镜头盖 (已连接在测光表上)
软包
LCD 屏幕防眩光板
挂带
使用简介
安全守则
中文
安全守则
为了正确使用起见 在使用本产品前,请先阅渎本篇安全守则。
警告 若在操作时不遵守警告符号下给的资讯,可能会 导致受伤或死亡。
小心 若操作时不遵守小心符号下给的资讯,可能会导 致受伤或损坏本产品。
ὀព
指出注意事件或在使用上有关的特别事项。请阅 渎注的事项,避免不正确使用测光表。
使用 Sekonic 开发的数据传输软件 *2 可以映射您的相机的曝光文档并根据您的拍摄风 格调整 L-858D。最多可以将 10 个曝光文档 *3 存储在测光表中,并在需要时随时检索。 L-858D 的精调功能可以即时查看场景和相对于相机动态范围的对象亮度,从而获得 最佳的曝光决定。数据传输软件还可以根据您的操作偏好定制 L-858D。
i
■■ 安全守则
在使用本产品前,请先阅读本“安全守则”以实现正确操作。
警告 小心
⌞ᝅ ৸㘹
若在操作时不遵守警告符号下给的资讯,可能会导致受伤或死亡。
若在操作时不遵守小心符号下给的资讯,可能会导致受伤或损坏本产 品。
注意符号表示使用产品时应该遵守的警告事项或限制。请阅读所有注 意事项,以避免不正确使用测光表。
本产品的目标用户如下。 在摄影、电影制作等领域工作的人员,例如摄影师、摄像师、电影摄像师、灯光师和 电影摄影技师
■■ 限制
存在一些有关使用本产品的警告事项和限制。 在使用测光表之前,请阅读并理解以下内容。
৸㘹
●● 本手册的内容可能因产品的规格变更等原因会有所更改,恕不另行通知。 我们建议您从我们的网站下载最新的操作手册,然后使用本产品。 URL :/support/instructionmanualuserguidedownload.aspx
如果合成纤维刺激皮肤、引起发炎或瘙痒,为了防止症状恶化,请避免使用本产品。
iii
⌞ᝅ
●● LCD 附有保护板。使用前请将其剥离。 ●● 尽管制造 LCD 监视器时采用了非常高的标准,但是仍可以在屏幕上观察到一些死像素。
这是正常现象,而非测光表的故障。 ●● 请勿在海拔超过 2,000m (6,561 feet) 的高度下,以有线闪光模式操作测光表。 ●● 对于由于但不限于恶意行为和控制错误导致的任何数据丢失,我们公司不承担任何责任。 ●● 确保不要跌落测光表或使其受到突然的撞击,否则会损坏测光表。 ●● 请勿将测光表存放在高湿度的高温区域,否则会损坏测光表。 ●● 请注意,不要将测光表从寒冷的环境运输到温暖潮湿的环境中,因为测光表上会形成凝结
含我们公司的版权声明。 ●● 本操作手册中的界面可能与您使用的测光表的实际显示不同。(颜色、字母等)
vi
■■ 配套附件
包装内有测光表和以下物品。请确认以下所列物品皆包含在包装内。
* 如果有任何物品缺失,请联系卖给您测光表的经销商或转销商。 * 包装内不含(带有 A 型接口和迷你 B 型接口的)USB 线。请另外获取该 USB 线。 * 包装内不含电池(两节 AA)。请另外获取这些电池。
液滴,并可能使其受损。 ●● 如果低于 -10° C 的温度下操作测光表,则 LCD 的响应将大幅减慢,并且显示器可能难
以查看和读取。这不会损坏测光表。此外,如果温度超过 50° C,液晶显示器将变暗并变 得难以读取,但是当其恢复到室温时,显示器将恢复其正常状态。 ●● 如果将测光表置于阳光直射的环境中、车辆或加热器附近,测光表的温度将升高,并可能 导致损坏。在这些类型的位置使用测量表时请小心谨慎。 ●● 如果将测量表置于可能产生腐蚀性气体的地方,该气体可能会影响本产品,并可能导致损 坏。在这些类型的位置使用测量表时请小心谨慎。 ●● 处置测量表时,请遵循您所在地区的处置规则。 维护说明 ●● 请注意,不要让感光体沾上灰尘、弄脏或划伤,否则可能会影响测量的精度。 ●● 如果测量表变脏,请用干燥的软布擦拭。切勿使用稀释剂或汽油等有机溶剂。
●●“安全指南和维护”和“安全守则”等安全相关注意事项符合创建本操作手册时适用的法 律和行业标准。因此,本手册可能不包含最新信息。如果您使用的是以前的操作手册,请 下载并参阅最新的操作手册。
●● 本产品可能包含有关安全的警告事项和 / 或作为操作手册补充材料的打印错误等打印材料。 ●● 可出于非商业用途复制本操作手册的内容,并且仅供个人使用。但是,复制的材料必须包
■■ L-858D 的特性
[ 基本功能和性能 ] 1 采 用入射光和反射光(1 度点测光)系统的模型 2 伸 展测光球和缩回测光球之间进行一键切换(光接收部件上下机制) 3 闪 光分析功能,提供闪光在总曝光中的百分比以及环境光和闪光组成。 4 曝 光文档功能(使用数据传输软件应用软件) 5 简 化的亮度测量(烛光 / 平方米或英尺朗伯)和简化的照度测量(勒克斯或呎烛光)
测光表
SPEEDMASTER
L-858D L-858D-U
操作手册
感谢您购买我们的产品。 请阅读本操作手册,以便您充分了解本产品的特性和操作。然后将本操作手册保存在安全的地方,以备将 来使用。 有关基本操作的信息,请参见使用简介。
请仔细阅读本操作手册,以充分了解内容,并确保安全正确地使用本产品。
SPEEDMASTER L-858D 是一款具有以下特性的摄影测光表 ; ●● 世界上第一个 *1 HSS(高速同步)闪光测量 ●● 闪光持续时间测量 ●● 多品牌无线触发和控制(可选无线模块)
始)(基于 ISO100)。 5 闪光灯触发和电源控制功能,并且带多品牌无线模块(单独出售) 6 增 强视频 / 电影功能,例如帧频设置(1 至 1,000 f/s)、快门角度设置(1 至 358 度),
并且可以进行滤色镜补正。(EV 值 +/-12,或从已注册的滤色镜名称中选择所需的选项。)
v
■■ 目标用户
参考符号表示有关控件或相关功能的附加信息。 建议阅读这些内容。
箭头表示参考页。
警告
●● 婴幼儿可能会无意中将挂带缠绕在自己的脖子上,因此请将其放在他们接触不到的 地方。存在窒息的危险。
●● 婴幼儿可能会无意中吞下镜头盖,因此请将其放在他们接触不到的地方。存在窒息 的危险。
●● 请勿通过取景器直视太阳或强光源。否则可能会损害视力。 ●● 请勿将电池置于明火中、尝试使其短路、拆卸或对其进行加热、使用未指定的电池
多功能 SPEEDMASTER L-858D 是 Sekonic 系列测光表的旗舰产品。L-858D 提供环境 光和闪光光源的反射点和入射光测量,并具有许多新功能和操作,使其成为可满足所 有光测量需求的理想工具。 彩色触屏面板是符合人体工程学且带橡胶垫的主体的控制中心。借助防水密封件可在 所有拍摄条件下使用 L-858D。感光度的增加和较宽的测量范围可实现当今数字成像 所需的高水平精度。
一般性安全信息
• 使用前请阅读操作手册。 • 请将操作手册放在手头,以便随时查阅。 • 如果本产品出现异常,请立即停止使用。 • 禁止自行改造或拆卸本产品。 • 请勿尝试自己维修本产品。 • 本产品只针对具备专业知识的人群。 • 请看管好儿童,切勿让其接触本产品。 • 请在操作手册描述的使用环境中使用本产品。 • 本产品不防水。