Android手机外文翻译---应用程序基础Android Developers
外文翻译-计算机安卓
毕业设计外文翻译英文原文:Try This Run the API Demos Sample ApplicationUsing Eclipse, load the API Demos application as a New Android Project. To do this,select File | New | Project from the Eclipse menu bar; a New Android Project wizardopens. Do not worry about the options in this wizard for now. Simply select CreateProject From Existing Source and browse to the folder with the API Demo applicationin it. When the project is loaded, choose Run to see it execute in the Android Emulator.Navigate your way through the more than 40 different applications. Use eachapplication to become familiar with the terminology and function of each API toolit demonstrates.Hello, Activity!The Hello, Activity! application, shown in the following illustration, is a simple Hello World!–style application. Though simple in its design, Hello, Activity! does a good job of showing off the abilities of the platform. You will create your own Hello World!–style applications in the next chapter.Lunar LanderLunar Lander, shown next, is a small game that plays on the Android Emulator. Lunar Lander shows how a simple 2-D game works on Android. The controls are fairly simple, and the game is not very complex. However, given these drawbacks, it is a great starter for game development. Lunar Lander implements a simple control scheme (Up, Down, Left, and Right).The game also displays relatively fluid graphics and looks impressive given the platform. Complex game theories such as collision detection are used in a simple way. Although this book does not cover programming games for the Android platform, if you are interested in doing so, you may want to look at Lunar Lander for some tipNote PadNote Pad, as shown in the illustration that follows, allows you to open, create, and edit small notes. Note Pad is not a full-featured word editor, so do not expect it to be something to rival Word for Windows Mobile. However, it does a good job as a demonstration tool to show what is possible with a relatively small amount of code.Skeleton AppSkeleton App, shown next, is an application shell. This is more of a base application that demonstrates a couple of different application features, such as fonts, buttons, images, and forms. If you are going to run Skeleton App by itself, you really are not going to get much out of it. You will be better served by referring to Skeleton App as a resource for how to implement specific items.SnakeThe final demo that I included with the Android SDK is Snake. This is a small, SNAFU-style game that is far more simplistic than Lunar Lander. This illustration shows what Snake looks like when run..NOTEIf you navigate to the base folder of each of the sample applications, you will see afolder namedsrc. This is the source code folder for the given sample application. You can use this to view, edit, and recompile the code for any of the applications. Take advantage of this source code to learn some tricks and tips about the Android platform.Android ToolsThe Android SDK supplies developers with a number of powerful and useful tools. Throughout this book, you will use only a handful of them directly. This section takes a quick look at just a few of these tools, which will be covered in much more depth in the following chapters, as you dive into command-line development.NOTEFor more detailed information about the other tools included in the Android SDK, consult the Android doc files.emulator.exeArguably one of the most important tools included in the Android SDK is emulator.exe. emulator.exe launches the Android Emulator. The Android Emulator is used toyou're your applications in a pseudo-Android environment. Given that, as of the writing of this book, there were no hardware devices yet released for the Android platform, emulator.exe is going to be your only means to test applications on a ―native‖ platform.You can run emulator.exe from the command line or execute it from within Eclipse. In this book, you’ll usually let Eclipse launch the Android Emulator environment for you. However, in the interest of giving you all the information you need to program with the Android SDK outside of Eclipse, Chapter 6 covers command-line usage of emulator.exe when you create your Hello World! applications.When using the Android Emulator to test your applications, you have two choices for navigating the user interface. First, the emulator comes with usable buttons, as shown in Figure 4-1. You can use these buttons to navigate Android and any applications that you develop for the platform.TIPThe Power On/Off, V olume Up, and V olume Down buttons are slightly hidden to the sides of the virtual device. They identify themselves when you hover the mouse pointer over them. Given that many higher-end phones now include a touch screen, the second input choice you have when using the emulator is a simulated touch screen. You use your mouse as a stylus. The objects on the emulator’s screen can be interacted with using the mouse.adb.exeAnother tool that will become very useful to you when you are using command-line programming is Android Debug Bridge or adb (adb.exe). This tool allows you to issue commands to the Emulator.exe tool. When you are working in a command-line environment, the adb tool allows you to do the following:● Start and stop the server● Install and uninstall applications● Move files to and from the emulatorMKSDCARD.exeMKSDCARD.exe is a very useful tool if you are testing an application that will need to read or write files to or from an SD Memory Card inserted into the mobile device. MKSDCARD.exe creates a small partition drive on your drive that will hold and retain the test files. The emulator will treat this partition like an SD Memory Card.DX.exeDX.exe is the compiler of the Android SDK. When run against your Java files, DX.exe will create files with .dex extensions—Dalvik executable format. These files are in the correct format to be understood by, and run on, an Android device.NOTEAndroid executable files are called Dalvik executable files as a reference to the Dalvik virtual machine that Android used to run all applications. The Dalvik virtual machine runs each application in its own thread with the same priority as core Android applications. activityCreator(.bat or .pn)activityCreator is a simple command-line tool that is used to set up a basic development environment. When run from the command line, activityCreator will set up the shell files needed to create a basic Android application. Having these shell files is especially useful if you are not using Eclipse. The Android plugin for Eclipse sets up these shell files for you by calling the activityCreator when you create a new project. Depending on what type of environment you are running, you will see the activityCreator represented by a different type of script file. If you are in a Windows environment, this will be a .bat file; otherwise it will be a python (.pn) script. You simply execute the script, which in turn calls the actual activityCreator process with the correct parameters.APIsThe API, or application programming interface, is the core of the Android SDK. An API is a collection of functions, methods, properties, classes, and libraries that is used by application developers to create programs that work on specific platforms. The Android API contains all the specific information that you need to create applications that can work on and interact with an Android-based application.The Android SDK also contains two supplementary sets of APIs—the Google APIs and the Optional APIs. Subsequent chapters will focus much more on these APIs as you begin writing applications that utilize them. For now, take a quick look at what they include so that you are familiar with their uses.Google API sThe Google APIs are included in the Android SDK and contain the programming references that allow you to tie your applications into existing Google services. If you are writing an Android application and want to allow your user to access Google services through your application, you need to include the Google API.Located in the android.jar file, the Google API is contained within the com.google.* package. There are quite a few packages that are included with the Google API. Some of the packages that are shipped in the Google API include those for graphics, portability, contacts, and calendar utilities. However, the packages devoted to Google Maps will be the primary focus in this book. Using the com.google.android.maps package, which contains information for Google Maps, you can create applications that interact seamlessly with the already familiar interface of Google Maps. This one set of packages opens a whole world of useful applications just waiting to be created. The Google API also contains a useful set of packages that allows you to take advantage of the newer Extensible Messaging and Presence Protocol (XMPP) developed by the Jabber open source community. Using XMPP, applications can quickly become aware of other clients’ presence and availability for the purpose of messaging and communications. The API packages dealing withXMPP are very useful if you want to create a ―chat‖-style program that utilizes the phone messaging capabilities.Optional APIsThe Android SDK includes a number of Optional APIs that cover functionality not covered by the standard Android APIs. These Optional APIs are considered optional because they deal with functionality that may or may not be present on a given handset device. That is, some devices created for the Android platform may include upgrades and features that others do not; the Optional APIs cover your programming options when trying to utilize these features in your Android applications.One of these optional features (which you will use later in the book) is a cell-phone-based GPS. The Android LBS (Location-Based Services) API deals with the functionality needed to receive and utilize information from a device’s GPS unit. (Combine the information in the Android LBS API with that in the Google Maps API, and you might have a very useful application that can automatically display a map of where you are located at any given point in time.)Other Optional APIs include those for utilizing Bluetooth, Wi-Fi, playing MP3s, and accessing 3-D—OpenGL-enable hardware.Application Life CycleIf you have a decent amount of experience as an application developer, you are familiar with the concept of an application life cycle. An application life cycle consists of the steps that the application’s processes must follow from execution to termination. Every application, regardless of the language it was written in, has a specific life cycle, and Android applications are no exception. This section examines the life cycle of an ASP application and compares that to an Android application’s life cycle.Standard ASP Application Life CycleThe life cycle of a standard ASP application is similar enough to that of an Android application to make this a good comparison. ASP applications step through five distinct processes from launch to disposal. These steps are required to be implemented by all ASP applications, and really define what an ASP application is. The steps, in order, are1. Application_Start2. Event3. HTTPApplication.Init4. Disposal5. Application_EndChapter 4: Exploring the Android SDK 4950 Android: A P rogrammer’s GuideTIPSome ASP reference materials consider Disposal and Application_End to be one step in the life cycle. However, the Disposal call can be intercepted before it is passed to Application_End. This can allow the application to perform specific functions beforeit is actually destroyed.Application_Start is called when the application is requested from the server. This process in turn leads into the Event process(es). When all associated application modules have loaded, HTTPApplication.Init is called. The application executes its events, and when the user attempts to close it, Dispose is called. Dispose then passes processing on to the Application_End process,which closes the application.This is a fairly standard application life cycle. Most applications follow similar life cycles: an application is created, loaded, has events, and is destroyed. The following section demonstrates how this compares to the Android application life cycle.Android Application Life CycleThe Android application life cycle is unique in that the system controls much of the life cycle of the application. All Android applications, or Activities, are run within their own process. All of the running processes are watched by Android and, depending on how the activity is running (this is, a foreground activity, background activity, and so forth), Android may choose to end the activity to reclaim needed resources.NOTEWhen deciding whether an activity should be shut down, Android takes into account several factors, such as user input, memory usage, and processing time.Some of the specific methods called during the life cycle of an android activity are● onCreate● onStart● Process-specific events (for example: launching activities or accessing a database)● onStop● onDes troyFollowing the same logic as other application life cycles, an Android application is created, the processes are started, events are fired, processes are stopped, and the application is destroyed. Though there are a few differences, many application developers should be comfortable with the steps in the life cycle.文献出处:DiMarzio,J.F.Android: A Programmer's Guide[M].McGraw-Hill Prof Med/Tech, 2008:41-50译文:运行API样本示例应用程序使用Eclipse,装载API示例应用现场作为一个Android项目。
安卓内置程序中英对照

首先需要root文件管理器,其次手机需要取得root权限,有root权限后,直接用文件管理进入/system /app 里删除对应的.apk。
*Accountprovider账号管理器ApkManager.apk APK安装器(即N多安装器)advancedsettings.apk高级设置AlarmClock闹钟AndroidSyncService系统同步服务AndroidUI索尼爱立信X10UI界面程序appinstaller.apk app安装器*ApplicationsProvider程序管理器AutoSettingDispatcher自动设置修补bootinfo启动信息Bluetooth.apk蓝牙(删了就没有蓝牙了)Browser自带浏览器Bugreport.apk Bug报告btoppservice蓝牙设置服务Calculator系统自带计算器Calendar系统自带日历程序CalendarProvider系统自带日历管理器*Camera系统自带相机CapabilitySetupReceiver接收器安装能力*CertInstaller.apk证书服务CdfInfoAccessor CDF信息访问器*Contacts联系人储存CredMgrService CredMgr服务*DefaultContainerService.apk默认通讯录服务DeskClock.apk自带闹钟(用第三方闹钟的可删)DigitalClock数字时钟*DownloadProvider下载管理器*DrmProvider DRM信息管理器SPManager.apk DSP音频管理(兴哥集成在设置里面,我不太使用这个,删了EMAIL伊妹儿。
Emeual(干什么用的我毫不知情)EnhancedGooglesearchProvider增强谷歌搜索管理器Fcebook非死不可FaceRecognition脸部识别程序(MS里面看照片的时候可以关联联系人)filemanager.apk文件管理FileCopier文件复制器Fota FOTA解决方案Generic-app-Installer全球版的APK安装器GlobalSearch全球搜索Gmail谷歌MAILGmailProvider GMAIL管理器Gallery3D.apk 3D浏览器(嫌弃它速度慢的,可删)GenieWidget.apk天气与新闻(我自己不用他看新闻,删了)GoogleApps谷歌程序googlebackuptransport.apkgooglecheckin.apkgooglecheckinhelper.apkGoogleFeedback.apk***(据说删除后开机会提示googlefeedback.apk,不过我删了没什么副作用)googlepartnersrtup.apk Google助手(删了没感觉有特殊)GoogleCalendarSyncAdapter.apk存储日历信息(删了没感觉有特殊)GoogleContactsSyncAdapter.apk存储联系人信息(怕影响到联系人未删,但兴哥精简版已经删了)GoogleCheckin谷歌签入程序GoogleContactsProvider谷歌联系人管理器GooglePartnerSetup谷歌好友设置GoogleSearch谷歌搜索GoogleQuickSearchBox.apk谷歌搜索(删了影响到桌面的搜索插件)GoogleServicesFramework.apk同步支持服务(删了不能同步联系人,不能登录google)GoogleSettingProvider谷歌设置管理器GoogleSubscribedFeedsProvider谷歌同步管理器GooglePinyinIME.apk Google拼音(用其他输入法的可删)gtalkservice GTALK服务HTMLViewer HTM查看器hidialer.apk 智能拨号himarket.apk 安卓市场kickback.apk辅助功能LearningClientLauncher2.apk 2.2原生桌面(用ADW和PRO的可删,删了以后第三方桌面要在开机以后从电脑安装,91,豌豆助手都可)LiveWallpapersPicker.apk 动态壁纸(可删,反正G2跑起来不怎么样)im.apk即使通讯组件包含MSN、yahoo通implugin.apkImProvider gtalk管理器Launcher主页面程序MAPS谷歌地图MarketUpdater电子市场更新程序*MediaProvider媒体管理器Mediascape大名鼎鼎的MediascapeMediascapePluginManager Media插件管理器MediaUploader媒体更新器Metadatacleanup元数据清除器MMS短信和彩信程序Moixer 烦人的moixer程序NUSIC原生音乐播放器nDuoaDialer.apk N多拨号(可删,自带的就可以了)nDuoaMarket.apk N多市场(可删,电子市场对我够了)nDuoaSettings.apk N多设置组件1(最好不要删,很不错的高级设置,兴哥集成在了设置里面)nDuoaSettingsAddon.apk N多设置组件2(最好不要删,很不错的高级设置)nDuoaSettingsHelper.apk N多设置组件3(最好不要删,很不错的高级设置)NetworkLocation纵横程序,显示地点officesuite office套件,可看PDFOneTimeInitializer.apk***(不明物体,删了没什么副作用)*PackgeInstaller APK安装器PcCompanionInstaller PcCompanion的安装程序,在设置>应用程序>里面就有勾选的选项*Phone电话程序Phonebook电话簿PhoneGuard.apk拨号卫士(可删,类似来电通等的)PicoTts语音程序Playnowarena PLAY NOW程序Playnowarena_updater PLAY NOW的更新程序PNPWizard PNP设置向导PrisonBreak.apk越狱(翻qiang用的)Protips.apk***(不明物体,删了无副作用)*QuickMgr.apk一键设置(长按menu的后弹出的那个,不要删,删了以后长安menu会FC)Readsdcard TF卡的系统读取程序se-support-rachael索尼爱立信的帮助程序SemcCameraApplication SE照相机增强程序(给自带的照相机加入各种模式)SemcIme系统自带输入法SemcSetupWiazard索尼爱立信设置向导SEMCTouchPalChinese索尼爱立信中文触摸输入法SEMCTouchPalKrea索尼爱立信韩语触摸输入法ServiceMenu服务菜单*Setting设置程序*SettingProvider设置管理器(储存手机设置里的一些设定)*SetupWizard第一次开机的开机向导SnsContactImageCacheProvider SNS联系人头像缓存管理器SMSPopup.apk短信泡泡(就是短信来时弹出的那个,其实就是个弹出框架,可用chomp 替换)soundback.apk辅助功能(可删)SoundRecorder录音机STK SIM卡工具Street谷歌地图的街景模式*superuser.apk超级用户systemupdater.apk系统升级TALK gtalk主体程序(可删,删了没有电子市场上)*TelephonyProvider电话管理器Timescape大名鼎鼎的TimesacpeTimescapePluginManager Timescape插件管理器TimescapeProivder Timescape管理器TimesacpeTheme****各种颜色的Timescape主题TrackID有名的TrackIDTerm.apk超级终端(可删,不过不建议,可以用来刷recovery)TtsService语音输入服务Updater.apk在线升级(可删)UserDictionaryProvider用户字典管理器(就是系统自带输入法的用户自定义词组管理器)Vending电子市场VoiceDialer语音拨号程序VoiceSearch语音搜索程序VpnService虚拟专用网服务WebMediaProvider网页媒体管理器Wiper擦除数据程序(恢复出厂设置用的)YouTube大名鼎鼎的Youtube客户端删除不必要的程序,可以增加手机内存顶帖子是为了让更多的朋友看到,好东西要分享!谢谢!注意:带*的千万不要删!!!切记!!!。
Android开发指南设计中文版
Android开发指南中文版‐应用程序框架Android Developers本文是对Android SDK1.5版的英文开发资料Android Development Guide一文应用程序框架部分的翻译,覆盖了Android应用开发所有主要的概念。
部分内容整理自网络。
本文仅用于技术学习,请勿用于商业用途。
目录应用程序基础ApplicationFundamentals (4)关键类............................................................................ (4)应用程序组件............................................................................ (5)激活组件:intent........................................................................ (7)关闭组件............................................................................ (7)manifest文件............................................................................ (8)Intent过滤器............................................................................ (8)Activity和任务............................................................................ (10)Affinity(吸引力)和新任务 (11)加载模式............................................................................ (12)清理堆栈............................................................................ (13)启动任务............................................................................ (14)进程和线程............................................................................ (14)进程............................................................................ (15)线程............................................................................ (15)远程过程调用............................................................................ (15)线程安全方法............................................................................ (16)组件生命周期............................................................................ (17)Activity生命周期............................................................................ (17)调用父类............................................................................ (18)服务生命周期............................................................................ (21)广播接收器生命周期............................................................................ (22)进程与生命周期............................................................................ (22)用户界面User Interface..................................................................... (24)视图层次View Hierarchy..................................................................... (24)布局Layout........................................................................ (25)部件Widgets....................................................................... (26)用户界面事件UI Events........................................................................ (26)菜单Menus......................................................................... (26)高级话题Advanced Topics........................................................................ (27)适配器Adapter....................................................................... (27)风格与主题Styles and Themes (27)资源和资产Resources and Assets (28)资源引用Resource Reference.....................................................................43国际化和本地化Internationalization andLocalization (43)意图和意图过滤器Intents and IntentFilters (43)意图过滤器Intent filters....................................................................... (47)通常情况Common cases..........................................................................51使用意图匹配Using intentmatching (52)数据存储Data Storage....................................................................... (52)概览Storagequickview..................................................................... (52)系统偏好:快速,轻量级存储 (52)文件:存储到设备内部或可移动闪存 (52)数据库:任意的结构化存储 (52)支持基于网络的存储............................................................................ (52)系统偏好Preferences................................................................... (53)文件Files......................................................................... (54)数据库Databases..................................................................... (54)网络Network....................................................................... (55)内容提供器Content Providers..................................................................... (55)内容提供器的基础知识Content ProviderBasics (55)查询一个内容提供器Querying a ContentProvider (57)修改数据Modifying Data.......................................................................... (61)创建一个内容提供器Creating a ContentProvider (64)Content URI 总结............................................................................ (67)清单文件The AndroidManifest.xmlFile (68)清单文件结构Structure of the ManifestFile (68)文件约定File Conventions................................................................... (70)文件特性File Features...................................................................... (73)应用程序基础Application Fundamentals关键类1. Activity2. Service3. BroadcastReceiver4. ContentProvider5. IntentAndroid应用程序使用Java做为开发语言。
外文翻译--Android起航

外文原文Beginning AndroidMark L. Murphy writeUsing XML-Based LayoutsW hile it is technically possible to create and attach widgets to our activity purely through Java code, the way we did in Chapter 4, the more common approach is to use an XML-based layout file. Dynamic instantiation of widgets is reserved for more complicated scenarios, where the widgets are not known at compile-time (e g., populating a column of radio buttons based on data retrieved off the Internet).With that in mind, it’s time to brea k out the XML and learn how to lay out Android activities that way.What Is an XML-Based Layout?As the name suggests, an XML-based layout is a specification of widgets’ relationships to each other—and to their containers (more on this in Chapter 7)—encoded in XML format. Specifically, Android considers XML-based layouts to be resources, and as such layout files are stored in the res/layout directory inside your Android project.Each XML file contains a tree of elements specifying a layout of widgets and their containers that make up one view hierarchy. The attributes of the XML elements are properties, describing how a widget should look or how a container should behave. For example, if a Button element has an attribute value of android:textStyle = "bold", that means that the text appearing on the face of the button should be rendered in a boldface font style.Android’s SDK ships with a tool (aapt) which uses the layouts. This tool should be automatically invoked by your Android tool chain (e.g., Eclips e, Ant’s build.xml). Of particular importance to you as a developer is that aapt generates the R.java source file within your project, allowing you to access layouts and widgets within those layouts directly from your Java code.Why Use XML-Based Layouts?Most everything you do using XML layout files can be achieved through Java code. For example, you could use setTypeface() to have a button render its text in bold, instead of using a property in an XML layout. Since XML layouts are yet another file for you to keep track of, we need good reasons for using such files.Perhaps the biggest reason is to assist in the creation of tools for view definition, such as a GUI builder in an IDE like Eclipse or a dedicated Android GUI designer like DroidDraw1. Such GUI builders could, in principle, generate Java code instead of XML. The challenge is re-reading the UI definition to support edits—that is far simpler if the data is in a structured format like XML than in a programming language. Moreover, keeping generated XML definitions separated from hand-written Java code makes it less likely that somebody’s custom-crafted source will get clobbered by accident when the generated bits get re-generated. XML forms a nice middle ground between something that is easy for tool-writers to use and easy for programmers to work with by hand as needed.Also, XML as a GUI definition format is becoming more commonplace. Microsoft’s XAML2, Adobe’s Flex3, and Mozilla’s XUL4all take a similar approach to that of Android: put layout details in an XML file and put programming smarts in source files (e.g., JavaScript for XUL). Many less-well-known GUI frameworks, such as ZK5, also use XML for view definition. While “following the herd” is not necessarily the best policy, it does have the advantage of helping to ease the transition into Android from any other XML-centered view description language.OK, So What Does It Look Like?Here is the Button from the previous chapter’s sample application, converted into an XMLlayout file, found in the Layouts/NowRedux sample project. This code sample along with all others in this chapter can be found in the Source Code area of .<?xml version="1.0" encoding="utf-8"?><Button xmlns:android="/apk/res/android"android:id="@+id/button"android:text=""android:layout_width="fill_parent"android:layout_height="fill_parent"/>The class name of the widget—Button—forms the name of the XML element. Since Button is an Android-supplied widget, we can just use the bare class name. If you create your own widgets as subclasses of android.view.View, you would need to provide a full package declara tion as well.The root element needs to declare the Android XML namespace:xmlns:android="/apk/res/android"All other elements will be children of the root and will inherit that namespace declaration.Because we want to reference this button from our Java code, we need to give it an identifier via the android:id attribute. We will cover this concept in greater detail later in this chapter.The remaining attributes are properties of this Button instance:• android:text indicates the initial text to be displayed on the button face (in this case, an empty string)• android:layout_width and andr oid:layout_height tell Android to have the button’swidth and height fill the “parent”, in this case the entire screen—these attributes will be covered in greater detail in Chapter 7.Since this single widget is the only content in our activity, we only need this single element. Complex UIs will require a whole tree of elements, representing the widgets and containers that control their positioning. All the remaining chapters of this book will use the XML layout form whenever practical, so there are dozens of other examples of more complex layouts for you to peruse from Chapter 7 onward.What’s with the @ Signs?Many widgets and containers only need to appear in the XML layout fileand do not need to be referenced in your Java code. For example, a static label (TextView) frequently only needs to be in the layout file to indicate where it should appear. These sorts of elements in the XML file do not need to have the android:id attribute to give them a name.Anything you do want to use in your Java source, though, needs an android:id.The convention is to use @+id/... as the id value, where the ... represents your locallyunique name for the widget in question. In the XML layout example in the preceding section, @+id/button is the identifier for the Button widget.Android provides a few special android:id values, of the form @android:id/.... We will see some of these in various chapters of this book, such as Chapters 8 and 10.We Attach These to the Java How?Given that you have painstakingly set up the widgets and containers in an XML layout filenamed main.xml stored in res/layout, all you need is one statement in your activity’s onCreate() callback to use that layout:setContentView(yout.main);This is the same setContentView() we used earlier, passing it an instance of a View subclass (in that case, a Button). The Android-built view, constructed from our layout, is accessed from that code-generated R class. All of the layouts are accessible under yout, keyed by the base name of the layout file—main.xml results in yout.main.To access our identified widgets, use findViewById(), passing in the numeric identifier of the widget in question. That numeric identifier was generated by Android in the R class asR.id.something (where something is the specific widget you are seeking). Those widgets are simply subclasses of View, just like the Button instance we created in Chapter 4.The Rest of the StoryIn the original Now demo, the button’s face would show the current time, which would reflect when the button was last pushed (or when the activity was first shown, if the button had not yet been pushed).Most of that logic still works, even in this revised demo (NowRedux). However, rather than instantiating the Button in our activity’s onCreate() c allback, we can reference the one from the XML layout:package youts;import android.app.Activity;import android.os.Bundle;import android.view.View;import android.widget.Button; import java.util.Date;public class NowRedux extends Activity implements View.OnClickListener { Button btn;@Overridepublic void onCreate(Bundle icicle) { super.onCreate(icicle);setContentView(yout.main);btn=(Button)findViewById(R.id.button);btn.setOnClickListener(this);upda teTime();}public void onClick(View view) { updateTime();}private void updateTime() {btn.setText(new Date().toString()); }}The first difference is that rather than setting the content view to be a view we created in Java code, we set it to reference the XML layout (setContentView(yout.main)). The R.java source file will be updated when we rebuild this project to include a reference to our layout file (stored as main.xml in our project’s res/layout directory).The other difference is that we need to get our hands on our Button instance, for which we use the findViewById() call. Since we identified our button as@+id/button, we can reference the button’s identifier as R.id.button. Now, with the Button instance in hand, we can set the callback and set the label as needed.As you can see in Figure 5-1, the results look the same as with the original Now demo.Figure 5-1. The NowRedux sample activityEmploying Basic WidgetsE very GUI toolkit has some basic widgets: fields, labels, buttons, etc. Android’s toolkit is no different in scope, and the basic widgets will provide a good introduction as to how widgets work in Android activities.Assigning LabelsThe simplest widget is the label, referred to in Android as a TextView. Like in most GUI toolkits, labels are bits of text not editable directly by users. Typically, they are used to identify adjacent widgets (e.g., a “Name:” label before a field where one fills in a name).In Java, you can create a label by creating a TextView instance. More commonly, though, you will create labels in XML layout files by adding a TextView element to the layout, with an android:text property to set the value of the label itself. If you need to swap labels based on certain criteria, such as internationalization, you may wish to use a resource reference in the XML instead, as will be described in Chapter 9. TextView has numerous other properties of relevance for labels, such as:• android:typeface to set the typeface to use for the label (e.g., monospace)• an droid:textStyle to indicate that the typeface should be made bold (bold), italic (italic),or bold and italic (bold_italic)• android:textColor to set the color of the label’s text, in RGB hex format (e.g., #FF0000 for red)For example, in the Basic/Label project, you will find the following layout file:<?xml version="1.0" encoding="utf-8"?><TextView xmlns:android=/apk/res/androidandroid:layout_width="fill_parent"android:layout_height="wrap_content"android:text="You were expecting something profound?" />As you can see in Figure 6-1, just that layout alone, with the stub Java source provided by Android’s project builder (e.g., activityCreator), gives youthe application.Figure 6-1. The LabelDemo sample applicationButton, Button, Who’s Got the Button?We’ve already seen the use of the Button widget in Chapters 4 and 5. As it turns out, Button is a subclass of TextView, so everything discussed in the preceding section in terms of formatting the face of the button still holds. Fleeting ImagesAndroid has two widgets to help you embed images in your activities: ImageView and ImageButton. As the names suggest, they are image-based analogues to TextView and Button, respectively.Each widget takes an android:src attribute (in an XML layout) to specify what picture to use. These usually reference a drawable resource, described ingreater detail in the chapter on resources. You can also set the image content based on a Uri from a content provider via setImageURI().ImageButton, a subclass of ImageView, mixes in the standard Button behaviors, for responding to clicks and whatnot.For example, take a peek at the main.xml layout from the Basic/ImageView sample project which is found along with all other code samples at :<?xml version="1.0" encoding="utf-8"?><ImageView xmlns:android=/apk/res/androidandroid:id="@+id/icon"android:layout_width="fill_parent"android:layout_height="fill_parent"android:adjustViewBounds="true"android:src="@drawable/molecule" />The result, just using the code-generated activity, is shown in Figure 6-2.Figure 6-2. The ImageViewDemo sample applicationFields of Green. Or Other Colors.Along with buttons and labels, fields are the third “anchor” of most GUI toolkits. In Android, they are implemented via the EditText widget, which is a subclass of the TextView used for labels.Along with the standard TextView properties (e.g., android:textStyle), EditText has many others that will be useful for you in constructing fields, including:• android:autoText, to control if the field should provide automatic spelling assistance• androi d:capitalize, to control if the field should automatically capitalize the first letter of entered text (e.g., first name, city)• android:digits, to configure the field to accept only certain digits• android:singleLine, to control if the field is for single-line input or multiple-line input (e.g., does <Enter> move you to the next widget or add a newline?)Beyond those, you can configure fields to use specialized input methods, such asandroid:numeric for numeric-only input, android:password for shrouded password input,and android:phoneNumber for entering in phone numbers. If you want to create your own input method scheme (e.g., postal codes, Social Security numbers), you need to create your own implementation of the InputMethod interface, then configure the field to use it via android: inputMethod.For example, from the Basic/Field project, here is an XML layout file showing an EditText:<?xml version="1.0" encoding="utf-8"?><EditTextxmlns:android=/apk/res/androidandroid:id="@+id/field"android:layout_width="fill_parent"android:layout_height="fill_parent"android:singleLine="false" />Note that android:singleLine is false, so users will be able to enter in several lines of text. For this project, the FieldDemo.java file populates the input field with some prose:package monsware.android.basic;import android.app.Activity;import android.os.Bundle;import android.widget.EditText;public class FieldDemo extends Activity { @Overridepublic void onCreate(Bundle icicle) { super.onCreate(icicle);setContentView(yout.main);EditText fld=(EditText)findViewById(R.id.field);fld.setText("Licensed under the Apache License, Version 2.0 " + "(the \"License\"); you may not use this file " + "except in compliance with the License. You may " + "obtain a copy of the License at " +"/licenses/LICENSE-2.0");}}The result, once built and installed into the emulator, is shown in Figure 6-3.Figure 6-3. The FieldDemo sample applicationNote Android’s emulator only allows one application in the launcher per unique Java package. Since all the demos in this chapter share the monsware.android.basic package, you will only see one of these demos in your emulator’s launcher at any one time.Another flavor of field is one that offers auto-completion, to help users supply a value without typing in the whole text. That is provided in Android as the AutoCompleteTextView widget and is discussed in Chapter 8.Just Another Box to CheckThe classic checkbox has two states: checked and unchecked. Clicking the checkbox toggles between those states to indicate a choice (e.g., “Add rush delivery to my order”). In Android, there is a CheckBox widget to meet this need. It has TextView as an ancestor, so you can use TextView properties likeandroid:textColor to format the widget. Within Java, you can invoke: • isChecked() to determine if the checkbox has been checked• setChecked() to fo rce the checkbox into a checked or unchecked state• toggle() to toggle the checkbox as if the user checked itAlso, you can register a listener object (in this case, an instance of OnCheckedChangeListener) to be notified when the state of the checkbox changes.For example, from the Basic/CheckBox project, here is a simple checkbox layout:<?xml version="1.0" encoding="utf-8"?><CheckBox xmlns:android="/apk/res/android"android:id="@+id/check"android:layout_width="wrap_content"android:layout_height="wrap_content"android:text="This checkbox is: unchecked" />The corresponding CheckBoxDemo.java retrieves and configures the behavior of the checkbox:public class CheckBoxDemo extends Activityimplements CompoundButton.OnCheckedChangeListener { CheckBox cb;@Overridepublic void onCreate(Bundle icicle) { super.onCreate(icicle);setContentView(yout.main);cb=(CheckBox)findViewById(R.id.check);cb.setOnCheckedChangeListener(this);}public void onCheckedChanged(CompoundButton buttonView,boolean isChecked) {if (isChecked) {cb.setText("This checkbox is: checked");}else {cb.setText("This checkbox is: unchecked");}}}Note that the activity serves as its own listener for checkbox state changes since it imple ments the OnCheckedChangeListener interface (via cb.setOnCheckedChangeListener(this)). The callback for the listener is onCheckedChanged(), which receives the checkbox whose state has changed and what the new state is. In this case, we update the text of the checkbox to reflect what the actual box contains.The result? Clicking the checkbox immediately updates its text, as you can see in Figures 6-4 and 6-5.Figure 6-4. The CheckBoxDemo sample application, with the checkbox uncheckedFigure 6-5. The same application, now with the checkbox checkedTurn the Radio UpAs with other implementations of radio buttons in other toolkits, Android’s radio buttons are two-state, like checkboxes, but can be grouped such that only one radio button in the group can be checked at any time.Like CheckBox, RadioButton inherits from CompoundButton, which in turn inherits fromTextView. Hence, all the standard TextView properties for font face, style, color, etc., are available for controlling the look of radio buttons. Similarly, you can call isChecked() on a RadioButton to see if it is selected, toggle() to select it, and so on, like you can with a CheckBox.Most times, you will want to put your RadioButton widgets inside of aRadioGroup. The RadioGroup indicates a set of radio buttons whose state is tied, meaning only one button out of the group can be selected at any time. If you assign an android:id to your RadioGroup in your XML layout, you can access the group from your Java code and invoke:• check() to c heck a specific radio button via its ID (e.g., group.check(R.id.radio1))• clearCheck() to clear all radio buttons, so none in the group are checked• getCheckedRadioButtonId() to get the ID of the currently-checked radio button (or -1 if none are checked)For example, from the Basic/RadioButton sample application, here is an XML layout showing a RadioGroup wrapping a set of RadioButton widgets: <?xml version="1.0" encoding="utf-8"?> <RadioGroupxmlns:android=/apk/res/androidandroid:orientation="vertical"android:layout_width="fill_parent"android:layout_height="fill_parent" ><RadioButton android:id="@+id/radio1"android:layout_width="wrap_content"android:layout_height="wrap_content"android:text="Rock" /><RadioButton android:id="@+id/radio2"android:layout_width="wrap_content"android:layout_height="wrap_content"android:text="Scissors" /><RadioButton android:id="@+id/radio3"android:layout_width="wrap_content"android:layout_height="wrap_content"android:text="Paper" /></RadioGroup>Figure 6-6 shows the result using the stock Android-generated Java forthe project and this layout.Figure 6-6. The RadioButtonDemo sample application Note that the radio button group is initially set to be completely unchecked at the outset. To pre-set one of the radio buttons to be checked, use either setChecked() on the RadioButton or check() on the RadioGroup from within your onCreate() callback in your activity.It’s Quite a ViewAll widgets, including the ones previously shown, extend View, and as such give all widgets an array of useful properties and methods beyond those already described.Useful PropertiesSome of the properties on View most likely to be used include:• Controls the focus sequence:• android:nextFocusDown• android:nextFocusLeft• android:nextFocusRight• android:nextFocusUp• android:visibility, which controls whether the widget is initially visible• android:background,which typically provides an RGB color value (e.g., #00FF00 for green) to serve as the background for the widgetUseful MethodsYou can toggle whether or not a widget is enabled via setEnabled() and see if it is enabled via isEnabled(). One common use pattern for this is to disable some widgets based on a CheckBox or RadioButton selection.You can give a widget focus via requestFocus() and see if it is focused via isFocused(). You might use this in concert with disabling widgets as previously mentioned, to ensure the proper widget has the focus once your disabling operation is complete.To help navigate the tree of widgets and containers that make up an activity’s overall view, you can use:• getParent() to find the parent widget or container• findVi ewById() to find a child widget with a certain ID• getRootView() to get the root of the tree (e.g., what you provided to the activity via setContentView())中文译文Android起航使用XML进行布局虽然纯粹通过Java代码在activity上创建和添加部件,在技术上是可行的,我们在第4章中做的一样,更常见的方法是使用一种基于XML的布局文件。
有关android技术英文文献翻译(同名6369)
Application FundamentalsAndroid applications are written in the Java programming language. The compiled Java code —along with any data and resource files required by the application —is bundled by the aapt tool into an Android package, an archive by an .apk suffix. This the vehicle for distributing the application and installing it on mobile devices; it's the download to their devices. All the code in a single .apk considered to be one application.Android应用基础:Android应用程序是通过java语言开发的,通过绑定一些应用所需要的东西,例如:编译的Java代码,加上数据和一些资源文件,使用一个apt的工具将所有的东西封装成一个android包,这个文件的文件后缀是.apk。
这个文件是分发并安装应用程序到移动设备的载体,是用户获得该应用程序所需要的下载的文件。
Application Components A central feature of Android is that one application can make use of elements of other applications (provided those applications permit it). For example, if your application needs to display a scrolling list of images and another application has developed a suitable scroller and made it available to others, you can call upon that scroller to do the work, rather than develop your own. Your application doesn't incorporate the code of the other application or link to it. Rather, it simply starts up that piece of the other application when the need arises. For this to work, the system must be able to start an application process when any part of it is needed, and instantiate the Java objects for that part. Therefore, unlike applications on most other systems, Android applications don't have a single entry point for everything in the application (no main() function, for example). Rather, they have essential components that the system can instantiate and run as needed. There are four types of components:Activities An activity presents a visual user interface for one focused endeavor the user can undertake. For example, an activity might present a list of menu items users can choose from or it might display photographs along with their captions. A text messaging application might have one activity that shows a list of contacts to send messages to, a second activity to write the message to the chosen contact, and other activities to review old messages or change settings. Though they work together to form a cohesive user interface, each activity isindependent of the others. Each one is implemented as a subclass of the Activity base class. An application might consist of just one activity or, like the text messaging application just mentioned, it may contain several. What the activities are, and how many there are depends, of course, on the application and its design. Typically, one of the activities is marked as the first one that should be presented to the user when the application is launched. Moving from one activity to another is accomplished by having the current activity start the next one. Android有四大应用程序组件Android的一个很重要的中心特征就是一个应用程序能充分利用其他的应用程序的一些组件(前提是被允许的)例如:如果的当前开发的应用需要一个滚动的列表去展示相片并且当时其他的程序已经开发了一个合适的滚动列表并且对其他人可用,你可以调用这个滚动的列表来完成你的工作而不是开发你自己的。
Android基础常用英语汇总
Android基础常用英语汇总Day01单词activity[ækˈtɪvəti] 活动;活跃framework[ˈfreɪmwɜ:k] 框架;构架;(体系的)结构;机构,组织driver[ˈdraɪvə(r)] 驱动器,驱动程序virtual[ˈvɜ:tʃuəl] 虚拟的kernel[ˈkɜ:nl] 核心,内核,要点kernelplatform[ˈplætfɔ:m] 平台,纲领platformpreferences['prefərənsɪs] 参数,偏好launcher[ˈlɔ:ntʃə(r)] 发射器,启动器emulator [ˈemjul eɪtə(r)] 模拟器,仿真器,仿真程序bundl e[ˈbʌndl] 捆,一批generate[ˈdʒenəreɪt] 生成,形成,造成asset[ˈæset]资产,财产manifest[ˈmænifest]清单,货单intent[ɪnˈtent]意图,目的relative[ˈrelətɪv] 相对的,相关的linear[ˈlɪniə(r)] 直线的,线形的absolute[ˈæbsəlu:t] 绝对的,完全的orientation[ˌɔ:riənˈteɪʃn] 方向,朝向,取向horizontal[ˌhɒrɪˈzɒntl] 水平的,地平线的vertical[ˈvɜ:tɪkl] 垂直的,竖立的align [əˈlaɪn] 排列,使成一线density[ˈdensəti] 密度wrap[ræp] 包裹,缠绕ind ependent[ˌɪndɪˈpendənt] 自主的,独立的,不相关连的layout[ˈl eɪaʊt] 布局,安排,设计internal[ɪnˈtɜ:nl] 内部的,国内的storage[ˈstɔ:rɪdʒ] 存储,贮存Day02 单词l og[lɔ:g] 日志,记录filter[ˈfɪltə(r)] 过滤器,滤波器verbose[vɜ:ˈbəʊs] 冗长的,啰唆的verbose external[ɪkˈstɜ:nl] 外面的,外部的externaleditor[ˈedɪtə(r) 编辑程序,编辑器editor serializer['sɪərɪəlaɪzər] 可序列化的,序列化器serializer parser['pɑ:sə]解析器,解剖器environment[ɪnˈvaɪrənmənt]环境,(运行)环境component[kəmˈpəʊnənt] 成分,组建compound[ˈkɒmpaʊnd] 复合物,组合物specify[ˈspesɪfaɪ] 指定,定义declare[dɪˈkleə(r)] 声明,宣布mount[maʊnt] 挂载,攀登Day03 单词cursor[ˈkɜ:sə(r)] 光标,游标journal[ˈdʒɜ:nl] 日报,日志primary[ˈpraɪməri] 首要的,主要的alter[ˈɔ:ltə(r)] 改变,修改mod el[ˈmɒdl] 模型,模式adapter[ə'dæptə] 适配器convert[kənˈvɜ:t] 转换,转变inflate[ɪnˈfl eɪt] 充气,打气dial og['daɪəlɒg] 会话,对话alert[əˈlɜ:rt] 警告,警报positive[ˈpɒzətɪv] 积极的,确实的,肯定的negative[ˈnɛɡətɪv] 消极的,否定的transaction[trænˈzækʃn] 交易,业务,事务styl e[staɪl] 样式,风格theme[θi:m]主题,主旋律Day04 单词connection[kəˈnekʃn] 连接,联系handl er[ˈhændlə(r)] 处理者,管理者queue[kju:] 队列l ooper['lu:pə] 轮询器obtain[əbˈtein]获得,得到bitmap[ˈbɪtmæp] 位图agent[ˈedʒənt] 代理,代理人notation[noʊˈteɪʃn] 记号,标记法visible [ˈvɪzəbəl] 显示的,可见的gone[gɒn] 过去的,消失的singl e[ˈsɪŋgl]唯一的,单一的smart[smɑ:t]聪明的,敏捷的Day05 单词property[ˈprɒpəti] 属性,特性asynchronous[eɪˈsɪŋkrənəs] 异步的failure[ˈfeɪljə(r)] 失败的,不及格的random[ˈrændəm] 随机的block[blɒk] 区块儿total[ˈtəʊtl] 总共,总计execute[ˈeksɪkju:t] 执行entity[ˈentəti] 实体pair[peə(r)] 一副,一对range[reɪndʒ] 范围,射程manner[ˈmænə(r)] 方式current[ˈkʌrənt] 当前的,现在的Day06 单词filter[ˈfɪltə(r)] 过滤器,滤波器category[ˈkætəgəri] 类型,种类feature[ˈfi:tʃə(r)] 特征,特点extra[ˈekstrə] 额外的cycle[ˈsaɪkl] 循环,周期pause[pɔ:z] 暂停,中止resume[rɪ'zju:m] 继续destroy[dɪˈstrɔɪ] 摧毁,销毁entire[ɪnˈtaɪə(r)] 完整的,全部的foreground[ˈfɔ:graʊnd] 前台,前景navigate[ˈnævɪgeɪt] 航行,驾驶priority[praɪˈɒrəti] 优先级stack[stæk] 栈instance[ˈɪnstəns] 示例Day07 单词broadcast[ˈbrɔ:dkɑ:st]广播,电台receiver[rɪˈsi:və(r)] 接收器,接受者boot[bu:t] 引导,启动originate[əˈrɪdʒɪneɪt] 起源于,来自abort[əˈbɔ:t] 终止,使流产exclude[ɪkˈsklu:d]不包括,排除ordered[ˈɔ:dəd] 有顺序的,规则的register[ˈredʒɪstə(r)] 登记,注册service[ˈsɜ:vɪs] 服务,服侍foreground[ˈfɔ:graʊnd] 前景,前台process[ˈprəʊses] 处理,进程reset[ˌri:ˈset]重置rel ease[rɪˈli:s] 释放,发布prepare[prɪˈpeə(r)] 准备;预备bind[baɪnd] 绑定,捆绑remote[rɪˈməʊt] 远程的definition[ˌdefɪˈnɪʃn] 定义,规定idle[ˈaɪdl] 空闲ringing[ˈrɪŋɪŋ]响铃的recorder[rɪˈkɔ:də(r)] 录音机audio[ˈɔ:diəʊ] 音频的zygote[ˈzaɪgəʊt] 受精卵,结合子capture[ˈkæptʃə(r)] 俘获,夺取modify[ˈmɒdɪfaɪ] 修改Day09 单词provider[prəˈvaɪdə(r)] 提供者,供应者authority[ɔ:ˈθɒrəti] 权威match[mætʃ] 匹配,等价于resolver[rɪ'zɒlvə] 解析者,解决问题的人notification[ˌnəʊtɪfɪˈkeɪʃn] 通知,公布pending[ˈpendɪŋ]待定的,即将发生的identifier[aɪˈdentɪfaɪə(r)] 识别符,编号observer[əbˈzɜ:və(r)] 观察者export[ˈekspɔ:t] 输出behavior[bɪ'heɪvjə] 行为,态度explicitly[ɪk'splɪsɪtlɪ] 明确的multimedia[ˌmʌltiˈmi:diə] 多媒体bitmap[ˈbɪtmæp] 位图bounds[baʊndz] 范围options[ˈɒpʃn] 选项display[dɪˈspl eɪ] 显示器,屏幕ratio[ˈreɪʃiəʊ] 比例canvas[ˈkænvəs] 油画,画布paint[peɪnt] 颜料,画笔matrix[ˈmeɪtrɪks] 矩阵scale[skeɪl] 规模,比例translate[trænsˈl eɪt] 转化,移动rotate[rəʊˈteɪt] 旋转pixel[ˈpɪksl] 像素scan[skæn] 扫描,浏览raw[rɔ:] 未加工的surface[ˈsɜ:fɪs] 表面,外观holder[ˈhəʊl də(r)] 持有者sensor[ˈsensə(r)] 传感器accel erometer[əkˌseləˈrɒmɪtə(r)]加速度proximity[prɒkˈsɪməti] 亲近,接近accuracy[ˈækjərəsi] 精确性,准确性Day11 单词fragment[ˈfrægmənt] 片段,碎片replace[rɪˈpl eɪs] 替换attach[əˈtætʃ] 附上,贴上detach[dɪˈtætʃ] 分开,分离repeat[rɪˈpi:t] 重复reverse[rɪˈvɜ:s] 反转,倒退infinite[ˈɪnfɪnət] 无限的,无穷的pivot[ˈpɪvət] 中心点,轴心点sequentially[sɪ'kwenʃəlɪ] 继续的interpolater['ɪntɜ:pəl eɪtər] 插入器,插值器。
Android系统应用程序中英文对照表

htccalendarwidgetsHTC日历桌面小插件
HTCCamera照相机(没人想把它删了吧)
HtcClockWidget闹钟小插件
HtcCompressViewer
HtcContacts联系人
CertInstaller证书安装器(貌似不能删)
CheckinProvider签入服务
Clicker键盘校准(貌似是)
com.htc.FMRadioWidget桌面收音机插件(插件类都可以删,自己决定)
com.htc.FriendStreamWidget好友流小插件(可删)
com.htc.MusicWidget桌面音乐插件
HtcScreenTimeoutWidget.apk调节屏幕延时插件
HtcSettingsProvider.apk HTC设置
htcsettingwidgets.apk HTC设置小插件,WIFI、移动网络、GPS、飞行模式、蓝牙的开关(好用)
HTCSetupWizard.apk HTC安装向导
GoogleFeedback谷歌反馈(反馈啥,直接干掉)
GooglePartnerSetup Google助手(直接干掉)
GoogleQuickSearchBox谷歌搜索(删了影响到桌面的搜索插件,自启动,干掉他)
GoogleServicesFramework谷歌同步支持服务框架(删了不能同步联系人,不能登录google,我留着呢)
HtcPushMedia.apk
pk
HtcRecommendsWidget.apk
HtcRingtoneTrimmer.apk铃声剪辑(无视,删了)
Android文档-开发者指南-第一部分:入门-中英文对照版-pdf
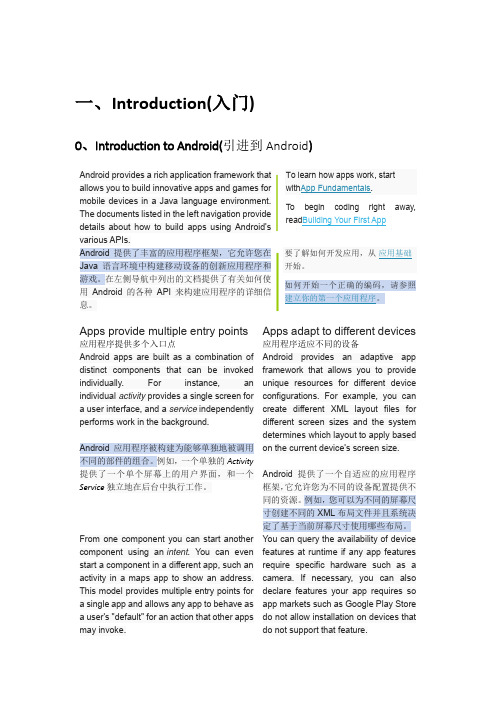
一、Introduction(入门)0、Introduction to Android(引进到Android)Android provides a rich application framework that allows you to build innovative apps and games for mobile devices in a Java language environment. The documents listed in the left navigation provide details about how to build apps using Android's various APIs.To learn how apps work, startwith App Fundamentals.To begin coding right away, read Building Your First AppAndroid提供了丰富的应用程序框架,它允许您在Java语言环境中构建移动设备的创新应用程序和游戏。
在左侧导航中列出的文档提供了有关如何使用Android的各种API来构建应用程序的详细信息。
要了解如何开发应用,从应用基础开始。
如何开始一个正确的编码,请参照建立你的第一个应用程序。
Apps provide multiple entry points 应用程序提供多个入口点Apps adapt to different devices 应用程序适应不同的设备Android apps are built as a combination of distinct components that can be invoked individually. For instance, an individual activity provides a single screen for a user interface, and a service independently performs work in the background.Android应用程序被构建为能够单独地被调用不同的部件的组合。
- 1、下载文档前请自行甄别文档内容的完整性,平台不提供额外的编辑、内容补充、找答案等附加服务。
- 2、"仅部分预览"的文档,不可在线预览部分如存在完整性等问题,可反馈申请退款(可完整预览的文档不适用该条件!)。
- 3、如文档侵犯您的权益,请联系客服反馈,我们会尽快为您处理(人工客服工作时间:9:00-18:30)。
英文原文及译文Application FundamentalsAndroid applications are written in the Java programming language. The compiled Java code —along with any data and resource files required by the application —is bundled by the aapt tool into an Android package, an archive file marked by an .apk suffix. This file is the vehicle for distributing the application and installing it on mobile devices; it's the file users download to their devices. All the code in a single .apk file is considered to be one application.In many ways, each Android application lives in its own world:1. By default, every application runs in its own Linux process. Android starts the process when any of the application's code needs to be executed, and shuts down the process when it's no longer needed and system resources are required by other applications.2. Each process has its own virtual machine (VM), so application code runs in isolation from the code of all other applications.3. By default, each application is assigned a unique Linux user ID. Permissions are set so that the application's files are visible only to that user and only to the application itself — although there are ways to export them to other applications as well.It's possible to arrange for two applications to share the same user ID, in which case they will be able to see each other's files. To conserve system resources, applications with the same ID can also arrange to run in the same Linux process, sharing the same VM.Application ComponentsA central feature of Android is that one application can make use of elements of other applications (provided those applications permit it). For example, if your application needs to display a scrolling list of images and another application has developed a suitable scroller and made it available to others, you can call upon that scroller to do the work, rather than develop your own. Your application doesn't incorporate the code of the other application or link to it. Rather, it simply starts up that piece of the other application when the need arises.For this to work, the system must be able to start an application process when any part of it is needed, and instantiate the Java objects for that part. Therefore, unlike applications on most other systems, Android applications don't have a single entry point for everything in the application (no main() function, for example). Rather, they have essential components that the system can instantiate and run as needed. There are four types of components:ActivitiesAn activity presents a visual user interface for one focused endeavor the user can undertake. For example, an activity might present a list of menu items users can choose from or it might display photographs along with their captions. A text messaging application might have one activity that shows a list of contacts to send messages to, a second activity to write the message to the chosen contact, and other activities to review old messages or change settings. Though they work together to form a cohesive user interface, each activity is independent of the others. Each one is implemented as a subclass of the Activity base class.An application might consist of just one activity or, like the text messaging application just mentioned, it may contain several. What the activities are, and how many there are depends, of course, on the application and its design. Typically, one of the activities is marked as the first one that should be presented to the user when the application is launched. Moving from one activity to another is accomplished by having the current activity start the next one.Each activity is given a default window to draw in. Typically, the window fills the screen, but it might be smaller than the screen and float on top of other windows. An activity can also make use of additional windows — for example, a pop-up dialog that calls for a user response in the midst of the activity, or a window that presents users with vital information when they select a particular item on-screen.The visual content of the window is provided by a hierarchy of views — objects derived from the base View class. Each view controls a particular rectangular space within the window. Parent views contain and organize the layout of their children. Leaf views (those at the bottom of the hierarchy) draw in the rectangles they control and respond to user actions directed at that space. Thus, views are where the activity's interaction with the user takes place.For example, a view might display a small image and initiate an action when the user taps that image. Android has a number of ready-made views that you can use —including buttons, text fields, scroll bars, menu items, check boxes, and more.A view hierarchy is placed within an activity's window by the Activity.setContentView() method. The content view is the View object at the root of the hierarchy. (See the separate User Interface document for more information on views and the hierarchy.)ServicesA service doesn't have a visual user interface, but rather runs in the background for an indefinite period of time. For example, a service might play background music as the user attends to other matters, or it might fetch data over the network or calculate something and provide the result to activities that need it. Each service extends the Service base class.A prime example is a media player playing songs from a play list. The player application would probably have one or more activities that allow the user to choose songs and start playing them. However, the music playback itself would not be handled by an activity because users will expect the music to keep playing even after they leave the player and begin something different. To keep the music going, the media player activity could start a service to run in the background. The system would then keep the music playback service running even after the activity that started it leaves the screen.It's possible to connect to (bind to) an ongoing service (and start the service if it's not already running). While connected, you can communicate with the service through an interface that the service exposes. For the music service, this interface might allow users to pause, rewind, stop, and restart the playback.Like activities and the other components, services run in the main thread of the application process. So that they won't block other components or the user interface, they often spawn another thread for time-consuming tasks (like music playback). See Processes and Threads, later.Broadcast receiversA broadcast receiver is a component that does nothing but receive and react to broadcast announcements. Many broadcasts originate in system code — for example, announcements that the timezone has changed, that the battery is low, that a picture has been taken, or that the user changed a language preference. Applications can also initiate broadcasts — for example, to let other applications know that some data has been downloaded to the device and is available for them to use.An application can have any number of broadcast receivers to respond to any announcements it considers important. All receivers extend the BroadcastReceiver base class.Broadcast receivers do not display a user interface. However, they may start an activity in response to the information they receive, or they may use the NotificationManager to alert the user. Notifications can get the user's attention in various ways — flashing the backlight, vibrating the device, playing a sound, and so on. They typically place a persistent icon in the status bar, which users can open to get the message.Content providersA content provider makes a specific set of the application's data available to other applications. The data can be stored in the file system, in an SQLite database, or in any other manner that makes sense. The content provider extends the ContentProvider base class to implement a standard set of methods that enable other applications to retrieve and store data of the type it controls. However, applications donot call these methods directly. Rather they use a ContentResolver object and call its methods instead. A ContentResolver can talk to any content provider; it cooperates with the provider to manage any interprocess communication that's involved.See the separate Content Providers document for more information on using content providers.Whenever there's a request that should be handled by a particular component, Android makes sure that the application process of the component is running, starting it if necessary, and that an appropriate instance of the component is available, creating the instance if necessary.Activating components: intentsContent providers are activated when they're targeted by a request from a ContentResolver. The other three components —activities, services, and broadcast receivers — are activated by asynchronous messages called intents. An intent is an Intent object that holds the content of the message. For activities and services, it names the action being requested and specifies the URI of the data to act on, among other things. For example, it might convey a request for an activity to present an image to the user or let the user edit some text. For broadcast receivers, the Intent object names the action being announced. For example, it might announce to interested parties that the camera button has been pressed.There are separate methods for activating each type of component:1. An activity is launched (or given something new to do) by passing an Intent object toContext.startActivity() or Activity.startActivityForResult(). The responding activity can look at the initial intent that caused it to be launched by calling its getIntent() method. Android calls the activity's onNewIntent() method to pass it any subsequent intents. One activity often starts the next one. If it expects a result back from the activity it's starting, it calls startActivityForResult() instead of startActivity(). For example, if it starts an activity that lets the user pick a photo, it might expect to be returned the chosen photo. The result is returned in an Intent object that's passed to the calling activity's onActivityResult() method.2. A service is started (or new instructions are given to an ongoing service) by passing an Intent object to Context.startService(). Android calls the service's onStart() method and passes it the Intent object. Similarly, an intent can be passed to Context.bindService() to establish an ongoing connection between the calling component and a target service. The service receives the Intent object in an onBind() call. (If the service is not already running, bindService() can optionally start it.) For example, an activity might establish a connection with the music playback service mentioned earlier so that it can provide the user with the means (a user interface) forcontrolling the playback. The activity would call bindService() to set up that connection, and then call methods defined by the service to affect the playback.A later section, Remote procedure calls, has more details about binding to a service.3. An application can initiate a broadcast by passing an Intent object to methods like Context.sendBroadcast(), Context.sendOrderedBroadcast(), and Context.sendStickyBroadcast() in any of their variations.Android delivers the intent to all interested broadcast receivers by calling their onReceive() methods. For more on intent messages, see the separate article, Intents and Intent Filters.Shutting down componentsA content provider is active only while it's responding to a request from a ContentResolver. And a broadcast receiver is active only while it's responding to a broadcast message. So there's no need to explicitly shut down these components.Activities, on the other hand, provide the user interface. They're in a long-running conversation with the user and may remain active, even when idle, as long as the conversation continues. Similarly, services may also remain running for a long time. So Android has methods to shut down activities and services in an orderly way:1. An activity can be shut down by calling its finish() method. One activity can shut down another activity (one it started with startActivityForResult()) by calling finishActivity().2. A service can be stopped by calling its stopSelf() method, or by calling Context.stopService().Components might also be shut down by the system when they are no longer being used or when Android must reclaim memory for more active components. A later section, Component Lifecycles, discusses this possibility and its ramifications in more detail.The manifest fileBefore Android can start an application component, it must learn that the component exists. Therefore, applications declare their components in a manifest file that's bundled into the Android package, the .apk file that also holds the application's code, files, and resources.The manifest is a structured XML file and is always named AndroidManifest.xml for all applications. It does a number of things in addition to declaring the application's components, such as naming any libraries the application needs to be linked against (besides the default Android library) and identifying any permissions the application expects to be granted.But the principal task of the manifest is to inform Android about the application's components. For example, an activity might be declared as follows:The name attribute of the <activity>element names the Activity subclass that implements the activity. The icon and label attributes point to resource files containing an icon and label that can be displayed to users to represent the activity.The other components are declared in a similar way —<service>elements for services, <receiver>elements for broadcast receivers, and <provider>elements for content providers. Activities, services, and content providers that are not declared in the manifest are not visible to the system and are consequently never run. However, broadcast receivers can either be declared in the manifest, or they can be created dynamically in code (as BroadcastReceiver objects)andregistered with the system by calling Context.registerReceiver().For more on how to structure a manifest file for your application, see The Android Manifest.xml File.Intent filtersAn Intent object can explicitly name a target component. If it does, Android finds that component (based on the declarations in the manifest file) and activates it. But if a target is not explicitly named, Android must locate the best component to respond to the intent. It does so by comparing the Intent object to the intent filters of potential targets. A component's intent filters inform Android of the kinds of intents the component is able to handle. Like other essential information about the component, they're declared in the manifest file. Here's an extension of the previous example that adds two intent filters to the activity:The first filter in the example —the combination of the action "android.intent.action.MAIN" and the category"UNCHER" —is a common one. It marks the activity as one that should be represented in the application launcher, the screen listing applications users can launch on the device. In other words, the activity is the entry point for the application, the initial one users would see when they choose the application in the launcher.The second filter declares an action that the activity can perform on a particular type of data.A component can have any number of intent filters, each one declaring a different set of capabilities. If it doesn't have any filters, it can be activated only byintents that explicitly name the component as the target.For a broadcast receiver that's created and registered in code, the intent filter is instantiated directly as an IntentFilter object. All other filters are set up in the manifest.For more on intent filters, see a separate document, Intents and Intent Filters.应用程序基础Android DevelopersAndroid应用程序使用Java编程语言开发。