V5-6R2012破解安装说明
达索系统发布最新版V5—6R2013解决方案

龙源期刊网
达索系统发布最新版V5—6R2013解决方案作者:
来源:《CAD/CAM与制造业信息化》2013年第04期
2013年4月1日,达索系统推出最新版V5解决方案V5-6R2013。
V5-6R2013增加了新的复合材料纤维建模技术,该技术基于达索系统近期收购的Simulayt公司的软件,具有更强的开放性、标准支持和高端曲面建模能力。
此外,新版软件包含了2012年推出的V6到V5多版本兼容性的附加功能,以促进V6-V5的内外部协作。
V5-6R2013涵盖了源于V6R2013和
V6R2013x的近40项3D体验新技术。
达索系统产品研发部高级执行副总裁Dominique Florack 说:“最新发布的增强功能可以帮助用户将V5提升到全新的高度,使其包含更加丰富的功能、特性和产品种类。
同时,我们还有更深层次的考虑。
”达索系统行业、营销和企业传播执行副总裁Monica Menghini说:“达索系统拥有庞大的客户群,我们的多种解决方案可以帮助客户创造更吸引人、更令人满意的产品和体验。
无论客户目前使用何种3D解决方案,我们都必须为他们提供最新的创新技术。
V4、V5和V6版本不应因名称不同而无法兼容,无论客户使用哪个版本的解决方案,我们都会帮助客户取得成功,使客户实现企业内部生态系统间的协作,并根据其自身情况采用创新技术。
”。
catiaV5 R22安装步骤
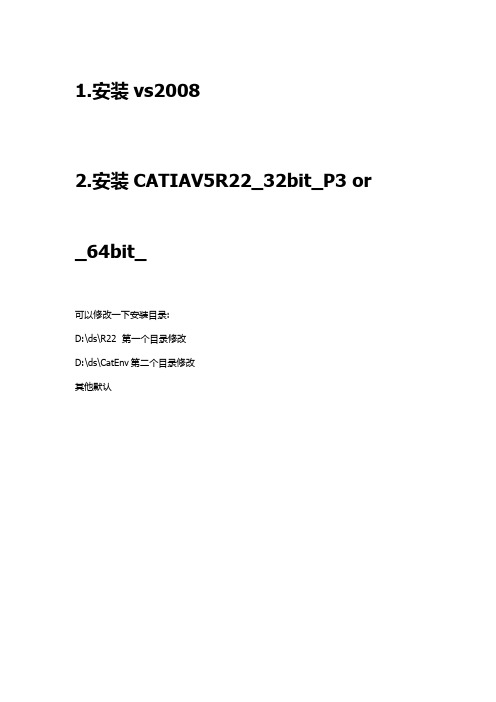
1.安装vs20082.安装CATIAV5R22_32bit_P3 or _64bit_可以修改一下安装目录:D:\ds\R22 第一个目录修改D:\ds\CatEnv第二个目录修改其他默认3.破解Catia(可以暂时不管和步骤7一起破解)1.严格按照【破解说明.pdf】安装2.对【破解说明.pdf】中5.1步骤说明:2.1.图左边【Licenses】为本目录下【Licenses(32)】或【Licenses(64)】2.2.右边【C:\ProgramData\DassaultSystemes】为隐藏文件夹,需要打开隐藏2.3破解成功后如下两图:4.VPM可以不安装(用于数据库连接貌似)5.安装CAA:直接NEXT安装即可V56R2012.CAA_CATIA_P3.windows.1-16.安装Rade环境变量目录修改为同CATIA:D:\ds\CatEnv7.破解Rade1.严格按照【破解说明.pdf】安装2. 对【破解说明.pdf】中3.8步骤说明2.1生成许可可以选择Rade和Catia,生成两个许可文件2.2添加许可再在license manager里面按照【破解说明 .pdf】4.1中添加上述两个许可:3.对破解步骤3.6-3.9的说明1.先导出CATIA破解文件,并完成后面CATIA的破解步骤,直到文档末尾2.再导出CAA RADE破解文件,并完成本文档【8配置RADE的操作】就可破解RADE4.对【DSLS_SSQ_Setup_eng.pdf】中5.1步骤说明:4.1.图左边【Licenses】4.2.右边【C:\ProgramData\DassaultSystemes】为隐藏文件夹,需要打开隐藏4.3破解成功后如下两图:8.配置Rade8.1许可 CATVBTLicenser.exe8.1.1报错8.2环境配置CATVBTSetup.exe9.常见问题:9.1.License Manager问题在导入license时报错解决:localhost必须保持连接状态9.2打开vs2008以后出现很多错误对话框解决:重复步骤7和步骤89.3 打开工程mkmk时报错:link error 2001 解决:安装vs2008 sp19.4 打开setting management 后没任何内容卸载后全部重装后解决9.5安装过程是否需要重启不需要重启。
CATIA V5R22安装教程

注意:1,安装CATIA_V5-6R2012_P2_GA你需要拥有管理员权限。
在Vista/Win7操作系统上必须要使用管理员权限。
就是每次再运行程序时都要鼠标右击使用管理员权限运行。
2,如果已经安装过CATIA的许可管理程序,请先卸载它。
3,关掉防火墙,它可能会阻止管理程序的运行。
开始安装:第一步:运行CRACK目录下的DSLS_32bit_SSQ(DSLS_64bit_SSQ).EXE(根据自己的电脑是32或是64位系统而定),安装过程不要改安装目录;将“Install Server from scratch…”打上对号,选择第二项。
(弹出的对话框点击OK就行);等待安装完成后,点FINISH。
(其间有如有阻止窗口的弹出,一定要放行)。
第二步:安装结束后,会自动弹出License Server Administration的窗口,如果没有弹出就手动从开始——程序——DS License Server – License Server Administration启动。
第三步:在License Administration Tool窗口中右击选择Add new server;在License Server name中填上localhost;点OK。
第四步:在License Administration Tool窗口中双击新建立的localhost服务;将会弹出服务器电脑的信息。
第五步:运行CRACK文件夹下的DSLS_LicGen_SSQ.exe。
将服务器电脑的相关信息复制粘贴到注册机窗口里;点击Generate;将生成的文件保存到C盘下的LICENSE文件夹中(新建一个LICENSE文件夹);All done!Enjoy窗口中点击OK。
第六步:点选License Administration Tool里的已建立的localhost服务,然后在菜单栏中依次选择到License ——Enroll。
安装破解说明
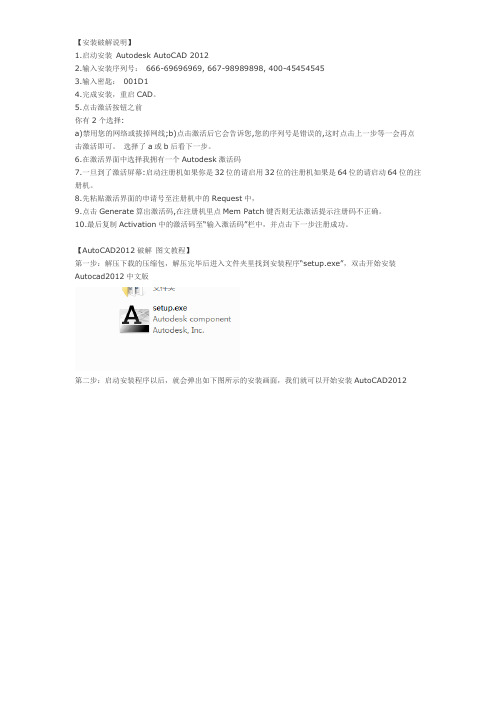
【安装破解说明】1.启动安装Autodesk AutoCAD 20122.输入安装序列号:666-69696969, 667-98989898, 400-454545453.输入密匙:001D14.完成安装,重启CAD。
5.点击激活按钮之前你有2个选择:a)禁用您的网络或拔掉网线;b)点击激活后它会告诉您,您的序列号是错误的,这时点击上一步等一会再点击激活即可。
选择了a或b后看下一步。
6.在激活界面中选择我拥有一个Autodesk激活码7.一旦到了激活屏幕:启动注册机如果你是32位的请启用32位的注册机如果是64位的请启动64位的注册机。
8.先粘贴激活界面的申请号至注册机中的Request中,9.点击Generate算出激活码,在注册机里点Mem Patch键否则无法激活提示注册码不正确。
10.最后复制Activation中的激活码至“输入激活码”栏中,并点击下一步注册成功。
【AutoCAD2012破解图文教程】第一步:解压下载的压缩包,解压完毕后进入文件夹里找到安装程序“setup.exe”,双击开始安装Autocad2012中文版第二步:启动安装程序以后,就会弹出如下图所示的安装画面,我们就可以开始安装AutoCAD2012第三步:接受安装协议第四步:选择许可证类型并输入产品信息,这里为大家提供的序列号包括:序列号:666-69696969 或667-98989898 或400-45454545密匙:001D1第五步:自定义安装路径并选择配置文件注意:这一步中默认即可,最好不要选择第二项,否则可能会无法安装成功。
第六步:开始安装AutoCAD2012,注意这一步的安装时间较长。
第七步:CAD2012 32位中文版安装完成(未激活版)点击“完成”这样我们CAD2012 32位中文版就安装完成了下面开始讲解CAD2012 32位中文版的激活过程第八步:运行CAD2012 32位中文版双击打开在桌面上生成的CAD2012 32位中文版图标第九步:CAD2012 32位中文版的激活界面点击“激活” 继续下一步的操作第十步:勾选“我同意按照Autodesk隐私声明“点击“我同意”继续下一步第十一步:CAD2012 32位中文版的产品许可激活选项申请号是我们下面要用到的重要点勾选“我具有Autodesk提供的激活码”第十二步:打开“注册机”找到激活码获取工具在我们解压出来的文件里面找到“注册机”打开双击“KeyGen-32bit”激活码获取工具注册机下载地址:/downinfo/38480.html第十三步:把申请号复制到注册机程序界面上的REQUEST输入框中,然后点击“Mem Patch”和Generate 按钮,得到CAD2012 32位中文版的激活码。
Catia V6R2012x 安装说明
完成安装以后进入控制面板选中JAVA选项,在弹出的窗口中 将“高级”-“JRE自动下载”设置为“从不自动下载”
Confidential Information
CATIA V6安装
CATIA V6R2012x的安装 将CD-ROM插入驱动器,启动安装程序后弹出“Welcome”对话框。
Confidential Information
2.确认目标路径
Confidential Information
V6帮助文档安装
CATIA V6 帮助文档安装(推荐安装方法) 确认完安装路径以后“确认”开始解压安装。
Confidential Information
V6帮助文档安装
CATIA V6 帮助文档安装(推荐安装方法) 解压安装完成后,我们进入到V6中对帮助文档进行配置即可。 完成安装后的帮助文档。
• CPU:Intel Xeon E5620 • 内存:12G • 硬盘:1T • 显卡:nVIDIA Quadro FX600 • 系统:Windows 2008 server R2 64bit
客户端 Client Side:HP Z600
• CPU:Intel Xeon E5620 • 内存 Memory:4G • 硬盘 Hard Disk:500G • 显卡 Graphics:nVIDIA Quadro FX600 • 系统 System:Windows 7
点击点击 NextNext 进入下一步 进入下一步
Confidential Information
CATIA V6安装
CATIA V6R2012x的安装 单击“Next”不作任何选择。
Confidential Information
CATIA V6安装
LabView2012下载、安装、破解全过程.

LabView2012下载、安装、破解全过程[图解]2013年7月31日 15:20:27 发布:awen能对LabView这个软件感兴趣的,大概也知道LabView的功能和用途了吧!软件功能太强大,我自己也不是很了解,这里就不多介绍了,只说说安装和破解的全过程,像我这样的初学者,百度一下就清楚了。
好了,废话少说,开始。
第一步:安装文件解压1)双击运行下载回来的安装文件(下载后对应的文件名是2012LV-WinChn.exe);2)选择释放安装文件的路径(这只是一个临时存放安装文件的路径,我选择在D盘创建,如上图红圈所示。
)3)点击Unzip开始解压缩安装文件,如下图所示;第二步:安装.NET 4.01)解压完成后,安装程序会自动运行,如果本机没有安装.net4框架,就会自动提示安装,选择“确定”进行安装;2)按下图红圈的选择进行安装;3)下图为.NET4安装过程,请耐心等待;4).NET4安装完毕,点击“完成”按钮;第三步:安装LabView20121).NET4安装完成后,LabView2012安装程序会自动运行,如下图;2)点击“下一步”继续安装;3)输入用户信息后点击“ 下一步”继续安装;4)此时会要求输入序列号,如下图;5)运行NI License Activato,如下图;6)在NI License Activato菜单中依次选择Options→Generate Serial Number…7)复制弹出窗口中的序列号8)回到LabView安装程序中,在序列号输入页面的第一个框中填入刚才复制的序列号,第二个框留空,点击“下一步”继续安装;9)选择安装目录(我选择安装到D盘,如下图所示),点击“下一步”继续安装;10)按需要选择安装组件,没特别要求的,默认就好,点击“下一步”继续安装;11)为节省安装时间,把下图红圈中的选中状态去掉,点“下一步”继续;12)一如既往的选择接受协议,然后点击“下一步”继续;13)点击“下一步”开始安装;14)这个时间比较漫长,找点零食啃啃消磨时间;15)好了,经过耐心的等待,终于安装完成了,点击“不需要支持”;16)点击“下一步”正式完成安装;17)选择“取消”18)选择“否”19)完成,重新启动电脑。
CATIA V R R R 安装教程

这个是catia的英文帮助文档,是各个模块的简单教 程,可以不装,要装的话和主程序装法一样
2、点击setup.exe
3、软件准备安装,等待。。。
4、软件安装界面跳出来后,点下一步
5、选择软件安装地址,随意,点下一步
13、下一步
14、下一步
15、安装
16、安装中,等待。。。
17、主程序安装完成,打钩取消,点击完成 打钩取消
18、打开文件夹_SolidSQUAD_
19、以管理员身份运行 DSLS_SSQ_V6R2016x_Installer_20160205.exe
20、点击next
21、选择安装地址,地址随意,本例子地址为:
d:\Program Files\Dassault Systemes\DS License Server 点install
22、安装,等待。。。
23、安装完成,自动跳出窗口,点击确定
此空格如果 空着,请输 入localhost, 再点确定
如果安装完成,没有自动跳出窗口,点击开始,找到下图软件 双击
29、自动跳出如下窗口,选择保存地址,地址随意,但须记住, 本例子保存在默认的我的文档里,点击保存
30、自动跳出all done!enjoy!点击OK
31、关掉这个窗口
32、回到这个窗口,点击确定
33、点击许可证,点击登记
34、选择刚才保存在我的文档里的破解文件,点击打开
35、点击确定
39、找到我的文档里的破解文件
40、将我的文档里的破解文件剪切到_SolidSQUAD_里的 Licenses文件夹里
41、将Licenses文件夹复制到 C:\ProgramData\DassaultSystemes,注意是C盘的
Autodesk Vault Server 2012 安装指南说明书
Installing Autodesk Vault Server 2012 on Small Business Server 2008Please follow the following steps to ensure a successful installation of the Autodesk Vault Server 2012 on Microsoft Small Business Server 2008. Please note that this document covers the most common Microsoft Small Business Server 2008 environment and your specific environment may vary. This document does not cover all possible configurations.Though it is supported, Autodesk does not recommend installing onto Microsoft Small Business Server 2008 due to the complexity of the operating system and that it is a domain controller. It is recommended to use a machine not running Microsoft Small Business Server 2008, if able.**Please note the following information regarding running SQL 2008 on a domain controller From /en-us/library/ms143506.aspx#DC_Support:For security reasons, Microsoft recommends that you do not install SQL Server 2008/ 2008 R2 on adomain controller. SQL Server Setup will not block installation on a computer that is a domain controller, but the following limitations apply:∙On Windows Server 2003, SQL Server services can run under a domain account or a local system account.∙You cannot run SQL Server services on a domain controller under a local service account or a network service account.∙After SQL Server is installed on a computer, you cannot change the computer from a domain member to a domain controller. You must uninstall SQL Server before you change the hostcomputer to a domain controller.∙After SQL Server is installed on a computer, you cannot change the computer from a domain controller to a domain member. You must uninstall SQL Server before you change the hostcomputer to a domain member.∙SQL Server failover cluster instances are not supported where cluster nodes are domain controllers.∙SQL Server Setup cannot create security groups or provision SQL Server service accounts ona read-only domain controller. In this scenario, Setup will fail.Pre Installation - Operating System1.Disable the User Account Control (UAC) through Control Panel -> User Accounts; a reboot isrequired.2.If applicable, download and install Windows 2008 Service Pack 2. Details on Server 2008 SP2can be found here.**Service pack 2 is required for a successful implementation.Pre Installation – Microsoft SQL ServerSQL 2008 / 2008 R21.Click Add a new user account inside the SBS Console.2.Enter user information shown below for the new user and click Next.3.Input a password that fulfills your password requirements and click Add user account.4.Click Finish to complete the wizard.5.Prior to installing SQL, please ensure that .NET 3.5 SP1 has been installed as it is a prerequisitefor SQL. The installer can be downloaded or ran from3rdParty\NET\35SP1\wcu\dotNetFramework on the installation media.6.Begin the SQL Server installation from your SQL installation media. If plan on using SQL Expressthat is bundled with vault, you will run Setup.exe located under 3rdParty\SQL2008Expressfolder on your Vault 2012 installation media. You can also download SQL Express 2008 R2 from .7.Start the installation process for Microsoft SQL 2008 Server by selecting New SQL Server stand-alone installation or add features to an existing installation from the Installation menu.8.The installation process installs any necessary prerequisites and begins running the pre-installation checks. Note any errors and take the necessary corrective actions before continuing.9.In the Feature Selection window, select Database Engine Services.10.In the Instance Configuration window, select Named instance and enter the name asAutodeskVault.Note: If you install SQL without using this instance name, the Autodesk Vault Server installation will create its own instance of SQL Server called AutodeskVault using Microsoft SQL Express 2008 and will fail due to the Domain Controller restrictions listed earlier in this document.11.In the Server Configuration window, select the Service Accounts tab.a.Specify user account created in Step 2 for the SQL Server Database Engine. Set theStartup Type to Automatic.12.In the Database Engine Configuration window, select the Account Provisioning tab.a.Select Mixed Mode authentication and set the SA password. The default password usedduring a default installation for the SA password is AutodeskVault@26200.b.Add the local administrator account (or desired account) as a SQL Server administrator.**Only Windows users entered in this dialog will have full rights when logging into theSQL server. All other Windows logins will be treated as a guest account.13.Verify the installation options chosen and Install. Once the installer has finished, it can beclosed.Pre Installation – IIS1.Browse to the IIS configuration files in SBS 2008:C:\Windows\System32\inetsrv\config\applicationHost.config2.Create a copy of applicationHost.config and place it in a temporary location. This will preservethe original file.3.Open the file applicationHost.config file in Notepad. Browse to the <globalModules>sectionand modify the line<add name="PasswordExpiryModule" image="C:\Windows\system32\RpcProxy\RpcProxy.dll" />to read<add name="PasswordExpiryModule" image="C:\Windows\system32\RpcProxy\RpcProxy.dll"preCondition="bitness64" />4.Additionally, if Exchange 2007 Service Pack 3 is installed, modify the lines<add name=”exppw” image=”C:\Program Files\Microsoft\ExchangeServer\ClientAccess\Owa\auth\exppw.dll” />to read<add name=”exppw” image=”C:\Program Files\Microsoft\ExchangeServer\ClientAccess\Owa\auth\exppw.dll” preCondition=”bitness64″/>and under <modules> section update line<add name=”exppw” />to read<add name=”exppw” preCondition=”bitness64″/>5.Save the file.6.Open the command prompt and stop and start IIS by running IISRESET at the command prompt.Do not close the command prompt.7.Type the following command at the command prompt and hit enter. Please note that this is oneline.%windir%\system32\inetsrv\appcmd.exe set config -section:system.webServer/httpCompression /-[name='xpress']8.Type exit to close the command prompt.Autodesk Vault Server 2012 Installation1. Autodesk recommends installing the Vault Server to a non-default website. This is achieved byselecting the Configure button during the installation. This is not required, but isrecommended.plete the installation of Vault Server 2012.3.In some cases, users experienced error 29001…Error –5001.19 during the installation of theAutodesk Vault 2012 (Server) Language Pack. If you experience this issue, please perform the following steps to resolve:a.Browse to the IIS configuration files in SBS 2008:C:\Windows\System32\inetsrv\config\applicationHost.configb.Open the file applicationHost.config file in Notepad and modify the line<section name="requestFiltering" overrideModeDefault="Deny" />to read< section name="requestFiltering" overrideModeDefault="Allow" />c.Save the file and close Notepad.d.Start the installation again.Post- Installation IIS 71.Open the IIS Manger by going to Control Panel -> Administrative Tools -> Internet InformationServices Manager2.Right click the Default Application Pool and select Set Application Pool Defaults3.Modify the Enable 32-Bit Applications and set the value to False.4.Right click on Application Pools and select Add Application Pool. Enter a name for a newapplication pool, 32DefaultAppPool.5.Right click the new application pool 32DefaultAppPool and select Advanced Settings.6.Set Enable 32-Bit applications to True.7.Next, right click the DefaultAppPool and select View Applications.8.Right click on /AutodeskDM/… application, and select Change Application Pool…9.Assign the new 32DefaultAppPool.10.Verify connectivity.Links referenced/en-us/library/ms143506.aspx#DC_Support/kb/968849/downloads/details.aspx?FamilyID=3181842A-4090-4431-ACDD-9A1C832E65A6&displaylang=nl&displaylang=en/kb/970259/EN-US/default.aspx?scid=kb;en-us;971272/en-us/library/cc546071(WS.10).aspxRevision History。
- 1、下载文档前请自行甄别文档内容的完整性,平台不提供额外的编辑、内容补充、找答案等附加服务。
- 2、"仅部分预览"的文档,不可在线预览部分如存在完整性等问题,可反馈申请退款(可完整预览的文档不适用该条件!)。
- 3、如文档侵犯您的权益,请联系客服反馈,我们会尽快为您处理(人工客服工作时间:9:00-18:30)。
破解的达索系统许可证服务器的安装说明
)
破解)
(由SSQ破解
1.总体概述
由SSQ破解的达索系统许可证服务器(以下简称为DSLS-SSQ)允许用户运行CATIA V5R21,CATIA V5-6R2012(也叫作 V5R22),CAA Rade V5R21,CAA Rade V5-6R2012,CAA MultiCax V5R21,CAA MultiCax V5-6R2012与他们所有的升级包。
用DSLS-SSQ来扩展达索系列的软件和许可证是可行的。
有两种安装DSLS-SSQ和DS的应用软件(CATIA,CAA,MultiCax等)的方式。
本地安装
在同一台计算机上本地安装DSLS-SSQ和DS的应用软件
网络安装
在网络上安装,DSLS-SSQ被安装在网络计算机(服务器端)上,DS的应用软件被安装在其他的网络计算机(客户端)上
该DSLS-SSQ的安装流程对于两种安装方式来说都是相同的
2.DSLS-SSQ 安装说明
2.1为了能够安装DSLS你必须有管理员权限!在VISTA/WIN7系统的计算机上,UAC
(用户账户控制)必须启动!在VISTA/WIN7计算机上,强烈推荐用管理员权限运行所有的可执行文件
2.2如果你已经安装好DS的许可证服务器,请卸载原始的
2.3运行DSLS-SSQ。
确保运行了对应版本的安装文件(32位或是64位)
对于32位的操作系统,安装..\DS_License_Server_32bit_SSQ\ DSLS_32bit_SSQ.msi 对于64位的操作系统,安装..\DS_License_Server_32bit_SSQ\ DSLS_64bit_SSQ.msi.
2.4点击Next
2.5点击Next
2.6 勾选Install Server from scratch… 弹出警告WARNING! All license keys will be deleted…单击OK,点击Next
2.7等待安装的完成。
如果在安装过程中,防火墙或病毒软件提示阻止服务器端可
执行文件(DSLicSrv.exe),必须选择解除阻止。
2.8 在安装界面的最后,License Server Administration会自动启动,如果它不自动启动,你必须手动启动(开始-所有程序-DS License Server-License Server Administration)
毒软件拦截。
3配置DSLS-SSQ
3.1 在License Server Administration中右键,选择Add New Server
3.2 在License Server name字段中输入主机或是计算机的名字(计算机名必须只能是数字,英文字母,连接符或下划线!不允许非英文字符!)。
你也可以使用计算机的IP地址来替换计算机名。
单击OK
3.3 在License Server Administration窗体中双击创建好的服务器
3.4 你会在Server Configuration窗体中获得服务器端的信息
3.5 运行SSQ的DS许可证生成器-DSLS_LicGen_SSQ.exe(在VISTA/WIN7的计算机上强烈推荐在右键弹出菜单中使用管理员模式启动)
3.6 把Server name(下图示例中的sever-n)以及Server id(下图示例中的DSL-41E210195B347D7D)从右侧的Server Configuration窗口中复制到左侧的DSLS_LicGen_SSQ窗口中的对应字段中。
在Generate License For字段中的下拉菜单中选择CATIA V5R21-V5R22.SSQ并单击Generate。
3.7 把许可证文件保存为licz格式
3.8 在LicGen窗口中单击OK,到此为止都完成了!
3.9 如果想要安装CAA Rade V5R21-V5R22,CAA MultiCax V5R21-V5R22,必须在下拉菜单中选择CAA Rade V5R21-V5R22.SSQ,CAA MultiCax V5R21-V5R22.SSQ后重复3.6到3.8步。
4向DSLS迁入许可证
4.1 在License Server Administration窗口中选择已安装的服务器(localhost)并单击Enroll
Licenses(菜单栏License-Enroll)。
选择CATIA V5R21-V5R22的许可证文件(licz格式),单击Open
4.2 在License Enrollment窗体中检查是否所有的许可证都被迁入(XXX license data received(0 invalid)),单击OK
4.3 如果也生成了其他DS的应用程序的许可证文件,将它们以与4.1-4.2步中的步骤相同的方式迁入到DSLS中
4.4 到此为止,你已经完成DSLS的配置,可以打开License Administration选项卡中查看迁入的许可证
关闭License Server Administration窗口
5将DS的应用程序连接到DSLS
5.1 所有的DS应用程序通过一个特别的配置文件(DSLicSRv.txt)来检查DSLS 的许可服务
每台安装DS应用程序的电脑,该文件必须放置于:
-对于VISTA/WIN7操作系统,路径为С:\ProgramData\DassaultSystemes\Licenses -对于XP操作系统,路径为C:\Documents and Settings\All Users \Application
Data\DassaultSystemes\Licenses
或者把带有DSLicSRv.txt的破解文件夹Licenses复制到:
-对于VISTA/WIN7操作系统,路径为С:\ProgramData\DassaultSystemes\
-对于XP操作系统,路径为C:\Documents and Settings\All Users \Application
Data\DassaultSystemes\
5.2 在记事本中打开DSLicSRv.txt,默认显示的是localhost:4085
它意味着DSLS正在这台计算机上运行(本地安装),使用端口4085作为与DS的应用
程序的通信接口。
物理网络计算机名替换localhost。
6初次启动DS应用程序时的许可证选择
在DS应用程序第一次启动前需要在DSLS中选择一个或多个可用的许可证。
为此需要运行DS应用程序的Settings Management(例如对于CATIA V5-6R2012的Settings Management,开始-所有程序-CATIA-Tools-Settings Management
V5-6R2012)
打开License选项卡
在Licensing Information中检查DSLS是否在运行
在List of Available Configurations or Products的列表中选择所需要的许可证(至少需要选择一个许可证),保存设置,单击OK
现在你能运行已安装的DS应用程序了,祝好运
-Team-SolidSQUAD (SSQ)(感谢热情破解
感谢热情破解))
本安装说明由々夜ペ之鼠王(QQ:475796673)与梅松(QQ:524296116)共同翻译完成,欢迎大家加入QQ群:CATIA/DELMIA/SIMULIA技术群(QQ群号:
169859559)与CATIA DELMIA ENOVIA学习区A(QQ群号:2690006)。