FM350-1使用
fm350高速计数器模块速成使用手册.
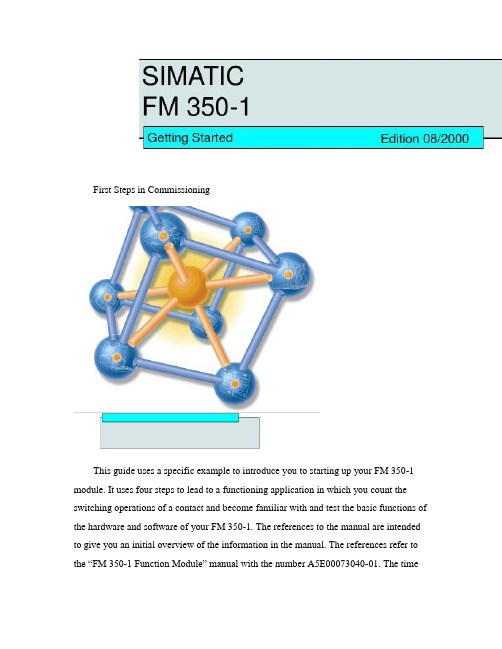
First Steps in CommissioningThis guide uses a specific example to introduce you to starting up your FM 350-1 module. It uses four steps to lead to a functioning application in which you count the switching operations of a contact and become familiar with and test the basic functions of the hardware and software of your FM 350-1. The references to the manual are intended to give you an initial overview of the information in the manual. The references refer to the “FM 350-1 Function Module” manual wi th the number A5E00073040-01. The timerequired to work through the example will be approximately 1 to 2 hours, depending on how experienced you are.RequirementsThe following requirements must be fulfilled:•You must have an S7-300 station comprising a power supply module and a CPU.•STEP 7 (≥V4.02 is correctly installed on your programming device (the example given in this Getting Started was carried out with STEP 7 V5.0.•You have set up a project for the S7-300 station.•The programming device must be connected to the CPU.•You must have an FM 350-1 module, the configuration package for the FM 350-1, and the necessary accessories such as a bus connector, front connector, sensors or switches, and wiring material.Installing the Configuration Package on the Programming Device(Manual Chapter 5The configuration package contains a configuration tool for the FM 350-1, the functions (FC and the data structure (UDT required, and a sample program.Insert the CD in the CD drive.Under Windows start the dialog for installing software by double-clicking the “Add/Remove Programs”symbol in “Control Panel”.Click Install... , start the Setup.exe file on the CD in the FMx50-1\Disk1 folder and follow the instructions of the installation program.Installing and Wiring the FM 350-1 (Manual Chapter 3 and 4To connect the 24-V sensor used in the example you must insert the coding key on the module in position D before you insert the FM 350-1. This sets the adjustment to the sensor level (you will find more information on the coding key in Sections 1.3 and 3.2 of the manual.Plug the bus connector supplied with the FM 350-1 into the bus connector on the CPU. Hang theFM 350-1 into the rail, swing it downwards, and screw it in place (you will find more detailed instructions in Section 3.2 of the manual.Wire up the front connector as follows (you will find the full pin assignment of the front connector in Chapter 4 of the manual:Insert the front connector in the FM 350-1 and snap it into place.Test:Switch on the voltage on the power supply module. The red LED SF lights up. After you have switched on the power supply module for the first time, the FM 350-1 is in the preset default state (refer to Section 4.3 of the manual for default settings.Assigning Parameters to the FM 350-1Open your project in the SIMATIC Manager.Open the configuration table (HW Config in your project.From the hardware catalog select the FM 350-1 with the correct order number and drag it to the required slot (in the example: slot 4.Call the parameter assignment screen forms by double-clicking on this FM 350-1. To do this, you may have to close the dialog asking you to save the configuration with OK.Select the following settings by clicking on the buttons in the parameter assignment screen forms (please leave all other settings unchanged, as they are not yet required for commissioning:•Operating Modes:0 to +32 Bit, Continuous Counting, Hardware Gate•Encoders:24V Initiator, P Switch•Inputs:Level-Controlled Hardware Gate•Process interrupt enable:not p ossible as deselected in basic parameters•Outputs:DQ0 Inactive, DQ1 Inactive•Reaction to CPU stop:STOPEnter the FM 350-1 parameter assignments in your configuration using the menu command File →Save and close the parameter assignment window.Save the configuration created by you in your project using Station>Save and Compile.Download the configuration with the CPU in STOP mode using the menu command PLC →Download T o Module.The data are now downloaded directly to the CPU and into the FM 350-1. The red LED SF extinguishes. From now on, as long as the configuration remains buffered in theCPU, the data will be transferred from the CPU to the FM 350-1 every time the CPU switches from STOP to RUN.Test:You can now run simple tests without a program:Close the gate contact: the green LED I0 lights up.Close and open the count contact several times: you can monitor the state of the leastsignificant bit of the FM 350-1 counter via the green LED CR.Note that a mechanical count contact can bounce.When you open the gate contact, the gate LED I0 extinguishes and no more switchingoperations are counted (the timing diagram for this function can be found in Section 2.2 of the manual.Integrating into the User ProgramOpen the library FMx50LIB in the SIMATIC Manager using the menu command File →Open...Libraries.Copy the functions FC0 and FC1 and the user-defined data type UDT1 from the “Blocks” container of the FMx50LIB library to the “Blocks” container of your project.Insert DB1 in the “Blocks” container using the menu command Insert → S7 Block → Data Block. Open DB1 and create the DB1 as a data block referencing the user-defined data type UDT1.Save the DB 1 with File>Save and then close with File>Close.Open the popup menu in HW Config by clicking with the right mouse button on the FM350-1 entry. Using the Object Properties menu command start the Properties –FM350-1 COUNTER screen form. Using the Mod Addr... button you can now automatically enter the module address (MOD_ADR (in the example: 256 corresponds to 100 Hex, the channel address (CH-ADR and the channel length set under Addresses in the channel data block.You can achieve this by clicking the Select DB button in the Module Address for DB screen form. Click and select the DB 1 in the Open dialog which was started . By clicking OK the values are stored inDB 1 and the Open and Module address for DB screen forms are automatically closed. Exit the Properties – FM350-1 COUNTER screen form with OK.Alternatively you can also supply these parameters to DB1 in OB100 (see manual, Section 6.1. Open OB 1 in your project.Call FC0 in OB1 and supply parameters to FC0 (see manual, Section 6.1:CALL FC 0DB_NO := 1::Assign all remaining parameters of FC0 with free memory bits.Save OB1 using the menu command File → Sav e.Select all the blocks in your project (apart from VAT and UDT.Download your program to the CPU using the menu command PLC → Download.Test:Using the “Monitoring and Modifying Variables” application you can now monitor the count value and the gate, for example:In your project select the “Blocks” container. Insert the variable table VAT1 using the menucommand Insert → S7 Block → Variable T able and confirm with OK.Open the variable table VAT1 and enter the following variables in the “Address” column:db1.dbd34(actual count valuedb1.dbx43.6(status of internal gateSave the variable table VAT1 using the menu command Table → Sav e.Switch online using the menu command PLC → Connect To →Configured CPU.Switch to monitoring using the menu command Variable → Monitor.Switch the CPU to RUN-P.Generate pulses with the count contact and monitor the count value with relation to the state of your gate contact.DiagnosticsErrors can occur as a result of incorrect operation, incorrect wiring, or contradictory parameter assignments which the FM 350-1 displays with the group error LED SF.Refer to Section 6.2 and Chapter 13 of the manual for information on how you can diagnose errors and messages.ExampleIn the zEn23-1 project you will find another example which you can use to guide you and which you can adapt to your application.。
FTM-350 中文说明书

[SET](设置模式)键
按此键可进入设置模式。
[DIAL] 旋钮
旋转该旋钮可以选择左侧 接收机的操作频率 (或存储信道)。 按住该旋钮一秒钟,能够以每次 1 MHz 的步 进调整 VFO 频率。 当左侧 接收机设置为“主”频段时,按一下 该旋钮即可激活频谱功能。 当左侧 接收机设置为“次”频段时,按一下 该旋钮即可将左侧 接收机切换至“主”频段。
[DIAL] 旋钮
旋转该旋钮可以选择右侧 接收机的操作频率 (或存储信道)。 按住该旋钮一秒钟,能够以每次 1 MHz 的步 进调整 VFO 频率。 当右侧 接收机设置为“主”频段时,按一下 该旋钮即可激活频谱功能。 当右侧 接收机设置为“次”频段时,按一下 该旋钮即可将右侧 接收机切换至“主”频段。
[PTT] 键
按下该键可进行发射。
麦克风
[B](频段)键
按下该键可更改主频段的操作频段。 可用频段包括 : 左频段 :调幅广播、调频广播、144 MHz 频段、
430 MHz 频段和音频线路输入 右频段 :144 MHz 频段和 430 MHz 频段 你可以通过设置模式项“B05 :RX EXPANSION” 调用增加的操作频段。见 35 页。
前面板的控制按钮与开关
[FWD]/[BCK](翻页)键
通过这两个键可以方便地选择操作功能页面。 可用的页面包括:“电台”页面、“定时器”页面、 “气压 / 海拔”页面、“导航”页面※ 以及“GPS 状态”页面※。 ※ :所需选购的“FGPS-1”GPS 设备。 按住这些键可以在双频接收功能的“开”和“关” 之间进行切换。
[F](功能)键
按该键可更改 [SMART FUNCTION] 键的当前 功能。
DIAL 照明 [VOL] 旋钮
FM 350

图2:定义通道
对于Word访问:FM350-2的模块地址从HW Config. +8,+10,+12,+14开始
实例:FM350-2地址是256,访问L PIW 264,L PIW 266,L PIW 268,L PIW 270
对于Dword访问:FM350-2的模块地址从HW Config. +8,+12开始
实例:FM350-2地址是256,访问L PID 264,L PID 268
在FM 350-2上直接访问I/O
隐藏订货号显示订货号订货号:
6ES7350-2..
SIMATIC S7-300, FM 350-2
问题:
在FM 350-2上如何通过访问I/O直接读取计数值和数值或测量值直接显示在模块I/O上。可通过使用“指定通道”功能来定义哪个单个测量值要显示在I/O区。
FM 350-1, 350-2, 450, SM338 --安装和参数化硬件--初始化和参数化组件
怎样快速下载计数器模块FM 350-1 / FM 450-1的初始值?
FM350-1的锁存功能产生过程中断
在FM450-1组态包里,用于显示硬件门控制器的图像颠倒了
SM 338:如何处理未连接的通道?
在FM 350-2上直接访问I/O
用这种方法读出测量值不需要读函数“FC CNT2_RD”。模块每隔2 ms更新一次I/O输入接口。
如果需要四个以上的测量值或计数值,则也需要读函数“FC CNT2_RD”来进行。
如下可进入参数窗口“指定通道”:
在硬件组态中双击FM350-2。
在“属性- FM350-2计数器”窗口中按“参数”按钮。
Simotion连接FM350模块

Simotion连接FM350模块Simotion Connect with FM350摘要 本使用入门做为 SIMOTION 附加编程参考文档的一部分,为SIMATIC FM 350-1 高速计数功能模块手册提供了如何通过Simotion来控制它的补充说明,为正确将FM350-1模块集成到Simotion控制系统中并完成调试提供帮助。
关键词Simotion,FM350-1Key Words Simotion,FM350-1IA&DT Service & Support Page 2-21目录一、概述 (4)二、产品描述 (4)三、安装及连接 (5)四、在SIMOTION项目中插入功能模块 (6)1.硬件组态 FM 350-1(分布式应用) (6)2.在用户项目中集成FM 350-1控制功能块 (6)五、FM350-1功能块 (9)1.概述 (9)2.功能块“_FM3501_control” (9)3.功能块“_FM3501_diagnostic” (12)4.FM350-1的数据结构 (14)5.功能块调用 (16)五、FM350-1应用程序示例 (19)1.使用的输入符号 (19)2.使用的输出符号 (19)3.示例内容 (19)IA&DT Service & Support Page 3-21一、概述本章描述了FM350模块在 SIMOTION 系统及 SIMATIC 系统中运行的相同及不同之处,它做为SIMATIC 手册“FM 350–1 Function Module Installation and Parameter Assignment”的补充部分。
对于Simotion系统,需要下述软件版本:• SIMOTION SCOUT V4.0 或更高• SIMOTION Kernel V4.0或更高• SIMOTION technology packages V4.0或更高Simotion 功能块不支持FM 350-1 模块(订货号:6ES7 350-1AH03-0AE0)的下述新功能: • 同步模式• 测量模式 (频率测量,速度测量,周期测量)二、产品描述FM 350-1FM 350-1 计数模块是一个单通道的高速计数模块,计数范围为:• 0 to 232 - 1• -231 to 231 - 1计数信号的最大输入频率为 500 kHz。
FM350 高速计数器模块怎么用
FM350 高速计数器模块怎么用
如题,请教高速计数器模块如何使用?
看程序是调用标准功能FC0,这个功能的各个形参代表什么呢?
为什么我两个编码器,都是用的FM350计数器模块,转动时间大致差不多,但是一个输入值9000多,另外一个输入值20000多,哪里可以设置吗?
最佳答案
FM350高速计数器模块怎么用,你可以下载入门手册进行学习——
《FM350-1/FM350-2常问问题集》下载:
/download/Upload/AS/faq/F050 9.pdf
《FM350-1工作原理及使用入门》下载:
/download/Upload/AS/applicati on/A0479.pdf
《FM350-1使用入门文档》下载:
/download/Upload/AS/applicati on/A0370.pdf
《FM350-2快速入门》下载:
/Download/Upload/AS/applicati on/A0025.pdf
《FM350-2计数模块的安装和参数配置》下载:
/download/Upload/AS/manual/1 105178.pdf
《SIMATICFM350-1功能模块》下载:
/download/Upload/AS/manual/1 086726.pdf。
FM350-1FM350-2常问问题集

FM350-1/FM350-2常问问题集∙文献∙涉及产品问题1:SIMATIC S7-300系列有哪些模板可以用于高速计数?解答表1 SIMATIC S7-300高速计数模板问题2:在哪里可以找到高速计数模块的手册和相关文档?解答:您可通过以下步骤获取您所需的文档:-请登陆网站:-在页面中点击技术资源库中:全球技术资源-在新窗口右上角的搜栏中输入“<关键字>”,并搜索-搜索结束后在窗口右侧列表中点击“只搜索手册/操作指南、只搜索证书、只搜索证书、只搜索FAQ常问问题只搜索更新信息”-最后列表中名为“<文档名称>”的条目即为您所需的文档。
常用文档的下载链接如下,您可以直接登陆如下网址下载相关资料:CPU31xC技术功能手册中文版:/CN/view/zh/12429336 FM350-1模板手册下载:/CN/view/zh/1086726FM350-2模板手册下载:/CN/view/zh/1105178关于西门子计数模板应用的文档可以参考相关产品手册,或登录下载中心网站/download/,搜索下载如下文档:(见表2 )表2 计数模板应用文档列表问题3:在哪里可以找到FM350-1/-2模块的软件包?解答:常用的驱动软件下载链接如下,您可以直接登陆如下网址下载相关软件:FM350-1 软件包下载:/CN/view/zh/28291262FM350-2 软件包下载:/CN/view/zh/28554065问题4:为何FM350-1 或FM350-2的软件包不能正常安装,提示1324 错误(见图1 )?图1解答:FM350-1/2 软件包安装时需要将计算机中的区域语言及高级选项中的语言改为“英语(美国)”,具体如下:控制面板->区域语言-> 区域选项(高级选项Advanced中也需要更改语言),更改后电脑会自动重新启动,启动后即可安装,安装完成后将语言改回“中文”即可(见图2 )。
西门子FM350-1在同步控制系统中的应用

l rw sd s n d a d e tbih d,t e a p iain o M 5 — f n t n mo u e i h y c rn z t n c n rla e s r s ac e n e l e a e i e n sa l e g s h p l t f c o F 3 0 1 u ci d l n t e s n h o i i o t l a wa e e r h d a d r a— o ao o ' ie z d,te s n h o iai n d tci n a d c n r lag r h w r r p s d,te s n h o iain c n rl t h o v y r s s m a e l e h y c r nz t ee t n o t loi m e e p o o e o o o t h y c rn z t o t o t e c n e e y t W o o e s rai d z
第2 8卷第 5期
2 1 年 5月 01
机
电
工
程
V0 . . 1 28 NO 5
Jun lo c a ia & Ee t clE gneig o r a fMe h nc l lcr a n ier i n
M a 011 v2
西 门 子 F 5 . 同步 控 制 系统 中的应 用 M3 01在
控制算法 , 实现 了对精度要求高 、 惯性大的运输 系统 的同步控 制。现场运行结果表明 , 同步控制 系统 能够实现对飞机运输系统精 该 确、 可靠的同步控制 。
关 键 词 :M 5 一; 步控 制 ; 速计 数 ; 机 运输 系统 F 3 0l 同 高 飞 中 图 分 类 号 :H 9 T 23 T 3 ;V 7 文 献标 志码 : A 文 章 编 号 : 0 - 5 12 1 )5— 50一 4 1 1 4 5 (0 1 0 06 o 0
FM350

电子组装设备1产品系列:电子组装设备产品名称:FM-350全电脑无铅波峰焊机产品型号:FM-350产品特点:(1)直联式入板结构,特制不锈钢链条传输,经久耐用;(2)预热系统采用远红外发热管,温度控制采用PID方式,使温控精度达到±2℃。
本预热区与焊接区的温度下降值≤5℃;(3)喷雾系统采用精密型调节阀进行数字化调节,方便管理。
喷嘴采用步进马达。
助焊剂自动稳压供给,可使喷雾流量迅速达到饱和,上下及后侧两级抽风过滤系统;(4)运输系统采用分段浮动式结构,有效防止导轨变形;(5)锡炉采用外热式加热,锡炉内胆采用铸铁制作,温度控制采用PID方式,控温精度达到±2℃。
两波峰近距离设计,第1波峰不带摇摆,完全适合无铅焊接;(6)强制式冷却系统,保证冷却速度在4~6℃/秒(可调);(7)PC+PLC控制系统控制电脑,WINXP操作系统,工艺曲线/数据自动存储功能,温度曲线测试功能;电源缺相报警;助焊剂液面过低过高报警;锡液面过低报警;规格:型号FM-350运输马达3∮220V 90W运输速度0.5-1.8m/min运输链爪Spring Pressed Type(弹簧压片爪)基板尺寸50-350mm助焊剂装置气压/容量3-5Bar/Approx.18 L喷雾移动Stepping Motor预加热器1.6M(L) 3段220V 1000W x 18pcs锡炉发热板220V 1500W x 9pcs锡炉容量Approx. 500Kg波峰马达 3 ∮220V 180W x2pcs锡炉温度MAX 300℃冷却风机1∮220V 550W洗爪泵1∮220V 10W运输角度Adjustable4-6°机体尺寸3500(L)X1420(W)X1760(H)mm 总功率Approx. 37kw电源 3 ∮380V 50Hz控制系统PC+PLC净重Approx. 1100Kg整体示意图:01 液晶显示器02 接驳系统03 助焊剂自动供给系统04 洗爪装置05 排风风机06 助焊剂喷雾系统07 预热器08 锡炉升降装置09 双波峰锡炉10 冷却系统11 角度调节12 运输系统。
- 1、下载文档前请自行甄别文档内容的完整性,平台不提供额外的编辑、内容补充、找答案等附加服务。
- 2、"仅部分预览"的文档,不可在线预览部分如存在完整性等问题,可反馈申请退款(可完整预览的文档不适用该条件!)。
- 3、如文档侵犯您的权益,请联系客服反馈,我们会尽快为您处理(人工客服工作时间:9:00-18:30)。
FM350-1高速计数模块使用
一、安装
1、信号类型
2、外部接线
二、设置
1、计数范围:
2、计数方式:
连续计数:当向上计数,在到达计数上限后,在下一个脉冲到来,计数值跳到下限然后再次开始加计数。
单向计数:计数器从装载值开始计数。
当向上计数,在到达计数上限后,在下一个脉冲到来,计数值跳到计数下限值,并且即使再有脉冲到
来,计数值仍保持在计数下限值。
当向下计数,在到达计数下限值后,在下一个脉冲到来,计数值
跳到计数上限值,并且即使再有脉冲到来,计数值仍保持在计数
上限。
周期计数:计数器从装载值开始计数。
当向上计数,在到达计数上限后,在
下一个脉冲到来,计数值跳到装载值然后再次开始加计数。
当向下计数,在到达计数下限值后,在下一个脉冲到来,计数值
跳到装载值然后再次开始减计数。
三、编程
1、“L-DIRECT”、“L-PREPAR”参数:
“L-DIRECT”参数定义:将装载值传送到装载寄存器,并直接进入计数器;
“L-DIRECT”参数定义:将装载值仅仅储存在装载寄存器;
2、“Gate”功能
3、计数器控制功能“FC0”。