真空除氧器操作说明书(中英文)
洪迪智能真空器说明书

SmartVacuumCleaner Instruction Manual(Household)In accordance with national standards:GB4706.1-2005GB4706.7-2014GB4706.1-2005GB4706.7-2014Model:F6SWarranty Card IncludedWe sincerely thank you for purchasing our Smart Vacuum Cleaner.The shape and color of the illustrations in this manual may be different from which of the actual product. The actual product shall prevail.Please read this instruction manual carefully before charging and using this product so as to operate correctly and extend its service life.Before all,please read[Safety Precautions]carefully before use.After reading,please keep this instruction manual for future reference.If you need to give this product to a third party,please attach this instruction manual with this product.CatalogI.Safety Precautions (2)II.Introduction (5)age (9)IV.Charging (13)V.Maintenance (14)VI.Specification (15)VII.Environmental Protection (16)VIII.Warranty Instruction (17)IX.Warranty Card (18)I.Safety Precautions1.1General Safety Regulations81.2Safety Instruction•Please read all safety precautions and instructions before operating this robot.•Please pay attention to all warnings on battery,power adapter,robot and instruction manual.•Please follow all instructions described in this manual.•All non-routine maintenance shall be the responsibility of Fushida's professional staff.•The harm and the degree of damage caused by the wrong operation are explained as follows. WarningAttention1.3About Safety Matters of ProductWarningThisAttentionThis product is for indoor use only.Avoid vacuum cleaner damage caused by inhalation of water,oil or other liquids.Before use,please tidy up the scattered wires on the ground,so asnot to interfere with the work of thevacuum cleaner.No heavy weight on the vacuumcleaner.Do not lift the vacuum cleaner by the front shell alone,as it will damage the vacuum cleaner.The charging stand should be placed against the wall.Theadapter cord should not be placed randomly onthe floor to prevent it from being wound around the bottom of thevacuum cleaner.1.4About Child SafetyChildren are not allowed touse this product alone.Children are not allowed to play with the packaging of the product,otherwise it may cause suffocation.1.5About Battery1.This product can only use the battery provided by the manufacturer;2.The battery must be taken out when the product is discarded;3.If you need to replace the battery,please contact our after-sales service department.If you use the wrong type of battery to replace it,it may cause a safety accident;4.In case of battery leakage,and if you accidentally let the liquid contact with the skin or clothing,you should immediately wipe with a dry cloth.Waste batteries should be sent to the recycle center or designated maintenance center,which cannot be thrown away.II.Introduction2.1Packing ListRobot(batteryincluded)Charging base Power adapter Instruction manual HEPA filter★Tips:*If you do not need to use the product for a long time,Please charge the machine at least every60days.2.2Product ViewRobot front viewBumperON/OFF buttonRecharge buttonOpen to take out thedust boxRobot bottom viewRight side brush Three detectors Right driving wheel Universal wheelLeft side brush Suction channelLeft driving wheel2.3Dust Box and Water Tank Installation•Take out the dust box:hold the handle and pull it out.Dust box into:dust box into the pressflat.•Water tank out:turn the machine over,hold the two sides of the tank with both hands,leftand right balance force up can be.•Water tank loading:hold both sides of the water tank with both hands,let the positioningcolumn of the water tank be aligned with the socket of the base,and press in balance.•Mop installation:after water is injected into the water tank,then the mop cloth is put intothe water tank,and then the mop cloth is flattened and pasted on the water tank.Internal structure of dust boxDust box coverHEPA filterDust boxRobot coverDust box placement zonePower adapterPower portCharging contact pinCharging contact pin2.4Clean the side brush•Clean the side brush with the cleaning brush.If there is a lot of hair on the side brush,you can use scissors to carefully cut the hair,and then clean.1.Installation steps:Align the side brush with the hole at the bottom and press down until you hear a "click"to indicate that the side brush is in place.2.Disassembly steps:Grab the bristles on both ends of the side brush and pull them out slightly.★Tips:Before each use,please check whether these side brushes have been assembled,otherwise it will affect the normal cleaning work of the vacuum cleaner.Dust box installationInstall mopAdd waterInstall the water tank into the robotDust box cover handleage*Attention:Before cleaning,it is necessary to remove the protective block at the front shell of the machine,and tidy up small objects or obstacles in the room,especially wire entanglements,to prevent them from getting stuck and winding into the bottom of the machine.3.1Application RangeRange of non-application*This product is not suitable for use in extremely hot (+60°C or above)or extremely cold (-5°C or below)environments.*This product is for indoor use only.*Do not use this product in the suspended environment without protective guard,so as to avoid the vacuum cleaner falling accidentally and causing personal injury.*Do not use this product in wet or flammable,explosive,or corrosive environments.*Do not allow this product to absorb unextinguished cigarette butts or matches.*This product cannot be used to absorb the toner used in laser printer or copier.These substances may cause fire disaster.*Do not use this product to absorb sharp objects,such as glass,nails,etc.,to avoid product damage.Protective unit Protective unitApplication rangeThe product is suitable for the following floor environment:Wooden floorUndercoat carpet Ceramic tile3.2Operating Status of Robot1.OFF statusWhen the vacuum cleaner is off,long press the""button,and the blue light will be on after the buzzer goes off.The vacuum cleaner will enter the standby mode after3secs.2.Standby statusWhen the robot is in standby state,the blue light is always on.1.If there is no operation,the vacuum cleaner will automatically shut down after5minutes of standby.2.Short press the""button once and the buzzer will go off once to indicate that the vacuum cleaner enters the automatic cleaning mode.3.Short press the""button once and the buzzer will go off once to indicate that the vacuum cleaner enters the automatic recharging mode.4.Long press the""button for3seconds,the buzzer will go off once,and the vacuum cleaner will shut down.5.Plug in the charger,the buzzer will go off once and the vacuum cleaner will enter the charging mode.3.Mobile phone WIFI connection machine operation●Download the"Tuya Smart"APP and sign up;●APP account registered successfully;●Click"Add Device"in the APP,then"Small Home Appliances",and select"Robot Vacuum"●Enter the WiFi interface,select the home WiFi account and enter the password,then click"Ok".●After starting the machine,hold down the""key for3-5seconds.After the blue light flashes,click "Flash(0.5seconds/time)"on the APP.●Enter the add device interface,connect to wifi,and pay attention to the bouncing prompts on the APP during the connection.12345674.Remote control status1.When the vacuum cleaner is off,press the“POWER”switch button on the remote controlto turn it on at distance,and the robot will enter standby mode with a beep of the buzzer. When the vacuum cleaner is in standby status,press the"POWER"button to turn it off.2.Press the“HOME”recharging button on the remote control to enter the automatic recharging mode and automatically find the charging base to charge.3.Press the“TURBO”cleaning button on the remote control to enter the automatic cleaning mode.4.Press the“WALL”edge cleaning button on the remote control to enter the edge cleaning mode.5.Press the“SPOT”spot cleaning button on the remote control to enter the spot cleaningmode,and the vacuum cleaner starts cleaning with the current point as the center.6.Press the up button on the remote control to move forward.7.Press the left button on the remote control to move left.8.Press the down button on the remote control to move backward.9.Press the right button on the remote control to move right.10.“FULLGO”repeated cleaning button.When the robot is in the charging base,long press this button for2seconds and the robot will emit two beeps to enter the automatic repeated cleaning mode with full power.When the robot is completely charged,it will automatically leave the charging base to enter the automatic cleaning mode for cleaning.In case of low battery,the robot will automatically return to the charging base for charging,so repeat twice to exit this mode.During this period,if you press other buttons to make the robot leave the charging base,the reservation function will be cancelled.11.TIMER reserved cleaning buttonWhen the robot is in the charging base,long press this button for2seconds and the robot will emit two beeps to enter the reserved automatic cleaning mode.The robot will automatically leave the charging base and enter the automatic cleaning mode after24hours from the current time.During this period,if you5.Automatic cleaningWhen the robot in the automatic cleaning status,the blue light for automatic cleaning is always on.The automatic cleaning mode is suitable for cleaning the whole home environment.The robot will clean the house according to the internal set cleaning path and automatically avoid obstacles and steps.1.Press the “”button or “”button on the robot,the buzzer willgo off once and the robot will enter standby mode.2.If the battery is low,the buzzer will go off once and the robot will enter the automatic recharging mode.3.If a fault is detected,the robot will enter the fault detected mode and give a failure alarm.4.If the charger is plugged in and the buzzer will go off once and therobot will enter the charging mode.Cleaning path in automatic cleaningmode6.Automatic recharging modeIn automatic recharging mode,the purple light flickers and the robot runs slowly for looking for the charging base,and will be automatically charged after finding it.During the search,it will turn off the vacuum motor. 1.Press the “”button or “”button on the robot,the buzzer will go off once and the robot will enterstandby mode.2.If a fault is detected,the robot will enter the fault detected mode and give a failure alarm.7.Charging modeIn charging mode,the blue and purple lights flicker alternately to indicate that the robot is in charging.After completely charged,the purple light is always on.In the charging,there are the following available function:Press the “”button on the robot,the buzzer will go off once,and the robot will leave the charging base to enter the automatic cleaning mode.8.Fault detected modeIV .Charging4.1Charging base placementIn order to facilitate the robot to find the charging base in time,it is recommended to place the charging base by the wall smoothly,and do not place anything within 2meters of the front or 1meter of the left and right.4.2Automatic chargingIn operating status,when the battery is too low,the robot will automatically start to look for the charging base and then automatically be charged after finding it.When you press the ""button on the robot,the robot will start to look for the charging base and then automatically be charged after finding it.4.3Manual chargingConnect the power adapter jack directly to the robot and then plug the charging cable into the power supply.1.Please completely charge the robot for12hours when charging for the first time.2.For daily use,please place the robot on the charging base and ensure that the charging base is connected to the power supply.3.If you do not use the vacuum cleaner for a long time,please fully charge it and then turn if off to store it ina ventilated and dry place.V.Maintenance5.1Clean the side brushPlease clean the side brush when the side brush becomes dirty.If the side brush is damaged,it can be replaced.5.2Clean the dust box and filterAfter each use,please clean the dust box and filter in time.Specific operations are shown in the following figure:★Tips:After taking out the dust box,please check whether there is any foreign object in the suction inlet and clean it.5.3Clean the sensor and charging contact pinWipe the sensor and charging contact pin gently with a cleaning tool or a soft cloth.★Tips:If there is any foreign object on the charging contact pin on the charging base,please clean it in time.VI.Specification★Note:The company reserves the right to make any technical or design changes to the product as a result of continuous improvement.The right of interpretation belongs to the company.SensorSensorCharging contact pinSensorCharging contact pinCharging contact pinVII.Environmental ProtectionElementPolybrominated PolybrominatedX:To of theproperlyVIII.Warranty InstructionAccording to the"New Three Guarantees",the warranty period of the complete machine is ONE YEAR "from the date of purchase".(The warranty is available for home use only).1.In the warranty period,as long as the fault caused by the quality of the product itself,customers can bring the completed Product Warranty Card and Purchase Invoice to the"Special Maintenance Center" around the country for free repair.2.Please keep the purchase invoice and warranty card properly as the warranty certificate.Once the invoice is altered,the warranty will become invalid.3.If the warranty period has expired,customers can contact the customer service department of the company for mail order of spare parts,or purchase from the local retailer.4.Special customer service center have the obligation to provide superior service to customers.If customers have any objection to their service quality,customers can directly complain to our customer service department.5.If the warranty period is promised in the instruction manual,the instruction manual shall prevail. No maintenance will be free under the following circumstances:1.No warranty card and valid purchase invoice.2.The complete machine and parts have exceeded the free warranty period.3.The model in the warranty card does not conform to the model of product for maintenance or the warranty card is altered.4.Fault or damage caused by failure to operate the machine as specified in the instruction manual.5.Damage caused by improper use,storage and maintenance of consumers.6.Damage caused by disassembly of other maintenance personnel(i.e.not authorized by our company).7.Fault or damage caused by accidental factors or human reasons(including operation error,liquid inlet, improper plugging,scratch,transport,collision,improper voltage input,etc.).8.Damage caused by force majeure(such as earthquake,fire disaster,lightning stroke,etc.).9.Normal and reasonable consumption or damage(such as natural consumption,wear and aging of the shell and connector parts).10.Other faults and damages not caused by quality problems of our products(including parts).Note:The customer service department of our company will still serve you warmly if the product is not within the warranty scope.IX.Warranty CardFCC Instructions:This product has been tested and found to comply with the limits for a Class B digital device,pursuant to Part15of the FCC Rules.These limits are designed to provide reasonable protection against harmful interference in a residential installation.This product generates,uses and can radiate radio frequency energy and,if not installed and used in accordance with the instructions,may cause harmful interference to radio communications.However,there is no guarantee that interference will not occur in a particular installation.If the product does cause harmful interference to radio or television reception,which can be determined by turning the equipment off and on,the user is encouraged to try to correct the interference by one or more of the following measures:-Reorient or relocate the receiving antenna.-Increase the separation between the product and receiver.-Connect the product into an outlet on a circuit different from that to which the receiveris connected.-Consult the dealer or an experienced radio/TV technicianfor help.This device complies with Part15of the FCC Rules.Operation is subject to the following two conditions:(1)this device may not cause harmful interference,and(2)this device must accept any interference received,including interference that may cause undesiredoperation.Warning:Changes or modifications not expressly approved by the party responsible for compliance could void the user’s authority to operate the product.FCC Radiation Exposure Statement:The equipment complies with FCC Radiation exposure limits set forth for uncontrolled environment.This equipment should be installed and operated with minimum distance20cm between the radiator and your body.。
除氧器操作规程范文
除氧器操作规程范文一、目的为了保证除氧器的安全、稳定运行,达到预期的除氧效果,制定本操作规程。
二、范围本操作规程适用于所有除氧器的操作人员。
三、操作程序1.接班与交班(1)接班人员应仔细阅读前一班次的班组操作记录和运行情况,了解设备现状。
(2)交接班期间,接班人员应与前一班次的操作人员进行面对面沟通,并注意记录有关事项。
特别需要注意的事项:异常运行情况、设备维护保养、待处理的故障、交班记录填写等。
(3)交接班完成后,接班人员应亲自检查设备的运行状况和各类参数,并确保设备处于正常运行状态。
2.设备开机与停机(1)设备开机前,应检查设备各部位是否安装完好、密封良好,并仔细检查阀门、泄漏口、管道等是否存在异常。
(2)按照操作顺序逐一启动设备的主要系统或装置。
3.设备运行监测(1)监测设备各种参数,包括除氧温度、压力、流量等,确保设备运行在正常范围内。
(2)及时发现运行异常或参数波动较大时,应进行相应的调整和处理。
4.设备维护保养(1)设备维护保养包括定期检查、清洁、润滑、紧固螺栓、更换易损件等。
各项操作需按照设备维护手册和规定进行。
(2)维护保养完毕后,应填写维护保养记录,并在设备周围明显位置标识。
5.故障处理(1)对于设备发生的故障,操作人员应根据故障类型,参考设备操作手册或相关资料,按照维修流程进行处理。
(2)操作人员应及时向维修人员报告故障情况,并提供详细的故障描述和现场情况。
6.事故应急处理(1)发生设备事故时,操作人员应立即采取紧急措施,确保人身安全,并在第一时间报告上级和相关部门。
(2)在事故应急处理过程中,应与相关部门保持紧密合作,互相配合,协助进行事故调查和处理。
7.设备停机与保护(1)设备需要停机维修或更换部件时,应按照操作规程正确停机,切断电源,并进行安全防护措施。
(2)在停机期间,应设置相应的警示标识,并严禁他人开机运行设备。
8.清洁与整理操作人员在完成工作后,应将操作区域、工具和设备清洁整理干净,确保无尘、无杂物。
湿氧系统中英对照操作手册基本操作
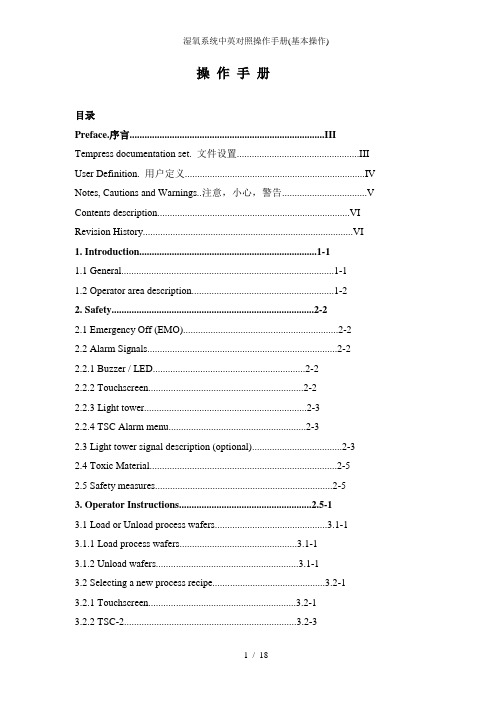
操作手册目录Preface.序言 (III)Tempress documentation set. 文件设置 (III)User Definition. 用户定义 (IV)Notes, Cautions and Warnings..注意,小心,警告 (V)Contents description (VI)Revision History (VI)1. Introduction.......................................................................1-11.1 General.....................................................................................1-11.2 Operator area description.........................................................1-22. Safety.................................................................................2-22.1 Emergency Off (EMO)..............................................................2-22.2 Alarm Signals............................................................................2-22.2.1 Buzzer / LED.............................................................2-22.2.2 Touchscreen..............................................................2-22.2.3 Light tower.................................................................2-32.2.4 TSC Alarm menu.......................................................2-32.3 Light tower signal description (optional)....................................2-32.4 Toxic Material...........................................................................2-52.5 Safety measures.......................................................................2-53. Operator Instructions.....................................................2.5-13.1 Load or Unload process wafers.............................................3.1-13.1.1 Load process wafers...............................................3.1-13.1.2 Unload wafers.........................................................3.1-13.2 Selecting a new process recipe.............................................3.2-13.2.1 Touchscreen...........................................................3.2-13.2.2 TSC-2.....................................................................3.2-33.3 Start/Continue a new process recipe.....................................3.3-1 3.3.1 Touchscreen...........................................................3.3-13.3.2 TSC-2.....................................................................3.3-23.4 Stop a running process recipe...............................................3.4-1 3.4.1 Touchscreen...........................................................3.4-13.4.2 TSC-2.....................................................................3.4-23.5 Abort a running process recipe..............................................3.5-1 3.5.1 Touchscreen...........................................................3.5-13.5.2 TSC-2.....................................................................3.5-23.6 Clear Alarms..........................................................................3.6-1 3.6.1 Required action.......................................................3.6-13.6.2 Touchscreen...........................................................3.6-13.6.3 TSC-2.....................................................................3.6-2Preface序言This set of manuals explains how to operate a Horizontal Diffusion/LPCVD furnace.这套手册是操作水平扩散炉/ LPCVD的说明。
莱宝真空泵说明书中文讲解共28页文档

41、实际上,我们想要的不是针对犯 罪的法 律,而 是针对 疯狂的 法律。 ——马 克·吐温 42、法律的力量应当跟随着公民,就 像影子 跟随着 身体一 样。— —贝卡 利亚 43、法律和制度必须跟上人类思想进 步。— —杰弗 逊 44、人类受制于法律,法律受制于情 理。— —托·富 勒
拉
60、生活的道路一旦选定,就要勇敢地 走到底 ,决不 回头。 ——左
45、法律的制定是为了保证每一个人 自由发 挥自己 的才能 ,而不 是为了 束缚他 的才能 。—— 罗伯过 去和未 来文化 生活的 源泉。 ——库 法耶夫 57、生命不可能有两次,但许多人连一 次也不 善于度 过。— —吕凯 特 58、问渠哪得清如许,为有源头活水来 。—— 朱熹 59、我的努力求学没有得到别的好处, 只不过 是愈来 愈发觉 自己的 无知。 ——笛 卡儿
除氧器 操作规程

除氧器操作规程《除氧器操作规程》一、前言除氧器是一种用于除去水中氧气的装置,它广泛应用于化工生产、水处理、食品加工等领域。
为了确保安全运行和有效的除氧效果,需要制定详细的操作规程。
二、操作流程1. 准备工作- 确保除氧器设备处于正常状态,无任何异常情况。
- 检查操作人员的工作装备,确保安全帽、工作服等配备完善。
- 确保操作人员已经接受过相关培训,并具备操作资格。
2. 启动除氧器- 按照设备启动程序,逐步启动除氧器设备。
- 监控设备运行情况,确保各项指标符合要求。
3. 运行除氧器- 在运行过程中,定期检查氧气排放口是否畅通。
- 关注氧气浓度指示器的读数,确保氧气浓度符合要求。
- 定期清理除氧器设备,防止积灰、杂物影响除氧效果。
4. 停止除氧器- 根据设备停机程序,逐步停止除氧器设备。
- 检查设备是否完全停止运行,并进行必要的维护工作。
5. 紧急情况处理- 在发生异常情况时,立即停止除氧器设备,并通知相关人员进行处置。
- 所有操作人员需严格按照应急预案进行处置,确保人员和设备的安全。
三、注意事项1. 操作人员需严格遵守操作规程,不得擅自变更操作程序。
2. 在操作过程中,如发现任何异常情况,应及时上报,不得隐瞒或掩饰。
3. 操作人员需定期接受培训,不断提升自身的操作技能和安全意识。
4. 除氧器设备的维护保养需按照相关要求进行,不得马虎处理。
四、总结除氧器是一项关键设备,其安全运行和有效运行对于生产过程至关重要。
制定详细的操作规程,严格执行操作流程,能够有效降低事故风险,确保设备稳定运行,保障生产安全。
旋膜式除氧器 说明书 -中英文

旋膜式除氧器安装、使用说明书Rotary film type deaerator installation, operation instruction一、旋膜除氧器的设计特征one, rotary membrane deaerator design features旋膜除氧器,是一种新型热力除氧器,可用于定压、滑压、负压等方式运行,适应于各类电站锅炉、工业锅炉给水及热电厂补给水或热用户用水的除氧。
Rotary membrane deaerator, is a new type of thermal deaerator, can be used for constant pressure, sliding pressure and negative pressure means such as operation, suitable for all kinds of power station boiler, industry boiler feed water and thermal power plant supplies water or hot water users of oxygen.旋膜除氧器的设计特征是:Rotary membrane deaerator design features are:利用气体在水中的溶解特性,通过加热蒸汽,将进入除氧器的补给水、凝结水(包括各种疏水)加热到与除氧器内部压力相对应的饱和温度。
根据亨利定律和道尔顿定律,溶解水中的氧和二氧化碳等非冷凝气体自水中析出,由顶部排气管排入大气,使水中的含氧量达到规定的标准,合格的除氧水贮存在除氧器下部的水箱中,随时准备锅炉给水的需要。
Using gas in water dissolving characteristic, through the heating steam, will enter the deaerator supply water, condensate (including all kinds of hydrophobic) heating to the deaerator internal pressure corresponding saturation temperature.According to Henry's law and Dalton law, the dissolution is the water of oxygen and carbondioxide and noncondensable gas from the water precipitation, the top exhaust pipe into the atmosphere, make the water of oxygen content meet the prescribed standard, qualified oxygen water stored in the lower part of deaerator water tank, ready to boiler feed water needs.旋膜除氧器,由于具备上述技术特性,尤为适用热电厂,热电厂的补给水量大(补水率最大要求100%),补给水温低(最低要求-15℃),含氧量高(约10000ug/L)。
莱宝真空泵说明书中文
• 双旋片与三旋片的区别: 双旋片:每转一周吸排气各两次 三旋片:每转一周吸排气各三次
工作原理说明
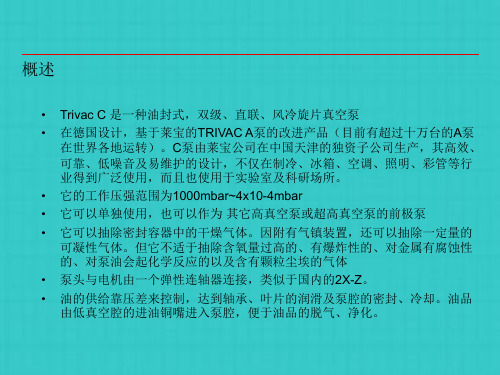
• Trivac C泵是油封式旋片真空泵,驱动电机与泵主体直接用法兰连接,泵与 电机的轴由弹性联轴器直接连接,在联轴器上装有风扇,通过冷却孔隙使联 轴器周围即使在极端的条件下仍保持较低的温度,所有轴承均为油润滑的滑 动轴承。
气镇的原理 由气体流量连续性方程可知:P1S1=P2S2,又因S1/S2=4,所以P2/P1=4。
通气/隔离阀(防返油阀) 泵主体由用O圈密封的部件组装而成,所有部件均用定位销连接以便于拆卸,泵体很易卸下且不需要专用工具。 Trivac C 极限真空的测定及合格标准
1油、循饱环和量蒸•与汽极压限气要真低镇空,之法易间挥又存发在称成有分掺下要图气少所。法示的,曲是线A防BC止的特蒸性气,并凝指结出获从得而最佳避的免极限油真污空所染需的的最有适效当的方油法循环。量这(在种B方点)法。 通常在泵运转于是极将限压一强股下会经出过现油控撞制击声的,气这种流噪(音可通由常在1是0注室入温很小干量燥的二的次空空气气来)消音经。气镇孔进入泵的压缩 如2、果要没有有一向定泵粘腔腔度冲,中入且大,随气温让,度在这变压化股差小的气(作粘流用度下在温,升压油曲将缩线被平过挤滑如程)泵。中腔,与下被次启抽动蒸时,气泵相所配混的,电机形功成率难蒸以气带动和,空造气成电的机混“憋合机物”。。 在压缩开始时,把打这开气种镇混阀注合入物一定压量缩的气到镇排气体气,压以确强保时泵抽,除使水蒸蒸气气压力分达压到技强术能参数保的持要求在。泵温状态的饱和蒸 业C得泵到由广莱泛宝使公用司气,在而压中且国以也天使下津用的,于独实因资验子而室公及蒸司科生气研产场不,所其会。高凝效、结可。靠、这低时噪音推及开易维排护气的设阀计,,不蒸仅气在制与冷其、冰它箱气、空体调一、照起明被、彩排管等行 被抽气体中蒸气至的泵含量外越。多,被掺抽入的气干体燥气中体蒸量就气要的越多含。量越多,掺入的干燥气体量就要越多。
莱宝真空泵中文说明书
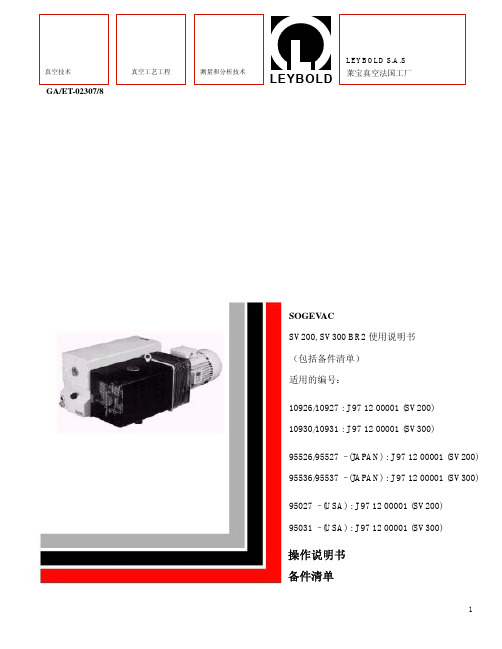
GA/ET-02307/8SOGEV ACSV200, SV300 BR2使用说明书(包括备件清单)适用的编号:10926/10927 : J 97 12 00001 (SV200)10930/10931 : J 97 12 00001 (SV300)95526/95527 – (JAPAN) : J 97 12 00001 (SV200)95536/95537 – (JAPAN) : J 97 12 00001 (SV300)95027 – (USA) : J 97 12 00001 (SV200)95031 – (USA) : J 97 12 00001 (SV300)操作说明书备件清单合格证的EC声明我们,LEYBOLD SA,在此郑重声明,以下规定的产品在设计、型号及流通过程中的改型方面均满足有关EEC指令的安全和健康基本要求。
如果没有我们批准而对产品做任何改变,本声明将无效。
产品结构:单级旋片泵SOGEV AC型号:UV25SV 16 – SV 25 – SV 40 – SV 65SV 100 – SV 200 – SV 300 – SV 585SV 630 – SV 750 – SV 1200和它们的改型,但不带电机交付的泵和带Eex…..电机交付的泵除外。
产品满足下述指令要求:- EEC 机械指令(89/392/EWG)和相继指令91/336/EWG- EEC 低电压指令(73/23/EWG)- EEC 电磁兼容性指令(89/336/EWG)应用协调标准:- EN 1012.1 (project 1993)292.1- EN- EN292.260204.1- EN真空泵安装和启动前,必须阅读并弄懂本使用说明书。
注意:按照最新技术标准和安全规程已经制造出SOGEV AC真空泵。
如果不能正确的安装或不能按指导正确使用,会发生危险。
在一定的运行条件下,当运转真空泵时可能出现危险状态。
如果发生这种情况,请与我们当地办事处联系。
- 1、下载文档前请自行甄别文档内容的完整性,平台不提供额外的编辑、内容补充、找答案等附加服务。
- 2、"仅部分预览"的文档,不可在线预览部分如存在完整性等问题,可反馈申请退款(可完整预览的文档不适用该条件!)。
- 3、如文档侵犯您的权益,请联系客服反馈,我们会尽快为您处理(人工客服工作时间:9:00-18:30)。
1 真空除氧器 Vacuum Deaerator
说 明 书 Instruction
江苏津宜水工业装备有限公司 Jiangsu Jinyi Water Industry Equipment Co.,Ltd. 2
一、 用途 天然水中溶有多种气体,在锅炉水给水中,氧对锅炉腐蚀的危害最大.为此国家标准GB1576-85“低压锅炉水质标准”中规定2吨/时以上锅炉必须除氧.真空除氧器的出水含氧量能满足标准的要求. 真空除氧器还可以用于石油钻井回注水的除氧及水处理脱硫工艺中氢离子交换器后除二氧化碳等多种场合. Application: There are various gases dissolved in nature water; the oxygen contained in the boiler feed water may cause maximum corrosion to the boiler. So the national standard GB1576-85 "low-pressure boiler water quality standard" clearly states that all the boilers of 2 t/h or higher are required to have their feed water deaerated. The oxygen level in the treated water from the vacuum deaerator can meet the standard and requirement. The vacuum deaerators may also be used for deaeration of the return water in oil drilling industry and for CO2 removal after the hydrogen ion exchange in the desulfurization process of water treatment; 二、 原理 真空除氧的原理是基于亨利定律,即在封闭容器中,气体在水中的溶解度与该气体在水面上的分压力成正比.水在沸腾时,水面上蒸汽的分压力增加,溶解于水中的气体分压力随之减小,当水面上充满了水蒸气时,水不再具有溶解气体的能力,水中所溶解的气体就析出.从水的饱和温度特性可知,在真空状态下低温水也能沸腾. 真空除氧就是利用这一特性达到除去气体(包括氧气)的目的. Working principle: The working principle of the vacuum deaeration is based on the Henry theory, that is, in a closed container, the solubility of gases in the water is in proportion to the partial pressure of the gas on the water surface; when the water is boiling, the partial pressure of the steam on the water surface will increase, while the partial pressure of the dissolved gas will decrease accordingly; when the water surface is covered full with steam, the water will no longer have the capacity to dissolve the gas and then the dissolved gas in the water will be separated out. We can see from the saturated temperature 3
characteristics of the water that low-temperature water can also boil under vacuum condition, which is utilized by the vacuum deaerator to remove the gases including oxygen; 三、 特点 1、运转工况稳定,真空度高,使用场合广. 2、不消耗蒸汽,锅炉出力可全部利用. 3、低温的除氧水可通过换热器回收低品位的废热后再作为锅炉给水,从而收到节能效果. 4、适应性强,从负荷0-120%范围内变化时,除氧效果不受影响. 5、本除氧器除高位安装外,接上引水泵机组后还可以低位安装,便于单层布置的小锅炉房用,节省投资,管理操作维修方便. Characteristics: 1, Stable operating conditions, high level of vacuum and widespread applications; 2, No consumption of steam and all outputs from the boiler may be fully utilized. 3, The low-temperature deaerated water may be recycled as feed water to the boiler after its low-grade waste heat is recovered by the heat exchanger to save the energy; 4, High adaptability, the changes of the load within 0-120% will have no impact on the deaeration efficiency; 5, In addition to overhead installation, the deaerator may also be installed at low place after connection with the water pump, which is suitable for small boiler room with only single floor featuring low cost and easy and convenient management, operation and maintenance; 四、 技术规格 真空除氧器主要由除氧器(脱气塔与除氧水箱),水喷射真空泵机组、引水泵机组等三部分设备组成,下述为除氧器技术规格,其它设备可备阅其样本。 Technical specifications: The vacuum deaerator mainly consists of deaerator (degas tower and 4
deaerated water tank), water jet pump unit and priming pump unit. The technical specification for the deaerator is described as following, the technical specifications for the other two parts may refer to corresponding instructions; 五、 设备与附件 Equipments and accessories 1、脱气塔 脱气塔内装有铜制雾化喷头,每只喷头处理水量恒定,从而得到最佳的喷雾效果。塔内装有填料层、传质快、亲水性能好。雾化的结果大大增加了水的脱气面积,当雾化的水滴继续流经无规则堆放的填料层时,进一步加强了脱气效果。因此,虽然水在脱气塔内停留的时间很短,然而除氧效果很好。 Degassing tower: The degassing tower is provided with copper atomizing nozzles inside with stable water flow from each nozzle to achieve the best atomizing efficiency. The packing inside the tower features fast mass transfer and good hydrophilic performance. The atomization will result in the great increase of the degassing area of the water; and the degassing efficiency is further strengthened when the atomized water droplets flow through the packing layers stacked in disorder. As the result, despite the short-time retention of the water in the degassing tower, the deaeration efficiency is satisfactory; 2、除氧水箱 除氧器运行时,水箱内处于负压。因此在高位安装时,水箱出口处与锅炉给水泵进口之间的净距离不得小于11米。在低位安装时(水箱出水口与锅炉给水泵在同一高度),水箱出水口要接上引水泵机组,使负压水升压后进入锅炉给水泵,水箱上装有人孔,便于维修保养时使用。 Deaerated water tank: The water tank is in negative pressure inside when the dearator is running, so when the deaerator is to be installed at high position, the net distance between the outlet of the water tank and the inlet of the water feed pump of boiler shall be no less than 11 meters. When the deaerator is to be installed at low place (the outlet of water tank and the water feed pump of the boiler are at the same