翼子前安装板组件(L)
浅谈汽车前翼子板的结构设计
.
于 侧 围与 翼 子 板 之 间 的大 缝 隙 既 影 响 美 观 ,也 是 风 噪 产 生 的主 要 区域 ,一 般 采 用 泡 棉 或 者 塑 料 橡 胶 件 进 行 封堵 ,较 多的 是 使 用 卡 扣 固 定在 翼 子 板 翻 边 上 。
t
一
e n? d e
嘧I l l O O】 n l
/| 一
经 验交
4前 翼 子 板 的 结构 设 计
( )前 翼 子 板 与 前 门的 运 动 校 核 1 如 图 1所 示 是 前 门和 翼 子 板 的 运 动 最 小 间 隙 值 ,不 同
的 公 司 设 定 的 目标 也 有 差 异 ,一 般 是 25 m 左 右 ,如 果 此 . a r 间 隙 值 过 小 ,在 制 造 过 程 中 就 会 出现 前 门 与 翼 子 板 干 涉 的 现 象 。决 定 此 值 的关 键 因 素 有 前 门分 缝 线 的 形 状 、前 门铰
\ ¨ bI E-o. ̄ r 刈n lg  ̄ cke: ] : :et
刮盖 户 板 上设 置 卡 钩 钩 住 翼 子 板 翻 边 ,从 而 遮 挡 该 缝 隙 ,或
\
\
l
/
厂 I 5u 一 ed }d
-
者将 雨 刮 盖 板 两 侧 橡 胶 部 分 与 翼 子板 粘 接 固 定 。另 外 ,由
图 4 翼 子 板 与 挡 泥 板 的 安 装
5前 翼 子 板 安 装 点 刚度 和 抗 凹性
前 翼 子 板 各 安 装 点 的 刚 度 和 前 翼 子 板 的抗 凹性 如 果 不 满 足 要 求 ,会 导致 翼 子 板 变 形 、外 观 不 良及 行 驶 中产 生 噪
飞行器翼蹬板用户指南说明书

Europe, Middle East ENGLISHFRANÇAIS DEUTSCH NEDERLANDS ITALIANOESPAÑOL PORTUGUÊSРУССКИЙČESTINATÜRKÇEPOLSKI SVENSKASUOMI SLOVENCINA MAGYAR NYELVNorth America/ Norteamérica ENGLISH FRANÇAIS ESPAÑOL Latin America/ América Latina ENGLISH ESPAÑOL PORTUGUÊS Asia Paci c日本語繁體中文ENGLISH✂❻❼❽User ManualTECHNICAL FEATURES ❶REMOVABLE HEEL-RESTS (10)The pedal set’s 2 heel-rests are removable.2 different ergonomic configurations are possible:- Foot fully positioned on the pedal ❷(with the heel-rest installed); or- Ball of the foot positioned at mid-pedal ❸(with the heel-rest removed)To remove the heel-rests ❹:- Using the included Allen key (11), unscrew and remove the 2 screws from each heel-rest. - Completely remove the heel-rests from the pedals.Please note: carry out this procedure in reverse to reinstall the heel-rests.1. TFRP pedal set2. Rudder axis3. Axes for independent differentialbrakes4. Pedal set’s male RJ12 connector5. RJ12/USB adapter (T.RJ12 USB Adapter)6. Adapter’s female RJ12 connector7. Adapter’s USB connector8. Adapter’s selector switch9. Adapter’s LED10. Removable heel-rests 11. Allen keyINSTALLATION ON PC ❻ USING THE RJ12/USB ADAPTER1.Connect the TFRP pedal set’s male RJ12 connector (4) to the female RJ12 connector (6) on the adapter (5).2.Set the adapter’s selector switch (8) to the AIRPLANE position ❺.3. Go to https:///. Select Joysticks / TFRP T.Flight Rudder Pedals, then select Drivers. Download and install the PC driver and its custom Windows Control Panel-based interface.4.Once the PC driver has been installed, connect the adapter’s USB connector (7) to one of the USB ports on your PC.5.The adapter’s LED (9) lights up in GREEN.6.To access the Control Panel, select:-Start / All Apps / Thrustmaster / Control Panel or Control Panel (in Windows® 10 / 8.1 / 8); or-Start / All Programs / Thrustmaster / Control Panel or Control Panel (in Windows® 7)The Game Controllers dialog box is displayed.The accessory appears onscreen with the name T-Rudder and OK status.7.In the Game Controllers dialog box, click Properties to test and view all functions. You are now ready to play!AVAILABLE AND COMPATIBLE ADVANCED SOFTWARE APPLICATIONS(only with the TFRP pedal set, when connected to the RJ12/USB adapter)ADVANCED CALIBRATION SOFTWARE ❼(T.RJ12 USB ADAPTER Calibration Tool)Go to https://. Select Joysticks / TFRP T.Flight Rudder Pedals, then select Utilities. Download and install the advanced calibration software, which lets you: -Adjust the dead zones to your liking at the beginning and end of the range of travel on the rudder axis, and on the 2 differential brake axes.-Adjust the central dead zone to your liking on the rudder axis.-Save these adjustments directly in the internal memory of the adapter (5).T.A.R.G.E.T ADVANCED PROGRAMMING SOFTWARE ❽(Thrustmaster Advanced pRogramming Graphical EdiTor)Go to https://. Select Joysticks / TFRP T.Flight Rudder Pedals, then select Software. Download and install the T.A.R.G.E.T advanced programming software.Main features of T.A.R.G.E.T:- A variety of configurations are available for the axes of the rudder and differential brakes. -Different programming levels are available: Basic, Advanced and Script.-Uses the Drag and Drop principle.-The TFRP pedal set can be used in conjunction with a variety of Thrustmaster controllers (Hotas Cougar, Hotas Warthog, T.16000M, MFD Cougar Pack, also compatible with T.A.R.G.E.T), allowing for them to be recognized as a single USB device.-Advanced profiles are available, created by members of the Thrustmaster community.IMPORTANT NOTES REGARDING AUTOMATIC CALIBRATION OF AXESTo avoid any calibration problems:- Always leave the rudder axis centered (without placing your feet on the rudder) when connecting the TFRP pedal set using the adapter’s USB connector.- Never connect the pedal set to the adapter when the adapter is connected to a PC or during a game.- Never disconnect the pedal set from the adapter when the adapter is connected to a PC or during a game. Power off the PC first.- Always connect the pedal set to the adapter before connecting the adapter’s USB connector to the PC.The pedals’ 3 axes automatically calibrate themselves after a few movements, and after having reached the physical stops for the rudder axis and the 2 differential brake axes.•My pedal set is not working properly, or seems to be improperly calibrated.- Power off your PC and disconnect the adapter’s USB connector. Then reconnect the USB connector, power on your PC again, and restart your game.- Make sure that the adapter’s selector switch (8) is set to the AIRPLANE position, and that the LED is lit up in GREEN.- When connecting the adapter’s USB connector, always leave the rudder axis centered (without placing your feet on the rudder).•I can’t configure my pedal set.- In your game’s Options / Controller / Gamepad or Joystick menu, select the appropriate configuration or completely reconfigure the controller’s options.- For more information, please refer to your game’s user manual or online help.- Use the T.A.R.G.E.T (Thrustmaster Advanced pRogramming Graphical EdiTor) advanced programming software.•My pedal set is too sensitive, or not sensitive enough.- Your pedal set automatically calibrates itself after a few movements, and after having reached the physical stops for the rudder axis and the 2 differential brake axes.- In your game’s Options / Controller / Gamepad or Joystick menu, adjust the sensitivity and dead zones for your controller (if these options are available).- Use the T.RJ12 USB ADAPTER Calibration Tool advanced calibration software.- Use the T.A.R.G.E.T (Thrustmaster Advanced pRogramming Graphical EdiTor)advanced programming software.CONSUMER WARRANTY INFORMATIONWorldwide, Guillemot Corporation S.A., whose registered office is located at Place du Granier, B.P. 97143, 35571 Chantepie, France (hereinafter “Guillemot”) warrants to the consumer that this Thrustmaster product shall be free from defects in materials and workmanship, for a warranty period which corresponds to the time limit to bring an action for conformity with respect to this product. In the countries of the European Union, this corresponds to a period of two (2) years from delivery of the Thrustmaster product. In other countries, the warranty period corresponds to the time limit to bring an action for conformity with respect to the Thrustmaster product according to applicable laws of the country in which the consumer was domiciled on the date of purchase of the Thrustmaster product (if no such action exists in the corresponding country, then the warranty period shall be one (1) year from the original date of purchase of the Thrustmaster product).Notwithstanding the above, rechargeable batteries are covered by a warranty period of six (6) months from the date of original purchase.Should the product appear to be defective during the warranty period, immediately contact Technical Support, who will indicate the procedure to follow. If the defect is confirmed, the product must be returned to its place of purchase (or any other location indicated by Technical Support).Within the context of this warranty, the consumer’s defective product shall, at Technical Support’s option, be either replaced or returned to working order. If, during the warranty period, the Thrustmaster product is subject to such reconditioning, any period of at least seven (7) days during which the product is out of use shall be added to the remaining warranty period (this period runs from the date of the consumer’s request for intervention or from the date on which the product in question is made available for reconditioning, if the date on which the product is made available for reconditioning is subsequent to the date of the request for intervention). If permitted under applicable law, the full liability of Guillemot and its subsidiaries (including for consequential damages) is limited to the return to working order or the replacement of the Thrustmaster product. If permitted under applicable law, Guillemot disclaims all warranties of merchantability or fitness for a particular purpose.This warranty shall not apply: (1) if the product has been modified, opened, altered, or has suffered damage as a result of inappropriate or abusive use, negligence, an accident, normal wear, or any other cause unrelated to a material or manufacturing defect (including, but not limited to, combining the Thrustmaster product with any unsuitable element, including in particular power supplies, rechargeable batteries, chargers, or any other elements not supplied by Guillemot for this product); (2) if the product has been used for any use other than home use, including for professional or commercial purposes (game rooms, training, competitions, for example); (3) in the event of failure to comply with the instructions provided by Technical Support; (4) to software, said software being subject to a specific warranty; (5) to consumables (elements to be replaced over the product’s lifespan: disposable batteries, audio headset or headphone ear pads, for example); (6) to accessories (cables, cases, pouches, bags, wrist-straps, for example); (7) if the product was sold at public auction.This warranty is nontransferable.The consumer’s legal rights with respect to laws applicable to the sale of consumer goods in his or her country are not affected by this warranty.Additional warranty provisionsDuring the warranty period, Guillemot shall not provide, in principle, any spare parts, as Technical Support is the only party authorized to open and/or recondition any Thrustmaster product (with the exception of any reconditioning procedures which Technical Support may request that the consumer carry out, by way of written instructions – for example, due to the simplicity and the lack of confidentiality of the reconditioning process – and by providing the consumer with the required spare part(s), where applicable).Given its innovation cycles and in order to protect its know-how and trade secrets, Guillemot shall not provide, in principle, any reconditioning notification or spare parts for any Thrustmaster product whose warranty period has expired.In the United States of America and in Canada, this warranty is limited to the product’s internal mechanism and external housing. In no event shall Guillemot or its affiliates be held liable to any third party for any consequential or incidental damages resulting from the breach of any express or implied warranties. Some States/Provinces do not allow limitation on how long an implied warranty lasts or exclusion or limitation of liability for consequential or incidental damages, so the above limitations or exclusions may not apply to you. This warranty gives you specific legal rights, and you may also have other rights which vary from State to State or Province to Province.LiabilityIf permitted under applicable law, Guillemot Corporation S.A. (hereinafter “Guillemot”) and its subsidiaries disclaim all liability for any damages caused by one or more of the following: (1) the product has been modified, opened or altered; (2) failure to comply with assembly instructions; (3) inappropriate or abusive use, negligence, an accident (an impact, for example); (4) normal wear; (5) the use of the product for any use other than home use, including for professional or commercial purposes (game rooms, training, competitions, for example). If permitted under applicable law, Guillemot and its subsidiaries disclaim all liability for any damages unrelated to a material or manufacturing defect with respect to the product (including, but not limited to, any damages caused directly or indirectly by any software, or by combining the Thrustmaster product with any unsuitable element, including in particular power supplies, rechargeable batteries, chargers, or any other elements not supplied by Guillemot for this product).FCC STATEMENT1. This device complies with Part 15 of the FCC Rules. Operation is subject to the following two conditions:(1) This device may not cause harmful interference, and(2) This device must accept any interference received, including interference that may cause undesired operation.2. Changes or modifications not expressly approved by the party responsible for compliance could voidthe user's authority to operate the equipment.8/8 COPYRIGHT © 2019 Guillemot Corporation S.A. All rights reserved. Thrustmaster® is a registered trademark of Guillemot Corporation S.A. Windows® is a registered trademark of Microsoft Corporation in the United States and/or other countries. All other trademarks are the property of their respective owners. Illustrations not binding. Contents, designs and specifications are subject to change without notice and may vary from one country to another. Made in China. ENVIRONMENTAL PROTECTION RECOMMENDATIONIn the European Union: At the end of its working life, this product should not be disposed of with standard household waste, but rather dropped off at a collection point for the disposal of Waste Electrical and Electronic Equipment (WEEE) for recycling. This is confirmed by the symbol found on the product, user manual or packaging. Depending on their characteristics, the materials may be recycled. Through recycling and other forms of processing Waste Electrical and Electronic Equipment, you can make a significant contribution towards helping to protect the environment. Please contact your local authorities for information on the collection point nearest you. For all other countries: Please adhere to local recycling laws for electrical and electronic equipment. Retain this information. Colours and decorations may vary. Plastic fasteners and adhesives should be removed from the product before it is used. *Applicable to EU and Turkey only TECHNICAL SUPPORThttps://* *。
汽车前翼子板的布置和结构设计
汽车科技 ,AU TO SCl _ T E CH 2 0 1 3 年第6 期
1 前翼子板设 计流程
的结 构 。一般 翼子板要 与 门运 动包络 面保证在2 . 5
在 造 型 可行 性 研 究 阶段 ,造 型 输 入 初 版 的 m m以上 ;此运动 间隙与前 门的铰链轴 布置 、分缝 C A S 面后 ,通 过 断面 设计 考虑 法 规 、工艺 等 各方 线 、翼子板 圆角及 翻边 、D T S 定义 、前 门包边及铰 面 因素 将 造 型 上 存 在 的 工 程 问 题 反 馈 给 造 型 部 链座 、侧 围间隙 、前 门铰链 型式等 因素有关 。 门 ,再结合 竞 品分析 初 步定义翼 子板 与周 边零 件 的分 缝位 置和 型式 ,由造 型部 门进 行调整 ,然 后
设计 - 研究 I 汽车前翼子板的布置和结构设计 d o i : 1 0 . 3 9 6 9 / j . i s s n . 1 0 0 5 - 2 5 5 0 . 2 0 1 3 . 0 6 . 0 0 4 收稿 日期 :2 0 1 2 — 0 4 — 2 8
汽 车前 翼 子 板 的布 置 和 结 构 设 计
图2 翼子板 与机 罩运 动 间隙
( 4) 前 翼子板 与前 门 、发动机 罩 、前轮包 络
的运 动安全 间隙 。
如 图2 所示 ,图中所示 圆圈处 ,开 闭发动 机罩 时容易 与翼 子板相 互碰撞 ,要 保证 发动机 罩开 闭
袁 亮 ,秦 信武 ,苗 布和 ( 东 风汽 车公 司技术 中心 ,武汉 4 3 0 0 5 8)
摘 要 :汽车覆盖件是现代汽车结构重 要组成 部分 ,而汽车前翼子板作为汽车 的大型覆 盖件对造 型 、零部件结构设计 、布置要求都很高 ,本文通过常见 的翼子板结构 ,总结 了翼子
任务1 车身前翼子板的拆装与调整
模块二 典型车身钣金件的拆装
一、翼子板的结构和组成 汽车翼子板可分为前翼子板和后翼子板,如图2-1-2所示。
模块二 典型车身钣金件的拆装
1.前翼子板 前翼子板大多用螺钉与车身壳体相连接,后端通过中间板
和前围支柱相连接,前端和散热器框的延长部分及灯具架相连 接,侧面与挡泥板连接。
2.后翼子板 后翼子板是车身后部侧面的外表,又称为后侧围板,是后部 车身两侧的大块板件,从后车门向后一直延伸到后保险杠位置, 构成后段车身的侧面。它与后侧围内板连接或后舱架连接(两 厢式),后翼子板通常以焊接方式固定,是后段车身中的重要 构件。后翼子板总成包容车轮,应具有防止水流飞溅的功能, 并与车轮不发生运动干涉。它的形状和四周边界取决于车身造 型,并与行李箱盖或后舱背门、后保险杠、后部灯具、车轮等 形状和位置有关。
相关实训
由于事故汽车左前部与其他车辆相撞,造成翼子板严重 变形,在更换之前,需先将前保险杠、大灯、挡泥板等一 一进行拆卸,再进行翼子板的拆卸修复。
一、拆下保险杠 首先准备好开口扳手和套筒扳手,拆下保险杠骨架的固 定螺栓和螺母,然后两人配合取下保险杠,如图2-1-8所示。
模块二 典型车身钣金件的拆装
模块二 典型车身钣金件的拆装
任务1 车身前翼子板的拆装与调整
1.掌握车身翼子板的结构; 2.掌握汽车翼子板拆装的常用工具及其使用方法; 3.能够熟练进行车身翼子板的拆装和调整。
模块二 典型车身钣金件的拆装
如图2-1-1所示为一辆事故汽车,汽车左前部与其他 车辆相撞,造成左前翼子板严重变形,经4S店鉴定无法恢 复其强度及表面形状,车主要求更换汽车左前翼子板。
模块二 典型车身钣金件的拆装
四、拆装翼子板 在拆装前查看所修理车型翼子板与车身的连接螺母,正 确地选择不同的扳手、十字起等维修工具。
飞机前缘缝翼
18加仑)控制缝翼工作速度.
30
前缘缝翼液压旁通活门
31
位置
32
2.4. 缝翼液压动力的来源
▪ 通常工作 ▪ 左液压系统操纵缝翼 ▪ 并且经过襟翼/缝翼释压组件(释压单元体)、旁通活门、
流量限制器和控制活门向动力驱动组件(PDU)上的一个可 逆转的液压马达提供液压压力, ▪ 压力释压组件包含有一个关断活门(失效保护/备用工作) ,一个优先次序活门(齿轮对衿翼/ 缝翼)和一个顺序活门( 缝翼对衿翼来说). ▪ 旁通活门将系统的压力释放到回油路去(失效保护/备用工 作). –控制活门向可逆转的液压马达提供系统压力。 ▪ 一个流量限笄封器(18加仑/分钟)控制了缝翼的最大工作 速度。
44
旋转作动器
45
2.8. 内侧缝翼控制面的驱动和滑轨
46
2.8.1.结构概述
▪ 每块内侧缝翼用两个旋转作动器, ▪ 两条主撑滑轨和两条附助滑轨来放出和引导缝翼的轨迹
. ▪ 在缝翼两边的主滑轨各由一个旋转作动器随动, ▪ 安装在这两条主滑轨的下面是一个齿轮托架, ▪ 每一滑轨安装在两片支撑肋之间, ▪ 支撑肋也对旋转作动器起支撑作用, ▪ 每一个作动器有一个游星齿轮,
沿着左机翼前缘向外延伸。 ▪ 从齿轮箱的右侧 也伸出一根扭力管穿过机身。 ▪ 经过机体角度齿轮箱的一边,
–沿着右机翼前缘向外延伸。
8
附件位置
▪ 每一块外侧缝翼段是安装在两个附助滑轨和两个包括由 一个旋转作动器传动的齿轮方架的主滑轨上.
▪ 内侧缝翼用一个额外的中心主滑轨作为支撑, –而这个滑轨是没有齿轮方架的.
29
3. 前缘缝翼液压旁通活门
标准工时
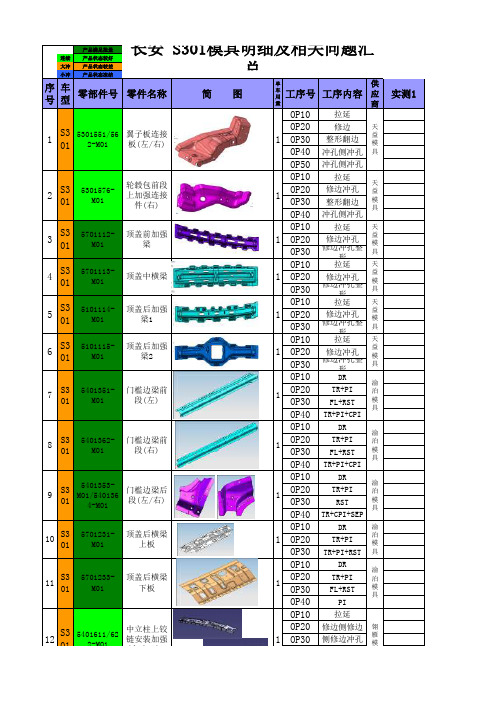
产品满足批量连续产品状态较好大冲产品状态较差小冲产品状态冻结序号车型零部件号零件名称简 图单车用量工序号工序内容供应商实测1OP10拉延OP20修边OP30整形翻边OP40冲孔侧冲孔OP50冲孔侧冲孔OP10拉延OP20修边冲孔OP30整形翻边OP40冲孔侧冲孔OP10拉延OP20修边冲孔OP30修边冲孔整形OP10拉延OP20修边冲孔OP30修边冲孔整形OP10拉延OP20修边冲孔OP30修边冲孔整形OP10拉延OP20修边冲孔OP30修边冲孔整形OP10DROP20TR+PIOP30FL+RSTOP40TR+PI+CPIOP10DROP20TR+PIOP30FL+RSTOP40TR+PI+CPIOP10DROP20TR+PIOP30RSTOP40TR+CPI+SEPOP10DROP20TR+PIOP30TR+PI+RSTOP10DROP20TR+PIOP30FL+RSTOP40PIOP10拉延OP20修边侧修边OP30侧修边冲孔1 2 3 4 5 6 7 8 9 10 11 12S301S301S301S301S301S301S301S301S301S301S301S35301551/562-M015301576-M015701112-M015701113-M015101114-M015101115-M015401351-M015401362-M015401353-M01/5401364-M015701231-M015701233-M015401611/62翼子板连接板(左/右)轮毂包前段上加强连接件(右)顶盖前加强梁顶盖中横梁顶盖后加强梁1顶盖后加强梁2门槛边梁前段(左)门槛边梁前段(右)门槛边梁后段(左/右)顶盖后横梁上板顶盖后横梁下板中立柱上铰链安装加强111111111111天益模具天益模具天益模具天益模具天益模具天益模具渝泊模具渝泊模具渝泊模具渝泊模具渝泊模具翎雁长安 S301模具明细及相关问题汇总OP50整形161OP05落料OP10拉延142OP20侧修边冲孔56OP30修边冲孔侧修边OP40整形OP10拉延OP20侧修边冲孔OP30修边冲孔侧修边OP40整形OP10拉延155OP20TR+CTR+PI 63OP30TR+CTR 25OP40FL+RST OP50CFL+SEP OP10DR OP20TR+PI OP30TR+PI OP40RST+SEP OP10拉延59OP20修边冲孔OP30修边冲孔OP10拉延OP20修边冲孔OP30整形OP40修边冲孔op10拉延32.4op20修边冲孔op30整形op40冲孔41.6op10拉延130op20切边冲孔45op30切边冲孔55op40翻边整形OP05落料OP10拉延OP20切边冲孔OP30翻边整形OP40冲孔侧冲孔OP10拉延OP20切边冲孔OP30翻边整形OP40冲孔侧冲孔OP10成型OP20侧整型OP30修边冲孔侧冲孔侧翻边OP05落料冲孔50OP10成型131415161718192021222301S301S301S301S301S301S301S301S301S301S301S301S3/622-M015401131-M015401142-M015401211/222-M015401513/524-M015701116-M015701211-M015102291-M015701121-M015401331-M015401342-M015102171-M01链安装加强板(左/右)侧围上边梁加强板(左)侧围上边梁加强板(右)后立柱外板(左/右)后大灯安装板下连接板(左/右)顶盖后加强梁Ⅲ顶盖前横梁前地板中鼓包天窗加强环 中立柱加强板(左) 中立柱加强板(右)左地板边梁11111111111雁模具翎雁模具翎雁模具翎雁模具翎雁模具西双宏模具西双宏模具通达模具通达模具通达模具通达模具兴达模具兴OP30修边冲孔侧冲孔侧翻边OP10拉延OP20修边冲孔侧修边OP30冲孔侧整形OP40冲孔侧冲孔侧修边OP10拉延138OP20修边冲孔47OP30整形翻边修边139OP40侧整形冲孔116OP50侧整形冲孔侧冲孔侧修50OP10拉延OP20修边冲孔OP30整形翻边修边OP40侧整形冲孔143OP50侧整形冲孔侧冲孔侧修91OP10拉延OP20修边冲孔OP30整型OP40侧整形OP50修边冲孔侧冲孔分离翻OP10DR OP20TR+PI OP30FL+RST OP40PI+SEP OP10BL OP20FO OP30FL OP40PI OP10DR OP20TR+PI OP30TR+PI OP40FL+SEP OP10BL OP20FO OP30PI OP40FL OP50PI+FL OP10BL 50OP20FO+FL OP30C_PI 43OP10BL+PI OP20FO+FL 113OP30PI 29OP40PI 35OP10BL+PI 58OP20FO+FL41OP3058OP40242526272829303132333435S301S301S301S301S301S301S301S301S301S301S3015102313-M015104351-M015104362-M015301111/53011225401113-M015401124-M015401517-M015401528-M015401231-M015401242-M015301672-M015102911-M015102912-M015102915-M015401382-M01右地板边梁前地板中鼓包上盖板后地板左下纵梁后地板右下纵梁前纵梁内板-左/右后门限位器安装加强板(左/右)后大灯安装板连接板(左/右)后门锁销安装板(左/右)水壶安装支架中央扶手上支架(左/右)扶手下支架门槛边梁加强支架11111达模具兴达模具兴达模具兴达模具兴达模具天业模具天业模具天业模具通达模具天业模具天业模具天业模具接刀段差面间隙3面间隙2.3OP20FOOP30PI+FL+SEPOP10BLOP20FO+FLOP30PIOP10BL+PIOP20FO+FLOP30PIOP10BL+PI160 OP20FO+FL50 OP30PI25 OP10BLOP20FO+FLOP30PIOP40FLOP50PIOP60FOOP10BL+PIOP20FO+FLOP30PI+C_PIOP10DR15.7 OP20TR+PI13.8 OP30FL+SEP19 OP40PI+C_TR15.8 OP50FL40 OP10BL+PI60.6 OP20FO53 OP30FL52 OP40FL67 OP50FL+PI38 OP10BL+PI43 OP20FO42 OP30FL28 OP40FL92 OP50FL+PI39 OP10BL+PI40 OP20FO90 OP30FL90 OP40PI55 OP10BL+PIOP20FL+FOOP30PI+SEP47S3015401526-M01锁扣安装板PRO PRO拓胜模具PRO PRO拓胜模具36 37 38 39 40 41 42 43 44 45 46 48S301S301S301S301S301S301S301S301S301S301S301S3015401373-M015401384-M015701212-M013550021-M013550021-M023550022-M015301373-M015301172-M015301372-M015301181-M015301182-M015301183-M015701157-M015701168-M015701135/46-M01门槛边梁前加强板(左/右)前室灯安装支架上安装支架ABSBRACKET上安装支架ESP UPPERBRACKET下安装支架空滤器二号支架左悬置(前/后)安装支架加强板右悬置前安装支架右悬置后安装支架右悬置安装加强板天窗后安装支架(左/右)天窗中安装支架(左/天业模具天业模具天业模具天业模具天业模具天业模具天业模具天业模具天业模具通达模具天业模具op10落料op20成型op30折弯op40冲孔op50冲孔,切料OP10BL OP20FO OP30FL+PI OP40CPI OP05BL OP10FO OP20REST+FL OP30PI+CPI OP40PIOP10BL+PI OP20FO+FL OP30PI+RST OP40PI+RST OP10FO OP20TR+PI OP30FL+RST OP10FO OP20TR+PI OP30FL+RST OP10DR OP20TR+PI OP30CTR+RST OP40FL+RST OP50PI+TR OP10DR OP20TR OP30CTR+RST OP40FL+RST OP50PI+TR OP10DR OP20TR+PI OP30FL+RST OP40SEP+PI+CTR OP10BL+PI 4950515253545556575859S301S301S301S301S301S301S301S301S301S301S3015401557/68-M015301117-M015301374-M015701251/252-M015701253/254-M015301574540133354013445401215-M015401226-M015401213/224-M01顶盖前横梁连接板(左右)空滤器三号支架左悬置连接加强板天窗前连接支架(左/右)天窗后连接支架(左/右)轮毂包前段上加强连接件(左)后门下铰链安装加强板(左)后门下铰链安装加强板(右)后大灯安装板(左)后大灯安装板(右)背门撑杆安装螺母板(左/右)PROPRO PROPRO拓胜模具广达模具景田模具景田模具景田模具天益模具天益模具天益模具翎雁模具翎雁模具翎雁模具520OP30BUR+PI OP40PI OP10BL+PI OP20FO+BUR OP30BUR+PI OP40PI OP10FO 8.7OP20TR+PI 8.9OP30FL+RST 7.5OP40PI+CRST-SEP 8.4OP50CPI OP10DR OP20DR OP30TR OP40FL+RST OP50CPI OP10BL OP20FO OP30PI OP10BL OP20FO OP30PI OP10DR OP20TR+PI OP30TR+PI OP40RST OP10BL+PI OP20FO+FL OP30RST OP10BL OP20FO OP30PI OP10BL OP20FO OP30PI OP10BL OP20FO OP30PI OP10BL OP20FO OP30PI OP10BL+BE OP20BE OP30BE OP05BL OP10BE+FL OP20PI OP05BL 606162636465666768697071727301S301S301S301S301S301S301S301S301S301S301S301S301S301S35001103-M015001103-M025301553-M01/5301564-M015401117-M015401386-M015401335/346-M015301171/371-M015701137/148-M015701133/144-M015401126-M015401128-M015102913/914-M01L 8402510-M015401217-M01换档安装支架-MT换档安装支架-AT翼子板安装板(右/左)加油口门槛边梁后加强板后门限位器安装加强板(左/右)悬置前安装支架(左/右)天窗后安装支架(左/右)天窗前安装板(左/右)翼子板上安装支架翼子板中安装支架中控扶手安装友架(左/右)后保险杠安装支架京桓模具双宏模具西双宏模具西双宏模具西双宏模具京桓模具京桓模具京桓模具京桓模具京桓模具京桓模具京桓模具京桓模具京桓模具。
北斗星维修手册_0681-0720

不要使用高压水。
发动机罩
调节
l 前后左右调节 松开调节用的四个安装螺栓。 l 垂直调节
如果仅有发动机罩的一边(右和左)相对于前翼子板不水 平,通过拧紧或松开发动机罩缓冲垫使其水平。
-683-
车身维修 9-24
昌河北斗星微型客车维修手册
车身维修 9-19
后侧围窗
通过使用特殊型号的胶粘剂(就是用底漆和氨基甲酸乙酯组成)安装后侧围窗。对于置换窗玻璃,使用提 供足够胶粘力的胶粘剂和按照下面正确的步骤是非常重要的。
小心:
l 本章所描述的是通过使用由日本横滨生产的两种类型的底漆和一种类型的玻璃胶来更换玻璃的(该 玻璃胶是由氨基甲酸乙脂玻璃胶与底漆一起混合调配构成的)。当使用由其它生产厂家生产的底漆和玻璃胶 时,一定要参照由他们提供的使用说明书。如果在下面作业中疏忽或错用玻璃胶的话,则会影响其自身原有 的胶粘性能。因此,在工作之前,注意仔细阅读所使用的玻璃胶生产厂家提供的说明书和牌号,并在整个工 作期间务必采用该程序,及遵守每一个注意事项。
渗漏,擦干玻璃,用胶粘剂填充渗漏的位置。填充后,如果还发
现渗漏,拆卸玻璃,并按上述安装步骤重新开始安装。
注意:
l 不要使用高压水。
l 干燥时,不要将压缩空气直接对着涂胶的部位。
l 对于干燥,不要使用红外线灯泡或诸如此类的东西。
小心:
完成上述安装后,注意以下事项。
l 胶粘部位完全粘着前,车门突然关闭可能导致玻璃松动或脱落。因此,胶粘部位完全粘着前,如果
安装
1)将密封胶条安装到玻璃上。 2)将绳子穿过密封胶条的外部凹槽(背门板装配好的凹 槽)以便将密封胶条安装到背门上。 3)在密封胶条的外边缘涂上肥皂水,然后一点一点拉绳 子,将玻璃和密封胶条一起安装到背门上。 4)连接后除霜器耦合器。 5)安装刮水器臂。 6)通过从软管里的水洒向车窗来检查是否渗水。如果发现 渗漏,擦干玻璃,用胶粘剂填充渗漏的位置。填充后,如果还发 现渗漏,拆卸玻璃,并按上述安装步骤重新开始安装。
翼子板安装支架冲压工艺及模具设计
翼子板安装支架冲压工艺及模具设计发表时间:2019-08-01T10:42:08.657Z 来源:《基层建设》2019年第9期作者:张乾[导读] 摘要:针对翼子板安装支架的零件特点及结构要求,制定了合理的冲压工艺,设计了包含15个工位的级进冲压工艺方案。
河北中兴汽车制造有限公司 071000摘要:针对翼子板安装支架的零件特点及结构要求,制定了合理的冲压工艺,设计了包含15个工位的级进冲压工艺方案。
采用对称排样中间载体的形式,并在载体上冲出T型废料槽,通过翻成的竖立直边实现后续成形工序的送料导向,通过内、外导料板提高带料送进导向精度。
本文对翼子板安装支架冲压工艺及模具设计进行分析关键词:翼子板安装支架;冲压工艺;模具设计1冲压工艺分析SCG1+Z属于冷轧镀锌钢板,具有良好的耐腐性和冲压成形性能。
该工件结构相对复杂,但没有尖角,属于薄板件;工件整体形状较规则,但结构不对称,且尺寸精度要求较高,为减小回弹并保证冲压时模具的受力平衡,采用对称成形再切开的冲压方法。
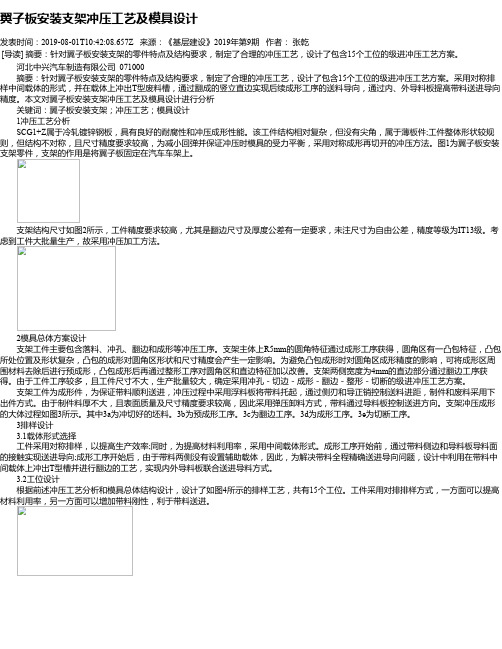
图1为翼子板安装支架零件,支架的作用是将翼子板固定在汽车车架上。
支架结构尺寸如图2所示,工件精度要求较高,尤其是翻边尺寸及厚度公差有一定要求,未注尺寸为自由公差,精度等级为IT13级。
考虑到工件大批量生产,故采用冲压加工方法。
2模具总体方案设计支架工件主要包含落料、冲孔、翻边和成形等冲压工序。
支架主体上R5mm的圆角特征通过成形工序获得,圆角区有一凸包特征,凸包所处位置及形状复杂,凸包的成形对圆角区形状和尺寸精度会产生一定影响。
为避免凸包成形时对圆角区成形精度的影响,可将成形区周围材料去除后进行预成形,凸包成形后再通过整形工序对圆角区和直边特征加以改善。
支架两侧宽度为4mm的直边部分通过翻边工序获得。
由于工件工序较多,且工件尺寸不大,生产批量较大,确定采用冲孔-切边-成形-翻边-整形-切断的级进冲压工艺方案。
支架工件为成形件,为保证带料顺利送进,冲压过程中采用浮料板将带料托起,通过侧刃和导正销控制送料进距,制件和废料采用下出件方式。
- 1、下载文档前请自行甄别文档内容的完整性,平台不提供额外的编辑、内容补充、找答案等附加服务。
- 2、"仅部分预览"的文档,不可在线预览部分如存在完整性等问题,可反馈申请退款(可完整预览的文档不适用该条件!)。
- 3、如文档侵犯您的权益,请联系客服反馈,我们会尽快为您处理(人工客服工作时间:9:00-18:30)。
SRF6
实实实名名实偏偏
N.D.0.0020.0000.002 X21.52321.5230.000
Y-719.099-719.1010.002
Z588.974588.9740.000
SRF7
实实实名名实偏偏N.D.-0.0100.000-0.010 X-16.272-16.2720.000
Y-721.811-721.801-0.010
Z621.239621.2390.000
SRF10
实实实名名实偏偏N.D.0.0040.0000.004 X26.59926.5990.000 Y-735.007-735.0110.004 Z459.064459.0640.000
SRF8
实实实名名实偏偏N.D.-0.0060.000-0.006 X-30.297-30.2970.000 Y-721.807-721.801-0.006
Z592.059592.0590.000
SRF11
SRF9
实实实名名实偏偏N.D.0.0070.0000.007 X-10.412-10.4120.000 Y-724.094-724.1010.007
Z537.271537.2710.000
SRF23
实实实名名实下下偏上下偏偏偏N.D.0.0970.000-0.1500.1500.097 X117.841117.937-0.096 Y-677.397-677.4130.015 Z639.001639.001-0.000 SRF12
SRF3
实实实名名实偏偏
N.D.-0.0160.000-0.016
X93.89593.8950.000
Y-704.117-704.101-0.016
Z633.627633.6270.000
SRF4
实实实名名实偏偏
N.D.-0.0210.000-0.021
X62.35362.3530.000
Y-704.121-704.101-0.021
Z634.196634.1960.000
LM4实实实
名名实
偏偏N.D.0.0080.0000.008X 19.71719.7170.000Y -724.093-724.1010.008Z
541.700
541.700
0.000
LM5实实实
名名实
偏偏N.D.0.0010.0000.001X 12.65112.6510.000Y -724.100-724.1010.001Z
537.765
537.765
0.000
LM6实实实
名名实
偏偏N.D.0.0060.0000.006X 12.78712.7870.000Y -724.095-724.1010.006Z
545.601
545.601
0.000
LM7LM8实实实
名名实
偏偏N.D.0.0110.0000.011X 68.50168.5010.000Y -740.788-740.8000.011Z 403.817
403.817
0.000
LM9实实实
名名实
偏偏N.D.0.0250.0000.025X 68.76568.7650.000Y -740.775-740.8000.025Z 410.620
410.620
0.000
LM1实实实名名实
偏偏N.D.-0.0280.000-0.028X 74.28974.2890.000Y -704.128-704.101-0.028Z
629.816
629.816
0.000
LM2实实实名名实
偏偏N.D.-0.0200.000-0.020X 67.71167.7110.000Y -704.121-704.101-0.020Z
626.380
626.380
0.000
LM3实实实名名实
下下偏上下偏偏偏N.D.
-0.0110.000-0.1000.100-0.011X 66.63766.637-0.1000.1000.000Y -704.112-704.101-0.1000.100-0.011Z
633.866
633.866
-0.1000.100
0.000
K1实实实
名名实
偏偏直直 5.982 6.000-0.018X 99.78699.7600.026Y -745.800-745.8000.000Z
345.625
345.672
-0.047
K2实实实
名名实
偏偏直直 5.979 6.000-0.021X 85.42185.3940.027Y -740.800-740.8000.000Z
380.507
380.500
0.007
K3实实实
名名实
偏偏直直 4.025 4.0000.025X 76.99776.9910.006Y -740.800-740.8000.000Z
397.287
397.339
-0.052
K4实实实
名名实
偏偏直直 5.963 6.000-0.037X 43.08243.088-0.007Y -735.011-735.0110.000Z
470.447
470.496
-0.049
K5实实实
名名实
下下偏上下偏偏偏直直
5.997
6.000-0.1000.100-0.003X 8.3938.416-0.1000.100-0.023Y -724.101-724.101-0.1000.1000.000Z
558.995
559.031
-0.1000.100
-0.036
K6实实实
名名实
偏偏直直 5.956 6.000-0.044X -5.162-5.116-0.046Y -724.101-724.1010.000Z
575.777
575.784
-0.007
K7实实实
名名实
偏偏直直 5.990 6.000-0.010X -16.932-16.909-0.023Y -721.801-721.8010.000Z
607.317
607.285
0.033
EDG7
实实实
名名实
偏偏N.D.0.0310.0000.031X 111.031111.0280.003Y -664.134-664.1650.031Z 569.325
569.326-0.001
EDG8
实实实
名名实下下偏上下偏
偏偏N.D.0.0070.000-0.1500.1500.007X 118.000118.0000.000Y -663.109-663.1160.007Z 629.437
629.437-0.000
EDG1
EDG2
实实实
名名实
偏偏N.D.-0.0070.000-0.007X 118.000118.0000.000Y -674.636-674.6360.000Z 398.007
398.0000.007
EDG3
EDG4
实实实
名名实
偏偏N.D.0.0420.0000.042X 117.471117.4700.001Y -666.101-666.1430.042Z 456.110
456.110-0.000
EDG5
实实实
名名实
偏偏N.D.0.0260.0000.026X 111.038111.0360.002Y -665.718-665.7440.026Z 478.849
478.850-0.000
EDG6
实实实
名名实
偏偏N.D.0.0330.0000.033X 118.000118.0000.000Y -664.650-664.6830.033Z 539.625
539.626-0.001
CIR1CIR2
实实实CIR3实实实直直
8.004X -135.234Y -787.104Z
728.208。
