DX2020说明书
西发科技自由盘 Theater+ HD 媒体播放器说明書说明书
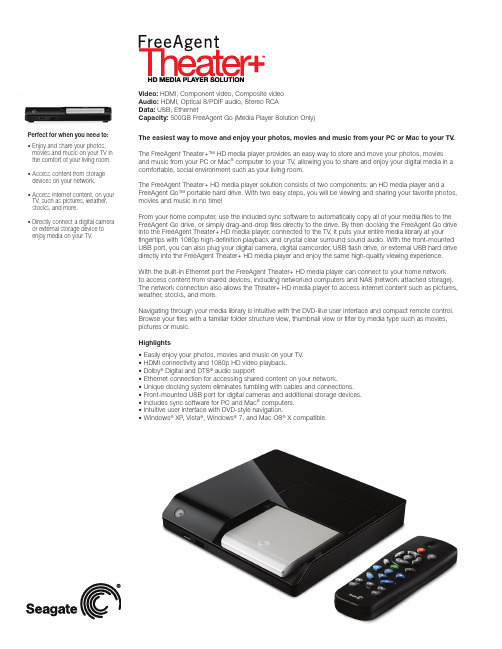
Perfect for when you need to:• E njoy and share your photos, movies and music on your TV in the comfort of your living room.• A ccess content from storage devices on your network.• A ccess internet content, on your TV, such as pictures, weather, stocks, and more.• D irectly connect a digital camera or external storage device toenjoy media on your TV.Video: HDMI, Component video, Composite videoAudio: HDMI, Optical S/PDIF audio, Stereo RCAData: USB, EthernetCapacity: 500GB FreeAgent Go (Media Player Solution Only)The easiest way to move and enjoy your photos, movies and music from your PC or Mac to your TV.The FreeAgent Theater+™ HD media player provides an easy way to store and move your photos, movies and music from your PC or Mac® computer to your TV, allowing you to share and enjoy your digital media in a comfortable, social environment such as your living room.The FreeAgent Theater+ HD media player solution consists of two components: an HD media player and a FreeAgent Go™ portable hard drive. With two easy steps, you will be viewing and sharing your favorite photos, movies and music in no time!From your home computer, use the included sync software to automatically copy all of your media files to the FreeAgent Go drive, or simply drag-and-drop files directly to the drive. By then docking the FreeAgent Go drive into the FreeAgent Theater+ HD media player, connected to the TV, it puts your entire media library at your fingertips with 1080p high-definition playback and crystal clear surround sound audio. With the front-mounted USB port, you can also plug your digital camera, digital camcorder, USB flash drive, or external USB hard drive directly into the FreeAgent Theater+ HD media player and enjoy the same high-quality viewing experience. With the built-in Ethernet port the FreeAgent Theater+ HD media player can connect to your home networkto access content from shared devices, including networked computers and NAS (network attached storage). The network connection also allows the Theater+ HD media player to access internet content such as pictures, weather, stocks, and more.Navigating through your media library is intuitive with the DVD-like user interface and compact remote control. Browse your files with a familiar folder structure view, thumbnail view or filter by media type such as movies, pictures or music.Highlights• Easily enjoy your photos, movies and music on your TV.• HDMI connectivity and 1080p HD video playback.• Dolby® Digital and DTS® audio support• Ethernet connection for accessing shared content on your network.• Unique docking system eliminates fumbling with cables and connections.• Front-mounted USB port for digital cameras and additional storage devices.• Includes sync software for PC and Mac® computers.• Intuitive user interface with DVD-style navigation.• Windows® XP, Vista®, Windows® 7, and Mac OS® X compatible.© 2009 Seagate Technology LLC. All rights reserved. Seagate, Seagate Technology, the Wave logo, FreeAgent Go, and FreeAgent Theater+ are trademarks or registered trademarks of Seagate Technology LLC or one of its affiliated companies in the United States and/or other countries. All other trademarks or registered trademarks are the property of their respective owners. When referring to hard drive capacity, one gigabyte, or GB, equals one billion bytes and one terabyte, or TB, equals one thousand billion bytes. Your computer’s operating system may use a different standard of measurement and report a lower capacity. In addition, some of the listed capacity is used for formatting and other functions and will not be available for data storage. Seagate reserves the right to change, without notice, product offerings or specifications. Seagate Technology LLC, 920 Disc Drive, Scotts Valley CA 95066 U.S.A. DS1692.1-0908US。
富士X20用户手册

正常现象。 当长时间拍摄或观 看图像时, 请使用 AC 电源适配 器。
2 照相机使用的是 AA 碱性
电池、锂电池或可充电镍 氢(镍金属氢化物)电池
* 有关您可使用的电池的详细信 息, 请参阅相机的用户手册。
■ 使用电池的注意事项
• 请勿加热电池或将电池扔进火 中。 • 请勿将电池触碰金属物体, 如 项链或发夹。 • 请勿将电池浸入水中, 弄湿电 池或将电池存放在潮湿场所。 • 请勿拆卸或改装电池, 包括电 池的外壳。 • 请勿让电池受到强烈冲击。 • 请勿使用有泄漏、变形、变色 现象的电池。 • 请勿将电池存放在高温或潮湿 的地方。 • 请将电池存放在婴儿和儿童够 不着的地方。 • 确认电池按照极性标志 (C 和 D) 正确安装。 • 请勿混用新旧电池。 请勿混用 已充电电池和未充电的电池。 • 请勿混用不同型号或品牌的电
配件
○
○
○
○
○
○
表示该有毒有害物质在该部件所有均质材料中的含量均在 SJ/ T11363-2006 标准规定的限量要求以下。 备注 ○: ×: 表示该有毒有害物质至少在该部件的某一均质材料中的含量超出 SJ/T11363-2006 标准规定的限量要求。 “X (铅) 属欧盟 RoHS 指令的豁免范围之列。“X (Pb)” exempted from the application of EU RoHS. ” / is
关于标识
下述标识表示误操作或忽略标识的警告信息可能造成的严重后 果。 该标识表示若忽略该信息, 将会造成死亡或严重伤 害。 该标识表示若忽略该信息, 将会造成人身伤害或物质 损失。
请勿在浴室 中使用相机。
禁止拆卸。
警告 注意
请勿触摸内 部部件。
下述图标表示必须遵守的信息性质。 三角标志表示此信息需要注意 “重要” 。 ( ) 圆形标志加一斜线表示禁止行为 “禁止” 。 ( ) 实心圆形加一惊叹号表示用户必须执行的操作 “必 ( 须操作” 。 )
DX温度控制器产品中文说明书

输出/输入端子有触电的危险,切勿与身体及通电物接触。
警告
1. 本机器的故障或异常有可能造成重大事故,请在外围安装相应的保护 回路,以防发生事故。
2. 本机器未附带电源开关及保险丝,请在外围另外安装。 (保险丝额定:250V 0.5A)
3. 为防止本机器的破损及故障,请务必以额定电源电压供电。 4. 为防止触电及机器故障,在未完成所有配线之前,切勿投入电源。 5. 本机器非属防爆构造,切勿在有易燃性,爆发性气体的场所使用。 6. 切勿对本机器进行分解、加工、改线、修理,否则有发生触电、故障或
延迟继电器。 32.因机器发生故障而用预备机器进行替换时,即使型号相同,动作也会因设定
参数的差异而不同,所以,在实施之前请务必确认互换性。
各部位功能及名称
控制输出(OUT)显示灯(绿) 自动演算(AT)显示灯(绿)
设定值(SV)显示器(红)
测定值(PV)显示器(绿)
控制回路断路警报(LBA)动作 显示灯(红) 下限警报(ALL)动作显示灯(红)
(4)控制回路断路警报(LBA)功能的注意事项 ① 控制回路断路警报(LBA)功能只在 PID 演算值为 0%或 100%时才动作。所以,
把 PID 演算值达到 0%或 100%时的所需时间和控制回路断路警报(LBA)的设定 时间加起来,就是从发生异常到控制回路断路警报(LBA)功能启动为止的所需 时间。 ② 进行自动联算(AT)时,控制回路断路警报(LBA)功能不会动作。 ③ 控制回路断路警报(LBA)功能在受外部(其他热源等)影响时,即使控制器没有 异常也会动作。 ④ 控制回路断路警报(LBA)的设定时间短或控制对象不对时,有时会发生控制回 路断路警报(LBA) ON-OFF 或不能 ON 的情况。此时,请把控制回路断路警报(LBA) 设定时间设定得稍微长一些。
基因组测序仪MiSeqDx使用手册说明书

MiSeq TM Dx使用手册MiSeqDx 使用手册文件号1000000039320 v04 | 1 2020年12月Material # 20030132引言本文档及其内容是Illumina,Inc.及其附属公司(“Illumina”)所有,并且仅供与所述产品相关的合同约定的客户使用,无其他用途。
未经Illumina事先书面同意,本文件及其内容不得以其他方式传播、披露或转载和/或用于任何其他目的。
Illumina不会通过本文件对专利、商标、版权或普通法权利或任何第三方类似的权利传达任何许可。
本文档中的说明必须由合格且经过适当培训的人员严格明确地遵循,从而确保本文所述产品的正确和安全使用。
在使用此类产品前,必须全面阅读并理解本文档的所有内容。
未能完全阅读并明确地遵守本文包含的所有说明可能会对产品造成损害,对人员造成伤害,包括用户或其他人员的损害以及对其他财产的损害,并失去该产品的保修。
由于本文所述产品(包括其中的任何部分或软件)的不当使用,ILLUMINA不承担任何责任。
© 2017 Illumina, Inc. 版权所有。
Illumina, MiSeq TM Dx,南瓜橙颜色和流动底纹设计是Illumina, Inc.和/或其在美国和/或其他国家/地区附属公司的商标。
所有其他名称、徽标和其他商标均为其各自所有者的财产。
MiSeqDx 使用手册文件号1000000039320 v04 | 2 2020年12月Material # 20030132修订历史MiSeqDx 使用手册文件号1000000039320 v04 | 3 2020年12月Material # 20030132目录引言 (2)修订历史 (3)目录 (4)第一章概述 (6)产品名称 (6)预期用途 (6)产品结构及组成 (6)第二章设备安装及环境要求 (14)运输和储存 (14)运输和安装 (14)实验室要求 (15)电气要求 (17)环境要求 (18)网络要求 (18)用户自备耗材和设备 (19)第三章工作原理 (21)工作原理 (21)需要但不提供的设备和材料 (21)第四章性能指标 (22)仪器技术指标 (22)仪器使用期限 (23)产品合规性和监管声明 (23)第五章运行操作 (26)P ART וL OCAL R UN M ANAGER(本地运行管理) (26)本地运行管理 (26)登陆信息管理 (26)操作界面概述 (27)管理设置和任务 (31)工作流程概述 (37)P ART װM I S EQ O PERATING S OFTWARE (M I S EQ操作软件) (41)启动和开机 (41)MiSeqDx 使用手册文件号1000000039320 v04 | 42020年12月Material # 20030132测序运行 (43)结果分析 (54)质量控制 (55)文件夹管理 (55)MOS软件界面图标 (56)第六章局限性和注意事项 (58)使用局限性 (58)警告和注意事项 (58)第七章危害及标志 (60)安全考虑和标志 (60)通用标志 (62)第八章设备维护 (63)维护频率 (63)维护清洗 (63)待机清洗 (65)关机步骤 (67)重启步骤 (68)所需磁盘空间 (68)杀毒软件 (68)第九章故障排除 (69)附件 (78)MiSeqDx 使用手册文件号1000000039320 v04 | 52020年12月Material # 20030132第一章概述产品名称中文名称:基因测序仪英文名称:MiSeq TM Dx Instrument型号:MiSeq TM Dx预期用途用于体外诊断。
AV-2020 20x HD All-in-one PTZ Camera 用户手册 V1.0说明书

Model: A V-202020x HD All-in-one PTZ CameraUser ManualV1.0Please read this user manualthoroughly before using.PrefaceThank you for using this HD All-in-one PTZ Camera.This manual introduces the functions, installation process and operation of the HD camera. Prior to installation and usage, please read the manual thoroughly.PrecautionsThis product should only be used under the specified conditions in order to avoid any damage to the camera:◼Do not subject the camera to rain or moisture.◼Do not remove the cover. Otherwise, you may risk receiving an electric shock. In case of unintended equipment operation, contact an authorized engineer.◼Never operate under unspecified temperature, humidity or power supply.◼Please use soft dry cloth to clean the camera. If the camera is very dirty, clean it with diluted neuter detergent; do not use any type of solvents, which may damage the surface.Note:This is a class A production. Electromagnetic radiation at certain frequencies may affect the image quality of TV in home environment.CONTENTSAFETY GUIDES (1)PACKING LIST (2)QUICK START (2)PRODUCT HIGHLIGHTS. (3)CAMERA SPECIFICATIONS (3)CAMERA INTERFACE. (5)CAMERA DIMENSION. (5)IR REMOTE CONTROLLER. (6)VISCA IN (RS232) PORT. (9)OSD MENU (10)UVC CONTROL (13)WEB SETTINGS (14)VIEW RTSP STREAM VIA VLC (18)VISCA OVER IP (19)VISCA PROTOCOL (22)PELCO-D PROTOCOL (29)PELCO-P PROTOCOL (30)WARRANTY (32)SAFETY GUIDES1. Electric Safety Installation and operation must accord with electric safety standard.e caution to transport Avoid stress, vibration or soakage in transport, storage and installation.3. Polarity of power supplyThe power supply of this product is +12V, the max electrical current is 2A. Polarity of the power supply plug is shown in the drawing below.4. Installation precautionsDo not grasp the camera lens when carrying it. Do not touch camera lens by hand. Mechanical damage may result from doing so. Do not use in corrosive liquid, gas or solid environment to avoid any cover (plastic material) damage. Make sure there is no obstacle within rotation range. Do not power on before installation is completed.5. Do not dismantle the camera We are not responsible for any unauthorized modification or dismantling. CAUTION! Certain frequencies of electromagnetic field may affect the image of the camera!Note:Video quality may be affected by the specific frequencies of electromagnetic field.Never grasp the head of the camera, or move the camera by hand when it is working. Otherwise, mechanism maybe affected.PACKING LISTWhen unpacked, check if all supplied accessories are included:Camera ··································································· 1pcPower Adapter ··························································· 1pcPower Cable ····························································· 1pcRS232 Control Cable ··················································· 1pcUSB2.0 Cable ··························································· 1pcRemote Controller ······················································ 1pcUser Manual ····························································· 1pcDouble-sided Adhesive················································· 1pcQUICK START1. External interface: RS232 I/O, HDMI output, 3G-SDI output, USB2.0 output, LAN output, DC12V power, Audio input. Please check all connections before powering on the device.2. Dial switch settings (at the bottom of the camera):Dial Switch (ARM)SW-1 SW-2 Instruction1 OFF OFF Updating mode2 ON OFF Debugging mode3 OFF ON Undefined4 ON ON Working modePRODUCT HIGHLIGHTS▪ Adopts advanced ISP, 1/2.8-inch 2.1MP sensor, providing full HD video resolution. ▪ High-quality 20x optical zoom, 2x digital zoom lens with 60-degree field of view. ▪ IP, HDMI, 3G-SDI, USB video output interface, compatible with different applications. ▪ White Balance/ Exposure/ Focus/ Iris can be adjusted automatically or manually.▪ Support PoE+: one single CAT5/6 for video, control and power, highly efficient video encoding. ▪ Support line-in function, ACC and LPCM audio encoding.▪ Advanced focusing algorithm: fast and precise focusing performance during movement. ▪ Smooth PTZ mechanism, accurate pan tilt motor control. ▪ Up to 128 presets available.▪ Support VISCA, PELCO-P , PELCO-D and VISCA over IP control protocol; IP VISCA over both TCP and UDP.▪ Support RS232 daisy chain, up to 7 cameras under VISCA protocol. ▪ Support upside-down (ceiling) installation, H/V flip.▪ Support RS232/UVC control▪Standard UVC1.1 protocol, seamlessly compatible with all major video conferencing software and platformsCAMERA SPECIFICATIONSCAMERA INTERFACE1. Camera Lens2. Camera Base3. IR Receiver Panel4. Power Indicator Light5. Dial Switch6. Tripod Screw Hole7. Installation Hole8. RS232 Control Input9. RS232 Control Output10. HDMI Output11.3G-SDI Output12, USB Output13, RJ45 Output14.DC12V Power Jack15.Line-in Audio InputCAMERA DIMENSION(MM)IR REMOTE CONTROLLERPOWERUnder normal working mode, press POWER to enter standbymode;Press it again, the camera will start self-configuration, then goback to HOME position.It will go to preset position 0 if the preset is set.FREEZE (do NOT support USB output)Press FREEZE to freeze/ unfreeze the image.IRT (IR Transfer/IR Pass)Open / close the IR pass function. Once press the IRT key, thecamera will receive and pass the IR remote control signal to thecodec/terminal (via VISCA IN port).SET 1~SET4 ADDRESS SETTINGTo set the current camera’s address (ID), press and hold thekey for 3seconds until the backlight of that key is ON.CAM1~CAM4(CAMERA SELECTING)Press the corresponding camera number to select the camera.NUMERIC KEY (1-9)Set preset: press and hold the number for 3 seconds to set presetposition.Call preset: press the corresponding number to call presetposition.CLR PRE (CLEAR PRESET)Press CLR PRE + number key to clear the corresponding presetposition.Press and hold the key to clear all existing preset positions.FOCUSManually adjust focus, only valid under manual mode.ZOOMManually adjust zoom.NA VIGATE KEY: UP/DOWN/LEFT/RIGHTUnder camera normal mode, use navigate keys to pan/ tilt;After entering camera OSD, use navigate keys to select and enter submenu.OK /HOME KEYUnder camera normal mode, press OK to make the camera go back to its HOME position;After entering camera OSD, press OK to confirm selection.AF: Auto focusMF: Manual focusRESET: Press and hold for 3 seconds to reset cameraMENU: Enter OSD menuLEARN+LIMIT L: Set the pan tilt left limit position.LEARN+LIMIT R: Set the pan tilt right limit position.LEARN+LMT CLR: Clear all limit position.BLC OFF/ BLC ON:Not availableBRIGHT-/BRIGHT+: Set image brightness, only valid under bright priority exposure mode.Video Format Selection:Press and hold for 3 seconds to select different video format output.VISCA IN (RS232 PORT )VISCA Network Construction:SERIAL PORT CONFIGURATIONNo. V_IN V_OU T VISCA IN RS485 1 DTR DTR 1 2 DSR DSR 2 3 TXD TXD 3 4 GND GND 4 5 RXD RXD 5 6 A 6 A(+) 7IR OUT 7 IR OUT 8B8B(-)VISCA IN & DB9 Connection Camera VISCA IN Windows DB-9 1 DTR 6 DSR 2 DSR 4 DTR 3 TXD 2 RXD 4 GND 5 GND 5 RXD 3 TXD 6 A (+) 7 IR OUT 8 B (-)VISCA IN &Mini DIN Connection Camera VISCAIN Mini DIN1 DTR 1 DSR2 DSR 2 DTR3 TXD 5 RXD4 GND 4 GND5 RXD 3 TXD6 A (+) 6 NC7 IR OUT7NC8 B (-) 8 NCParameter Value Parameter Value Baud rate 2400/4800/9600/115200Stop Bit 1bit Start Bit 1 bit Check BitNone Date Bit 8 bitOSD MENU1. Under working mode, press the MENU key on the IR remote controller, to enter the OSD menu as shown bellow:2. After entering the main menu, use navigate UP/DOWN keys to select the from the main menu options.3. Press RIGHT key to enter sub menu; use UP/DONW key to select the sub menu; use LEFT/RIGHT key to change current settings.4. Press MENU key again to return to the previous menu, repeat and exit the OSD menu.5. OSD Menu setting listSYSTEM PROTOCOL Optional item: VISCA/ PELCO-P/ PELCO-D Default: VISCA ADDRESS VISCA: 1~7 PELCO-P/D: 1~255 Default: 1 BAUD RATE 2400/ 4800/ 9600/ 115200 Default: 9600 PTL LOCK Protocol lock: once set, above protocol settings will be locked Default: OFF RS485 RS485 ON/OFF Default: ON VISCA OVER ALL/ OVER IP/ OVER COM Default: OVERALL LANGUAGE Chinese/ English Default: EnglishEXPOSURE EXPOSURE MODEAUTO/ MANUAL/ SHUTTER/ IRIS/ BRIGHT Default: AUTO SHUTTERShutter speed: 1/30~1/10000, only valid under MANUAL andSHUTTER modeDefault: AUTOIRIS Iris setting: CLOSE~F1.8, only valid under MANUAL andIRIS modeDefault: AUTO GAIN Gain setting:0dB~30dB, only valid under MANUAL mode Default: AUTO EBRIGHT Bright setting:0~27, only valid under BRIGHT priority mode. Default: AUTO BRIGHT 0~15 Default: 8ALL RESET Reset all settings to defaultINFO IR ADDR Camera IR control addressUSB USB firmware versionCLIENT Default client end protocol: VISCA MODEL NO. Model numberARM VER ARM firmware versionFPGA VER FPGA firmware versionCAM VER Camera versionRELEASE Software release dateSET IP ADDRESS IN MENUIn order to facilitate customer debugging, the camera supports IP address configuration under OSD.1. Press "MENU" to enter the camera OSD, then select “IP”;2. Press “ ” navigation key to enter the IP setting interface. Select the parameter needs to be changed using the navigation “ ” and “ ”keys”;3. Use numeric keys to set the corresponding parameters. After finishing entering, press the "MENU" again to complete and save the setting;4. Press "MENU" again to exit menu.UVC CONTROL1. Make sure the USB2.0 camera output is connected to the USB2.0 port on the PC/MAC, and it is recognized by the PC Device Manager. If connected to the USB3.0 port, video resolution may be compromised.2. The interval of control commands sending from the server (via USB) to the camera should be no less than 250ms.PU_BRIGHTNESS_CONTROL 81 01 04 4d 00 00 0p 0q FFPU_CONTRAST_CONTROL 81 01 04 A2 00 00 0p 0q FFPU_SATURATION_CONTROL 81 01 04 A1 00 00 0p 0q FFPU_SHARPNESS_CONTROL 8x 01 04 42 00 00 0p 0q FFPU_GAMMA_CONTROL 8x 01 04 5B 0p FFPU_WHITE_BALANCE_TEMPERATURE_CONTROL 8x 01 04 35 0X FFPU_BACKLIGHT_COMPENSATION_CONTROL 81 01 04 33 02/03 FFPU_POWER_LINE_FREQUENCY_CONTROL 8x 01 04 AA 00/01/02 FFCT_ZOOM_ABSOLUTE_CONTROL 8x 01 04 47 0p 0q 0r 0s FFCT_PANTILT_ABSOLUTE_CONTROL 8x 01 06 02 VV WW 0Y 0Y 0Y 0Y 0Z 0Z 0Z 0Z F CT_PANTILT_RELATIVE_CONTROL 8x 01 06 01 pp qq rr ss FFCT_ZOOM_RELATIVE_CONTROL 8x 01 04 07 pp FFWEB SETTINGS1.Download and install Flash PlayerWhen access the camera via Internet Explorer browser for the first time, Flash Player needs to be installed. We recommend users download it from flash official website to get latest version:https:///englishAfter installation is complete, it will be listed in PC’s Programs and Features Control Panel:2.LoginTo access the camera interface, open IE browser, input IP address(default IP address is 192.168.1.188). Users can select language(Chinese/English). Default username: admin Default password:admin3.Real-time PreviewWhen log in to the web interface for the first time, a message below will show. Please go to IE browser “Settings”, allow pop-ups and allow running Flash Player.On the Preview interface shown above, there is a virtual control panel on the right-hand side. Options include pan, tilt, zoom, focus, presets, focus speed and zoom speed. On the bottom of image preview, main stream and sub stream preview can be selected.4.ConfigurationClick “Setting” to enter camera configuration interface shown below:Video Encode: To set image encoding mode, main stream and sub stream resolution/bit rate/frame rate, bit rate control option, I frame interval, etc. as shown above.Video Transmission: To set RTMP settings.Audio Setting: To enable/disable embedded audio. Audio encoding mode can be selected. Parameters such as sampling rate and bit rate can be adjusted.Image Parameter: To set focus, exposure, white balance, image, image quality, noise-reduction, etc.Ethernet: To set DHCP mode, IP address, subnet mask, default gateway, http port, web port, main stream port and sub stream port. Default settings are as following:DHCP OFF Default gateway 192.168.1.1IP address 192.168.1.188 HTTP port 80Subnet mask 255.255.255.0 RTSP port 554Firmware upgrade: To update the camera ISP. Steps are shown below:Click “clicking to upload file”, in the dialog box, select the upgrade file. Click “upgrade”to start the updating process.DO NOT power off or do any operation when upgrading. Please reboot the camera at least 5 min after the upgrade is finished.Then re-login to web interface, select “Reset all” to reset the camera completely.Reset to default: To reset the camera to default settings.Reset simply: reset camera image settings; Reset completely: reset all camera settings including IP configurations, image settings, language and protocol; Reboot: reboot ISP part of the camera.Account Setting: To set camera account username and password.USING VLC TO VIEW RTSP/RTMP VIDEODefault RTSP main streaming URL: rtsp://192.168.1.188/stream/mainDefault RTSP sub streaming URL: rtsp://192.168.1.188/stream/subDefault RTMP main streaming URL: rtmp://192.168.1.188:1935/app/rtmpstream0Default RTMP sub streaming URL: rtmp://192.168.1.188:1935/app/rtmpstream1VISCA OVER IPVISCA over IP means VISCA protocol transmit via IP.This can be used to reduce RS232/RS485 cable layout(the controller must support IP communication function).Communication port specs:⚫Control port: RJ45 Gigabit LAN⚫IP protocol: IPv4⚫Transmit protocol: UDP⚫IP address: set via web interface or OSD menu⚫Port address: 52381⚫Confirm send/transmission control: depend on applied program⚫Applied range: in the same segment, not suitable for bridge network.⚫To apply, enter camera OSD, choose VISCA option: OVER IPHow to use VISCA over IPVISCA CommandCommands are sent from controller to peripheral equipment (camera), and when peripheral equipment receives commands, it returns ACK. When the command is executed, a complete message will be returned.VISCA InquiryInquiry is sent from controller to peripheral equipment (camera), and when peripheral equipment receives the command, it will return required message.VISCA ReplyIt is sent from peripheral equipment (camera) to controller. ACK, which is the complete message, can be either reply or error reply.Command format: Note that LAN output is big-endian, and LSB is in the front.Payload type: data definitions are listed below:Name Value (Byte 0) Value (Byte 0) Value (Byte 0)VISCA command 0x01 0x00 Stores the VISCA command.VISCA inquiry 0x01 0x10 Stores the VISCA inquiry.VISCA reply 0x01 0x11 Stores the reply for the VISCA command and VISCA inquiry, or VISCA device setting command.VISCA devicesetting command0x01 0x20 Stores the VISCA device setting command.Control command 0x02 0x00 Stores the control command.Control reply 0x02 0x01 Stores the reply for the control command.Payload length: V alid data length in Payload (1~16), is the command length.For example, when valid data length is 16-byte, Byte 2: 0x00; Byte 3: 0x10Controller will save sequence number of each command, when one command sent, the sequence number of the command will add 1; when the sequence number reaches the max, it will return back to 0. The peripheral equipment will save sequence number of each command, and return the sequence number to controller.Payload: According to Payload type, the following data will be saved.⚫VISCA command: Save VISCA command packet⚫VISCA inquiry: Save VISCA message packet⚫VISCA reply: Save VISCA return packet⚫VISCA device setting command: Save VISCA equipment setting command packet.⚫Control command: The following data is saved in control command payload⚫Controlled reply: The following data is saved in return command payload of control command.Delivery confirmation:VISCA over IP uses UDP as transmission communication protocol. UDP communication message transmission is not stable, it is necessary to confirm delivery and resent in application.Generally, when controller sends a command to peripheral equipment, controller will wait for the return message then send the next command, we can detect and confirm if the peripheral equipment receive the commands from its return message’s lag time. If controller detects it overtime, it is regarded as error transmission. Controller will resend the commands to check peripheral’s status. The resent command sequence number is same as the last one. Following chart lists possible received message and the corresponding status after the resent command.Note: Do not change IP address, subnet mask, or gateway parameters under VISCA over IP mode, otherwise, it will cause network inconsistency.VISCA PROTOCOLPart1 Camera Return CommandsAck/Completion MessageCommand Packet NoteACK z0 41 FF Returned when the command is accepted. Completi onz0 51 FFReturned when the command has been executed.z = camera adderss+8Error MessagesCommand Packet NoteSyntax Error z0 60 02 FF Returned when the command format is different or when a command with illegal command parameters is acceptedCommand Not Executablez0 61 41 FFReturned when a command cannot be executed due to current conditions. For example, when commands controlling the focus manually are received during auto focus.Part 2 Camera Control CommandsCommand type function commandAddressSetBroadcast88 30 01 FFAddress settingSequence chart when command lostSequence chart when returned message lostPart 2 Camera Control CommandNote: 【x】means the camera address: 【y】=【x + 8】. VISCA Pan Tilt Absolute Position V alueVISCA Pan Tilt Speed ValuePELCO-D PROTOCOL COMMAND LISTPELCO-P PROTOCOL COMMAND LISTWarrantyThank you for your interest in the products of AVIPAS Inc.This Limited Warranty applies to HD Conference Camera purchased from AVIPAS Inc.This Limited Warranty covers any defect in material and workmanship under normal use within the Warranty Period. AVIPAS Inc. will repair or replace the qualified products at no charge.AVIPAS Inc. provides a two (2)-year warranty (from the date of purchase) for this HD Conference Camera.This Limited Warranty does not cover problems including but not limited to: improper handling, malfunction or damage not resulting from defects in material.To receive warranty service, please contact AVIPAS Inc. first. We will decide whether a repair or replacement is needed and will advise you of the cost of such repair or replacement.Copyright NoticeAll contents of this manual, whose copyright belongs to our Corporation cannot be cloned, copied or translated without the permission of the company. Product specifications and information which were referred to in this document are for reference only. We may alter the content at any time and without prior notice.VER: 2020-07-14 (EN)AViPAS Inc.Address: 4320 Stevens Creek Blvd. Suite 227San Jose, CA 95129Phone: 1-844-228-4727Fax: (408) 228-8438Email: ***************Website: 32。
Cisco Webex DX70 和 DX80 用户指南说明书

D15104.28 Cisco Webex DX70 和 DX80 用户指南 2020 年 4 月本指南内容目录所有目录条目都是可点击的超链接,点击即可打开相应的文章。
要在章节之间切换浏览,还可以单击侧边栏中的图标。
注意:本用户指南中介绍的部分功能可能在某些市场中是可选的,因此可能不适用于您的设备。
简介Cisco DX70 概览......................................................................4Cisco DX80 概览......................................................................5配对蓝牙头戴式耳机 .................................................................6使用您的个人凭证登录 .............................................................7视频呼叫从联系人列表发出呼叫 .............................................................9呼叫之前编辑联系人 ..............................................................10使用姓名、号码或地址发出呼叫 .............................................11来电 ......................................................................................12在通话期间收到呼叫 ..............................................................13从呼叫自行断开连接 ..............................................................14将呼叫置于保留状态和恢复保留的呼叫 ..................................15转接正在进行的呼叫 ..............................................................16更改呼叫速率 ........................................................................17激活免打扰 ...........................................................................18自动前转所有呼叫 .................................................................19在通话期间查看键盘 ..............................................................20将其他参加者添加到现有呼叫 ................................................21断开会议参加者的连接 . (22)Intelligent ProximityCisco Proximity 超声波信号 ...................................................24内容共享在通话中共享内容 .................................................................26在通话期间更改演示布局 .......................................................27预定的会议加入预定会议 ........................................................................29加入 Webex Meeting ...............................................................30联系人收藏夹、最近通话和通讯录....................................................32通话期间,将某人添加到收藏夹 .............................................33非通话期间,将某人添加到收藏夹 .........................................34编辑现有收藏夹.....................................................................35摄像机控制打开和关闭本端视频 ..............................................................37移动本端视频 PiP ....................................................................38远端摄像机控制.....................................................................39设置设置 ......................................................................................41本用户指南适用于 DX70 和 DX80。
DX200快速使用手册

目录规格参数 6-8机械操作功能介 9-10接口及功能介绍 11-12基本操作 13-14关机/屏幕开启关闭/重置/电/连接电脑做USB声卡安卓常用功能介绍 15-23接网络/第三方APK应用的安装和卸载/知管理/USB连接/应用授权/固件升级/机、重启及系统切换播放器APK操作指南 24-43一、产品介绍DX200是 iBasso 推出的参考级音乐播放器 。
DX200用时超过一年, 并借助双ES9028PRO的情况下,达到了目前最高的实测数据指标 。
失真控制到了0.0002%,实现了名副其实的参考级别,另外信噪比动态范围都达到了 125dB的超高数据。
可换耳放卡设计让DX200可实现多种变化,适合不同的听音习惯和耳机搭配。
DX200可以播放PCM高达32bit/384kHz, 硬解DSD512。
支持多种音乐格式。
同时它还可以作为一台专业的 USBDAC使用。
安卓和Mango双系统,特别是安卓6.0系统的i 存在,让DX200的可玩性大大增强。
通过5G wif可以流畅无干扰的播放网络音频。
DX200做外DX100的升级后继, 我们实现了多个重大突破。
也愿国产音乐播放器越做越好 。
二、产品及配件DX200的皮套,有效保护机身。
指引:的快速使用说明。
卡:后需求时需要提供保修卡, 敬请妥-C数据线:X200进行充电及数据传输。
煲机线:线连接耳机输出口,保持音乐播放 DX200 处于煲机状态。
煲机能有助 DX200 内部的电容及其它电子到稳定状态,从而使 DX200 的声最佳状态。
线:接外部音频解码器。
三、主要特点MOS USB 接收芯片及Thesycon声卡驱动,提供完美易用的 USB功能cusilicone超低相位噪音飞秒晶振S 屏幕,768*1280分辨率,搭配式触摸屏,OCA无缝贴合PULPDDR34G内存及光纤输出G wifi及蓝牙4.0DXC及SDHC TF卡M3U播放列表mAh 3.8V 锂聚合物电池四、规格参数材质:铝合金屏幕:4.2"IPS触摸屏(768*1280)格式:APE、FLAC、WAV、WMA、ALAC、AIFF、OGG、MP3、DFF、DXD同时支持CUE、M3U、M3U8连接:Type-C(数据传输和充电)输出接口:3.5mm同轴&光纤输出耳放卡:3.5mm单端耳机输出、线性输出、2.5mm平衡输出容量:4400mAh 3.8V 锂离子聚合802.11 b/g/n/ac(2.4Ghz/5Ghz)蓝牙V4.0重量:128.5mm*69mm*19.5mm 240gN:< 0.0002%, -114dB(64Ω@3Vrms) -122dBm 耳机输出平:3Vrms应:20Hz-20KHz -0.16dB:122dBN:0.00032%, -110dB(32Ω@1.8Vrms) -118dB输出平:3Vrms应:20Hz-20KHz -0.16dB:122dBN:< 0.00025%,-112dB五、机械操作功能介绍量调节旋钮:DX200的音量,向上旋转增加音向下旋转减小音量。
DX处理器 用户手册说明书

SECURITY UTILITY:
Show Parameter
4.2
SECURITY UTILITY:
Lock Unit
4.3
SECURITY UTILITY:
User Password
4.4
SECURITY UTILITY:
Enable Password
ESC ENTER
ESC ENTER
ESC ENTER
5 超载负荷
插座上的电源不可过载,延 长电源线、集成式插座等也 要倍加小心,因为这些都可 能造成触电或引起火灾。
- 1、下载文档前请自行甄别文档内容的完整性,平台不提供额外的编辑、内容补充、找答案等附加服务。
- 2、"仅部分预览"的文档,不可在线预览部分如存在完整性等问题,可反馈申请退款(可完整预览的文档不适用该条件!)。
- 3、如文档侵犯您的权益,请联系客服反馈,我们会尽快为您处理(人工客服工作时间:9:00-18:30)。
DX2020说明书
一、DX2020数据采集器用途
DX2020数据采集器是yokogawa新型彩色液晶显示数据采集器,适合在频繁移动的现场,对温度,电压,电流,流量,压力等信号进行记录、显示和管理;能够满足产业界日益迫切的多项目测量、多通道数据记录和超大存储容量的要求,是用户提高生产效率的可靠工具。
DX2020数据采集器作为独立型的温升测试仪,采用了横河自主研发的高耐压半导体继电器(SSR:Solid State Relay)进行通道的切换扫描,具备多通道、高速、可扩展的测量能力,DX1000系列最多可提供12通道输入,DX2000最多可达48通道,能够大大降低客户成本。
除了拥有以往机型的125ms及1s测量周期,DX2020数据采集器还具有高速采样模式-TURBO模式,可实现最快25ms的测量周期(DX1002,DX1004,DX2004,DX2008)。
此外,DX2020数据采集器通过MODBUS或TCP可以连接DAQMASTER MW100等作为外部输入单元(选配件),这样其最快的测量周期为1秒,输入通道最多可达348通道,通过追加MW100的输入模块,可实现灵活的系统扩展。
二、DX2020数据采集器特点和性能
1、基本功能
20通道输入;
批处理开始和停止记录,并生成数据文件;
使用MW100自动连接功能最多可扩展至320通道。
2、高速测量
使用高速模式测量可以实现最快25ms的测量周期
(DX1002DX1004DX2004DX2008),因此,能够测量和记录一般数据采集器采集不到的高速信号;
内存容量增加至400MB,是原有机型的300倍;
管理测量值的校正有效期;
根据任意创建的模版自动创建Excel表格文件。