Spring定时器的使用
Spring配置定时器(注解+xml)方式—整理
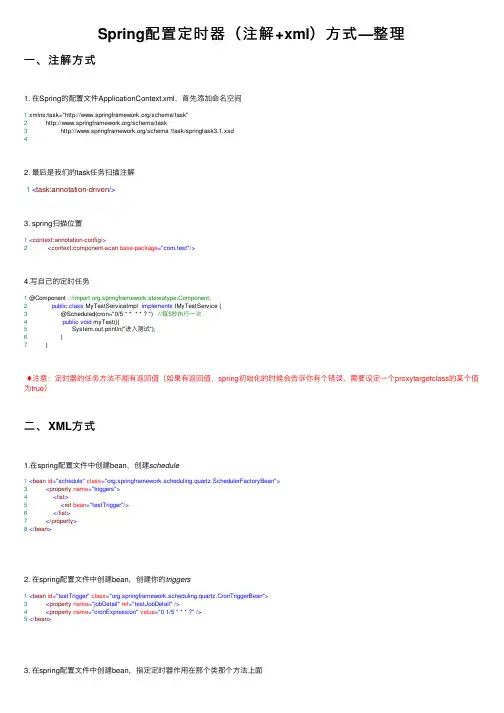
Spring配置定时器(注解+xml)⽅式—整理⼀、注解⽅式1. 在Spring的配置⽂件ApplicationContext.xml,⾸先添加命名空间1 xmlns:task="/schema/task"2 /schema/task3 /schema /task/springtask3.1.xsd42. 最后是我们的task任务扫描注解1<task:annotation-driven/>3. spring扫描位置1<context:annotation-config/>2<context:component-scan base-package="com.test"/>4.写⾃⼰的定时任务1 @Component //import ponent;2public class MyTestServiceImpl implements IMyTestService {3 @Scheduled(cron="0/5 * * * * ? ") //每5秒执⾏⼀次4public void myTest(){5 System.out.println("进⼊测试");6 }7 }♦注意:定时器的任务⽅法不能有返回值(如果有返回值,spring初始化的时候会告诉你有个错误、需要设定⼀个proxytargetclass的某个值为true)⼆、XML⽅式1.在spring配置⽂件中创建bean,创建schedule1<bean id="schedule"class="org.springframework.scheduling.quartz.SchedulerFactoryBean">3<property name="triggers">4<list>5<ref bean="testTrigger"/>6</list>7</property>8</bean>2. 在spring配置⽂件中创建bean,创建你的triggers1<bean id="testTrigger"class="org.springframework.scheduling.quartz.CronTriggerBean">3<property name="jobDetail" ref="testJobDetail"/>4<property name="cronExpression" value="0 1/5 * * * ?"/>5</bean>3. 在spring配置⽂件中创建bean,指定定时器作⽤在那个类那个⽅法上⾯1<bean id="testJobDetail"class="org.springframework.scheduling.quartz.MethodInvokingJobDetailFactoryBean">3<property name="targetObject" ref="targetTestService"/>4<property name="targetMethod" value="timerTest"/>5</bean>♦注明:把定时器作⽤在targetTestService对象中的timerTest⽅法上⾯4. 当然还得把你作⽤的对象交Spring来管理,所以在spring配置⽂件中创建作⽤类的 bean1<bean id="targetTestService" class=".service.TargetTestService" scope="prototype"></bean>♦这是时间的设置规则org.springframework.scheduling.quartz.CronTriggerBean允许你更精确地控制任务的运⾏时间,只需要设置其cronExpression属性。
Spring提供的三种定时任务机制及其比较
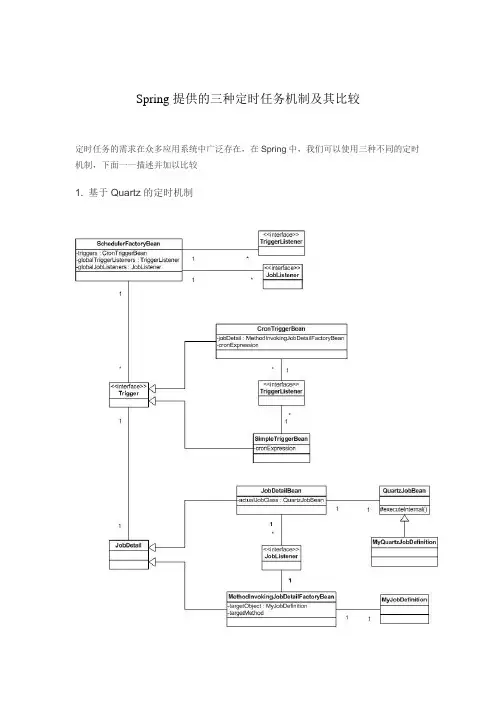
Spring提供的三种定时任务机制及其比较定时任务的需求在众多应用系统中广泛存在,在Spring中,我们可以使用三种不同的定时机制,下面一一描述并加以比较1. 基于Quartz的定时机制下面详细解释这个类图中涉及的关键类及其使用场景1.1. SchedulerFactoryBean这是Spring中基于Quartz的定时机制入口,只要Spring容器装载了这个类,Quartz定时机制就会启动,并加载定义在这个类中的所有triggerSpring配置范例:[xhtml]view plaincopy1.<bean id="sfb"class="org.springframework.scheduling.quartz.SchedulerFactoryBean">2.<!-- 添加触发器 -->3.<property name="triggers">4.<list>5.<ref local="appSubscTrigger"/>6.</list>7.</property>8.9.<!-- 添加listener -->10.<property name="globalTriggerListeners">11.<list>12.<ref local="myTaskTriggerListener"/>13.</list>14.</property>15.</bean>1.2. CronTriggerBean实现了Trigger接口,基于Cron表达式的触发器这种触发器的好处是表达式与linux下的crontab一致,能够满足非常复杂的定时需求,也容易配置Spring配置范例:[xhtml]view plaincopy1.<bean id="notifyTrigger"class="org.springframework.scheduling.quartz.CronTriggerBean">2.<property name="jobDetail"ref="notifyJobDetail"/>3.<property name="cronExpression"value="${notify_trigger_cron_expression}"/>4.</bean>1.3. SimpleTriggerBean该类也实现了Trigger接口,基于配置的定时调度这个触发器的优点在于很容易配置一个简单的定时调度策略Spring配置范例:[xhtml]view plaincopy1.<bean id="simpleReportTrigger"class="org.springframework.scheduling.quartz.SimpleTriggerBean">2.<property name="jobDetail">3.<ref bean="reportJob"/>4.</property>5.<property name="startDelay">6.<value>3600000</value>7.</property>8.<property name="repeatInterval">9.<value>86400000</value>10.</property>11.</bean>1.4. JobDetailBeanJobDetail类的简单扩展,能够包装一个继承自QuartzJobBean的普通Bean,使之成为定时运行的Job缺点是包装的Bean必须继承自一个指定的类,通用性不强,对普通Job的侵入性过强,不推荐使用1.5. MethodInvokingJobDetailFactoryBeanSpring提供的一个不错的JobDetail包装工具,能够包装任何bean,并执行类中指定的任何stati或非static的方法,避免强制要求bean去实现某接口或继承某基础类Spring配置范例:[xhtml]view plaincopy1.<bean id="notifyJobDetail"parent="org.springframework.scheduling.quartz.MethodInvokingJobDetailFactoryBean">2.<property name="targetObject"ref="notifyServerHandler"/>3.<property name="targetMethod"value="execute"/>4.</bean>1.6. 关于TriggerListener和JobListenerQuartz中提供了类似WebWork的拦截器的功能,系统执行任务前或任务执行完毕后,都会检查是否有对应的Listener需要被执行,这种AOP的思想为我们带来了灵活的业务需求实现方式。
java 定时器用法
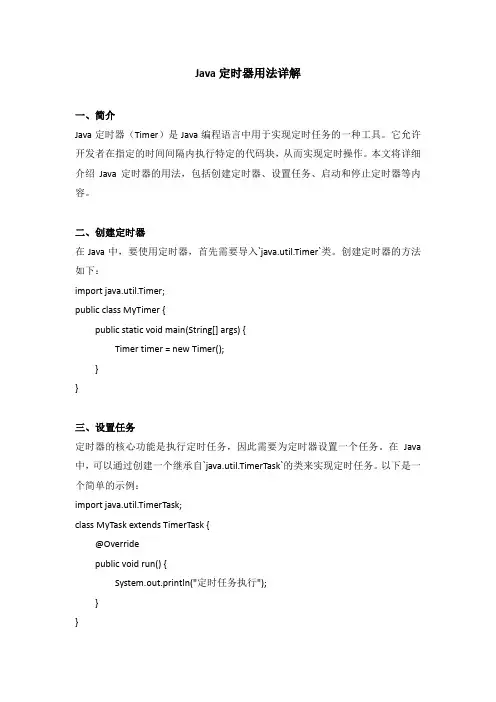
Java定时器用法详解一、简介Java定时器(Timer)是Java编程语言中用于实现定时任务的一种工具。
它允许开发者在指定的时间间隔内执行特定的代码块,从而实现定时操作。
本文将详细介绍Java定时器的用法,包括创建定时器、设置任务、启动和停止定时器等内容。
二、创建定时器在Java中,要使用定时器,首先需要导入`java.util.Timer`类。
创建定时器的方法如下:import java.util.Timer;public class MyTimer {public static void main(String[] args) {Timer timer = new Timer();}}三、设置任务定时器的核心功能是执行定时任务,因此需要为定时器设置一个任务。
在Java 中,可以通过创建一个继承自`java.util.TimerTask`的类来实现定时任务。
以下是一个简单的示例:import java.util.TimerTask;class MyTask extends TimerTask {@Overridepublic void run() {System.out.println("定时任务执行");}}四、启动定时器创建好定时器和任务后,接下来需要启动定时器。
可以使用`schedule()`方法来设置定时器的任务和执行间隔。
以下是一个完整的示例:import java.util.Timer;import java.util.TimerTask;class MyTask extends TimerTask {@Overridepublic void run() {System.out.println("定时任务执行");}}public class MyTimer {public static void main(String[] args) {Timer timer = new Timer();MyTask task = new MyTask();timer.schedule(task, 0, 1000); // 立即执行,然后每隔1秒执行一次}}五、停止定时器在某些情况下,可能需要停止定时器的执行。
spring定时器定时任务到时间未执行问题的解决
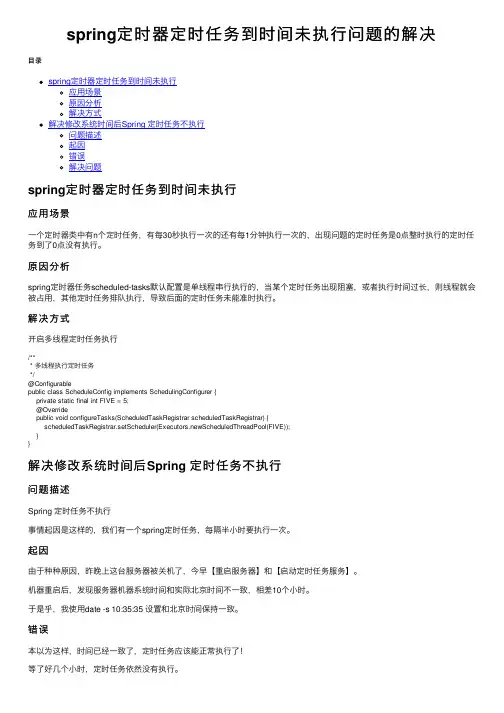
spring定时器定时任务到时间未执⾏问题的解决⽬录spring定时器定时任务到时间未执⾏应⽤场景原因分析解决⽅式解决修改系统时间后Spring 定时任务不执⾏问题描述起因错误解决问题spring定时器定时任务到时间未执⾏应⽤场景⼀个定时器类中有n个定时任务,有每30秒执⾏⼀次的还有每1分钟执⾏⼀次的,出现问题的定时任务是0点整时执⾏的定时任务到了0点没有执⾏。
原因分析spring定时器任务scheduled-tasks默认配置是单线程串⾏执⾏的,当某个定时任务出现阻塞,或者执⾏时间过长,则线程就会被占⽤,其他定时任务排队执⾏,导致后⾯的定时任务未能准时执⾏。
解决⽅式开启多线程定时任务执⾏/*** 多线程执⾏定时任务*/@Configurablepublic class ScheduleConfig implements SchedulingConfigurer {private static final int FIVE = 5;@Overridepublic void configureTasks(ScheduledTaskRegistrar scheduledTaskRegistrar) {scheduledTaskRegistrar.setScheduler(Executors.newScheduledThreadPool(FIVE));}}解决修改系统时间后Spring 定时任务不执⾏问题描述Spring 定时任务不执⾏事情起因是这样的,我们有⼀个spring定时任务,每隔半⼩时要执⾏⼀次。
起因由于种种原因,昨晚上这台服务器被关机了,今早【重启服务器】和【启动定时任务服务】。
机器重启后,发现服务器机器系统时间和实际北京时间不⼀致,相差10个⼩时。
于是乎,我使⽤date -s 10:35:35 设置和北京时间保持⼀致。
错误本以为这样,时间已经⼀致了,定时任务应该能正常执⾏了!等了好⼏个⼩时,定时任务依然没有执⾏。
Springboot定时任务Scheduled重复执行操作

Springboot定时任务Scheduled重复执⾏操作今天⽤scheduled写定时任务的时候发现定时任务⼀秒重复执⾏⼀次,⽽我的cron表达式为 * 0/2 * * * * 。
在源码调试的过程中,发现是我的定时任务执⾏过程太短导致的。
于是我另外写了个简单的定时任务@Componentpublic class TestJob {@Scheduled(cron = "* 0/2 * * * *")public void test() {System.out.println("测试开始");System.out.println("测试结束");}}上述任务在启动之后⼀直执⾏。
然后我在任务后⾯加⼊线程睡眠1分钟。
@Componentpublic class TestJob {@Scheduled(cron = "* 0/2 * * * *")public void test() {System.out.println("测试开始");System.out.println("测试结束");try {Thread.sleep(60000);} catch (InterruptedException e) {e.printStackTrace();}System.out.println("睡眠结束");}}上述任务执⾏⼀次就没有再执⾏了。
所以我继续深⼊查看源码,发现问题在于CronSequenceGenerator.class的next⽅法。
public Date next(Date date) {Calendar calendar = new GregorianCalendar();calendar.setTimeZone(this.timeZone);calendar.setTime(date);//1.设置下次执⾏时间的毫秒为0,如上次任务执⾏过程不⾜1秒,则calendar的时间会被设置成上次任务的执⾏时间calendar.set(14, 0);long originalTimestamp = calendar.getTimeInMillis();this.doNext(calendar, calendar.get(1));//2.由于有上⾯⼀步,执⾏时间太短,会导致下述条件为trueif(calendar.getTimeInMillis() == originalTimestamp) {//3.calendar在原来的时间上增加1秒calendar.add(13, 1);//CronSequenceGenerator的doNext算法从指定时间开始(包括指定时间)查找符合cron表达式规则下⼀个匹配的时间//注意第⼀个匹配符是*,由于增加了1秒,依然符合cron="* 0/2 * * * *",所以下⼀个执⾏时间就是在原来的基础上增加了⼀秒this.doNext(calendar, calendar.get(1));}return calendar.getTime();}请查看代码中的注释,由于任务执⾏时间太短了,代码会进⼊if语句,并设置执⾏时间在原来的基础上增加⼀秒。
SpringBoot执行定时任务@Scheduled的方法
SpringBoot执⾏定时任务@Scheduled的⽅法在做项⽬时,需要⼀个定时任务来接收数据存⼊数据库,后端再写⼀个接⼝来提供该该数据的最新的那⼀条。
数据保持最新:设计字段sign的值(0,1)来设定是否最新定时任务插⼊数据:⾸先进⾏更新,将所有为1即新数据设置过期,然后插⼊新数据,设置sign为1。
这两个操作是原⼦操作。
通过添加事务来进⾏控制。
Java 定时任务的⼏种实现⽅式基于 java.util.Timer 定时器,实现类似闹钟的定时任务使⽤ Quartz、elastic-job、xxl-job 等开源第三⽅定时任务框架,适合分布式项⽬应⽤使⽤ Spring 提供的⼀个注解: @Schedule,开发简单,使⽤⽐较⽅便,也是本⽂介绍的⼀种⽅式Spring 提供的⼀个注解: @Schedule,开发简单,使⽤⽐较⽅便,也是本⽂介绍的⼀种⽅式Spring ⾃⾝提供了对定时任务的⽀持,本⽂将介绍 Spring Boot 中 @Scheduled 定时器的使⽤。
创建定时任务⾸先,在项⽬启动类上添加@EnableScheduling注解,开启对定时任务的⽀持@SpringBootApplication@EnableSchedulingpublic class ScheduledApplication {public static void main(String[] args) {SpringApplication.run(ScheduledApplication.class, args);}}其中@EnableScheduling注解的作⽤是发现注解@Scheduled的任务并后台执⾏。
其次,编写定时任务类和⽅法,定时任务类通过Spring IOC 加载,使⽤@Component注解,定时⽅法使⽤@Scheduled注解。
@Componentpublic class ScheduledTask {@Scheduled(fixedRate = 3000)public void scheduledTask() {System.out.println("任务执⾏时间:" + LocalDateTime.now());}}fixedRate 是 long 类型,表⽰任务执⾏的间隔毫秒数,以上代码中的定时任务每 3 秒执⾏⼀次。
springboot使用定时器@Scheduled不管用的解决
springboot使⽤定时器@Scheduled不管⽤的解决⽬录使⽤定时器@Scheduled不管⽤多个@Scheduled定时器不执⾏解决⽅法使⽤定时器@Scheduled不管⽤如果是⼀开始就不能⽤就是没写@EnableScheduling注解,如果是⽤着⽤着不管⽤了是因为@Scheduled是单线程,有定时器在⼯作或者没有运⾏完毕,所以造成了线程堵塞所以导致下⼀个定时器不能运⾏增加⼀个⽅法类package com.llt;import org.springframework.boot.autoconfigure.batch.BatchProperties;import org.springframework.context.annotation.Configuration;import org.springframework.scheduling.annotation.Scheduled;import org.springframework.scheduling.annotation.SchedulingConfigurer;import org.springframework.scheduling.config.ScheduledTaskRegistrar;import ng.reflect.Method;import java.util.concurrent.Executors;@Configurationpublic class ScheduleConfig implements SchedulingConfigurer {@Overridepublic void configureTasks(ScheduledTaskRegistrar taskRegistrar) {Method[] methods = BatchProperties.Job.class.getMethods();int defaultPoolSize = 3;int corePoolSize = 0;if (methods != null && methods.length > 0) {for (Method method : methods) {Scheduled annotation = method.getAnnotation(Scheduled.class);if (annotation != null) {corePoolSize++;}}if (defaultPoolSize > corePoolSize)corePoolSize = defaultPoolSize;}taskRegistrar.setScheduler(Executors.newScheduledThreadPool(corePoolSize));}}就好了!多个@Scheduled定时器不执⾏最近项⽬中经常有⽤到@Scheduled注解,在内测时由于数据量⼩(没有进⾏压⼒测)所以每个线程执⾏都很快,但线上后发现部分功能⽆法使⽤,最后定位是部分的定时器没有执⾏,后查阅资料和Springboot源码后ScheduledTaskRegistrar在启动时,如果没有指定线程池的⼤⼩,默认会创建核⼼线程数为1的默认线程池,故⽽当项⽬中出现多个@Scheduled线程时,只能⼀个个的执⾏,从⽽导致个别线程执⾏时间过长(或长期执⾏)时,其他定时器不能按照指定的规则进⾏执⾏。
定时器的用法
定时器的用法定时器确实是一项了不起的发明,使相当多需要人控制时间的工作变得简单了许多。
下面店铺就给大家介绍定时器的用法。
定时器的用法1、调整当前时间使用定时器时,须先将定时器的显示时间调整到当前时间。
按住“时钟”键的同时,分别按“星期”、“小时”和“分钟”键,调整到当前的时间。
(每按一次增加一小时,长按可快速调整。
) 按“时钟”键3秒后,当前时间增加1小时,同时液晶屏显示“夏令时”字样,进入夏令时功能,再按"时钟"键3秒,取消夏令时功能,时间自动减少1小时。
2、设置程序按“设定”键,即可进入定时模式设置,屏幕上显示“1开”。
按“小时”、“分钟”和“星期”,即第一组定时开开始工作的时间。
其中,按“星期”键,可选择不同星期组合模式。
可根据需求,定时器只在设定的星期数中工作。
再按“设定”键,屏幕上显示“1关”,即第一组定时关闭时间,时间设置参考一开设置方法。
依次类推,最多可设置20组开与关。
设置完成后按“时钟”键返回当前时间。
注:1.如果每天不需要设定20组,而其他组已设定,必须按“清除”键,将多余各组的时间程序清除。
2.定时设置完成后,应按“设定”键检查多次定时设定情况是否与实际情况一致。
如有异,请按时间需要进行调整或重新设定。
注:1.如果每天不需要设定20组,而其他组已设定,必须按“清除”键,将多余各组的时间程序清除。
2.定时设置完成后,应按“设定”键检查多次定时设定情况是否与实际情况一致。
如有异,请按时间需要进行调整或重新设定。
如设置的时间程序是跨天的,需要逐一将“开”与“关”时间程序相对应的星期模式对应好。
3、定时器工作模式选择在当前时间状况下,连续按“模式”键,显示屏的左侧将循环显示“自动关”、“开”、“自动开”、“关”四种模式。
根据您的需要进行模式选择。
四种模式释意:“开”:定时器一直有电源输出,没有定时功能;“关”:定时器无电源输出,呈关闭状态;“自动开”:定时器接通电源时有电源输出,之后按设定的程序工作;“自动关”:定时器接通电源时无电源输出,之后按设定的程序工作。
前端开发中的定时任务和定时器使用技巧
前端开发中的定时任务和定时器使用技巧随着互联网的快速发展,前端开发在应用程序中的重要性也日益凸显。
在前端开发中,定时任务和定时器的使用非常常见。
它们可以帮助我们实现自动化的操作,提高用户体验和系统性能。
但是,要正确地使用定时任务和定时器,并充分发挥它们的优势,我们需要掌握一些技巧。
一、了解定时任务与定时器的区别和应用场景在深入研究定时任务和定时器的使用技巧之前,我们首先需要明确它们的区别和应用场景。
定时任务是指在指定的时间执行某个任务。
例如,我们可以设置定时任务在每天凌晨0点执行一次备份数据库的操作,或者定时任务在每隔一定时间刷新页面的内容。
而定时器则是指在指定的时间间隔执行某个任务。
比如,我们可以设置定时器每隔1秒执行一次轮播图片的切换效果,或者定时器每隔5分钟向服务器发送一次数据更新请求。
二、合理选择定时任务和定时器的设置在选择定时任务和定时器的设置时,我们应根据具体的业务需求和用户体验来决定。
对于耗时较长的任务,我们可以使用定时任务进行处理。
通过合理设置定时任务的执行时间,可以避免对用户造成过大的等待时间。
另外,在设置定时任务时,我们还可以考虑巧妙利用多线程技术,提高任务执行效率。
对于需要实时响应的操作,我们可以使用定时器来处理。
通过合理设置定时器的时间间隔,可以让页面在用户操作时及时更新内容。
此外,在设置定时器时,我们还要注意性能消耗的问题,避免不必要的资源浪费。
三、防止定时任务和定时器的冲突和误操作在实际开发中,有时候我们会遇到同时使用定时任务和定时器的情况。
为了避免冲突和误操作,我们需要采取一些措施。
首先,我们要确保定时任务和定时器的运行时间不重叠。
可以通过合理安排执行时间或者加锁的方式实现。
另外,在使用定时器时,如果用户触发了某个操作,我们需要先判断当前是否有正在执行的定时任务,如果有,则先停止定时任务再执行用户操作,以免造成数据错误或界面异常。
其次,我们要避免频繁的定时任务和定时器的触发。
java中spring与Quartz 整合定时任务
现在想要获得在特定时间或者指定时间执行相应功能有两种做法在applicationContext.xml中写入如下Bean<bean id="repeatingTrigger"class="org.springframework.scheduling.timer.ScheduledTimerTask"> <!--启动一秒后执行 --><property name="delay"><value>1000</value></property><!--每隔一小时执行一次 --><property name="period"><value>3600000</value></property><!--注入要监控的javaBean --><property name="timerTask"><ref bean="task" /></property><!--类型是否为fixedRate型,默认为fixedDelay--><property name="fixedRate"><value>true</value></property></bean><bean id="scheduler"class="org.springframework.scheduling.timer.TimerFactoryBean"> <property name="scheduledTimerTasks"><list><ref bean="repeatingTrigger" /></list></property></bean><bean id="task" class="com.css.wam.portlet.SampleTask"><property name="workService"><ref bean="workService" /></property><property name="work"><ref bean="work" /></property></bean>然后写SampleTask类,如下:package com.css.wam.portlet;import java.util.ArrayList;import java.util.Calendar;import java.util.Iterator;import java.util.List;import java.util.TimerTask;import javax.servlet.ServletContext; 字串2import org.apache.jetspeed.security.SecurityException; 字串9 import com.css.wam.service.WorkService; 字串1@SuppressWarnings("unused")class SampleTask extends TimerTask{ 字串2private static final int C_SCHEDULE_HOUR = 23;//设置指定时间private WorkService workService;private List users;private List teams;private WorkPortlet work;public void setWorkService(WorkService workService) {this.workService = workService;} 字串7public void setWork(WorkPortlet work) {this.work = work;} 字串4public SampleTask(){}@SuppressWarnings("unchecked")public void run() {Calendar cal = Calendar.getInstance();try {users = work.getUsers();teams = new ArrayList();for(Iterator it = users.iterator(); it.hasNext();){String teamname = work.getGroupsByUser((String)it.next()); teams.add(teamname);}//查看当前时间与指定是否一致,一致则执行任务if (C_SCHEDULE_HOUR == cal.get(Calendar.HOUR_OF_DAY) ) 字串6workService.autoWorkOff(users, teams); 字串8} catch (SecurityException e) {e.printStackTrace();}}}使用Quartz定时<bean id="methodInvokingJobDetail"class="org.springframework.scheduling.quartz.MethodInvokingJobDetailFactoryBean"><property name="targetObject"><ref bean="changeService"/></property><property name="targetMethod"><value>changeAll</value></property></bean><bean id="cronTrigger" class="org.springframework.scheduling.quartz.CronTriggerBean"> <property name="jobDetail"><ref bean="methodInvokingJobDetail"/></property><property name="cronExpression"><!--<value>0 0 6,12,20 * * ?</value>--><value>0 0 23 * * ?</value></property></bean><bean class="org.springframework.scheduling.quartz.SchedulerFactoryBean"><property name="triggers"><list><ref local="cronTrigger"/></list></property></bean>简单定时<bean id="methodInvokingJobDetail"class="org.springframework.scheduling.quartz.MethodInvokingJobDetailFactoryBean"><property name="targetObject"><ref bean="sgService"/></property><property name="targetMethod"><value>updateNowSgList</value></property></bean><bean id="simpleTrigger"class="org.springframework.scheduling.quartz.SimpleTriggerBean"><property name="jobDetail"><ref bean="methodInvokingJobDetail"/></property><property name="startDelay"><value>10000</value> <!-- 10 s--></property><property name="repeatInterval"><value>1296000000</value> <!-- 1296000000 6 hours--></property></bean><bean class="org.springframework.scheduling.quartz.SchedulerFactoryBean"><property name="triggers"><list><ref local="simpleTrigger"/></list></property></bean>一个cron表达式有至少6个(也可能7个)有空格分隔的时间元素。
- 1、下载文档前请自行甄别文档内容的完整性,平台不提供额外的编辑、内容补充、找答案等附加服务。
- 2、"仅部分预览"的文档,不可在线预览部分如存在完整性等问题,可反馈申请退款(可完整预览的文档不适用该条件!)。
- 3、如文档侵犯您的权益,请联系客服反馈,我们会尽快为您处理(人工客服工作时间:9:00-18:30)。
定时执行任务,这是项目中常用的东西,今天我们来做一个使用Spring定时器进行任务定制的小例子,仅供学习!
1首先要增加相应的JAR。
因为这是一个小例子,使用的JAR包不是很多,用到了spring.jar,
quartz-all-1.6.5.jar,quartz-1.5.2.jar,commons-logging.jar,
log4j-1.2.14.jar!不用关心版本,从你下载到的Spring中找即可。
定义web.xml配置文件
要在配置文件中定义Spring和Log4j的使用。
具体看工程即可。
重点关注的是如果你做例子时使用了web-app_2_5.xsd,那么在部分服务器上是跑不起
来的。
Xml代码
1<?xml version="1.0" encoding="UTF-8"?>
1<!-- 如果定义的是web-app_2_5.xsd,那么在部分服务器上是跑不通过的
-->
1<web-app version="2.4" xmlns="/xml/ns/j2ee"
1xmlns:xsi="/2001/XMLSchema-instance"
1xsi:schemaLocation="/xml/ns/j2ee
1/xml/ns/j2ee/web-app_2_4.xsd">
1<!-- 系统默认首页面-->
1<welcome-file-list>
1<welcome-file>index.jsp</welcome-file>
1</welcome-file-list>
1
1<!-- 定义Spring配置文件的加载路径-->
1<context-param>
1<param-name>contextConfigLocation</param-name>
1<param-value>/WEB-INF/spring.xml</param-value>
1</context-param>
1<!-- 定义Log4j日志配置文件-->
1<context-param>
1<param-name>log4jConfigLocation</param-name>
1<param-value>/WEB-INF/classes/log4j.properties</param-value> 1</context-param>
1
1<!-- 定义日志监听-->
1<listener>
1<listener-class>
1org.springframework.web.util.Log4jConfigListener
1</listener-class>
1</listener>
1<!-- 定义Spring监听-->
1<listener>
1<listener-class>
1org.springframework.web.context.ContextLoaderListener
1</listener-class>
1</listener>
1</web-app>
定义Spring配置文件
这个文件的位置你可以自己定义,我放到了web-inf下面。
里面需要定义四个内容,具体看注释。
重点是时间间隔的配置,这个你可以网上查一下,或看
readme文件。
Xml代码
1<?xml version="1.0" encoding="UTF-8"?>
1<beans xmlns="/schema/beans"
1xmlns:xsi="/2001/XMLSchema-instance"
1xsi:schemaLocation="/schema/beans
1/schema/beans/spring-beans-2.0.xsd">
1<!-- 每个定义的任务都要在这里进行引用才能运行-->
1<bean
class="org.springframework.scheduling.quartz.SchedulerFactoryBean">
1<property name="triggers">
1<list>
1<ref local="BusinessTestTrigger" />
1</list>
1</property>
1</bean>
1<!-- 定义我们要运行的类,可以使用注入定制一些参数-->
1<bean id="BusinessTestTime" class="com.test.Test">
1<property name="para" value="Spring定时器测试V1" />
1</bean>
1<!-- 引用,配置要运行的方法-->
1<bean id="BusinessTestDetail"
1class="org.springframework.scheduling.quartz.MethodInvokingJobDetailF actoryBean">
1<property name="targetObject">
1<ref bean="BusinessTestTime" />
1</property>
1<property name="concurrent" value="false" />
1<property name="targetMethod" value="run" />
1</bean>
1<!-- 引用,定制调用间隔,具体时间配置的正则,请阅读readme.txt --> 1<bean id="BusinessTestTrigger"
1class="org.springframework.scheduling.quartz.CronTriggerBean">
1<property name="jobDetail">
1<ref bean="BusinessTestDetail" />
1</property>
1<property name="cronExpression">
1<value>0/5 * * * * ?</value>
1</property>
1</bean>
1</beans>
执行的代码
这个代码就是一个普通的代码,里面定义一个要执行的方法就可以了,方法
名称自己定义并在Spring配置文件中配置即可。
Java代码
1package com.test;
1import java.text.SimpleDateFormat;
1import java.util.Date;
1/**
1* 执行类
1*/
1public class Test {
1// 执行参数
1private String para ;
1// 执行方法
1public void run() {
1// 定义输出的格式化日期,以便于区分调用
1SimpleDateFormat format = new SimpleDateFormat("yyyy-MM-dd
HH:mm:ss");
1System.out.println("the para is : " + para + " ! Time is :" +
format.format(new Date()));
1}
1public String getPara() {
1return para;
1}
1public void setPara(String para) {
1this.para = para;
1}
1}
备注:工程直接使用工具导入即可查看代码,将工程部署即可在控制台看到效果。