AppCan uexWidgetOne
widget用户交互(android)
Android 妙招解决App Widget用户交互 2010年01月07日 07:28 【IT168技术】App Widget对于Android来说是非常强大的。
通过它,开发人员可以创建简单的控件,在主屏幕上或在任何程序中提供类似的主机托管功能。
在创建一主屏幕App Widget时,您学习了如何创建和配置一个App Widget。
这个简单的应用程序插件播放了一个由用户预先设定时间间隔的图像幻灯片。
但是,如果用户想改变这个时间间隔?如果他们想暂停幻灯片或立即跳到下一张图片他们该怎么做呢?在本文中,您将学习如何对App Widget增加用户控件来处理这些行为。
为了处理与App Widget的交互,必须执行下面的任务:1、为每个App Widget控件设置唯一的单击处理器。
2、这个单击处理器向注册接收器发送一个命令3、处理收到的命令并执行任何必要行动4、更新App Widget,以反映变化在这个例子中,我们将修改之前文章所创建的App Widget(图1,顶上的App Widget ),包括一个带有三个控件的按钮栏(图1,底部App Widget)。
按钮栏上的每个按钮将执行一项具体的行动,然后点击App Widget的任何地方将隐藏按钮栏。
左边的按钮(工具集)将启动配置活动,用户可以改变幻灯片图像转换之间的时间间隔。
中间的按钮将暂停或恢复,幻灯片。
右侧的按钮,允许用户立即跳到下一张图片。
Figure 1: App Widget的三个不同状态Working with RemoteViews一个App Widget使用一种叫做RemoteViews的特殊的显示控件。
与普通视图不同的是,设计RemoteViews控件的目的是显示另一个进程中的视图控件的集合。
因此,不能简单地添加一个按钮处理程序,因为该代码将在应用程序的进程中运行,而不是在显示RemoteViews 对象的进程中(在这种情况下,主屏幕的进程中)。
MXview One软件介绍指南V1.0说明书

•Software Introduction Guide V1.0MXview One Retrospect & ChallengesMXview One Central ManagerFeatures & BenefitsLicenses & Purchasing Scenarios AgendaMXview One IntroductionMonitor and diagnose networking devices in industrial networks.Device…Full visibility with flexible, customizable viewVisualize NetworksOptimize OperationsDedicated add-ons to increase operational efficiencyMinimize DowntimeQuickly respond to issues from a single platformMXview One Value PropositionExpand With Growing Customer Networks…………ScalabilityBusinessContinuityIntegrationInvestmentProtectionAdapting the scalability ofnetwork hardware, software,and databasesPreparing BCP to cover system failures, natural disasters,and other disruptive eventsNeed for seamless integration and interoperability with existing systemsAbility to efficiently allocate and manage invested resourcesKey Concerns for Rapid GrowthStreamlining Operational ProcessesI have 20 MXview One Sites…Unable to centrally control account permissionsAuthorizationInefficient licensemanagement andallocationInventoryConsolidating data andgenerating reports istime-consumingReporting VisibilityDifficulties monitoringand managing multiplesites at onceA centralized platform to efficiently manage distributed networks…………Centralized Platform for Managing Distributed MXview One Local SitesMXview One Central ManagerFeature HighlightsCentralized license management andallocationIntuitive DashboardRemote AccessCentralized ManagementLicense ManagementConsolidated ReportsOne-click remote access to local MXview One Sites for troubleshootingSingle-pane-of-glass dashboard and real-time global map viewGroup-based site management to easily organize multiple sitesAuto-generated periodical reports based on groupsor sitesMXview One Central Manager Key FeaturesSite Status Categories Quickly spot problematic sitesMap viewEasily locate sites and dispatch on-site engineers to addresscritical issuessitesEvent InformationDetailed information about eventsRoot Cause Analysis Quickly identify the issuesourceEvent NotificationsConfigurable event alarm notificationsOne Click to Access SiteRemote access for troubleshooting(Root Group)GroupSiteFunction-based Site GroupsOrganization | Multi-layered (up to 4 Layers)Simplified Network DesignSimplified ManagementSimplified Troubleshooting(Root Group)Account and Privilege ManagementSecurity | Compliance | Efficiency | ProductivityAudit ControlsSeparation of Duty User Access Records Provision/DeprovisionConsolidated View Grant/Revoke Access Access ManagementRole AssignmentSystem RestrictionsOperational EfficiencyComplianceAdmin ProductivityCentralized Manage and Allocate LicensesAsset and Inventory ManagementVisibility | Availability | InvestmentVisibility of Total Assets Availability of Inventory Investment PlanningResource PlanningActivation Status Total Capacity On-demand ExpansionLicense ValidationSite A30 nodesSite B20 nodesSite C10 nodesSite D15 nodesSite E25 nodes……………Flexible License DistributionInvestment Protection | Flexibility | Adoption5 sites/ 100 nodesSite F 20 nodes…Site A30 nodesSite B20 nodesSite C10 nodesSite D15 nodesSite E25 nodes……………Site F 20 nodes…X 1X 206sites/ 120nodesFlexible License DistributionInvestment Protection | Flexibility | AdaptabilitySimplify and Streamline ManagementCollect | Analyze | Evaluate DataCollective ReportGroup and Site ReportsOperation StatusMXview One ServerStatus MonitoringDevice and NetworkAutomated ReportsEfficient ReportingFocused DataGroup-based ReportsTemplatesPreconfigured FormatUser SchedulesUser-set Report Intervals•Optimize networkmanagement with data of all sites in a single report.•Set upschedules to automatically generate reports.•Save time with preconfigured report templates based on your criteria.Comprehensive ReportsMonitor and manage the status of all your sites from a single, centralized platformStreamline and simplify management of distributed networksReal-time event notifications and remote access to local sites for troubleshootingReduce DowntimeVisualize Site StatusEnhance EfficiencyMXview One Family Value PropositionsLicense Purchasing GuideProduct Model DescriptionMXview One Central Manager LIC-MXviewOneCM-NEW-XS-SR MXview One Central Manager sitelicense with customizable site quantity(minimum 1 site)MXview Power LIC-MXviewOneCM-ADD-POWER-XS-SR MXview One Central Manager license to enable the Power add-on for MXview One sites, customizable site quantity (minimum 1 site)MXview Wireless LIC-MXviewOneCM-ADD-WIRELESS-XS-SR MXview One Central Manager license to enable the Wireless add-on for MXview One sites, customizable site quantity (minimum 1 site)(SR: Single registration code, indicating this will only provide a single license registration code for the specified quantity.) License Type OverviewAdopting MXview One Central Manager for New and Existing MXview One UsersBase Licenses Add-On LicensesDepending on the type of user, the required licenses may vary.User Types & JourneyNew UsersExisting UsersNodes Sites Power WirelessExsiting NodesSites Power WirelessSite license to manage local MXview One sitesLicense ModelRequirements QuantityLIC-MXviewOneCM-NEW-XS-SR2 New UsersNode license to manage local site devicesRequirementsQuantityLicense Model…………50 devicesLIC-MXviewOne-NEW-XN-SR45 devices95New UsersAdd-on licenses for local sitesRequirementsQuantityLicense Model2 sites50 devicesLIC-MXviewOne-NEW-XS-SRLIC-MXviewOne-NEW-XN-SR LIC-MXviewOneCM-ADD-POWER-XS-SR245 devices952Note: The number of add-on licenses required depends on the number of sites the add-on will be activated for. For example, to activate the add-on for two sites, you will need two add-on licenses.New UsersMXview One site A: Has 50 existing nodes MXview One site B: Already has 45 nodes LIC-MXviewOne-NEW-XN-SR LIC-MXviewOne-NEW-XN-SRSite license to manage sites through MXview One Central ManagerRequirements QuantityLicense ModelsLIC-MXviewOneCM-NEW-XS-SR 2Existing MXview OneUsersMXview One site A: Has 50 existing nodes MXview One site B: Has 45 existing nodes LIC-MXviewOne-NEW-XN-SR LIC-MXviewOne-NEW-XN-SRRequirements QuantityLicense ModelLIC-MXviewOneCM-ADD-POWER-XS-SR 2LIC-MXviewOneCM-NEW-XS-SR 2ExistingMXview OneUsersAdd-on licenses for local sitesLearn more about Moxa’s Network Management Software。
widget

if (FRESH.equals(action)){
showTime(context);
}elseif(Intent.ACTION_TIME_TICK.equals(action)){
showTime(context);
}
super.onReceive(context,intent);
super.onUpdate(context,appWidgetManager, appWidgetIds);
mContext = context;
RemoteViews views = newRemoteViews(context.getPackageName(),yout.main);
} catch (InterruptedException e) {
e.printStackTrace();
}
mContext.sendBroadcast(newIntent(FRESH));//通知刷新Widget的Intent
}
};
};
@Override
import android.widget.RemoteViews;
public class TestAppWidget extends AppWidgetProvider {
private String tag="--------TestAppWidget";
private static
public void onUpdate(Contextcontext, AppWidgetManager appWidgetManager,
int[] appWidgetIds) {//这个是每次Widget更新时调用的函数
AppCan插件使用文档之uexAudio
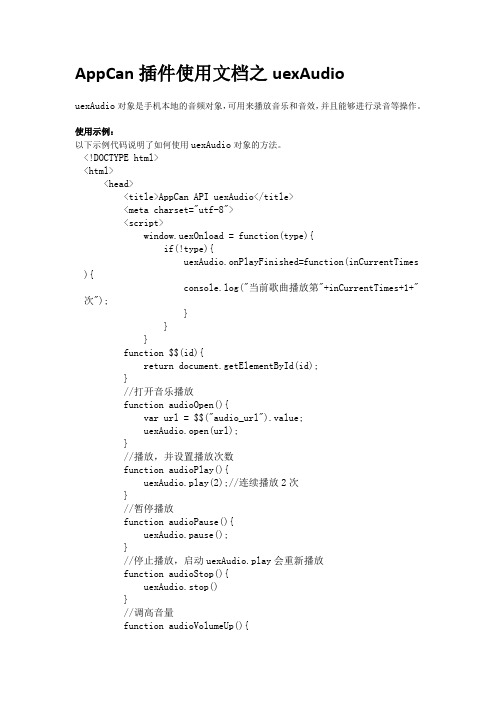
AppCan插件使用文档之uexAudiouexAudio对象是手机本地的音频对象,可用来播放音乐和音效,并且能够进行录音等操作。
使用示例:以下示例代码说明了如何使用uexAudio对象的方法。
<!DOCTYPE html><html><head><title>AppCan API uexAudio</title><meta charset="utf-8"><script>window.uexOnload = function(type){if(!type){uexAudio.onPlayFinished=function(inCurrentTimes){console.log("当前歌曲播放第"+inCurrentTimes+1+"次");}}}function $$(id){return document.getElementById(id);}//打开音乐播放function audioOpen(){var url = $$("audio_url").value;uexAudio.open(url);}//播放,并设置播放次数function audioPlay(){uexAudio.play(2);//连续播放2次}//暂停播放function audioPause(){uexAudio.pause();}//停止播放,启动uexAudio.play会重新播放function audioStop(){uexAudio.stop()}//调高音量function audioVolumeUp(){uexAudio.volumeUp();}//调低音量function audioVolumeDown(){uexAudio.volumeDown();}//打开系统播放界面function audioOpenPlayer(){//设置播放音乐数组 var arr_ =["res://1.mp3","res://2.mp3","res://3.mp3"];//传入数组,并设置从数组第一个开始播放uexAudio.openPlayer(arr_,0);}/*********音效处理方法************/var sondPoolId = 0;//全局变量,用于保存打开音效池的返回id,初始化为0//打开音效池function audioOpenSoundPool(){uexAudio.cbOpenSoundPool=function(opId,dataType,data){if(dataType==2)sondPoolId = data;}}//播放音效池中的音效function audioPlayFromSoundPool(){if(sondPoolId!=0)uexAudio.playFromSoundPool(sondPoolId);}//停止播放音效function audioStopFromSoundPool(){if(sondPoolId!=0){uexAudio.stopFromSoundPool(sondPoolId);sondPoolId = 0;}}//向音效池添加音效var soundId = 100; function audioAddSound(){soundId++;var tmp = "res://1.amr";uexAudio.addSound(soundId,tmp);}//关闭音效池function audioCloseSoundPool(){uexAudio.closeSoundPool();}/****************录音处理方法*****************///打开系统录音界面function audioRecord(){uexAudio.cbRecord=function(opId,dataType,data){if(dataType==0)console.log("录音文件路径为:"+data);}uexAudio.record(0);//设置录音格式为amr}//开始后台录音function audioStartBackgroundRecord(){uexAudio.startBackgroundRecord(0);//设置录音格式为amr}//停止后台录音function audioStopBackgroundRecord(){uexAudio.cbBackgroundRecord=function(opId,dataType,data){if(dataType==0)console.log("录音文件路径为:"+data);}uexAudio.stopBackgroundRecord();}</script></head><body><span>音乐播放</span><br/><input id="audio_url" type="text"style="width:200px;height:20px" /><br/><input type="button" value="Open" onclick="audioOpen()"/><br/> <input type="button" value="Play" onclick="audioPlay()"/><br/> <input type="button" value="Pause" onclick="audioPause()"/><br/> <input type="button" value="Stop" onclick="audioStop()"/><br/> <input type="button" value="VolumeUp"onclick="audioVolumeUp()"/><br/><input type="button" value="VolumeDown"onclick="audioVolumeDown()"/><br/><br/><span>打开系统音乐播放界面</span><br/><input type="button" value="OpenPlayer"onclick="audioOpenPlayer()"/><br/><br/><span>音效播放</span><br/><input type="button" value="OpenSoundPool"onclick="audioOpenSoundPool()"/><br/><input type="button" value="PlayFromSoundPool"onclick="audioPlayFromSoundPool()"/><br/><input type="button" value="StopFromSoundPool"onclick="audioStopFromSoundPool()"/><br/><input type="button" value="AddSound"onclick="audioAddSound()"/><br/><input type="button" value="CloseSoundPool"onclick="audioCloseSoundPool()"/><br/><br/><span>录音</span><br/><input type="button" value="Record"onclick="audioRecord()"/><br/><input type="button" value="StartBackgroundRecord"onclick="audioStartBackgroundRecord()"/><br/><input type="button" value="StopBackgroundRecord"onclick="audioStopBackgroundRecord()"/><br/></body></html>Methods:1、open(url)打开音乐文件。
python中的widget用法 -回复

python中的widget用法-回复Python中的widget用法Widget是指用户界面(UI)中的各种元素,如按钮、文本框、复选框等,它们用于与用户进行交互。
在Python中,有多个库提供了丰富的widget功能,其中最常用的是Tkinter库。
本文将一步一步回答关于Python中的widget用法的问题,介绍如何创建、配置和使用不同类型的widget。
一、什么是widget?在软件开发中,widget是指用户界面上的可视化元素,用于与用户进行交互。
它们可以是按钮、文本框、标签、滑块等,用于获取用户输入、显示信息或执行某些操作。
widget通常有自己的属性和方法,可以通过编程来控制其行为和外观。
在Python中,widget是通过各种GUI库实现的。
Tkinter是Python 标准库中的一个GUI库,它提供了丰富的widget类和方法,用于创建和管理用户界面上的元素。
二、如何创建一个widget?在Tkinter中,创建一个widget的基本步骤如下:1. 导入Tkinter库首先,需要导入Tkinter库。
通过以下代码实现:pythonimport tkinter as tk2. 创建主窗口使用Tkinter库创建一个主窗口,并设置其标题和大小。
pythonroot = ()root.title("My Application")root.geometry("500x300")3. 创建widget在主窗口中,使用Tkinter提供的widget类来创建不同类型的widget。
例如,创建一个按钮:pythonbutton = tk.Button(root, text="Click Me!")在上述代码中,`tk.Button`表示创建一个按钮类型的widget,`root`表示按钮父窗口为主窗口,`text`参数用于设置按钮上显示的文本。
AppCan支付类插件使用文档之uexPay
AppCan支付类插件使用文档之uexPay:AppCan官方最近提供了一些新的API,其中整合了众多第三方移动支付的能力,包括了支付宝、苹果的inAppPurchase、联动优势、Paypal、中国银联、易宝支付等,通过综合的第三方支付方法,使用AppCan平台开发HTML5游戏变现不再成为瓶颈,相比国外中间件就更具本土优势。
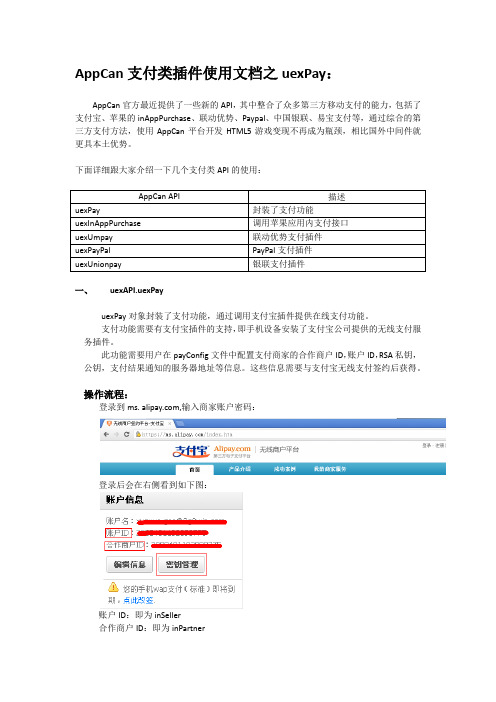
下面详细跟大家介绍一下几个支付类API的使用:一、uexAPI.uexPayuexPay对象封装了支付功能,通过调用支付宝插件提供在线支付功能。
支付功能需要有支付宝插件的支持,即手机设备安装了支付宝公司提供的无线支付服务插件。
此功能需要用户在payConfig文件中配置支付商家的合作商户ID,账户ID,RSA私钥,公钥,支付结果通知的服务器地址等信息。
这些信息需要与支付宝无线支付签约后获得。
操作流程:登录到ms. ,输入商家账户密码:登录后会在右侧看到如下图:账户ID:即为inSeller合作商户ID:即为inPartner点击'密钥管理',进入到密钥界面:如何生成RSA私钥和公钥,请下载支付宝官网提供的工具【下载地址】:按照【openssl-0.9.8k_WIN32(RSA密钥生成工具).zip】文件夹里面的使用说明,生成RSA 公钥和私钥。
生成的RSA公钥txt文本上传到支付宝,支付宝会为此商家生成对应的支付宝公钥。
最后,商户需要签约为手机应用内支付产品:使用示例:以下示例代码说明了如何使用uexPay对象的方法。
<!DOCTYPE html><html><head><title>AppCan API uexPay</title><meta charset=utf-8><script>var partner = 2088501923710512;var seller = 2088501923710512;var rsaPrivate =MIICeAIBADANBgkqhkiG9w0BAQEFAASCAmIwggJeAgEAAoGBANY6sXzRlqgmngX6m 1G2BJQzsZuvAE2iXVB/e/T4CBHnvp63dQUesPZM1gyWm+wGjmYEr3QP4DiXJHSsCt UHUWbGiKeuodwUFr25LX9kDKBA/Vkol6NtTL/bkzPO48Epr5pb8jhcfFN0xUQfxcZ R4p7oLcLA4sSY7H+dSAUL7NlVAgMBAAECgYEAjPpjArkKY+3F4DljLQqTSNQb9U/c 6zoGHotGj5cJ+H6BOwGPyKbB3dQCqJYUVeaanxhGPiKUc6lDHGR7XGVMcxk1ckFHn iGY7SGeddDs1wODyMVRXUuZleZ0I2QdhxuyK3RQzMiD9tRuSttq8wj+MKcXoYRN9b Y+GOrtnQuHfAECQQD4/ytu7q9CvDCNpONUzjBXFVfAbQOAv5dWvBDyoS9aN9wicZ9 EaJIcjozqUyyXqMek1/+v+ehnwr++NNo9reI1AkEA3EEwtI2d4EUkfp0gjPj29p22 CgkVbHyfweVfBjuR5evaTFRJWzf9yuksogPS1JLeTqKXczW6mBdgj05iEr3+oQJBA I3Hli6rYEZKrAbrXbqbUXE0qOvb5wO3lHAB1FCjsTfY2NMQCZVFSfVSwjBnPdv5cf yONXw5e7khblba923phgUCQGO4gDy/AYPQyj0pFtu8vNPbg9f3VOPRaON43hUMU3o t1qBIaQ4Lw7Ri7fpMkN/9vvkLVFatNNY3f1hivLSPoQECQQDEaP8VLsUVd3QdoDru H4oIpqVbQ8xj3aEZKiA01w8QqLkElPG14+7EFA+gDKWjTghOduomnXDleVX34tVlA uCn;var rsaPublic =MIGfMA0GCSqGSIb3DQEBAQUAA4GNADCBiQKBgQCq8+Q1EiRE9Chp3RtNo4Iftx/i1 nWyxecEfDRZK+v3UsxZ3Zdo1kbMXH3fAcNgNlfNhlE3vGb/AWdehp4bBqweQiyuhx BLBRnDGNd6iuqksEJfgxq/iBgGSQKiGcM8XzGGHU7Tbe/HL8s532hCNOAUwvJYCXS odWwaMSOsWBy/nwIDAQAB;var notifyUrl = null;function setInfo(){uexPay.setPayInfo(partner, seller, rsaPrivate, rsaPublic, notifyUrl);}function pay(){setInfo();var subject = document.getElementById(subject).value;var body = document.getElementById(bodyy).value;var fee = document.getElementById(fee).value;var num = document.getElementById(num).value;uexPay.pay(num, subject, body, fee);}function paySuccess(status, des){document.getElementById('adre').innerHTML = des;}function payFailed(opCode, errorCode, des){document.getElementById('adre').innerHTML = des;}window.uexOnload = function(){uexPay.onStatus = paySuccess;uexWidgetOne.cbError = payFailed;}</script></head><body><div>支付接口</div><div><div><span>支付接口测试:</span><span style=color:red;>注意:因公司暂未与支付宝无线支付服务签约,没有获得相关支付公钥,所以此功能默认定向支付宝公司开发测试帐户,所花费的钱款为真实花费,无法退回,<br><br>且登录支付宝后,支付宝将绑定手机,请谨慎测试!!<br><br>代码中已经写死了,每笔交易额为0.01元。
AppCan插件使用文档之uexuexJabber
AppCan插件使用文档之uexJabberuexJabber本对象封装了根据Jabber协议的即时通讯接口API。
Methods1,login(inUserName,inPassWord,inServerIp,inPort) 登录Jabber服务。
Parameters∙inUserName用户名∙inPassWord密码∙inServerIpJabber服务地址∙inPortJabber服务端口号2,cbLogin(opId,dataType,data)uexJabber.login的回调方法。
Parameters∙opId操作ID,在此函数中不起作用,可忽略∙dataType返回数据的数据类型为uex.cInt(值为2)∙data返回的数据,0表示成功或1表示失败3,sendData(inData,inToUser)给对方发送数据。
Parameters∙inData发送的数据∙inToUser接收方用户名4,sendFile(inFilePath,inToUser)给对方发送文件。
Parameters∙inFilePath发送的文件路径∙inToUser接收方用户名5,cbSendFile(opId,dataType,data)uexJabber.sendFile的回调方法。
Parameters∙opId操作ID,在此函数中不起作用,可忽略∙dataType返回数据的数据类型为uex.cInt(值为2)∙data返回的数据,0表示成功或1表示失败uexJabber 6,onData(inX)登录后监听是否有数据发送过来。
Parameters∙onData接收的数据7,onFile(fileSender,fileNamefileSize) 登录后监听是否有文件发送过来。
Parameters∙fileSender发送者名称∙fileName发送文件名称∙fileSize发送文件大小8,receiveFile (inFilePath)当监听到有文件发送过来时,接收文件。
【IOS7插件推荐】Ultra Widget:主页定制神器
【IOS7插件推荐】Ultra Widget:主页定制神器
想要随时随地掌握有用的信息,直接在主页看到想要的内容?那么这款Ultra Widget完全可以满足你的需求。
今天XY苹果助手小编就要为大家推荐这款主页定制神器。
Ultra Widget可以给主页界面添加实用的小工具,它完美地兼容iWidgets,你可以提前获知一周后的天气预报,也可以知道目前的电池情况,日期,时间,和外面的温度等。
以上的所有要素,都是完全可以定制的。
安装这款插件后,你可以在主页听过点击和长按来增加小工具,当你点击和长按的时候,你会发现iWidget 的清单会出现,然后你就可以找到Ultra Widget。
在增加到主页之前,你可以找到这款插件的配置面板,对外观,包括图标,文本颜色,背景颜色,电池轮廓等进行设置。
此外,你还可以对电池隐藏或者是出现,启动或禁用GPS,选择天气代码等进行设置。
Ultra Widget 同时兼容LockHTML3,所以你也可以将它放到锁屏中,就像主页的一样。
值得注意的是,安装Ultra Widget之前。
最好先安装iWidgets 和InfoStats 这两款插件,然后它还要依赖WinterBoard 才能进行。
如果你对这款插件感兴趣,不妨
到 cydia 中源下载,售价0.99 美元。
AppCan插件使用文档之uexDevice
AppCan插件使用文档之uexDeviceuexDevice对象封装了用于调用设备硬件参数相关信息和硬件状态相关信息。
使用示例以下示例代码说明了如何使用uexDevice对象的方法.<!DOCTYPE html><html><head><title>AppCan API uexDevice</title><meta charset='utf-8'><script>function $$(id){returndocument.getElementById(id);}functionisDefine(para) {if (typeofpara == 'undefined' || para == '' || para == null || para == undefined) return false;else return true;}window.uexOnload = function(type){if(!type){/*** 屏幕旋转监听方法* @param {Object} mode*/uexDevice.onOrientationChange = function(mode){if(mode == 1){$$('data').innerHTML ='正竖屏';}else if(mode == 2){$$('data').innerHTML ='左横屏';}else if(mode == 4){$$('data').innerHTML ='倒竖屏';}else if(mode == 8){$$('data').innerHTML ='右横屏';}}uexWidgetOne.cbError=function(opCode,errorCode,errorInfo){ console.log(errorInfo);}}/*** 设备信息的回调方法* @param {Object} opCode* @param {Object} dataType* @param {Object} data*/uexDevice.cbGetInfo=function (opCode,dataType,data){var device = eval('('+data+')');varcpuFrequency=device.cpu;if(isDefine(cpuFrequency)){console.log('CPU信息:' + cpuFrequency); }varosVersion=device.os;if(isDefine(osVersion)){console.log('系统版本信息:' + osVersion); }var manufacturer=device.manufacturer;if(isDefine(manufacturer)){console.log('厂商信息:' + manufacturer);}var keyboard= device.keyboard;if(isDefine(keyboard)){console.log('是否支持键盘:' + keyboard);//1:支持;0:不支持 }varbluetooth=device.blueTooth;if(isDefine(bluetooth)){console.log('是否支持蓝牙:' + bluetooth);//1:支持;0:不支持 }varwifi=device.wifi;if(isDefine(wifi)){console.log('是否支持WIFI:' + wifi);//1:支持;0:不支持}var camera=device.camera;if(isDefine(camera)){console.log('是否支持摄像头:' + camera);//1:支持;0:不支持 }vargps=device.gps;if(isDefine(gps)){console.log('是否支持GPS:' + gps);//1:支持;0:不支持}vargprs=device.gprs;if(isDefine(gprs)){console.log('是否支持GPRS:' + gprs);//1:支持;0:不支持}var touch=device.touch;if(isDefine(touch)){console.log('是否支持触屏:' + touch);//1:支持;0:不支持}varimei=device.imei;if(isDefine(imei)){console.log('IMEI号:' + imei);}vardeviceToken = device.deviceToken;if(isDefine(deviceToken)){//没有时返回空字符串。
AppCan分享类插件使用文档之uexRenRen
AppCan分享类插件使用文档之uexRenRen:上回跟大家介绍了AppCan官方提供的支付类插件使用文档,这回跟大家介绍一下分享类插件的使用文档。
AppCan提供的分享类插件:uexRenRen:uexRenRen调用人人分享文字,图片。
使用示例:以下示例代码说明了如何使用uexRenRen对象的方法。
<!DOCTYPE HTML><html><head><meta http-equiv="Content-Type" content="text/html; charset=utf-8" /> <meta name="viewport" content="target-densitydpi=device-dpi,width=device-width, initial-scale=1.0, user-scalable=no" /><link rel="stylesheet" type="text/css" href="css/index.css"><title>分享到人人功能</title><script type="text/javascript">var cText = 0;var cJson = 1;var cInt = 2;window.uexOnload = function(){uexRenren.cbShare=function(opCode,dataType,data){//data是状态码/* WXSuccess = 0,WXErrCodeCommon = -1,WXErrCodeUserCancel = -2,WXErrCodeSentFail = -3,WXErrCodeAuthDeny = -4,WXErrCodeUnsupport = -5,*///alert("cbSendTextContent:"+data);document.getElementById("showStatus").innerHTML = "返回分享文字状态码:"+data;};uexWeiXin.cbSendImageContent=function(opCode,dataType,data){//data是状态码document.getElementById("showPicStatus").innerHTML = "返回分享图片状态码:"+data;};}function shareText(){//分享文字var txt = "这是来自AppCan中国最大的移动中间键平台对人人支持测试";uexRenren.sendTextContent(txt);}function sharePic(){var imgPath = "res://icon.png";var des = "中国最大的移动中间键平台AppCan对人人分享的图片支持测试";uexRenren.sendImageContent(imgPath,des);}</script></head><body><div class="tit">分享到人人</div><div class="conbor"><div class="consj"><span>1.注册app id</span><input class="btn" type="button" value="注册App"onClick="uexWeiXin.registerApp('wxd930ea5d5a258f4f');"><div class="tcxx" id="selectItem"></div><br><span>2.分享文本到人人网</span><input class="btn" type="button" value="分享文本"onClick="shareText();"><div class="tcxx" id="showStatus"></div><br><span>3.分享图片到人人网</span><input class="btn" type="button" value="分享图片"onClick="sharePic();"><div class="tcxx" id="showPicStatus"></div><br><input class="btn" type="button" value="返回"onClick="uexWindow.close(-1);"></div></div></body></html>Methods:1、registerApp(appId,appKey,secretId)注册从人人开放平台申请的appId。
- 1、下载文档前请自行甄别文档内容的完整性,平台不提供额外的编辑、内容补充、找答案等附加服务。
- 2、"仅部分预览"的文档,不可在线预览部分如存在完整性等问题,可反馈申请退款(可完整预览的文档不适用该条件!)。
- 3、如文档侵犯您的权益,请联系客服反馈,我们会尽快为您处理(人工客服工作时间:9:00-18:30)。
1.
flag:(Number 类型) 可选 是否弹出关闭提示框,0-不弹,否则弹提示框。 平台支持: Android2.2+ iOS6.0+ 版本支持: 3.0.0+ 示例: uexWidgetOne.exit(0); getCurrentWidgetInfo 获取当前 widget 信息 uexWidgetOne.getCurrentWidgetInfo() 说明: 获取当前 widget 信息 参数: 无 平台支持: Android2.2+ iOS6.0+ 版本支持: 3.0.0+ 示例: uexWidgetOne.getCurrentWidgetInfo();
1.
1.
alert('系统版本为:'+uexWidgetOne.platformVersion); iOS7Style 应用 iOS7 风格判断 uexWidgetOne.iOS7Style 说明: 判断当前应用是否为 iOS7 风格.0 为非 iOS7 风格,1 为 iOS7 风格. 平台支持: iOS6.0+ 版本支持: 3.0.0+ 示例: alert('应用是否为 iOS7 风格:'+uexWidgetOne. iOS7Style)"; isFullScreen 应用全屏判断 uexWidgetOne.isFullScreen 说明: 判断当前应用是否为全屏.0 非全屏(显示状态栏),1 是全屏(不显示状态栏). 平台支持: iOS6.0+ 版本支持: 3.0.0+ 示例:
1. 2. 3.
1. 2. 3. 4. 5. 6.
Hale Waihona Puke 1. 2. 3.版本支持: 3.0.0+ 示例: functioncbError(opId,dataType,data){ alert(data); } window.uexOnload=function(){ uexWidgetOne.cbError=cbError; }
1. 2. 3. 4. 5. 6.
uexWidgetOne
1、简介 1.1、属性 platformName 系统名称 platformVersion 系统版本 iOS7Style 应用 iOS7 风格判断 isFullScreen 应用全屏判断 2、方法
2.1、方法 getPlatform 获取平台信息 exit 退出 getCurrentWidgetInfo 获取当前 widget 信息 cleanCache 清除缓存 getMainWidgetId 获取主 widget 的 appId 2.2、回调方法 cbGetPlatform 获取平台信息的回调方法 cbGetCurrentWidgetInfo 获取当前 widget 信息的回调方法 cbCleanCache 清除缓存的回调方法 cbGetMainWidgetId 获取主 widget 的 appId 的回调方法 cbError 出现异常时的回调方法
1、简介
系统全局对象
1.1、属性 platformName 系统名称 uexWidgetOne.platformName 说明: 同步获取系统名称,如 Android,iOS 等。 平台支持: Android2.2+ iOS6.0+ 版本支持: 3.0.0+ 示例: alert('系统为:'+uexWidgetOne.platformName); platformVersion 系统版本 uexWidgetOne.platformVersion 说明: 同步获取系统版本,如 2.3.4,4.3.1 等。 平台支持: Android2.2+ iOS6.0+ 版本支持: 3.0.0+ 示例:
1. 2. 3.
1. 2. 3. 4. 5. 6. 7. 8. 9.
10. }
cbGetMainWidgetId 获取主 widget 的 appId 的回调方法
uexWidgetOne.cbGetMainWidgetId(opId,dataType,data) 参数: opId:(Number 类型)必选操作 ID,在此函数中不起作用,可忽略 dataType:(Number 类型)必选参数类型详见 CONSTANT 中 Callback 方法数据类型 data:(Number 类型)必选返回主 widget 的 appId 版本支持: 3.0.0+ 示例: functioncbGetMainWidgetId(opId,dataType,data){ alert("主 widgetId 为:"+data); } window.uexOnload=function(){ uexWidgetOne.cbGetMainWidgetId=cbGetMainWidgetId; } cbError 出现异常时的回调方法 uexWidgetOne.cbError(opId,errorCode,errorInfo) 参数: opId:(Number 类型)必选操作 ID,在此函数中不起作用,可忽略 errorCode:(Number 类型)必选错误代码详见 ErrorCode errorInfo:(String 类型)必选错误信息
1.
版本支持: 3.0.0+ 示例: uexWidgetOne.getMainWidgetId(); 2.2、回调方法 cbGetPlatform 获取平台信息的回调方法 uexWidgetOne.cbGetPlatform(opId,dataType,data) 参数: opId:(Number 类型)必选操作 ID,在此函数中不起作用,可忽略 dataType:(Number 类型)必选参数类型详见 CONSTANT 中 Callback 方法数据类型 data:(Number 类型)必选返回当前手机平台的类型,详见 CONSTANT 中 PlatformInfo 版本支持: 3.0.0+ 示例: functioncbGetPlatform(opId,dataType,data){ if(data ==0){ alert("iOS"); }elseif(data ==1){ alert("Android");} } window.uexOnload=function(){
1.
1.
alert('应用是否为全屏:'+uexWidgetOne.isFullScreen)";
2、方法
2.1、方法 getPlatform 获取平台信息 uexWidgetOne.getPlatform() 说明: 获取平台信息 参数: 无 平台支持: Android2.2+ iOS6.0+ 版本支持: 3.0.0+ 示例: uexWidgetOne.getPlatform(); exit 退出 uexWidgetOne.exit(flag) 说明: 退出程序 参数:
1.
1. 2. 3.
1. 2. 3. 4. 5. 6. 7.
8. 9.
uexWidgetOne.cbGetPlatform=cbGetPlatform; } cbGetCurrentWidgetInfo 获取当前 widget 信息的回调方法 uexWidgetOne.cbGetCurrentWidgetInfo(opId,dataType,data) 参数: opId:(Number 类型)必选操作 ID,在此函数中不起作用,可忽略 dataType:(Number 类型)必选参数类型详见 CONSTANT 中 Callback 方法数据类型 data:(Number 类型)必选回当前 widget 相关信息,json 数据格式 版本支持: 3.0.0+ 示例: functioncbGetCurrentWidgetInfo(opId,dataType,data){ varobj=eval('('+data+')'); alert(obj.widgetId); } window.uexOnload=function(){ uexWidgetOne.cbGetCurrentWidgetInfo=cbGetCurrentWidgetInfo; } cbCleanCache 清除缓存的回调方法
1. 2. 3.
1. 2. 3. 4. 5. 6. 7.
uexWidgetOne.cbCleanCache(opId,dataType,data) 参数: opId:(Number 类型)必选操作 ID,在此函数中不起作用,可忽略 dataType:(Number 类型)必选参数类型详见 CONSTANT 中 Callback 方法数据类型 data:(Number 类型)必选返回 uex.cSuccess 或者 uex.cFailed,详见 CONSTANT 中 Callbackint 类型数据 版本支持: 3.0.0+ 示例: functioncbCleanCache(opId,dataType,data){ if(data ==0){ alert("清除成功!"); }else{ alert("非主 widget 不能清除 Cache!"); } } window.uexOnload=function(){ uexWidgetOne.cbCleanCache=cbCleanCache;
1.
1.
cleanCache 清除缓存 uexWidgetOne.cleanCache() 说明: 清除当前应用的缓存,仅主 widget 调用此接口有效。 参数: 无 平台支持: Android2.2+ iOS6.0+ 版本支持: 3.0.0+ 示例: uexWidgetOne.cleanCache(); getMainWidgetId 获取主 widget 的 appId uexWidgetOne.getMainWidgetId() 说明: 获取主 widget 的 appId 参数: 无 平台支持: Android2.2+ iOS6.0+