BIO-RAD电穿孔
美国伯乐电转化仪使用说明
Gene pulser xcell TM Electroporation system quick guide产品名称: Gene Pulser Xcell 电穿孔系统产品型号: Gene Pulser Xcell 电穿孔系统产品展商: 众磊(北京)生物科技发展有限公司驻沪办简单介绍Gene Pulser Xcell 电穿孔系统Gene Pulser Xcell 电穿孔系统的详细介绍【介绍】电穿孔是功能强大的将核酸、蛋白及其它分子导入多种细胞的高效技术。
通过高强度的电场作用,瞬时提高细胞膜的通透性,从而吸收周围介质中的外源分子。
这种技术可以将核苷酸、DNA 与RNA 、蛋白、糖类、染料及病毒颗粒等导入原核和真核细胞内。
电转化相对其它物理和化学转化方法,是一种有价值和有效的替代方法。
Gene Pulser Xcell 系统的设计,基于Bio-Rad 15 年来在电转化技术上经验积累,它提供指数波和方波波型选择、系统配置选择及友好的用户界面。
主要特点指数波和方波波型确保所有细胞类型(原核及真核)均可获得最佳的电转化效果Bio-Rad 专利的* PulseTrac 电路和电弧保护设计,确保可重复性并保护样品模块化设计可根据研究需要选择系统用户友好的数字化界面,具有直观的编程以控制所有参数,包括附属模块的参数包括人工操作、预设规程、用户规程、一个优化规程及其它先进功能等程序选择指数波或方波脉冲选择Gene Pulser Xcell 系统可产生指数波和方波波型,使你选择最适合你细胞的波型与规程。
指数波和方波均能有效地用于电转化及电融合。
电穿孔波型对不同类型细胞的转化效率有很重要的影响。
左,指数衰变脉冲。
当一个充电至电压为V 0 的电容器放电到细胞,加在细胞上的电压随时间以指数方式下降。
从起始电压下降到V0 / e 所需的时间称为为时间常数τ, 一种方便的脉冲时间表达方式。
右,方波脉冲。
放电到样品后截断电容器脉冲可产生方波脉冲。
创萌生物-生命科学仪器美国Bio-rad伯乐 PowerPac Basic 基础电源、小垂直板电泳槽Mini-Protean Tetra Elec

150 x 1.5 mm 胶管, 4 块凝胶(最小)
— 800(C) 3.5
— 800(C) <1 16 hr
3000 或 通用
Mini-PROTEAN II 管式电泳槽
75 x 1.0 mm 胶管, 8 块凝胶(最少)
— 750(C) 1
— 750(C) <1 3–4 hr 3000 或 通用
制备型电聚焦
美国ABI 梯度PCR仪(Veriti PCR仪)
型号 Veriti Veriti fast
通常成交价 94500 94500
招标购买价 10950 10950
直接购买价 款到发货价电议 款到发货价电议
美国ABI 普通PCR仪(9700 型)
型号 9700
通常成交价 68000
招标购买价 78000
通常成交价 31300
招标购买价 35000
直接购买价 款到发货价电议
瑞士IBS CELLROLL细胞培养滚瓶机
规格
186 001
通常成交价 48687
招标购买价 51250
直接购买价 款到发货价电议
美国Wheaton 细胞培养滚瓶机
型号
W348923-C W348924-F
通常成交价 13500 14500
美国UVP美国UVP紫外交联仪CL-1000
型号 CL-1000
通常成交价 13450
招标购买价 14160
直接购买价 款到发货价电议
美国UVP组合型(紫外交联仪+分子杂交仪)HL-2000 型Hybrilinker分子杂交仪
型号 HL-2000
通常成交价 36100
招标购买价 38000
直接购买价 款到发货价电议
MicroPulser电穿孔仪的操作及维护规程

Bio-Rad MicroPulser电穿孔仪的操作及维护规程1、功能介绍选择预设程序电穿孔仪预设了常用的微生物电击程序,包括5个细菌和5个真菌电击程序。
如下:按程序即被调出,按"Raise"和"Lower"键显示出不同的真菌转化程序。
电击的参数自动按显示的程序设定。
同样的,选择"Bacteria "程序相同。
选择手动模式A.改变电压按"Settings"键,当"Manual"旁的LED灯亮时,显示屏显示电压值(单位kV)。
按"Raise"和"Lower"键在kV to kV之间改变电压设置。
如果仪器刚刚打开,显示值为""。
B.截短脉冲当"Manual"旁的LED灯亮时,同时按"Raise"和"Lower"键LED屏显示“t —表示为脉冲选择了时间。
开机时的默认设置为标准的指数衰减脉冲,衰减过程并不被截短,显示为“一一”。
同时按"Raise"和"Lower"键后只松开"Lower"键,显示数字为截短的脉冲持续时间,单位为毫秒( ms),从1毫秒开始以毫秒为增量一直到4毫秒。
限定脉冲时间在1-4毫秒之间。
同时按"Raise"和"Lower"键后只松开"Raise"键,可以调整脉冲时间到更短。
脉冲功能按"Pulse"键到电容充电至设定电压;"PLS"显示在显示屏上。
脉冲完成后会发出一声响,如果是一次设置好的多重脉冲则在整个脉冲过程中每次脉冲后发出一声响,"PLS" —直在显示屏上显示。
要想手动多重脉冲,则可以在一次脉冲完成发出一声响后,再次按"Pulse"键。
BIO-RAD电转化仪使用教程(自制)

BIO-RAD Gene Pulser Xcell Electroporation SystemBIO-RAD电转化仪使用教程(自制)cexoihtydx 20110902一电转仪示意图Figure 1 connecting the shockpad to the Gene Pulser Xcell main unit.Figure 2 Shockpod with cuvette.Figure 3 Gene Pulser Xcell front panel.二电转仪主界面在主界面中,我们经常会用到:4. Pre-set protocols和5. User protocolsPre-set protocols(预置方案)中,有Bacterial,Fungal和Mammalian三种预置方案。
下面简单介绍一下Bacterial中E. coli和Fungal中Pichia pastoris的电转化方案和注意事项。
三Electroporation of Bacterial Cells (E. coli)1 制备电转化感受态细胞1). Inoculate 5 ml of a fresh overnight E. coli culture into 500 ml of L-broth ina 2.8 L Fernbach flask.2). Grow the cells at 37°C shaking at 300 rpm to an OD600 of approximately 0.5–0.7. The best resultsare obtained with cells that are harvested at early- to mid-log phase; the appropriate cell densitydepends on the strain and growth conditions but should be about 4–5 x 10⁷cells/ml.3). Chill the cells on ice for ~20 min. For all subsequent steps, keep the cells as close to 0°C as possi-ble (in an ice/water bath) and chill all containers in ice before adding cells. Transfer the cells to asterile, cold 500 ml centrifuge bottle and centrifuge at 4000 xg for 15 minutes at 4°C.4). Carefully pour off and discard the supernatant. It is better to sacrifice yield by pouring off a fewcells than to leave any supernatant behind.5). Gently resuspend the pellet in 500 ml of ice-cold 10% glycerol. Centrifuge at 4000 xg for 15 minutes at 4°C; carefully pour off and discard the supernatant.6). Resuspend the pellet in 250 ml of ice-cold 10% glycerol. Centrifuge at 4000 xg for 15 minutesat4°C; carefully pour off and discard the supernatant.7). Resuspend the pellet in ~20 ml of ice-cold 10% glycerol. Transfer to a 30 ml sterile Oakridge tube.Centrifuge at 4000 xg for 15 minutes at 4°C; carefully pour off and discard the supernatant.8). Resuspend the cell pellet in a final volume of 1–2 ml of ice-cold 10% glycerol. The cell concentration should be about 1–3 x 10¹⁰cells/ml.9). This suspension may be frozen in aliquots on dry ice and stored at -70°C. The cells are stable forat least 6 months under these conditions.2 电转化转化参数:Pre-set protocols (E. coli)V oltage(V) 1800Capacitance(µF) 25Resistance(ohm) 200Cuvette(mm) 11). Thaw the cells on ice. For each sample to be electroporated: place a 1.5 ml microfuge tube onice, place either a 0.1 or 0.2 cm electroporation cuvette on ice, and place a 17 x 100 mm tubewith 1 ml of SOC at room temperature.2). To a cold, 1.5 ml polypropylene microfuge tube, add 20 µl of cell suspension if electroporating in 0.1 cmcuvettes, or 20–40 µl of cell suspension if electroporating in 0.2 cm cuvettes. Add 1 to 2 µlof DNA(DNA should be in a low ionic strength buffer such as water or TE). Mix well and incubateon ice for ~1 minute. (Note: it is best to mix the plasmids and cells in a microfuge tube since the narrow gap ofthe cuvettes prevents uniform mixing.)3). From the Home screen on Gene Pulser Xcell open the Pre-set Protocols screen, then the BacterialProtocol screen (press 4, then Enter twice). When using the 0.1 cm cuvettes, press Enter to open E. coli, 1mm cuvette Protocol Detail screen. When using the 0.2 cm cuvettes, press 2 then Enter, or 3 then Enter, to select the Protocol Detail screens for E. coli to pulse at 2.5 or 3.0 kV, respectively.4). Transfer the mixture of cells and DNA to a cold electroporation cuvette and tap the suspension to the bottom. Place the cuvette in the ShockPod. Push the chamber lid down to close.5). Pulse once.6). Remove the cuvette from the chamber and immediately add 1 ml of SOC medium to the cuvette.Quickly but gently resuspend the cells with a Pasteur pipette. (The period between applying the pulse and transferring the cells to out growth medium is crucial for recovering E. coli transformants (Dower et al., 1988). Delaying this transfer by even 1 minute causes a 3-fold drop in transformation.This decline continues to a 20-fold drop by 10 minutes.)7). Transfer the cell suspension to a 17 x 100 mm polypropylene tube and incubate at 37°C for 1 hour,shaking at 225 rpm.8). Check and record the pulse parameters. The time constant should be close to 5 milliseconds. Thefield strength can be calculated as actual volts (kV) / cuvette gap (cm).9). Plate on LB plates with antibiotic.3 溶液和试剂1). L-Broth: 10 g Tryptone peptone, 5 g Yeast extract, 5 g NaCl; dissolve in 1.0 L water.Autoclave.2). LB agar plates with selective antibiotic: prepare L broth as above, adding 15g of agar perliter. Autoclave. Cool to 55–60°C and add antibiotic. Pour 12–15 ml per 100 mm plate.3). 10% (v/v) Glycerol: 12.6 g glycerol (density = 1.26 g/cc) in 90 ml of water. Autoclave or filtersterilize.4). TE: 10 mM Tris-HCl pH 8.0, 1 mM EDTA.5). SOB: 2.0 g Tryptone peptone, 0.5 g Yeast extract, 0.2 ml 5 M NaCl, 0.25 ml 1 M KCl; dissolvein 90 ml water. Adjust pH to 7.0. Bring volume to 100 ml. Autoclave. Add 1.0 ml sterile 1 M MgCl2and 1.0 ml sterile 1 M MgSO4.6). SOC: to 100 ml SOB, add 2.0 ml sterile 1 M glucose (sterilize by filtration).4 注意事项1). 细菌电转化电压一般默认为1.8 KV即可,某些细菌可能会需要更高的电压,可以参考电转化仪器厂商的相关资料以及文献报道。
Bio-radMicroPulser电穿孔仪中文说明书
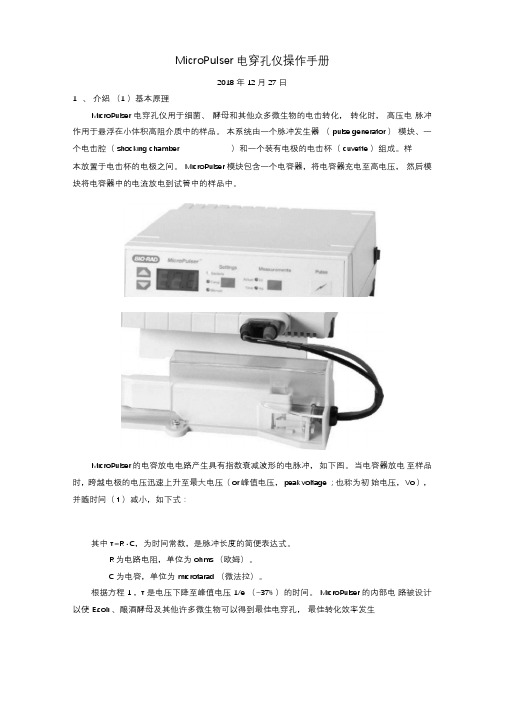
MicroPulser 电穿孔仪操作手册2018 年12 月27 日1、介绍(1 )基本原理MicroPulser 电穿孔仪用于细菌、酵母和其他众多微生物的电击转化,转化时,高压电脉冲作用于悬浮在小体积高阻介质中的样品。
本系统由一个脉冲发生器(pulse generator )模块、一个电击腔(shocking chamber )和一个装有电极的电击杯(cuvette )组成。
样本放置于电击杯的电极之间。
MicroPulser 模块包含一个电容器,将电容器充电至高电压,然后模块将电容器中的电流放电到试管中的样品中。
MicroPulser 的电容放电电路产生具有指数衰减波形的电脉冲,如下图。
当电容器放电至样品时,跨越电极的电压迅速上升至最大电压(or 峰值电压,peak voltage ;也称为初始电压,Vo ),并随时间(t )减小,如下式:其中τ=R · C,为时间常数,是脉冲长度的简便表达式。
R 为电路电阻,单位为ohms (欧姆)。
C 为电容,单位为microfarad (微法拉)。
根据方程1 ,τ是电压下降至峰值电压1/e (~37% )的时间。
MicroPulser 的内部电路被设计以使E.coli 、酿酒酵母及其他许多微生物可以得到最佳电穿孔,最佳转化效率发生在大约5ms 的时间常数内。
这些电穿孔条件是通过使用10 微法拉电容器和将600 欧姆电阻与样品池并联以及将30 欧姆电阻与样品池串联来实现的。
除时间常数外,电场强度是另一个决定转化效率的重要参数。
电场强度E,是施加于电极间的电压,公式为:其中,V 为施加的电压,d 为电极间的距离,单位为cm 。
电场强度和细胞的尺寸(size )决定了横贯每个细胞的电压降,正是电压降可能是电穿孔中电压效应的重要表现。
30 欧姆串联电阻的目的是在发生电弧的情况下保护设备电路。
在正常操作条件下,当样本在高电阻介质中,电阻不会影响施加在样本上的电压。
BIORAD电泳仪及SDS-PAGE凝胶电泳操作规范
使用BIO-RAD电泳仪进行SDS-PAGE凝胶电泳的操作规范实验原理根据蛋白分子量亚基的不同而分离蛋白,在样品介质和丙烯酰胺凝胶中加入离子去污剂和强还原剂后,蛋白质亚基的电泳迁移速率主要取决于亚基分子量的大小。
实验所用仪器FR-200A全自动紫外与可见分析装置上海复日科技有限公司电泳仪 BIO-RAD公司TS-1型脱色摇床江苏海门市其林贝尔仪器制造有限公司实验用试剂低分子量蛋白Maker TAKARA4*上样缓冲 TAKARAPagn Blue protein staining solution Fermentas试剂的配制1.贮液的配制(1)凝胶储液取30g丙烯酰胺+0.8g甲叉双丙烯酰胺0.8g ,先用35ml双蒸水溶解,搅拌,直到溶液变成透明,再用双蒸水稀释至100ml,过滤。
棕色瓶4℃保存一个月。
(2)1 mol/l Tris-HCL (PH 8.8)12.1g Tris(三羟甲基氨基甲烷)溶解在80ml双蒸水中,用4mol/l盐酸调PH至8.8。
再用双蒸水稀释至100ml,保存在4℃冰箱。
(3)1.0 mol/l Tris-HCL (PH 6.8)6.06g Tris溶解在40ml双蒸水中,用用4mol/l盐酸调PH至6.8。
再用双蒸水稀释至50ml,保存在4℃冰箱。
(4)10%过硫酸铵(APS)0.1g过硫酸铵+1ml双蒸水。
使用前新鲜配制(5)Tris–甘氨酸电泳缓冲液的配制(25mmol/L Tris;250mmol/L甘氨酸(pH8.3))30.3gTris+ 144.2g甘氨酸+ 10gSDS,双蒸水定容至1L。
每次使用时10倍稀释。
(6)样品缓冲液使用4*SDS-PAGE loading buffer(Takara公司),上样缓冲与样品比例1:3混匀,之后煮沸5min。
2.凝胶的配制注:上表所标体积为配制两块胶的用量。
若配制一块或多块,可按比例减半或加倍。
具体步骤如下:1、样品制备:40 µL蛋白+5*上样缓冲液10 µL,煮沸5 min,冷却后放冰箱下层保存,备用2、制胶1)用专用的医用棉口罩将胶板擦拭干净,电泳槽清洗干净,组装模具。
Biorad基因导入电转仪

Table of ContentsSection 1Introduction and Safety Information:The Gene Pulser XcellSystem (1)1.1General Safety Information (1)1.2Electrical Hazards (2)1.3Mechanical Hazards (2)1.4Other Safety Precautions (2)Section 2Unpacking and System Installation (3)2.1Unpacking the System Components (3)2.2Setting up the System (4)2.2.1Setting up the Gene Pulser Xcell Main Unit and Connectingthe ShockPod (Cat. #s 165-2660, 165-2661, 165-2662,165-2666) (4)2.2.2Connecting the PC Module to the Gene Pulser Xcell MainUnit (Cat. #s 165-2660, 165-2662, and 165-2668) (5)2.2.3Connecting the CE Module to the Gene Pulser Xcell MainUnit (Cat. #s 165-2660, 165-2661, and 165-2667) (6)2.2.4ShockPod (Cat. #s 165-2660, 165-2661, 165-2662, and165-2669) (6)Section 3Gene Pulser Xcell Operating Instructions (8)3.1Section Overview (8)3.2Front Panel and Home Screen (9)3.2.1Description of Keypad (9)3.2.2Home Screen (10)3.2.3Help Screens (11)3.3Manual Operation (12)3.3.1Manual Operation (Guide Guide) (12)3.3.2Electroporation using Exponential Decay Pulses (12)3.3.3Electroporation Specifying Time Constant (14)3.3.4Electroporation using Square Wave Pulses (15)3.3.5Results Screens (17)3.3.6Saving a Program from Manual Operation (19)3.3.6A Saving in a Location without a Named User Entry (20)3.3.6B Saving in a Location with a Named User Entry (20)3.4Pre-Set Protocols (21)3.4.1Using a Pre-set Protocol (Quick Guide) (21)3.4.2Electroporation using a Pre-Set Protocol (22)3.4.3Modifying Pre-Set Protocol Parameters (25)3.4.4Saving Changes to Pre-Set Protocols (25)3.5User Protocols (26)3.5.1Using a User Protocol (Quick Guide) (26)3.5.2Creating a New User Name (26)3.5.3Creating a New User Protocol (26)3.5.4Modifying a User Protocol (30)3.5.5Deleting a User Name and a User Protocol (31)3.5.6Renaming a User Name or a User Protocol (33)3.6Last Pulse (34)3.7Optimize Operation (34)3.8Data Management (36)3.9Measurements (39)3.9.1Sample Resistance Measurements (39)3.9.2Calibration and Measurement of Capacitors in theCE Module (40)3.10User Preferences (41)3.10.1Setting the Clock (41)3.10.2Adjusting the Screen Intensity (42)3.10.3Sleep Function Setting (42)3.11The Pulse Trac System (43)3.11.1Pulse Trac System Description (43)3.11.2Pulse Trac Diagnostic Algorithm (44)Section 4Overview of Electroporation Theory (44)4.1Exponential Decay Pulses (45)4.2Square Wave Pulses (45)Section 5Factors Affecting Electroporation:OptimizingElectroporation (48)5.1Cell Growth (48)5.2DNA (49)5.3Electroporation Media (49)5.4Temperature (50)Section 6Electroporation of Bacterial Cells (52)6.1Escherichia coli (52)6.1.1Preparation of Electrocompetent Cells (52)6.1.2Electroporation (53)6.1.3Solutions and Reagents (53)6.2Staphylococcus aureus (54)6.2.1Preparation of Electrocompetent Cells (54)6.2.2Electroporation (54)6.2.3Solutions and Reagents (55)6.3Agrobacterium tumefaciens (56)6.3.1Preparation of Electrocompetent Cells (56)6.3.2Electroporation (56)6.3.3Solutions and Reagents (57)6.4Bacillus cereus (57)6.4.1Preparation of Electrocompetent Cells (57)6.4.2Electroporation (57)6.4.3Solutions and Reagents (58)6.5Pseudomonas aeruginosa (58)6.5.1Preparation of Electrocompetent Cells (58)6.5.2Electroporation (59)6.5.3Solutions and Reagents (59)6.6Streptococcus pyogenes (60)6.6.1Preparation of Electrocompetent Cells (60)6.6.2Electroporation (60)6.6.3Solutions and Reagents (61)6.7Lactobacillus plantarum (61)6.7.1Preparation of Electrocompetent Cells (61)6.7.2Electroporation (61)6.7.3Solutions and Reagents (62)Section 7Electroporation of Fungal Cells (62)7.1Saccaromyces cerevisiae (62)7.1.1Preparation of Electrocompetent Cells (62)7.1.2Electroporation (63)7.1.3Solutions and Reagents (64)7.2Schizosaccharomyces pombe (64)7.2.1Preparation of Electrocompetent Cells (64)7.2.2Electroporation (65)7.2.3Solutions and Reagents (65)7.3Pichia pastoris (65)7.3.1Preparation of Electrocompetent Cells (65)7.3.2Electroporation (66)7.3.3Solutions and Reagents (66)7.4Candida albicans (67)7.4.1Preparation of Electrocompetent Cells (67)7.4.2Electroporation (67)7.4.3Solutions and Reagents (68)7.5Dictyostelium discoideum (68)7.5.1Preparation of Electrocompetent Cells (68)7.5.2Electroporation (69)7.5.3Solutions and Reagents (69)Section 8Mammalian Cells (70)8.1Preparation of Electrocompetent Cells (70)8.1.1Attached Cells (70)8.1.2Suspension Cells (70)8.2Electroporation (70)8.3Solutions and Reagents (71)Section 9References (72)Section 10Specifications and Product Information (75)10.1System Specifications (75)10.2Product Information (76)Section 1The Gene Pulser Xcell™Electroporation SystemThe Gene Pulser Xcell is a pulse generator that uses capacitors to produce controlled exponential or square wave electrical pulses for cell electroporation. The unit is capable of producing pulses of up to 3000 V on a high-voltage circuit, and up to 500 V on a low-voltage circuit. For generating pulses on the high voltage circuit, capacitors of 10, 15, and 25 µF present in the Gene Pulser Xcell main unit are used and generating pulses on the low-voltage circuit requires use of capacitors in the CE Module. Exponential decay (or capacitance discharge) and square wave pulses are the most commonly used types of electrical pulse. Anin-depth discussion of these two waveforms can be found in Section 4.The Gene Pulser Xcell is a modular system, comprising of a main unit and two accessory modules,the CE module and the PC module, in addition to the shocking chamber and a cuvette with incorporated electrodes. The CE Module is recommended for use with the Gene Pulser Xcell main unit for electroporation of most eukaryotic cells, including mammalian cells and plant protoplasts. The CE Module should only be used with low-resistance media (<1000 ohms). For exponential decay pulses, the CE Module provides a means of controlling the capacitance of the circuit by increasing the time constant of the pulse. For square wave pulses, the CE Module provides the large capacitor necessary for delivering a square wave pulse into low resistance media. This module contains a set of capacitors with a functional range between 50 and 3275 µF and selectable in 25 µF increments. For square wave pulses, the CE Module provides the large capacitance, 3275 µF, necessary for delivering a square wave pulse into low resistance media.The PC Module is recommended for the electroporation of bacteria and fungi using exponential decay, as well as in other applications where high-voltage pulses are applied to samples of small volume and high resistance. The PC Module selects resistance of 50 ohms 1000 ohms in 50-ohm increments. The unit is used to control the resistance of the circuit by placing resistors in parallel with the sample, thereby provid-ing a means of reducing the time constant of an exponential decay pulse. This provides an effective means of controlling the time constant when using high-resistance media but has little effect on the time constant when using low-resistance media. The PC Module greatly reduces the likelihood of an arc occurring at high voltage. It is not recommended that the PC module be used for square wave pulses due to the increase in droop of the pulse that can occur (see Section 4).Both the PC Module and CE Module have integral leads that connect to the main unit (see Section 2 for installation) and both units are controlled directly from the user interface on the front panel of the main unit.1.1General Safety InformationThis Bio-Rad instrument is designed and certified to meet the safety requirements of EN61010 and the EMC requirements of EN61326 (for Class A) and conforms to the “Class A” standards for electromagnetic emissions intended for laboratory equipment applications. This instrument is intended for laboratory application only. It is possible that emissions from this product may interfere with some sensitive appliances when placed nearby or in the same circuit as those appliances. The user should be aware of this potential and take appropriate measures to avoid interference.No part of the Gene Pulser Xcell system should be used if obvious external case damage has occurred or the electronic displays are not functioning as described in the manual. This instrument is only to be used with the components provided (or their authorized additions or replacements) including, but not limited to, supplied cables and ShockPod. The operating temperature range for the Gene Pulser Xcell system and its associated components is 0–35°C.1There are no user serviceable parts within the unit. The operator should make no attempt to open any case cover or defeat any safety interlock. This instrument must not be altered or modified in any way. Alteration of this instrument will•Void the manufacturer’s warranty•Void the IEC 1010 safety certification•Create a potential safety hazardBio-Rad is not responsible for any injury or damage caused by the use of this instrument for purposes other than those for which it is intended or by modification of the instrument not performed by Bio-Rad or an authorized agent.1.2Electrical HazardsThe Gene Pulser Xcell produces voltages up to 3,000 volts and is capable of passing very high currents. When charged to maximum voltage, the instrument stores about 400 joules. A certain degree of respect is required for energy levels of this order. System safety features prevent operator access to the recessed input jacks and to the recessed electrode contacts inside the sample chamber. These mechanical interlocks should never be circumvented.The pulse button is active whenever the character space in the lower right corner is flashing. There is high voltage present whenever the pulse button is depressed and “Pulsing” is shown on the LCD display on the front of the instrument. Because of the built-in safety interlock in the ShockPod, no pulse is delivered to the cuvette when the ShockPod lid is opened. If the capacitor has been partially charged but not fired (for example, when the charging cycle has been interrupted before the pulse is delivered), some charge may remain on the internal capacitor. This charge will dissipate over 1–2 minutes. However, the user cannot make contact with any charged electrical components due to the system safety features.1.3Mechanical HazardsThe Gene Pulser Xcell contains a patented arc-protection circuit that dramatically reduces the incidence of arcing in the cuvette when high voltage is delivered into the sample. The unit incorporates a circuit that senses the beginning of an arc and diverts current from the sample within <10 µsec, preventing, or greatly reducing, mechanical, visual, and auditory phenomena at the ShockPod. Should an arc occur, the sample chamber is effective in containing these small discharges, but nonetheless we strongly recommend wearing safety glasses when using the instrument.1.4Other Safety PrecautionsAvoid spilling any liquids onto the apparatus. Use only a paper towel or a cloth wet with either water or alcohol to clean the outside surfaces of the Gene Pulser Xcell.Use only the Bio-Rad cables supplied with the Gene Pulser Xcell.Use the ShockPod only in the assembled condition. Do not attempt to circumvent the protection of the ShockPod or use it while disassembled.Verify the display segments periodically.Read the instruction manual before using the Gene Pulser Xcell Electroporation System. For technical assistance contact your local Bio-Rad office or, in the US, call technical services at 1-800-4BIORAD(1-800-424-6723).2Warning: The Gene Pulser Xcell generates, uses, and radiates radio frequency energy. If it is not used in accordance with the instructions given in this manual, it may cause interference with radio communications. The Gene Pulser Xcell has been tested and found to comply with the limits for Class A computing devices (pursuant to Subpart J of Part 15 of FCC Rules) which provide reasonable protection against such interference when operated in a commercial environment. Operation of this equipment in a residential area is likely to cause interference. In this case the user will be required, at their expense, to take whatever measure may be required to correct the interference.Section 2Unpacking and System InstallationThe Gene Pulser XCell™ can be purchased as three systems as well as component parts:165-2660Gene Pulser Xcell Total System for eukaryotic and microbial cells, 100–240 V, 50/60 Hz, exponential decay and square wave delivery, includes main unit, CE Module, PCModule, ShockPod, 15 sterile cuvettes (5 each of 0.1, 0.2, and 0.4 cm gap),instruction manual165-2661Gene Pulser Xcell Eukaryotic System, 100/240 V, 50/60 Hz, exponential decay (25–3,275 µF range) and square wave delivery, includes main unit, CE Module,ShockPod, 5 sterile cuvettes (0.4 cm gap), instruction manual165-2662Gene Pulser Xcell Microbial System, 100/240 V, 50/60 Hz, exponential decay and square wave delivery, includes main unit, PC Module, ShockPod, 10 sterile cuvettes(5 each of 0.1 and 0.2 cm gap), instruction manual165-2666Gene Pulser Xcell main unit, 100/240 V, 50/60 Hz165-2667Gene Pulser Xcell CE Module, 25–3,275 µF range controlled by main unit, includes integral leads, 5 sterile cuvettes (0.4 cm gap), instruction manual165-2668Gene Pulser Xcell PC Module, 50–1,000 ohm range controlled by main unit, includes integral leads, 10 sterile cuvettes (5 each of 0.1 and 0.2 cm gap)165-2669Gene Pulser Xcell ShockPod shocking chamber, includes integral leads for connection to Gene Pulser Xcell, Gene Pulser II, or MicroPulser2.1Unpacking the System ComponentsRemove all packing material and connect components on a flat, dry surface near an appropriate electrical outlet.Upon receiving your instrument, please check that all items listed were shipped. If any items are missing or damaged, contact your local Bio-Rad office.3Section 3Gene Pulser Xcell™Operating Instructions3.1 Section OverviewThis section describes the operation of the Gene Pulser Xcell. The following summarizes the organization of this section.Section 3.2 below describes the functions of the keys on the front panel, the Home screen on the LCD display, and the Help functions built into the Gene Pulser Xcell.•The keys on the front panel of the main unit control the Gene Pulser Xcell. Section 3.2.1 describes the uses of these keys.•The Home screen provides easy access to programs built into the Gene Pulser Xcell as well as a direct method of manually entering pulse parameters to electroporate a sample. Section 3.2.2 describes these programs.•On-screen help is built into the software of the Gene Pulser Xcell. This may be accessed from any screen as described in Section 3.2.3.The Gene Pulser Xcell has three modes of operation: manual operation, pre-set protocols, and user protocols.Section 3.3 describes the Manual mode, which may be used to rapidly program the parameters necessary for delivering either an exponential decay or a square wave pulse.•Section 3.3.2 describes delivering an exponential decay pulse.•Section 3.3.3 describes delivering an exponential decay pulse but specifying a time constant rather than a capacitance and resistance value.•Section 3.3.4 describes delivering a square wave pulse.•Section 3.3.6 explains how programmed settings may be saved as user protocols.Section 3.4 describes the Pre-set protocols in which the pulse parameters have been optimized for a number of commonly used bacterial and fungal species and mammalian cell lines.•Pre-set Protocols may be called up and used directly (Section 3.4.2) or may be modified prior to being used (Section 3.4.3).• A modified Pre-set Protocol may be saved as a User Protocol (Section 3.4.4).Section 3.5 describes a custom mode (User Protocols) in which users may store optimized pulse parameters that they use in their own work.•User Protocols may be created in any of four ways:•In the User Protocols menu as a new protocol (Section 3.5.3).•In the User Protocols menu as an edited (modified) program (Section 3.5.4)•In the Manual menu as a new protocol (Section 3.3.4).•In the Pre-set Protocol Menu as a modified protocol (Section 3.4.4).•User Protocols, once created and saved, may be called up and used directly like Pre-set Protocols (Section 3.5.1).3.2 Front Panel and Home Screen3.2.1 Description of the keypadSee Figure 3.1 for a view of the Gene Pulser Xcell front panel.Alpha-numeric keys This array of keys permits entering numbers and letters into the Gene PulserXcell. Pressing the Shift key toggles between alphabetic and numeric input. Totype an alphabetic character, press the Shift key to enter alpha mode, thenpress the key with the appropriate letter. To type an a, press the 2 key once; totype a b, press the 2 key twice; to type a c, press the 2 key three times. To usethe same key twice, for example to type a then b, advance the cursor usingthe Right Arrow Key. The firmware on Gene Pulser Xcell will automaticallychange between alpha and numeric input depending on the parameter beingentered. In Protocol screens and Directory screens where a two-digit entrymust be made, the second digit must be entered within 2 seconds of the firstentry, otherwise the screen will default to the single-digit entry.Home key Returns the user to the Home screen from anywhere in the program.Back key Returns the user one level back in hierarchy toward the Home screen.Help key Displays on-screen help text.Save key Saves User Names and User Protocols.Delete key Removes only the last entry in the field; also used to remove User Name andUser Protocol files.Clear key Removes the entire line of the field.Enter key Indicates that a choice has been made and moves the cursor to the nextlocation.Arrow keys The Up and Down Arrow keys move the cursor up or down one row at a time.Depending on the screen and location of the cursor, the Right and Left Arrowsmay (1) move the cursor right or left one space at a time, (2) toggle forwardand backward one screen when there are multiple screens for the samemenu, or (3) increase or decrease numerical input values.Pulse button:Results in discharging a pulse. During this time “Pulsing” is shown on the LCDdisplay. A tone sounds to indicate that the pulse has been delivered. Whenmultiple pulses are delivered, a tone sounds after the last pulse has beendelivered. The Pulse is discharged to the electrodes if the ShockPod isconnected and the lid is closed. Otherwise, it is discharged safely within theinstrument.3.3 Manual Operation3.3.1 Manual Operation (Quick Guide)•From the Home screen:•Press Enter to select exponential decay;•Press 2, then Enter to select exponential decay but specifying a time constant;•Press 3, then Enter to select square wave.•Use the Up and Down Arrow keys to scroll through the parameter value spaces on the screen.When a parameter value is highlighted, use the keypad to enter a value, then press Enter to accept that value.•When the necessary parameter values have been entered, the Pulse button on the Gene Pulser Xcell is active.•Press the Pulse button to electroporate the sample.•Press the Back key to return to the Protocol Detail screen and to deliver another pulse.3.3.2 Electroporation using Exponential Decay PulsesSee Section 4.1 for a discussion of electroporation using exponential decay pulses.•When the Home screen (Figure 3.2) is selected, the number 1, corresponding to “Exponential protocol” is highlighted as the default choice. Press Enter to view the Protocol Detail Screen. If the number 1 on the Home screen is not highlighted, press 1 or use the Up or Down Arrow keys to highlight “Exponential protocol”, then press Enter to select. The Protocol Detail screen appears (Figure 3.3).•The following combination of parameters may be entered:Capacitance + VoltageCapacitance + Voltage + ResistanceThe three variables may be selected in any order, however, the set voltage will determine whether the high voltage or the low voltage circuit is to be used and will limit the range of the capacitance as indicated in Table 3.1. If a value for the capacitance is chosen that outside the range of the system, this value will default to the closest allowable value.Specifying a resistance value requires that the PC Module be attached. This is always recommended with high resistance media (i.e., >600 ohm) such as water, sucrose, glycerol, sorbitol, or polyethylene glycol. The PC Module places a resistor in parallel with the sample to reduce the resistance of the circuit. In this way, the time constant of a high-resistance sample may be reduced and controlled.•When the necessary parameter values have been specified, a flashing “P” appears in the character space in the lower right corner of the LCD display indicating that the pulse button on the Gene Pulser Xcell is active and that a pulse may be delivered.•Press the Pulse button to deliver a pulse. When the Pulse button is depressed, the LCD display will blank then show “Pulsing”. Upon completion, a tone will sound and the pulse measurements will be displayed on the Protocol Results screen (see Figure 3.8, Section 3.3.5).•Use the Left and Right Arrow keys to toggle between the Protocol Results screen and the last Protocol Detail screen.•With the Protocol Detail screen on the LCD display another pulse can be delivered using the same pulse parameters. To change the pulse conditions, press Enter; the cursor appears in the voltage parameter value. The parameters may be changed as described above.•To save the pulse parameters, see Section 3.3.6.•To review previously delivered pulses, see Section 3.8.3.3.5 Results ScreensAfter delivering a pulse, the LCD displays the results on a Protocol Results screen. This screen shows the results in both graphic and tabular form. Figures 3.6, 3.7, and 3.8 show examples of the results from an exponential decay pulse, an exponential decay pulse in which the time constant was specified, and a square wave pulse, respectively.Results of the last 100 pulses as well as of the pulse parameters are stored in Gene Pulser Xcell memory and are accessible from the Data Management program (Section 3.8).3.4.2 Electroporation using Pre-set ProtocolsThere are nine Pre-set Bacterial Protocols, six Pre-set Fungal Protocols, and 12 Pre-set Mammalian Protocols. These protocols are pre-programmed with the optimal parameters for the given organism. Use the Pre-set Protocols as follows.•From the Home screen, press 4 or use the Up and Down Arrow keys to highlight “Pre-set Protocols”, then press Enter to select and to show the Pre-set Protocols screen (Figure 3.12).•Press 1–3, or use the Up and Down Arrow keys, to highlight Bacterial, Fungal, or Mammalian Pre-set Protocols, then press Enter to select.•Use the alpha-numeric keypad or the Up and Down Arrow keys to scroll through the list of names.For the Bacterial and Mammalian Pre-set Protocols, use the Right and Left Arrow keys to toggle between the two screens. When the number corresponding to the desired name is highlighted, press Enter to select and to view the Protocol Detail Screen showing the electroporation parameters for that protocol. A flashing “P” in the character space in the lower right corner of the LCD display indicates that the Pulse button is active.•For example, from the Pre-set Protocols screen, press 3 to highlight “Mammalian”, then press Enter to select and to bring up the first Pre-set Mammalian Protocols screen with the names of six pre-set mammalian protocols (Figure 3.13). Press the Right and Left Arrow keys to togglebetween the two Mammalian Pre-set Protocols screens. Use the alpha-numeric keypad or the Up and Down Arrow keys to scroll through the list of names. When the desired name on theMammalian Pre-set Protocols screen is highlighted,press Enter to select that protocol and toview the Protocol Detail Screen showing the electroporation parameters for that protocol. Forexample, from the Mammalian Pre-set Protocols screen, press 1, then Enter to bring up theProtocol Detail Screen for CHO cells in a 2 mm cuvette (Figure 3.14).•Press the Pulse button to deliver a pulse. When the Pulse button is depressed, the LCD display will blank then show “Pulsing”. Upon completion, a tone will sound and the pulse measurements will be displayed on the Protocol Results screen (see Section 3.3.5).•Use the Left and Right Arrow keys to toggle between the Protocol Results screen and the last Protocol Detail screen.•With the Protocol Detail screen on the LCD display another pulse can be delivered using the same pulse parameters. To change the pulse conditions, press Enter; the cursorappears in the voltage parameter value. The parameters may be changed as described in Section 3.4.3.•To review previously delivered pulses, see Section 3.8.3.4.3 Modifying Pre-set Protocol ParametersThe parameters for a Pre-set protocol may be changed as follows.•From the Protocol Detail screen, press the Up or Down Arrow keys to highlight the value for one of the parameter settings (voltage, capacitance, or resistance for exponential decay pulses;voltage or time constant for time constant mode; pulse length, voltage, number of pulses, or pulse interval for square wave pulses). (Note: the waveform cannot be changed in the Pre-set Protocols Mode.) When the desired parameter is selected, use the alpha-numeric keypad to input the new value.Alternatively, use the Right and Left Arrow keys to incrementally increase or decrease, respectively, the parameter value. Use the Delete or Clear keys to correct entries. When the correct value has been specified, press Enter. If a value outside the limits of the Gene Pulser Xcell is selected, the value in the field will default to the closest permitted value. Use the Up and Down Arrow keys to select other parameter values to be changed, then use the alpha-numeric keypad or the Left and Right Arrow keys to enter the desired value.• A pulse may be delivered when appropriate parameters have been entered in the Protocol Detail screen and the character space at the lower right of the LCD display is flashing “P”.•To return to the last Protocol Detail screen, press the Back key or the Left Arrow key. Another pulse may be delivered using the same parameters shown on the LCD display. To return to the Protocol Results Screen, press the Right Arrow key. (Note: Returning to the Protocol Detail Screen returns to the modified parameters. To return to the Pre-set Protocol, press the Back key again to return to the Pre-set Protocols screen. This will remove any changes made.)•To change the pulse conditions, with the Protocol Detail screen on the LCD display, press Enter;the cursor appears in the voltage parameter value. The parameters may be changed as described above.•To review previously delivered pulses, see Section 3.8.3.4.4 Saving Changes to Pre-set ProtocolsChanges to a Pre-set Protocol may be saved as a User Protocol as follows:•Change the Pre-set Protocol as described in Section 3.4.3.•With the Protocol Detail screen open, press Save.•The first User Directory screen will appear (Figure 3.9); the second line will read “Choose location for protocol”.•Use the Right and Left Arrow keys to toggle between the two User Directory screens. Press 1–12 or use the Up and Down Arrow keys to highlight the User Name under which to store the protocol.Press Enter to select the User Name. The User Protocols screen will appear (Figure 3.10); the second line will read “Choose location for protocol”. If it is necessary to create a new User Name, seeSection 3.5.2.•Use the Right and Left Arrow keys to toggle between the two User Protocols screens. Press 1–12 or use the Up and Down Arrow keys to highlight a location for the new protocol. A protocol may be stored in a position without an entry (see Section 3.3.6A) or in a position with an entry (seeSection 3.3.6B). If necessary, delete a User Protocol as described in Section 3.5.5.•To use the saved protocol, press Enter to view the Protocol Detail screen. Press the Pulse button to deliver a pulse.。
Bio-rad 双向电泳系统标准操作规程
Bio-rad 双向电泳系统标准操作规程1、目的:正确使用Bio-rad 双向电泳系统,确保Bio-rad 双向电泳系统正常运行。
2、适用范围:Bio-rad 7cm/11cm/17cm双向电泳系统。
3、责任人:双向电泳系统操作人员。
4、程序:4.1、第一向等电聚焦4.1.1、准备工作及注意事项用标配的刷子小心将聚焦盘清洗干净,注意聚焦盘两端的两根电极丝,晾干后备用;根据样品使用合适的水化上样液,对于不同的聚焦盘的上样体积可参考下表:4.1.2、上样4.1.2.1、从冰箱中取-20℃冷冻保存的水化上样缓冲液(不含DTT,不含Bio-Lyte)一小管,置室温溶解,加入合适的DTT与Bio-Lyte,充分混匀。
4.1.2.2、从小管中取出适量水化上样缓冲液与样品充分混匀。
4.1.2.3、取出-20℃冷冻保存的IPG预制胶条,室温中放置10分钟。
4.1.2.4、沿着聚焦盘或水化盘中槽的边缘至左而右线性加入样品。
在槽两端各1cm左右不要加样,中间的样品液一定要连贯。
注意:不要产生气泡。
否则影响到胶条中蛋白质的分布。
4.1.2.5、当所有的蛋白质样品都已经加入到聚焦盘或水化盘中后,用镊子轻轻的去除预制IPG胶条上的保护层。
4.1.2.6、分清胶条的正负极,轻轻地将IPG胶条胶面朝下置于聚焦盘或水化盘中样品溶液上,使得胶条的正极(标有+)对应于聚焦盘的正极。
确保胶条与电极紧密接触。
不要使样品溶液弄到胶条背面的塑料支撑膜上,因为这些溶液不会被胶条吸收。
同样还要注意不使胶条下面的溶液产生气泡。
如果已经产生气泡,用镊子轻轻地提起胶条的一端,上下移动胶条,直到气泡被赶到胶条以外。
4.1.2.7、在每根胶条上覆盖1-3ml矿物油,防止胶条水化过程中液体的蒸发。
需缓慢的加入矿物油,沿着胶条,使矿物油一滴一滴慢慢加在塑料支撑膜上。
4.1.2.8、对好正、负极,盖上盖子。
设置等电聚焦程序。
4.1.3、设置程序4.1.3.1、打开电源;4.1.3.2、根据情况选择水化(REHYDRATION),预设的程序(PRESET METHOD),储存的程序(STORED METHOD),新的程序(NEW METHOD);4.1.3.3、如果只需要水化,选择水化(REHYDRATION)选项,在接下来的界面选择主动水化或者被动水化、水化温度、水化时间;4.1.3.4、如果需要跑完整的程序,选择新的程序(NEW METHOD), 在接下来的界面选择是否水化,并设置相应的等电聚焦程序,设置完成后,在最后的界面选择总的胶条数、限电流和聚焦温度,然后开始运行程序。
- 1、下载文档前请自行甄别文档内容的完整性,平台不提供额外的编辑、内容补充、找答案等附加服务。
- 2、"仅部分预览"的文档,不可在线预览部分如存在完整性等问题,可反馈申请退款(可完整预览的文档不适用该条件!)。
- 3、如文档侵犯您的权益,请联系客服反馈,我们会尽快为您处理(人工客服工作时间:9:00-18:30)。
与任何电穿孔缓冲液都兼容,包括Bio-Rad的Gene Pulser电穿孔缓冲液
电转化仪
仪器型号:GenePulser II
生产商:USA Bio-Rad工作原理:Gene PulserⅡ电转化仪器可用于原核细胞、酵母和哺乳动物细胞的转化。仪器采用Pulse Trac波形传送系统,能产生最精确的指数衰减的脉冲,可在电转化杯里获得最佳的细胞转化。
同时取100μl感受态加0.01ngpuc18直接电穿孔转化,检测转化效率。
9.次日观察转化子生长情况,并记录。
2.连接产物纯化
1.将连接产物转移至一1.5mlEppendorf管中,加入下列试剂:
10ul of ddH2O
2ul of 3M NaAC(PH5.2)
50ul of无水乙醇
轻轻混匀,稍微离心并将其置于-20℃放置1小时以上;
系统参数:
输入电压220-240V,50-60HZ
输入电流15A
最大输出电压和电流2500V,125A(正常负荷)
电弧时限定值1500A
输出波形Pulse Trac指数衰减,RC时间常数取决于所选的样品和电容器
输出电压调节50-2500V范围(取决于电容器)内,低电压范围(50-500V)和
高电压范围分别具有2V和10V的调节精度。
工作环境温度0-35oC
湿度0-95%,无冷凝
简易操作指南:1:打开电源
2:根据自己的情况设置参数:如电容 c=25F, 电压 v=1.8kV (0.1cm电击杯),R=200
3:将电击杯两壁水檫干
4:电转:所产生的时间常数一般为4.6—5.0ms
5:立即加入培养液恢复培养
注意:电击杯两壁水一定要檫干;所制备的感受态细胞一定要干净,否则电流过大
Gene Pulser Xcell微生物电穿孔系统ቤተ መጻሕፍቲ ባይዱ货号165-2662)—用于细菌和真菌的电穿孔,以及对小体积样本施加高压脉冲的其他应用;包含PC模块
更多信息
功能可修改的传送参数包括时间常数、施加的实际电压、脉冲间隔和脉冲时间,具体取决于选择的波型(指数波或方波)
提供一系列用于手动操作、预设实验方案、用户实验方案和优化实验方案的相关程序
5.弃上清(将一切上清倒光,能够将离心管倒过来),离心杯中加入少量预冷灭菌ddH2O,轻吹,(建议不要用枪吹,用10 ml移液管)使沉淀悬浮后,然后加水稀释至离心管的2/3体积,4℃,4000rpm离心10分钟。
6.弃上清,加少量预冷灭菌灭菌水,轻吹,重悬菌体,然后加水稀释至离心管的2/3体积,4000rpm,4℃,离心10min。
通用电穿孔—转染所有细胞类型(从原代细胞和干细胞到细菌和酵母菌)
预设实验方案—包括最常见的哺乳动物和细菌细胞类型
灵活性—预设实验方案、优化实验方案、手动操作和/或用户实验方案的程序选择
实验方案库—一系列电穿孔实验方案,适用于包括原代细胞、永生细胞和细菌细胞在内的各种细胞类型
数据管理—能够存储和调用前100次试验中使用的参数,有助于故障排除
电穿孔是一个物理过程,利用电脉冲瞬时穿透原核细胞或真核细胞的细胞膜,使得细胞能够吸收各种不同种类的生物分子。当用化学或其他物理方法转化某些类型的细胞效率不高或有毒性时,电转化则可能是一种有用的方法。
Gene PulserⅡ电穿孔仪由三个部分组成:Gene PulserⅡ装置及两个附属设备Pulse Controller PLUS和Capacitance Extender PLUS。Gene PulserⅡ可与另两个附属设备中的任意一个一起使用:对于细菌和酵母细胞的电转化(高电压/低电容),使用Pulse Controller PLUS;对于哺乳动物细胞和胚胎组织的电转化(低电压/高电容),则应使用Capacitance Extender PLUS。
4.打开电转仪,调至Manual,调节200Ω,25 uF,电压为2.5KV,时间不低于3毫秒,应接近5毫秒。
转化的电压一般选择1.8kv(转细胞或是大质粒可以选择2.5kv)。
5.从冰中取出电极杯,用纸巾吸干表面水分,务必擦干电转杯外的水气。
6.将电极杯推入电转化仪,按一下pulse键,听到蜂鸣声后,向电击杯中迅速加入预热的1mlSOC液体培养基,快速而轻柔地重悬细胞后,转移到1.5ml的离心管中。(越快越好)电击后立即在电转杯中加入培养基(室温),很关键哦!
/html/201312/6824083.html
制备的电转化的感受态细胞可以用于化学转化操作吗?
举报删除此信息
ljy525380(站内联系TA)
一般来说,电转感受态制备时都要用水和10%甘油洗数遍,其目的是为了尽可能的去除其中的盐离子成分,电击时才可以使电压附加在细胞两极,从而形成电穿孔,而不是电子直接通过盐离子传递;而热激感受态则是通过Ca2+等离子和试剂的作用改变细胞膜两侧渗透压,造成低渗的环境,菌会变得膨胀,细胞膜变薄,从而热激时吸收附着在菌表面的DNA。所以我感觉电转感受态是不太可能用于热激的,这些都是我认为的,供你参考吧
重点:
1.电转化感受态细胞的制备
第一天:
0.高温灭菌大的离心管(25-50ml)以备第二天用
0.准备几瓶灭菌水(总量约1.5升),保存于冷冻室中以备第二天重悬浮细胞用
1.用枪头挑取单克隆菌落,投入盛有10ml LB液体培养基的50ml离心管中。(同时做培养基和枪头的空白对照)
2.过夜,37℃,220rpm。
2.向电击杯中加入的75%酒精浸泡2hr。
3.弃去酒精,再用蒸馏水冲洗2~3遍,然后用1ml的枪吸取超纯水反复吹打电击杯10遍以上。
4.加入无水乙醇2ml于电击杯中,浸泡30分钟。
5.弃去无水乙醇,于通风厨内挥干乙醇。(电转杯用酒精消毒后一定要让酒精挥发干净)
6.将清洗好的电击杯放入-20℃冰箱内待用。
4.以下步骤务必在超净工作台和冰上操作。
在超净工作台中,将菌液分装于大的灭菌离心管(提前高压灭菌)中,在冰上预冷20-30分钟(至少15 min,但是也有人说10min,时间不要太长,特别是夏天),4℃,4000rpm离心10分钟。
[使细菌的成长中止,代谢减慢。由于这时现已没有培育基了,假如细菌仍有很高的代谢功率,则有很多细菌逝世。] [冰浴是为了降低细胞代谢率,避免细胞很多逝世。]
功能和优点一系列电穿孔实验方案适用于包括原代细胞永生细胞和细菌细胞在内的各种细胞类型能够存储和调用前100次试验中使用的参数有助于故障排除使用pulsetrac电路和电弧保护功能以确保可重复性和样品防护系统选项genepulserxcell总电穿孔系统货号1652660用于转染真核细胞和原核细胞的完整电穿孔系统
3.电转化
1.从-80℃冰箱中取出感受态细胞,置于冰上解冻;
将0.1CM的电极杯和1.5 ml灭菌离心管一起置于冰上预冷
2.取1-2μl纯化后的DNA(DNA不要太多,防止向感受态里多带进了离子)于100ul融化的感受态细胞中,用粗口吸头的枪轻柔混匀,越温柔越好,小心混匀混匀!,
3.将上述混合物转移到预冷的电极杯中,轻轻敲击电极杯,使混合物均匀,无气泡,进入电极杯的底部,静置冰浴5-10min。(怕感受态细胞量不够,吸得很多,电转时效果反而不好。)
[让菌复苏,进入对数期的早中期。此刻更简单制得感受态细胞。]
3.第二天,以1:100的比例将这10ml菌液倒入1000ml LB液体培养基中,37度,220rpm-250,振摇2-3小时,每半小时测一次OD,当OD值达到0.3-0.4-0.6时,停止培养。
[削减到达所需量的繁衍世代数,以削减菌的变异。]
可重复性—使用PulseTrac™电路和电弧保护功能以确保可重复性和样品防护
系统选项
Gene Pulser Xcell总电穿孔系统(货号165-2660)—用于转染真核细胞和原核细胞的完整电穿孔系统;包含CE模块和PC模块
Gene Pulser Xcell真核电穿孔系统(货号165-2661)—用于大多数真核细胞(包括哺乳动物细胞和植物原生质体)的电穿孔;包含CE模块
1.利用氨苄青霉素抗性筛选转化子时,用转化细胞铺平板的密度要低(90mm平板上不得超过105个菌落),同时37℃培养不应超过20小时,具氨苄青霉素抗性的转化体可将
β-内酰胺酶分泌到培养基中,迅速灭活菌落周围的抗生素,从而导致对氨苄青霉素敏感的卫星菌落的出现。
4.电击杯清洗流程
1.用清水将电击杯稍冲一下。
7.弃上清,往离心杯中加入少量10%甘油(灭菌,预冷),重悬菌体,再加预冷灭菌的10%甘油至离心管的2/3体积, 4℃, 4000rpm,离心10min,小心弃去上清液(沉淀可能会很松散)。
重复两次。
8.小心弃去上清液,每个离心杯中加入5ml10%的甘油(就是1000ml菌液:5 ml 10%甘油的比例,500 ml菌液就加2-3 ml 10%甘油),使沉淀悬浮后,将菌液以150ul/管分装于1.5ml的离心管中,直接用于电转化或-80℃冰箱中保存。
cicelyzh(站内联系TA)
不能。两种感受态的原理不同,LS的正解。
电转化感受态细胞的制备主要是脱盐。
略
Gene Pulser Xcell™系统是用于转染每种细胞类型的模块化电穿孔系统。
系统包括主单元、ShockPod™电击槽以及选择的附件模块:电容扩增器(CE模块)和脉冲控制器(PC模块)。
功能和优点
7.37℃,轻摇120 rpm,复苏1小时。
8.取20ul转化产物加160ulSOC涂板,放于37℃温室,过夜培养,次日查看转化结果。其余菌液加1:1的30%的甘油后混匀-80℃保存。
注:每块加有Amp的平板上均匀涂有X-Gal 80μl,SOC 80μl,IPTG 20μl。不懂!!!
由于感受态细胞在电转化中受损伤较大,筛选转化子的平板所含抗生素浓度应低一些。