基于PL2303的USB转串口制作(精)
PL2303HX芯片的USB转串口方法

:详见本刊曾经刊登过的《USB驱动安装与说明》k 第二步:插上USB连接线。电脑成功识别USB所 转换的串口。 第三步:将板上的P8排针上的T)(D与RXD短接. 如图3中所示。 第日步:打开电脑端的串口调试助手软件.选中所 转换出来的串口.然后输^一些数据。点击发送.看能 不能正常回收到数据.如图4中所示。 值得说明的是.某些串口调试助手只支持到 COM4.所以如果转换出来的串口编号在4往后.就需 要更改串口编号.关于COM口的编号.可在电脑的设 备管理器中的端口中看到.具体操作如下: 右键我的电脑,然后选择管理。 点击设备管理器。 点击端口。如图5所示。 串口编号更改方法如下: 在所要进行修改编号的COM上右键,选择属性。 弹出属性窗口。 在属性窗口中选端口设置选项卡。如图6所示。
号在端口附近产生反射现象需要在B型USB端口目{
●512宇节可调的双向数据缓存.支持默认的
ROM和外部E2PROM存储设备配置信息.具有陀总
脚D一和D+上分别接上一个阻懂为270左右的终端
固1 PL2303HX的USB转串口电路 03●电于嗣作I 51
2011
万方数据
宦固口皿盈
HANDS ON PROJECTS
图2 VSB转串口电路赛物固
囝3将P8排针上的TxD与RxD短接
图4使用串口调试助手来验证数据的发送与接收
囤5查看串口编号
匹配电阻,D+接一个r拉电阻以帮助实现枚举功能, 此外考虑到防止USB口短路问题.串人R11,可以将 其焊成个500MA的保险丝或者一个小贴片电阻.从 而保护USB口,图1中的P8和P9两个排针接口可以 用跳线帽来连接单片机串口和从USB口取电给单片机 电路 将图1对应到Study—C学习板上的各元件PcB板 排列位置如图2肝示(方框中部分k 值得提出的是,PL2303HX芯片是SSOP28脚封 装.故对焊接水平有定要求.此外焊接完成后.应先 检查焊接质量.以保证焊接无误并质量高,、由于涉及连 接到电脑端的USB口,更应注意,否则可能烧坏电脑 的US8口。对此笔者的建议在焊接完毕后.在未上电 z前.用万用表对所焊接的管脚进行短路检测.特别是 USB口的正负两端.一定不能短路,正常情况下用电 阻档测量时有2 7K左右的阻值。 为了验证该下载电路是否正常工作,可以按照如下 步骤进行测试。 第一步:安装好PL2303HX在电脑USB端的驱动
搬运原作之一—DIY PL2303转串口
搬运原作之一—DIY PL2303 转串口
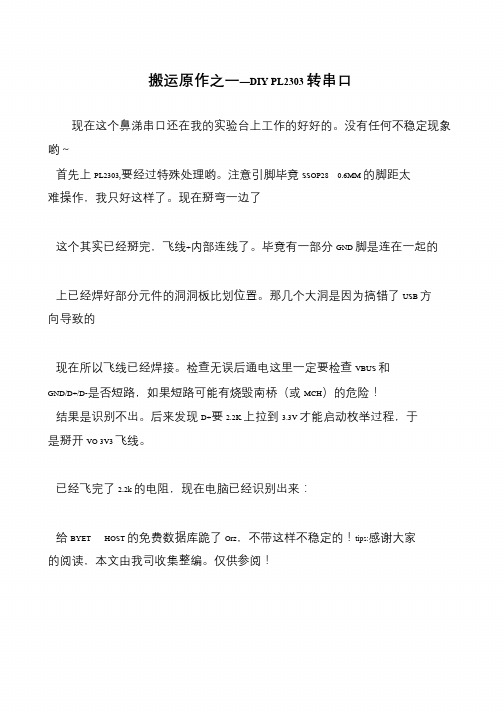
现在这个鼻涕串口还在我的实验台上工作的好好的。
没有任何不稳定现象哟~
首先上PL2303,要经过特殊处理哟。
注意引脚毕竟SSOP28 0.6MM 的脚距太难操作,我只好这样了。
现在掰弯一边了
这个其实已经掰完,飞线+内部连线了。
毕竟有一部分GND 脚是连在一起的
上已经焊好部分元件的洞洞板比划位置。
那几个大洞是因为搞错了USB 方
向导致的
现在所以飞线已经焊接。
检查无误后通电这里一定要检查VBUS 和
GND/D+/D-是否短路,如果短路可能有烧毁南桥(或MCH)的危险!
结果是识别不出。
后来发现D+要2.2K 上拉到3.3V 才能启动枚举过程,于
是掰开VO 3V3 飞线。
已经飞完了2.2k 的电阻,现在电脑已经识别出来:
给BYET HOST 的免费数据库跪了Orz,不带这样不稳定的!tips:感谢大家的阅读,本文由我司收集整编。
仅供参阅!。
采用PL2303芯片的USB转TTL串口模块

采用PL2303芯片的USB转TTL串口模块对于一些学校、工业、科研客户来说,电脑的串口非常重要,很多设备都必须采用串口和电脑端软件连接,很多电路模块可以非常直观方便地利用串口调试软件进行调试,很多仪器必须通过串口进行通讯和数据交换。
但是目前笔记本电脑因为空间的限制和其他方面考虑的原因都没有串口,甚至一些台式电脑也取消了串口配置,这让我们迫切需要串口的客户非常苦恼。
USB 转串口模块全称为USB to Serial port Module,它可以将USB 接口虚拟成一个串口,解决客户无串口的苦恼。
现在市面上的USB 转串品的设备可谓是琳琅满目,质量也是参差不齐。
造成这种现象的根本原因就在于控制芯片的不同。
现在USB 转串口桥接芯片有很多,比如CP2102、FT232、PL2303 等等。
但并非每一种芯片都可以用作ISP 下载。
经过测试CP2102 是不能下载的,而FT232 可以下载,但其价格实在不菲。
最为适中的就是台湾生产的PL2303,可以稳定下载,并可以支持多种操作系统。
PL2303HX 采用28 脚贴片SOIC 封装,工作频率为12MHZ,符合USB 1.1 通信协议,可以直接将USB 信号转换成串口信号,波特率从75~1228800,有22 种波特率可以选择,并支持5、6、7、8、16 共5 种数据比特位,是一款相当不错的USB 转串口芯片。
这是我们用PL2303 芯片开发的USB 转串口模块,采用机器自动焊接都经人工检测,电路板只有30*16*7 毫米,模块一共引出5 根脚,引脚电平为TTL,引脚定义如下:+5V、P3.0 TXD 、P3.1 RXD 、GND 地线、+3.3V 。
其中+5V 和+3.3V 电源输出线一般情况下都不用的,不需要连接。
现在购买PL2303 模块我们还赠送一根30 厘米长的杜邦连接线,它一头。
PL2303,USB转串口极限波特率

一、PL2303缓冲区大小缓冲区的上行和下行数据从96 个增加到256 个字节1.3--Buffer for upstream and downstream data flow –change from 96 to 256 bytes上行和下行缓存区都是256B256 bytes buffer each for upstream and downstream data flow 二、PL2303支持的波特率The programmable baud rate generatorsupports baud rates up to 1.2M bpsTable 3. Baud Rate Setting【STM32:USART1接口通信速率可达4.5兆位/秒,其他接口的通信速率可达2.25兆位/秒。
One of the USART interfaces is able to communicate at speeds of up to 4.5 Mbit/s.The other available interfaces communicate at up to 2.25 Mbit/s.】【MAX232,极限波特率200Kbps】【SP3238E极限波特率The SP3238E drivers can maintain high datarates up to 250kbps fully loaded】【PC串行通信CSerialport发送缓冲区大小设置】(以下不是偶写的)PL2303HX缓冲区大小Configurable 512-byte bi-directional data buffero256-byte outbound buffer and 256-byte inbound buffer; or o 128-byte outbound buffer and 384-byte inbound bufferPL2303HX支持的波特率Programmable baud rate from 75 bps to 12M bps。
usb转串口ttyUSB0无法识别或者没有数据返回pl2303芯片

usb转串口ttyUSB0无法识别或者没有数据返回pl2303芯片
usb 转串口 /ttyUSB0 无法识别或者没有数据返回 pl2303芯片
2012-12-19 10:30 3448人阅读评论(4) 收藏举报
最近公司在做一个项目,是要用到USB转串口的,插入到android设备的host中,但是把串口插入后,使用google 的开源项目 google-serial-port ,可以成功打开设备,但是在发送数据和接收数据方面就不行了,一直都没有数据返回。
这个问题困扰了我很久,我是一个没有搞过硬件的软件工程师,没办法硬着头皮看驱动开发,linux的驱动开发,android的驱动开发。
最后终于找到原因了,原来是android设备没有pl2303的驱动。
插入设备,adb shell 进android设备,然后使用命令 dmesg ,查看系统是如何处理我们刚才插入的usb转串口设备。
从最后几行的系统日志信息来看,我的android设备是把GSM的串口驱动给连接到了usb上面。
GSM的驱动如何能发送和读取pl2303芯片的设备呢。
我们需要把android下的pl2303。
ko文件加入进系统,在网上我还没有找到这样的驱动,因此,悲催了。
PL2303单片机程序下载电路设计

采用PL2303HX芯片的USB转串口模块对于一些学校、工业、科研客户来说,电脑的串口非常重要,很多设备都采用串口和电脑端软件配接,很多电路模块可以非常直观方便地利用串口调试软件进行调试,很多仪器必须通过串口进行通讯和数据交换。
但是目前笔记本电脑因为空间的限制和其他方面考虑的原因都没有串口,甚至一些台式电脑也取消了串口配置,这让我们迫切需要串口的客户非常苦恼。
USB转串口模块全称为USB to Serial port Module,它可以实现将USB接口虚拟成一个串口解决客户无串口的苦恼。
现在USB转串口桥接芯片有很多,比如CP2102、FT232、PL2303等等。
但并非每一种芯片都可以用作ISP下载。
经过测试CP2102是不能下载的,而FT232可以下载,但其价格实在不菲。
最为适中的就是PL2303,可以稳定下载。
这是我们用PL2303芯片开发的USB转串口模块,模块电路板只有32*14*7毫米,模块一共引出4根脚:一根串口入R、一根串口出D、一根地线-、还有一根是+5V实际不用的。
PL2303HX采用28脚贴片SOIC封装,工作频率为12MHZ,符合USB 1.1通信协议,可以直接将USB信号转换成串口信号,波特率从75~1228800,有22种波特率可以选择,并支持5、6、7、8、16共5种数据比特位,是一款相当不错的USB转串口芯片。
PL2303模块可以方便地利用杜邦免焊接连接线接入电路,只要插接3根线,一根串口入、一根串口出、一根地线。
这是双头20厘米长的杜邦线,采用优质彩虹12股排线通过机器自动加工,品质有保证,现在的电子模块一般都采用标准的插针作为电路接口,杜邦线可以非常牢靠地和插针连接,无需焊接,可以快速进行电路试验.应用举例1、单片机的串口ISP下载目前单片机的ISP下载已经成为潮流,例如比较流行的STC系列单片机就是以其高性能和方便实用的串口ISP下载功能备受青睐,但是ISP对时序要求非常严格,例如常用的CP2102就因为采用内部RC振荡器精度不够无法胜任,PL2303是极少几种支持ISP下载并且价格低廉的芯片,具体步骤可以参考我们制作的是STC芯片最理想的USB 下载线。
PL2303数据线自制MTK系列刷机线图文教程
PL2303数据线自制MTK系列刷机线图文教程所有手机制作刷机线,<包括三星NOKIA 杂牌手机MTK SPD> 只要是手机就可以自己做刷机线现在MTK芯片手机已经占据了手机市场的半壁江山,同时MTK的软件问题也很多。
如果各位想自己简单的刷机解锁的话。
可以参考下面的教程自制刷机数据线:一线通,PL2303刷机线,新手自制刷机线刷机教程。
刷机线来源1,推荐用诺基亚DK-5的下载数据线,2,内含PL2303芯片的数据线。
只要是PL2303驱动的数据线都可以的。
改线篇,如果我们自己手上有这个线,没有改装过,可以自己来改一根,只要接四根线出来就可以了。
.VCC (VBAT) GND (地)RX TX 四根线PL-2303数据线原理图:PL2303的1脚是TX 5脚是RX 图片上面写了TX 接手机的RX ,RX接手机的TX,这个没有写错的,对于新手来说,这个原理就不细说了,按照图片接就可以了。
GND (地线)A B C 点都可以接。
任意找一个点接。
VCC (供电线)D E F 点都可以接。
(供电电压保证手机能开机,否则不能联机)这样子线就改好了。
我们再来看主板。
现在的很多MTK芯片的手机上面都有标记:如果主板没有标示,可以利用测量电压的方法来找出RX TX ,请参考这个教程:测量电压查找MTK主板RX TX 接线端刷机教程如图: CHG , VBAT GND RX TX 五个点,我们只需要接VBAT(电池正极)GND(电池负极)RX TX 四根就可以刷机了。
开始接线现在我们的图片里面已经按上面的原理接好了。
插入电脑USB口,开始上机操作。
这是一根改好了的线:在插入USB线之前,记得先装好驱动了再插入刷机线,如果插入了线再装驱动的话,驱动安装不起来的。
只能装好了驱动再插入线。
电脑会自动安装驱动。
然后到设备管理器里面看,能出来正确的端口就可以了。
PL-2303 USB转串口适配器用户安装手册说明书
PL-2303 USB to Serial AdapterUser Installation Manual(For Vendor Reference Only)For Windows 98/ME/2000/XPRelease Version 1.0 (4/08/2002)ContentsIntroductionFeatures & SpecificationsSystem RequirementsInstalling the DeviceVerifying the InstallationUninstalling the DeviceDisclaimerIntroductionThe PL-2303 USB to Serial adapter is your smart and convenient accessory for connecting RS-232 serial devices to your USB-equipped Windows host computer. It provides a bridge connection with a standard DB 9-pin male serial port connector in one end and a standard Type-A USB plug connector on the other end. You simply attach the serial device onto the serial port of the cable and plug the USB connector into your PC USB port. It allows a simple and easy way of adding serial connections to your PC without having to go thru inserting a serial card and traditional port configuration.This USB to Serial adapter is ideal for connecting modems, cellular phones, PDAs, digital cameras, card readers and other serial devices to your computer. It provides serial connections up to 1Mbps of data transfer rate. And since USB does not require any IRQ resource, more devices can be attached to the system without the previous hassles of device and resource conflicts.Finally, the PL-2303 USB to Serial adapter is a fully USB Specification compliant device and therefore supports advanced power management such as suspend and resume operations as well as remote wakeup. The PL-2303 USB Serial cable adapter is designed to work on all Windows operating systems.Features & SpecificationsSmart USB to RS-232 (DB 9-pin male serial port) interfaceSupports various serial devices like modems, PDAs, cellular phones, digital cameras, card readers, and more.Easy Plug and Play InstallationFull Compliance with the Universal Serial Bus Specification v1.1Supports the standard RS-232 Serial InterfaceSupports automatic handshake modeOver 1Mbps data transfer rateSupports Remote Wake-up and Intelligent Power ManagementProvides Dual Buffers for upstream and downstream data transferNo IRQ resource requiredBus Powered – no separate power supply or battery requiredDimensions L x W x H: _________ (mm)Weight: ____grams (approximate)System RequirementsWindow s 98, Windows ME, Windows 2000, or Windows XP operating system AMD or Intel Pentium 133MHz or better based computerUSB 1.1 or higher portUSB to RS-232 (Serial Port) Cable AdapterUSB to RS-232 Driver Utility DiskInstalling the DeviceThis section will guide you on how to install the PL-2303 USB to Serial adapter under Windows XP, Windows 2000, Windows ME, and Windows 98 operating systems.Note:Before you plug in the USB to Serial adapter for the first time, make sure that you do not attach any serial device first to the adapter. You must only plug in the USB to Serial adapter itself.The following steps will show how to install the device under Windows XP. Basically, the procedures are also somewhat the same for other Windows operating systems.1. Power on your computer and boot to Windows.2. Locate the USB port of your computer and plug in the USB to Serial adapter.3. Windows will detect the new device and will initiate the Found New HardwareWizard prompting you to install the software for the detected USB Device.Select to install from a list or specific location. Click Next to continue.4. When prompted for the driver location of the device, click Browse and refer tothe USB to Serial driver disk or folder drive. Click Next to continue.5. Windows should detect the driver as Prolific USB-to-Serial Comm Port. BeforeWindows installs this, it may prompt you that this device driver has not yet passed Windows XP Logo compatibility. Click Continue Anyway.6. Windows will then start to install the driver for the USB-to-Serial Comm Port.Once installation is complete, Windows will prompt you that it has finished installing the software. Click Finish to continue.Verifying the InstallationThis section will guide you on how to verify if the PL-2303 USB to Serial adapter was properly installed. You will also need to determine the COM port assignment made by Windows for the USB to Serial adapter.Note:Before you plug in the USB to Serial adapter for the first time, make sure that you do not attach any serial device first to the adapter. You must only plug in the USB to Serial adapter itself.To verify if the device is properly installed and determine the COM port assignment of the device:1. Click Start Control Panel System. Inside System Properties, click onDevice Manager. Double-click on Ports (COM & LPT1). You should see theProlific USB-to-Serial Comm Port (COM3) device listing. This also means that Windows has assigned the device to COM3 port.Note:The COM port assignment of the USB to Serial adapter varies on yourcomputer hardware configuration. Windows will check what COM port are unused or free in your computer and assigns that port number to the device.2. If you want to assign the COM Port of the device to another port number, you candouble-click on the device (Prolific USB-to-Serial Comm Port) to view properties.3. Inside the USB-to-Serial Comm Port Properties, click on the Port Settings tab.Click on the Advanced button.4. Inside the Advanced Settings, click on the COM Port Number and check whatother port numbers are unused. If it so happens that Windows assigned a COM5 to the device, you may try to reassign it to a lower unused port number. Click OK when finished. Try running HyperTerminal to test if the new port number is OK.Note:Some software programs may only support up to COM4 and may not work if the port is assigned to COM5 or higher.5. Once you have verified the device to be properly installed, you may now proceedto using the USB to Serial adapter in connecting to serial devices. Attached the serial device to the serial port of the adapter and then plug in the USB connector to the USB port of your computer. Use the supplied driver of the serial device if needed.Uninstalling the Device DriverIt is easy to uninstall the USB to Serial device driver:1. Run the DRemover98_2K.exe UnInstall program found on your driver utility CDor diskette.2. The uninstall program will then prompt you if you want to remove the utilityprogram. Click OK to continue.3. After uninstall is complete, the program will prompt you to restart Windows.Click Yes to continue. Make sure you remove the diskette from floppy drive.4. Windows will also show a dialog box that the driver was removed successfully.Wait for Windows to restart your computer.DisclaimerInformation in this document is subject to change without notice. The manufacturer does not make any representations or warranties (implied or otherwise) regarding the accuracy and completeness of this document and shall in no event be liable for any loss of profit or any other commercial damage, including but not limited to special, incidental, consequential, or other damages.No part of this document may be reproduced or transmitted in any form by any means without the express written permission of the manufacturer.All brand names and product names used in this document are trademarks or registered trademarks of their respective holders.。
PL2303_中文资料
PL2303 USB 转 RS232 控制器一、产品特性:1. 完全符合 USB 规范 2.0(全速兼容) 2. 片内拥有 USB 1.1 收发器,5V 转 3.3V 的稳压器,12 MHz 的晶体振荡器 3. 支持 RS232 这样的串行接口 1)全双工发送器和接收器(TxD 和 RxD) 2)六个调制解调控制引脚(RTS,CTS,DTR,DSR,DCD 和 RI) 3)内容可以为 5,6,7 或 8 个数据位 4)支持自动握手各种模式 5)一、一个半,或两个停止位 6)奇偶错误,帧错误和串行中断检测 7)可编程波特率从 75bps 到 6 Mbps 8)外部的 RS232 驱动下降控制 9)独立的串行接口电源 4. 宽广的流量控制机制 1)自动与 CTS / RTS 流控制 2)自动使用的 XON / XOFF 流量控制 3)入站数据缓冲区溢出检测 5. 可配置的 512 个字节双向数据缓冲器 1)256 字节的输出缓冲区和 256 字节的输入缓冲区 2)128 字节的输出缓冲区和 384 字节的输入缓冲区 6. 支持从远程输入相关调制信号进行唤醒功能 7. 两个通用的 I / O(GPIO)引脚 8. 启动时可以将配置存储于外部的 EEPROM 9. 提供支持 Windows 和 Mac OS,Linux 和 WinCE 的驱动程序 10.具有专为 Windows XP 驱动程序认证的标志 11.该 IC 是 SSOP 封装的小尺寸 28 引脚二、简介:PL2303 是 Prolific 公司生产的一种高度集成的 RS232-USB 接口转换器,可提供一个 RS232 全双工异步串行通信装置与 USB 功能接口便利联接的解决方案。
该器件内置 USB 功能控制器、USB 收发器、振荡器和带有全部调制解调器控制信号的 UART,只需外接几只电容就可实现 USB 信号与 RS232 信号的转换,能够方便嵌入到手 持设备。
基于PL2303的USB转串口制作
基于PL2303的USB转串口制作PL2303是一款常用的USB转串口芯片,可以将USB接口转化为串口接口,使得计算机可以与串口设备进行通信。
本文将介绍如何基于PL2303芯片制作USB转串口模块。
首先,我们需要准备以下材料和工具:1.PL2303芯片:从电子元件市场或在线平台购买。
2.PCB板:用于固定和连接芯片和其他电子元件。
3.电子元件:例如电阻、电容、晶振、电源电容等。
BA型接口:用于连接到计算机的USB接口。
5.串口接口:例如DB9接口。
6.焊接工具:包括焊锡丝、焊台和吸锡器等。
接下来,按照以下步骤进行制作:步骤1:设计原理图首先,根据PL2303芯片的规格和使用说明书,设计电路原理图。
原理图应包括PL2303芯片、晶振、电源电容、串口接口等电子元件。
确保电路连接正确,没有错误。
步骤2:绘制PCB板将电路原理图转化为PCB布局图。
根据原理图,将电子元件适当地摆放在PCB板上,并根据PL2303芯片的引脚布局,绘制连接线路。
在绘制过程中,注意保持线路的短、直、粗,以减小串扰和电阻。
步骤3:制作PCB板使用PCB制作软件,将PCB布局图生成PCB板制作文件。
然后,将制作文件发送给PCB厂家进行加工。
一般可以选择将制作文件发送到PCB厂商进行批量制作,或者使用PCB切割机在家中进行个人制作。
步骤4:焊接电子元件将PL2303芯片和其他电子元件焊接到PCB板上。
在焊接过程中,要注意将电子元件正确地对准相应的焊盘,并使用焊锡固定。
在焊接完成后,使用吸锡器去除多余的焊锡,以确保焊点的质量和可靠性。
步骤5:测试和调试将制作好的USB转串口模块连接到计算机,并使用串口通信软件进行测试和调试。
确保模块可以正确地通过USB与计算机进行通信,并能够与串口设备进行数据交互。
步骤6:封装模块根据需要,将制作好的USB转串口模块进行封装。
可以选择使用塑料外壳或其他材料将模块包裹起来,以保护电路和提高外观质量。
总结:通过以上步骤,我们可以基于PL2303芯片制作USB转串口模块。
- 1、下载文档前请自行甄别文档内容的完整性,平台不提供额外的编辑、内容补充、找答案等附加服务。
- 2、"仅部分预览"的文档,不可在线预览部分如存在完整性等问题,可反馈申请退款(可完整预览的文档不适用该条件!)。
- 3、如文档侵犯您的权益,请联系客服反馈,我们会尽快为您处理(人工客服工作时间:9:00-18:30)。
基于PL2303的USB转串口制作
串口模块USB转TTL模块DVD升级路由/MODEN等刷机线STC单片机程序下载其它串行通迅领域. (东西虽小用途却很广泛
对于一些学校、工业、科研客户来说,电脑的串口非常重要,很多设备都采用串口和电脑端软件配接,很多电路模块可以非常直观方便地利用串口调试软件进行调试,很多仪器必须通过串口进行通讯和数据交换。
但是目前笔记本电脑因为空间的限制和其他方面考虑的原因都没有串口,甚至一些台式电脑也取消了串口配置,这让我们迫切需要串口的客户非常苦恼。
USB转串口模块全称为USB to Serial port Module,它可以实现将USB接口虚拟成一个串口解决客户无串口的苦恼。
现在市面上的USB转串品的设备可谓是琳琅满目,质量也是参差不齐。
造成这种现象的根本原因就在于控制芯片的不同。
现在USB转串口桥接芯片有很多,比如CP2102、FT232、PL2303等等。
但并非每一种芯片都可以用作ISP下载。
经过测试CP2102是不能下载的,而FT232可以下载,但其价格实在不菲。
最为适中的就是台湾生产的PL2303,可以稳定下载,并可以支持多种操作系统。
PL2303HX采用28脚贴片SOIC封装,工作频率为12MHZ,符合USB 1.1通信协议,可以直接将USB信号转换成串口信号,波特率从75~1228800,有22种波特率可以选择,并支持5、6、7、8、16共5种数据比特位,是一款相当不错的USB转串口芯片。
PL2303模块可以方便地利用杜邦免焊接连接线接入电路,只要插接3根线,一根串口入、一根串口出、一根地线。
用途:
1、STC单片机程序下载
2、单片机/开发板串口通讯实验
3、路由器或者ADSL等固件升级
4、GPS串口通信
5、超级终端里使用;常用串口调试工具
6、使用方便,RDX接到MCU的TDX;TDX接到MCU的RDX.在接上地。
而无需再用MAX232转换。
本模块可用于刷机(不论你接收机输出是4线还是5线均只接其中3线就可以了
针脚接法:
TX RX 地GND 5V(VCC
连接方法
有的是
RX对TX;
TX对RX;
地对地(GND对GND
有的是(至于这种接法可能是他们标识不一样
TX对TX;
RX对RX;
地对地(GND对GND
驱动安装方法
第一步:将我们提供的驱动解压并预安装
第二步:插上USB-TTL模块,电脑自动搜索安装
第三步:打开电脑“硬件管理器”发现会多一个COM端口,就表示安装成功了1.电路原理图
2. 完全电路图-转成9针串口标准接口
3.电路成品。