使用安装说明书
使用说明和安装说明说明书

R e g i s t e ry o u rn e w d e v i c eo nM y B o s c h no w a n dg e t f r e e b en e f i t s:b o sc h-h o me.c o m/w e l c o m e Warming drawerBIC510N.0W BID510N.0W[en]User manual and installation instructions2 [zh]使用说明和安装说明11en Safety2Table of contentsINFORMATION FOR USE 1Safety.................................................................... 22Preventing material damage ............................... 33Environmental protection and saving en-ergy....................................................................... 34Familiarising yourself with your appliance........ 45Before using for the first time............................. 46Tableware............................................................. 47Basic operation.................................................... 58Preheating tableware........................................... 59Keeping food warm.............................................. 510Cleaning and servicing........................................ 611Troubleshooting................................................... 612How it works......................................................... 713Customer Service. (814)INSTALLATION INSTRUCTIONS (8)14.4Safe installation ...................................................91 SafetyObserve the following safety instructions.1.1 General information¡Read this instruction manual carefully.¡Keep the instruction manual and the product information safe for future refer-ence or for the next owner.¡Do not connect the appliance if it has been damaged in transit.1.2 Intended useThis appliance is designed only to be built into kitchen units. Read the special installation instructions.Only a licensed professional may connect ap-pliances without plugs. Damage caused by in-correct connection is not covered under the warranty.Only use this appliance:¡To keep food warm and to warm cookware.¡In private households and in enclosed spaces in a domestic environment.¡Up to an altitude of max. 4000 m abovesea level.Do not use the appliance:¡On boats or in vehicles.¡with an external timer or a remote control.1.3 Restriction on user groupThis appliance may be used by children aged 8 or over and by people who have reduced physical, sensory or mental abilities or inad-equate experience and/or knowledge,provided that they are supervised or have been instructed on how to use the appliance safely and have understood the resulting dangers.Do not let children play with the appliance.Children must not perform cleaning or user maintenance unless they are at least 15 years old and are being supervised.Keep children under the age of 8 years away from the appliance and power cable.1.4 Safe useWARNING ‒ Risk of fire!The inside of the appliance gets very hot and may cause flammable materials to ignite.▶Never place flammable objects or plasticcontainers in the appliance.WARNING ‒ Risk of burns!The accessories and cookware become very hot during operation.▶Always use oven gloves when removing hot accessories or cookware from the ap-pliance.The inside of the appliance becomes very hot during operation.▶Never touch the inside of the appliance while it is hot.▶Keep children away from the appliance.The appliance becomes hot during operation.▶Allow the appliance to cool down beforecleaning.WARNING ‒ Risk of electric shock!Incorrect repairs are dangerous.▶Repairs to the appliance should only be carried out by trained specialist staff.▶Only use genuine spare parts when repair-ing the appliance.▶If the power cord of this appliance is dam-aged, it must be replaced by trained spe-cialist staff.Preventing material damage en3If the insulation of the power cord is dam-aged, this is dangerous.▶Never let the power cord come into contact with hot appliance parts or heat sources.▶Never let the power cord come into contact with sharp points or edges.▶Never kink, crush or modify the power cord.An ingress of moisture can cause an electric shock.▶Do not use steam- or high-pressure clean-ers to clean the appliance.If the appliance or the power cord is dam-aged, this is dangerous.▶Never operate a damaged appliance.▶Never pull on the power cord to unplug the appliance. Always unplug the appliance at the mains.▶If the appliance or the power cord is dam-aged, immediately unplug the power cord or switch off the fuse in the fuse box.▶Call customer services. →Page 8WARNING ‒ Risk of suffocation!Children may put packaging material over their heads or wrap themselves up in it and suffocate.▶Keep packaging material away from chil-dren.▶Do not let children play with packaging ma-terial.Children may breathe in or swallow small parts, causing them to suffocate.▶Keep small parts away from children.▶Do not let children play with small parts.2 Preventing material damageATTENTION!Excessive weight may damage the appliance.▶The appliance has a maximum load capacity of 15 kg.Moisture may damage the appliance.▶Do not use the appliance to store food and drinks.The humidity of the food may cause corrosion dam-age.3 Environmental protection and saving energy3.1 Disposing of packagingThe packaging materials are environmentally compat-ible and can be recycled.▶Sort the individual components by type and dispose of them separately.en Familiarising yourself with your appliance44 Familiarising yourself with your appliance4.1 ApplianceYou can find an overview of the parts of your appliance here.4.2 ControlsYou can use the control panel to configure all functions of your appliance and to obtain information about the 5 Before using for the first timeConfigure the settings for initial start-up. Clean the ap-pliance and accessories.5.1 Cleaning and heating up the appliance before using it for the first time1.Clean the appliance.2.Remove the accessories.3.Heat up the appliance at 80 °C for one hour.a Smoke development and odour development arenormal.6 TablewareThese instructions help you to avoid damaging your tableware.6.1 Suitable tablewareThe warming drawer has a maximum load capacity of 15 kg. You can use it to preheat the place settings for 6 or 12 people, for example.Drawer – 14 cm Drawer – 29 cm 6 dinner plates 24 cm diameter 12 dinner plates 24 cm diameter 6 soup bowls 10 cm diameter 12 soup bowls 10 cm diameter 1 bowl 19 cm diameter 1 bowl 22 cm diameter 1 bowl17 cm diameter 1 bowl 19 cm diameter 1 meat platter32 cm1 bowl17 cm diameter 2 meat platters32 cmBasic operation en57 Basic operation7.1 Opening the appliance▶Press on the centre of the warming drawer.a The warming drawer pops open and can be pulledout.7.2 Closing the appliance▶Press on the centre of the warming drawer andpush it back in.7.3 Switching on the appliance▶Press .7.4 Switching off the appliance▶Press .7.5 Setting the temperature▶Set the temperature to any value between , and .8 Preheating tablewareFood does not cool down as quickly on preheated tableware. Drinks also remain warm for longer.8.1 Starting the "Preheat tableware"functionWARNING ‒ Risk of burns!Drinking vessels become very hot at high temperat-ures.▶For drinking vessels, set the settings to .1.Place an anti-slip mat at the bottom of the drawer toprevent the tableware scratching the interior surface of the drawer.2.Place the tableware in the warming drawer.‒Distribute the tableware across the entire bottom of the warming drawer to reduce the preheating time.Do not block the ventilation opening with tall items of tableware or stacks of plates. Keeping the ventila-tion opening clear ensures that hot air can circulate efficiently.3.Turn the temperature selector to set the required temperature.A setting of up to is suitable for tableware. For drinking vessels, the settings from to are suit-able.4.Switch on the appliance.a The operation indicator lights up, the applianceheats up and the fan runs.5.Close the warming drawer.Note: The preheating time depends on the material,thickness, quantity and distribution of the tableware.For place settings for 6 people, the preheating time is approx. 15-25 minutes.8.2 Ending the "Preheat cookware" functionWARNING ‒ Risk of burns!The accessories and/or cookware become very hot during operation.▶Always use oven gloves to remove accessories or cookware from the cooking compartment.1.Open the warming drawer.2.Switch off the appliance.3.Remove the cookware.9 Keeping food warmYou can use the warming drawer to keep food warm for a certain period of time.We advise against keeping food warm for longer than an hour. Suitable food includes meat, poultry, fish,sauces, vegetables, side dishes and soups.9.1 Starting the "Keep food warm" functionATTENTION!Hot cookware from the hob damages the anti-slip mat in the warming drawer.▶Never take hot pots and pans off the hob and place them directly on the anti-slip mat.1.Place an anti-slip mat at the bottom of the drawer toprevent the tableware scratching the interior surface of the drawer.The anti-slip mat is food-safe. Dry food can be heated directly on the anti-slip mat in the warming drawer. The anti-slip mat must then be cleaned.2.Place the tableware in the warming drawer.3.Turn the temperature selector to set the required temperature.4.Switch on the appliance.a The operation indicator lights up, the appliance heats up and the fan runs.5.Preheat the tableware for approx. 10 minutes.6.Place food into the preheated tableware.‒Do not completely fill the tableware with food to prevent any content from spilling out when you open and close the warming drawer.‒Cover food which dries out easily with a heat-res-istant lid or aluminium foil.7.Close the warming drawer.en Cleaning and servicing69.2 Ending the "Keep food warm" functionWARNING ‒ Risk of burns!The accessories and/or cookware become very hot during operation.▶Always use oven gloves to remove accessories or cookware from the cooking compartment.1.Open the warming drawer.2.Switch off the appliance.3.Remove the cookware.10 Cleaning and servicingTo keep your appliance working efficiently for a long time, it is important to clean and maintain it carefully.10.1 Cleaning productsYou can obtain suitable cleaning products from after-sales service or the online shop.ATTENTION!Unsuitable cleaning products may damage the sur-faces of the appliance.▶Do not use harsh or abrasive detergents.▶Do not use cleaning products with a high alcohol content.▶Do not use hard scouring pads or cleaning sponges.▶Only use glass cleaners, glass scrapers or stainless steel care products if recommended in the cleaning instructions for the relevant part.▶Wash sponge cloths thoroughly before use.10.2 Cleaning the applianceWARNING ‒ Risk of electric shock!An ingress of moisture can cause an electric shock.▶Do not use steam- or high-pressure cleaners toclean the appliance.WARNING ‒ Risk of burns!The appliance becomes hot during operation.▶Allow the appliance to cool down before cleaning.Requirement: The appliance is switched off.1.Clean the appliance with a damp cloth and a neutral cleaning agent, such as washing-up liquid and wa-ter.2.Dry with a soft cloth.10.3 Cleaning the stainless steel surfaces1.Always remove limescale, grease, starch or albuminstains immediately.Corrosion may form under such stains.2.Clean with water and some washing-up liquid.3.Dry with a soft cloth.10.4 Cleaning the glass front▶Clean the glass front using a glass cleaning productand a soft cloth.‒Do not use any abrasive sponges that may scratch or any glass scrapers.10.5 Cleaning the anti-slip mat1.Remove the anti-slip mat to clean it.2.Clean the anti-slip mat with washing-up liquid.11 TroubleshootingYou can rectify minor faults on your appliance yourself.Read the troubleshooting information before contactingafter-sales service. This will avoid unnecessary costs.WARNING ‒ Risk of injury!Improper repairs are dangerous.▶Repairs to the appliance should only be carried out by trained specialist staff.▶If the appliance is defective, call Customer Service.WARNING ‒ Risk of electric shock!Incorrect repairs are dangerous.▶Repairs to the appliance should only be carried out by trained specialist staff.▶Only use genuine spare parts when repairing the appliance.▶If the power cord of this appliance is damaged, it must be replaced by trained specialist staff.11.1 MalfunctionsFaultCause and troubleshooting The cookware or food is not heating up.There has been a power cut.▶Check whether the lighting in your kitchen or other appliances are working.The appliance is switched off.▶Switch the appliance on.The warming drawer is not completely closed.▶Close the warming drawer.How it works en7FaultCause and troubleshooting The appliance is not working.The circuit breaker is faulty.▶Check the circuit breaker in the fuse box.The cookware or food does not get warm enough.The cookware or food has not been heated for long enough.▶Heat the cookware or the food for a longer period of time.The warming drawer is not completely closed.▶Close the warming drawer.The warming drawer was open for a long time.▶Close the warming drawer.The warming drawer was not adequately preheated.▶Preheat the warming drawer sufficiently.The ventilation opening has been blocked by tableware.▶Remove tall tableware from the ventilation opening.The operation indic-ator light does not light up.The operation indicator light is defective.▶Call the after-sales service. → "Customer Service", Page 8The fuse in the fuse box has blown.The circuit breaker is faulty.▶Pull out the mains plug.▶Call the after-sales service. → "Customer Service", Page 812 How it worksHere, you can find the ideal settings for various dishes as well as the best accessories and cookware. We have tailored these recommendations to your appliance.12.1 Recommended settingsThe following settings have been specially tested for your appliance.Tableware and drinking vessels DishPreheating thePreheating tableware Level InformationDefrosting frozen foods DishPreheating the Preheating tableware LevelInformationen Customer Service 8Warming DishPreheating thePreheating tableware Level InformationmuffinsKeeping warm DishPreheating the Preheating tablewareLevel InformationMelting DishPreheating the Preheating tableware LevelInformationProving dough Dish Preheating thePreheating tableware Level Information trays13 Customer ServiceDetailed information on the warranty period and terms of warranty in your country is available from our after-sales service, your retailer or on our website.If you contact Customer Service, you will require the product number (E-Nr.) and the production number (FD) of your appliance.The contact details for Customer Service can be found in the enclosed Customer Service directory or on our website.13.1 Product number (E-Nr.) and production number (FD)You can find the product number (E-Nr.) and the pro-duction number (FD) on the appliance's rating plate.You can see the rating plate with these numbers when you open the drawer.Make a note of your appliance's details and the Cus-tomer Service telephone number to find them again quickly.14 Installation instructionsObserve this information when installing the appliance.Installation instructions en914.1 Included with the applianceAfter unpacking all parts, check for any transport dam-age and for completeness of delivery.14 cm29 cm14.2 Installation in the cabinetYou will find the dimensions of the appliance here14 cm29 cm14.3 Instructions for the electrical connectionIn order to safely connect the appliance to the elec-trical system, follow these instructions.¡The appliance must only be connected to a protect-ive contact socket that has been correctly installed.Only a qualified electrician may install a socket or replace the connecting cable, taking the appropriate regulations into account.¡The appliance must only be connected with the power cable provided. Connect the power cable to the back of the appliance.¡Connecting cables with various plug types are avail-able from after-sales service.¡No multi-plugs, multiple connectors or extension leads must be used. Overloading causes a risk of fire.¡If the plug can no longer be reached after the in-stallation, a partition must be provided in the phases in the permanent electrical installation in accord-ance with the installation regulations.Follow these safety instructions when in-stalling the appliance.WARNING ‒ Risk of suffocation!Children may put packaging material over their heads or wrap themselves up in it and suffocate.▶Keep packaging material away from chil-dren.▶Do not let children play with packaging ma-terial.WARNING ‒ Risk of electric shock!If the insulation of the power cord is dam-aged, this is dangerous.▶Never let the power cord come into contact with hot appliance parts or heat sources.▶Never let the power cord come into contact with sharp points or edges.▶Never kink, crush or modify the power cord.en Installation instructions10WARNING ‒ Risk of injury!Sharp-edged parts may be accessible during installation.▶Wear protective gloves.14.5 InstallationFitted unitsThis is where you can find information about safe in-stallation.ATTENTION!Covering the ventilation slots and air intake openings causes the appliance to overheat.▶Do not cover ventilation slots and air intake open-ings.If the appliance is installed behind a decorative panel,this may cause it to overheat.▶Do not install the appliance behind a decorative panel.The built-in unit must not have a rear panel behind the appliance.The minimum distance between the wall and the cab-inet base or back wall of the cabinet that is situated above must be complied with.Observe the installation instructions for the appliance installed above.If no intermediate floor is possible above the appliance or above the oven, install tilt protection for the appli-ance. Suitable tilt protection can be obtained from cus-tomer service, on our website or in the online shop.Installing the applianceWARNING ‒ Risk of electric shock!If the insulation of the power cord is damaged, this is dangerous.▶Never let the power cord come into contact with hot appliance parts or heat sources.▶Never let the power cord come into contact with sharp points or edges.▶Never kink, crush or modify the power cord.WARNING ‒ Risk of injury!After removing the transport lock, the drawer may open suddenly during transport.▶Transport the appliance in such a way that the drawer does not accidentally open.The high weight of the appliance may result in injury when lifted.▶Do not lift the appliance on your own.1.Insert the power cord into a protective contactsocket.The power cord must not touch the rear and base of the appliance after installation.2.Insert the appliance.3.Centre the appliance.4.5.Remove and dispose of the protective padding.安全性 zh 11目录使用说明书1安全性 (11)2避免财产损失 (12)3环境保护和节约 (12)4了解机器 (12)5首次使用前 (12)6餐具 (13)7操作基本知识 (13)8预热餐具 (13)9食物保温 (13)10清洁和保养 (14)11处理故障 (14)12工作原理 (15)13客户服务 (16)14安装说明书 (16)14.4安全安装..............................................................171 安全性请注意以下安全注意事项。
软件安装说明书
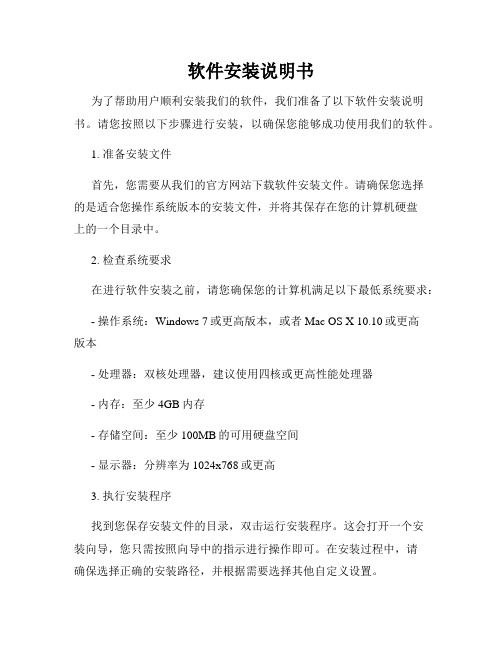
软件安装说明书为了帮助用户顺利安装我们的软件,我们准备了以下软件安装说明书。
请您按照以下步骤进行安装,以确保您能够成功使用我们的软件。
1. 准备安装文件首先,您需要从我们的官方网站下载软件安装文件。
请确保您选择的是适合您操作系统版本的安装文件,并将其保存在您的计算机硬盘上的一个目录中。
2. 检查系统要求在进行软件安装之前,请您确保您的计算机满足以下最低系统要求:- 操作系统:Windows 7或更高版本,或者Mac OS X 10.10或更高版本- 处理器:双核处理器,建议使用四核或更高性能处理器- 内存:至少4GB内存- 存储空间:至少100MB的可用硬盘空间- 显示器:分辨率为1024x768或更高3. 执行安装程序找到您保存安装文件的目录,双击运行安装程序。
这会打开一个安装向导,您只需按照向导中的指示进行操作即可。
在安装过程中,请确保选择正确的安装路径,并根据需要选择其他自定义设置。
4. 阅读许可协议在安装过程中,您将看到软件使用许可协议。
请仔细阅读所有条款和条件,并在同意之前确保您理解其中的内容。
如果您不同意协议的任何条款,请不要继续安装软件。
5. 等待安装完成一旦您点击了“同意”或“安装”按钮,安装程序将开始复制文件并配置软件。
请耐心等待直到安装完成。
这可能需要一些时间,取决于您的计算机性能和文件大小。
6. 快捷方式创建安装程序将询问您是否要在桌面上创建软件的快捷方式。
如果您想要快速访问软件,您可以选择创建快捷方式。
否则,您可以选择不创建。
7. 完成安装一旦安装完成,您将看到一个安装成功的提示。
点击“完成”按钮关闭安装程序。
8. 启动软件现在,您可以通过双击桌面上的快捷方式或者从“开始”菜单中找到软件并点击打开。
软件将启动并显示欢迎界面。
9. 激活软件有些软件可能需要激活才能正常使用。
请确保您按照软件提供的激活指南进行操作。
通常,您需要输入许可证密钥或注册邮箱,并遵循指示完成激活过程。
滚筒洗衣机使用与安装说明书-美诺
58 58 59 60 60 60 62 63 63
3
目录
______________________________________________________________________________________________________________________________________________
中断程序......................................................... 38 添加或取出衣物................................................... 39 衣物护理标签符号................................................. 40 洗涤剂........................................................... 41 正确的洗涤剂..................................................... 41 水质软化片....................................................... 41 配给量辅助用具................................................... 41 衣物柔顺剂或液态粉浆............................................. 41 Miele 建议洗涤产品................................................ 42 按照(EU)1015/2010 指令建议的洗涤剂............................. 43 清洁与保养....................................................... 清洁滚筒(除菌信息)............................................. 外壳与面板....................................................... 清洗............................................................. 清洁进水口过滤器................................................. 45 45 45 45 47
山东通安装使用说明书
“山东通”安装使用说明书一、特别注意 (3)二、安装前的准备工作 (4)(一)确认电脑型号 (4)1.查看麒麟(Kylin)V10(SP1)系统方法 (5)2.查看麒麟(Kylin)V10系统方法 (7)(二)检查DNS配置 (8)1.检查DNS配置 (8)(三)升级系统及内核 (10)1.下载麒麟(Kylin)内核补丁包 (10)2.升级麒麟(Kylin)V10系统内核 (10)三、安装“山东通”相关软件 (11)(一)下载“山东通”相关软件 (11)(一)安装“山东通”安全接入客户端 (14)(二)安装“山东通”客户端 (14)(三)常见安装问题及解决方法 (15)(四)山东通客户端(国产)登录的使用说明 (16)1.初始化安全接入客户端(aTrust) (16)2.登录安全接入客户端(aTrust) (18)(五)安全接入客户端(国产)文件导入导出操作说明 ..23“山东通”安装使用说明书本安装说明书为各级部门技术人员提供参考,内容包含3款操作系统和3款CPU芯片型号的9种组合,从查看电脑参数型号、检查DNS配置、安装系统内核补丁包和“山东通”软件4个步骤详细介绍信创电脑安装“山东通”软件的流程,同时在“山东通”的下载中心提供各种组合的操作系统升级、内核补丁及山东通相关使用操作。
一、特别注意风险一:系统重新安装统信系统通过系统重装升级到1050属于全新系统升级,有以下风险:原系统存储的个人数据全部丢失,需要备份;导致省级、市级信创工作统一配发的wps、pdf、ofd、签章软件,以及杀毒软件商业授权失效,需要向省级、市级信创工作团队申请进行系统升级风险评估方可进行;可能导致部分办公或行业的应用软件及外设产品无法适配,需要向应用软件或外设产品牵头推广单位申请系统升级的风险评估后方可进行。
—3—“山东通”安装使用说明书—4—时代亿信终端安全登录万里红主机监控与审计奇安信终端安全管理中孚终端安全登录天融信主机监控与审计北信源终端安全登录风险三:内核补丁升级麒麟V10系统版本、统信(UOS)20系统的内核版本升级,属于内核补丁升级。
LD5501EN安装使用说明书
目录第一章 概述 (1)第二章 产品特点 (1)第三章 结构特征与工作原理 (2)3.1 结构特征 (2)3.1.1 结构外形 (2)3.1.2 内部结构 (3)3.1.3 面板控制锁说明 (3)3.1.4 每路指示灯和按键说明 (3)3.2 工作原理 (5)第四章 技术特性 (5)第五章 安装与调试 (6)5.1 安装说明 (6)5.1.1 安装尺寸 (6)5.1.2 开箱检查 (6)5.2 外接端子说明 (7)5.2.1 外接设备端子连接说明 (7)5.2.2 现场布线要求 (8)5.2.3 外接设备连接注意事项 (9)5.3 设置说明 (9)5.3.1 地址设置 (10)5.3.2 控制器的相关设置 (10)5.3.2.1 地址类型设置 (10)5.3.2.2 延时设置 (10)5.3.2.3 逻辑设置 (12)5.3.3 故障检测设置 (12)5.4 调试 (14)5.4.1 气体灭火盘系统调试 (14)5.4.1.1查看地址 (14)5.4.1.2自检操作 (14)5.4.1.3复位操作 (14)5.4.2 逻辑启动功能调试 (14)5.4.3 手动启动功能调试 (15)5.4.4 现场紧急启动功能调试 (16)5.4.5 按键保护罩的安装 (16)第六章 使用及操作 (17)6.1 正常监测状态 (17)6.2 启动钢瓶(1谨慎操作) (19)6.2.1 自动启动(延时启动) (19)6.2.2 手动启动(无延时启动,谨慎操作!!!) (19)6.2.3 现场紧急启动(延时启动) (20)6.3 延时中取消启动 (20)6.3.1 停止键操作 (20)6.3.2 现场急停键操作 (21)6.4 复位 (21)6.5 自检 (22)第七章 故障分析与排除方法 (22)第八章 注意事项 (24)第九章 保养与维修 (25)第十章 运输及贮存 (25)第十一章 售后服务 (26)附录1:工程接线示例图 (26)附录2:按键保护罩安装更换方法 (27)第一章 概 述LD5501EN气体灭火控制盘(以下简称气体灭火盘)是依据GA61-2002标准,根据消防规范和消防验收规范研制的,配合我公司生产的LD128EN/LD128E系列火灾报警控制器使用,可根据采集的现场火警信息,智能控制气体灭火系统的执行机构,从而达到准确无误的控制灭火气体喷洒的目的。
NDW1A 系列万能式断路器 安装使用说明书
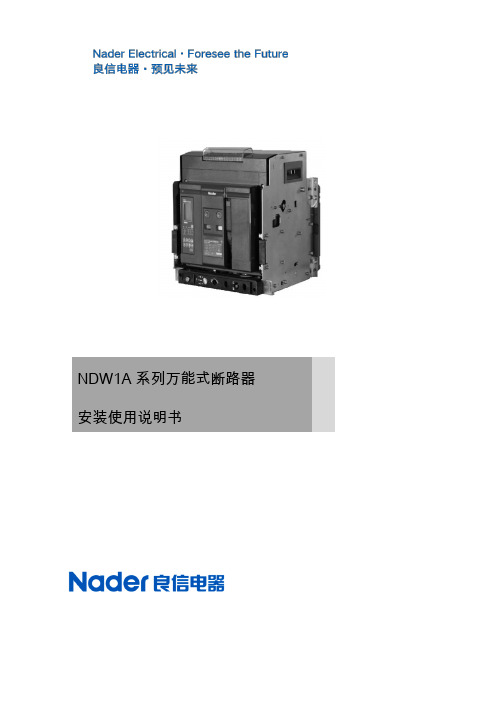
NDW1A系列万能式断路器安装使用说明书目录概述 (3)运行环境及安装条件 (5)拆箱与安装 (9)断路器的操作 (10)控制器的操作 (14)控制器出厂整定值 (14)联锁机构的安装 (14)断路器技术数据一览表 (15)断路器电气线路图 (19)外形及安装尺寸 (28)断路器的检查与维护 (54)附录1:断路器缆绳联锁装置安装说明 (58)附录2:外接互感器安装说明 (62)断路器型号解释及编码规则 (64)日期:20190515版本修订原因/内容实施日期编制人审核人批准人1增加NDW1A-4000壳架(2000A、2500A、3200A、3600A、4000A)20190515 张颖庄秧秧杨玉勇2 1、更新NDW1A-4000壳架抽屉式3200-4000外形尺寸;2、更新各壳架接线图;3、增加信号输出附件信号容量;4、增加备注及排版;5、6300切换为新结构20191227左要国庄秧秧张颖徐小庆杨玉勇概述■用途及适用范围NDW1A系列万能式断路器(以下简称断路器),适用于交流50Hz/60Hz,额定电流200A~6300A、额定绝缘电压1000V、额定工作电压为AC220V/230V/240V、AC380V/400V/415V、AC440V、AC660V/690V的配电网络中,用来分配电能和保护线路及电源设备免受过载、欠电压、短路、单相接地等故障的危害。
同时也可以作为隔离开关使用。
断路器具有多种保护功能,可做到高精确的选择性保护,避免不必要的停电,提高供电系统可靠性、安全性。
NDW1A系列(GD)产品适用于-40℃的低温环境,可用于高原地区。
NDW1A系列(TH)产品适用于湿热环境。
产品符合下列标准:GB/T 2423.4-2008 电工电子产品环境试验第2部分:试验方法试验Db:交变湿热(12h+12h循环)GB/T 4207-2003 固体绝缘材料在潮湿条件下相比电痕化指数和耐电痕化指数的测定方法GB/T 14048.1-2012 低压开关设备和控制设备第1部分:总则(IEC 60947-1:2001,MOD) GB/T 14048.2-2008 低压开关设备和控制设备第2部分:低压断路器(IEC 60947-2:2006,IDT) GB/T 14048.5-2008 低压开关设备和控制设备第5-1部分:控制电路电器和开关元件机电式控制电路电器(IEC 60947-5-1:2003,MOD)GB/T 14092.3-2009 机械产品环境条件高海拔GB/T 19608.3-2004 特殊环境条件分级_第3部分:高原GB/T 20645-2006 特殊环境条件高原用低压电器技术要求GB/T 20626.3-2006 特殊环境条件高原电子产品_第三部分雷电污秽凝露的防护■型号及规格ND W 1A- 20C 20 / 3/KY控制器类型:见注1极数:3-3极;4-4极;5-3P+N额定电流:见注2安装结构:固定式不标;抽屉式-C壳架等级额定电流“1”设计代号,“A”改进型万能式断路器“”牌低压电器注1:控制器类型: KM- NWK31/NWK21(数码屏)、KY- NWK32/NWK22(液晶屏)注2:额定电流:02-200A、04-400A、06-630A、08-800A、10-1000A、12-1250A、16-1600A、20-2000A、25-2500A、29-2900A、32-3200A、36-3600A、40-4000A、50-5000A、63-6300A;■包装规格识别■结构、指示简介1、复位按钮9、断开、闭合指示2、规格标牌10、铭牌3、断开位置钥匙锁11、“连接”“试验”“分离”位(增选功能)置锁定及解锁装置4、良信标牌12、摇杆工作位置5、断开按钮13、“连接”、“试验”、“分离”6、闭合按钮位置指示器7、计数器(增选功能) 14、摇杆及其存放位置8、释能、贮能指示注:1~10为固定式,1~14为抽屉式。
miele 微波烤箱 操作和安装说明书

操作和安装说明微波烤箱为避免发生事故或损坏电器,请务必在安装和首次使用前仔细阅读这些说明。
Miele奉行“不断超越”的理念,故将保留对说明书作出修改的权利。
zh-CN M.-Nr. 11 417 751内容警告和安全说明 (6)环境保护 (14)电器使用说明书 (15)控制鍵 (16)On/Off(开启/关闭)感应控制键 (17)显示屏 (17)感应控制键 (17)符号 (19)使用电器 (20)选择菜单选项 (20)更改列表中的设置 (20)使用分段条更改设置 (20)选择功能或操作模式 (20)输入数字 (20)输入字母 (21)激活 MobileStart (21)特点 (22)铭牌 (22)随机内容 (22)可选配件,可订购 (22)安全性特点 (24)经 PerfectClean 清洁表面处理过的表面 (24)首次使用前 (25)Miele@home (25)基本设置 (26)首次加热烤箱 (27)设置 (28)设置概述 (28)打开“设置”菜单 (30)语言 (30)时间 (30)日期 (30)照明 (30)显示屏 (30)音量 (31)单位 (31)快速微波 (31)爆米花 (32)2内容Booster (32)建议温度 (32)建议设置 (32)通风冷却运行 (32)安全性 (33)Miele@home (33)远程更新 (33)远程控制 (34)激活 MobileStart (34)软件版本 (34)演示程序 (34)出厂设置 (34)分钟提示器 (35)主菜单和子菜单 (36)微波操作 (38)运行方式 (38)合适的餐具 (38)合适的餐具 (38)不合适的餐具 (40)测试餐具 (40)盖板 (41)操作 (42)更改烹饪程序的数值和设置 (42)更改温度 (42)更改微波功率级别 (43)设置烹饪持续时间 (43)更改设定的烹饪持续时间 (43)删除设定的烹饪持续时间 (44)中断微波 功能中的某个烹饪程序 (44)取消烹饪程序 (44)预热烤箱内腔 (44)Booster (45)预热 (45)快速微波和爆米花 (46)自动程序 (47)类别 (47)使用自动程序 (47)便利提示 (47)3内容其他应用 (48)解冻 (48)翻热 (50)烘干 (52)预热餐具 (53)保温 (53)烹饪 (54)冷冻食物/即食食品 (56)用户偏好程序 (57)烘焙 (59)烘焙提示 (59)烹饪图表上的注释 (59)功能注释 (59)烘烤 (60)烘烤提示 (60)烹饪图表上的注释 (60)功能注释 (60)烧烤 (62)烧烤提示 (62)烹饪图表上的注释 (62)功能注释 (63)清洁与保养 (64)不适用的清洁剂 (64)去除正常污渍 (65)去除顽固污渍 (65)调低烧烤元件 (66)故障排除指南 (67)服务 (71)若发生故障,请联系我们 (71)保修 (71)安装 (72)安装尺寸 (72)安装在高柜或基座中 (72)侧视图 (73)接线和通风 (74)安装烤箱 (75)电气连接 (75)4内容烹饪图表 (76)面糊 (76)油酥松饼 (77)发酵面团 (78)夸克面团 (78)海绵蛋糕混合物 (79)泡芙面团、千层酥皮、蛋白饼 (79)开胃菜 (80)牛肉 (81)小牛肉 (81)猪肉 (82)羊肉,野味 (83)家禽,鱼类 (84)产品标准 (85)有害物质 (86)5警告和安全说明正确使用此烤箱适用于家庭和其他类似环境。
BGK2850 GNSS 一体机 使用安装手册说明书

BGK2850GNSS一体机使用安装手册版本号:Rev.A目录1 概述 (1)2 系统组成 (1)2.1 基准点及测点 (1)2.2 解算站 (2)2.3 供电电源 (2)2.3.1交流220V供电 (2)2.3.2太阳能供电 (2)3 设备安装与使用 (3)3.1 设备选址 (3)3.1.1 测点选址 (3)3.1.2 基准点选址 (3)3.2 设备安装 (3)3.3 测点的防护 (4)3.4 设备配置 (4)3.4.1 数据中心配置 (4)3.4.2 工作模式设置 (5)3.4.3 路由设置 (6)3.5 工作指示灯 (6)3.5.1 NET指示灯 (6)3.5.2 SAT指示灯 (6)3.5.3 RTK指示灯 (6)3.6 设备维护 (6)3.6.1 常见故障及排除方法 (6)4 单元及附件配置 (7)5 主要技术参数 (8)1 概述BGK2850型GNSS一体机是一款基于全球卫星导航系统的高精度表面位移测量系统。
其主要功能是通过对GNSS数据的实时解算,实现被测对象三向位移变化量的监测。
该系统适用于大坝、尾矿库、山体滑坡、桥梁、矿山采空区地面沉降等大型建筑的位移及变形等监测场景。
2 系统组成GNSS测量系统主要由基准点、监测点、解算站及云平台组成,系统支持的测点—基准点距离可达5km,每个系统支持的测站数量不限。
2-1 系统组成示意图2.1 基准点及测点基准点(也称为参考点或站)是系统中作为标准的原点,所有测点的水平位移及高程变化均以基准站的相对变化为最终结果,因此基准点应设置在相对稳固的位置。
在系统通讯网络一致的前提下,基准点与测点具有完全相同的物理配置,因此在多数情况下以及实际安装使用中,测点与基准点除了位置不同外,两者在使用上具有互换性。
基准点或测点采用一体化封装方式,内部由GNSS接收机主机、GNSS测量天线、供电装置、保护罩等组成。
2-2 接收机内部封装示意图2.2 解算站解算站负责接收基准点及测点的原始观测卫星数据,并实时解算基准点及测点之间的相对位移量,给云平台提供数据作应用展示。
- 1、下载文档前请自行甄别文档内容的完整性,平台不提供额外的编辑、内容补充、找答案等附加服务。
- 2、"仅部分预览"的文档,不可在线预览部分如存在完整性等问题,可反馈申请退款(可完整预览的文档不适用该条件!)。
- 3、如文档侵犯您的权益,请联系客服反馈,我们会尽快为您处理(人工客服工作时间:9:00-18:30)。
2 编辑指纹、3 编辑卡,上下翻选择新增的密钥形式
按“#”键确认, 再选择“增加密码、指
纹、卡”, 按“#”键确认,根据屏幕提示,配置相应的密钥,按“#”键确认,确认成功后按“*”
键退出菜单,如果想输入多个密匙,重复以上操作即可。(如 2.1.1 用户密匙设定) 2.删除密匙的操作方法:在按键面板上输入“0#”,屏幕显示“请输入管理密码(指纹)授权”, 输
用 户 管 理 由 用 户 自 主 管 理 ,管 理 员 、主 人 、客 人 、孩 子 、 用户管理
保 姆 、 钟 点 工 、 临 时 工 。 用 户 数 量 可 设 置 99 个 用 户 。
由管理员限制其它用户时用户和更改用户性质(客人或
6
用户权限
孩子),在设置的有效时间段、周期内可进行开锁。
7
开锁认证 可 支 持 单 验 证 模 式 、 双 秘 钥 验 证 、 双 用 户 验 证 开 锁 。
使用安装说明书
感谢您购买本产品
使用本产品前敬请仔细阅读本说明书 请妥善保管本说明书,以便今后参考
一、智能防盗锁示意图(具体实物为准)
二、技术参数
供应电源 静态电流 动态电流 驱动输出 驱动能力 报警电压 工作温度 储存温度 储存时间 指纹更改 指纹数量 工作湿度 抗静电
4 节 2 串 2 并,7.0V5AH 锂电池 18650 锂电池
指纹修改成功。
2.2 智能防盗锁用户管理操作:主要包括添加用户功能和对已存在的用户进行管理功能 2.2.1 添加用户功能
在按键面板上输入“0#”,屏幕显示“请输入管理密码(指纹)授权”, 输入管理密钥“如
0123456789”, 最后按“#”键确认,进入主菜单页面, 按“#”键进入“用户管理”, 按
“更
改权限的操作方法”。
2.4 系统设置
2.4.1 智能防盗锁系统设置功能包括:用户管理、锁模式、权限设置、音量调节、时间设置、开锁记录、锁
信息、恢复出厂设置八种功能。
2.4.1.1 开锁模式功能:主要是针对门锁的开锁方式和开锁的安全级别进行设置
设置开锁模式的操作方法:在按键面板上输入“0#”,屏幕显示“请输入管理密码(指纹)授权” 输
显示“请输入指纹”,把手指正放在指纹头上,屏幕显示“请放开手指”反复三次,屏幕显示“指纹配置
成功”。
3.编辑卡:下翻至 3 编辑卡, 按“#”键确认,选择新增卡,按“#”键确认,屏幕显示“请在读
卡感应区域放置卡片”,按提示操作后,屏幕显示“此卡配置成功” 2.1.2 更改管理密匙的操作方法:
1.修改管理密码:在按键面板上输入“0#”,屏幕显示“请输入管理密码(指纹)授权”, 输
户管理”, 下翻选择非管理用户“张某某(主)”, 按“#”键确认进,下翻,在“张某某(主)”
选择“更改权限”, 按“#”键确认进,在进入“更改权限”菜单中后,屏幕会显示“主人、客人、
孩子、保姆、钟点工、临时工”,再选择你想要更改成为的权限,如“孩子”, 按“#”键确认,确
认成功后屏幕会显示“设置成功”,这时再连续按 “*”键,退至“主菜单栏”, 然后左右翻选择
按 “ 0+# ” 进 入 主 菜 单 栏 系 统 管 理 界 面 , 初 始 状 态 下 直 接进入主菜单栏。
密 码 由 用 户 管 理 , 可 保 存 20 组 6-10 位 密 码 , 初 始 化 后 将删除全部存入密码。 指 纹 由 用 户 自 主 管 理 ,可 保 存 九 十 九 枚 指 纹 ,初 始 化 将 删 除全部录入指纹。
2.2.2.1 密匙管理功能 密匙管理功能包括:增加密匙、密匙修改和删除密匙(普通密钥无法修改)
1.增加密匙的操作方法:在按键面板上输入“0#”,屏幕显示“请输入管理密码(指纹)授权” 输 入管理密钥“如 0123456789”, 最后按“#”键确认,进入主菜单界面, 按“#”键进入“用
户管理”, 选择非管理用户如“张某某”, 按“#”键确认进,在“张某某”选择 1 编辑密码、
用户,比如“张某某”,确认进去之后,选择编辑指纹,或者编辑卡就可以了。)
2.2.2.2 更改权限功能包括:将主人权限更改为客人、孩子、保姆、钟点工、临时工,并设置在一定周期内的 某些有效时间段可进行开锁。
更改权限的操作方法:在按键面板上输入“0#”,屏幕显示“请输入管理密码(指纹)授权”, 输
入管理密钥“如 0123456789”, 最后按“#”键确认,进入主菜单界面, 按“#”键进入“用
入管理密钥“如 0123456789”, 最后按“#”键确认,进入用户管理界面, 按“#”键进入“用
户管理”, “用户管理”里面选择“管理员”, 按“#”键确认,屏幕显示“修改管理密码/修改
管理指纹”,按提示操作,
输入原密码,输入完全正确的原始密码后,屏幕显示“请输入新密码” 输
入新密码之后, 屏幕提示“请再次输入新密码”反复输入两次后屏幕显示“密码修改成功!”
“权限设置”, 按“#”键确认,进入菜单后,根据之前已经更改好的权限“孩子”,选择“孩子权
限”, 按“#”键确认,然后根据实际情况设置“起始日期”、“结束日期”、“开门时段”和“循
环周期”, 最后按“#”键确认,确认成功后屏幕会显示“设置成功”,完成设置后, 按“*”
退出。(数字输入与 2.4.2 项,时间调整的输入方式一样)
操作。(添加用户见 2.2.1)
1.编辑密码:上下翻,选择编辑密码, 输入一组由 6-10 个数字组成的密码,如“111111”屏幕
显示“请再次输入密码”,
再次输入“111111”,两次输入之后,屏幕显示“密码配置成功”。
2.编辑指纹:下翻至 2 编辑指纹, 按“#”键确认,选择新增指纹, 按“#”键确认,屏幕
三、功能键说明
上翻
左
右
返回
下翻
确认
1. 当进入“主菜单栏”时,数字 4、6、*、#键背光灯点亮, 4 为左键,6 为右键,*为返回键,#为确 认键。当进入其它操作页面时数字 2、8、*、#键背光灯点亮,2 为上键,8 为下键。 2. 当进入添加密钥输入状态时,所有数字背光灯点亮,为数字密码按键。 3. 进入“主菜单栏”方式 3.1 锁处于出厂状态下,触摸面板数字键至系统上电,直接输入“0#”,然后输入初始管理密码“0123456789” 进入主菜单栏界面。 3.2 锁内己添加有用户状态下,须先在按键面板输入“0#”,屏幕显示“请输入管理密码(指纹)授权” 再 输入“管理员密钥(指纹锁)”, 最后按“#”键确认,方可进入主菜单栏界面。
12
攻击保护
3 分钟,系统进入锁定状态此时不能进行解锁。
13
低压报警 电池不足时开锁后会有语音提示电量过低。
14
记录查询 可提供最近的 200 条开锁操作记录。
15
电量显示 具有电量显示功能,显示当前状态电量值。
开 锁 密 码 可 随 意 输 入 20 位 以 内 密 码 ,只 要 连 续 输 入 包 含
四、指纹的使用方法
注意事项:
指纹采集窗灯亮时,请按上述正确方法将手指放在指纹采集窗上,按系统提示,采集 3 次,以保证指纹采 集的完整度。
五、智能防盗锁使用说明
1.功能说明
序号 1 2 3 4
5
功能 菜单显示 系统管理
密码管理 指纹管理
功能说明 采 用 OLED0.96 显 示 屏 , 分 级 管 理 菜 单 式 显 示 模 式
入管理密钥“如 0123456789”, 最后按“#”键确认,进入主菜单界面, 在主菜单界面中选择
“锁模式”,按“#”键确定,这时屏幕会显示:“安全模式、语言选择、动态密码”, 选择“安全
模式”,按“#”键确定,这时屏幕会显示:“单验证模式、双秘钥验证、双用户验证”, 最后根据
实际情况选择门锁的开锁方式, 如“单验证模式”,按“#”键确认,即屏幕显示“已进入单验证模
16
乱码功能
有正确的密码即可开门;有效防止他人旁观窃取密码。
电池电压不足驱动电机时,可用外接电源供电应急开门
17
应急开门
或者机械钥匙应急开门。
18 双 电 源 供 电 支 持 两 路 电 源 同 时 供 电 。
可设置锁为常开模式,下压把手可直接开锁;用有效密
19
常开设置 码或指纹开锁解除常开设置。
2.功能操作说明
2.2.2.3 删除用户功能:将无用的用户精确的删除
删除用户的操作方法:在按键面板上输入“0#”,屏幕显示“请输入管理密码(指纹)授权”, 输
入管理密钥“如 0123456789”, 最后按“#”键确认,进入主菜单界面, 按“#”键进入“用
户管理”, 下翻选择非管理用户“张某某(主)”, 按“#”键确认进,在用户“张某某(主)”
≤60uA ≤500mA 电机
无任何工作状态下 显示0mA
驱动输出时的最大电流
≤ 6.7V
符合国标(80%±5%)
-25℃ ~ +55℃
-25℃ ~ +55℃
大于 10 年
100000 次
99 枚
5~95%RH(无结露)
空气放电 15KV,接触放电 8KV
8
锁信息
查 询 本 锁 的 ID 号 。
9
系统初始化 长按初始化键或直接在面板上设置恢复系统出厂设置。
10
时间设置 系统具有时间记忆,为开锁操作提供时间依据,可根据
当前时间信息进行调整
11
语音提示 不同的操 作有语音导航 提示,可调节音 量大小及静音 。
连续输入 3 次错误密码或 5 次错误指纹,系统自动锁死
入管理密钥“如 0123456789”, 按“#”键确认,进入主菜单界面, 按“#”键进入“用户管
理”, 选择非管理用户“张某某”, 按“#”键确认进,在“张某某”选择编辑密码, 按
“#”键确认, 再选择“如密码 12****56”, 按“#”键确认, 屏幕弹出“是否删除当前
