CHECK POINT操作手册文档v1.0
中国移动Checkpoint防火墙安全配置手册V0.1.doc
密级:文档编号:项目代号:中国移动Checkpoint防火墙安全配置手册Version *.*中国移动通信有限公司二零零四年十一月拟制: 审核: 批准: 会签: 标准化:Firewall 版本控制分发控制目录1 综述 (5)2 Checkpoint的几种典型配置 (6)2.1 checkpoint 初始化配置过程: (6)2.2 Checkpoint Firewall-1 GUI安装 (13)2.3 Checkpoint NG的对象定义和策略配置 (18)3 Checkpoint防火墙自身加固 (34)1综述本配置手册介绍了Checkpoint防火墙的几种典型的配置场景,以加强防火墙对网络的安全防护作用。
同时也提供了Checkpoint防火墙自身的安全加固建议,防止针对防火墙的直接攻击。
通用和共性的有关防火墙管理、技术、配置方面的内容,请参照《中国移动防火墙安全规范》。
2Checkpoint的几种典型配置2.1 checkpoint 初始化配置过程:在安装完Checkpoint软件之后,需要在命令行使用cpconfig命令来完成Checkpoint的配置。
如下图所示,SSH连接到防火墙,在命令行中输入以下命令:IP350[admin]# cpconfigWelcome to Check Point Configuration Program=================================================Please read the following license agreement.Hit 'ENTER' to continue...(显示Checkpoint License版权信息,敲回车继续,敲q可直接跳过该License提示信息)Do you accept all the terms of this license agreement (y/n) ?y(输入y同意该版权声明)Which Module would you like to install ?-------------------------------------------(1) VPN-1 & FireWall-1 Enterprise Primary Management and Enforcement Module(2) VPN-1 & FireWall-1 Enforcement Module(3) VPN-1 & FireWall-1 Enterprise Primary ManagementCheckpoint Firewall-1/VPN-1支持多种安装模式,Firewall-1/VPN-1主要包括三个模块:GUI:用户看到的图形化界面,用于配置安全策略,上面并不存储任何防火墙安全策略和对象,安装于一台PC机上;Management:存储为防火墙定义的各种安全策略和对象;Enforcement Module:起过滤数据包作用的过滤模块,它只与Managerment通信,其上的安全策略由管理模块下载;以上三个选项中如果Management与Enforcement Module安装于同一台设备上,则选择(1),如果Management与Enforcement Module分别安装于不同的设备上,则选择(2)或(3)。
Check Point教程
Check point防火墙基本操作手册CheckPoint(中国)TEL:(86)10 8419 3348 FAX:(86)10 8419 3399©2010 Check Point Software Technologies Ltd. All rights reserved.Classification:目录目录 (2)防火墙架构 (3)防火墙的Web管理 (3)配置IP: (4)配置DNS和Host: (5)配置路由: (5)通过防火墙的管理客户端管理 (5)添加防火墙 (7)添加策略步骤 (10)IP节点添加 (10)添加网段 (11)IPS的配置 (13)更新IPS库 (14)新建IPS动作库 (14)应用控制 (16)更新数据库 (16)添加应用控制策略 (17)App Wike (18)自定义添加应用 (18)QOS配置 (20)Qos策略的添加 (20)日志工具的使用 (20)筛选日志 (21)临时拦截可以连接 (22)©2010 Check Point Software Technologies Ltd. All rights reserved.Classification:©2010 Check Point Software Technologies Ltd. All rights reserved.Classification:防火墙架构Check point 防火墙的管理是通过一个三层架构来实现的。
首先我们可以在任意的机器上安装防火墙客户端控制台,然后利用控制台的图形化界面登录check point 的管理服务器,定义出各个网络对象,定义企业各条策略,最后下发到防火墙执行模块。
具体实现过程见图示:防火墙的Web 管理首先打开Web 管理界面,出现登录界面:登陆后的界面设备的Web界面只能配置设备的IP地址,网关,DNS和路由。
还可以针对设备的事件,SNMP监控,代理等信息。
checkpoint用户手册

checkpoint⽤户⼿册Check Point UTM-1⽤户⼿册第⼀章使⽤向导 (3)⼀、从配置UTM开始 (3)1、登陆UTM (3)2、配置⽹卡 (3)3、配置路由 (4)4、配置主机名 (5)5、调整时间 (5)⼆、步骤1-配置之前......⼀些有⽤的术语 (6)三、步骤2-安装和配置 (7)四、步骤3-第⼀次登录到SmartCenter服务器 (8)五、步骤4-在安全策略定义之前 (10)六、步骤5-为安全策略定义规则 (15)七、步骤6-来源和⽬的 (16)第⼆章策略管理 (16)⼀、有效的策略管理⼯具需要 (17)⼆、CheckPoint管理策略的解决⽅案 (17)1、策略管理概况 (17)2、策略集 (18)3、规则分节标题 (20)4、查询和排列规则以及对象 (20)三、策略管理需要注意的问题 (21)四、策略管理配置 (21)第三章SmartView Tracker (24)⼀、跟踪的需求 (25)⼆、CheckPoint对跟踪的解决⽅案 (25)1、跟踪概况 (25)2、SmartView Tracker (26)3、过滤 (27)4、查询 (28)5、通过⽇志切换维护⽇志⽂件 (28)6.通过循环⽇志来管理⽇志空间 (28)7、⽇志导出功能 (29)8、本地⽇志 (29)9、使⽤⽇志服务器记录⽇志 (29)10、⾼级跟踪操作 (29)三、跟踪需要考虑的问题 (30)四、跟踪配置 (31)1、基本跟踪配置 (31)2、SmartView的查看选项 (31)3、配置过滤器 (32)4、配置查询 (32)5、维护 (33)6、本地⽇志 (34)7、使⽤⽇志服务器 (34)8、⾃定义命令 (35)9、阻断⼊侵 (36)10、配置报警命令 (36)第⼀章使⽤向导⼀、从配置UTM开始1、登陆UTM2、配置⽹卡3、配置路由4、配置主机名5、调整时间⼆、步骤1-配置之前……⼀些有⽤的术语这⾥介绍⼀些有助于理解本章内容的相关信息。
CheckPoint防火墙操作手册
CheckPoint防火操作手册1 配置主机对象定义防火墙策略时,如需对I P 地址进行安全策略控制则需首先配置这个对象,下面介绍主机对象配置步骤,在“Network Objects”图标处,选择“Nodes”属性上点击右键,选择“Node”,点击“Host”选项,定义主机对象的名称,IP Address属性,同时可按照该主机的重要性定义颜色,配置完成后点击OK,主机对象创建完成。
2 配置网段对象定义防火墙策略时,如需对网段进行安全策略控制则需首先配置这个网络对象,配置步骤如下,在防火墙“Network”属性上点击右键,选择“Network”,选项,定义网段名称,比如DMZ,Internal,建议根据网段所处位置定义,配置网段地址和子网掩码,如有必要可以添加注释(Comment),配置完成后点击确认。
3 配置网络组对象如果需要针对单个I P 地址、IP 地址范围或者整个网段进行安全策略控制,可以将这些对象添加到网络组,如下在防火墙“Group”属性上点击右键,选择“Simple Group”选项,成后点击O K 即可4 配置地址范围对象除了配置I P 地址,网段,也可以指定地址范围(IP range),地址范围对象配置步骤是,如下在防火墙“Network”属性上点击右键,选择去掉“Do not show empty folders”选项,让I P Range 配置属性显示出来。
配置“Address Rage”,选择“Address Ranges”,如下图输入地址名称、起始IP地址与结束IP地址,完成后点击OK即可。
5 配置服务对象5.1 配置T CP 服务对象Check Point 防火墙内置了预定义的近千种服务,包括T CP、UDP、RPC、ICMP 等各种类型服务,通常在定义防火墙安全策略时,大多数服务已经识别并内置,因此无需额外添加,但也有很多企业自有开发程序使用特殊端口需要自行定义,下面介绍如何自定义服务,如下图所示,点击第二个模块标签,即S ervices,已经预定义多种类型服务,用户根据需要自定义新的服务类型,下面举例定义T CP 类型服务,右键点击“TCP”,选择“New TCP如下图,可以点以单个TCP服务端口服务对象,如果是一段端口,可以定义端口范围以上举例新建T CP 协议的端口服务,如需定义U DP 协议或其他协议类型按照同样流程操作即可。
Checkpoint 1 登录指南说明书
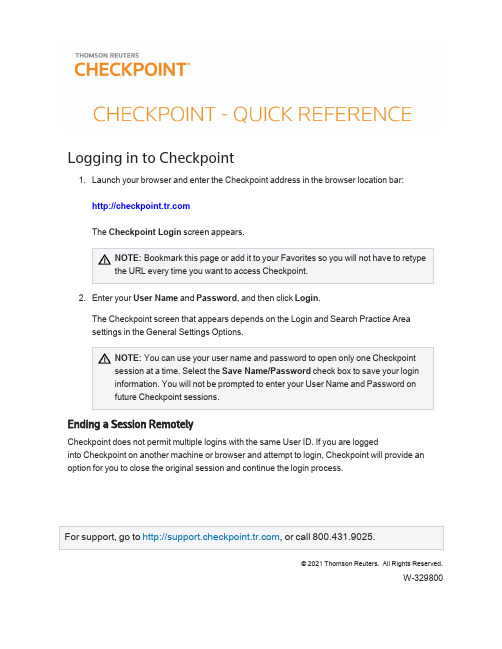
Logging in to Checkpointunch your browser and enter the Checkpoint address in the browser location bar:The Checkpoint Login screen appears.NOTE:Bookmark this page or add it to your Favorites so you will not have to retypethe URL every time you want to access Checkpoint.2.Enter your User Name and Password,and then click Login.The Checkpoint screen that appears depends on the Login and Search Practice Areasettings in the General Settings Options.NOTE:You can use your user name and password to open only one Checkpointsession at a time.Select the Save Name/Password check box to save your logininformation.You will not be prompted to enter your User Name and Password onfuture Checkpoint sessions.Ending a Session RemotelyCheckpoint does not permit multiple logins with the same User ID.If you are loggedinto Checkpoint on another machine or browser and attempt to login,Checkpoint will provide an option for you to close the original session and continue the login process.©2021Thomson Reuters. All Rights Reserved.W-329800U SING THE H OME S CREENCheckpoint -Quick Reference -2Using the Home ScreenThe Home screen provides quick links to Checkpoint tools and documents,access to current news of interest to Checkpoint subscribers,updates related to Checkpoint features and content,and easy access to training and support.You can change the contentandcustomize the features as needed.Choose from several Home screen views that organize content by practice area.Eachview's layout and content can be modified to match your preferences.Create your ownview consisting of selected content panes.My Quick Links provides quick access to frequently used areas of Checkpoint.You can tailor My Quick Links to your specific needs by modifying the list to reflect your areas of interest and frequent use.The Support &Product Training links make it easy to access instructor-led and self-study product training,user guides and other reference materials,support and trainingU SING THE H OME S CREENCheckpoint -Quick Reference -3news,support contact information and Checkpoint user options.Keep up-to-date with news and product developments.Consult Today's Headlines forlinks to current news.Review New in My Subscription to learn about new features and enhancements specific to your version of Checkpoint.Use Home screen features to display the results of Scheduled Searches ,ongoingcitation tracking (Track It)and proposed legislation being followed (Follow It).Enter your keyword in the Quick Search box and click Search to perform a keywordsearch.You can perform a keyword search in two ways:Intuitive Search recognizesquestions,common phrases,connectors,or citations,and interprets your queryaccordingly to retrieve the most relevant results,including relevant variations.Terms &Connectors will limit your search to the exact words you typed,without any variations.The search AutoComplete feature will suggest keywords as you type in the field.You can also perform a Quick Search on a predefined source set you create by selecting from the Choose Source Set drop-down list.U SING THE S EARCH S CREENCheckpoint -Quick Reference -4Using the Search ScreenThe Search screen provides a launch point from which to perform keyword searches on selected sources in several practice e the left navigation bar to access customized search templates andtoolsbased on the practice area.Select a practice area to use sources and search tools specific to an area of research.Practice areas include Federal ,State &Local ,Estate Planning ,Pension &Benefits ,International Tax ,International Trade ,Payroll ,and Accting,Audit &Corp Finance .To perform a keyword search enter search terms,select the sources to search,andthen click the Search icon.You can perform a keyword search in two ways:IntuitiveSearch recognizes questions,common phrases,connectors,or citations,and interprets your query accordingly to retrieve the most relevant results,including relevant variations.Terms &Connectors will limit your search to the exact words you typed,without anyU SING S EARCH C ONNECTORSCheckpoint -Quick Reference -5variations.The search AutoComplete feature will suggest keywords as you type in thefield.Open the Thesaurus/Query Tool to enhance your keywords with such features as aspell checker,a thesaurus of alternative terms,a list of connector symbols,andpreviously used keyword combinations.Select a search template to perform a search by filling in requested information.Forexample,use Find by Citation to request a code section from an official documentation source.Using Search ConnectorsUsing Connectors in Intuitive SearchIf the Terms &Connectors search method is selected,the AND,SPACE,or &connectors can all be used to require more than one term in each of the documents of your search results.However,if Intuitive Search is left as the default search method,Checkpoint will read the word "AND"and any SPACE as it would any other word used in your query.Although the most relevant documents are likely to have all words used,you may get results that have only most of the words.U SING S EARCH C ONNECTORSAlso,when using the Intuitive Search method,the use of quotations to search for a phrase will find the most relevant documents that include the exact phrase and relevant variations that contain the keywords within3words of one another.Checkpoint-Quick Reference-6U SING THE D OCUMENT S CREENCheckpoint -Quick Reference -7Using the Document ScreenThe Document screen provides the format for viewing and managing Checkpoint documents,with various tools and features for navigating,saving,printing,sharing,exporting,adding notes,and flagging the content.You can also highlight document text and savethehighlighted text as a note.Within a document,you can use the Context Panel on the right to take advantage ofadditional navigation and features.The available tabs listed in the Context Panel willdepend on the document displayed and how you arrived at that document (by Keyword or Table of Contents).Document tools include Print,Export,E-mail,Save,Open in New Window,Selected Text Option,Show Permalinks,Full Screen,Document Display Options,Flag this document,Add Note,and Reset view.Use the Navigate by field and arrow buttons to advance to the next Best result orDocument found by your search,the next document listed in the Table of Contents ,or the next occurrence of a Keyword .Keyword occurrences appear with yellow highlighting throughout the open document.Use the top line and side line link buttons that appear across the top of a document orembedded within the document to link to related documents in the Links section of the Context Panel .U SING THE T ABLE OF C ONTENTS S CREENCheckpoint -Quick Reference -8Using the Table of Contents ScreenThe Table of Contents screen,accessed from the menu bar on Checkpoint,provides access to all of the sources available to you through your subscription.Content is organized hierarchically into broad practice area categories.You can drilldown through levels of content to find individual documents.Click the "+"symbol next to a title to view its contents,or click the title name toU SING THE N EWS S CREENCheckpoint -Quick Reference -9Using the News ScreenThe News screen provides the latest news updates in the areas of tax,audit,accounting,trade,corporate finance,and employee benefits.Most of the news services provide access to earlier editions and e-mail delivery options.Headlines,summaries,or opening paragraphs are generally provided for each news article.In some news sources,the headline is a link to the full article.In others,a"document"symbol at the end of the paragraph links you to the full article.Select from news sources included in your Checkpoint subscription.Available newssources may include (depending on your subscription)Checkpoint Daily Updates ,L EGENDCheckpoint -Quick Reference -10News &Insight ,Accounting & Compliance Alert ,PPC's Daily Update ,IBFD Tax News Service ,Willis Towers Watson ,EBIA Weekly ,AAEI International Trade Alert ,TR Global Indirect Tax Update ,and EY Tax News .Click a date on the Date drop-down list,if available,to access earlier editions.Document tools let you print,export,e-mail,and manage the news content.Advance to a section of the news update by selecting the section title from the Outline on the left navigation bar.Click Set Display/E-mail Preferences and arrange to receive any of your subscribed news updates by e-mail.Options include receiving a Daily Update version or a Weekly Update (or Complete Newsletter)version offered on a less frequent schedule.This option is not available for all news sources.Click Checkpoint Weekly Updates to view all articlesfrom (depending on yoursubscription)the Federal Tax,State &Local Tax,Estate Planning,Pension &Benefits,and Payroll Updates for the most recently completed week (Monday through Friday).LegendL EGENDCheckpoint-Quick Reference-11。
Checkpoint安装手册介绍

Full Disk Encryption安装手册Checkpoint Endpoint R73CheckPoint(中国)TEL:(86)10 8419 3348FAX:(86)10 8419 3399文档修订记录文档说明此文档是由以色列捷邦安全软件科技公司于2010年05月制定的内部文档。
本文档仅就CheckPoint内部与相关合作伙伴和CheckPoint最终用户使用。
版权说明本文档中出现的任何文字叙述、文档格式、插图、照片、方法、代码等内容,除由特别注明,版权均属于以色列捷邦安全软件科技公司所有,受到有关产权及版权法保护。
任何个人、机构未经以色列捷邦安全软件科技公司的书面授权许可,不得以任何方式复制或引用本文档的任何片断。
目录一、环境要求 (4)二、安装步骤 (4)2.1服务器安装 (4)2.2FDE客户端安装步骤 (19)一、环境要求以下介绍安装Endpoint R73 FDE所需的环境要求:1.安装在域环境中进行。
2.准备一台win2000或win2003server,配置如下:操作系统中文版(英文版均可):Windows Server 2003 Standard Edition with Service Pack 1 and 2Windows Server 2003 Enterprise Edition with Service Pack 1 and 2Windows Server 2003 R2 Standard Edition with Service Pack 1 and 2Windows Server 2003 R2 Enterprise Edition with Service Pack 1 and 2Windows Server 2000系统硬件单CPU,2G内存,4G交换空间,CPU可以是下列中的一种:Intel® Xeon® processor (Dual Core)Intel® Core™ Duo processor T2600 - T2300Intel® Pentium® processor Extreme Edition 965 (Dual Core)Intel® Pentium® D processor 960 (Dual Core)I ntel® Pentium® 4 processor with Hyper-Threading TechnologyDual-Core AMD Opteron ProcessorAMD Opteron ProcessorAMD Athlon 64 FX ProcessorAMD Athlon™ 64 X2 Dual-Core3.Server的Fremwork必须为.NET2.0以上版本4.Server 必须加入域5.准备安装光盘:Check_Point_R73_server_for_Windows.isoCheck_Point_R73_client_for_Windows.iso二、安装步骤以下介绍FDE的服务器安装步骤以及客户端的安装步骤2.1服务器安装1.首先将FDE Server加入本地域,右键桌面我的电脑图标,选择属性,进入计算机名栏如下图所示:这时的DNS需要使用本地的DNS服务器)点击确定按钮输入域管理员帐号与密码,点确定按钮,重启服务器,使用域管理员权限登录服务器。
Check Point UTM-1 2050实施文档_V1.0

Check Point UTM-1 2050实施文档Matthew.Lee2014-5目录第一章、网络拓扑及相关网络信息的确定 (2)第二章、系统初始化 (3)第三章、管理控制台Smartconsole的安装及基本操作 (7)第四章、Check Point的策略管理设置 (17)第五章、NAT设置 (19)第六章、SmartDefense配置 (22)第七章、LDAP的配置 (26)第八章、MSN上网认证配置。
(37)第一章、网络拓扑及相关网络信息的确定1、改造后的链路出口拓扑图第二章、系统初始化一、UTM-1系统的恢复出厂设置。
在启动UTM-1,系统会弹出选择框,这里可以选择恢复出场设置。
对系统进行恢复出厂设置。
二、Check Point产品初始化1、待系统重启后,进入到引导菜单,我们选择Start in normal mode。
2、OK,现在系统成功启动,输入默认的用户名及密码,都为admin,在首次登陆时系统要求必需更改密码及用户名,密码要符合复杂性要求,用户名可设为默认admin。
3、正确修改用户名及密码后登陆到系统的normal模式,运行sysconfig,完成基本配置并开始产品的安装。
4、选择n开始网络信息的配置,5、选择3设定DNS服务器。
6、选择4开始网络接口的配置,internal为192.168.0.244,external为121.34.250.130,Lan1为192.168.3.1。
7、选择n,开始时间与日期的设置8、选择n,开始下一步配置,可通过TFTP从第三方服务器上进行远程安装(忽略此选项,我们从光盘进行本地安装)9、在命令行模式输入CPconfig,选择3进入GUI Clients管理,10、选择可以管理Checkpoint UTM-1 2050的GUI Clients,并按ctrl+D结束。
11、至此完成Check Point产品的初始化,reboot系统后就可开始相关配置了。
11.CheckPoint 防火墙管理中心高可用性操作手册
C h e c k P o i n t防火墙管理中心高可用性操作手册广州中软信息技术有限公司目录1. 管理中心高可用性概述 (3)2. 管理中心高可用性解决方案 (4)2.1. 备份管理中心服务器 (4)2.2. 管理中心高可用性部署 (5)2.3. 管理中心备份信息 (6)2.4. 管理中心同步模式 (6)2.5. 管理中心同步状态 (7)2.6. 改变管理中心状态 (8)2.7. 高可用性注意事项 (8)3. 管理中心高可用性配置 (10)3.1. 安装与同步备份管理中心 (10)3.2. 改变管理中心状态 (12)3.3. 管理中心同步方式 (13)1.管理中心高可用性概述CheckPoint管理中心SmartCenter由几个独立的数据库组成,分别存储了用户定义的网络对象、用户对象以及安全策略等信息。
系统管理员修改了这些数据库中的信息后,管理中心服务器会把修改后的信息发布到SVN产品的各个相关组件进行执行,因此,做好管理中心数据的备份是很重要的。
备份了管理中心的数据后,在管理中心服务器失效时可以保证这些重要的数据不会丢失。
另外,如果管理中心服务器由于维护的目的需要停机,备份管理中心服务器就可以代替活动的管理中心服务器进行各种处理。
例如,执行模块就可以从备份管理中心服务器获得安全策略和传递CRL以及传达其它信息等。
2.管理中心高可用性解决方案2.1. 备份管理中心服务器实现管理中心的高可用性,那么活动的管理中心服务器就总有一个或多个的备份管理中心服务器处于备份状态,准备随时从活动的管理中心服务器接替管理中心的任务。
备份的管理中心服务器必须和活动的管理中心服务器具有相同的操作系统(例如:Windows NT、Window 2000),操作系统的版本可以不相同。
备份管理中心服务器的存在可以起到两方面的作用:备份活动管理中心――企业防火墙的各种不同数据库和信息,例如网络对象数据库、用户对象数据库、安全策略数据库以及ICA文件等都会存储到备份的管理中心服务器,并且备份管理中心服务器可以同主管理中心服务器进行同步,以便保证保存信息的一直。
- 1、下载文档前请自行甄别文档内容的完整性,平台不提供额外的编辑、内容补充、找答案等附加服务。
- 2、"仅部分预览"的文档,不可在线预览部分如存在完整性等问题,可反馈申请退款(可完整预览的文档不适用该条件!)。
- 3、如文档侵犯您的权益,请联系客服反馈,我们会尽快为您处理(人工客服工作时间:9:00-18:30)。
天诚世纪网络科技有限公司网络安全事业部Checkpoint操作手册文档
目录
●Smart Dashboard (3)
●SmartView Tracker (7)
●SmartView monitor (9)
●Checkpoint网关gateway模式 (11)
●PPPOE拨号 (16)
●checkpoint桥接bridge模式 (19)
●ISP双链路接入配置 (21)
●NAT地址转换 (28)
●SSL VPN (31)
●Site-to-site 预共享密码vpn (38)
●Site-to-site 证书vpn (cp270与edge/safe@office) (42)
●RemoteAccess vpn (48)
●IPS (52)
Smart Dashboard
1.登录smart center
2.功能介绍
Checkpoint属性
更新网络拓扑
Nodes对象
网段Network
开启NAT功能
配置完任何firewall防火墙规则,都需要安装策略,否则规则不会生效
1.Smartview tracker 登录
2.功能界面介绍
Network&endpoint:记录网络安全日志
Management:记录操作checkpoint日志
●SmartView monitor
1.登录smartview monitor
2.界面介绍
Traffic---Top services
Traffic---Top Interfaces
Traffic---Top soures
1.网络拓扑图
2.配置步骤:
1)登录SmartDashboard
2)新建网段对象
将192.168.200.0定义为内网网段inside192.168.200.0
将192.168.1.0定义为公网网段outside192.168.1.0
3)开启NAT功能
双击inside192.168.200.0,到NAT,将add automatic address translation打上钩,确定
4)建立防火墙规则
防火墙firewall建立规则,允许源地址到目标地址任何服务
5)安装规则
运行install policies
6)客户端配置
PPPOE拨号
1.在checkpoint的console口命令行中,增加下面语法
[Expert@cp]# mknod /dev/ppp c 108 0 (重启设备后,这条命令会丢失,需要在启动脚本里增加)
[Expert@cp]# vi $CPDIR/tmp/.CPprofile.csh (在脚本里增加此命令)
在最后增加一行内容是mknod /dev/ppp c 108 0
保存,重启设备
2.web界面新建pppoe拨号
External接口接到moder,internal接到交换机
External接口需要自动获取ip地址(adsl线路是动态,获取到的公网ip地址是动态。
)如果adsl是固定ip,External接口需要手动填写固定ip地址
新建pppoe拨号
拨号成功
注:checkpoint拨号时候要注意,用华为moder时候,会出现不兼容现象。
与中国电信商务领航moder结合使用正常
checkpoint桥接bridge模式
1.登录checkpoint的web管理界面
2.将两个接口加入桥接bridge接口
3.新建bridge
ISP双链路接入配置网络拓扑:
Isp-1线路192.168.1.221
Isp-2线路192.168.10.2
1)登陆Checkpoint web界面配置接口ip地址
Isp-1 分配到External 接口192.168.1.221 Isp-2 分配到Lan1接口192.168.10.2
Internal接口192.168.20.1 是内网网关
2)增加两条isp的默认路由
isp-1 线路的网关
isp-2 线路的网关
3)登陆smartdashboard,双击cp270
4)选择Topology,get各个网卡接口ip地址信息
5)Topology—isp Redundancy,把support isp Redundancy选择上
在Redundancy mode中选择负载均衡模式,还是主次模式 在ISP Links in order of priority 中Add建立isp-1线路
Add 建立isp-2线路
电信与网通的所使用DNS域名解释地址不同,分别填写各自的DNS
网络拓扑:
1.新建nodes---host
2.NAT---选择手动static,指定公网ip地址
3.新建防火墙规则
source是所有人,访问destination是ftpserver,server是any,动作是允许4.安装策略
5.验证ftp服务器是否映射成功
SSL VPN 1)网管对象
软件版本使用R70
更改端口:
SSL VPN需要使用443端口确认此端口没有被checkpoint使用。
默认情况
下checkpoint的路由、接口的配置使用此端口:
如果此端口被使用,进入超级终端使用下列命令更换端口:webui enable <port number> (webui enable 444)
此时通过端口444访问上页。
2.配置SSL VPN
启用office模式
黑框标注的是需要定义的支持visitor模式
只有启动了visitor模式,才能启动SSL VPN 启动SSL VPN
服务端设置完毕
3.使用SSL VPN访问
通过IE登陆VPN
使用SSL VPN的客户端机器需要安装相应的ActiveX/Java控件,使用IE登录后会有相应安装提示,安装即可。
登录
输入用户名密码即可登陆。
默认可以连接8小时。
PC右下角提示连接状态5.测试
拓扑
Ping内网接口
连接成功后
断开后
Site-to-site 预共享密码vpn 1.定义vpn对象Interoperable device
2.定义site-to-site vpn community
3.配置防火墙vpn规则
Site-to-site 证书vpn (cp270与
edge/safe@office)
网络描述:总部使用静态ip地址,分部使用动态ip地址,通过证书方式来建立vpn连接
网络拓扑:
1.分别在cp 270和UTM-1 edge上建立网段并做NAT,确保两台pc能正常接入
外网(以cp270为例):
在
定义内部网段,开启NAT功能
下发策略完成后就可以正常和外网通讯:
和外网连接正常:
UTM-edge同样道理。
2.在cp 270上建立VPN对象:
对象信息如下红色矩形为注意事项:
方框中的内容两者用逗号隔开为 CN=vpnedge VPN Certificate, O=cp270..c9eq8u
cp270
Satellite gateways分支网关选EDGE:
4.将生成的证书到过来并在EDGE上安装(web界面——VPN选择第三项证书
然后安装)
5.在firewall建立VPN选择site-to-site认证方式是证书方式,目标网关(是对
端)192.168.1.221 网段是192.168.10.0即可,尝试VPN连接。
RemoteAccess vpn
1.配置checkpoint的remoteAcces vpn 属性
2.RemoteAccess---office mode
3.定义用户
4.定义remote vpn communities。