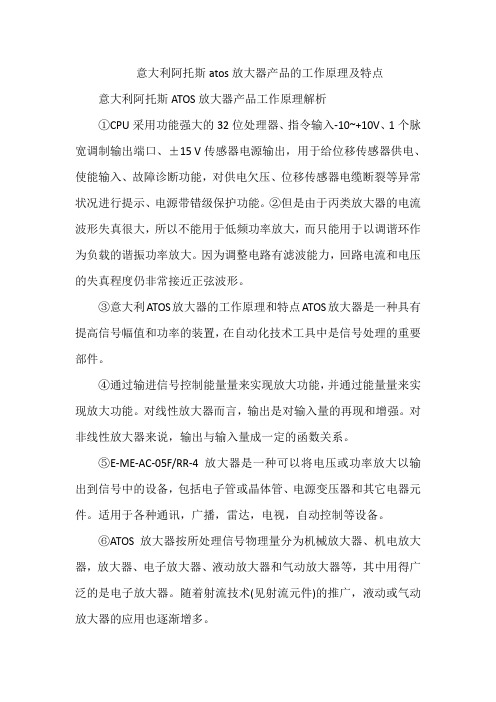
阿托斯E-ME-T型电子放大器
意大利阿托斯atos放大器产品的工作原理及特点

意大利阿托斯atos放大器产品的工作原理及特点意大利阿托斯ATOS放大器产品工作原理解析①CPU采用功能强大的32位处理器、指令输入-10~+10V、1个脉宽调制输出端口、±15 V传感器电源输出,用于给位移传感器供电、使能输入、故障诊断功能,对供电欠压、位移传感器电缆断裂等异常状况进行提示、电源带错级保护功能。
②但是由于丙类放大器的电流波形失真很大,所以不能用于低频功率放大,而只能用于以调谐环作为负载的谐振功率放大。
因为调整电路有滤波能力,回路电流和电压的失真程度仍非常接近正弦波形。
③意大利ATOS放大器的工作原理和特点ATOS放大器是一种具有提高信号幅值和功率的装置,在自动化技术工具中是信号处理的重要部件。
④通过输进信号控制能量量来实现放大功能,并通过能量量来实现放大功能。
对线性放大器而言,输出是对输入量的再现和增强。
对非线性放大器来说,输出与输入量成一定的函数关系。
⑤E-ME-AC-05F/RR-4放大器是一种可以将电压或功率放大以输出到信号中的设备,包括电子管或晶体管、电源变压器和其它电器元件。
适用于各种通讯,广播,雷达,电视,自动控制等设备。
⑥ATOS放大器按所处理信号物理量分为机械放大器、机电放大器,放大器、电子放大器、液动放大器和气动放大器等,其中用得广泛的是电子放大器。
随着射流技术(见射流元件)的推广,液动或气动放大器的应用也逐渐增多。
⑦ATOS电子放大器又按所用有源器件分为真空管放大器、晶体管放大器、固体放大器和磁放大器,其中又以晶体管放大器应用广。
在自动化仪表中晶体管放大器常用于信号的电压放大和电流放大,主要形式有单端放大和推挽放大。
此外,还常用于阻抗匹配、隔离、电流-电压转换、电荷-电压转换(如电荷放大器)以及利用放大器实现输出与输入之间的一定函数关系(如运算放大器)。
意大利阿托斯ATOS放大器产品特点意大利阿托斯(ATOS)放大器是一种高性能的音频放大器,具有以下特点:①高保真音质:ATOS放大器采用先进的音频处理技术和优质的电子元件,能够提供卓越的音质表现。
Eden E系列组合放大器说明书

Quickstart Guide
Manuel d’utilisation, Kurzanleitung, 快速开始 用户指南, Inicio Rápido Guía del usuario, Guida Rapida, EDEN E シリーズ コンボ・アンプ
2 | NEVER COMPROMISETM
EDEN | E SERIES COMBOS | ENGLISH - 1
Thank you for choosing Eden.
We hope that this product provides you with not only years of faithful service, but also the inspiration and capability to take your music and express yourself in your own way. At Eden we realize that having the right gear can mean the difference between having the confidence and ability to perform or not, so we strive to provide you with the tools that you need, whether at home, in the studio or in a stadium. All of our Amplifiers, Speaker Cabinets, Speakers and other items have been carefully designed and built to provide you with optimum performance and maximum flexibility, right down to component level. At Eden we work carefully to ensure that everything down to the last screw used in a product has been chosen to deliver the best possible product to you. In addition to using the best materials and processes, Eden is also conscious of the environment and works hard to do everything it can to minimize its impact on the world we live in while still giving you the premium equipment you should expect from us. Please take time to read this quick start guide carefully before using your equipment. As with every piece of musical equipment how you use it will affect the results you can achieve. By taking 5 minutes to understand these guidelines you will not only ensure you get the best performance from your Eden product, but it may also prevent you from accidentally damaging your unit through improper use.
通信电子线路重点总结

通信电子线路重点总结第一章1、一个完整的通信系统应包括信息源、发送设备、信道、接收设备和收信装置五部分。
2、只有当天线的尺寸大到可以与信号波长相比拟时,天线才具有较高的辐射效率。
这也是为什么把低频的调制信号调制到较高的载频上的原因之一。
3、调制使幅度变化的称调幅,是频率变化的称调频,使相位变化的称调相。
4、解调就是在接收信号的一方,从收到的已调信号中把调制信号恢复出来。
调幅波的解调称检波,调频波的解调叫鉴频。
第二章1、小信号调谐放大器是一种最常见的选频放大器,即有选择地对某一频率的信号进行放大的放大器。
它是构成无线电通信设备的主要电路,其作用是放大信道中的高频小信号。
所谓调谐,主要是指放大器的集电极负载为调谐回路。
2、调谐放大器主要由放大器和调谐回路两部分组成。
因此,调谐放大器不仅有放大作用,还有选频作用。
其选频性能通常用通频带和选择性两个指标衡量。
3、并联谐振回路01LC0L10CLCCLCL(C称为谐振回路的特性阻抗)并联谐振回路的品质因数是由回路谐振电阻与特性阻抗的比值定义的,即QR0LCR00LR00CR0回路的越大,Q值越大,阻抗特性曲线越尖锐;反之,00R0越小,Q值越小,阻抗特性曲线越平坦。
在谐振点处,电压幅值最大,当0时,回路呈现感性,电压超前电流一个相角,电压幅值减小。
当相角,电压幅值也减小。
4、谐振回路的谐振曲线分析UUm11(Q2f2)f0时,回路呈现容性,电压滞后电流一个U对于同样频偏f,Q越大,Um值越小,谐振曲线越尖锐一个无线电信号占有一定的频带宽度,无线电信号通过谐振回路不失真的条件是谐振回路的幅频特性是一常数,相频特性正比于角频率。
在无线电技术中,常把Um从1下降到U1ff2(以dB表示,从0下降到-3dB)处的两个频率1和22f0.7的范围叫做通频带,以符号B或Bf2f1f0Q表示。
即回路的通频带为选择性是谐振回路的另一个重要指标,它表示回路对通频带以外干扰信号的抑制能力。
ATOS比例阀

信号插头 前视图
电气插头
-BC(CANBus) 插头
CAN-SHLD 屏蔽 NC 不接
CAN-GND 零信号线
CAN-H BUS线(高电压) CAN-L BUS线(低电压)
-BP( PROFIBUS-DP) 插座
+5V 终端电压 LINE-A BUS 线(高电压) DGND-零信号线 -终端电压
LINE-B BUS 线(低电压) SHIELD 屏蔽
- 故障信号—插芯11 安全选项,在放大器因电流过大或过热而报警条件下,输出信号可以切换为 0.这样阀停止工作。
4.2 选 项/C-AERS型 式 放 大 器 被 设 定 成 接 收 从 远 程 压 力 传 感 器 反 馈 来 的4 - 2 0 m A电 流 信 号 , 而 不 是 标 准 的0 - 1 0 V信 号 . 关 于 压 力 传 感 器 接头接线,参见第 3节. 4.3 电流输入信号(选项/ I)-反对 TERS选 项 数字式放大器,-TERS和-AERS型可以提供,按照要求,专门的形式4-20mA电流输入信号和反馈信号,而不是标准的 0~1 0 V信号。
此类放大器有不同的形式供选用: *-TERS : 集 成 压 力 传 感 器②+ 预 调 数 字 放 大 器③形
成闭环控制,该特性提高了静态和动态性能。 *-AERS: 同-TERS但不带集成式压力传感器(预先安
排了遥控压力传感器的连接面)。
通讯用金属或塑料插头 见第 12 节
1 型号编码:配集成式数 字放大器比例阀
CAN-BUS 接口(-BC选项) 带光导绝缘的 CAN-BusISO11898 的工业用field-Bus CANOPENEN50325-4 DeviceProfile Ds408
EMT220大说明书

m/s2
1kHz
cm/s
LO
mm
加速度,单位:m/s2(峰值) 速度,单位:cm/s(有效值) 位移,单位:mm(峰-峰值)
所测量的加速度单位是m/s2。如果加速度用G表示,可将所测 量的值除以9.8(1 G=9.8m/s2)
设置频率范围:
如果选择加速度测量,用频率范围开关选择频率范围。显示器左边 的光标“ ”指示所选的频率范围。频率范围设置仅限于加速度测量。
3
体表面仅有一点接触或接触不良,则不能保证在高频段有平坦的频率响 应。如果物体表面粗糙,应涂上一些粘性的蜡,以保证有良好的频响。 探杆选用原则
用长探杆可在10Hz~1KHz范围内测量振动的位移、速度或加速度。 如果要保证测量数据的可靠性,尤其在测量加速度高频档(HI)时,应 使用短探杆。如果要求加速度在1kHz以上的高频有一个平坦的频响时, 不要使用任何探杆。
EMT220系列袖珍式测振仪的型号说明
仪器背面板标有仪器功能类型: EMT220 X X X
温度测量功能:C-带测温功能 频带下限:N(通用型)-10Hz;L(低频型)-5Hz 振动加速度传感器连接形式:A-一体式;B-分体式 例如:EMT220ANC 表示一体式,频带下限 10Hz,带测温功能测振仪
使用分体式测振仪时传感器的连接:
用专用导线将传感器与测振仪连接
取下磁铁上的护片及橡胶垫
将磁铁吸在测点表面上
【注意】在使用分体式传感器时, 一定要确保传感器上的编号和仪 加速度传感器
器上的编号对应起来。如果换用别 的传感器,必须将传感器和仪器同 时送到生产厂家进行标定,否则将 影响测量精度。
磁座
京制 01060116 号
EMT220 系列 袖珍式测振仪
Kustom Sienna30模型电子吉他放大器说明书

Thank you for purchasing the Sienna30model acoustic/electric guitar amplifier.Kustom has listened to musicians throughout the world and stands proudly behind each and every one we make.Flexible,feature laden,great sounding,able to adapt to all kinds of music,this amplifier really delivers what you have been looking and waiting for.Whatever style you choose,it’s ready!Kustom,with a 30-year tradition of excellence,proudly delivers a rugged and dependable amp designed and engineered in the USA.Again,thank you for your purchase.Please take a few minutes to learn about all of the built-in professional features.OWNER’SMANUALENGLISHDangerExposure to extremely high noise levels may cause a permanent hearing loss.Individuals vary considerably to noise induced hearing loss but nearly everyone will lose some hearing if exposed to sufficiently intense noise for a sufficient time.The ernment'sOccupational Safety and Health Administration (OSHA)has specified the following permissible noise level exposures:According to OSHA,any exposure in the above permissible limits could result in some hearing loss.Ear plugs or protectors in the ear canal or over the ears must be worn when operating this amplification system in order to prevent a permanent hearing loss.If exposure in excess of the limits as put forth above,to insure against potentially harmful exposure to high sound pressure levels,it is recommended that all persons exposed to equipment capable of inducing high sound pressure levels,such as this amplification system,be protected by hearing protectors while this unit is in operation.DURATION PER DAY (HOURS)864321SOUND LEVEL (dB)90939597100103THIS SYMBOL IS INTENDED TO ALERT THE USER TO THE PRESENCE OF NON-INSULATED "DANGEROUS VOLTAGE"WITHIN THEPRODUCT'S ENCLOSURE THAT MAY BE OF SUFFICIENT MAGNITUDE TO CONSTITUTE A RISK OF ELECTRIC SHOCK TO PERSONS.THIS SYMBOL IS INTENDED TO ALERT THE USER TO THE PRESENCE OF IMPORTANT OPERATING AND MAINTENANCE (SERVICING)INSTRUCTIONS IN THE LITERATURE ACCOMPANYING THE UNIT. 1.Read all safety and operating instructions before using this product.2.All safety and operating instructions should be kept for future reference.3.Read and understand all warnings listed on the operating instructions.4.Follow all operating instructions to operate this product.5.This product should not be used near water,i.e.Bathtub,sink,swimming pool,wet basement,etc.6.Only use dry cloth to clean this product.7.Do not block any ventilation openings,It should not be placed flat against a wall or placed in a built-in enclosure that will impede the flow of cooling air.8.Do not install this product near any heat sources ;such as,radiators,heat registers,stove or other apparatus (including heat producing amplifiers)that produce heat.9.Do not defeat the safety purpose of the polarized or grounding-type plug.A polarized plug has two blades with one wider than the 0ther.A grounding-type plug has two blades and a third grounding prong.The wide blade or the third prong are provided for your safety If the provided plug does not fit into your outlet,consult an electrician for replacement of the obsolete outlet.10.Protect the power cord being walked on or pinched,particularly at Plugs,convenience receptacles and the point where they exit from the apparatus.Do not break the ground pin of the power supply cord.11.Only use attachments specified by the manufacturer.12.Use only with the cart,stand,tripod,bracket,or table specified by the manufacturer or sold with the apparatus.When a cart is used,use caution when moving cart/apparatus combination to avoid injury from tip-over.13.Unplug this apparatus during lightning storms or when unused for long periods of time.14.Care should be taken so that objects do not fall and liquids are not spilled into the unit through the ventilation ports or any other openings.15.Refer all servicing to qualified service personnel.Servicing is required when the apparatus has been damaged in any way;such as,power-supply cord or plug is damaged,liquid has been spilled or objects have fallen into the apparatus,the apparatus has been exposed to rain or moisture,does not operate normally or has been dropped.16.WARNING:To reduce the risk of fire or electric shock,do not expose this apparatus to rain or moisture.IMPORTANT SAFETYINSTRUCTIONSCAUTION:TO REDUCE THE RISK OF ELECTRIC SHOCK,DONOT REMOVE CHASSIS.NO USER-SERVICEABLE PARTS INSIDE.REFER SERVICING TO QUALIFIED SERVICE PERSONNEL.AVIS:RISQUE DE CHOC ELECTRIQUE-NE PAS OUVRIR.APPARATUS SHALL NOT BE EXPOSED TO DRIPPING OR SPLASHING AND THAT NO OBJECTS FILLED WITH LIQUIDS,SUCH AS VASES,SHALL BE PLACED ON THEAPPARATUS.Kustom Inc.,4940Delhi Pike,Cincinnati,OH USA (800)999-5558Fax:(513)347-2192/•1.)Mic/Line Input -this is a 1/4”2conductor input jack for plugging in a Hi-Z microphone or instrument.It is intended for microphones but will accept other instruments as well.this is a 1/4”2conductor input jack for plugging in your instrument.It is intended for guitar or Hi-Z microphones but will accept other instruments as well.this control is the output volume control for the mic/line input.Slowly increase the control to increase the volume.If you are using a high impedance microphone,be careful when increasing the volume.Depending on mic position,it may feedback if mic is in front of speaker.this switch will select a mic or line level input.If you are using a high impedence microphone,be careful when increasing volume.Depending on mic placement,feedback may occur.this control is the output volume control for the guitar input.Slowly increase the control to increase the volume.If you are using a guitar with an on-board preamp,set it’s level for a mid position before increasing this control otherwise distortion may occur.this switch will place a -20db pad in the circuit which will allow use of active on-board electronics from pre-amplified guitars.This will help keep the signal extremely clean.this control is a tight Hi-Q cut filter notch with an extremely narrow width.It sweeps between 50Hz &500Hz and “fine tunes”the midrange of the acoustic guitar.This helps elimate unwanted “ringing”tones.It is preset to -10db.this control is the bass control.It is active and set to boost or cut frequencies at 60Hz.This will effect the lowfrequency signals.Turning it counterclockwise,the low will be rolled off -18db.Clockwise,it will boost +18db.Especially good for “cleaning up”preset patches or making thin toned guitars sound fuller.this control is the midrange control.It is active and set to boost or cut frequencies 1.5KHz.This will effect the mid-low frequency signals.Turning it counterclockwise,the low-mids will be rolled off -12db.Clockwise,it will boost +12db.Especially good for “cleaning up”guitar overtones.this is the high frequency tone control.It is active and set to boost or cut frequencies at 5KHz.This will effect the high frequency signals.Turning it counterclockwise,the highs will be rolled off -18db.Clockwise,it will boost +18db.This will add or subtract the high end shimmer and clarity.this control adds the spring reverb and mixes it into the main signal buss.Reverberation creates a trail like effect with the sound.It lets the notes “hang in the air”longer,extending the sound.this is the switch to turn on and off the chorus circuit.this is the Speed Control for the chorus circuit this is a 1/4”3conductor jack for plugging headphones.It will sum the signal and put the sound in both ears,thereby creating a pseudo-stereo sound.Volume will be determined by the volume control on the channel you are on.It will disconnect the internal speaker when plugged in.This will allow quiet practicing.this jewel light lets you know that the amplifier is on..2.)Guitar Input -5.)Guitar Volume -3.)Mic/Line Volume -4.)Mic/Line -6.)Active -7.)Frequency -8.)Low -9.)Mid -10.)High -11.)Reverb Level -12.)Chorus On/Off -13.)Chorus Level -14.)Headphone Jack -15.)Jewel Light -Suggested Settings(These settings are general starting points.They are designedto get you close to the sound you are looking for.If the control isnot shown,then it doesn’t apply to this particular sound.)Standard Single Input Setup-in this setup your acoustic/electric guitar is plugged into inputs1. (Remember,if you are using an active guitar or pre-amplified guitar,press the active switch in.We also suggest that you turn it’s output level to about mid way up and this will give you a cleaner sound as well as giving you available headroom for leads.)The tone controls follow both inputs.Of course,you can adjust the tone controls to any desired sound but in this setup,we suggest these tone control settings.It will deliver a clear,clean sound that has enough top end clarity to cut through. Add low and low mid for a beefier presence but be careful as this can“muddy up”the sound.Adjust the feedback control to eliminate those unwanted“ringing”frequencies.Adjust the reverb and chorus to suit the music or to your taste.Standard Dual Input Setup-in this setup two inputs are utilized.Guitar is plugged into guitar input jack and a Hi-Z microphone is plugged into mic/line Input.Assuming you are also using a microphone,plug it into the mic/line jack and slowly turn up the mic/line volume control.Balancing the two types of inputs gives you a much more natural acoustic guitar sound.You could also plug in any combination of inputs such as:keyboards,microphones or other guitars.This can also be a basic mini-PA system.It could be used for plugging in a CD player or cassette decks and a microphone for singing.It can be used for playing over prerecorded tapes with mixing capabilities.As mentioned earlier,you can adjust the tone controls to any desired sound but in this setup we suggest these tone control settings.Of course it depends on the listening environment.It will deliver a clear,clean sound that has enough top end clarity to let the acoustic sound cut through.Adjust the reverb and chorus to suit the music or to your taste.。
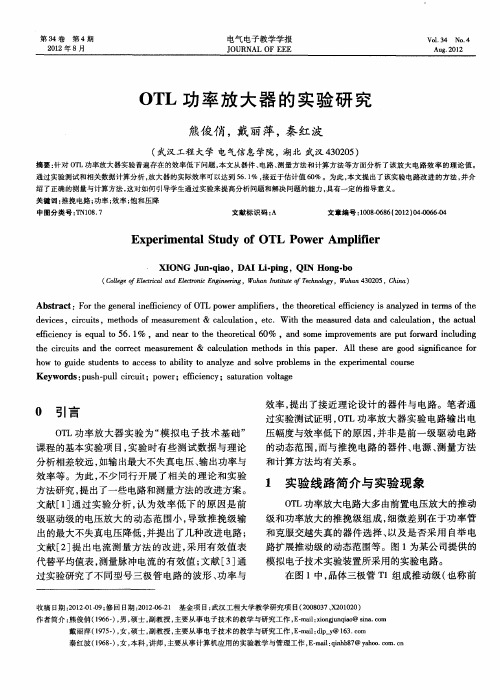
OTL功率放大器的实验研究

第 4期
电气 电子 教 学 学 报
J OURN EE AL OF E
Vo . 4 N . 13 o 4 Au . 01 g2 2
21 0 2年 8月
OT L功 率 放 大 器 的 实 验 研 究
熊俊俏 , 丽萍 , 戴 秦红波
( Y.程 大学 电气信 息 学院 ,湖北 武 汉 4 00 ) 武/ y .- 325
压 变 化 ( 电流表 的 内阻影 响 ) 从 而 引起 整 个 放 ,
() 5 状态 5为 处 于 状 态 4时 , 大输 入 信 号 幅 增 度 后 , 得 最 大 输 出不 失 真 信 号 : 点 为 0 8V, 获 A .4 B
点 为 0 8 V; .6
() 6 状态 6为调 节 R W1和 R , 负载 时 , W2 带 测 输 出最 大不 失真 时 的 电压 和 电流 , 时最 大 输 出 信 此 号 分别 为 : A点 09 B点 1 .V, V。
的动 态范 围 , 与推 挽 电路 的 器件 、 源 、 而 电 测量 方 法
和计 算方 法均 有关 系 。
1 实 验 线 路简 介 与 实验 现 象
O L功率 放大 电路 大多 由前置 电压 放大 的推 动 T
文献 [ ] 过 实验 分 析 , 为 效 率 低 下 的 原 因 是前 1通 认 级驱 动级 的 电压 放 大 的动 态 范 围小 , 导致 推 挽 级 输
输 出信 号 幅度为 0 3 V, 动级 B点输 出为 0 3 V; .2 驱 .8
大不 失真 输 出时 , 电压并 非在 中心 ; A点 ( ) 整 R , 除交越 失真 , 以改善 输 出波 3调 W2 消 可 形 , 调节 过度 会导致 电流急剧 上升 ; 但 () 4 电流 的变化会 导 致放 大 电路 的实 际供 电 电
阿托斯放大器的主要原理

阿托斯放大器的主要原理东莞巴广联工业自动化设备有限公司大量现货库存意大利阿托斯ATOS品牌产品:ATOS柱塞泵、ATOS齿轮泵、ATOS叶片泵、ATOS普通油缸、ATOS伺服油缸等。
本公司以优质产品,高效服务,以客为先的宗旨,为您提供原装正厂的优质产品,以合理的性价比,快捷的交货期,热情周到的服务,从而赢得客户的*赞赏。
ATOS放大器历史背景:1962年美国EGGPARC(SIGNALRECOVERY公司的前身)的*台锁相放大器(Lock-inAmplifier,简称LIA)的发明,使微弱信号检测技术得到标志性的突破,地推动了基础科学和工程技术的发展。
目前,微弱信号检测技术和仪器的不断进步,已经在很多科学和技术领域中得到广泛的应用,未来科学研究不仅对微弱信号检测技术提出更高的要求,同时新的科学技术发展反过来促进了微弱信号检测新原理和新方法的诞生。
ATOS放大器主要原理:ATOS放大器实际上是一个模拟的傅立叶变换器,锁相放大器的输出是一个直流电压,正比于是输入信号中某一特定频率(参数输入频率)的信号幅值。
而输入信号中的其他频率成分将不能对输出电压构成任何贡献。
两个正弦信号,频率都为1Hz,有90度相位差,用乘法器相乘得到的结果是一个有直流偏量的正弦信号。
如果是一个1Hz 和一个1.1Hz的信号相乘,用乘法器相乘得到的结果是轮廓为正弦的调制信号,直流偏量为0。
只有与参考信号频率完全*的信号才能在乘法器输出端得到直流偏量,其他信号在输出端都是交流信号。
意大利ATOS放大器的放大作用是什么?如果在乘法器的输出端加一个低通滤波器,那么所有的交流信号分量全部被滤掉,剩下的直流分量就只是正比于输入信号中的特定频率的信号分量的幅值。
ATOS放大器选择的方法:选择放大器的方法确认您要传输的输出信号数量和计算机信号类型。
当计算机显卡和显示器距离较远时,一个计算机视频信号和多个显示器相连时或者驱动几个切换器以达到用低成本提升您的输入/输出配置的目的。
