CKEditor插件开发
ckeditor使用方法
ckeditor使用方法
CKEditor是一个流行的WYSIWYG(所见即所得)文本编辑器,
它可以轻松地集成到网站或应用程序中。
要使用CKEditor,首先需
要将其引入到你的项目中。
你可以从CKEditor的官方网站上下载最
新版本的CKEditor,然后将其解压缩并将文件复制到你的项目中。
接下来,你需要在你的HTML页面中引入CKEditor的js文件,通常
是通过script标签来实现。
一旦引入了CKEditor,你就可以在页面中创建一个编辑器实例。
你可以使用JavaScript来实现这一点,通过调用CKEditor提供的API来创建和配置编辑器。
你可以指定编辑器的大小、工具栏的按钮、语言设置等等。
此外,CKEditor还提供了丰富的插件系统,你
可以根据自己的需求来扩展编辑器的功能。
另外,CKEditor还提供了丰富的文档和示例,帮助你快速上手
和了解如何使用它的各种功能。
你可以在官方网站上找到详细的文
档和示例代码,以及社区论坛上的讨论和帮助。
总的来说,要使用CKEditor,你需要将其引入到你的项目中,
然后通过JavaScript来创建和配置编辑器实例,最后根据需要使用
它的各种功能和插件来满足你的编辑需求。
希望这些信息能够帮助你更好地了解CKEditor的使用方法。
ckeditor配置(详细)

一、使用方法:1、在页面<head>中引入ckeditor核心文件ckeditor.js<script type="text/javascript" src="ckeditor/ckeditor.js"></script>2、在使用编辑器的地方插入HTML控件<textarea><textarea id="TextArea1" cols="20" rows="2" class="ckeditor"></textarea> 如果是环境,也可用服务器端控件<TextBox><asp:TextBox ID="tbContent" runat="server" TextMode="MultiLine"class="ckeditor"></asp:TextBox>注意在控件中加上 class="ckeditor" 。
3、将相应的控件替换成编辑器代码<script type="text/javascript">CKEDITOR.replace('TextArea1');//如果是在环境下用的服务器端控件<TextBox>CKEDITOR.replace('tbContent');//如果<TextBox>控件在母版页中,要这样写CKEDITOR.replace('<%=tbContent.ClientID.Replace("_","$") %>');</script>4、配置编辑器ckeditor的配置都集中在 ckeditor/config.js 文件中,下面是一些常用的配置参数:// 界面语言,默认为 'en'nguage = 'zh-cn';// 设置宽高config.width = 400;config.height = 400;// 编辑器样式,有三种:'kama'(默认)、'office2003'、'v2'config.skin = 'v2';// 背景颜色config.uiColor = '#FFF';// 工具栏(基础'Basic'、全能'Full'、自定义)plugins/toolbar/plugin.jsconfig.toolbar = 'Basic';config.toolbar = 'Full';这将配合:config.toolbar_Full = [['Source','-','Save','NewPage','Preview','-','Templates'],['Cut','Copy','Paste','PasteText','PasteFromWord','-','Print', 'SpellChecker', 'Scayt'], ['Undo','Redo','-','Find','Replace','-','SelectAll','RemoveFormat'],['Form', 'Checkbox', 'Radio', 'TextField', 'Textarea', 'Select', 'Button', 'ImageButton', 'HiddenField'],'/',['Bold','Italic','Underline','Strike','-','Subscript','Superscript'],['NumberedList','BulletedList','-','Outdent','Indent','Blockquote'],['JustifyLeft','JustifyCenter','JustifyRight','JustifyBlock'],['Link','Unlink','Anchor'],['Image','Flash','Table','HorizontalRule','Smiley','SpecialChar','PageBreak'],'/',['Styles','Format','Font','FontSize'],['TextColor','BGColor']];//工具栏是否可以被收缩config.toolbarCanCollapse = true;//工具栏的位置config.toolbarLocation = 'top';//可选:bottom//工具栏默认是否展开config.toolbarStartupExpanded = true;// 取消“拖拽以改变尺寸”功能 plugins/resize/plugin.jsconfig.resize_enabled = false;//改变大小的最大高度config.resize_maxHeight = 3000;//改变大小的最大宽度config.resize_maxWidth = 3000;//改变大小的最小高度config.resize_minHeight = 250;//改变大小的最小宽度config.resize_minWidth = 750;// 当提交包含有此编辑器的表单时,是否自动更新元素内的数据config.autoUpdateElement = true;// 设置是使用绝对目录还是相对目录,为空为相对目录config.baseHref = ''// 编辑器的z-index值config.baseFloatZIndex = 10000;//设置快捷键config.keystrokes = [[ CKEDITOR.ALT + 121 /*F10*/, 'toolbarFocus' ], //获取焦点[ CKEDITOR.ALT + 122 /*F11*/, 'elementsPathFocus' ], //元素焦点 [ CKEDITOR.SHIFT + 121 /*F10*/, 'contextMenu' ], //文本菜单[ CKEDITOR.CTRL + 90 /*Z*/, 'undo' ], //撤销[ CKEDITOR.CTRL + 89 /*Y*/, 'redo' ], //重做[ CKEDITOR.CTRL + CKEDITOR.SHIFT + 90 /*Z*/, 'redo' ], //[ CKEDITOR.CTRL + 76 /*L*/, 'link' ], //链接[ CKEDITOR.CTRL + 66 /*B*/, 'bold' ], //粗体[ CKEDITOR.CTRL + 73 /*I*/, 'italic' ], //斜体[ CKEDITOR.CTRL + 85 /*U*/, 'underline' ], //下划线[ CKEDITOR.ALT + 109 /*-*/, 'toolbarCollapse' ]]//设置快捷键可能与浏览器快捷键冲突 plugins/keystrokes/plugin.js. config.blockedKeystrokes = [CKEDITOR.CTRL + 66 /*B*/,CKEDITOR.CTRL + 73 /*I*/,CKEDITOR.CTRL + 85 /*U*/]//设置编辑内元素的背景色的取值 plugins/colorbutton/plugin.js. config.colorButton_backStyle = {element : 'span',styles : { 'background-color' : '#(color)' }}//设置前景色的取值 plugins/colorbutton/plugin.jsconfig.colorButton_colors ='000,800000,8B4513,2F4F4F,008080,000080,4B0082,696969,B22222,A52A2A,DAA52 0,006400,40E0D0,0000CD,800080,808080,F00,FF8C00,FFD700,008000,0FF,00F,EE82E E,A9A9A9,FFA07A,FFA500,FFFF00,00FF00,AFEEEE,ADD8E6,DDA0DD,D3D3D3,FFF0F5, FAEBD7,FFFFE0,F0FFF0,F0FFFF,F0F8FF,E6E6FA,FFF’//是否在选择颜色时显示“其它颜色”选项 plugins/colorbutton/plugin.js config.colorButton_enableMore = false//区块的前景色默认值设置 plugins/colorbutton/plugin.jsconfig.colorButton_foreStyle = {element : 'span',styles : { 'color' : '#(color)' }};//所需要添加的CSS文件在此添加可使用相对路径和网站的绝对路径config.contentsCss = './contents.css';//文字方向config.contentsLangDirection = 'rtl'; //从左到右//CKeditor的配置文件若不想配置留空即可CKEDITOR.replace( 'myfiled', { customConfig : './config.js' } );//界面编辑框的背景色 plugins/dialog/plugin.jsconfig.dialog_backgroundCoverColor = 'rgb(255, 254, 253)'; //可设置参考config.dialog_backgroundCoverColor = 'white' //默认//背景的不透明度数值应该在:0.0~1.0 之间 plugins/dialog/plugin.jsconfig.dialog_backgroundCoverOpacity = 0.5//移动或者改变元素时边框的吸附距离单位:像素 plugins/dialog/plugin.js config.dialog_magnetDistance = 20;//是否拒绝本地拼写检查和提示默认为拒绝目前仅firefox和safari支持plugins/wysiwygarea/plugin.js.config.disableNativeSpellChecker = true//进行表格编辑功能如:添加行或列目前仅firefox支持plugins/wysiwygarea/plugin.jsconfig.disableNativeTableHandles = true; //默认为不开启//是否开启图片和表格的改变大小的功能 config.disableObjectResizing = true; config.disableObjectResizing = false //默认为开启//设置HTML文档类型config.docType = '<!DOCTYPE html PUBLIC "-//W3C//DTD XHTML 1.0 Transitional//EN" "/TR/xhtml1/DTD/xhtml1-transitional.dtd%22' ;//是否对编辑区域进行渲染 plugins/editingblock/plugin.jsconfig.editingBlock = true;//编辑器中回车产生的标签config.enterMode = CKEDITOR.ENTER_P; //可选:CKEDITOR.ENTER_BR或CKEDITOR.ENTER_DIV//是否使用HTML实体进行输出 plugins/entities/plugin.jsconfig.entities = true;//定义更多的实体 plugins/entities/plugin.jsconfig.entities_additional = '#39'; //其中#代替了&//是否转换一些难以显示的字符为相应的HTML字符 plugins/entities/plugin.js config.entities_greek = true;//是否转换一些拉丁字符为HTML plugins/entities/plugin.jsconfig.entities_latin = true;//是否转换一些特殊字符为ASCII字符如"This is Chinese: 汉语."转换为"This is Chinese: 汉语." plugins/entities/plugin.jsconfig.entities_processNumerical = false;//添加新组件config.extraPlugins = 'myplugin'; //非默认仅示例//使用搜索时的高亮色 plugins/find/plugin.jsconfig.find_highlight = {element : 'span',styles : { 'background-color' : '#ff0', 'color' : '#00f' }};//默认的字体名 plugins/font/plugin.jsconfig.font_defaultLabel = 'Arial';//字体编辑时的字符集可以添加常用的中文字符:宋体、楷体、黑体等plugins/font/plugin.jsconfig.font_names = 'Arial;Times New Roman;Verdana';//文字的默认式样 plugins/font/plugin.jsconfig.font_style = {element : 'span',styles : { 'font-family' : '#(family)' },overrides : [ { element : 'font', attributes : { 'face' : null } } ]};//字体默认大小 plugins/font/plugin.jsconfig.fontSize_defaultLabel = '12px';//字体编辑时可选的字体大小 plugins/font/plugin.jsconfig.fontSize_sizes='8/8px;9/9px;10/10px;11/11px;12/12px;14/14px;16/16px;18/18px;20/20px;22/22p x;24/24px;26/26px;28/28px;36/36px;48/48px;72/72px'//设置字体大小时使用的式样 plugins/font/plugin.jsconfig.fontSize_style = {element : 'span',styles : { 'font-size' : '#(size)' },overrides : [ { element : 'font', attributes : { 'size' : null } } ]};//是否强制复制来的内容去除格式 plugins/pastetext/plugin.jsconfig.forcePasteAsPlainText =false //不去除//是否强制用“&”来代替“&”plugins/htmldataprocessor/plugin.js config.forceSimpleAmpersand = false;//对address标签进行格式化 plugins/format/plugin.jsconfig.format_address = { element : 'address', attributes : { class :'styledAddress' } };//对DIV标签自动进行格式化 plugins/format/plugin.jsconfig.format_div = { element : 'div', attributes : { class : 'normalDiv' } };//对H1标签自动进行格式化 plugins/format/plugin.jsconfig.format_h1 = { element : 'h1', attributes : { class : 'contentTitle1' } };//对H2标签自动进行格式化 plugins/format/plugin.jsconfig.format_h2 = { element : 'h2', attributes : { class : 'contentTitle2' } };//对H3标签自动进行格式化 plugins/format/plugin.jsconfig.format_h1 = { element : 'h3', attributes : { class : 'contentTitle3' } };//对H4标签自动进行格式化 plugins/format/plugin.jsconfig.format_h1 = { element : 'h4', attributes : { class : 'contentTitle4' } };//对H5标签自动进行格式化 plugins/format/plugin.jsconfig.format_h1 = { element : 'h5', attributes : { class : 'contentTitle5' } };//对H6标签自动进行格式化 plugins/format/plugin.jsconfig.format_h1 = { element : 'h6', attributes : { class : 'contentTitle6' } };//对P标签自动进行格式化 plugins/format/plugin.jsconfig.format_p = { element : 'p', attributes : { class : 'normalPara' } };//对PRE标签自动进行格式化 plugins/format/plugin.jsconfig.format_pre = { element : 'pre', attributes : { class : 'code' } };//用分号分隔的标签名字在工具栏上显示 plugins/format/plugin.jsconfig.format_tags = 'p;h1;h2;h3;h4;h5;h6;pre;address;div';//是否使用完整的html编辑模式如使用,其源码将包含:<html><body></body></html>等标签config.fullPage = false;//是否忽略段落中的空字符若不忽略则字符将以“”表示plugins/wysiwygarea/plugin.jsconfig.ignoreEmptyParagraph = true;//在清除图片属性框中的链接属性时是否同时清除两边的<a>标签plugins/image/plugin.jsconfig.image_removeLinkByEmptyURL = true;//一组用逗号分隔的标签名称,显示在左下角的层次嵌套中 plugins/menu/plugin.js. config.menu_groups='clipboard,form,tablecell,tablecellproperties,tablerow,tablecolumn,table,anchor,link,i mage,flash,checkbox,radio,textfield,hiddenfield,imagebutton,button,select,textarea';//显示子菜单时的延迟,单位:ms plugins/menu/plugin.jsconfig.menu_subMenuDelay = 400;//当执行“新建”命令时,编辑器中的内容 plugins/newpage/plugin.js config.newpage_html = '';//当从word里复制文字进来时,是否进行文字的格式化去除plugins/pastefromword/plugin.jsconfig.pasteFromWordIgnoreFontFace = true; //默认为忽略格式//是否使用<h1><h2>等标签修饰或者代替从word文档中粘贴过来的内容plugins/pastefromword/plugin.jsconfig.pasteFromWordKeepsStructure = false;//从word中粘贴内容时是否移除格式 plugins/pastefromword/plugin.js config.pasteFromWordRemoveStyle = false;//对应后台语言的类型来对输出的HTML内容进行格式化,默认为空config.protectedSource.push( /<\?[\s\S]*?\?>/g ); // PHP Codeconfig.protectedSource.push( //g ); // ASP Codeconfig.protectedSource.push( /(]+>[\s|\S]*?<\/asp:[^\>]+>)|(]+\/>)/gi ); // Code//当输入:shift+Enter时插入的标签config.shiftEnterMode = CKEDITOR.ENTER_P; //可选:CKEDITOR.ENTER_BR或CKEDITOR.ENTER_DIV//可选的表情替代字符 plugins/smiley/plugin.js.config.smiley_descriptions = [':)', ':(', ';)', ':D', ':/', ':P','', '', '', '', '', '','', ';(', '', '', '', '','', ':kiss', '' ];//对应的表情图片 plugins/smiley/plugin.jsconfig.smiley_images = ['regular_smile.gif','sad_smile.gif','wink_smile.gif','teeth_smile.gif','confused_smile.gif', 'tounge_smile.gif','embaressed_smile.gif','omg_smile.gif','whatchutalkingabout_smile.gif','angry_smile.g if','angel_smile.gif','shades_smile.gif','devil_smile.gif','cry_smile.gif','lightbulb.gif','thumbs_down.gif','thumbs_up.gif','heart. gif','broken_heart.gif','kiss.gif','envelope.gif'];//表情的地址 plugins/smiley/plugin.jsconfig.smiley_path = 'plugins/smiley/images/';//页面载入时,编辑框是否立即获得焦点 plugins/editingblock/plugin.jsplugins/editingblock/plugin.js.config.startupFocus = false;//载入时,以何种方式编辑源码和所见即所得 "source"和"wysiwyg"plugins/editingblock/plugin.js.config.startupMode ='wysiwyg';//载入时,是否显示框体的边框 plugins/showblocks/plugin.jsconfig.startupOutlineBlocks = false;//是否载入样式文件 plugins/stylescombo/plugin.js.config.stylesCombo_stylesSet = 'default';//以下为可选config.stylesCombo_stylesSet = 'mystyles';config.stylesCombo_stylesSet = 'mystyles:/editorstyles/styles.js';config.stylesCombo_stylesSet ='mystyles:/editorstyles/styles.js';//起始的索引值config.tabIndex = 0;//当用户键入TAB时,编辑器走过的空格数,( ) 当值为0时,焦点将移出编辑框 plugins/tab/plugin.jsconfig.tabSpaces = 0;//默认使用的模板 plugins/templates/plugin.js.config.templates = 'default';//用逗号分隔的模板文件plugins/templates/plugin.js.config.templates_files = [ 'plugins/templates/templates/default.js' ]//当使用模板时,“编辑内容将被替换”框是否选中 plugins/templates/plugin.js config.templates_replaceContent = true;//主题config.theme = 'default';//撤销的记录步数 plugins/undo/plugin.jsconfig.undoStackSize =20;// 在 CKEditor 中集成 CKFinder,注意 ckfinder 的路径选择要正确。
富文本编辑器ckeditor使用手册
富文本编辑器ckeditor使用手册一.环境配置1 在web.xml配置servlet<servlet><servlet-name>multiform</servlet-name><servlet-class>com.newtouch.upload.servlet.MultiFormServlet</servlet-class><load-on-startup>1</load-on-startup></servlet><servlet-mapping><servlet-name>multiform</servlet-name><url-pattern>/multiform</url-pattern></servlet-mapping>2 将插件ckeditor及upload文件夹(用于图片上传功能)添加至工程中。
二. 如何在项目中使用ckeditor?将标签textarea中的isRich属性设置为true即可textarea替换成ckeditor。
三.在textarea标签中有哪几个属性设置与ckeditor有关?分别有哪些作用?toolbarType:提供了三种工具栏的布局,分别是full,normal,basic。
customToolBar:如果在开发中有特殊的需求导致提供的三种默认的工具栏布局无法满足项目需求,开发者可以自定义工具栏中的选项,以及其排列。
开发者可以将所需要的工具栏以逗号为分隔符进行排列。
目前共提供12类工具栏。
(1)source:包含source按钮。
(2)system:系统类按钮,包括保存,新建,预览。
(3)templates:包含模板按钮,可以利用所提供的模板进行文字图片的编辑。
(4)textOperation:包括一些文本操作的按钮,例如剪切,复制,粘贴等。
CKEditor多图片上传插件(一)(二)

的内容:启程上文,我们继续来讲如何在CKEditor中添加多图片上传控件。
我们先贴一张最终的演示图给大家看一下:点击CKEditor上的上传多图片按钮,就会弹出这个对话框,这里我们使用的是UEditor中的多图片上传控件。
如何实现呢,其实就是从UEditor中把这块扣出来单用了。
我们来贴一下iframe下的页面吧:[html]view plaincopy1. <!DOCTYPE HTML PUBLIC "-//W3C//DTD HTML 4.01 Transitional//EN"2. "http://www.w/TR/html4/loose.dtd">3. <html>4. <head>5. <title></title>6. <meta http-equiv="Content-Type" content="text/html;charset=utf-8"/>7. <link rel="stylesheet" href="image.css" type="text/css"/>8. <script type="text/javascript" src="/js/login/jquery-1.7.2.min1c6c0c.js"></script>9. <script type="text/javascript" src="Default.js"></script>10. <style type="text/css">11. body{ font-size:12px; font-family:微软雅黑;}12. .up_tit{ width:620px; line-height:30px; display:table; height:30px; background-color:#ccc;}13. .up_ddl{ float:left;}14. .up_ddl div{ display:inline-block;}15. .up_sy{ float:right;}16. #updisable{ color:#666;}17. #upload {18. cursor: pointer;19. float: right;20. height: 30px;21. margin: 3px 6px 0 0;22. width: 100px;23. }24. </style>25.26. </head>27. <body>28. <div class="wrapper">29. <div id="imageTab">30. <div id="tabHeads" class="tabhead">31. <span tabSrc="local"><var id="lang_tab_local"></var></span>32. </div>33. <div id="tabBodys" class="tabbody">34. <!--隐藏域,用来保存Flash中选择的文件个数,从而判定上传按钮是否可用--->35. <input id="curCount" name="curCount" type="hidden" value="0" />36. <div class="panel" id="local" style="z-index: 200;">37. <div id="flashContainer">38. <object width="608" height="272" align="middle" id="flash"39. codebase="/pub/shockwave/cabs/flash/swflash.cab#version=6,0,0,0"40. classid="clsid:d27cdb6e-ae6d-11cf-96b8-444553540000">41. <param value="window" name="wmode">42. <param value="imageUploader.swf" name="movie">43. <param value="container=flashContainer&url=/imageUp.jsp&ext=%7B%22fileNameFormat%22%3A%22%7Btime%7D%7Brand%3A6%7D%22%7D&fileType=%7B%22description%22%3A%2244. name="flashvars">45. <embed width="608" height="272" align="middle"46. pluginspage="/go/getflashplayer"47. type="application/x-shockwave-flash" name="flash" src="imageUploader.swf"48. flashvars="container=flashContainer&url=/imageUp.jsp&ext=%7B%22fileNameFormat%22%3A%22%7Btime%7D%7Brand%3A6%7D%22%7D&fileType=%7B%22description%22%3A%22%49. ver="10.0.0" wmode="window" errormessage="Flash插件初始化失败,请更新您的FlashPlayer版本之后重试!">50. </object>51. </div>52. <div><div style="background: url('images/upload.png') repeat scroll 0% 0% transparent;" id="upload"></div><div id="duiqi" style="background: url('images/imglabel.png') no-repeat scroll -12px 2px tran53. </div>54. </div>55. </div>56. </div>57. <script type="text/javascript">58. $(function(){59. var ci = "#localFloat";60. var floatContainer = $(ci),61. nameMaps = {"none":"默认", "left":"左浮动", "right":"右浮动", "center":"居中"};62. for (var j in nameMaps) {63. var div = document.createElement("div");64. div.setAttribute("name", j);65. if (j == "none") div.className = "focus";66.67. div.style.cssText = "background:url(images/" + j + "_focus.jpg);";68. div.setAttribute("title", nameMaps[j]);69. floatContainer.append(div);70. }71. switchSelect(ci);72. });73. /**74. * 选择切换,传入一个container的ID75. * @param selectParentId76. */77. function switchSelect(selectParentId) {78. var select = $(selectParentId);78. var select = $(selectParentId);79. select.on("click", function (evt) {80. var tar = evt.srcElement || evt.target;81. select.children().attr("class","");82. tar.className = "focus";83. parent.duiqi = tar.getAttribute("name");84. });85. }86. </script>87. </body>88.89. </html>再来看一下Default.js文件:[javascript]view plaincopy1. parent.imgs = new Array();2. /***********************Flash事件*****************************/3. /**4. * 检查flash状态5. * @private6. * @param {Object} target flash对象7. * @return {Boolean}8. */9. function _checkReady(target) {10. if (typeof target !== 'undefined' && typeof target.flashInit !== 'undefined' && target.flashInit()) {11. return true;12. } else {13. return false;14. }15. }16. /**17. * 创建一个随机的字符串18. * @private19. * @return {String}20. */21. function _createString() {22. var prefix = 'mw__flash__';23. return prefix + Math.floor(Math.random() * 2147483648).toString(36);24. }25.26. /**27. * 为传入的匿名函数创建函数名28. * @private29. * @param {String|Function} fun 传入的匿名函数或者函数名30. * @return {String}31. */32. function _createFunName(fun) {33. var name = '';34. name = _createString();35. window[name] = function () {36. fun.apply(window, arguments);37. };38. return name;39. }40. /***41. 反复判断Flash是欧加载完成,完成后为Flash添加回调函数..42. */43. var interval = setInterval(function () {44. try {45. var flash = thisMovie("flash");46. if (_checkReady(flash)) { //轮询flash的某个方法即可47.48. var callBack = [];49. callBack[0] = _createFunName(selectFileCallback);50. callBack[1] = _createFunName(exceedFileCallback);51. callBack[2] = _createFunName(deleteFileCallback);52. callBack[3] = _createFunName(StartUploadCallback);53. callBack[4] = _createFunName(uploadCompleteCallback);54. callBack[5] = _createFunName(uploadErrorCallback);55. callBack[6] = _createFunName(allCompleteCallback);56. callBack[7] = _createFunName(changeHeightCallback);57. thisMovie("flash").call('setJSFuncName', [callBack]);58.59. clearInterval(interval);60. }61. }62. catch (ex) {63. }64. }, 20);65.66. //获得Flash对象67. function thisMovie(movieName) {68. if (navigator.appName.indexOf("Misrosoft") != -1) {69. return window[movieName];70. }71. else {72. return document[movieName];73. }74. }75. //事件76. $(function () {76. $(function () {77. $("#upload").live("click", function () { return upload(); });78.79. });80. function Setbtn(count) {81. //// if ($("#ddlAlbum").val() != "0") {82. // if (count > 0) {83. //// $("#updisable").hide();84. // $("#upload").show();85. // }86. // else {87. //// $("#updisable").show();88. // $("#upload").hide();89. // }90. //// }91. $("#curCount").val(count);92. }93. // 通过添加文件按钮新增的需要上传文件94. function selectFileCallback(selectFiles) {95. var count = $("#curCount").val();96. count = parseInt(count) + selectFiles.length;97. Setbtn(count);98. }99. // 文件超出限制的最大体积时的回调100. function exceedFileCallback(selectFiles) {101.102. }103. //被删除的文件: 用于控制上传按钮是否显示...104. function deleteFileCallback(delFiles) {105. var count = $("#curCount").val();106. count = parseInt(count) - delFiles.length;107. Setbtn(count);108. }109. //开始上传前执行的JS函数.110. function StartUploadCallback(data) {111.112. }113. //上传单个文件后执行的JS函数.114. function uploadCompleteCallback(data) {115. try {116. var info = eval("(" + + ")");117. info && parent.imgs.push(info);118. var count = $("#curCount").val();119. count = parseInt(count) - 1;120. Setbtn(count);121. } catch (e) {alert(e)}122. }123. //上传失败后执行的JS函数.124. function uploadErrorCallback(data) {125. if (!) {126. alert("照片上传失败,请刷新后重试");127. window.location.reload();128. }129. }130. //全部完成上传后执行::定向到相册界面131. function allCompleteCallback(data) {132. // alert("上传成功!" + parent.imgs);133. // window.location.reload();134. }135. //改变Flash高度时执行136. function changeHeightCallback(data) {137.138. }139. //开始上传:添加参数:aid,表示相册, mark,表示水印,需要为每个照片都添加这两个参数。
CKeditor富文本编辑器使用技巧之添加自定义插件的方法

CKeditor富⽂本编辑器使⽤技巧之添加⾃定义插件的⽅法本⽂实例讲述了CKeditor富⽂本编辑器使⽤技巧之添加⾃定义插件的⽅法。
分享给⼤家供⼤家参考,具体如下:⾸先就是在CKeditor的plugins⽬录下新建⼀个⽬录qchoice:qchoice⽬录下的结构如下:然后, images中如下:dialogs中如下:我们先来看plugins.js⽂件的内容:(function() {CKEDITOR.plugins.add("qchoice", {requires: ["dialog"],init: function(a) {a.addCommand("qchoice", new CKEDITOR.dialogCommand("qchoice"));a.ui.addButton("qchoice", {label: "qchoice",//调⽤dialog时显⽰的名称command: "qchoice",icon: this.path + "images/qchoice.jpg"//在toolbar中的图标});CKEDITOR.dialog.add("qchoice", this.path + "dialogs/qchoice.js")}})})();再来看qchoice.js⽂件的内容:CKEDITOR.dialog.add('qchoice', function (editor) { //要和plugin.js 中的command ⼀致 var escape = function (value) {return value;};return {title: '', //对话框标题minWidth: 500, //对话框宽度minHeight: 600,//对话框⾼度contents: [{ //对话框内容id: 'choice',name: 'choice',label: '插⼊选择题答案',title: '插⼊选择题答案',elements: [{id: 'rdType_1',type: 'radio', //表单元素类型:单选按钮items: [['中国赞','[中国赞]'],['⼴告','[⼴告]'],['doge','[doge]'],['喵喵','[喵喵]'],['⼆哈','[⼆哈]'],['抱抱','[抱抱]'],['哼','[哼]'],['思考','[思考]'],['⽣病','[⽣病]'],['偷乐','[偷乐]']]},{id: 'rdType_2',type: 'radio', //表单元素类型:单选按钮items: [['笑cry','[笑cry]'],['馋嘴','[馋嘴]'],['拜拜','[拜拜]'],['右哼哼','[右哼哼]'],['左哼哼','[左哼哼]'],['怒骂','[怒骂]'],['鄙视','[鄙视]'],['笑⽽不语','[笑⽽不语]']]},{id: 'rdType_3',type: 'radio', //表单元素类型:单选按钮items: [['害羞','[害羞]'],['费解','[费解]'],['挖⿐','[挖⿐]'],['悲伤','[悲伤]'],['打脸','[打脸]'],['抓狂','[抓狂]'],['哈哈','[哈哈]'],['傻眼','[傻眼]'],['好喜欢','[好喜欢]'],['好爱哦','[好爱哦]']]},{id: 'rdType_4',type: 'radio', //表单元素类型:单选按钮items: [['失望','[失望]'],['good','[good]'],['弱','[弱]'],['耶','[耶]'],['来','[来]'],['握⼿','[握⼿]'],['加油','[加油]'],['haha','[haha]'],['拳头','[拳头]'],['男孩⼉','[男孩⼉]']]},{id: 'rdType_5',type: 'radio', //表单元素类型:单选按钮items: [['话筒','[话筒]'],['礼物','[礼物]'],['飞机','[飞机]'],['⼲杯','[⼲杯]'],['围脖','[围脖]'],['钟','[钟]'],['肥皂','[肥皂]'],['浪','[浪]'],['⼥孩⼉','[⼥孩⼉]'],['照相机','[照相机]']]},{id: 'rdType_6',type: 'radio', //表单元素类型:单选按钮items: [['熊猫','[熊猫]'],['喜','[喜]'],['绿丝带','[绿丝带]'],['威武','[威武]'],['弗莱见钱眼开','[弗莱见钱眼开]'],['看涨','[看涨]'],['看跌','[看跌]'],['奥特曼','[奥特曼]'],['兔⼦','[兔⼦]']]},{id: 'rdType_7',type: 'radio', //表单元素类型:单选按钮items: [['顶','[顶]'],['⽶奇喜欢','[⽶奇喜欢]'],['⽶奇飞吻','[⽶奇飞吻]'],['⽶奇⼤哭','[⽶奇⼤哭]'],['⽶奇⽐⼼','[⽶奇⽐⼼]'],['笑哈哈','[笑哈哈]'],['羞嗒嗒','[羞嗒嗒]'],['憧憬','[憧憬]'],['酷','[酷]']] },{id: 'rdType_8',type: 'radio', //表单元素类型:单选按钮items: [['⽉亮','[⽉亮]'],['围观','[围观]'],['蛋糕','[蛋糕]'],['微风','[微风]'],['⾳乐','[⾳乐]'],['猪头','[猪头]'],['鲜花','[鲜花]'],['太阳','[太阳]'],['Aloha','[Aloha]'],['赞啊','[赞啊]'],['求关注','[求关注]']] },{id: 'rdType_9',type: 'radio', //表单元素类型:单选按钮items: [['哈⽋','[哈⽋]'],['泪','[泪]'],['怒','[怒]'],['闭嘴','[闭嘴]'],['疑问','[疑问]'],['⽩眼','[⽩眼]'],['吐','[吐]'],['⿊线','[⿊线]'],['委屈','[委屈]'],['下⾬','[下⾬]'],['伤⼼','[伤⼼]']]},{id: 'rdType_10',type: 'radio', //表单元素类型:单选按钮items: [['作揖','[作揖]'],['星星','[星星]'],['半星','[半星]'],['空星','[空星]'],['草泥马','[草泥马]'],['浮云','[浮云]'],['沙尘暴','[沙尘暴]'],['给⼒','[给⼒]'],['骷髅','[骷髅]'],['最右','[最右]']]},{id: 'rdType_11',type: 'radio', //表单元素类型:单选按钮items: [['太开⼼','[太开⼼]'],['挤眼','[挤眼]'],['衰','[衰]'],['感冒','[感冒]'],['可怜','[可怜]'],['汗','[汗]'],['⾊','[⾊]'],['可爱','[可爱]'],['钱','[钱]'],['ok','[ok]'],['NO','[NO]'],['蜡烛','[蜡烛]']]},{id: 'rdType_12',type: 'radio', //表单元素类型:单选按钮items: [['吃狗粮','[吃狗粮]'],['蚁⼈','[蚁⼈]'],['黄蜂⼥','[黄蜂⼥]'],['吃⽠','[吃⽠]'],['允悲','[允悲]'],['坏笑','[坏笑]'],['困','[困]'],['互粉','[互粉]'],['睡','[睡]'],['并不简单','[并不简单]']]},{id: 'rdType_13',type: 'radio', //表单元素类型:单选按钮items: [['阴险','[阴险]'],['嘘','[嘘]'],['嘻嘻','[嘻嘻]'],['爱你','[爱你]'],['吃惊','[吃惊]'],['污','[污]'],['⿎掌','[⿎掌]'],['给你⼩⼼⼼','[给你⼩⼼⼼]'],['⼼','[⼼]'],['赞','[赞]']]},{id: 'rdType_14',type: 'radio', //表单元素类型:单选按钮items: [['微笑','[微笑]'],['偷笑','[偷笑]'],['舔屏','[舔屏]'],['亲亲','[亲亲]'],['摊⼿','[摊⼿]'],['跪了','[跪了]'],['晕','[晕]'],['⽶奇爱你','[⽶奇爱你]'],['带着微博去旅⾏','[带着微博去旅⾏]']]}]}],onOk: function () { //点击确定按钮出发onOK事件。
ckeditor的详细配置
3、将相应的控件替换成编辑器代码
<script type="text/javascript">
CKEDITOR.replace('TextArea1');
//如果是在环境下用的服务器端控件<TextBox>
CKEDITOR.replace('tbContent');
//如果<TextBox>控件在母版页中,要这样写
//是否对编辑区域进行渲染 plugins/editingblock/plugin.js
//改变大小的最大宽度
config.resize_maxWidth = 3000;
//改变大小的最小高度
config.resize_minHeight = 250;
//改变大小的最小宽度
config.resize_minWidth = 750;
// 当提交包含有此编辑器的表单时,是否自动更新元素内的数据
config.contentsCss = './contents.css';
//文字方向
config.contentsLangDirection = 'rtl'; //从左到右
//CKeditor的配置文件 若不想配置 留空即可
CKEDITOR.replace( 'myfiled', { customConfig : './config.js' } );
[ CKEDITOR.CTRL + 76 /*L*/, 'link' ], //链接
[ CKEDITOR.CTRL + 66 /*B*/, 'bold' ], //粗体
为CKEditor开发FLV视频播放插件
FLV视频格式具有本身占有率低、视频质量良好、体积小等特点,非常适合在网络上传播。
国内的视频站几乎都是采用FLV格式作为解决方案。
但是,在新版本的CKEditor里却没有FLV格式视频的支持。
不过CKEditor却提供了丰富的接口,于是我们自己动手开发CKEditor的FLV视频播放插件。
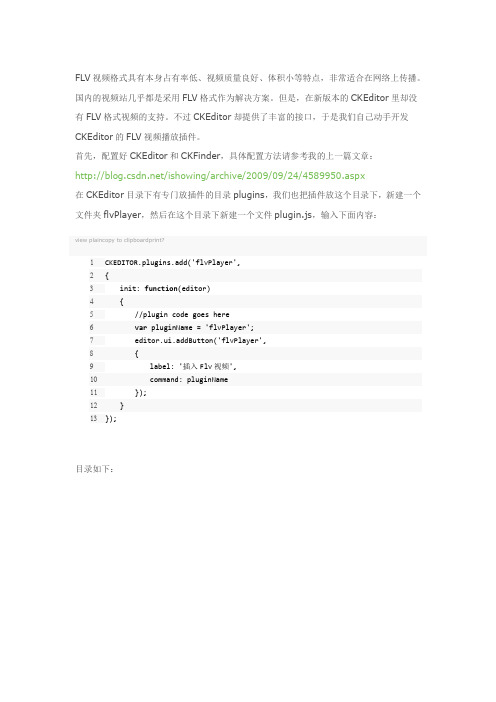
首先,配置好CKEditor和CKFinder,具体配置方法请参考我的上一篇文章:/ishowing/archive/2009/09/24/4589950.aspx在CKEditor目录下有专门放插件的目录plugins,我们也把插件放这个目录下,新建一个文件夹flvPlayer,然后在这个目录下新建一个文件plugin.js,输入下面内容:view plaincopy to clipboardprint?1CKEDITOR.plugins.add('flvPlayer',2{3 init: function(editor)4 {5 //plugin code goes here6var pluginName = 'flvPlayer';7 editor.ui.addButton('flvPlayer',8 {9 label: '插入Flv视频',10 command: pluginName11 });12 }13});目录如下:代码很容易理解,添加名为flvPlayer的插件,并初始化。
这里有两个参数需要注意:label:当鼠标悬停在按钮上出现的文字提示,相当于HTML里的titlecommand:点击按钮的时候默认执行的事件然后,我们在ckeditor\config.js里注册这个插件,就能看到了。
打开ckeditor\config.js,添加下面代码:view plaincopy to clipboardprint?14CKEDITOR.editorConfig = function( config )15{16 // Define changes to default configuration here. For example:17 // nguage = 'fr';18 // config.uiColor = '#AADC6E';19 config.toolbar = 'MyToolbar';2021 config.toolbar_MyToolbar =22 [23 ['Source','-','Save','NewPage','Preview','-','Templates'],24 ['Cut','Copy','Paste','PasteText','PasteFromWord','-','Print','SpellChecker', 'Scayt'],25 ['Undo','Redo','-','Find','Replace','-','SelectAll','RemoveFormat'],26 ['Form', 'Checkbox', 'Radio', 'TextField', 'Textarea', 'Select','Button', 'ImageButton', 'HiddenField'],27 '/',28 ['Bold','Italic','Underline','Strike','-','Subscript','Superscript'],29 ['NumberedList','BulletedList','-','Outdent','Indent','Blockquote'],30 ['JustifyLeft','JustifyCenter','JustifyRight','JustifyBlock'],31 ['Link','Unlink','Anchor'],32['Image','Flash','flvPlayer','Table','HorizontalRule','Smiley','SpecialChar','Pa geBreak'],33 '/',34 ['Styles','Format','Font','FontSize'],35 ['TextColor','BGColor'],36 ['Maximize', 'ShowBlocks','-','About']3738 ];39 config.extraPlugins = 'flvPlayer';4041};运行以后我们就可以看到,多出来一个位置:按钮上没有图片的话会让人郁闷的,于是我们给按钮添加一个图标。
经典的 Web 编辑器——CKEditor 介绍

CKEditor 简介CKEditor 是一款功能强大的开源在线文本编辑器。
它所见即所得的特点,使你在编辑时所看到的内容和格式,能够与发布后看到的效果完全一致。
利用它,我们可以在Web 上实现类似于Microsoft Word 的许多强大的功能。
CKEditor 完全是基于JavaScript 开发的,因此不必在客户端进行任何安装,并且兼容各大主流浏览器,比如:IE,Firefox,Chrome,Safari,Opera。
而且由于它是一个纯粹的JavaScript 应用,所以无论用的是哪种服务器端技术(JSP,PHP,ASP 等等),都可以获得很好的支持。
CKEditor 的前身是FCKEditor,这个项目是在2003 年由Frederico Caldeira Knabben 发起的,FCK 代表的就是项目创建者Frederico Caldeira Knabben 的简称。
从3.0 版本后,它改名为CKEditor,CK 代表的含义是Content And Knowledge(内容与知识)。
现在,CKEditor 隶属于CKSource 公司,背后拥有一个强大的技术团队的支持。
在同类产品之中,CKEditor 的使用最为广泛,社区最为活跃,一直拥有良好的口碑。
目前,有很多公司都在使用CKEditor 作为Web 编辑的解决方案,比如:IBM,Oracle,Adobe 等等。
其中,IBM 已经在其所发布的多款软件中广泛应用了CKEditor,这些软件包括:Lotus Connections,Lotus Quickr,LotusLive,Lotus Notes,Rational Requirements Management 等等。
不仅如此,IBM 也为CKEditor 的发展,不遗余力地提供了持续性的投入与支持,在IBM 内部的产品团队中,有专业的开发人员负责CKEditor 的定制开发,还有专门的技术社区供大家讨论和交流。
- 1、下载文档前请自行甄别文档内容的完整性,平台不提供额外的编辑、内容补充、找答案等附加服务。
- 2、"仅部分预览"的文档,不可在线预览部分如存在完整性等问题,可反馈申请退款(可完整预览的文档不适用该条件!)。
- 3、如文档侵犯您的权益,请联系客服反馈,我们会尽快为您处理(人工客服工作时间:9:00-18:30)。
CKEditor插件开发星期二7/27/2010 发布在Tutorial | 评论From: /content/2/ckeditor-plugin-development/根据comment有修改CKeditor API: /ckeditor_api/index.htmlCKEditor 是目前市场上比较灵活的在线WYSIWYG编辑器之一. 它灵活的设计, 开放的API和详细的文档使得用户扩展功能非常容易. 本文尝试勾勒出CKEditor插件开发的基础,包含了增加按钮,对话框和执行命令.源代码的结构在开始之前,感性的认知一下CKEditor源码的组织形式是很有用的. CKEditor固有的一些文件被组织到ckeditor\_source目录里. 核心的功能,诸如DOM元素操作,事件处理,初始化脚本和一些环境设置被包含在ckeditor\_source\core文件夹内. 而其它的一些功能, 比如格式化,拷贝和粘贴, 图片和链接, 都被实现为插件形式放在ckeditor\_source\plugins文件夹内. 每个文件夹表示一个插件. 并且在每个文件夹内, 有一个plugin.js的文件包含了该插件需要用到的代码.你可以看到源代码被组织成不同的文件. 为了减少HTTP请求, CKEditor把不同的文件压缩并打包到ckeditor.js和ckeditor_basic.js里, 这种方式是运行编辑器的默认方式. 在开发的过程中, 你会希望通过ckedtior_source.js来代替ckeditor.js的执行.现在, 创建ckeditor\_source\plugins\footnote目录,并在目录里创建plugin.js文件.配置插件为了开始开发你的插件, 你需要首先注册你的插件,这样CKEditor才能载入它. 在ckeditor/config.js 里,增加:config.extraPlugins='f ootnote';此配置将会告诉编辑器在footnote目录下载入plugin.js. 基本的plugin.js结构如下:CKEDITOR.plugins.add('f ootnote',{init:f unc tion(editor){//plugin co de goe s here}});按钮CKEditor中主要的功能的实现基本都是通过命令的形式. 命令由事件,函数调用或者点击某个工具栏的按钮触发. 下列代码增加了一个‟Footnote‟的按钮和…footnote‟的命令.CKEDITOR.plugins.add('f ootnote',{init:f unc tion(editor){var pluginName ='f ootnote';CKEDITOR.dialog.add(pluginName,this.path+'dialogs/f ootnote.j s');editor.addCommand(pluginName,new CKEDITOR.dialogCommand(pluginName));editor.ui.addButton('Footnote',{label:'Footnote or Citation',c ommand:pluginName});}});editor.ui.addButton函数声明包含了两个参数, 按钮名字和按钮定义. 在按钮定义中可能的属性还包含: ∙label: 当鼠标位于按钮之上时所出现的文字提示∙className: 按钮的css类名. 默认为: …cke_button_‟ + 命令名称∙click: 当点击按钮后所调用的函数. 默认为: 执行由命令键值指定的命令.∙command: 将在按钮点击之后执行的命令上述代码利用了CKEDTIOR.dialogCommand,该函数将在下面的对话章节中介绍. 在添加了一个按钮后,你需要把…Footnote‟增加到config.js的工具栏的定义中, 把该按钮放到工具栏的合适的位置.之后,你就能看到一个空的按钮出现在工具栏里.按钮图片最简单的增加按钮图片的办法是利用属性icon. 代码如下:CKEDITOR.plugins.add('myplugin',{init:f unc tion(editor){//plugin co de goe s hereeditor.ui.addButton('myplugin',{label:'myplugin',c ommand:FCK Command_myplugin,icon:CK EDITOR.plugins.getPath('myplugin')+'myplugin.png'});}});命令CKEditor以命令的方式提供了大部分的功能. 命令和函数之间的不同是命令是有“ON”, “OFF“和未启用状态的.定义一个命令editor.addCommand函数声明了两个参数, 命令名字和命令的对象定义. 可能的命令定义的属性包含:∙exec: 最小形式, 定义的对象拥有一个exec方法, 该方法会在命令执行时执行.∙modes: 命令能被执行的模式. 默认为: {wysiwyg:1} 有效的模式是: wysiwyg, source∙editorFocus: 在执行命令时,是否给予编辑器焦点. 默认: true∙state: 命令的状态. 默认: CKEDITOR.TRISTATE_OFF∙canUndo: 该命令是否会和redo/undo系统挂钩∙async: 在异步功能,例如ajax中被用到. 在执行完命令后, afterCommandExec事件将不会被自动触发. 它将期望程序员能够手工触发该事件.执行命令触发命令是很简单的, 通过editor.execCommand(commandName);命令状态命令有三个状态: ON, OFF和DISABLED. 状态能够通过setState进行设置,例如:editor.getCommand(commandName).setState(state);状态值将会是: CKEDITOR.TRISTATE_ON, CKEDITOR.TRISTATE_OFF,CKEDITOR.TRISTATE_DISABLED 中的一个.当设置为未启用的时候, 按钮将会表现为灰色, 并且通过execCommand执行的命令将无效. 当设置为on的时候, 按钮就会被高亮. 当命令的状态改变的时候, 命令将会触发一个‟state‟事件.对话框对话框是一些插件的核心. 为了使用该对话框, 他们必须首先在plugin.js中注册, 包括定义, 通过调用CKEDITOR.dialog.add如下:CKEDITOR.dialog.add(pluginName,this.path+'dialogs/pluginName.j s');之后,如果你想通过点击一个按钮触发这个对话框, 你可以通过使用CKEDITOR.dialogCommand来简单的完成这项工作.editor.addCommand(pluginName,new CKEDITOR.dialogCommand(pluginName));对话框定义按约定,有关对话框的代码将会被放到dialogs/.js中. 和按钮和命令类似, 对话框也是通过定义一些属性和方法来定义的. 下面的代码展示了一个标准的.js的模板:(f unc tion(){var exampleDialog =f unction(editor){return{title :/* title in string*/,minWidth :/*number o f pixels*/,minHeight :/*number o f pixels*/,buttons:/*a rray o f butto n de finitions*/,onOk:/*functio n*/,onLoad:/*function*/,onShow:/*function*/,onH ide:/*function*/,onCancel:/*function*/,resizable:/* no ne,width,height or both */,c ontents:/*conte nt de finition, ba sically the UI o f the dia log*/}}CKEDITOR.dialog.add('insertHTML',f unction(editor){return exampleDialog(editor);});})();定义里有以下一些属性/方法:Buttons该属性定义了对话框底部可用的按钮. 它是一个CKEDITOR.dialog.buttonDefinition对象的数组. 默认的值是[ CKEDITOR.dialog.okButton, CKEDITOR.dialog.cancelButton ]. 为了增加你自己的按钮, 你须要写下按钮的定义,并把它加到该数组里. 例如:buttons:[{type:'button',id:'someButtonID',/* note: this is not the CSS ID attribute! */label:'Button',onClick:f unc tion(){//action on click ing the button}},CKEDITOR.dialog.okButton,CKEDITOR.dialog.cancelButton],效果如下:对话框事件onOK, onLoad, onShow, onHide, onCancel 事件在不同的情况下会被触发. onLoad在对话框第一次打开的时候被触发, 可以用来针对该对话框做一些初始化. onShow在对话框显示的时候被触发. onLoad 和onShow的不同之处在于onLoad将只触发一次,而不管对话框被打开或关掉多少次, 而同时onShow 将在对话框每次显示的时候被触发. 这是因为在按下ok或cancel的时候,对话框将被隐藏(触发onHide),而不是完全的卸载. onOk和onCancel将在ok或cancel按钮被按下的时候触发.Resizable该属性用来描述对话框是否可以被调整大小. 可能的值包含: CKEDITOR.DIALOG_RESIZE_NONE, CKEDITOR.DIALOG_RESIZE_WIDTH, CKEDITOR.DIALOG_RESIZE_HEIGHT and CKEDITOR.DIALOG_RESIZE_BOTH. Default is CKEDITOR.DIALOG_RESIZE_NONE对话框的UI对话框的用户接口是对话框属性定义的内容. 对话框的UI部分会首先被组织为几个页面, 每个页面表示了对话框的一个tab页. 在每个页面中, 输入元素(按钮,文本输入,文本区域, 单选, 下拉, 多选和文件)都将被辅助性的结构元素(vbox,hbox和label)组织起来. 通过写这些UI元素的定义, 你将不须要写任何html代码而完成对这些UI的行为和外表的定义. 当然,替代使用这些所提供的对象来构建用户界面的方法是依然选择用原始的HTML代码去实现html的UI元素。