EXceed WMS用户手册-越库0
WMS系统操作手册-产品管理篇
WMS系统操作手册-产品管理篇
前言
本手册讲述易仓WMS仓配管理系统的操作流程,旨在引导用户理解系统、正确使用系统,以及系统常见问题。
1. 版本信息
2. 产品管理
2.1产品管理
【功能概述】客户在OMS端新建的产品,要在WMS端进行审核。
查看所有客户创建的产品信息。
【功能入口】:【产品管理】-产品管理
【操作步骤】:产品管理-搜索-查看管理WMS产品信息;
【操作说明】:
查询:搜索查询出WMS所有产品信息
打印条码:选择勾选需要打印条码标签的产品代码进行标签条码打印;
自定义打印:自行导入产品信息进行产品条码标签打印;
批量打印:以导入表格的形式进行产品条码标签打印
注:打印前需要先维护打印机设备信息;
导出:全选或指定导出产品代码信息到EXCEL表格中;
批量修改自定义编码:以EXCEL表格方式进行批量导入维护产品代码的自定义编码信息;
导入产品质检项:
2.2产品仓库属性
【功能概述】查看所有仓库的产品信息(所属仓库、材积、重量、库位)。
编辑产品的长宽高、重量、货物类型、材积等信息
【功能入口】:【产品管理】-【产品仓库属性】
【操作步骤】:产品管理-产品仓库属性-搜索-查看管理WMS产品规则信息;
【操作说明】:
查询:搜索查询出WMS所有产品规则信息
添加:
批量更新属性:全选多选或单选需要修改产品规则信息的产品代码进行批量更新产品规则属性;
导出:导出选择的产品代码仓库属性至EXCEL表格中;
批量上传:以EXCEL表格维护好产品代码的规格信息进行批量表格上传维护;。
WMS系统操作技巧介绍说明
物流(WMS系统)操作手册WMS系统电脑桌面快捷方式图标如下:(说明:WMS系统更新程序,设置在开机时自动更新,如需手动更新,则点击自动更新图标即可)目录系统登录......................................................... 1~5 1.基础信息 ..................................................................................................................... 5~181.1 基础信息设置.................................................................................................... 6~161.1.1 货主......................................................................................................... 6~81.1.2 商品....................................................................................................... 8~111.1.3 货位..................................................................................................... 11~121.1.4 批属性................................................................................................. 12~131.1.5 图书规格(BOOKSIZE)................................................................ 13~141.1.6 上架策略维护....................................................................................... 15~161.2 公共信息设置.................................................................................................. 16~171.2.1 属性资料维护..................................................................................... 17~182.仓库........................................................................................................................ 18~1582.1 日常业务单据.................................................................................................. 18~962.1.1 到货处理环节..................................................................................... 19~322.1.1.1 到货登记.............................................................................. 19~282.1.1.2 到货情况查询...................................................................... 29~292.1.1.3 采购订单.............................................................................. 29~322.1.2 翻理环节............................................................................................. 32~502.1.3 直配环节............................................................................................. 51~592.1.4 拣配、集货环节................................................................................. 59~722.1.5 退货部分............................................................................................. 72~902.1.6 退货查询/报表......................................................................................... 91~962.2 库存管理........................................................................................................ 96~1582.2.1 库内移库............................................................................................. 96~972.2.2 库存调整........................................................................................... 97~1022.2.3 库存移转......................................................................................... 102~1042.2.4 3 ....................................................................................................... 104~1072.2.5 库存变动日志................................................................................. 107~1092.2.6 库存冻结......................................................................................... 109~1102.2.7 盘点请求......................................................................................... 110~1112.2.8 补货................................................................................................. 111~1142.2.9 图书库存查询................................................................................. 114~1172.2.10 直配预警......................................................................................... 117~1182.2.11 RF差异............................................................................................ 118~1192.2.12 商流对帐......................................................................................... 119~1242.2.13 箱子任务查找................................................................................. 124~1242.2.14 拒收书打印..................................................................................... 124~1262.2.15 仓库工作量统计 ............................................................................ 126~1272.2.16 货位占用空间................................................................................. 127~1292.2.17 进销存查询..................................................................................... 129~1302.2.18 发货统计......................................................................................... 130~1322.2.19 收货统计............................................................................................... 132~1342.2.20 任务/工作量统计................................................................................. 134~1562.2.20 物流中心综合查询............................................................................... 156~1583.订单(SO)处理 ........................................................................................................... 158~1604.任务管理................................................................................................................ 160~1774.2 交易.............................................................................................................. 161~1644.3 计划.............................................................................................................. 164~1775.排车/装车 ..................................................................................................................... 177~1935.1 排车/装车.................................................................................................... 178~1935.1.1 装车任务维护........................................................................................... 179~1835.1.2 生成装车任务........................................................................................... 184~1915.1.3 排车计划................................................................................................... 191~193RF操作手册...................................................................................................................... 194~223 ERP建立书目和供应商原单录入操作手册...................................................... 224~235 信息中心外挂程序 ......................................................................................................... 235~238系统登录操作:录入用户名、密码,点击确定,登录物流(WMS)操作系统,如图所示:登录界面,点击<变更密码>,可修改密码,密码设定需英文字母加数字共6位,先输入原密码,再输入新密码,再次输入新码密确认,点击OK ,密码修改成功,如图所示:进入物流(WMS)操作系统,如图所示:保存按钮WMS操作系统的说明:一、查询说明1、在SSA(WMS)客户化软件操作界面模糊查询,只需在相关条件栏录入关键字,查询即可;2、凡在SSA(WMS)标准软件操作界面模糊查询,方法如下:(1)、如查询关键字后面模糊,在相关查询条件栏中,录入like ‘关键字%’ ,右击查询结果;(2)、如查询关键字前面模糊,在相关查询条件栏中,录入like ‘%关键字’ ,右击查询结果;(3)、如查询包含关键字,在相关查询条件栏中,录入like ‘%关键字%’,右击查询结果。
WMS出入库及转库操作说明
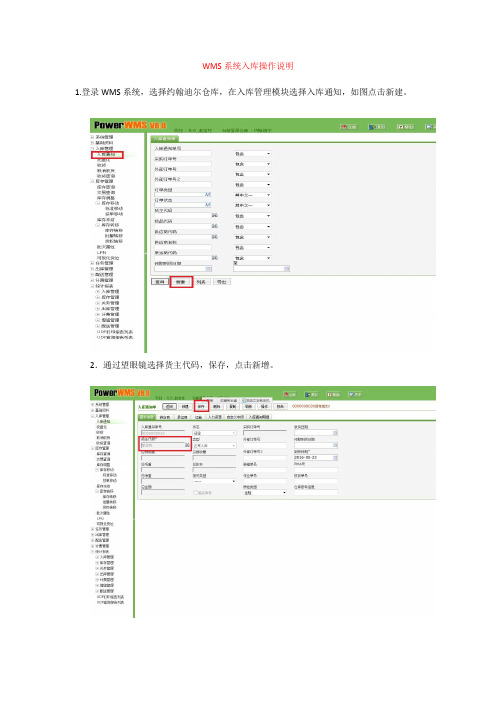
WMS系统入库操作说明1.登录WMS系统,选择约翰迪尔仓库,在入库管理模块选择入库通知,如图点击新建。
2.通过望眼镜选择货主代码,保存,点击新增。
3.通过望眼镜选择货品代码,输入预测量,选择清洗状态和货品属性,保存。
4.收货:选择收货,选择订单状态-新增,点击查询。
出现新增货品信息,点击。
5.在入库通知明细处勾选货品--批量接收;在收货明细处勾选货品,选择操作--自动上架;在上架明细处勾选货品,确认货位处输入货位--选择确认上架。
入库完成。
WMS系统出库操作说明1.选择出库管理模块-发货订单,点击新建。
2.通过望眼镜选择货主代码,输入外部订单号,保存。
点击订单行选择新增。
3通过望眼镜选择货品代码,VW默认托盘数量,神龙默认周转箱数量进行作为分配基数。
4.勾选货品进行分解。
5.选择出货执行,点击查询。
选择对应货主单号的订单,点击查询。
6.勾选货品,点击批量分配进行分配,选择操作,确认拣货进行拣货。
复制发货订单号。
7.选择发货,将复制的订单号粘贴在发货订单号处,点击查询,勾选货品点击发货,再次勾选货品,修改发货时间。
修改到指定发货时间。
出货完成。
WMS系统库位库存移动操作说明按单移动:适用VW及神龙项目,有按单移动模板。
通过库存转移更改货品属性。
标准移动:适用全部项目。
按单移动:1.选择库存管理模块-库存移动-按单移动,点击新建。
2.通过望眼镜选择货主代码,保存。
3.点击移动明细-数据导入,出现下图所示,点击BROWSE,导入相应按单移动模板,点击确认,返回。
4.导入成功后,勾选货品,选择操作分配,确认。
按单移动数量完成。
WMS系统库存转移操作:库存移动用来变更货品属性。
1.点击库存管理模块-库存移动-库存转移。
点击新建。
2.通过望眼镜选择原货主代码及至货主代码,保存。
3.点击库存转移明细-新增。
4.通过望眼镜选择货品代码,在货位处输入货位,点击查询。
选择要更改的货品。
5.点击复制,将货品信息复制后,选择清洗状态,保存。
智能仓储WMS系统使用情况说明

智能仓储WMS系统使用情况说明智能仓储WMS系统的功能及使用WMS是仓库管理系统(Warehouse Management System) 的缩写,仓库管理系统是通过入库业务、出库业务、仓库调拨、库存调拨和虚仓管理等功能,综合批次管理、物料对应、库存盘点、质检管理、虚仓管理和即时库存管理等功能综合运用的管理系统,有效控制并跟踪仓库业务的物流和成本管理全过程,实现完善的企业仓储信息管理。
该系统可以独立执行库存操作,与其他系统的单据和凭证等结合使用,可提供更为完整全面的企业业务流程和财务管理信息。
WMS系统的功能货位管理采用数据收集器读取产品条形码,查询产品在货位的具体位置,(如X产品在A货区B航道C货位),实现产品的全方位管理。
通过终端或数据收集器实时地查看货位货量的存储情况、空间大小及产品的最大容量,管理货仓的区域、容量、体积和装备限度。
产品质检产成品包装完成并粘贴条码之后,运到仓库暂存区由质检部门进行检验,质检部门对检验不合格的产品扫描其包装条码,并在采集器上作出相应记录,检验完毕后把采集器与计算机进行连接,把数据上传到系统中;对合格产品生成质检单,由仓库保管人员执行生产入库操作,产品入库从系统中下载入库任务到采集器中,入库时扫描其中一件产品包装上的条码,在采集器上输入相应数量,扫描货位条码(如果入库任务中指定了货位,则采集器自动进行货位核对),采集完毕后把数据上传到系统中,系统自动对数据进行处理,数据库中记录此次入库的品种、数量、入库人员、质检人员、货位、产品生产日期、班组等所有必要信息,系统并对相应货位的产品进行累加。
物料配送根据不同货位生成的配料清单包含非常详尽的配料信息,包括配料时间、配料工位、配料明细、配料数量等,相关保管人员在拣货时可以根据这些条码信息自动形成预警,对错误配料的明细和数量信息都可以进行预警提示,极大的提高仓库管理人员的工作效率。
产品出库产品出库时仓库保管人员凭销售部门的提货单,根据先入先出原则,从系统中找出相应产品数据下载到采集器中,制定出库任务,到指定的货位,先扫描货位条码(如果货位错误则采集器进行报警),然后扫描其中一件产品的条码,如果满足出库任务条件则输入数量执行出库,并核对或记录下运输单位及车辆信息(以便以后产品跟踪及追溯使用),否则采集器可报警提示。
WMS及电子分拣系统操作手册
WMS及DPS系统操作细则目录一、登陆WMS软件二、基础信息准备(测试组准备)学员查询三、入库操作(含软件操作与RF 操作)四、岀库操作(含软件操作与RF操作)五、条码制作软件操作方法六、电子标签拣选系统(DPS)软件操作流程>登陆WMS软件打开IE浏览器,输入物流考核软件的访问地址:httD://IP:996/noswms,其中IP 为服务器的IP地址,根据给定账号密码登陆用户账户。
(打开桌面“深圳市中诺思资讯科技有限公司”图标启动物流考核软件,根据给定账号密码登陆用户账户。
)二.基础信息准备(测试组准备)学员査询[•输入或确认基础数据。
基础数据主要包括:仓库信息、仓位信息、托盘信息及物料信息等仓储业务发生所必须的数据基础。
2•录入或确认客户信息。
客户管理/客户信息:仓储业务发生的所有客户信息(含上下游所有客户)。
注意事项:操作过程中如遇系统提示错误,点击浏览器上的【后退】按钮,回到上一步,从新进行操作。
本软件多数操作是不可逆操作,如遇不能删除或后退, 请从新进行录入或操作。
三.入库操作(含软件操作与RF操作)根据给出的入库单在系统中制定相应的入库单,配令RF操作将货物入库,同时完成信息系统的录入。
1 •点击【订单管理/入库计划】进入到入库订单列表页面。
2•新增入库订单:点击【新增】按钮,进入到新增贝面:计划单号:录入计划制定的入库单单号。
客户名称:点击后面的输入框,系统将自动弹出客户信息对话框,点击査询, 当出现要录入的客户名称选中即可。
或是选择手动输入,该项为必输项,不可置空。
入库日期:点击后面的输入框,系统将自动弹出时间对话框,选择时间,手动输入无效,该项为必输项,不可置空。
完善入库订单明细:点击【新增货品】按钮,系统将新增一空行,再点击货品条码下的空Cb系统将自动弹出货品信息的对话框,点击査询,当出现要录入的货品名称选中即可,再输入该货品计划入库的数量。
点击【保存】按钮,完成点击【入库管理/入库作业儿进入到入库订单列表页面:确认生成的未确定入库单。
WMS用户手册
WMS用户手册欢迎使用 WMS! WMS 是一款功能强大的物流管理系统,可以帮助您更有效地管理物流流程,提高效率。
本手册将介绍 WMS 的基本功能,以及如何使用 WMS 进行物流管理。
一、WMS 功能1. 库存管理:WMS 可以帮助您管理仓库中的货物,包括库存数量、存储位置等信息。
2. 进出库管理:WMS 可以帮助您跟踪进出库货物,并记录相关信息,例如货物名称、数量、时间等。
3. 货物跟踪:WMS 可以帮助您跟踪货物在仓库中的流动情况,并及时发现异常情况。
4. 仓库管理:WMS 可以帮助您管理仓库的货架、储物柜、工作台等,以及货物的存储位置。
5. 报表管理:WMS 可以帮助您生成各种类型的报表,以便更好地管理物流流程。
二、如何使用 WMS1. 注册:首先,您需要在 WMS 网站上注册一个账号,以便使用 WMS 的功能。
2. 登录:登录后,您可以看到 WMS 的主界面,并开始使用 WMS 的功能。
3. 库存管理:在 WMS 的主界面上,您可以看到库存管理模块,可以对仓库中的货物进行管理。
4. 进出库管理:在 WMS 的主界面上,您可以看到进出库管理模块,可以对进出库货物进行管理。
5. 货物跟踪:在 WMS 的主界面上,您可以看到货物跟踪模块,可以跟踪货物在仓库中的流动情况。
6. 仓库管理:在 WMS 的主界面上,您可以看到仓库管理模块,可以对仓库的货架、储物柜、工作台等进行管理。
7. 报表管理:在 WMS 的主界面上,您可以看到报表管理模块,可以生成各种类型的报表,以便更好地管理物流流程。
三、WMS 安全1. 密码安全:WMS 使用复杂的加密算法来保护您的账号密码,以防止他人窃取您的账号密码。
2. 数据安全:WMS 将您的数据存储在加密的数据库中,以防止他人窃取您的数据。
3. 网络安全:WMS 使用严格的网络安全技术,以防止他人攻击或窃取您的数据。
四、WMS 支持如果您在使用 WMS 时遇到任何问题,可以联系 WMS 客服,我们将尽快为您解决。
WMS系统用户手册-V4.30
word格式-可编辑-感谢下载支持WMS USER GUIDEWMS 系统用户手册上海富勒信息科技有限公司包括:作者:主要联系人:创建日期:最后更新:版本:Cynthia LeeCynthia Lee2007 年05 月29 日2015 年03 月09 日4.30变更记录日期作者版本变更参考07/05/23 09/06/15 14/10/08 15/02/28CynthiaCynthiaCynthiaCynthia1.02.34.234.30Rich Client Version月台管理、质检、加工、装车V4R2M3V4R3M0审核姓名职务分发副本姓名地点1234目录第一章概述 (11)欢迎 (12)申明 (12)培训的目标 (12)第二章仓库、配送中心管理概述 (13)目标 (14)现代仓储、配送中心管理的目标 (14)仓库的类型 (14)仓储、配送中心的运作流程概述 (16)备注 (21)第三章FLUX WMS 概述 (22)目标 (23)什么是仓库管理系统 (23)FLUX WMS 的系统结构 (23)登录FLUX WMS (24)版本更新 (26)切换仓库 (27)修改密码 (28)FLUX WMS 的模块 (29)FLUX WMS 的用户界面 (31)消息广播 (34)锁定系统 (35)系统伤心日记 (35)备注 (37)第四章基础设置 (38)目标 (39)基础设置概述 (39)系统代码 (40)区域和库区 (42)库位 (44)库位组 (49)批次属性 (50)包装 (54)客户档案 (58)货物类型 (70)产品档案 (71)组件 (90)海关HScode (92)循环级别 (94)装箱 (94)月台 (96)设备 (97)路线 (98)备注 (100)第五章业务规则 (101)目标 (102)业务规则概述 (102)系统配置 (103)上架规则 (105)库存周转规则 (111)配货准备和配货 (114)预配规则 (114)分配规则 (116)补货规则 (118)质检规则 (118)word格式-可编辑-感谢下载支持Full-value Logistics, United eXpertise 序列号规则 (120)DataHub 接口配置 (121)定时器 (122)流水号规则 (122)波次计划规则 (123)导入文件格式定义 (127)配送规则 (128)路线规则 (129)归档规则 (129)报表自定义数据源 (130)自定义功能管理 (131)界面字段控制 (132)单据合并打印设置 (133)备注 (134)第六章入库操作 (135)目标 (136)入库流程概述 (136)采购订单(PO) (137)预期到货通知(ASN) (142)码盘预约 (161)收货 (165)上架 (175)取消收货 (177)质量检验 (178)收货异常处理 (181)ASN 编组 (181)其他组合功能 (185)备注 (187)第七章库存管理 (188)目标 (189)概述 (189)库存冻结 (200)库存移动 (202)库存移动单 (204)库存调整 (207)库存调整单 (208)库存转移 (211)库存转移单 (213)库存盘点 (216)库存冻结单 (221)库存扫描作业 (223)图形化库存查询 (224)备注 (226)第八章出库操作 (227)目标 (228)出库流程概述 (228)发运订单(SO) (229)波次计划(Wave) (246)预配 (255)分配 (256)拣货 (258)发货 (261)取消发货 (262)销售订单 (263)销售订单编组 (263)手工波次模板 (264)出库复核 (265)单品复核 (278)波次播种 (281)配送单作业 (282)集拼箱 (284)拣货异常处理 (291)复核异常处理 (292)出库放行单 (293)集货位 (293)发票管理 (295)包裹管理 (296)备注 (298)第九章任务管理 (299)目标 (300)任务管理 (300)补货任务 (301)上架任务 (305)拣货任务 (306)后台作业查询 (307)归档库召回 (308)备注 (309)第十章费收 (310)目标 (311)费收概述 (311)仓储费率设置 (311)费用结算 (316)运输费率设置 (319)收入/支出结算 (321)备注 (322)第十一章预警 (323)目标 (324)预警 (324)预警参数设置 (324)自定义预警查询 (325)第十二章报表&KPI (327)报表 (328)入库日报表 (328)出库日报表 (328)库存报表 (329)进出存合并报表 (329)仓库入库作业汇总单 (329)仓库出库作业汇总单 (330)发货装车清单 (330)零库存产品汇总清单 (330)标准库龄报表 (331)分段库龄报表 (331)入库序列号报表 (331)出库序列号报表 (332)ABC 动态分析 (332)理论库存报表 (334)自定义查询 (334)KPI (336)备注 (337)第十三章月台管理 (338)目标 (339)概述 (339)月台管理 (339)备注 (341)第十四章增值服务 (342)目标 (343)概述 (343)加工单 (343)增值服务单 (345)部件拆分 (346)第十五章行业插件 (348)目标 (349)行业插件 (349)自定义操作 (349)自定义导入 (351)称重 (352)业务申请单 (353)序列号查询 (355)药品养护 (356)药品检验报告 (357)药品资料审核 (358)客商资料审核 (359)备注 (360)第十六章资源管理 (361)目标 (362)概述 (362)工作组 (362)员工 (363)派工单 (364)备注 (366)第十七章系统管理 (367)目标 (368)概述 (368)创建角色管理 (368)权限管理 (370)用户管理 (370)相关功能 (373)系统配置 (374)信息查询 (375)备注 (376)word格式-可编辑-感谢下载支持Full-value Logistics, United eXpertise 附录一常见问题 (1)备注 (1)第一章概述欢迎欢迎参加FLUX WMS 的培训课程上海富勒信息科技有限公司(以下称FLUX)是具有领先地位的供应链咨询和软件实施提供商,以提供最好的物流管理解决方案为特色。
EXceed WMS用户手册-越库4
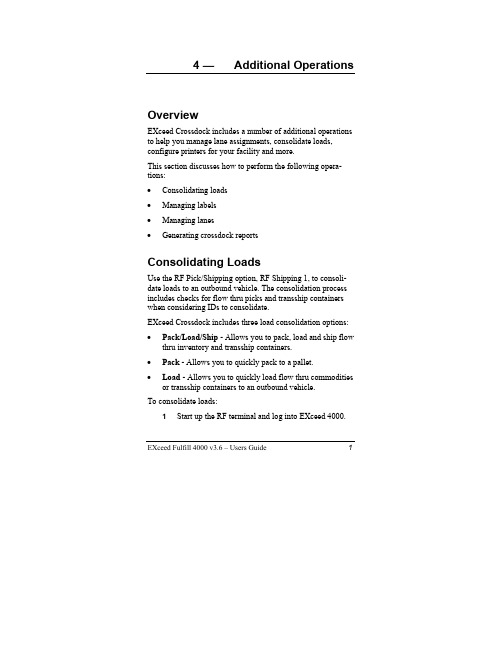
4 — Additional OperationsOverviewEXceed Crossdock includes a number of additional operations to help you manage lane assignments, consolidate loads, configure printers for your facility and more.This section discusses how to perform the following opera-tions:• • • ••• • Consolidating loads Managing labels Managing lanes Generating crossdock reportsConsolidating LoadsUse the RF Pick/Shipping option, RF Shipping 1, to consoli-date loads to an outbound vehicle. The consolidation process includes checks for flow thru picks and transship containers when considering IDs to consolidate.EXceed Crossdock includes three load consolidation options: Pack/Load/Ship - Allows you to pack, load and ship flow thru inventory and transship containers.Pack - Allows you to quickly pack to a pallet.Load - Allows you to quickly load flow thru commodities or transship containers to an outbound vehicle.To consolidate loads:1 Start up the RF terminal and log into EXceed 4000.EXceed Fulfill 4000 v3.6 – Users Guide 1Crossdock Additional Operations The EXceed 4000 Main Menu appears.2 From the EXceed 4000 Main Menu, press 6.The Picking Tasks menu appears.3 Press4 for RF Ship 1.2 EXceed Fulfill 4000 v3.6 – Users GuideCrossdock Additional OperationsThe Pack/Load/Ship menu appears.4 If you wish to use the standard Pack/Load/Ship op-tion:a Press 1 for Pack/Load/Ship.The Pack/Load/Ship screen appears.b Fill in the appropriate fields by scanning or typ-ing in the information.TIP: When packing cases to a pallet, type PACK into the ACT field. When loading pallets to an outbound ve-EXceed Fulfill 4000 v3.6 – Users Guide 3Crossdock Additional Operations hicle, type LOAD into the ACT field. When you areready to ship the inventory, type SHIP into the ACTfield.c When you complete the last field on the screenand press Enter twice, the unit transmits the datato the EXceed database and then displays a newscreen so you can pack, load or ship the nextitem.5 If you wish to use the Pack option:a From the Pack/Load/Ship menu, press 2.The RF Pack screen appears.b Fill in the appropriate fields by scanning or typ-ing in the information.When you complete the last field on the screenand press Enter twice, the unit transmits the datato the EXceed database and then displays a newscreen so you can pack the next item.NOTE:Depending upon the configuration of your Prompts file, your system may display one of two differentmessages if you attempt to pack cases allocated todifferent customers on the same pallet. The systemwill either display a warning message asking if you 4 EXceed Fulfill 4000 v3.6 – Users GuideCrossdock Additional Operationswould like to create a multi-customer record, or itwill display a hard error message. Discuss Promptsfile options with your EXE Technologies representa-tive.6 If you wish to use the Load option:a From the Pack/Load/Ship menu, press 3 forLoad.The RF Load screen appears.b Fill in the appropriate fields by scanning or typ-ing in the information.When you complete the last field on the screenand press Enter twice, the unit transmits the datato the EXceed database and then displays a newscreen so you can load the next item.7 Press Esc to return to the EXceed 4000 Main Menu. NOTE: The Status field on the Picks tab of the Flow Thru Allocation Management screen is updated to"Picked" status after consolidation is completed. TIP: If you made a mistake and would like to de-consolidate from a load, use the RF Pack option to re-pack the case to the correct pallet. Similarly, to de-consolidate a pallet loaded to an outbound vehicle, EXceed Fulfill 4000 v3.6 – Users Guide 5Crossdock Additional Operations6 EXceed Fulfill 4000 v3.6 – Users Guideuse the RF Load option to re-pack the pallet to thecorrect outbound vehicle. Use the Maintain Drop ID screen to verify your corrections.Table 4—1: Typical RF Ship 1 FieldsOn ScreenFull Name Definition Pack/LoadShipThis screen appears when you choose option #1 on the RF Ship 1 menu. FROM ID ID Number Identifier for the movable unit,usually barcoded on the caseor pallet.FROM LOC Location Original location of the goodswithin the facility.TO ID ID Number Identifier for the movable unitin the new location.TO LOC Location New location of the goods.ACT Action The action being performed -PACK, LOAD or SHIP . RF Pack This screen appears when you choose option #2 on the RF Ship 1 menu. FROM ID ID Number Identifier for the movable unit, usually barcoded on the caseor pallet.TO IDID Number Identifier for the movable unitin the new location. RF LoadThis screen appears when you choose option #3 on the RF Ship 1 menu. FROM IDID Number Identifier for the movable unit. TO ID ID Number Identifier for the movable unitin the new location.Crossdock Additional OperationsInquiring About CasesEXceed Crossdock provides functionality that will allow you to use the RF module to inquire about specific cases that have been consolidated to pallets or outbound vehicles before shipment. The Case Inquiry screen allows you to view detailed information about a particular case.To inquire about a case:1 Start up the RF terminal and log into EXceed 4000.The EXceed 4000 Main Menu appears.2 From the EXceed 4000 Main Menu, press 7. EXceed Fulfill 4000 v3.6 – Users Guide 7Crossdock Additional Operations The Inquiry Tasks menu appears.3 Press 2 for Case ID.The Case Inquiry screen appears.4 Type or scan the case ID number in the Case fieldand press Enter twice.8 EXceed Fulfill 4000 v3.6 – Users GuideCrossdock Additional OperationsThe Case Info screen appears.NOTE: Use this screen to verify or review information connected to the case ID. You do not have the abilityto change case information from this screen.5 Press Esc to return to the EXceed 4000 Main Menu. Table 4—2: Typical Case Inquiry FieldsOn Screen Full Name DefinitionID IdentificationNumber Identifier for the case. Usually barcoded on the case.STOR Storer Name of the storer of thegoods.SKU CommodityCode Commodity code, also known as a PROD, product code, item code or UPC code.QTY Quantity Amount of goods in thespecified location.DLOC Drop Location Current location of the goodsin the warehouse.EXceed Fulfill 4000 v3.6 – Users Guide 9Crossdock Additional OperationsOn Screen Full Name DefinitionDRP ID Drop ID Identifier for the moveable unitthat case ID is consolidated to. CSTM Customer Customer that the case hasbeen allocated to.Printing Outbound DocumentsThe Master Bill of Lading (MBOL), Bill of Lading (BOL) and Packing Slip are standard outbound documents used to record information about shipments being transported via the same carrier.When the documents are printed, the shipment status changes from "Shipped" to "Printed/Released". One Bill of Lading and one Packing Slip are printed for each customer. One MasterBill of Lading is printed for each Carrier. Outbound docu-ments can only be printed for loads that have already been consolidated to an outbound vehicle and prepared for ship-ment.To generate outbound documents:1 Start the EXceed 4000 Series Workstation.2 From the EXceed Explorer, double-click TaskManager.3 Double-click Transactions, and then click Drop ID.10 EXceed Fulfill 4000 v3.6 – Users GuideThe Maintain Drop ID window appears.4 Enter a drop ID in the Drop ID field, right-click thewindow and then choose Apply Search from themenu that appears.The Form tab appears.5 Right-click the header, select Documents, and thenchoose Outbound Documents from the menu thatappears.EXceed Fulfill 4000 v3.6 – Users Guide 11NOTE: All documents will automatically print to the default Windows printer in the facility.12 EXceed Fulfill 4000 v3.6 – Users GuideManaging LabelsLabels are generated at various stages during the process of moving commodities from the inbound dock to the outbound dock. Labels are generated automatically when the Pick to Belt method of receiving for flow thru commodities is used. EXceed Crossdock includes the following default labels:• Standard Pick to Belt Case• Pick to Belt Warning• Flow Thru Pallet• Transship Container• Flow Thru Move Task• Transship Move TaskConfiguring PrintersA number of specific printer configurations can be saved for your facility. Typically, printers will be configured once during the installation of EXceed 4000. An EXE Technologies technician should handle this procedure. The RF Printers Configuration option provides the ability to predetermine printer information for RF printing labels.To configure printers:1 Start the EXceed 4000 Series Workstation.2 From the EXceed Explorer, double-click Barcodes.3 Double-click Printers, and then click RF PrintersConfiguration.EXceed Fulfill 4000 v3.6 – Users Guide 13The Maintain Printer Info window appears.4 Right-click the window and choose Add New Re-cord from the menu that appears.The Form tab appears.5 Fill in the fields as required, making sure to select aspecific job type from the drop-down menu in theJob Type field.6 Click the Save button.14 EXceed Fulfill 4000 v3.6 – Users GuideTable 4—3: Maintain Printer Info - Form FieldsField DescriptionSimple Name Simple name for the printer configuration. Printer Number Printer number.Drop Directory Directory where the file resides.Llm Directory Storage location where label definitionsreside.Label Name Name of the barcode label format.Job Type Label types specified by type of job and typeof container.Creating Printer LabelsYou must create barcodes for your printers if you want yourRF users to have the ability to scan printers with a RF gun.The system provides the ability to print barcode labels for printers in your facility.To create barcode labels for printers:1 Start the EXceed 4000 Series Workstation.2 From the EXceed Explorer, double-click Barcodes.3 Double-click Printers, and then click RF PrintersConfiguration.EXceed Fulfill 4000 v3.6 – Users Guide 15The Maintain Printer Info window appears.4 Right-click the window and choose Add New Re-cord from the menu that appears.The Form tab appears.5 Right-click the window and choose Label from themenu that appears.16 EXceed Fulfill 4000 v3.6 – Users GuideThe Printer Labels window appears.6 Right-click the window and choose Add New Re-cord from the menu that appears.The Form tab appears.7 Enter the number of copies in the Copies field. EXceed Fulfill 4000 v3.6 – Users Guide 178 Choose a label name from the drop-down menu in theLabel Name field.9 Choose a printer name from the drop-down menu inthe Printer field.10 Click the Save button.Table 4—4: Printer Labels - Form FieldsField DescriptionCopies Number of copies.Label Name Name of the barcode label format.Printer Specified printer in the facility.List TabSimple Name Simple name for the printer configuration. Copies Number of copies.18 EXceed Fulfill 4000 v3.6 – Users GuideManaging LanesLane Management ensures that all commodities are assigned and placed in the correct lanes. The Lane Management window assigns a customer or commodity to a lane.To manage lane assignments:1 Start the EXceed 4000 Series Workstation.2 From the EXceed Explorer, double-click Cross-dock.3 Double-click Management, and then click Lane.The Lane Management window appears.4 To add a new lane assignment, right-click the win-dow and choose Add New Record.EXceed Fulfill 4000 v3.6 – Users Guide 19The Form tab appears.5 Enter the name of the lane in the Lane field.6 Choose a lane type from the drop-down menu in theLane Type field:a If you choose Customer Lane, OutboundLane, or Divert Lane you must then enter a cus-tomer or storer in the Customer/Storer field.b If you choose Commodity Lane, you must thenenter a storer in the Customer/Storer field and acommodity in the Commodity field.7 Click the Save button.8 If you wish to modify existing lane records,a Right-click the Search tab and choose ApplySearch.b When the List tab appears, choose a record tomodify from the list.9 If you wish to change or designate a specific flowlane, click on the drop-down menu in the Lane Typefield to change the lane type.20 EXceed Fulfill 4000 v3.6 – Users GuideNOTE:A warning message appears if you attempt to create a lane assignment for a lane that has already been as-signed.Table 4—5: Lane Management - Form FieldsField DescriptionLane Unique identification for the location of thelane. This is a required field.Lane Seq. Lane sequence.Lane Type Required field. There are five lane types:Lane Location designatedFlowCustomerfor a specific customer.FlowLane Location designated Commodityfor a specific commodity.Lane Location designated for the Outboundconsolidation of outbound shipment orders. DivertLane Location designated for multiplecustomer assignments.Lane Default lane type forUnassignedcommodities that do not have an assignment. Customer/Owner of the commodity.StorerCommodity Code identifying the commodity.Door Door in the facility where the goods will bedelivered.EXceed Fulfill 4000 v3.6 – Users Guide 21Generating Crossdock ReportsPre-defined crossdock reports give you the ability to effi-ciently compile information about flow thru inventory and transship containers in your facility. EXceed Crossdock includes a set of standard flow thru and transship reports that you can run and print using the EXceed 4000 Series Work-station. These reports are accessible through the Crossdock module and the Reports applet.To run a crossdock report:1 Start the EXceed 4000 Series Workstation.2 From the EXceed Explorer, double-click Cross-dock.3 Double-click the Reports icon, then click View Re-ports.The View Crossdock Report window appears.4 Right-click the window and then choose ApplySearch.22 EXceed Fulfill 4000 v3.6 – Users GuideThe List tab appears.5 Right-click the desired report and then choose RunReport.A dialog box appears for the report that you have se-lected. The fields in the dialog box vary according towhich report you selected.TIP If you wish to view a report form without any data before you run it, right-click that report and thenchoose View Blank Report.6 Fill in the appropriate fields. Make sure that you fillin any start or end dates.7 Click OK.EXceed Fulfill 4000 v3.6 – Users Guide 23EXceed 4000 displays the report on the Resultstab.TIP To move up, down, left or right in the report, use thescroll bars which accompany large reports. To view entire pages of the report, access the Print Previewwindow and press the Page Up or Page Down key.8 If you wish to make changes to your report beforeprinting it, right-click the window and choose one of the following:• Filter Allows you to reduce the number of re-cords in the report by specifying the records to beincluded.•Sort Allows you to sort data by dragging anddropping each expression. Many reports are pre-sorted and pre-grouped in a logical manner.Changes to the sorting and groupings may haveunexpected side effects. 9 If you wish to print the report, click the Print button. Table 4—6: Reports Provided with Crossdock24EXceed Fulfill 4000 v3.6 – Users Guide Report Name Description Drop ID ContentsR t Report of Drop ID contents.Report Name Description EXceed Fulfill 4000 v3.6 – Users Guide25 ReportFlow Thru ShipmentReport (simple)Report of the shipment activity for the requested period. Flow Thru ShipmentReport (detail)Report of the shipment activity for the requested period. Flow Thru AuditReport Report of all flow thru activityassociated with a designated POnumber.Lane Assignment Report Report of current lane assignments inthe system.Lane Contents Report Report of all locations containingallocated flow thru inventory andtransship containers.Transship Receiving Report Report of all transship containersreceived into the warehouse.Transship ReportReport of the transship containers handled by the warehouse. Generating a Receipt Audit ReportYou can use the advance shipment notice number to obtain a report of all flow thru commodities connected to a receipt. The Receipt Audit Report provides basic information about the location and quantity of flow thru commodities received. Unlike the standard crossdock reports, the Receipt Audit Report is accessed exclusively through the Maintain ASN/Receipt window.To run a Receipt Audit Report:1Start the Warehouse Documents applet. 2 From the Documents menu, choose ASN/Receipt .- or -Click the Warehouse Documents toolbar and clickthe ASN/Receipt button.The Maintain ASN/Receipt window appears.3 Enter an ASN number in the ASN Number field,then right-click and choose Apply Search from themenu that appears.The Form tab appears.4 Right-click the header and choose Run Audit Re-port from the menu that appears.26 EXceed Fulfill 4000 v3.6 – Users GuideThe Audit Report tab appears.5 If you wish to print the report, click the Print button. NOTE:The pack definition must be accurate for the report to work properly. If an each is defined as a case, thecase should be defined with a quantity of 1. EXceed Fulfill 4000 v3.6 – Users Guide 27。