飞利浦x100说明书
飞利浦S11xx电气剃须刀用户指南说明书
注: 图片仅供参考
您没有正 确保剃须4222.002.5978.1_cHR.indd 1 确插入剃 刀头凸起 须刀头。 部位正好
插入凹陷 部位。
/support
按下开/ 关钮 时,产 品不工 作。
充电电池 给电池充 的电量已 电。 耗尽。
立即扫码进入官网公众号注册
S1103
2
1
Hale Waihona Puke 1S1108 32
4
5
SH30
6
S1101 1 S1102
S1103
S1108 1
2
2
4
7
S1108_3000.032.6371.3_IIB-SDFU_folded55x99mm_BW.indd 2
04-06-20 13:18
- 电源部件中包含一个变压器。 请勿自行更换电源部件的插 头,否则将导致严重后果。
- 本产品也可以由 8 岁或以上 年龄的儿童以及肢体不健 全、感觉或精神上有障碍或 缺乏相关经验和知识的人士 使用,但前提是有人对他们 使用本产品进行监督或指 导,以确保他们安全使用, 并且让他们明白相关的危 害。 切勿让儿童玩弄本产 品。 不要让儿童在无人监督 的情况下对本产品进行清洁 和保养。
- 切勿使用温度高于 60°C 的热水冲洗剃须刀。
- 只能将本产品用于用户手册 中所示的原定用途。
- 出于卫生的目的,本产品只 能供一个人使用。
- 切勿使用压缩气体、钢丝 绒、研磨性清洁剂或腐蚀性 液体(例如汽油或丙酮) 来清洁产品。
- 如果剃须刀随附清洁系统, 应始终使用原装飞利浦清洁 液(滤芯或瓶,取决于清洁 系统类型)。
- 清洁系统必须放在稳定、平 坦的水平表面上,以防漏 液。
飞利浦电动剃须刀说明书

SW7700™ Lucas lm Ltd.English 6简体中文 25IntroductionCongratulations on your purchase and welcome to Philips! To fully benefit from the support that Philips offers, register your product at/welcome .Please read this user manual, as it contains information about the features of this shaver as well as some tips to make shaving easier and more enjoyable.General description (Fig. 1)1Shaving unit with hair chamber2On/off button3Replacement reminder4Cleaning reminder5Travel lock symbol6Unplug for use symbol7Battery status indicator8Socket for small plug9Click-on precision trimmer attachment 10Supply unit11Small plug12PouchImportant safety informationRead this important information carefully before you use the appliance and its accessories and save it for future reference. The accessories supplied may vary for different products.6EnglishDanger-Keep the supply unit dry.Warning -To charge the battery, only use the detachable supply unit (HQ8505) provided with theappliance.-The supply unit contains a transformer. Do not cut off the supply unit to replace it with another plug, as this causes a hazardous situation.-This appliance can be used by children aged from 8 years and above and persons withreduced physical, sensory or mental capabilities or lack of experience and knowledge if they have been given supervision or instruction concerning use of the appliance in a safe way and understand the hazards involved. Children shall not play with the appliance. Cleaning and user maintenance shall not be made bychildren without supervision.-Always unplug the shaver before you clean it under the tap.-Always check the appliance before you use it.Do not use the appliance if it is damaged, as this may cause injury. Always replace adamaged part with one of the original type.-Do not open the appliance to replace the rechargeable battery.7EnglishCaution-Never immerse the cleaning system or the charging stand in water and do not rinse it under the tap.-Never use water hotter than 60°C to rinse the shaver.-Only use this appliance for its intended purpose as shown in the user manual.-For hygienic reasons, the appliance should only be used by one person.-Never use compressed air, scouring pads,abrasive cleaning agents or aggressive liquids such as petrol or acetone to clean theappliance.-If your shaver comes with a cleaning system,always use the original Philips cleaning fluid (cartridge or bottle, depending on the type of cleaning system).-Always place the cleaning system on a stable,level and horizontal surface to prevent leakage.-If your cleaning system uses a cleaning cartridge, always make sure the cartridge compartment is closed before you use the cleaning system to clean or charge the shaver.-When the cleaning system is ready for use, do not move it to prevent leakage of cleaning fluid.-Water may drip from the socket at the bottom of the shaver when you rinse it. This is normal and not dangerous because all electronics are enclosed in a sealed power unit inside the shaver.-Do not use the supply unit in or near wallsockets that contain an electric air freshener to prevent irreparable damage to the supply unit.8EnglishElectromagnetic fields (EMF)-This Philips appliance complies with allapplicable standards and regulations regarding exposure to electromagnetic fields.General-This shaver is waterproof. It is suitable for use in the bath or shower and for cleaning under the tap. For safety reasons, the shaver cantherefore only be used without cord.-The supply unit is suitable for mains voltages ranging from 100 to 240 volts.-The supply unit transforms 100-240 volts to a safe low voltage of less than 24 volts.When you press the on/off button for the very first time, all display indications light up in sequence.Charge the shaver before use.Quick charge: When the battery is empty and you connect the shaver to a wall socket, the lights of the battery status indicator light up white one after the other repeatedly. When the battery contains enough energy for one shave, the bottom light of the battery status indicator starts flashing white slowly.9EnglishWhile the shaver continues to charge, first thebottom light of the battery status indicator flasheswhite and then lights up white continuously. Thenthe second light flashes and lights upcontinuously, and so on until the shaver is fullycharged.Battery fully chargedNote: This shaver can only be used without a cord.When the battery is fully charged, all lights of thethe battery status indicator light up whitecontinuously.Note: When you press the on/off button during orafter charging, the 'unplug for use' symbol lights upto indicate that the shaver is still connected to thewall socket.Note: When the battery is full, the display switchesoff automatically after 30 minutes.Battery lowWhen the battery is almost empty, the bottom lightof the battery status indicator flashes orange.Remaining battery chargeThe remaining battery charge is shown by thelights of the battery charge indicator that light upcontinuously.10EnglishClean the shaver after every shave for optimal performance (see 'Cleaning and maintenance'). When you switch off the shaver, the cleaning reminder flashes to remind you to clean the shaver.You can lock the shaver when you are going to travel. The travel lock prevents the shaver from being switched on by accident (see 'Activating the travel lock').For maximum shaving performance, replace the shaving heads every two years. The shaver is equipped with a replacement reminder which reminds you to replace the shaving heads. The replacement reminder flashes to indicate that you have to replace the shaving heads (see 'Replacing the shaving heads').Note: After replacing the shaving heads, you need to reset the replacement reminder by pressing theon/off button for 7 seconds.ChargingCharge the shaver before you use it for the firsttime and when the display indicates that thebattery is almost empty.Charging takes approx. 1 hour. A fully chargedshaver has a shaving time of up to 60 minutes.Note: You cannot use the shaver while it ischarging.Charging with the supply unit1Make sure the shaver is switched off.2Put the small plug in the shaver and put thesupply unit in the wall socket.The display of the shaver indicates that theshaver is charging.3After charging, remove the supply unit from thewall socket and pull the small plug out of theshaver.in the bath or shower.-Use this shaver for its intended household useas described in this manual.-For hygienic reasons, the shaver should only beused by one person.-Trimming is easier when the skin and hair aredry.Note: This shaver can only be used without a cord.1To switch the shaver on or off, press the on/off button once.The replacement symbol lights up continuously when the shaver is switched on.Skin adaptation periodYour first shaves may not bring you the result you expect and your skin may even become slightly irritated. This is normal. Your skin and beard need time to adapt to any new shaving system. To allow your skin to adapt to this new appliance, we advise you to shave regularly (at least 3 times a week) and exclusively with this appliance for a period of 3 weeks.For the best results on skin comfort, pre-trim your beard if you have not shaved for 3 days or longer. Dry shaving1Switch the shaver on.2Move the shaving heads over your skin in circular movements to catch all hairs growing in different directions. Exert gentle pressure for a close, comfortable shave.Note: Do not press too hard, this can cause skin irritation.3Switch off and clean the shaver after each use.The display lights up for a few seconds to show the battery status.Wet shavingFor a more comfortable shave, you can also use this shaver on a wet face with shaving foam or shaving gel.1Apply some water to your skin.2Apply shaving foam or shaving gel to your skin. 3Rinse the shaving unit under the tap to ensure that the shaving unit glides smoothly over your skin.4Switch the shaver on.5Move the shaving heads over your skin in circular movements to catch all hairs growing in different directions. Exert gentle pressure for a close, comfortable shave.Note: Do not press too hard, this can cause skin irritation.Note: Rinse the shaving unit regularly to ensure that it continues to glide smoothly over yourskin.6Dry your face.7Switch off the shaver and clean it after eachuse.Note: Make sure that you rinse all foam or shavinggel off the shaver.Using the click-on attachmentRemoving or attaching the click-on attachment1Make sure the shaver is switched off.3Hold the trimmer perpendicular to the skin and move it downwards while exerting gentlepressure.4Switch off and clean the trimmer after use.You can lock the shaver when you are going to travel. The travel lock prevents the shaver from being switched on by accident.1Press the on/off button for 3 seconds to enter the travel lock mode.While you activate the travel lock, theindications on the display light up briefly. When the travel lock is activated, the travel locksymbol flashes.1Press the on/off button for 3 seconds.While you deactivate the travel lock, the indications on the display light up briefly. When the travel lock is deactivated, the travel lock symbol flashes and goes out. The shaver switches on and is now ready for use again.Note: The shaver unlocks automatically when it is connected to wall socket.Cleaning and maintenance-Regular cleaning guarantees better shavingresults.-Never clean, remove or replace the shaving unitwhile the shaver is switched on.-Do not apply pressure to shaving head combs.-Do not touch shaving heads with hard objectsas this may dent or damage the precision-madeslotted combs.-Do not use abrasives, scourers or aggressiveliquids such as gasoline or acetone to clean theshaver.Cleaning the shaver under the tapClean the shaver after every shave for optimal5Rinse the shaving head holder under a warm tap.6Carefully shake off excess water and let the shaving head holder air dry completely.7Attach the shaving head holder to the bottompart of the shaving unit (‘click’).Clean the trimmer after each use.1Switch the shaver on.2Rinse the trimmer under a warm tap.3After cleaning, switch off the shaver.4Carefully shake off excess water and let the attachment air dry completely.Tip: For optimal performance, lubricate theteeth of the attachment with a drop of sewingmachine oil regularly.ReplacementReplacing the shaving headsSwitch the shaver off.Pull the shaving head holder off the bottompart of the shaving unit.Turn the retaining ring anticlockwise and lift itoff the shaving head.Repeat this process for the other retaining rings.Place them aside in a safe place.Remove the shaving heads from the shavinghead holder.Discard the used shaving heads immediately toavoid mixing them with the new shaving heads.8To reset the replacement reminder, press and hold the on/off button for approx. 7 seconds.Store the shaver in the pouch.Note: Always let the shaver dry before you store itin the pouch.Ordering accessoriesTo buy accessories or spare parts, visit/service or go to yourPhilips dealer. You can also contact the PhilipsConsumer Care Center in your country (see theinternational warranty leaflet for contact details).The following accessories are available:-SH70 Philips shaving heads-RQ111 Philips beard styler-RQ585 Philips cleansing brush-RQ560, RQ563 Philips cleansing brush heads-HQ8505 supply unitNote: The availability of the accessories may differby country.Recycling-Do not throw away the product with the normalhousehold waste at the end of its life, but handit in at an official collection point for recycling.By doing this, you help to preserve theenvironment.21English-This product contains a built-in rechargeablebattery which shall not be disposed of withnormal household waste. We strongly adviseyou to take your product to an official collectionpoint or a Philips service centre to have aprofessional remove the rechargeable battery.-Follow your country’s rules for the separatecollection of electrical and electronic productsand rechargeable batteries. Correct disposalhelps prevent negative consequences for theenvironment and human health.Removing the rechargeable shaver batteryfront and back panel in the bottom of theappliance. Remove the back panel.2Remove the front panel.3Unscrew the two screws at the top of the inner panel and remove the inner panel.4Remove the rechargeable battery with ascrewdriver.22EnglishWarranty and supportIf you need information or support, please visit/support or read theinternational warranty leaflet.Warranty restrictionsThe shaving heads (cutters and guards) are notcovered by the terms of the international warrantybecause they are subject to wear. TroubleshootingShaverProblem Possible cause SolutionThe appliance does not work when I press the on/off button.The appliance is stillattached to the wallsocket. For safetyreasons, theappliance can onlybe used withoutcord.Unplug the appliance andpress the on/off button toswitch on the appliance.The rechargeablebattery is empty.Recharge the battery.The travel lock isactivated.Press the on/off button for3 seconds to deactivate thetravel lock.The shaving unit issoiled or damagedto such an extentthat the motorcannot run.Clean the shaving headsthoroughly or replacethem. Also see 'Hairs or dirtobstruct the shaving heads'for a detailed description ofhow to clean the shavingheads thoroughly.The appliance does not shave as well as it used to.The shaving headsare damaged orworn.Replace the shaving heads.23EnglishProblem Possible cause SolutionHairs or dirt obstruct the shaving heads.Clean the shaving heads in the regular way or clean them thoroughly.To clean the shaving heads thoroughly, remove the shaving heads from the shaving head holder one by one (see 'Replacement'). Then separate the cutter from its guard and rinse each matching set under the tap.After rinsing, place the cutter back into its corresponding guard.Finally, put the shaving heads back into the shaving head holder (see 'Replacement').I replaced the shaving heads,but the replacement reminder is still showing.You have not resetthe replacement reminder.To reset the replacement reminder, press and hold the on/off button for approx. 7 seconds.Water is leaking from the bottom of the appliance.During cleaning,water may collect between the inner body and the outer shell of the appliance.This is normal and not dangerous because allelectronics are enclosed in a sealed power unit inside the appliance.24English介绍感谢您的惠顾,欢迎光临飞利浦! 为了让您能充分享受飞利浦提供的支持,请在 /welcome 上注册您的产品。
Philips 电动剃须刀系列9000 100% 水抗性 SkinIQ 智能剃须刀说明书
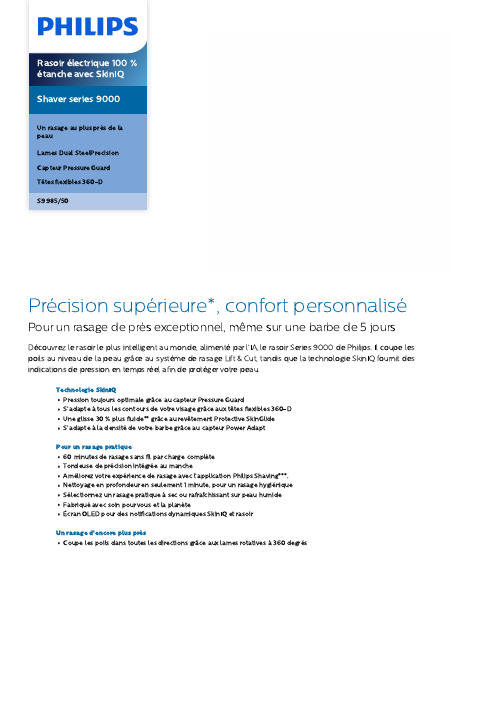
Précision supérieure*, confort personnaliséPour un rasage de près exceptionnel, même sur une barbe de 5 joursDécouvrez le rasoir le plus intelligent au monde, alimentépar l’I A, le rasoir Series 9000 de Philips. Il coupe les poils au niveau de la peau grâce au système de rasage Lift & Cut, tandis que la technologie SkinIQ fournit des indications de pression en temps réel afin de protéger votre peau.Technologie SkinIQPression toujours optimale grâce au capteur Pressure GuardS’adapteàtous les contours de votre visage grâce aux têtes flexibles 360-DUne glisse 30 % plus fluide** grâce au revêtement Protective SkinGlideS’adapteàla densitéde votre barbe grâce au capteur Power A daptPour un rasage pratique60 minutes de rasage sans fil par charge complèteTondeuse de précision intégrée au mancheA méliorez votre expérience de rasage avec l’application Philips Shaving***.Nettoyage en profondeur en seulement 1 minute, pour un rasage hygiéniqueSélectionnez un rasage pratiqueàsec ou rafraîchissant sur peau humideFabriquéavec soin pour vous et la planèteÉcran OLED pour des notifications dynamiques SkinIQ et rasoirUn rasage d'encore plus prèsCoupe les poils dans toutes les directions grâce aux lames rotativesà 360 degrésPoints fortsSystème Lift &CutNotre technologie rotative unique et brevetée Lift & Cut soulève délicatement le poil à la racine avant de le couper avec précision au plus près de la peau (jusqu ’à 0,00 mm de la peau ) sans même que les lames ne touchent votre peau .Lames DualSteelPrecisionLes rasoirs rotatifs Philips sont spécialement conçus pour s ’adapter à la pousse naturelle des poils et capturer tous les poils qui poussent dans n ’importe quelle direction ,grâce aux lames rotatives à 360 degrés . Les lames Dual SteelPrecision réalisent jusqu ’à150 000 coupes par minute , pour un rasage au plus près de la peau .Capteur PressureGuardIl est essentiel d 'exercer la bonne pression pour obtenir un rasage de près qui respecte la peau . Les capteurs avancés du rasoir détectent la pression que vous exercez et le voyant innovant vous indique lorsque vous appuyez trop fort ou trop peu . Pour un rasage personnalisé optimal .Têtes flexibles 360-DConçu pour suivre les contours de votre visage et même de votre cou , ce rasoir électrique Philips est doté de têtes entièrement flexibles qui pivotent à 360° pour un rasage impeccable et confortable .Revêtement protecteurSkinGlideUn revêtement de protection sépare les têtes de rasoir et votre peau . Composé de 250 000billes micro -tech par centimètre carré, le revêtement améliore la glisse de 30 %** a fin de réduire les irritations .Capteur Power AdaptCe rasoir électrique est doté d ’une technologie de détection intelligente de la pilosité faciale qui détecte la densité des poils 500 fois par seconde . Le capteur Power A dapt ajusteautomatiquement la puissance de coupe pour vous procurer un rasage en douceur et sans e ffort .Personnalisation via l 'applicationPerfectionnez votre rasage en appairant votre rasoir à l ’application Philips Shaving . Rasage après rasage , suivez la progression de votre peau , personnalisez votre rasage etperfectionnez votre technique , pour un rasage de près qui respecte la peau .Quick Clean Pod sanscâbleCe puissant module de nettoyage nettoie et lubri fie votre rasoir en seulement 1 minute ,pour un fonctionnement optimal pluslongtemps . Il est 10 fois plus e fficace qu 'unnettoyage à l 'eau .**** Ce module de nettoyage ultra -compact est facile à ranger et à utiliser en tout lieu .À sec ou avec de lamousseA daptez votre technique de rasage à vos besoins . A vec le système Wet & Dry , vous pouvez opter pour un rasage à secconfortable , ou pour un rasage rafraîchissant sur peau humide - avec du gel ou de la mousse - même sous la douche .CaractéristiquesA ccessoiresTrousse: Housse de voyageSmartClick: Brosse nettoyanteQuick Clean Pod: Oui, 1 cartouche incluse Tondeuse rétractable intégréeA limentationCharge: Charge complète en 1 heure, Recharge rapide en 5 minType de batterie: Li-ionA utonomie: 60 minutes DesignManche: Design ergonomique pour une bonneprise en mainCouleur: A rgent chroméFinition: Élégance intemporelleEntretienGarantie de 2 ansTête de rechange: Remplacer tous les 2 ansavec SH91Performance de rasageSystème de rasage: Système Lift&Cut, LamesDual SteelPrecisionSuivi des contours: Têtes flexibles 360-DTechnologie SkinIQ: Capteur Pressure Guard,Revêtement protecteur SkinGlide, CapteurMotion Control, Capteur Power A daptFacile d'utilisationNettoyage: Quick Clean Pod sans câble,Ouverture d'une simple pression, EntièrementlavableÀsec ou avec de la mousse: Utilisableàsec ouavec de la mousseAfficheur: Indicateur de niveau de charge en %SmartClickA daptéaux types de produits: Le produitRQ585/51 NE s’adapte P A S au type de têteangulaire* par rapport au modèle Philips Series 9000 précédent* * Par rapport au matériau sans revêtement* ** Basésur les utilisateurs du Philips Series S7000 et del’application Philips Shaving en 2019© 2023 Koninklijke Philips N.V. Tous droits réservés.Les caractéristiques sont sujettesàmodification sans préavis. Les marques commerciales sont la propriétéde Koninklijke Philips N.V. ou de leurs détenteurs respectifs.Date de publication 2023‑12‑17 Version: 12.12.1E A N: 87 10103 96482 7 。
飞利浦 手机 用法说明(14)

SIM 收藏夹 ........................ 35 模板 .............................. 36 电子邮件 .......................... 36 高级 .............................. 37 语音信箱 .......................... 38 设置 .............................. 38
功能键
左右功能键 ( 和 ) 位于键盘顶端,可让您 选取其上方屏幕上所显示的对应选项,包括通话 期间的选项。功能键会随当前内容的不同而有所 差异。
耳机操作
以下有关耳机操作的描述仅对只有一个按键的 耳机有效。 在待机状态下输入号码,并短按耳机上的按钮即 可拨号。在拨号的过程中,长按耳机上的按钮可 以停止拨号。 在通话过程中,短按耳机上的按钮以录音 / 停止 录音,长按以挂机。 如果有来电,短按耳机上的按钮以接听,长按 以拒接。
14. 通话 ..................... 56
通话记录 .......................... 56 通话选项 .......................... 56 删除记录 .......................... 58
15. 设置 ..................... 59
手机响时,按 静音。
手机响时,按 。
在通话期间,按音量侧键以 调节通话音量。
在待机模式下,按 , > 设置 > 声音设置 > 铃声音量以调节 来电的铃声音量。
进入所有 通话记录 进入主菜单 返回上级菜单
在浏览菜单时 快速返回待机 模式
在待机模式下,按 。
X100说明书
感谢您购买本公司记录仪,本机采用高性能低照度“cmos wxga hd ”高清感光芯片,有独特的超便携式设计,使它可以应用在各个领域,为您带来方便,安全,丰富多彩的日常生活。
主用于车载摄像,是行车中安全事故取证的最佳帮手。
在使用本产品之前,请详细阅读此用户手册,并请保管好此手册。
我们希望本产品,能满足您的需求并长期服务于您!本使用手册在编写和印刷中,可能存在一定文字错误,请谅解。
使用手册印刷过程中,机器因外观和软件的修复过程导致了同该使用手册的部分操作的非一致性,本公司保持最终解释权。
安装记录仪1.关闭引擎,将锁匙从点火器上取出。
2.将tf卡插入记录仪卡槽中。
3.将记录仪用支架垫黏贴安装在汽车的挡风玻璃上或驾驶仪表台上。
4.用电源线将记录仪的usb终端和汽车点烟器连接起来。
5.调整摄像位置,以便获取最佳的拍摄范围。
6.发动引擎,检查机器是否已安装正确。
【注意】(1)请在光线充足、全安的地方安装记录仪。
(2)当机器安装正确,其系统状态led会变成蓝色及显示屏会显示。
使用简介一.使用自动录像功能1.安装完毕后,启动汽车引擎,记录仪将会自动开启并开启自动录像功能。
2.关闭汽车引擎,在6秒后,记录仪保存档并将会关闭。
【注意】记录仪摄像镜头正/反相切换方法,长按【mic键】并保持3秒钟进行切换反相摄像。
长按【录像键】并保持3秒钟进行切换正相摄像,切换正或反相后,关机会自动保存其操作设置。
二.使用手动录像功能1.长按记录仪上的【开启/关闭键】并保持3秒钟。
2.当记录仪启动后,自动开启录像功能。
3.记录仪摄像镜头正/反相切换方法,长按【mic键】并保持3秒钟进行切换反相摄像。
长按【录像键】并保持3秒钟进行切换正相摄像。
(切换正或反相后,关机会自动保存设置)。
4.当再次点擎【录像键】,记录仪将会停止录像功能。
三.使用拍照功能1.长按记录仪上的【开启/关闭键】并保持3秒钟。
2.当记录仪启动后,在自动开启录像功能的状态下。
Philips SBM100 可攜式揚聲器用戶手冊说明书

6
收聽 FM 廣播
6
播放外接裝置的內容
6
透過耳機聆聽
6
調整音量
7
5 產品資訊
7
規格
7
6 疑難排解
8
7 注意
8
ZH-TW 2
1 重要事項
• 閱讀這些指示。 • 遵循所有指示。 • 請勿在近水處使用本產品。 • 請勿阻塞任何通風口。 請依照製造商
的指示進行安裝。 • 請勿將本產品安裝在接近熱源處,例如
您的產品包括了符合歐洲指令 (European Directive) 2006/66/EC 的電池,不得與其 他一般家用廢棄物一併丟棄。請注意有關 電池分類收集的當地法規,正確處理廢棄 產品有助於避免對環境和人類健康帶來負 面影響。
環境保護資訊 所有非必要之包裝材料均已捨棄。 我們嘗 試讓包裝可以輕易拆解成三種材質:厚紙 板 (外盒)、聚苯乙烯泡棉 (防震) 以及聚乙 烯 (包裝袋、保護性泡棉膠紙)。
開啟/關閉
1 將 向右滑動。 »» 揚聲器會切換至您上次選擇的來 源。
2 要關閉揚聲器,請將 向左滑動。
選擇來源
重複按 S 以選擇音訊來源:Micro SD 卡、FM 調諧器,或 Aux。
5 ZH-TW
4 播放
播放 Micro SD 卡的內容
備註 •• 確認 Micro SD 記憶卡中有可播放的音訊內容。
一般資訊
電源供應 內建電池 尺寸 - 主裝置 (寬 x 高 x 深) 重量 - 主裝置
5 V 0.6 A; 鋰電池
107 x 71 x 36 公釐 0.1 公斤
7 ZH-TW
6 疑難排解
警告
•• 請勿打開裝置外殼。
為維持有效的保固,請勿自行嘗試修理系 統。 如果您在使用本裝置時發生任何問題,請 在送修前先行檢查下列項目。 如果問題仍 未解決,請造訪 Philips 網頁 (/support)。 聯絡 Philips 時,手邊請先準備好您的裝置、型號與序 號。
YSI X100 Series 产品说明书

Transmitter x100e Seriesfor pH, Dissolved Oxygen and ConductivityAdvanced transmitters for reliable measurements and for harsh conditions Technical DataDrawings2Specifications transmitter pH 2100e 4Specifications transmitter O 24100e 6Specifications transmitter O 24100ppb 7Specifications transmitter Cond 7100e 8Specifications transmitter Cond Ind 7100e 10Terminal assignment «Advanced Line» transmitters 12General specifications «Advanced Line» transmitters 14Ordering information17Short descriptionThe cost-effective Transmitter X100 Series are suitable designed for highly reliable and accurate measure-ments in a wide range of industrial applications. The instruments are easy to operate and the large-size LCD provides substantial all essential information. The measurement values are displayed in largecharacters and additional pictographs explain the function operation and advise any signal or functional irregularities.Features–Two 0/4…20 mA current outputs –Two limit contacts –Alarm & wash contact–Continuous monitoring of sensor and transmitter performance –Sensor diagnostics–Easy operation with help of pictographs –PID controller–Communication with EasyClean, the METTLER TOLEDO cleaningContentsDrawings AssemblyMounting1Sealing plugs2Hexagon nuts3Pg cable glands4Rubber reducer5Pg plug6Enclosure screws7Hinge pin8Cable ties9Filler plugs10Gaskets11Washer12Jumper876541Cable gland (3 pieces)2Breakthroughs for cablegland or conduit 1/2 ",Ø 21.5 mm(2 breakthroughs).Conduits not included!3Holes for post mounting4Holes for wall mountingDrawingsPipe mounting with ZU 0274 bracket kitProtective hood ZU 0276 for wall and pipe mountingPanel-mount kit ZU 0275165 mm 132 mm173 m m1 Protected hood (if required)2 Hose clamps with worm gear drive to DIN 3017(2 pieces)3 Postmounting plate4 For vertical orhorizontal post/pipe mounting5 Self-tapping screws1 Screws2 Seal3 Control panel4 Span pieces5 Threaded sleevesSpecifications Transmitter pH 2100e pH/mV input Input for pH, ORP electrodes or ISFETMeasurement range –1500…+1500 mVDisplay range pH value –2.00…16.00ORP –1999…+1999 mVGlass electrode input1)Input resistance > 0.5 x 10 12ΩInput current < 2 x 10 –12AReference electrode input1)Input resistance > 1 x 10¹⁰ΩInput current < 1 x 10 –10AMeas. error 1,2,3)pH value< 0.02mV value< 1 mVElectrodestandardization pH *Operating modes-BUF Calibration with automatic buffer recognition Calimatic:Buffer sets-01-Mettler-Toledo 2.00/4.01/7.00/9.21-02-Merck/Riedel de Haen 2.00/4.00/7.00/9.00/12.00-03-Ciba (94) 2.06/4.00/7.00/10.00-04-NIST technical 1.68/4.00/7.00/10.01/12.46-05-NIST standard 1.679/4.006/6.865/9.180-06-HACH 4.00/7.00/10.18-07-WTW technical buffers 2.00/4.01/7.00/10.00-PRD Product Calibration-MAN Calibration with manual entry of individual buffer values-DAT Data entry of premeasured electrodesZero point adjustment ±200 mVMax. calibration range Asymmetry potential: ±60 mVSlope: 80…103 % (47.5…61 mV/pH)Sensor standardizationORP*ORP calibrationMax. calibration range –700…+700D mVCal timer 0000…9999 hSensocheck automatic monitoring of glass andreference electrode (can be disabled)Sensoface provides information on the electrode condition.Evaluation of zero/slope, response,calibration interval, SensocheckSpecifications Transmitter pH 2100e Temperature input *Pt100/Pt1000/NTC 30 kΩ / NTC 8,55 kΩ2-wire connection, adjustableMeasurement range Pt100/Pt1000: –20.0…+ 200.0 °C/–4…+ 392 °FNTC 30 kΩ – 20.0…+ 150.0 °C/–4…+ 302 °FNTC 8.55 kΩ –10.0…+ 130.0 °C/+14…+ 266 °FAdjustment range 10 KResolution0.1 °C/1 °FMeas. error 1,2,3)< 0.5 K (< 1 K for Pt100; <1K for NTC >100 °C)Temp. compensation Linear –19.99…+19.99 %/Kof process medium (reference temp. 25 °C)Power output for operating an ISFET adapter+ 3 V/0.5 mA– 3 V/0.5 mA*User-defined1)To IEC 746 Part 1, at nominal operating conditions2)± 1 count3)Plus sensor errorSpecifications Transmitter O24100e Dissolved oxygen inputSensor type A:InPro6000 (6800)Sensor type B:InPro6900Measuring current-2…1800 nAResolution0.05 nA (with Vpol ≤ 800 mV and Vref ≤ 200 mV)Saturation (–10…80 °C)0…500 %Meas. error1,2,3)0.5 % of meas. val. +0.5 %Concentration (–10…80 °C)0.00…50.00 mg/l0.00…50.00 ppmMeas. error 1,2,3)0.5 % of meas. val. + 0.05 mg/lor 0.05 ppmAdm. guard current20 µAPolarization voltage * 0…1000 mVProcess pressure* 0.000…9.999 bar(…999.9 kPa/…145.0 psi)Salt correction * 00.00…45.00 g/kgSensor standardizationOperating modes * DO saturation (automatic)DO concentration (automatic)Product calibrationZero point calibrationCalibration range Zero point ± 2 nASensor type A Slope 25…130 nA(at 25 °C, 1013 mbars)Calibration range Zero point ± 2 nASensor type B Slope200…550 nA(at 25 °C, 1013 mbars)Calibration timer * 0000…9999 hPressure correction * 0.000…9.999 bars/999.9 kPa/145.0 psiSensocheck Monitoring for short circuits/open circuits (can be disabled)Sensoface Provides information on the sensor conditionEvaluation of zero/slope, response, calibration interval, SensocheckTemperature input *NTC 22 kΩ / NTC 30 kΩ*2-wire connection, adjustableMeasurement range– 20.0…+150.0 °C/– 4…+ 302 °FAdjustment range10 KResolution0.1 °C/1 °FMeas. error 1,2,3)< 0.5 K (< 1 K at >100 °C)*User-defined1)To IEC 746 Part 1, at nominal operating conditions2)± 1 count3)Plus sensor errorSpecifications Transmitter O24100ppb Dissolved oxygen inputSensor type A:InPro6000 (6800)Sensor type B:InPro6900Measuring current-2…600 nAResolution0.01 nA (with Vpol ≤ 500 mV and Vref ≤ 200 mV)Saturation (–10…80 °C)0.0.…120.0 %Meas. error1,2,3)0.5 % of meas. val. +0.1 %Concentration (–10…80 °C)0000…9999 µg/l0000…9999 ppb0.0000…9.999 mg/l0.0000…9.999 ppmMeas. error 1,2,3)0.5 % of meas. val. +0.005 mg/lor 0.005 ppmAdm. guard current20 µAPolarization voltage* 0…1000 mVProcess pressure* 0.000…9.999 bars(to 999.9 kPa/…145.0 psi)Salt correction* 00.00…45.00 g/kgSensor standardizationOperating modes * DO saturation (automatic)DO concentration (automatic)Product calibrationZero point calibrationCalibration range Zero point ± 2 nASensor type A Slope25…130 nA(at 25 °C, 1013 mbars)Calibration range Zero point ± 2 nASensor type B Slope 200…550 nA(at 25 °C, 1013 mbars)Calibration timer * 0000…9999 hPressure correction * 0.000…9.999 bars/999.9 kPa/145.0 psiSensocheck Monitoring for short circuits/open circuits (can be disabled)Sensoface Provides information on the sensor conditionEvaluation of zero/slope, response, calibration interval, SensocheckTemperature input *NTC 22 kΩ/ NTC 30 kΩ*2-wire connection, adjustableMeasurement range–20.0…+150.0 °C/–4…+302 °FAdjustment range10 KResolution0.1 °C/1 °FMeas. error 1,2,3)< 0.5 K (< 1 K at >100 °C)*User-defined1)To IEC 746 Part 1, at nominal operating conditions2)± 1 count3)Plus sensor errorSpecifications Transmitter Cond 7100e Conductivity input Input for 2-e or 4-e conductivity sensorsWorking range4-electrode sensor:0.2 µS *c …1000 mS * c (c = cell constant)2-electrode sensor:0.2 µS *c …200 mS * c(the actual range is very much depending on the sensor used,display limited to 3500 mS)Effective ranges Conductivity0.000…9.999 µS/cm00.00…99.99 µS/cm000.0…999.9 µS/cm0000…9999 µS/cm0.000…9.999 mS/cm00.00…99.99 mS/cm000.0…999.9 mS/cm0.000…9.999 S/m00.00…99.99 S/mResistivity00.00…99.99 MΩcmConcentration0.00…9.99 % by wt.Salinity0.0…45.0 ‰ (0…35 °C)Measurement error1,2,3)< 1% of measured value +0.4 µS * cConc. measurements-01- NaCl0.00…9.99 % by wt.(0 …60°C)-02- HCl0.00…9.99 % by wt.(–20…50 °C)-03- NaOH0.00…9.99 % by wt.(0…100 °C)-04- H2SO40.00…9.99 % by wt.(–17…110 °C)-05- HNO30.00…9.99 % by wt.(–17…50 °C)Sensor standardization Input of cell constant with simultaneous displayof conductivity value and temperatureInput of conductivity value with simultaneous displayof cell constant and temperatureProduct calibrationTemperature probe adjustmentPermissible cell constant00.0050…19.9999 cm–1Sensocheck Monitoring of sensor polarization and cable capacitance (can be disabled)Sensoface Provides information on the sensor condition (Sensocheck)Sensor monitor Display of direct measurement values for validationpurpose (resistance/temperature)USP-Function Monitoring of conductivity of water for pharmaceuticalapplications to USP (USP <645>) with adjustable limitvalues (10…100 % of USP value)Specifications Transmitter Cond 7100e Temperature input*)Pt100/Pt1000/NTC 30 kΩ / NTC 8.55 kΩ2-wire connection, adjustableMeasuring range Pt100/Pt1000–20…+200 °C / –4…+392 °FNTC 30 kΩ–20…+150 °C / -4…+302 °FNTC 8.55 kΩ–10…+130 °C / +14…+266 °FResolution0.1 °C / 1 °FError1,2,3)0.5 K (< 1 K with Pt100; < 1 K with NTC > 100 °C)Temperature compensation(OFF)not compensated(ref. temp. 25 °C)(Lin)linear, 0.00…19.99 %/K, –20…130 °C(NLF)natural waters to EN 27888, 0…36 °C(nACL)ultrapure water with NaCl traces, 0…120 °C(HCL)ultrapure water with HCl traces, 0…120 °C(nH3)ultrapure water with NH3traces, 0…120 °C*User-defined1)To IEC 746 Part 1, at nominal operating conditions2)± 1 count3)Plus sensor errorSpecifications Transmitter Cond Ind 7100e Conductivity input Input for inductive sensorsWorking range Conductivity0.000…1999 mS/cmConcentration0.00…100 % by wt.Salinity0.0…45.0 ‰ (0…35 °C)Effective ranges Conductivity0.000…9.999 mS/cm00.00…99.99 mS/cm000.0…999.9 mS/cm0000…1999 mS/cm0.000…9.999 S/m00.00…99.99 S/mConcentration0.00…99.99 %Salinity0.0…45.0 ‰ (0…35 °C)Measurement error1,2,3)< 1% of measured value +0.005 mSConc. measurements-01- NaCl0…26 %(0…60 °C)-02- HCl0…18 % (–20…50 °C)-03- NaOH0…14 % (0…100 °C)-04- H2SO40…30 % (–17…110 °C)-05- HNO30…30 % (–20…50 °C)-06- H2SO492…99 % (–17…115 °C)-07- HCl22…39 % (–20…50 °C)-08- HNO335…96 % (–20…50 °C)-09- H2SO432…84 % (–17…115 °C)-10- NaOH18…50 % (0…100 °C)Sensor standardization Input of cell factor with simultaneous displayof conductivity value and temperatureInput of conductivity value with simultaneous displayof cell factor and temperatureProduct calibrationZero point calibrationTemperature probe adjustmentPermissible cell factor00.100…19.999Permissible transfer ratio01.00…199.99Permissible zero pointdeviation± 0.5 mS/cmSensocheck Monitoring of sender coil and leads for short circuiting,and of the receiver coil for disruption (can be disabled)Sensoface Indicates sensor status (zero point, sensocheck)Sensor monitor Display of direct measurement values for validationpurpose (resistance /temperature)Specifications Transmitter Cond Ind 7100e Temperature input*Pt100/Pt1000/NTC 100 kΩ2-wire connection, adjustableMeasuring range Pt100/Pt1000–20…+200 °C / –4… +392 °FNTC–20…+130 °C / –4… +266 °FResolution0.1 °C / 1 °FError1,2,3)0.5 K (< 1 K with Pt100; < 1 K with NTC > 100 °C)Temperature compensation(OFF)not compensated(ref. temp. 25 °C)(LIN)linear, 0.00…19.99 %/K(NLF)natural waters to EN 27888 (0…35 °C)* User-defined1) To IEC 746 Part 1, at nominal operating conditions2) ± 1 count3) Plus sensor errorTerminal assignment «Advanced Line» transmittersTransmitter O 24100 ppbTransmitter O 24100 eTransmitter pH 2100 eTerminal assignment«Advanced Line» transmitters Transmitter Cond 7100eTransmitter Cond Ind 7100eGeneral specifications «Advanced Line» transmitters HOLD input Galv. separated (OPTO coupler)Function Switches device to HOLD stateSwitching voltage 0…2 V (AC/DC) hold inactive10…30 V (AC/DC) hold activeCONTROL input pH/O2)Galv. separated (OPTO coupler)Function Control input for automatic cleaning/calibration systemSwitching voltage0…2 V (AC/DC) inactive10…30 V (AC/DC) activeCONTROL input (Cond)Galv. separated (OPTO coupler)Function Switches between two parameter setsSwitching voltage0…2 V (AC/DC) set #1 active10…30 V (AC/DC) set #2 activeOutput 10/4…20 mA, max. 10 V, floating(galv. connected to output 2)Process variable *pH 2100 e pH/mVO24100e%, mg/lO24100 ppb%, mg/lCond 7100e conductivity, resistivity, concentration, salinityCond Ind 7100e conductivity, concentration, salinityCurrent characteristics*linear or logarithmic (depends on transmitter)Overrange *22 mA in the case of error messageOutput filter *Low-pass, filter time constant 0…120 sMeas. error1)< 0.3 % of current value +0.05 mAStart/end of scale As desired within measuring rangeAdm. span pH 2100e 2.00…18.00/200…3000 mV024100e 5…500 %, 0.5…50 mg/l024100 ppb 2…200 %, 0.2…10 mg/lCond 7100e LIN 5 % of selected measuring rangeLOG 1 decadeCond Ind 7100e LIN 5 % of selected measuring rangeLOG 1 decadeOutput 20/4…20 mA, max. 10 V, floating(galv. connected to output 1)Process variable TemperatureOverrange *22 mA in the case of temp error messagesOutput filter *Low-pass, filter time constant 0…120 sMeas. error 1)< 0.3 % of current value + 0.05 mAStart/end of scale *pH, Cond: –20…+200 °C/–4…+392 °F, 02:–20…+150 °C/–4...+302 °FAdm. span pH, Cond: 20…320 K, 02:20…170 KAlarm contact Relay contact, floatingContact ratings AC < 250 V/< 3 A/< 750 VADC < 30 V/< 3 A/< 90 WContact response N/C (fail-safe type)Alarm delay 0000…0600 sGeneral specifications «Advanced Line» transmitters Limit values Output via relay contacts R1, R2Contacts R1, R2 floating, but inter-connectedContact ratings AC < 250 V/< 3 A/< 750 VADC < 30 V/< 3 A/< 90 WContact response *N/C or N/ODelay *0000…9999 sSwitching points *As desired within measuring rangeHysteresis *pH 2100e0…5.00 pH/0…500 mV024100e 0…50 %/0…5.00 mg/l (ppm)024100ppb 0…50 %/0…5.00 mg/l (ppm)Cond 7100e0…50 % of measuring rangeCond Ind 7100e0…50 % of measuring rangePID process controller Output via relay contacts R1, R2 (see limit values)Setpoint specification *pH 2100e–02.00…16.00/– 1500…+1500 mV024100e 0…500 % / 0…50 mg/l024100ppb 0…120% / 0…9.999 mg/lCond 7100e within selected measuring rangeCond Ind 7100e within selected measuring rangeNeutral zone *pH 2100e0…5.00 pH / 0…+500 mV024100e 0…50 % / 0…5 mg/l024100ppb 0…50 % / 0…5 mg/l (ppm)Cond 7100e within selected measuring rangeCond Ind 7100e max. 50 % of selected measuring rangeP-action *Controller gain K R:0010…9999 %I-action component *Reset time Tr: 0000…9999 s(0000 s = no integral action)D-action component *Derivative-actiontime Td: 0000…9999 s(0000 s = no derivative action)Controller type*Pulse length controller or pulse frequency controllerPulse period *0001…0600 s, min. ON time 0.5 s (pulse length controller)Max. pulse frequency *0001…0180 min–1(pulse frequency controller)Cleaning function/Relay contact, floating2nd parameter set for controlling a simple rinsing system or an automatic cleaning systemor to show that 2nd parameter set is activeContact ratings AC < 250 V/< 3 A/< 750 VADC < 30 V/< 3 A/< 90 WContact response *N/C or N/O (cleaning function)N/O (2nd parameter set)Rinsing interval *000.0…999.9 h(000.0 h = cleaning function switched off)Cleaning time *0000…1999 sCalibration interval *000.0…999.9 hCleaning interval*000.0…999.9 h*User-defined1)To IEC 746 Part 1, at nominal operating conditions2)± 1 count3)Plus sensor errorGeneral specifications«Advanced Line» transmitters Display LC display, 7-segment with iconsMain display Character height 17 mm, unit symbols 10 mmSecondary display Character height 10 mm, unit symbols 7 mmSensoface 3 status indicators (friendly, neutral, sad smiley)Mode indicators 5 status bars: «meas», «cal», «alarm», «cleaning», «config»18 further icons for configuration and messagesAlarm indication Red LED in case of alarm or HOLD, user definedKeypad 5 keys: [cal] [conf] [] [] [enter]Service functionsCurrent source Current specifiable for output 1 and 2 (00.00…22.00mA)Manual controller Controller output entered directly (start of control process)Device self-test Automatic memory test (RAM, FLASH, EEPROM)Display test Display of all segmentsLast Error Display of last error occurredSensor monitor Display of direct, uncorrected sensor signal (electrode/sensor)Relay test Manual control of the four switching contactsParameter sets*Two selectable parameter sets for different applicationsData retention Parameters and calibration data > 10 years (EEPROM)EMC EN 61326EN 61326/A1Lightning protection EN 61000-4-5, Installation Class 2Protection against Protective separation of all extra-low-voltageelectrical shock circuits against mains as per EN 61010FM/CSA NI, Class 1, Div 2, Group A, B, C, D, T4Power supply24 (–15%)…230 (+10%) V AC/DC; approx. 5 VA, 2.5 WAC: 45…65 HzOvervoltage category II, Class IINominal operating conditionsAmbient temperature– 20…+55 °C / –4...+131 °FTransport/Storage temp – 20…+70 °C / -4...+158 °FRelative humidity 10…95 % non condensingPower supply24 (–15%)…230 (+ 10 %) V AC/DCFrequency for AC 45…65 HzGeneral specifications and ordering information«Advanced Line» transmittersEnclosure molded enclosure made of PBT (polybutylene terephtalate)Color Bluish gray RAL 7031Assembly• Wall mounting• Pipe mounting: Ø 40…60 mm,Ø 30…45 mm• Panel mounting, cutout to DIN 43 700, sealed against panelDimensions H x W x L: 144 x 144 x 105 mm (5.67 x 5.67 x 4.13")Ingress protection IP 65/NEMA 4XCable glands 3 breakthroughs for cable glands M20 x 1.52 breakthroughs for NPT 1/2 " or Rigid Metallic ConduitWeight approx. 1 kg*User-defined1)To IEC 746 Part 1, at nominal operating conditions2)± 1 count3)Plus sensor errorOrdering information Array Transmitter pH 2100e pH 2100e52 121 102Transmitter O24100e O24100e52 121 103Transmitter O2 4100ppb O24100ppb52 121 104Transmitter Cond 7100e Cond 7100e52 121 126Transmitter Cond Ind 7100e Cond Ind 7100e52 121 127Installation accessoriesBracket kit ZU 027452 120 741Panel-mount kit ZU 027552 120 740Protective hood ZU 027652 120 739NotesNotesMETTLER TOLEDO Market Organizations Subject to technical changes.© Mettler-Toledo AG, Process Analytics 08/13 Printed in Switzerland. 52 121 132Mettler-Toledo AG, Process Analytics Im Hackacker 15, CH–8902 Urdorf Tel. + 41 44 729 62 11, Fax +41 44 729 66 Sales and Service:Australia Mettler-Toledo Ltd.220 Turner Street Port Melbourne AUS-3207 Melbourne/VIC Phone +61 1300 659 761Fax +61 3 9645 3935e-mail *****************Austria Mettler-Toledo Ges.m.b.H.Südrandstraße 17A-1230 Wien Phone +43 1 604 19 80Fax +43 1 604 28 80e-mail ***********************Brazil Mettler-Toledo Ind. e Com. Ltda.Avenida Tamboré, 418TamboréBR-06460-000 Barueri/SP Tel.+55 11 4166 7400Fax +55 11 4166 7401e-mail *******************.br *******************.br China Mettler-Toledo Instruments (Shanghai) Co. Ltd.589 Gui Ping Road Cao He Jing CN-200233 Shanghai Phone +86 21 64 85 04 35Fax +86 21 64 85 33 51e-mail *************** Croatia Mettler-Toledo d.o.o.Mandlova 3HR-10000 Zagreb Phone +385 1 292 06 33Fax +385 1 295 81 40e-mail ****************Czech Republic Mettler-Toledo s.r.o.Trebohosticka 2283/2CZ-100 00 Praha 10 Phone +420 2 72 123 150Fax +420 2 72 123 170e-mail *****************Denmark Mettler-Toledo A/S Naverland 8DK-2600 Glostrup Phone +45 43 27 08 00Fax +45 43 27 08 28e-mail ****************France Mettler-Toledo Analyse Industrielle S.A.S.30, Boulevard de Douaumont F-75017 Paris Phone +33 1 47 37 06 00Fax +33 1 47 37 46 26e-mail **************Germany Mettler-Toledo GmbH Prozeßanalytik Ockerweg 3D-35396 Gießen Phone +49 641 507 333Fax +49 641 507 397e-mail **************Great Britain Mettler-Toledo LTD 64 Boston Road, Beaumont Leys GB-Leicester LE4 1AW Phone +44 116 235 7070Fax +44 116 236 5500e-mail *******************Hungary Mettler-Toledo Kereskedelmi KFT Teve u. 41HU-1139 Budapest Phone +36 1 288 40 40Fax +36 1 288 40 50e-mail ***************India Mettler-Toledo India Private Limited Amar Hill, Saki Vihar Road Powai IN-400 072 Mumbai Phone +91 22 2857 0808Fax +91 22 2857 5071e-mail *****************Italy Mettler-Toledo S.p.A.Via Vialba 42I-20026 Novate Milanese Phone +39 02 333 321Fax +39 02 356 2973e-mail **************************Japan Mettler-Toledo K.K.Process Division 6F Ikenohata Nisshoku Bldg.2-9-7, Ikenohata Taito-ku JP-110-0008 Tokyo Phone +81 3 5815 5606Fax +81 3 5815 5626e-mail **********************Malaysia Mettler-Toledo (M) Sdn Bhd Bangunan Electroscon Holding, U 1-01Lot 8 Jalan Astaka U8/84Seksyen U8, Bukit Jelutong MY-40150 Shah Alam Selangor Phone +60 3 78 44 58 88 Fax +60 3 78 45 87 73e-mail ****************************Mexico Mettler-Toledo S.A. de C.V.Ejercito Nacional #340Col. Chapultepec Morales Del. Miguel Hidalgo MX-11570 México D.F.Phone +52 55 1946 0900e-mail *****************Poland Mettler-Toledo (Poland) Sp.z.o.o.ul. Poleczki 21PL-02-822 Warszawa Phone +48 22 545 06 80Fax +48 22 545 06 88e-mail *************Russia Mettler-Toledo Vostok ZAO Sretenskij Bulvar 6/1Office 6RU-101000 Moscow Phone +7 495 621 56 66Fax +7 495 621 63 53e-mail **************Singapore Mettler-Toledo (S) Pte. Ltd.Block 28Ayer Rajah Crescent #05-01SG-139959 Singapore Phone +65 6890 00 11Fax +65 6890 00 12+65 6890 00 13e-mail ****************Slovakia Mettler-Toledo s.r.o.Hattalova 12/A SK-83103 Bratislava Phone +421 2 4444 12 20-2Fax +421 2 4444 12 23e-mail *************Slovenia Mettler-Toledo d.o.o.Pot heroja Trtnika 26SI-1261 Ljubljana-Dobrunje Phone +386 1 530 80 50Fax +386 1 562 17 89e-mail *******************South Korea Mettler-Toledo (Korea) Ltd.Yeil Building 1 & 2 F 124-5, YangJe-Dong SeCho-Ku KR-137-130 Seoul Phone +82 2 3498 3500Fax +82 2 3498 3555e-mail *****************Spain Mettler-Toledo S.A.E.C/Miguel Hernández, 69-71ES-08908 L’Hospitalet de Llobregat (Barcelona)Phone +34 902 32 00 23Fax +34 902 32 00 24e-mail *************Sweden Mettler-Toledo AB Virkesvägen 10Box 92161SE-12008 Stockholm Phone +46 8 702 50 00Fax +46 8 642 45 62e-mail ****************Switzerland Mettler-Toledo (Schweiz) GmbH Im Langacher Postfach CH-8606 Greifensee Phone +41 44 944 45 45Fax +41 44 944 45 10e-mail ******************Thailand Mettler-Toledo (Thailand) Ltd.272 Soi Soonvijai 4Rama 9 Rd., Bangkapi Huay Kwang TH-10320 Bangkok Phone +66 2 723 03 00Fax +66 2 719 64 79e-mail ****************************USA/Canada Mettler-Toledo Ingold, Inc.36 Middlesex Turnpike Bedford, MA 01730, USA Phone +1 781 301 8800Freephone +1 800 352 8763Fax +1 781 271 0681e-mail**************。
philips+sbm100+portable speaker+user 说明书

3
2 Your Portable Speaker
4
Introduction
4
What's in the box
4
Overview of the speaker
4
3 Get started
5
Power supply
5
Turn on/off
5
Select a source
5
4 Play
6
Play from Micro SD card
Note
•• Keep the portable speaker away from other electronic
devices to avoid radio interference.
1 Press S repeatedly to select FM tuner
source.
2 Press and hold / for two seconds. »» The speaker tunes to a station with strong reception automatically.
Power supply
Caution
•• Danger of explosion if battery is incorrectly replaced.
Replace only with the same or equivalent type.
•• Risk of damage to the speaker. Do not charge through
Press S repeatedly to select an audio source: Micro SD card, FM tuner, or Aux.
- 1、下载文档前请自行甄别文档内容的完整性,平台不提供额外的编辑、内容补充、找答案等附加服务。
- 2、"仅部分预览"的文档,不可在线预览部分如存在完整性等问题,可反馈申请退款(可完整预览的文档不适用该条件!)。
- 3、如文档侵犯您的权益,请联系客服反馈,我们会尽快为您处理(人工客服工作时间:9:00-18:30)。
1
第一次使用 插入 SIM 卡
1. 按住手机后盖,向下推开后盖。如右下图所示,取出电池。
2. 安装 SIM 卡。确保正确地插入 SIM 卡,卡的金色触点朝下。
3. 如图所示,重新装回电池和电池盖。
2
为电池充电
如图所示插上充电连接 器,然后将连接器的另一 端插入电源插座。
插入 Micro SD 卡 ( 存储卡 )
置手机密锁 默认的手机锁密码为 0000。)
恢复出厂设置 选择 L 菜单 > 设置 > 恢复出厂设置。( 默
认出厂设置密码为 0000。)
6
输入文本和数字
1. 重复按 # 键选择您所需的输入法。
: 简体笔划输入法
: 拼音输入法
ABC/abc/Abc: 智能英文输入法
ABC/abc/Abc: 英文输入法
了解您的手机
听筒
主屏幕
左软键 导航键 接听键
话筒
右软键
,( 确认 ) 键
挂断、取消和 开 / 关机键
字母数 字键盘 耳机 / 充电 器接口
飞利浦将不断力争改善产品性能。因此,飞利浦保留修改本用 户指南的权利,如有更改,恕不另行通知。飞利浦力求确保该 用户指南的信息准确性,但不承担用户指南与产品之间存在任 何错误、遗漏或差异的责任。本手机用于连接 GSM/ GPRS 网 络。
4
待机模式设置 在待机屏幕,按 R 捷径 > 待机模式设置, 按后导按航L键 +确或定-编选辑择SSIMIM卡1 设名置称以/SI及M2设设置置来,电然
及信息铃声。 如需设置主卡,选择主卡切换,然后按
L
切换选择 SIM1/SIM2。
选择铃声以及 调整铃声音量
选需择的情L景模菜式单,>按设L 置 >编情辑景,模选式择。所选需择选您项所
选项
>
使用模板。
阅读和回复短信
1. 2.
若屏幕显示有新信息,选择查看阅读该条信息;也可以选
如择需信回息复> 当短前信短>信收,件选箱择,选L择需选阅项读>的回短复信。,按 ,。
编写和发送彩信
1. 2.
在选择收件L人、菜副单本、>密信件息副>本彩栏信中>,写按彩L 信。编辑输入收件人或
收件群组的电话号码或电子邮箱地址。
进行设置;要激活所选的情景模式,按 , 激
活。
查看通话记录 在待机屏幕,选择 L 菜单 > 通话记录。
手机上网
在待机屏幕,选择 L 菜单 > 网络服务 > 浏
览器。
如需启动
在待机屏幕,选择 L 菜单 > 网络服务 > 浏
Push 消息 ( 特 览器 > 设置 > 服务信息设置 > 服务信息设置 >
殊格式的短消 打开。如需查看所收到的 push 消息,选择菜
式。
设置手机自动 选择 L 菜单 > 设置 > 手机设置 > 定时开关
开机 / 关机的 机。
时间
为您的 SIM 卡 选择 L 菜单 > 设置 > 安全设置 > 更改密码
设置 PIN 密码 > SIM PIN 码 /SIM PIN 码 2。( 默认的 PIN 码由您
保护
的网络运营商提供。)
为您的手机设 选择 L 菜单 > 设置 > 安全设置 > 手机锁。(
3. 长按 ) 开机。 4. 进入 L 菜单 > 文件管理 > 存储卡 > 图片。 5. 选择所需图片,然后按 , 查看图片。 6. 按 < 或 > 浏览上一张或下一张图片。
设置时钟
1. 2.
确认手机已经开机。如有需要,长按 )。
在待机屏幕,选择L菜单进入设置 > 手机设置>
时间与日
期。
< > 时间 / 日期设置:使用数字键盘输入日期和时间。
确认手机时间是否设置正确。
选选择择一L个闹菜钟单,>按附L 件功编能辑>开闹始钟设,置屏。幕显示闹钟列表。
设置时间:设置闹钟时间。
12
设置重复模式:可选择闹铃一次,每天闹铃或者自定义。若
选择了自定义,在日期列表,按 L 键勾选所需闹铃的日
动搜索功能。按 或 微调电台。
编辑频道列表
您可为预设频道设定特定位置。在收音机播放屏幕,按相应数
字键时,即可收听该频道。
1. 进入多媒体 > 调频广播,按 L 选项 > 频道列表。选择预
设频道的位置。
2. 按 L 选项 > 编辑:
频道名称: 为频道命名或重命名。
频率: 输入频率。
或者
1. 调频到你所需设为预设电台的频率。 2. 在收音机播放屏幕,长按所需数字键 (1-9)。
重复按键输入 (ABC/abc/Abc)
按所需字母的对应键输入单词。按一次可输入键上的第一个
字母,快速按两次可输入键上第二个字母,以此类推直到所
需字母出现在屏幕上。
7
如何输入单词 “home”
按34, ,34(DE(FG)H。I)输,入6 完成,后,6 按 L , 6 确定(。MNO),
笔划输入
笔划输入的原理是将中文字按其笔划顺序分解。使用笔划输入 时,参照手机上对应笔划的按键,将笔划按顺序输入,即可得 到需输入的中文字。 该手机中的笔划输入法将中文字的笔划 分成五个基本笔划:( 即横,竖,撇,捺及折 ),再加上一个 特殊笔划。当所需笔划不属于以上五种笔划时,可使用特殊笔
3.
在彩信内容栏中,按 L 编辑编辑彩信内容;如需插入图 像,音频文件等,则按 L 选项选择所需的编辑选项。
4. 彩信编辑完成后,按 R 完成选择发送彩信。
阅读和回复彩信
1. 2.
在选信,收择件信按箱息L列>表彩选中信项要>>回播收复放件所当箱选前,彩彩在信信信,。息按列L表中选,项选>择回所复需/ 的短彩信
的1. 信选息择,L 如家庭菜电单话>、电办话公簿室>电添话加、号邮码箱。地选址择等存。储位置:至
SIM1、至 SIM2 或至手机。
2.
依次输入联系人的姓名和电话号码。
若选择保存至手机 ,要选择联系人所在群组,重复按<或>。
查找联系人
选名择拼电音话的簿首字> 母快。速按查找#。在切搜换索至栏您内所,需输的入输所入需法联。系按人+的或姓-
纸,每次开机时,您需再次设定自定义墙纸。
)
设置 LCD 背 选择 L 菜单 > 设置 > 显示设置 > LCD 背
光时间
光。
设置手机显示 选择 L 菜单 > 设置 > 手机设置 > 语言。
语言
将导航键设为 访问菜单的快
键选。择按LL菜单编辑> 进设入置菜>单手为机此设键置选择>新指的定快功捷能方
捷键
智能英文输入 ( ABC/abc/Abc)
您只要按一次所需字母的对应键,即可拼出单词:手机会分 析您输入的按键,然后在弹出窗口显示可能相关的字母或单 词组合。
如何输入单词 “home”
1. 按 4, 6, 6, 3。
2. 3.
按屏按幕L >上浏显览选示并择列选确表择定中H。的om第e。一个单词:Good
或
选择开启,开启
< > 通按过L扬声选器项收>听设电置台。> 背景播放:按 或 选择开启,退出
收音机后继续收听电台。
11
浏览图片
您可以使用手机浏览储存在存储卡中的图片。如需浏览图片, 1. 插入Micro SD卡至手机(见第3页“插入Micro SD卡(存储卡
)” )。 储存在存储卡中的图片大小应小于或等于 100KB。 2. 安装电池和电池盖 (参见 " 插入 SIM 卡 " 步骤 3)。
算器。
收听收音机 创建备忘录
收听电台时,应将随机提供的耳机连接到手机
上。在待机屏幕,选择 L 菜单 > 多媒体 >
调频广播。
在待机屏幕,选择 L 菜单 > 附加功能 > 备
忘录。
5
将所选图片设 选择 L 菜单 > 设置 > 显示设置 > 墙纸。
为手机墙纸 ( 如需将 Micro SD 存储卡中的图片设定为墙
选择所需的联系人。
来电群组
1. 2.
选按择+电或话-簿,>及来L电群确组定。选择群组。
3. 您可以为群组选择铃声及添加群组成员。
调频广播
搜索电台
收听电台时,应将随机提供的耳机连接到手机上。
• 自动调台: 进入多媒体 > 调频广播,按
L
选项
>
自动搜索并设置。
手机开始自动搜索电台。您可在频道中最多存储 20 个可搜索
如图示,将卡夹推下,然后 将其掀起。将 micro-SD 卡 与 卡 槽 对 齐 并 放 入 卡 槽。 按下卡夹,推上直至锁定。
取出 SIM 卡
如图所示,右手向下按压 定位弹片,同时左手水平 向上推出 SIM 卡。
3
如何操作 ...
手机开 / 关机 长按 )。
输入 PIN 码 用键盘输入 PIN 码,然后按 L 确认。
格式设置:使用导航键 或 选择时间格式 (12 小时或 24
小时 ) 及日期格式。
3.
如需设置不同时区的时钟:
按选导择航L键 <菜或单>进选入择附所件需功的能城>市世。界如时需钟开。启或关闭夏令时,
按 L 选项选择其他城市启动夏令时, 然后按 L 开启 /
关闭。
闹钟
您可以设置 5 个闹钟。
设置闹钟
1. 2. 3.