魅族PRO5刷国际版固件教程中英文版
MB525刷机教程
9、刷底包过程中手机屏幕会闪烁、自动重启,耐心等待7分钟左右。成功后状态栏会显示Please manually power up this phone,然后过20秒钟显示FINISH,然后手机非常慢的(大约2分钟)自动进入桌面。
10、开机后出现英文界面按Finish setup、然后按小绿人,一路按Skip、Next,最后进入英文界面的桌面。英文系统开机很快,用的惯可以不刷汉化。
8、原装USB数据线,通过电脑连接好手机,刷机过程一直插好USB即可,切勿随便插拔。以上8个步骤做完后,开始刷机。
二、刷机教程
刷机有风险,必须谨慎!请一定严格按照刷机教程操作,切勿省略任何步骤。
备注:为什么要多次WIPE:主要是为了清除系统安装时残留的数据,减少磁盘使用空间,让系统更干净,如果你嫌麻烦,那么至少刷机之前先双WIPE一次。强烈建议所有的WIPE都要严格操作,如果不多次WIPE,那么可能会出现很多莫名其妙的问题。
4、下载MOTO RSD LITE刷机程序,最新的是5.0的是1.9.1的版本。
6、下载Defy Recovery恢复软件(Defy Recovery 1218 0326 signed),直接拷贝到SD卡根目录(这样省事)。
7、电池要有至少30%,建议充满。
总步骤:清除数据、先刷底包,再刷汉化恢复包。
(一)、清除残留数据文件,俗称WIPE。
1、关机。
2、"音量减键"和"电源键"同时按,20秒左右出现"白色三角形、惊叹号、小绿机器人"界面。
3、"音量加键"和"音量减键"同时按(之前是2.1系统的就点一下屏幕右下角),出现白盒子小绿机器人界面,第一行红字显示:Android system recovery<3e>。
G5刷机完整版

HTC G5又叫Google N1Google Nexus One刷机教程第一步备份及下载所需文件:1、备份好通讯录、短信彩信、记事本、多媒体等等存储在手机内存上的数据,可用豌豆荚手机精灵软件备份(如果本来使用的是MIUI的ROM,想再装新的MIUI ROM,很简单很方便,直接用“系统工具”中的“本地备份”来备份短信彩信、WIFI设置、桌面布局位置、通讯录、通话记录,还可以把安装的程序也备份起来,装完新的MIUI ROM后可以直接恢复这些数据和程序,不用再次设置和安装)。
2、打开USB调试模式:进入“系统设置->应用程序->开发->USB调式”,勾选上USB调试模式(MIUI系统是在系统设置->程序->安装和调试中设置)3、下载你想要刷的ROM,并把ROM文件复制到SD卡根目录,下面是2.3.5B目前最稳定版本(/2.3.5b/miui_NexusOne_2.3.5b_dbytx30ouo_2.3.zip),以及下载NexusOne驱动、ADB工具、Recovery。
附件列表(下载后“解压到D盘根目录”):NexusOne驱动:/file/be8wcpk iADB工具:/file/dpxiv76u(里面包含Recovery和ROOT权限文件)第二步解锁Unlock bootloader:1、插上手机安装Nexus one驱动,一般安装过豌豆荚手机精灵N1的驱动都会自动被安装。
2、将附件ADB.rar解压到D盘根目录3、手机关机,然后按住音量减键,再按住电源键,过几秒就进入fastboot模式后松开手,用数据线连接电脑,再按下电源键显示USB 看下图4. 在电脑上开始菜单->运行中输入cmd回车输入以下命令行:输入D: 回车输入cd adb回车输入fastboot oem unlock回车手机中就会出现一个“Unlock bootloader?”的界面,用音量键选择YES,用电源键确定,手机就解锁成功并自动重启。
黑莓——使用WIPE.exe软件刷机教程综合版
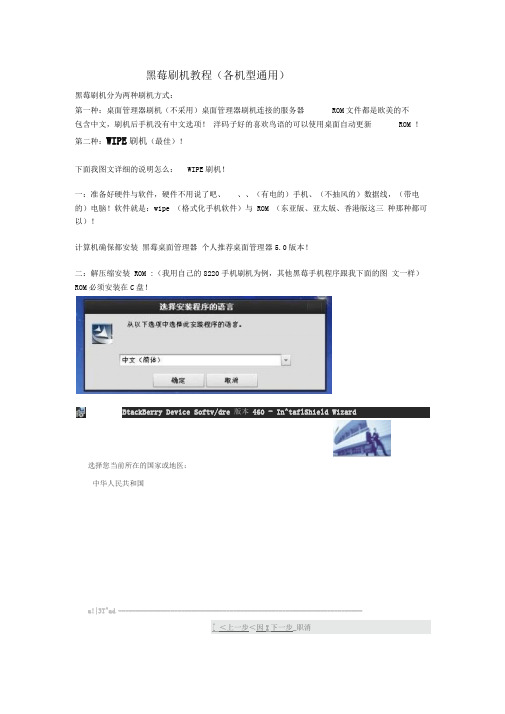
黑莓刷机教程(各机型通用)黑莓刷机分为两种刷机方式:第一种:桌面管理器刷机(不采用)桌面管理器刷机连接的服务器ROM文件都是欧美的不包含中文,刷机后手机没有中文选项!洋码子好的喜欢鸟语的可以使用桌面自动更新ROM !第二种:WIPE刷机(最佳)!下面我图文详细的说明怎么:WIPE刷机!一:准备好硬件与软件,硬件不用说了吧、、、(有电的)手机、(不抽风的)数据线,(带电的)电脑!软件就是:wipe (格式化手机软件)与 ROM (东亚版、亚太版、香港版这三种那种都可以)!计算机确保都安装黑莓桌面管理器个人推荐桌面管理器5.0版本!二:解压缩安装 ROM :(我用自己的8220手机刷机为例,其他黑莓手机程序跟我下面的图文一样)ROM必须安装在C盘!BtackBerry Device Softv/dre 版本460 - In^taflShield Wizard选择您当前所在的国家或地医:中华人民共和国a!|3T^ad ----------------------------------------------------------------------[ <上一步<因I下一步_职消这里切记:不要勾选那个:是,我想启动应用程序加载程序!!直接点击完成!三:进入 C 盘T program files 宀 com mon files research in moti on appload B除 ven dor 这个文件!删除这个文件后关闭文件夹框子,一定要关闭!四:用数据线连接手机和电脑,打开WIPE 软件点击:开女台WIPE•黒莓一St・IPE程序VI,程序:B E黒毒WIFE教学如果你的師已经莫名的出皓,而且无可救药’甚至刷机都无运解决问题'那么就有必要班FE机黑了°什么是WIPE?""就是除除>就是注你的師什金都没有了>燃后再刷机即可.一■引用[茸战胜佛1的话操作再简卑不过了:将你的黑莓与电脑连接->第二步点击开始WTFE [眨眼间你的盼就只会说5M啦]第三步刷ROM专业术马查杀莪件术马董家20聽点击免费下载点击后手机自动从新启动,然后手机显示:507就可以刷机了这就是507的图片!五:关闭 WIPE 软件,打开: C 盘T program files 宀 com mon files research inmotion T apploader 找到loader关闭文件夹窗口,开始刷机!建议:找到这个loader后发送到桌面快捷模式,然后关闭窗口,在桌面双击Loader开始刷机!六:然后出现对话框什么USB端口之类的直接下一步,不要管他;一直到出现下面的图片:------- 附加内容-------------------------- 附加信息------------------------------一条条说,以我的 8320刷机为例,其他机型差别不大。
MB525刷机说明1

安卓4.0,Android 4.0在反复念叨等待的漫长岁月里一度备受关注的Android 4.0终于发布了,这一次Defy 4.0也同样被纳入其中,虽然称不上是一个完美版的4.0固件,不过体验上已经完全与2.3有了本质上的区别。
固件在运行上速度是有了很大的提升,喜欢尝鲜的童鞋们可以试试。
不过光说不做还是嘴把式,因为对于许多有好奇心而又不太明白刷机含义的童鞋可以跟着拉拉的教程走,今天咱们就来一个手把手的互动刷机吧,刷机其实是一种快乐,也是一种享受!最后还是禁不住要感叹一句:“谷歌的亲儿子就是好哇~”正文(MB525刷机教程)1)首先拉拉还是要声明一下,这次的4.0抢鲜版是专门针对国际版Defy(传说中的MB525,也就是传说中的“水货”)专门制作的。
国行机请不要轻易尝试!在刷之前首先需要确保自己是否刷有MIUI2.3.7版本固件,如果刷入的是国行固件或者其他版本ROM的话需要先刷底包,对于MIUI可以直接跳过下面的步骤,进入恢复模式双WIPE之后使用bootmenu刷拉拉在下面提供的固件ROM镜像即可完成升级。
手机版本可以通过菜单键-设置-关于手机来进行查看,如下图:ROM信息查看2)下面对于不是MIUI系统的童鞋来说还是会相对麻烦一些,我们需要准备一些工具来进行刷机。
拉拉已经都为大家准备好了,点击对应名称即可进行下载(4.0固件包、2.3刷机包、刷机工具包)。
下载完成之后只需要将刷机工具包defy+_tools.zip解压即可,4.0固件包(miuiscotland_Defy-1.11.9-ICS-4.0.zip)和2.3刷机包(miui_Defy_1.11.4_wjqyzqmn0h_2.3.zip)只需要放入SD卡根目录即可。
刷机之前最好再确认一下,解压defy+_tools.zip之后应该总共应该具备如下文件:准备工作注意:1.安装手机驱动,Drive文件夹下是手机驱动,如果已经装有就可以跳过此步骤。
黑莓刷机教程--正规刷机+强刷方法
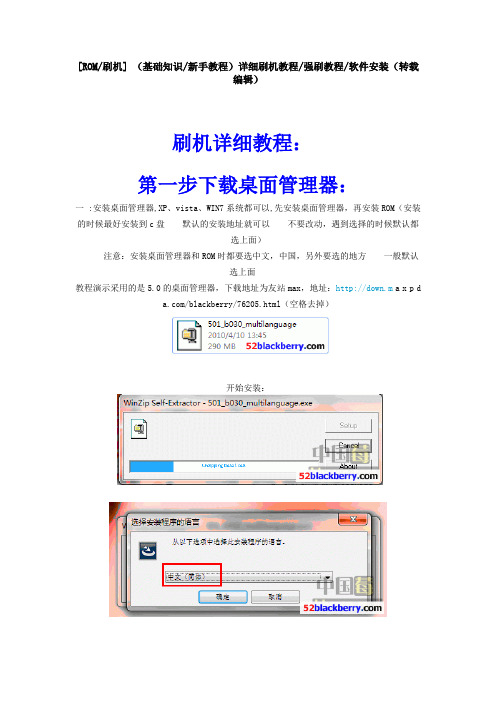
[ROM/刷机] (基础知识/新手教程)详细刷机教程/强刷教程/软件安装(转载编辑)刷机详细教程:第一步下载桌面管理器:一 :安装桌面管理器,XP、vista、WIN7系统都可以,先安装桌面管理器,再安装ROM(安装的时候最好安装到c盘默认的安装地址就可以不要改动,遇到选择的时候默认都选上面)注意:安装桌面管理器和ROM时都要选中文,中国,另外要选的地方一般默认选上面教程演示采用的是5.0的桌面管理器,下载地址为友站max,地址:http://down.m a x p d/blackberry/76205.html(空格去掉)开始安装:到这里就ok了,桌面管理器安装成功!二:安装rom (一定要安装rom,很多人就是因为没有装rom然后桌面管理器提示更新,导致升级系统后没有了中文,装和手机一样的rom(进去选项--关于,就可以看到rom 版本,或者你要升级ROM就去下载新版安装就好)开始安装ROM,示例为9700ROM,版本为5.0.0.593下载成功,开始安装:ROM安装完成三:然后再进一遍C:\Program Files\Common Files\Research InMotion\AppLoader\Vendor.xml(将这个文件删除)删除完成,接下来可以运行第三步了,不过有的情况下需要先wipe一下,比如4.6升级5.0就需要,也有很多人觉得wipe后系统干净,没有残留这一步开始,你就把数据线一直连接好吧,没有取下来的必要,全部完成后取下来就ok双击:然后BB就507了,现在开始运行:C:\Program Files\Common Files\Research InMotion\AppLoader\Loader.exe然后就出来这个界面了,很多人刷机的时候出不了这个界面,显示空白一片,有几个原因:你没有安装ROM,或者没有删除C盘Vendor.xml文件,安装的ROM不适合:如V版9520安装5.0.0.436的,T版9520安装5.0.0.580的.还有人问到,这些哪些是需要打勾哪些是不需要的,那么我就给个大概截图给大家看看,我是这么刷我的BB的:有人说APP world那个没用,我也这么认为,大家可以不选,以免浪费空间靠上面的什么语言啊,输入法啊,我一律不打勾,因为BB本身会有英语的,不用担心这样基本就ok了,需要添加软件的,点上面的添加来加软件就好,如下图:添加完了以后就点下一步吧,我一般是用berrybox添加软件如果你不是wipe以后刷机的,这个地方你点完成后还会遇到一个提示:是备份你的资料后刷机还是不备份,我建议大家需要备份的话在桌面管理器备份,不要在这里备份,我遇到过在这里备份丢失电话薄的情况OK,搞定了,这就是全部的刷机过程了,如果你操作和我刚才演示的一样顺利的话,你有没有觉得其实好简单呢强刷:在你的BB更新或者装软件的时候,手机不开机了,闪红灯,连接不了电脑,怎么办?这时候我们就需要强刷了,简单理解就是强行刷机!强刷步骤:取掉手机电池,运行C:\Program Files\Common Files\Research InMotion\AppLoader\Loader.exe至下一步如图:注意:在这个时候,插数据线连接至BB,然后会读取出PIN:unknown 你可能只有几秒的机会,迅速点下一步,记住只点一次,然后等待。
MB525刷机
【MIUI DEFY】【Android 2.3.4】刷机教程首先说明下此贴转载于摩托罗拉手机论坛另外有朋友问到恢复镜像的方式。
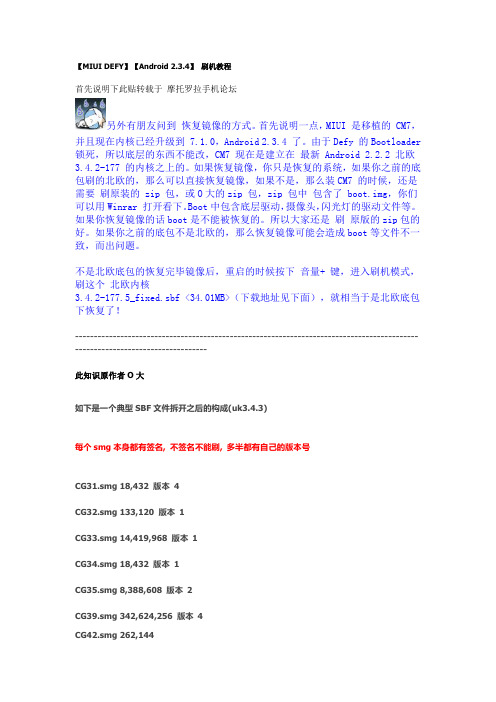
首先说明一点,MIUI 是移植的 CM7,并且现在内核已经升级到 7.1.0,Android 2.3.4 了。
由于Defy 的Bootloader 锁死,所以底层的东西不能改,CM7 现在是建立在最新 Android 2.2.2 北欧3.4.2-177 的内核之上的。
如果恢复镜像,你只是恢复的系统,如果你之前的底包刷的北欧的,那么可以直接恢复镜像,如果不是,那么装CM7 的时候,还是需要刷原装的 zip 包,或O大的zip 包,zip 包中包含了 boot.img,你们可以用Winrar 打开看下。
Boot中包含底层驱动,摄像头,闪光灯的驱动文件等。
如果你恢复镜像的话boot是不能被恢复的。
所以大家还是刷原版的zip包的好。
如果你之前的底包不是北欧的,那么恢复镜像可能会造成boot等文件不一致,而出问题。
不是北欧底包的恢复完毕镜像后,重启的时候按下音量+ 键,进入刷机模式,刷这个北欧内核3.4.2-177.5_fixed.sbf <34.01MB>(下载地址见下面),就相当于是北欧底包下恢复了!------------------------------------------------------------------------------------------------------------------------------此知识原作者O大如下是一个典型SBF文件拆开之后的构成(uk3.4.3)每个smg本身都有签名, 不签名不能刷, 多半都有自己的版本号CG31.smg 18,432 版本4CG32.smg 133,120 版本1CG33.smg 14,419,968 版本1CG34.smg 18,432 版本1CG35.smg 8,388,608 版本2CG39.smg 342,624,256 版本4CG42.smg 262,144CG45.smg 3,147,776 版本0CG47.smg 8,388,608 版本2CG53.smg 2,048CG61.smg 524,288 版本1CG64.smg 18,432 版本1CG65.smg 18,432 版本1RAMDLD.smg 315,392每次不可降级的升级中CG31和CG39版本都会升高(2.21/国行=2,2.51=3,3.4.x=4)而国行1.11和uk3.4.3-3不同的文件(md5值校验)如下CG31/CDT是描述各文件版本号的, 相当于注释文件CG33/CDROM是个ISO文件, 可以用WinRAR之类的打开, 包含PC端程序(MotoHelperAgent)CG35/Boot包含了系统内核<-8.3MB的boot-only就是这个CG39/system分区就是恢复包中的system.imgCG40/cache缓存分区(国行多余的部分), 显然里面什么都没有CG45/Baseband基带固件CG47/Recovery就是官方恢复, 里面也包含独立的内核, 但不用于启动CG61/devtree包含设备描述符RAMDLD/RamDisk&tmpfs, Android/Linux启动初始化的一部分, 不涉及具体设备而CG39就是个EXT3的文件系统镜像, 其内容和镜像版的system.img(yaffs2文件系统)完全一致, 可以直接从CG39创建system.img使用恢复镜像方式安装系统的机油,只是恢复了system.img,其他部分无法恢复。
Rom_刷机(升级)使用教程
-= Rom 刷机(升级)使用教程=-ROM Upgrade Utility (RUU)作者:林楓(Rom签名:Lin.Jp ,论坛名称:LJp018182)注意:本资源均来自网络,由作者整合,有何疑问请您自行于网上咨询求解。
升级前您设备的HSPL已解锁(以下以HTC Touch HD为例讲解)1. 下载最新版本USPL。
(HSPLWrapper_Blackstone_156OliNex.zip)下载地址:/file/f8304e7ed3(如不放心,请自行网上搜索,作者不承担任何责任。
)2. 长按下音量键“-”不放的同时按一下电源键“POWER”键进入HD三色屏,或者开机状态下连接PC。
3. 运行HSPLWrapper_Blackstone_156OliNex.zip里的EXE文件,便可完成设备Rom的升级。
P.S. 0014. 如果HSPLWrapper_Blackstone_156OliNex.zip里的EXE文件不能运行,那是因为您的PC设备没有安装.NET framework。
官方下载地址:(如下链接)/downloads/details.aspx?FamilyID=333325fd-ae52-4e35-b531-508d977d32 a6&DisplayLang=en5. 不管您的SPL是已经解锁的1.14.OliNex还是官方1.14.0000版本,只要按照上面步骤做了就能实现“升级(解锁)SPL到1.56.OliNex ”的效果,无需其他繁琐程序。
P.S. 0026. HD硬启方法:同时按住上、下音量键不动,然后用触摸笔轻触Reset,便可进入硬启界面;而后,再按音量上键“+”(即是确认硬启),待硬启设备滚动条走完,按其他任意键均可退出硬启。
P.S. 0037. HD卡刷方法:先将刷机包内的“*.nbh ”命名为:BLACIMG.nbh,拷到卡的根目录,按住向下的音量键不要松开,戳“pp”(复位键),等到刷机画面出来以后松开,Rom检测完毕后,按电源键开始刷机。
黑莓刷机图文简易教程
新手入门:刷机图文简易教程接触到的不少新莓友遇到的第一个问题就是:不小心更新了桌面管理器后,手机变成了英文系统,设置里也没有了中文选项。
出现这个问题的原因很多是因为更新到的是最新版的ROM,最新版的ROM往往是没有中文的,这个时候就需要通过刷机来给ROM降级,刷上带有中文的ROM以恢复中文界面。
刷机对于资深莓友来说是非常简单和经常做的事情,早已驾轻就熟。
但对于新莓友却可能是一头雾水,不知从何做起。
坛子里也有不少刷机的教程,不过可能因为视角的不同,部分新莓友还是不能正确地刷机。
我在此贴出给8110刷机的步骤,黑莓各个机型刷机的过程都差不多,基本可以通用。
供新莓友参考,资深莓友可绕行。
观看教程前注意:(1) 刷机可能会有风险,如果对黑莓不了解,建议在有经验的人的指导下进行。
(2) 刷机将手机使用USB连接电脑时,一定要选择稳定的接口。
台式电脑的话尽量使用机身后的USB口,尽量不要使用机身前的USB口,防止电压不稳造成风险。
(3) 刷机未完成时,尽量不要操作其他程序,防止刷机时电脑死机造成刷机失败。
(4) 刷机未完成时,尽量不要拔掉USB线,防止产生风险。
这篇简易教程我将以9个步骤来介绍:1. 下载安装桌面管理器2. 下载安装ROM3. 删除Vendor.xml文件4. 通过桌面管理器备份相关的资料,比如通讯薄,短信等等5. 下载WIPE,并WIPE手机(如果对刷机不是很了解的话,建议忽略5.步骤,直接进入6.)6. 应用程序加载器7. 刷机注意事项8. 设置向导9. 其他设置1. 下载安装桌面管理器桌面管理器下载地址/thread-405777-1-1.html在电脑上安装下载下来的桌面管理器文件,一路下一步即可。
这里有桌面管理器的安装和使用教程,也可以参考一下/thread-417141-1-1.html2. 下载安装ROM这里有很齐全的rom下载/thread-405777-1-1.html也可以到down. max pda. com (去掉空格)搜索如“8110 ROM”或“8110 OS”之类的关键词进行下载。
- 1、下载文档前请自行甄别文档内容的完整性,平台不提供额外的编辑、内容补充、找答案等附加服务。
- 2、"仅部分预览"的文档,不可在线预览部分如存在完整性等问题,可反馈申请退款(可完整预览的文档不适用该条件!)。
- 3、如文档侵犯您的权益,请联系客服反馈,我们会尽快为您处理(人工客服工作时间:9:00-18:30)。
METHOD 1: INSTALLATION THROUGH ADB VIA PC第一种方法:连接通过电脑刷/thread-23842-1-1.html旅游无疆界 hb1987628–Required before using ADB command to install.1. Rooted device (note: you need a Flyme account for this).一:先root•Enable root by tapping on Settings-> Accounts-> My Flyme-> Personal settings (first option) -> System privileges and set it to open - accept disclaimer and confirm.*2. Busybox (SuperSU should be possible too) installed.*二:安装busybox•You can download and install busybox from Google Play (or search for the .apk file yourself).Note: make sure it is installed successfully.3. Setting up phone3:安装ADB驱动!(连接过电脑的可以忽略)• 3.1Set your device on ‘connect as Built-in CD-ROM’ (settings->about phone->storage->connect as).• 3.2Connect the phone to your PC and copy the ‘‘USB Drivers’’ folder from your phone to your desktop.• 3.3 Go to settings->accessibility->developer options and enable ‘‘debugging’’ and mock locations.4. Install ADB drivers四:无视• 4.1 Open Windows Device Management (search:devmgmt.msc). You’ll see a yellow exclamation mark at‘‘Androidphone/ADB interface’’ - right click on it and clickupdate driver. Click browse my computer for driver software(2nd option) and then click on browse and locate the driverfolder you copied from your Meizu phone to your computer (atstep 3.2). If it installs your good to go to pre-install if not go tostep 4.2.• 4.2 [Optional] When trying to manually install the drivers Windows could give a error l ike ‘‘the driver is corrupt or hasbeen tampered’’ If this is the case you’ll need to Disable Driver Signature Verification.How to: (1) Hold down the SHIFT key while you click Restart.(2) Once rebooted click the Troubleshoot option. (3) ClickAdvanced options. (4) Click Startup Settings. (5) Click Restart.(6) Now Disable ‘‘driver signature enforcement’’ by pressing F7(7th option in the list). (7) Now you’ll be able to install the driver - at step 4.1 - without an error..前面是准备工作!基本就是root和安装busybox-Now you can start the pre- installation procedure1.下载ADB文件夹 /s/1kT5uT1P1. Download ADB (files) folder click to download ADB files•Download (see link above) and unzip the folder.2. Setting up .android folder2设置.android文件夹如下图!新建adb_usb.ini 里面的内容为0x2a45,注意后缀名为ini•Go to ‘‘c:\Users\your name\android’’ and create or edit the ‘‘adb_usb.ini’’ file in this folder. Create it by making a txt file and name it to adb_usb.ini (don’t forget to replace .txt by .ini). Open the adb_usb.ini file with notepad for example and add thefollowing text in it: 0x2a45Note: If there is no .android folder, run the commands in step 3 and search again, also check ADB-drivers.3. Checking driver and connection3.现在检查驱动和连接,打开文件夹!打开运行打开cmd运行框后输入adb kill-server然后回车(Enter键,键盘里最大的键)然后再输入adb devices回车,如图•Start ADB shell by clicking the .bat file in the downloaded and unzipped adb folder. (运行 means run)•In the just started ADB shell run (type) the following 2 commands:adb kill-serveradb devicesAfter the 2 commands mentioned above you should see your device below ‘‘list of devices attached’’.Note: [Important] If the device list is empty it does not recognize your device and you should check: if you installed your drivers correctly, if the .android file exists and if it contains the adb_usb.ini file with0x2a45 in it. If you sure you did - try rebooting your PC or kill the adb.exe process - and connect/reconnect your device again - and run (type) the command again. If you’re getting a ''Permission denied" error make sure you have busybox or SU correctly installed and that you did all the other required steps (root, debugging,mock)..-The Installation through ADB这里的123步都是制作提取国际版固件!就不做解释!我直接发我提取的/s/1bn8ZcVt国际版455i 大小为1.28G.1. Download the correct and desired international (i)ROM/firmware (update.zip) for your device•Download from /en/firmware.html or•Download from: http://downloads.meizufans.eu/2. Now download and use the update.zip (firmware) converter that creates the required system-i.img•Click to download converter and unpack theConverter_system_Lollipop folder to your PC.•Copy the files ‘‘system.new.dat’’ and system.transfer.list fr om the update.zip to the ‘‘in’’ folder of converter.•If you copied the two above files to ‘‘in’’ start the process by clicking on System-conVERTER.cmd•When completed you should have the required image in the ‘‘out’’ (you’ll need it for updating).4. Now copy the created image from the ‘‘out’’ folder to the root of your device.把从百度云下载的或自己提取的系统system.img 放在手机的根目录•Copy it to internal system memory of your device5.Open ADB by clicking the (运行) run.bat file in the ADB folder and type the following 3 commands.现在又回到刚才的cmd框!关掉的话直接打开就行!•输入adb shell 回车•su 回车•dd if=/sdcard/system.img of=/dev/block/platform/ mtk-msdc.0/by-name/system 回车•如图•adb shell•su•dd if=/sdcard/system.img of=/dev/block/platform/XXXXXXX/by-name/systemIMPORTANT: Replace **XXXXXXX **with the correct partition system for your deviceMX4 Pro = 15540000.dwmmc0M2 note = mtk-msdc.0MX4 = mtk-msdc.0 (OR mmcblk0p6)MX5 = mtk-msdc.0 (OR mmcblk0p18)So for the MX4, for example, your command will be:dd if=/sdcard/system.img of=/dev/block/platform/mtk-msdc.0/by-name/system这里只有说一点~就是最后的那个命令行如果是PRO5的话应为dd if=/sdcard/system.img of=/dev/block/platform/15570000.ufs/by-name/systemNote:After giving the ‘‘su’’ command your smartphone may ask for confirmation tap allow/confirm on your screen.输完dd if 那一行后看似手机什么都没搞!(如果卡顿也是正常)大约5分钟左右出现“#”就说明已经成功了,好,现在重启手机,手机会出现优化程序,大功告成!6. The installation command will take some time (± 5min)•After it is done you’ll see some records in and out and at the very end the following sign: ‘#’;. If this is the case it is done.总结:最好是先刷455A版本最简洁步骤就是,1 root2安装busybox3把system.img放在手机根目录,4输入三行命令,好结束祝大家都成功7.Your phone should be updated by now, but your device will be unresponsive, this is normal.•Hold the power button for 5-10 seconds to shut it down. Now start it up again and wait for it to update apps etc. and yourphone has updated successfully. However, once in Flymeagain it is wise - but not*necessary - to completely reset yourphone. Go to settings->about phone->memory->factory datareset-> check both boxes and click start cleaning (this couldtake 5-10minutes [Note: this deletes everything!!!]Note: if the booting - after flashing/updating - takes longer than 15 minutes go to recovery and factory reset it and try again (boot with volume down button + power button to access recovery).END OF METHOD 1METHOD 2: INSTALLATION THROUGH THE TERMINAL第二种方法就不介绍了自己看看吧1. Enable root•Enable root by tapping on Settings-> Accounts-> My Flyme-> Personal settings (first option) -> System privileges and set it to open - accept disclaimer and confirm.2. Download and successfully install Busybox (from GooglePlay or search .apk)3. Download and install a Terminal Emulator (from Google Play or search .for an apk)4. Download the correct and desired international (i)ROM/firmware (update.zip) for your device•Download from /en/firmware.htmlor•Download from: http://downloads.meizufans.eu/5. Download and use the update.zip (firmware) converter that creates the required system-i.img•Click here to download converter first•Copy system.new.dat and system.transfer.list (from the update.zip) to the folder “in” (see converter folder)•Then start the converting process by starting System-conVERTER.cmd and pressing option 1 [enter]•If successfully converted you can find the system-i.img in the ‘‘out’’ folder.6. Copy the converted system-img from ‘‘out’’ to the internal memory of your Meizu device7 Go to Settings-> Display-> Sleep and set it to at least 10 minutes8. Start the Terminal Emulator and run (type) the super user command•su• A permission popup will come; give permission by tapping allow (always allow).9. Now run (type) the command for installing the system-img.•dd if=/sdcard/system.img of=/dev/block/platform/XXXXXXX/by-name/system•Replace XXXXXXX with the correct partition system for your deviceMX4 Pro = 15540000.dwmmc0M2 note = mtk-msdc.0MX4 = mtk-msdc.0 (OR mmcblk0p6)MX5 = mtk-msdc.0 (OR mmcblk0p18)Example Mx5 : dd if=/sdcard/system.imgof=/dev/block/platform/mtk-msdc.0/by-name/system10. The installation should start after the ‘‘dd if’’ command, but please note…•…it may seem that the copying/process did NOT start because you didn’t notice it, but it DID start.•do NOT type a new command or whatsoever, just…•…be patient and give your device 5-10 minutes to process.11. When the process is done you’ll see a # at the very end•your device should be unresponsive by now - this is normal12 Now just shutdown your phone (hold power button) and reboot it13Once successfully booted your device should be running an i-rom•Once in Flyme again it is wise - but not necessary - to completely reset your phone. Go to settings->about phone->memory->factory data reset-> check both boxes and clickstart cleaning (this could take 5-10minutes [Note: this deleteseverything!!!]END OF METHOD 2Alternative/separate download links•/en/firmware.html•http://downloads.meizufans.eu/•Update.zip to image Converter tool (only for lollipop roms)•Folder with ADB Shell (files)•Busybox app playstore link•Meizu MX4 system-img. (4.2.8.2I).Answers to some questions and errors•Q:I’m getting a ‘‘permission denied’’ error.Make sure you have root and that busybox is installed. Alsomake sure you gave the su command and that you tappedallow permission on your screen.•Q:I’m getting a system.img: no such file or directory error Make sure you gave the correct install command. The ‘’ ddif’'command has to be EXACTLY the same as given. Also the system-i.img should be in the root of (internal memory) yourdevice). Mind spaces dots etc.•Q: Can I update to a newer rom via OTA (upgrade app).NO, you cannot. You have to flash via this method again.•Q How can I revert back to an A,C,U rom?Download the desired rom, copy the update.zip to your deviceand install/update via the stock recovery.Note: boot with volume down button + power button to accessrecovery. Besides, I advise you to do a full factory reset afterdowngrading..Sources•/android/development/meizu-install-rom-international-devices-t3174496•/index.php?route=pavblog/blog&id=18 (Russian) •http://4pda.ru/forum/index.php?s=&showtopic=673310&view=fi ndpost&p=41940840 (Russian)•https://www.tinhte.vn/threads/tong-hop-rom-quoc-te-va-rom-cook-all-meizu.2498074/ (Vietnamese)Credits to all of them。