EV3解魔方机器人搭建说明书MindCub3r-v1p0
ev3编程软件中文使用帮助[工具]
![ev3编程软件中文使用帮助[工具]](https://img.taocdn.com/s3/m/c3bcba6927d3240c8447efd3.png)
比较合适。
欢迎使用 LEGO® MINDSTORMS® EV3 帮助
0
目录
图像编辑器 ............................................................................................................................................................... 2 声音编辑器 ............................................................................................................................................................... 6 内存浏览器 ............................................................................................................................................................... 8 我的模块创建器 ..................................................................................................................................................... 10 无线设置 ................................................................................................................................................................. 15 软件升级 ................................................................................................................................................................. 15 固件升级 ................................................................................................................................................................. 16
LEGO Mindstorms EV3 控制器指南说明书
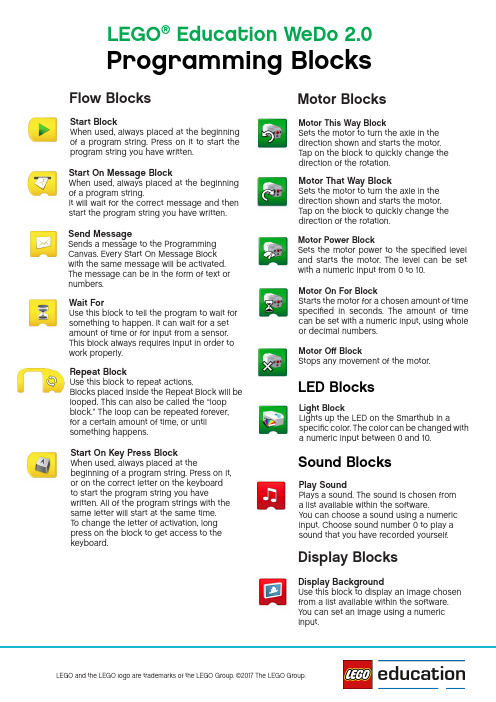
Display BackgroundUse this block to display an image chosen from a list available within the software.You can set an image using a numericinput.Light BlockLights up the LED on the Smarthub in aspecific color. The color can be changed with a numeric input between 0 and 10.Flow BlocksMotor BlocksLED BlocksMotor This Way BlockSets the motor to turn the axle in the direction shown and starts the motor.Tap on the block to quickly change thedirection of the rotation.Motor That Way BlockSets the motor to turn the axle in the direction shown and starts the motor.Tap on the block to quickly change thedirection of the rotation.Motor Power BlockSets the motor power to the specified level and starts the motor. The level can be set with a numeric input from 0 to 10.Motor On For BlockStarts the motor for a chosen amount of time specified in second s. The amount of time can be set with a numeric input, using wholeor decimal numbers.Motor Off BlockStops any movement of the motor.Start BlockWhen used, always placed at the beginning of a program string. Press on it to start theprogram string you have written.Start On Key Press BlockWhen used, always placed at thebeginning of a program string. Press on it,or on the correct letter on the keyboard to start the program string you havewritten. All of the program strings with the same letter will start at the same time.To change the letter of activation, long press on the block to get access to thekeyboard.Start On Message BlockWhen used, always placed at the beginning of a program string.It will wait for the correct message and then start the program string you have written.Display BlocksSound BlocksPlay SoundPlays a sound. The sound is chosen from a list available within the software.You can choose a sound using a numeric input. Choose sound number 0 to play asound that you have recorded yourself.Wait ForUse this block to tell the program to wait for something to happen. It can wait for a set amount of time or for input from a sensor.This block always requires input in order to work properly.Repeat BlockUse this block to repeat actions.Blocks placed inside the Repeat Block will be looped. This can also be called the “loop block.” The loop can be repeated forever,for a certain amount of time, or untilsomething happens.Send MessageSends a message to the Programming Canvas. Every Start On Message Block with the same message will be activated.The message can be in the form of text or numbers.Programming BlocksLEGO ®Education WeDo 2.0Add to DisplayAdds a quantity to the number currently shown on the display. Enter the number you wish to add. Tap on the block tochange the mathematical operation.Subtract from DisplaySubtracts a quantity from the number shown on the display. Enter the number you wish to subtract. Tap on the block tochange the mathematical operation.Tilt UpInputs the Tilt Sensor mode “Tilt Up” to a block.Tilt DownInputs the Tilt Sensor mode “Tilt Down” to a block.Tilt This WayInputs the Tilt Sensor mode “Tilt This Way” to a block.Numeric and Text InputsOther BlocksText InputInputs a text value to a block.BubbleUse the bubble to insert comments into your program. This is not a programming block.Number Input Inputs a numeric value to a block.Random InputInputs a random value to a block.The range of numbers is determined by the block to which it is attached.Sound Sensor ChangeInputs the Sound Sensor (from the device)mode “sound level change” to a block.Display InputInputs the numeric value shown on the dis-play area to a block.Tilt That WayInputs the Tilt Sensor mode “Tilt That Way” to a block.ShakeInputs the Tilt Sensor mode “Shake” to ablock.Multiply DisplayMultiplies the number shown on the display by a specified number.Enter the number you wish to multiply by. Tap on the block to change the mathematicaloperation.Divide DisplayDivides the number shown on the display by another number. Enter the number you wish to divide by. Tap on the block tochange the mathematical operation.Display ClosedUse this block to close the d isplay area on the software screen.Tap on the block to change the size.Display Medium SizeUse this block to set the display area to medium size.Tap on the block to change the size.Display Full SizeUse this block to set the display area to full size. Tap on the block to change the size.Sensors InputsDistance Change CloserInputs the Motion Sensor mode “decreasing distance between thesensor and an object” to a block.Distance Sensor InputInputs the value detected by the MotionSensor (from 0 to 10) to a block.Display BlockUse this block to open the display area on the software screen. Numbers or text willappear in the display area.Tilt Sensor No TiltInputs the Tilt Sensor mode “No Tilt”(or horizontal position) to a block.Any Distance ChangeInputs the Motion Sensor mode “Any Distance Change” to a block.Distance Change FurtherInputs the Motion Sensor mode “increasing distance between thesensor and an object” to a block.。
ev3课程设计

ev3课程设计一、课程目标知识目标:1. 学生能够理解EV3编程的基本概念,掌握相关的术语和原理。
2. 学生能够描述EV3机器人的结构和功能,了解各个传感器的工作原理。
3. 学生能够解释程序中的逻辑结构,理解顺序、循环和条件语句的应用。
技能目标:1. 学生能够使用EV3软件进行编程,设计并实现简单的机器人控制程序。
2. 学生能够运用传感器获取信息,实现对机器人的智能控制。
3. 学生能够通过合作和问题解决,调试和优化程序,提高机器人的性能。
情感态度价值观目标:1. 学生培养对科学技术的兴趣,激发创新意识和探索精神。
2. 学生在团队合作中,学会互相尊重、沟通与协作,培养集体荣誉感。
3. 学生通过解决实际问题,认识到编程与实际生活的联系,提高学习的积极性和责任感。
课程性质:本课程为实践性、合作性课程,注重培养学生的动手能力、创新能力和团队协作能力。
学生特点:六年级学生具备一定的逻辑思维能力和问题解决能力,对新鲜事物充满好奇心,喜欢动手实践。
教学要求:教师应关注学生的个体差异,提供有针对性的指导,鼓励学生主动探索和合作学习,确保每位学生都能达到课程目标。
在教学过程中,将目标分解为具体的学习成果,以便进行有效的教学设计和评估。
二、教学内容1. EV3基本结构与编程环境介绍:包括EV3机器人的硬件组成、传感器类型及其功能,介绍EV3软件的使用方法。
- 教材章节:第一章 EV3机器人概述2. 简单程序设计:学习顺序结构编程,让学生掌握基本编程指令,如移动、转向等。
- 教材章节:第二章 EV3编程基础3. 循环结构与条件语句:让学生学会使用循环和条件语句进行程序设计,实现复杂的机器人动作。
- 教材章节:第三章 循环与条件语句4. 传感器应用:学习使用EV3传感器进行数据采集,实现对机器人的智能控制。
- 教材章节:第四章 传感器与智能控制5. 项目实践与团队合作:分组进行项目设计,运用所学知识解决实际问题,培养学生的团队协作能力。
ev3编程方式

ev3编程方式
EV3编程方式是一种用于LEGOMindstormsEV3机器人的编程语言,它使用图形化界面和积木式编程来帮助用户轻松地创建自己的程序。
这种编程方式具有易学易用的特点,适合初学者和儿童使用,同时也能够满足高级用户的需求。
通过EV3编程方式,用户可以轻松地控制EV3机器人的行动,例如移动、转向、停止等。
此外,用户还可以使用传感器和执行器来创建更复杂的程序,例如检测颜色、声音和位置,然后根据这些信息进行相应的行动。
EV3编程方式还具有许多其他功能,例如调试工具、代码编辑器、代码共享等,使用户能够更加高效地编写程序。
此外,用户还可以在EV3编程方式的社区中分享自己的代码,并从其他用户那里获取灵感和帮助。
总的来说,EV3编程方式是一种非常实用的编程语言,它可以帮助用户轻松地控制LEGO Mindstorms EV3机器人,实现各种有趣的功能和项目。
如果你对编程和机器人感兴趣,那么不妨尝试一下EV3编程方式,相信你会有意想不到的发现!
- 1 -。
LEGO MINDSTORMS EV3 Bluetooth Troubleshooting说明书

Bluetooth T roubleshooting f or E V3General N otes•Make sure that the iPhone/iPad option on the EV3 Brick is turned off, whenever you want to use Bluetooth as connection type to your LEGO MINDSTORMS EV3 Home Edition Software.•We advise that you turn off Wi-Fi when trying to connect via Bluetooth.For M ac O S-‐XConnecting•Start the LEGO MINDSTORMS EV3 Home Edition Software application and connect your EV3 Brick to the Mac using the USB cable. Make sure that Bluetooth is activated on the EV3 Brick.•In the EV3 Software, navigate to the Hardware Page (see below image) and click Refresh.•The following window appears and will list all previously connected and available EV3 Bricks. Note; it might take some minutes before your EV3 Brick is recognized and being showed in the list of available devices.•Find the EV3 Brick you would like to connect to and select it.•Bluetooth is now available as a connection type, which is indicated by the enabled radio button on the Hardware Page in the EV3 Software.•Select Bluetooth by clicking the radio button, below the Bluetooth icon.•Confirm connection and password on your EV3 Brick.•Enter “1234” as the Passcode in the Pairing Request from EV3 window.•The EV3 Brick is now connected to your Mac using Bluetooth.If this is the first time you want to connect your EV3 Brick to your Mac using Bluetooth, some extra steps might be necessary.If your EV3 Brick never shows up on the list of available Bricks, please restart your EV3 Brick and try the following steps.•Go to System Preferences and select Bluetooth•Select Set Up New Devices or Add new Device•The Bluetooth Setup Assistant will now search for all devices available over Bluetooth. Note: it might take some minutes before your EV3 Brick is recognized and being shown in the list of available devices.•When you see your EV3 Brick, select it and click Continue.•Confirm the connection and password on your EV3 Brick.•This first attempt will most likely fail, because the Mac’s default passcode is set to “0000”•Click on Passcode Options•Select Use a specific passcode and enter “1234”•Click OK•Confirm the connection and the password on your EV3 Brick.•You should now see the following window confirming, that your EV3 Brick has been paired successfully.•Click Quit.•Your EV3 Brick will now show up on the list of known Bluetooth devices.•Return to the Hardware Page, in the EV3 Software, and click Refresh•Find your EV3 Brick in the list and select it.•In the Hardware Page, your EV3 Brick will now be available over Bluetooth. •Click on the radio button, below the Bluetooth icon, to connect.•Your Mac will now connect to your EV3 Brick. Note: that you might have to confirm the connection one more time on your Brick at this stage. •When you are connected, the EV3 icon will turn red like below.For W indowsMainly on Windows XP and VISTA it might benecessary to pair the EV3 Brick to the PC using the “Add device” functionality. If you cannot see the Brick in the Hardware Page in the application, try the following steps.• Go to Start and find Devices and Printers • Click on “Add Devices”• After some time, your EV3 Brick will show up in the list of available devices. Select it and press Next• The PC will now try to connect to the EV3 Brick. • Confirm connection and password on the EV3 Brick •On the PC, enter “1234” like below and click Next•When the pairing process is done, the following window will show up.•Go back to the LEGO MINDSTORMS EV3 Home Edition Software application and hit the refresh button in the Hardware Page•In the Hardware Page, your EV3 Brick will now be available over Bluetooth •Click on the radio button, below the Bluetooth icon, to connect•Your computer will now connect to your EV3 Brick. NOTE that you might have to confirm the connection one more time on your brick at this stage •When you are connected, the EV3 icon will turn red like below.。
LEGO MINDSTORMS EV3软件桌面版入门教程:机器人学习计划说明书
πr INTRODUCTIONTO ROBOTICS LESSON PLAN5 . Lesson Challenge Ideas:a .Program the robot to trace out a figure eight, the first letter of your name, oranother letter or number .For this path, use curved turns for the first section, followed by single-motor turns for the 90-degree turns, and finally, a point turn before reversing the robot into the parking area .Discussion QuestionsRobot Behavior: What did you discover when using the different turn methods?• The Steering Parameter Value was set to 50 to perform a single motor turn,and the Steering Parameter Value was set to 100 or -100 to perform a pointturn.Program Flow: What is the purpose of the Wait Block?• The Wait Block makes your program wait for something before continuing to the next block in the sequence. You can wait for a certain amount of time for a sensor to reach a certain value, or for a sensor value to change.Discovery: Which method of turning worked the best for the curved line?• Move Tank or Move Steering Blocks work best because they keep both motors running in the same direction, with one motor running slightly slower. AssessmentDuring the lesson, students can interact with the Introduction to Robotics rubrics, using peer or self-assessment by marking the box that best reflects their level of work .Help your students to improve by writing a comment for each of them in the Notes column during the lesson cycle .Discussion QuestionsRobot Behavior: How did you overcome the problem of movinglarger sized objects?• Modified the Medium Motor Module frame to fit the larger objects.Program Flow: What did you have to change in order to movedifferent sized objects?• The number of degrees of the Medium Motor Block had to be changed.Discovery: What did you discover when using the Medium Motor Module?• In order for the robot to lower the Medium Motor Module, the Medium Motor Block Power setting must be set to a negative (-) value.AssessmentDuring the lesson, students can interact with the Introduction to Robotics rubrics, using peer or self-assessment by marking the box that best reflects their level of work .Help your students to improve by writing a comment for each of them in the Notes column during the lesson cycle .Discussion QuestionsRobot Behavior: What happens if the speed of the Medium Motor Moduleis set too high?• The Medium Motor Module knocks over or pushes aside the Cuboid before itcan take hold of it.Program Flow: What is the difference between the Change and CompareModes when using the Ultrasonic Sensor?• Change Mode reads the distance and then waits for an increase or decrease.Compare Mode waits for a certain predefined distance.Discovery: What happens to the robot when it drives towards a round object?• The Ultrasonic Sensor does not always recognize the shape, as it is unable to receive a signal back.AssessmentDuring the lesson, students can interact with the Introduction to Robotics rubrics, using peer or self-assessment and can record their progress by marking the box that best reflects their level of work .Help your students to improve by writing a comment for each of them in the Notes column during the lesson cycle .In the “Modify It” task, you may want to introduce students to the Loop Block as a way of decreasing the number of blocks needed to drive in a square . However, allow the students sufficient time to work it out for themselves .Suggested program:Discussion QuestionsRobot Behavior: What did you have to do in order to make your robot turn90 degrees?• Slow down the rotation speed of the robot and potentially set the angle to avalue lower than 90 degrees.Program Flow: Why is it important to know how to set the Threshold Value?• This can make the difference between whether or not the robot reacts to theinput of the sensor. It is also a way in which the robot can be ‘fine-tuned’ tomake it more accurate.Discovery: What did you find was the difference between the Change andCompare Modes?• Change Mode - Wait for the selected value to change.• Compare Mode - Wait to reach a selected value.AssessmentDuring the lesson, students can interact with the Introduction to Robotics rubrics, using peer or self-assessment and can record their progress by marking the box that best reflects their level of work .Help your students to improve by writing a comment for each of them in the Notes column during the lesson cycle .Discussion QuestionsRobot Behavior: Which color or shade reflects the most light?• White reflects the most and black reflects the least.Program Flow: Was it easier to set up the Wait Block for measuring Color orReflected Light Intensity?• When detecting a color, the color is just selected. When reacting to reflectedlight, a good threshold value must be found in order for the robot to behave as expected. Color is easier if the Color Sensor recognizes the color.Discovery: What would you do if the robot were to detect a gray color?• Use the Wait Block set to read the Color Sensor inReflected Light Intensity Mode.AssessmentDuring the lesson, students can interact with the Introduction to Robotics rubrics, using peer or self-assessment and can record their progress by marking the box that best reflects their level of work .Help your students to improve by writing a comment for each of them in the Notes column during the lesson cycle .Lesson 7 4 . Students complete the “Modify It” task, which allows them to test their programwith a lighter-colored line . This will challenge them to experiment with the WaitBlock’s Threshold Value parameter .5 . Lesson Challenge Ideas:a . Ask the students to test how fast they can make their robot follow a line .b . Make a line-follower program that uses Move Steering Blocks to performcurved turns rather than the sharp single-motor turns used in the tutorial .c .The tutorial sample program uses a Switch Block to create a line follower .Can they produce the same result without using a Switch Block?Discussion QuestionsRobot Behavior: What did you have to do in order to make the robot follow theline more smoothly?• Keep both motors running, one at a lower speed than the other, or use theMove Steering Blocks.Program Flow: What is a threshold value?• The threshold value is the average number reading between light and dark.This is the number that you add to the Switch Block.Discovery: What did you have to do in order for the robot to follow a gray line?• Work out the average threshold value between white and gray.AssessmentDuring the lesson, students can interact with the Introduction to Robotics rubrics,using peer or self-assessment and can record their progress by marking the box thatbest reflects their level of work .Help your students to improve by writing a commentfor each of them in the Notes column during the lesson cycle .AssessmentObserve and/or ask questions to determine if the students:• Use both the Color and Gyro Sensors• Correctly predict the angle required to park the robot in each of the parking bays • Use the blue line to stop forward movement• Can compensate for the factors that may affect the stopping precision when using the Gyro Sensor (sensor tolerance, motor slack, and rotational momentum)• Work cooperatively to solve the tasksAssessmentObserve and/or ask questions to determine if the students can use their experience from the seven lessons to solve this seven-step Challenge by:• Understanding the difference between Change and Compare Modes; they should use the Wait Block’s Ultrasonic Sensor in Compare Mode to achieve the best results in this Challenge• Calculating distance based on wheel circumference or using trial and error to get to the required 84 cm• Estimating the turn angle by using a protractor and the Gyro Sensor• Measuring the distance and then calculating the number of motor rotations to get close to the center of the target• Programming the robot to stop at the line• Following the line back• Stopping in front of the large object• Working cooperatively to solve the tasksDuring the lesson, students can interact with the Introduction to Robotics rubrics, using peer or self-assessment and can record their progress by marking the box that best reflects their level of work .Help your students to improve by writing a comment for each of them in the Notes column during the lesson cycle .Relevant Standards Computer Science Teachers AssociationComputational Thinking• Recognize that software is created to control computer operations .• Understand and use the basic steps in algorithmic problem solving .• Develop a simple understanding of an algorithm .Collaboration• Work cooperatively and collaboratively with peers, teachers, and others usingtechnology .• Identify ways that teamwork and collaboration can support problem solving andinnovation .Computing Practices and Programming• Use technology resources for problem solving and self-directed learning .• Construct a program as a set of step-by-step instructions to be acted out .• Implement problem solutions using a block-based visual programming language .Computers and Computing Devices• Use standard input and output devices to successfully operate computers andrelated technologies .• Apply strategies for identifying simple hardware and software problems that mayoccur during use .• Identify factors that distinguish humans from machines .• Recognize that computers model intelligent behavior (as found in robotics, speechand language recognition, and computer animation) .Relevant Standards ISTE National Education Technology StandardsCreativity and Innovation• Students demonstrate creative thinking, construct knowledge, and developinnovative products and processes using technology .• Apply existing knowledge to generate new ideas, products, or processes .• Use models and simulations to explore complex systems and issues .Communication and Collaboration• Students use digital media and environments to communicate and workcollaboratively, including at a distance, to support individual learning and contributeto the learning of others .• Contribute to project teams to produce original works or solve problems .Critical Thinking, Problem Solving, and Decision Making• Students use critical thinking skills to plan and conduct research, manage projects,solve problems, and make informed decisions using appropriate digital tools andresources .• Plan and manage activities to develop a solution or complete a project .• Collect and analyze data to identify solutions and/or make informed decisions .• Use multiple processes and diverse perspectives to explore alternative solutions .Digital Citizenship• Exhibit a positive attitude toward using technology that supports collaboration,learning, and productivity .• Demonstrate personal responsibility for lifelong learning .Technology Operations and Concepts• Students demonstrate a sound understanding of technology concepts, systems,and operations .• Understand and use technology systems .• Select and use applications effectively and productively .• Troubleshoot systems and applications .• Transfer current knowledge to learning of new technologies .ITEEA Standards for Technological LiteracyThe Nature of Technology• Students will develop an understanding of the characteristics and scope oftechnology .• Students will develop an understanding of the core concepts of technology .Design• Students will develop an understanding of the attributes of design .• Students will develop an understanding of engineering design .• Students will develop an understanding of the role of troubleshooting, research anddevelopment, invention and innovation, and experimentation in problem solving .Abilities for a Technological World• Students will develop abilities to apply the design process .• Students will develop abilities to use and maintain technological products andsystems .Relevant Standards Common Core Mathematics StandardsPractices• Make sense of problems and persevere in solving them .• Reason abstractly and quantitatively .• Construct viable arguments and critique the reasoning of others .• Attend to precision .• Look for and make use of structure .• Look for and express regularity in repeated reasoning .• Model with mathematics .• Use appropriate tools strategically .Expressions and Equations• Solve real-life and mathematical problems using numerical and algebraicexpressions and equations .Geometry• Solve real-life and mathematical problems involving angle measure, area, surfacearea, and volume .Common Core English Language ArtsReading Standards for Literacy in Science and Technical Subjects• Follow precisely a multistep procedure when carrying out experiments, takingmeasurements, or performing technical tasks .• Determine the meaning of symbols, key terms, and other domain-specific wordsand phrases as they are used in a specific scientific or technical context relevant togrades 6–8 texts and topics .Reading Standards for Informational Text• Draw on information from multiple print or digital sources, demonstrating the abilityto locate an answer to a question quickly or to solve a problem efficiently .Speaking and Listening Standards• Engage effectively in a range of collaborative discussions (one-on-one, in groups,and teacher-led) with diverse partners on topics, texts, and issues, building onothers’ ideas and expressing their own clearly .Introduction to Robotics Class Assessment Record Name。
乐高EV3高级课程课件

条件语句
if语句、switch语句等, 根据条件执行不同代码
块
循环语句
for循环、while循环等 ,重复执行某段代码直
到满足条件
中断与跳出
break语句、continue 语句等,用于控制循环
流程
嵌套结构
条件语句和循环语句可 以相互嵌套,实现更复
杂的程序逻辑
04
机器人设计与搭建实例
Chapter
人形机器人
利用乐高EV3套件搭建一款仿人形的机器人。通过 编程控制机器人的动作,实现行走、跳舞、打拳等 功能。同时,可以为人形机器人添加语音识别、图 像识别等功能,提高其智能化水平。
05
传感器应用与编程实践
Chapter
超声波传感器应用
超声波测距
利用超声波传感器测量物体与机 器人之间的距离,实现避障、跟
调试技巧
使用模拟器、单步执行、查看变量值 等
编程流程
拖拽模块、设置参数、连接模块、上 传程序等
变量、数据类型与运算
变量定义
命名规则、数据类型、作用域等
01
02
运算符
03
算术运算符、比较运算符、逻辑 运算符等
04
数据类型
数字、字符串、布尔值、数组等
表达式
组合运算符和变量形成表达式, 计算结果
条件判断与循环控制
多机器人协作
多机器人协作将成为未来机器人领域的重要研究方向,通过多个机 器人的协同工作,可以完成更复杂的任务和挑战。
机器人与人类互动
未来的机器人将更加注重与人类的互动和沟通,通过自然语言处理、 情感计算等技术,实现更加自然和友好的人机交互体验。
THANKS
感谢观看
学生作品展示及评价标准
EV3机器人入门计划(9次课)
πr机器人课程 计划简介使其机器人的程序块状态灯闪烁。
观察和/或提出问题以确定学生是否循拼砌说明成功构建驱动基座;力创建或运行简单程序;以及此路径的第一部分使用弧线转向,然后使用90度转向的单一电机转向,最终,在将机器人倒回到停止区域前还有一个点转向。
评估观察和/或提出问题以确定学生是否•将“转向参数值”设置为50以进行单一电机转向;•将“转向参数值”设置为100或-100以进行点转向;•尽可能详细描述程序带动的机器人行为;•对于课程挑战a. 可沿选定形状的轨迹移动;b. 可将钢笔固定在机器人上以使机器人绘制出正确形状;c. 可通过选择正确的转向类型使机器人沿路径移动;•合作完成任务。
评估观察和/或提出问题以确定学生是否•使用机器人成功抓住长方体;•尽可能详细描述程序带动的机器人行为;•修改机器人以抓住其他物体;•在课堂挑战中,抓住长方体并将其准确放在预定的最终位置处;•合作完成任务。
:在“修改”任务中,您可能想要向学生采用“循环模块”,以此减少需要在方形中驱动的模块数量。
但是,请留给学生足够的时间使其自行解决问题。
建议程序:评估观察和/或提出问题以确定学生是否•可识别在使用陀螺仪传感器时可能影响停止精度的因素(传感器容差、电机迟滞和旋转动量);•尽可能详细描述程序带动的机器人行为;•在“修改”任务中,可根据陀螺仪传感器中的输入内容在方形中驱动机器人;•对于课程挑战a. 完全或部分绘制出字母“Z”;b. 完全或部分绘制出五个角度相同的星形;c. 在迷宫中完全或部分导航其机器人;以及•合作完成任务。
机器人行为描述示例: 使用颜色传感器测量颜色,机器人在检测到蓝色时转向,然后停止。
课程挑战: 让学生找出“无颜色”参数是什么(如果颜色传感器无法检测到与任意预定颜色匹配的颜色,该参数将使机器人产生反应)。
评估观察和/或提出问题以确定学生是否•既使用颜色传感器,又使用陀螺仪传感器;•正确预测将机器人停至每个停车位的所需角度;•使用蓝色线条停止向前运动;•对使用陀螺仪传感器时可能影响停止精度的因素(传感器容差、电机迟滞和旋转动量)进行补偿;•合作完成任务。