BTNM3.92安装和运行指南
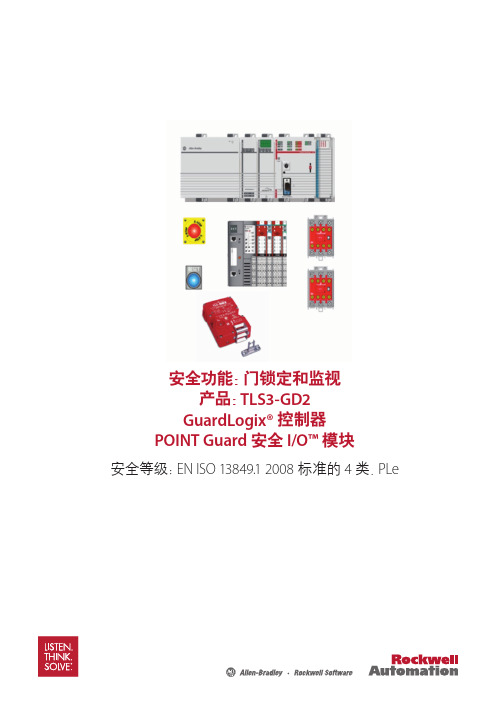
罗克韦尔自动化 TLS3-GD2 门锁定和监视安全功能应用说明书
24 V 直流以太网适配器
带可拆卸 IEC 螺丝端子的模块基座
POINT Guard 安全输入模块
POINT Guard 安全输出模块
Stratix 2000™ 非管理型以太网交换机
数量
1 1 2
1
1 1 1 1 1 1 4 1 1 1
7
安装和接线
关于安装和接线的详细信息,请参见其他资源中所列的产品手册。
11. 展开 Safety (安全) 目录,选择 1734-IB8S 模块,然后单击 OK (确定)。
12. 在 New Module (新建模块) 对话框中,将设备命名为“IB8S”,然后单击 Change (更改)。
13. 当 Module Definition (模块定义) 对话框打开后,将 Output Data (输出数据) 更改为“None”(无), 并确认 Input Status (输出状态) 为“Combined Status-Power”(状态-电源组合),然后单击 OK (确 定)。将输出数据设为“None”(无) 意味着您无法使用 Test Outputs (测试输出) 作为标准输出,在 本例中,我们未作如此设置。注意,由于只使用了输入连接,这么做可以节省一个控制器连接。
4
安全功能的实现:风险评估
经过风险评估将得出必需的性能等级,它指控制系统安全相关部件所能降低的风险量。风险降低过 程中的部分环节将决定机器的安全功能。为便于说明,本文档中假定所需的性能等级为 4 类,PLe。
ਸ๔ǖޅ၃ೠࠚ (ISO 12100)
1
Ҿඇࠀీ๎՚
2
߳Ҿඇࠀీڦ༬Ⴀࡀ߭
3
ඓۨ߳ҾඇࠀీႴ ڦPL (PLr)
北塔软件BTNM安装和运行指南(包括高级服务管理模块)

北塔BTNM3.9安装和运行指南<V1.0>BETASoftFloor 15, No.55 West Huaihai Road, Shanghai, China4008207719版权© 2010 上海北塔软件股份有限公司版权所有版权保护声明未经上海北塔软件股份有限公司书面许可,本文档不得整体或部分地复印、复制、翻译或缩减成任何电子介质或计算机可以阅读的格式。
随着产品的不断完善、发展,本文档中描述的信息可能与正式发布版本的实际情况有出入,如有出入应以后者为准。
目录第一章前言 (1)1.1.系统概述 (1)1.2. 功能概述 (1)第二章安装 (3)2.1. 软硬件配置要求 (3)2.1.1.软件环境 (3)2.1.2.硬件配置 (3)2.2. BTNM安装 (4)2.3. 中文语音包安装 (13)2.4. BTNM注册 (14)2.4.1.生成注册文件 (14)2.4.2.导入许可证文件 (15)2.5. 数据流分析探针安装 (16)2.6. PC代理程序安装 (20)第三章运行 (25)3.1. 网络环境 (25)3.2. 运行网络管理 (25)3.2.1.定义用户和权限 (25)3.2.2.生成拓扑图 (30)3.2.3.运行远程控制台 (31)3.2.4.启用远程协助 (32)3.2.5.实现层次化管理 (34)3.2.6.启用数据流分析探针 (35)3.2.7.节点数检测 (36)3.3. 运行服务管理 (37)3.3.1.服务端启动 (37)3.3.2.BTNM短消息中心配置 (39)3.3.3.客户端登录 (42)3.3.4.系统工具 (45)第一章 前言北塔BTNM(Before Trouble Network Manager),是上海北塔软件股份有限公司基于Windows操作系统发布的,拥有完全自主知识产权,跨平台、跨厂商,“立足于平台面向应用”的通用网络管理平台。
momentum 3 操作手册

文章标题:深度解读:Momentum 3 操作手册1. 导言Momentum 3 是一款备受欢迎的个人时间管理工具,它的高效性和易用性备受用户好评。
在本文中,我们将深入探讨Momentum 3 的操作手册,帮助你更好地掌握这款工具的使用方法和技巧。
2. 了解Momentum 3Momentum 3 是一款集任务管理、时间跟踪和提醒功能于一体的应用程序,适用于各类工作和生活场景。
它的核心理念是帮助用户建立个人时间管理系统,提升工作效率和生活质量。
3. 界面与基本操作Momentum 3 的界面简洁清晰,主要分为任务列表、今日进度、提醒和设置等几大部分。
在使用Momentum 3 时,你可以通过简单的点击和拖拽来添加、编辑和完成任务,实现任务的快速管理和跟踪。
4. 高级功能与技巧除了基本的任务管理功能外,Momentum 3 还提供了丰富的高级功能,如时间统计、番茄工作法和定时提醒等。
通过合理利用这些功能,你可以更加深入地了解自己的工作习惯、提升工作效率,并有效应对时间管理中的各类挑战。
5. 个人观点与建议作为一名长期用户,我认为Momentum 3 在个人时间管理领域有着独特的优势,它不仅提供了丰富的功能和灵活的操作方式,还能够帮助用户培养良好的时间管理习惯。
在实际使用中,建议用户充分发挥Momentum 3 的功能优势,结合个人需求和习惯,打造适合自己的时间管理系统。
6. 总结通过本文的深度解读,相信你已经对Momentum 3 的操作手册有了全面的了解。
在日常使用中,不妨多多尝试各项功能,逐步培养良好的时间管理习惯,提升工作效率和生活质量。
总结模块提示内容:- 总结本文的主要观点和观点 -- Momentum 3 的操作手册包含哪些内容?- 强调关键信息和核心要点 -- 你需要了解Momentum 3 的基本操作和高级功能- 对主题进行回顾和概括 -- 深度理解Momentum 3 的操作手册,有助于提升个人时间管理水平以上就是本文的详细内容,希望对你有所帮助。
Dell EMC OpenManage 安装指南 — Linux 版本 9.3.1说明书

Dell EMC OpenManage Installation Guide — LinuxVersion 9.3.1注、小心和警告: “注”表示帮助您更好地使用该产品的重要信息。
: “小心”表示可能会损坏硬件或导致数据丢失,并告诉您如何避免此类问题。
: “警告”表示可能会导致财产损失、人身伤害甚至死亡。
© 2018 - 2019 Dell Inc. 或其子公司。
保留所有权利Dell、EMC 和其他商标均是 Dell Inc. 或其子公司的商标。
其他商标可能是其各自所有者的商标。
2019 - 10Rev. A011 简介 (5)What’s new in this release (5)软件可用性 (6)系统管理软件 (6)管理系统上的 Server Administrator 组件 (6)Security Features (7)您可能需要的其他说明文件 (8)2 Preinstallation Setup (9)安装要求 (9)支持的操作系统和 Web 浏览器 (9)系统要求 (9)受管系统要求 (9)支持的系统管理协议标准 (10)配置 SNMP 代理程序 (10)Remote Enablement Requirements (10)Remote Enablement 的相关 RPM (10)Remote Enablement 的安装后配置 (11)用于 Red Hat Enterprise Linux 操作系统openwsman和sfcb的 Winbind 配置 (12)libssl问题的解决方法 (12)3 Installing Managed System Software On Supported Linux and VMware ESXi operating systems (13)软件许可协议 (14)单个组件的 RPM (14)安装管理系统软件 (17)安装管理系统软件的前提条件 (17)使用提供的介质安装管理系统软件 (18)Server Administrator 自定义安装公用程序 (20)Managed System Software Installation Using Third-Party Deployment Software (22)卸载管理系统软件 (23)使用卸载脚本卸载管理系统软件 (23)使用 RPM 命令卸载管理系统软件 (23)4 在 VMware ESXi 上安装 Systems Management 软件 (24)使用 vSphere CLI (24)使用 VMware vSphere Management Assistant vMA (25)使用 VMware Update Manager (VUM) (25)使用 Power CLI (26)在 Vmware ESXi 上访问 Server Administrator (26)卸载现有的 Systems Management VIB (27)在运行 VMware ESXi 的系统上配置 SNMP 代理 (27)使用 vSphere CLI 配置系统以向 Management Station 发送陷阱 (27)故障排除 (27)Contents35 在 VMware ESXi 上升级系统管理软件 (29)使用 vSphere CLI (29)使用 Power CLI (29)使用 VMware Update Manager (VUM) (30)6 常见问题 (31) (31)7 Linux 安装程序包 (36)4Contents简介本主题提供以下相关信息:•在管理系统上安装 Server Administrator。
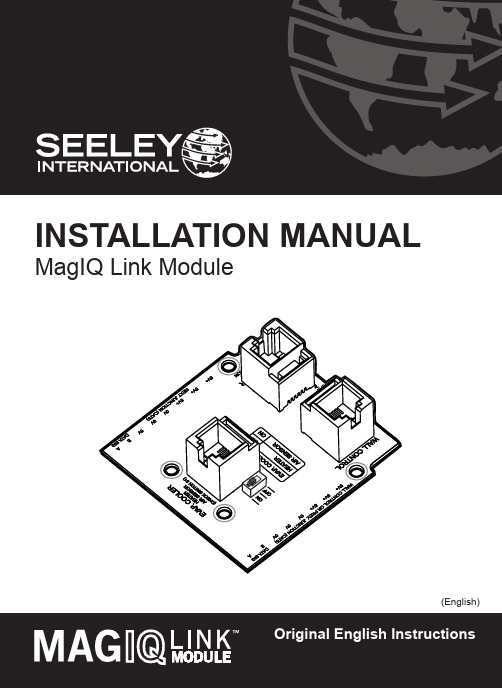
MagIQ Link模块安装指南说明书
OR
2. HEATER
OR
3. AIR SENSOR
1. WALL CONTROL
(MAGIQ TOUCH CONTROLLER)
Cable lengths between all other components should be no greater than 20m. For more information, refer to System Configuration diagrams at the end of this manual.
SAFETY
EMPLOYER AND EMPLOYEE RESPONSIBILITIES
The installation and maintenance of evaporative coolers at height has the potential to create Occupational Health and Safety issues for those involved. Installers are advised to ensure they are familiar with Local Acts, Regulations and Standards, which may offer practical guidance on health and safety issues. Compliance with these regulations will require appropriate work practices, equipment, training and qualifications of workers. INSTALLER AND MAINTENANCE CONTRACTORS– RISK ASSESSMENT
天思V92安装说明

V9.2.4.0安装说明注意:V9.2.4.0安装完成后需进行网络注册。
一、服务器的安装:1.双击安装包Setup.exe出现图(1)界面,点“运行”进入安装界面。
图(1)出现如图(2)图(2)2.在点下一步(N)或者按键盘ALT+N.图(3)3.在点下一步(N)或者按键盘ALT+N,根据需求来选择“单机版”或“网络版”。
现以网络版为例:如图(4)4.在点下一步(N)或者按键盘ALT+N出现如图(5)图(5)5.选择程序存放路径(注意:软件默认存放在C:\Program Files\Masterservice\ERP,建议不存放在系统盘),如果不想安装在默认路径下,可点击浏览更改路径,再点击下一步(N)或者按键盘ALT+N。
若安装在默认路径下,直接点击下一步(N)或者按键盘ALT+N。
如图(6)6.在系统从未安装ERP9.2时,我们应选择“完全安装”的安装类型,在安装时系统默认为“完全安装”,如图(7)图(7)7.在点下一步(N)或者按键盘ALT+N出现如图(8)图(8)出现如图(9)图(9)9.在点下一步(N)或者按键盘ALT+N。
出现如图(10)图(10)10.等安装到100%时,大约花一两分钟左右(安装容易且快速)。
单击“完成”或者按键盘ALT+F,退出完成界面。
如图(11)图(11)11.数据库维护。
①单击开始->程序->MasterServer ERP->Manager Assistant出现登陆控制服务器对话框,请填入数据库服务器名、数据库用户名、数据库密码,点击连接,如下图所示。
进行数据库创建。
③点击开始进入系统执行阶段,如下图所示选择‘Yes to ALL’开始维护。
④系统执行完成后弹出对话框显示数据库维护完毕,点击OK就可以了。
12.网络注册。
①单击开始->程序->MasterServer ERP ->SvrConf进行设置,如图(12)图(12)②单击后点击数据库配置如下图所示:③数据库服务器:设为SQL的服务器名或IP地址(注意:所使用的”数据库服务器”之设置是所有使用天思ERP软件的工作站可以访问的主机名称或IP地址,在网络版中,类似”.”,”localhost”,”127.0.0.1”等的设定会导致工作站无法连接),数据库用户:默认为“SA”,数据库密码:如果你的SQL有密码必须要重新输入,如果没有就把“*”清空,后单击“保存”。
Micro830 10点可编程控制器 安装指南说明书
安装指南Micro830™ 10 点可编程控制器产品目录号 2080-LC30-10QWB、2080-LC30-10QVB目录主题页码重要用户须知2其它资源7概述8控制器说明8状态指示器说明8安装模块9连接控制器11规范122 Micro830™ 10 点可编程控制器出版物 2080-IN002A-ZH-P - 2010年9 月重要用户须知固态设备具有与机电设备不同的运作特性。
《固态控制设备的应用、安装与维护安全指南》 (出版号 SGI-1.1,可向您当地的罗克韦尔自动化销售处索取或通过 在线索取) 描述了固态设备和硬接线机电设备之间的一些重要区别。
由于存在这些区别,同时由于固态设备的广泛应用,负责应用此设备的所有人员都必须确保仅以可接受的方式应用此设备。
对于由于使用或应用此设备而导致的任何间接损失或连带损失,罗克韦尔自动化在任何情况下都不承担任何责任。
本手册中的示例和图表仅供说明之用。
由于任何特定的安装都存在很多差异和要求,罗克韦尔自动化对于依据这些示例和图表所进行的实际应用不承担任何责任和义务。
对于因使用本手册中所述信息、电路、设备或软件而引起的专利问题,罗克韦尔自动化不承担任何责任。
未经罗克韦尔自动化公司书面许可,任何单位或个人不得复制本手册之全部或部分内容。
Micro830™ 10 点可编程控制器 3出版物 2080-IN002A-ZH-P - 2010年9 月环境和机柜防止静电放电本设备适用于在污染等级 2 工业环境、过电压类别 II 的应用中使用,(如 IEC 60664-1 所定义),在海拔 2000 米(6562 英尺)以下使用时不降额。
根据 IEC/CISPR 11,本设备为 1 组、A 类工业设备。
在没有采取合适的预防措施时,由于传导性和辐射性射频干扰的影响,在居民区和其它环境中使用时可能很难实现电磁兼容性。
本设备作为开放型设备提供。
必须将其安装在专为适应特定应用环境而设计的机柜中,并且这种机柜还应具有相应设计以防止操作人员由于接触活动部件而遭受人身伤害。
MANUAL_程序安装说明文档
1 安装windows server 2003 SP2 操作系统z 必须安装windows server 2003 SP2版本,否则会安装不了SQL SERVER2005。
z C 盘必须为NTFS 系统,否则安装IIS 会出现安全性降低的情况。
z 确认SQL2000的数据库文件位置:点击开始---所有程序---server2000---企业管理器---将左侧目录树展开,找到JFXT 数据库,右键单击JFXT ,选择“数据库文件”选项卡,然后查看数据库具体位置。
2 安装IIS6.0 1. 在控制面板中点击“添加或删除程序”。
2. 在左侧点击“添加\删除windows 组件”。
please insert windows server cd2 ????reinstall winrar & daemon tools,1. 要附加 已转换过的数据库 cqdj.mdf,2. 打印模板的调试, 选 打印纸大小, 每次都是怎么调得? EXCEL 模板 文件夹 必须在 D: 的根目录下3. 系统管理员手册, 操作及权限 设置 模板.4. 如何通过QQ 远程 登入 做支持?1.添加 IIS 6.0 在 MS SQL SERVER 之前2.3.在组件下面的列表中找到“应用程序服务器”,将前面的复选框打勾。
服务器应用程序不可用您试图在此 Web 服务器上访问的 Web 应用程序当前不可用。
请点击 Web 浏览器中的“刷新”按钮重试您的请求。
管理员注意事项: 详述此特定请求失败原因的错误消息可在 Web 服务器的系统事件日志中找到。
请检查此日志项以查明导致 该错误发生的原因。
先自动安装,删除 wwwroot\cqdj\ 解压,move cqdj 到 wwwroot,from IIS 网站-》默认网站权限,添加 IUSE_xxxxxxxxxxxfrom IIS “应用程序池” 右键新建应用程序池标识-》预定义帐号(本地系统)网站-》默认网站-》权限添加高级立即查找 Network Service 确定先自动安装,删除 wwwroot\cqdj\ 解压,move cqdj 到 wwwroot,4.选择后点击“下一步”。
DCSM 后台软件安装
DCSM后台软件安装1.后台软件安装1、向DCN客服索要DCSM后台软件版本(本例以3.02.06.02版本为例),并通过ftp或sftp上载至DCSM服务器。
2、解压后台软件tar zxvf trustview-3.02.06.02.tar.gz,得到trustview-3.02.06.02目录夹3、进入trustview-3.02.06.02目录夹,执行./install安装脚本,即开始DCSM后台软件的安装[root@DCSM-Master ~]#lsanaconda-ks.cfg install.log.syslog trustview-3.02.06.02Desktop mysql_5.0.22 trustview-3.02.06.02.tar.gzinstall.log mysql_5.0.22.tar[root@DCSM-Master ~]# cd trustview-3.02.06.02[root@DCSM-Master trustview-3.02.06.02]#lsbin dbscript dcsm_ha etc gui include install install_oracle_db.sh lib man mysql oracle sbin share sock var[root@DCSM-Master trustview-3.02.06.02]#./install++++++++++++++++++++++++++++++++++++++++++++++++++++++++++++++++++++++ +++++++++++++++++++++ trustview installer,Version 1.0+ Installer is scanning old trustview...+ Installing trustview...+ which kind of database you chose to install (0 mysql ,1 oracle), (0/1)?0+ Copy file......................................................................................................................................................................................................................................................................................................................................................+ copy file accourding to dbtype+ copy mysql file accourding to dbtype+ finish copy file accourding to dbtype++ Choose the net interface which one will be used by trustview server:1) eth0 (IPv4: 192.168.1.21, IPv6: 2001:1:1::1/64;fe80::20c:29ff:fefb:d552/64)#? 1(如果部署HA,需先确认Eth0、Eth1 为up,且安装DCSM时必须选择Eth0-即Eth0为通信接口)+ Choose the interface IPv6 address which one will be servered by trustview server:1) no support2) 2001:1:1::1/643) fe80::20c:29ff:fefb:d552/64#?2(如果没有或不使用IPv6地址,请选择1-no support)192.168.1.212001:1:1::1停止MySQL:[确定]启动MySQL:[确定]+ please input db ip(default ip is 127.0.0.1)(直接回车)+ please input db user(default user is root)(直接回车)+ please input db password(default password is empty)(输入之前定义的mysql密码) + Installing trustview database......+ Running Database descript......+ Finished installing database+ Installing JAVA..../root+ Set Java license....+ Set JAVA environment variable++++++++++++++++ initial dbus env for java +++++++++++++++++++++++++++install -d /usr/local/lib/jniinstall libcgi-java.so /usr/local/lib/jniinstall libunix-java.so /usr/local/lib/jniinstall -d /usr/local/share/javainstall -m 644 debug-enable-1.1.jar /usr/local/share/javainstall -m 644 debug-disable-1.1.jar /usr/local/share/javainstall -m 644 unix-0.5.jar /usr/local/share/javainstall -m 644 cgi-0.5.jar /usr/local/share/javainstall -m 644 io-0.1.jar /usr/local/share/javainstall -m 644 hexdump-0.2.jar /usr/local/share/javaln -sf debug-disable-1.1.jar /usr/local/share/java/debug-disable.jarln -sf debug-enable-1.1.jar /usr/local/share/java/debug-enable.jarln -sf unix-0.5.jar /usr/local/share/java/unix.jarln -sf io-0.1.jar /usr/local/share/java/io.jarln -sf cgi-0.5.jar /usr/local/share/java/cgi.jarln -sf hexdump-0.2.jar /usr/local/share/java/hexdump.jar++++++++++++++++ end initial dbus env +++++++++++++++++++++++++++++ Configure trustview server,creat configure file...+ Modify the ipaddree:200.101.0.179 to :192.168.1.21 in configure file++ success in registing trustview service+ Configure trustview monitor.......+ Configure shell programe...+ Modify confige file,regist trustview server.......+ Setting environment variable......+ Modify rc.local configure file......+ rc.local has been set++ Configure WebPortal ActiveX ing Plugin for collecting terminal information+ Are you sure deploy plugin in WebPortal? (Y/N)yinstall dcsm-ha ......install pils......install stonith......install heartbeat......Preparing... ########################################### [100%]1:heartbeat ########################################### [100%]install perl module......install mon......please input database type(0:mysql / 1:oracle), (0/1)?:0install dcsm_ha script......configure init para of mysqlconfigure init para of mysql successinstall dcsm_ha successExiting trustview......could not find ParserDetails.ini in /usr/lib/perl5/vendor_perl/5.8.8/XML/SAXmode is off iii192.168.1.21dos2unix: converting file /usr/local/dcsm/gui/WebAuth/WEB-INF/dcweb portal.cfg to UNIX format ...dos2unix: converting file /usr/local/dcsm/gui/WebAuth/WEB-INF/dcwebportal.cfg to UNIX format ...dos2unixopenactiveccdcsm iphostnameopen dcsm_conf_filedbus machine-id has already create.dbus 2916 0.0 0.1 2740 928 ? Ss 17:19 0:00 dbus-daemon --systemroot 4841 0.0 0.0 5188 708 pts/2 S+ 19:28 0:00 grep dbus no deamon launchlaunch new dbus deamon(DBUS_SESSION_BUS_ADDRESS='unix:abstract=/tmp/dbus-MrmwcfLKUL,guid=c0362ca20034a086c710a9004e54e078';export DBUS_SESSION_BUS_ADDRESS;DBUS_SESSION_BUS_PID=4847;)4847dbus 2916 0.0 0.1 2740 928 ? Ss 17:19 0:00 dbus-daemon --systemroot 4847 0.0 0.0 2740 508 ? Ss 19:28 0:00 /bin/dbus-daemon --fork --print-pid 4 --print-address 6 --sessionroot 4864 0.0 0.0 5188 708 pts/2 S+ 19:28 0:00 grep dbus 启动crond:cardmgr 已经在运行[失败]启动MySQL:[确定]================000001f4==ffffffff1314185338,0last login 0!First run, check!verifyLicence success!starting dcsp...........successstarting dhcpd4...........failurestarting dhcpd6...........failurestarting dcnitd...........success================000001f4==ffffffff1314185339,1316777338last login 1314185338!check last login!verifyLicence success!Wed Aug 24 19:28:59 2011 : Info: check license success !000C29FBD5522905181209812442189021815092Wed Aug 24 19:28:59 2011 : Info: getid : 20090-0C518-21920-9F8B1-24D42-18950-52181-52092.================000001f4==ffffffffWed Aug 24 19:28:59 2011 : Info: Radius Accounting Module has been enable!================000001f4==ffffffffWed Aug 24 19:28:592011 : Info: Starting -reading configuration files ...starting radiusd...........successstarting terminal scan...........successstarting dcsmsid...........successstarting simdnsd...........success================000001f4==ffffffff1314185343,1316777338last login 1314185342!check last login!verifyLicence success!starting tsped...........success================000001f4==ffffffff1314185345,1316777338last login 1314185343!check last login!verifyLicence success!starting tpusd...........successstarting transfer...........successUsing CATALINA_BASE: /usr/local/dcsm/gui/Tomcat/Using CATALINA_HOME: /usr/local/dcsm/gui/TomcatUsing CATALINA_TMPDIR: /usr/local/dcsm/gui/Tomcat//tempUsing JRE_HOME: /usr/local/dcsm/gui/jdk2011-8-24 19:29:12 org.apache.catalina.startup.Catalina stopServer(安装完毕自动执行重启动作,所以stop服务会报错)严重: Catalina.stop:.ConnectException: Connection refusedat .PlainSocketImpl.socketConnect(Native Method)at .PlainSocketImpl.doConnect(PlainSocketImpl.java:333)at .PlainSocketImpl.connectToAddress(PlainSocketImpl.java:195)at .PlainSocketImpl.connect(PlainSocketImpl.java:182)at .SocksSocketImpl.connect(SocksSocketImpl.java:366)at .Socket.connect(Socket.java:519)at .Socket.connect(Socket.java:469)at .Socket.<init>(Socket.java:366)at .Socket.<init>(Socket.java:179)at org.apache.catalina.startup.Catalina.stopServer(Catalina.java:421)at sun.reflect.NativeMethodAccessorImpl.invoke0(Native Method)atsun.reflect.NativeMethodAccessorImpl.invoke(NativeMethodAccessorImpl.java:39)atsun.reflect.DelegatingMethodAccessorImpl.invoke(DelegatingMethodAccessorImpl.java:25) at ng.reflect.Method.invoke(Method.java:597)at org.apache.catalina.startup.Bootstrap.stopServer(Bootstrap.java:337)at org.apache.catalina.startup.Bootstrap.main(Bootstrap.java:415) Using CATALINA_BASE: /usr/local/dcsm/gui/Tomcat2/Using CATALINA_HOME: /usr/local/dcsm/gui/Tomcat2Using CATALINA_TMPDIR: /usr/local/dcsm/gui/Tomcat2//tempUsing JRE_HOME: /usr/local/dcsm/gui/jdk2011-8-24 19:29:13 org.apache.catalina.startup.Catalina stopServer严重: Catalina.stop:.ConnectException: Connection refusedat .PlainSocketImpl.socketConnect(Native Method)at .PlainSocketImpl.doConnect(PlainSocketImpl.java:333)at .PlainSocketImpl.connectToAddress(PlainSocketImpl.java:195)at .PlainSocketImpl.connect(PlainSocketImpl.java:182)at .SocksSocketImpl.connect(SocksSocketImpl.java:366)at .Socket.connect(Socket.java:519)at .Socket.connect(Socket.java:469)at .Socket.<init>(Socket.java:366)at .Socket.<init>(Socket.java:179)at org.apache.catalina.startup.Catalina.stopServer(Catalina.java:421)at sun.reflect.NativeMethodAccessorImpl.invoke0(Native Method)atsun.reflect.NativeMethodAccessorImpl.invoke(NativeMethodAccessorImpl.java:39)atsun.reflect.DelegatingMethodAccessorImpl.invoke(DelegatingMethodAccessorImpl.java:25) at ng.reflect.Method.invoke(Method.java:597)at org.apache.catalina.startup.Bootstrap.stopServer(Bootstrap.java:337)at org.apache.catalina.startup.Bootstrap.main(Bootstrap.java:415) Killing: 6546Using CATALINA_BASE: /usr/local/dcsm/gui/Tomcat3Using CATALINA_HOME: /usr/local/dcsm/gui/Tomcat3Using CATALINA_TMPDIR: /usr/local/dcsm/gui/Tomcat3/tempUsing JRE_HOME: /usr/local/dcsm/gui/jdk1.5.02011-8-24 19:29:17 org.apache.catalina.startup.Catalina stopServer严重: Catalina.stop:.ConnectException: Connection refusedat .PlainSocketImpl.socketConnect(Native Method)at .PlainSocketImpl.doConnect(PlainSocketImpl.java:333)at .PlainSocketImpl.connectToAddress(PlainSocketImpl.java:195)at .PlainSocketImpl.connect(PlainSocketImpl.java:182)at .SocksSocketImpl.connect(SocksSocketImpl.java:366)at .Socket.connect(Socket.java:516)at .Socket.connect(Socket.java:466)at .Socket.<init>(Socket.java:366)at .Socket.<init>(Socket.java:179)at org.apache.catalina.startup.Catalina.stopServer(Catalina.java:421)at sun.reflect.NativeMethodAccessorImpl.invoke0(Native Method)atsun.reflect.NativeMethodAccessorImpl.invoke(NativeMethodAccessorImpl.java:39)atsun.reflect.DelegatingMethodAccessorImpl.invoke(DelegatingMethodAccessorImpl.java:25) at ng.reflect.Method.invoke(Method.java:585)at org.apache.catalina.startup.Bootstrap.stopServer(Bootstrap.java:337)at org.apache.catalina.startup.Bootstrap.main(Bootstrap.java:415) Killing: 3222/usr/local/dcsm/gui/Tomcat3/bin/catalina.sh: line 328: kill: (3222) -没有那个进程Using CATALINA_BASE: /usr/local/dcsm/gui/Tomcat/Using CATALINA_HOME: /usr/local/dcsm/gui/TomcatUsing CATALINA_TMPDIR: /usr/local/dcsm/gui/Tomcat//tempUsing JRE_HOME: /usr/local/dcsm/gui/jdkUsing CATALINA_BASE: /usr/local/dcsm/gui/Tomcat2/Using CATALINA_HOME: /usr/local/dcsm/gui/Tomcat2Using CATALINA_TMPDIR: /usr/local/dcsm/gui/Tomcat2//tempUsing JRE_HOME: /usr/local/dcsm/gui/jdkBefore start, Killing: 6546/usr/local/dcsm/gui/Tomcat2/bin/catalina.sh: line 281: kill: (6546) -没有那个进程Using CATALINA_BASE: /usr/local/dcsm/gui/Tomcat3Using CATALINA_HOME: /usr/local/dcsm/gui/Tomcat3Using CATALINA_TMPDIR: /usr/local/dcsm/gui/Tomcat3/tempUsing JRE_HOME: /usr/local/dcsm/gui/jdk1.5.0trustview has been start+ trustview has been installed.+ run# service trustview {start|stop|restart}to start,stop,restart trustview server after restarting computer.++++++++++++++++++++++++++++++++++++++++++++++++++++++++++++++++++++++ ++++++++++++++++++++[root@DCSM-Master trustview-3.02.06.02]#4、通过命令service trustview restart重启dcsm后台服务,查看相关进程能否正常启动[root@DCSM-Master trustview-3.02.06.02]# service trustview restart停止crond:[确定]Stopping High-Availability services:[确定] logd is already stoppedExiting trustview......Exiting /usr/local/dcsm/sbin/radiusd, pid=5788Exiting /usr/local/dcsm/bin/dcspd, pid=4980Exiting /usr/local/dcsm/bin/dcnts, pid=5834Exiting /usr/local/dcsm/bin/dcsmsid, pid=5850Exiting /usr/local/dcsm/bin/dcsmsid, pid=5850Exiting /usr/local/dcsm/bin/dcnitd, pid=5258Exiting /usr/local/dcsm/bin/simdnsd, pid=5857Exiting /usr/local/dcsm/bin/tsped, pid=5903Exiting /usr/local/dcsm/bin/tsped, pid=5903Exiting /usr/local/dcsm/bin/tpusd, pid=6265Exiting /usr/local/dcsm/bin/transfer, pid=6492Using CATALINA_BASE: /usr/local/dcsm/gui/Tomcat/Using CATALINA_HOME: /usr/local/dcsm/gui/TomcatUsing CATALINA_TMPDIR: /usr/local/dcsm/gui/Tomcat//tempUsing JRE_HOME: /usr/local/dcsm/gui/jdkUsing CATALINA_BASE: /usr/local/dcsm/gui/Tomcat2/Using CATALINA_HOME: /usr/local/dcsm/gui/Tomcat2Using CATALINA_TMPDIR: /usr/local/dcsm/gui/Tomcat2//tempUsing JRE_HOME: /usr/local/dcsm/gui/jdkKilling: 6602Using CATALINA_BASE: /usr/local/dcsm/gui/Tomcat3Using CATALINA_HOME: /usr/local/dcsm/gui/Tomcat3Using CATALINA_TMPDIR: /usr/local/dcsm/gui/Tomcat3/tempUsing JRE_HOME: /usr/local/dcsm/gui/jdk1.5.0Killing: 6617Exiting /usr/local/dcsm/gui/jdk/bin/java, pid=6591Exiting /usr/local/dcsm/gui/jdk/bin/java, pid=6591trustview service has been stopdbus machine-id has already create.4847unix:abstract=/tmp/dbus-MrmwcfLKUL,guid=c0362ca20034a086c710a9004e54e078 dbus 2916 0.0 0.1 2740 928 ? Ss 17:19 0:00 dbus-daemon --systemroot 4847 0.0 0.1 2740 928 ? Ss 19:28 0:00 /bin/dbus-daemon --fork --print-pid 4 --print-address 6 --sessionroot 8403 0.0 0.0 5188 708 pts/2 S+ 19:38 0:00 grep dbus launch new dbus deamon(DBUS_SESSION_BUS_ADDRESS='unix:abstract=/tmp/dbus-Lxl3yZG8aO,guid=9c896e 6f99e8fedee6d7b1004e54e2b1';export DBUS_SESSION_BUS_ADDRESS;DBUS_SESSION_BUS_PID=8409;)8409dbus 2916 0.0 0.1 2740 928 ? Ss 17:19 0:00 dbus-daemon --systemroot 8409 0.0 0.0 2740 512 ? Ss 19:38 0:00 /bin/dbus-daemon --fork --print-pid 4 --print-address 6 --sessionroot 8426 0.0 0.0 5188 712 pts/2 S+ 19:38 0:00 grep dbus 启动crond:[确定]启动MySQL:[确定]================000001f4==ffffffff1314185907,1316777338last login 1314185345!check last login!verifyLicence success!starting dcsp...........successstarting dhcpd4...........failurestarting dhcpd6...........failurestarting dcnitd...........success================000001f4==ffffffff1314185908,1316777338last login 1314185907!check last login!verifyLicence success!Wed Aug 24 19:38:28 2011 : Info: check license success !000C29FBD5522802181309812442189031812082Wed Aug 24 19:38:28 2011 : Info: getid : 20080-0C218-21930-9F8B1-24D42-18950-53181-22082.================000001f4==ffffffffWed Aug 24 19:38:28 2011 : Info: Radius Accounting Module has been enable!================000001f4==ffffffffWed Aug 24 19:38:28 2011 : Info: Starting -reading configuration files ...starting radiusd...........successstarting terminal scan...........successstarting dcsmsid...........successstarting simdnsd...........success================000001f4==ffffffff1314185912,1316777338last login 1314185908!check last login!verifyLicence success!starting tsped...........success================000001f4==ffffffff1314185913,1316777338last login 1314185912!check last login!verifyLicence success!starting tpusd...........successstarting transfer...........successUsing CATALINA_BASE: /usr/local/dcsm/gui/Tomcat/Using CATALINA_HOME: /usr/local/dcsm/gui/TomcatUsing CATALINA_TMPDIR: /usr/local/dcsm/gui/Tomcat//tempUsing JRE_HOME: /usr/local/dcsm/gui/jdkUsing CATALINA_BASE: /usr/local/dcsm/gui/Tomcat2/Using CATALINA_HOME: /usr/local/dcsm/gui/Tomcat2Using CATALINA_TMPDIR: /usr/local/dcsm/gui/Tomcat2//tempUsing JRE_HOME: /usr/local/dcsm/gui/jdkBefore start, Killing: 6602/usr/local/dcsm/gui/Tomcat2/bin/catalina.sh: line 281: kill: (6602) -没有那个进程Using CATALINA_BASE: /usr/local/dcsm/gui/Tomcat3Using CATALINA_HOME: /usr/local/dcsm/gui/Tomcat3Using CATALINA_TMPDIR: /usr/local/dcsm/gui/Tomcat3/tempUsing JRE_HOME: /usr/local/dcsm/gui/jdk1.5.0trustview has been start[root@DCSM-Master trustview-3.02.06.02]#5、检验相关服务端口是否UP[root@DCSM-Master trustview-3.02.06.02]#lsof -i:1812COMMAND PID USER FD TYPE DEVICE SIZE NODE NAMEradiusd 9057 root 253u IPv4 96876 UDP *:radius[root@DCSM-Master trustview-3.02.06.02]# lsof -i:8080COMMAND PID USER FD TYPE DEVICE SIZE NODE NAMEjava 9656 root 31u IPv6 98375 TCP *:webcache (LISTEN)[root@DCSM-Master trustview-3.02.06.02]#lsof -i:8090COMMAND PID USER FD TYPE DEVICE SIZE NODE NAMEjava 9656 root 34u IPv6 98383 TCP *:8090 (LISTEN)[root@DCSM-Master trustview-3.02.06.02]# lsof -i:7755COMMAND PID USER FD TYPE DEVICE SIZE NODE NAMEdcspd 8544 root 258u IPv4 96262 TCP 192.168.1.21:7755 (LISTEN)[root@DCSM-Master trustview-3.02.06.02]#lsof -i:4443COMMAND PID USER FD TYPE DEVICE SIZE NODE NAMEtsped 9145 root 256u IPv4 97808 TCP *:pharos (LISTEN)[root@DCSM-Master trustview-3.02.06.02]# lsof -i:80COMMAND PID USER FD TYPE DEVICE SIZE NODE NAMEjava 9667 root 33u IPv6 98397 TCP *:http (LISTEN)[root@DCSM-Master trustview-3.02.06.02]# lsof -i:8443COMMAND PID USER FD TYPE DEVICE SIZE NODE NAMEjava 9667 root 31u IPv6 98392 TCP *:pcsync-https (LISTEN)[root@DCSM-Master trustview-3.02.06.02]#2.许可升级1、登录许可管理端,默认用户名、密码均为admin,请安装系统之后立刻修改说明:版本信息中基本版本代表终端安全管理版本、无计费功能,计费版本表示计费版本、无终端安全管理功能的版本。
dormakaba 92 30 访问管理器用户指南说明书
Manuals+— User Manuals Simplified.92 30 Dormakaba Access Manager User GuideHome » dormakaba » 92 30 Dormakaba Access Manager User GuideContents1 92 30 Dormakaba Access Manager2 Product Information3 Product Usage Instructions4 Safety and Security5 Installation6 dormakaba access manager 92 90 The dormakaba access manager 92 90 is a central, efficient controlunit for complex access controls. The access manager is available as an in-wall as well as an IT rack design. It is especially suitable for building situations where a central wiring infrastructure is already available. Optimal access components for each situation7 Overview of Dormakaba Access Manager system topology8 Features9 Documents / Resources9.1 References10 Related Posts92 30 Dormakaba Access ManagerProduct InformationThe product is an access portfolio for online peripherals, designed to provide solutions for different types of access points and buildings. It includes access managers, door controls, readers, and registration units. The portfolio offers versatility, security, and compatibility with existing infrastructure.Safety and SecurityThe access components are designed to ensure high levels of security both externally and internally. The readers are equipped with the secure RFID technologies of LEGIC Advant and MIFARE DESFire, following the dormakaba ARIOS security concept.InstallationThe selection of devices in the portfolio allows for various installation scenarios. Whether it’s a newly planned building, an old building, or a migration of an existing system, the devices can be easily integrated. They are compatible with modern IT infrastructures and can also utilize existing wiring without any changes.DesignThe readers and registration units in the portfolio not only offer high security and easy installation but also feature a timeless, minimalist design. The clear design language and outstanding quality make them suitable for creating a positive first impression for staff and visitors.Product Usage InstructionsAccess Manager 92 30The access manager 92 30 is installed locally at each access point. This allows for a closer-to-door wiring of door control and readers. If there is an existing network infrastructure, no new wirings are required. If powered via PoE (Power over Ethernet), there is no need for an additional power supply or an electrician. This solution is ideal for new installations in buildings with modern IT infrastructures.Access Manager 92 90The access manager 92 90 is installed centrally in a control room. Wirings for all readers and door controls are laid from each access point to the central access manager. This is the traditional installation method used in existing buildings. It is suitable when there is a central wiring infrastructure available or when the access manager needs to be installed in an IT cabinet for security or organizational reasons. The central execution of maintenance at one location is a significant advantage of this solution.dormakaba Access ManagerThe dormakaba access managers are designed to meet the requirements of modern security concepts. They provide efficient access control with intelligent decision logic and free reconfigurability. Whether it’s a simple access point or a complex, highly sensitive company area, the access managers offer optimized solutions fordifferent installation scenarios.Overview of access portfolio for online peripheralsEach access and each building is differentGlass doors, rotating doors, garage doors, sliding doors, and many other accesses have different requirements. Even the design of the existing building infrastructure has an influence on how access components can be installed as easily and cost-effectively as possible. With our versatile portfolio of access managers, door controls, readers, and registration units, we offer solutions that are optimized for every situation.Safety and SecurityThe existing combination options ensure installations with the highest level of security for exteriors, with all security-critical elements in secured interiors, as well as within the building. Our readers are equipped with the highly secure RFID technologies of LEGIC Advant and MIFARE DESFire with the dormakaba ARIOS security concept.InstallationDo you need a solution for a newly planned building, is the access system being installed in an old building, or is a migration of an existing system required? Our selection of devices allows for the use of modern IT infrastructures or the re-use of existing wiring and is compatible with older dormakaba devices without making any changes to the existing wiring.Equipped for the future – investment securityShould your requirements change in the future, you can use the devices in other dormakaba access systems, too. DesignThe access to your company is the first impression and at the same time the business card for your staff and external visitors. Therefore, the visible readers and registration units offer not only high security and easy installation but also an outstanding quality of design. The timeless, minimalist look and the clear design language of our readers convince customers all over the world as well as renowned design institutes.The right solution for every installation scenario – local access installationThe access manager 92 30 is installed locally at each access point and therefore allows for a closer-to-door wiring of door control and readers. With the use of existing network infrastructure, no new wirings are required in the building.If the access manager is powered via PoE (Power over Ethernet), there is no need for an additional power supply or an electrician. This solution is primarily suitable for new installations in buildings with modern IT infrastructures. The advantage of this solution is a simple and quick installation.The right solution for every installation scenario – central access installationThe access manager 92 90 is installed centrally in a building in a control room. Wirings for all readers and door controls are laid from each access point to the central access manager. This is the classic way of installation, which is used mainly in existing buildings.This solution is offered if a central wiring infrastructure is already available. This solution is also the best option if the access manager is to be installed in an IT cabinet for security or organizational reasons. The main advantage is the central execution of all maintenance at one locationdormakaba access manager: for every requirement The dormakaba access managers meet all requirements of modern security concepts. The efficient access controls with their intelligent decision logic and free configurability control the access at simple access points or even those in complex, highly sensitive company areas. Our various designs provide an optimized solution for each installation scenario.The dormakaba access manager at a glancedormakaba access manager 92 00The dormakaba access manager As a rail-mounted model, 92 00 offers flexible installation options. It can also be installed locally as a single device near an access point, in electrical cabinets or centrally with extendedinput/output modulesdormakaba access manager 92 30The dormakaba access manager 92 30 is optimized for single access points. The quick and simple installation at each door reduces the installation effort and the costs. Power can be provided entirely via PoE/PoE+, making additional power supplies unnecessary.dormakaba access manager 92 90The dormakaba access manager 92 90 is a central, efficient control unit for complex access controls. The access manager is available as an in-wall as well as an IT rack design. It is especially suitable for building situations where a central wiring infrastructure is already available.Optimal access components for each situationdormakaba registration unitsdormakaba registration units are generally detached from the control device (remote reader or access manager). The control device can be installed in a tamper-proof room; the registration unit is located directly at the door. Each installation location can have different constructions in an appealing design. Encrypted communication between the registration units and the control unit offers a high degree of security.The dormakaba registration unit 90 00 can be installed into individual or on-site housings or behind a variety of panels. The component fits into many European switch covers.The dormakaba registration unit 90 01 stands out due to its compact form and elegant glossy finish. Therefore, it fits subtly and harmoniously into modern building structures. This registration unit moreover offers the Mobile Access function via BLE.The dormakaba registration unit 90 02 with a wear-free PIN keyboard for access points with increased security requirements can be used indoors or in protected outdoor areas. The PIN keyboard operation is supported by “Guide by Light”.The registration unit 90 03 is slim, small and suitable for direct installation on door frames and any kind of fittings. The dormakaba registration unit 90 04 has a slim, compact form and can be mounted directly to metal, wood or PVC door frames. Water-proof and weather-resistant, the device is also well suited for outdoors.dormakaba remote readerThe advantage of the remote reader is that the registration unit and the control device can be installed separately from each other. This means it is suitable for installations with the highest security level, with all security-critical elements in a secured interior. The Reader 91 15 is designed for simple access points and the Reader 91 25 for complex situations like door configurations with entries and exits.dormakaba extension modulesThe extension modules 90 30 and 90 31 are used if more digital inputs or relay outputs are required by the access manager 92 00 than are available, e.g. for a lift control or for window monitoring. The installation is done by simply plugging it in at the access manager 92 00. Thanks to monitored inputs, the module 90 31 offers increased security.Suitable solution for each access point – combinable varietydormakaba compact readerThe dormakaba compact reader has integrated everything in one device. It is easy to install and has a compact design that fits into every building structure. It is especially well suited for access inside of a building. The compact readers 91 10 and 91 12 are optimized for wall mounting, the reader 91 04 for door frame mounting. The 91 04 and 91 12 with IP 66 are waterproof and weather-resistant and therefore well suited for outdoor use.Additionally, these two readers also offer the Mobile Access function via BLE.with the optional thermal infrared sensor, the device can also check whether people are wearing masks.Remark: The effectively available scope of product functions depends in each case on the system context inOverview of Dormakaba Access Manager system topologyOur commitment to sustainabilityOverview of services of the Dormakaba Access ManagerTotal number of possible readers pe r access manager up to 15 KCP readers/ 2 16 up to 16 sub terminalsMobile Access● ● ●InterfacesRS485 party line● ● ●RS232 for peripheral components 2 1 1Coaxial connections for registrationunits2 2 –Digital IOsNumber of inputs (monitored)4 (4) 4 (4) + tamper switch 18 (16) + tamper switch Number of relay outputs 3 3 16Hardware optionsUpgradable with additional I/O modules● – –Passive RS485 interface● ● ●Active RS485 interface– – ●Software optionsMemory option 2,000/8,000● ● ●Memory option 10,000/40,000● ● ●Memory option 50,000/100,000● ● ●Memory option 120,000AVISO● ● ●CardLink/Access on Card● ● ●Data encryption● ● ●Number of readers2/4/8 2 2/4/8/16Power supplyPoE– ● –110/230 V AC– – ●12/24 V DC● (12/24 V) ●(24 V) ●(24 V)Design/installationTop hat rail Surface-mounted hous- Wall-mounted housing, installation ing for installation in- rack-mounteddoors housing (19”)CertificationsUL 294 approval● ● ●CE● ● ●FCC● ● ●UL 60950● ● ●You will find further details and order information in the relevant dormakaba catalogs or system descriptions. The effectively available scope of product functions depends in each case on the system context in which the product is used. The diagram shows the maximum available scope of services.Overview of services of the dormakaba registration unitsreaderPIN keyboard– – ● ––MRD● ● ● ●●NFC● ● ● ●●BLE– ● – ––InterfacesCoaxial connection● ● ● ●●Design/installationSurface-mounted cable feed– ● ● –●Flush-mounted cable feed● ● ● ●●Door frame installation– – – ●●IP class of protection IP20 IP40/IP54 IP40/IP54 IP40/IP54IP66 CertificationsCE● ● ● ●●FCC● ● ● ●●UL 60950● ● ● ●●Overview of services of the dormakaba readersreaderMRD (Multi RFID devi● ●● ●●●ce)Mobile Access (NFC)● ●● ●●●Mobile Access (BLE)● –● ––InterfacesRS–485● ●● ●●–Coaxial connection for– –– 12–regis- tration unitEthernet– –– ––●Digital IOsNumber of inputs 2 2 2 24 4 1Number of relay outpu1 One One 132 1tsInput for tamper switch– – 1 –11Power supply10–34 V DC● ●● ●●–Power over Ethernet (– –– ––●PoE)Design/installationSurface-mounted cabl● ●● ––●e feedFlush-mounted cable f● ●● ––●eedTop hat rail mounting– –●●–IP class of protection IP54/66 IP40/54IP66 IP20IP20IP30/54/65 CertificationsCE● ●● ●●●FCC● ●● ●●●UL 60950● ●● ●●–UL 294● ●● –––UL 62368-1– –– ––●only in connection with the options for the add-on I/O or the removed I/Os for the 9600-K6You will find further details and order information in the relevant dormakaba catalogs or system descriptions. The effectively available scope of product functions depends in each case on the system context in which the product is used. The diagram shows the maximum available scope of services.The different access and media solutions at a glanceYou can freely chooseWhether ID card, chip, smart key or key fob: You open all your doors. The access media is based on the RFID chip technology. With the integration into the dormakaba system, they get special encryption from dormakaba and therefore enable secure and controlled access. In case of loss, the authorizations can be easily deleted, and new access media can be programmed and reissued just as easily.You can freely chooseWhether ID card, chip, smart key or key fob: You open all your doors. The access media is based on the RFID chip technology. With the integration into the dormakaba system, they get special encryption from dormakaba and therefore enable secure and controlled access. In case of loss, the authorizations can be easily deleted, and new access media can be programmed and reissued just as easily.Biometric access controlWith its easy handling, high user acceptance, and highest data protection, the biometric access control is very convincing. There is no scope for security risks due to lost or RFID cards. And it goes without saying that it is highly cost-efficientMobile AccessUse your smartphone to gain access to buildings. Send digital keys to multiple smartphones. You’ll never have to worry about lost keys again. Especially convenient: you no longer have to be on-site to hand over keys. You can control who has access to your building and for how long.The effectively available scope of product functions depends in each case on the system context in which theIf you are interested, we will be happy to advise you Features.Documents / Resourcesdormakaba 92 30 Dormakaba Access Manager [pdf] User Guide90 03, 92 30, 92 30 Dormakaba Access Manager, 92 30, Dormakaba Access Manager, AccessManager, ManagerReferencesManuals+,。
- 1、下载文档前请自行甄别文档内容的完整性,平台不提供额外的编辑、内容补充、找答案等附加服务。
- 2、"仅部分预览"的文档,不可在线预览部分如存在完整性等问题,可反馈申请退款(可完整预览的文档不适用该条件!)。
- 3、如文档侵犯您的权益,请联系客服反馈,我们会尽快为您处理(人工客服工作时间:9:00-18:30)。
2.2. 2.3.
BTNM 安装 ...................................................................................................................................... 4 BTNM 注册 .................................................................................................................................... 13
- 1 -
BTNM 安装和运行指南
所对应的位置,为迅速定位故障源提供依据。 智能化告警: 支持从网络的第 2 层到第 7 层实施全面的故障告警管理, 将运维管理人员从网管机 前解放出来。支持自定义警报级别,通过设置延迟及轮询间隔,可以防止由于线路抖动等原 因产生的误报,支持报警过滤处理,对于同一故障源只报警一次,同时,在故障源上以醒目 的标记标示,防止多项重复的报警。在网络出现异常情况时,及时作出反应,主动通过各种 声、光、电等告警方式通知管理人员,让运维管理人员在网络故障出现前获知并进行事前处 理,确保整个网络系统的正常运行。 与第三方程序连动:在发生告警时可以调用相关的程序进行进一步处理,极大地方便了用户的对 策的实现。 应用系统管理:提供网络层面、数据交换层、应用进程,和应用服务层四个层面的全方位监控。 以及,通过脚本和模拟仿真等方法,支持服务器及小型机系统的进程、CPU、内存、磁盘空 间等的监控,其操作平台包含:Windows、Red Hat linux、RedFlag linux、企鹅 Linux、IBM AIX、 Sun Solaris、 HP unix、 SCO Open server、 Digital, FreeBSD 和 Tru64; 支持 SQL Server、 Oracle,Informix 数据库的监控;支持 Web、FTP,SMTP 等各类服务实时运行状况监控。 数据流分析:分析网络实时流量,捕捉非正常的网际数据流动,提供立即的安全审计。包括:基 于 IP 数据流的 BT_Dataflow_Analysis、基于 Netflow 数据流的 BT_Netflow_Analysis、基于 NetStream 数 据 流 的 BT_Netstream_Analysis , 和 基 于 RFC-3176 国 际 标 准 的 BT_Sflow_Analysis。 数据回放:BTNM 数据流分析探针,支持跨 IP 网段分析捕捉各类异常网络数据流,提供 2-7 层 的数据分析,一旦捕捉到问题特征,在任何时刻均保留“此刻以前 10 分钟原始数据”以供 事后分析,避免了异常事件转瞬即逝的困境,可以进行“数据回放”分析,帮助事后分析问 题。 PC 管理:采用操作系统核心技术和自有创新技术,从软硬件资产管理、应用程序管理、外接设 备管理、软件分发、远程管理,文件访问监控和网络访问管理等方面,对桌面计算机各种资 源要素进行全程控制、保护和审计,确保桌面计算机运行的可靠性、完整性和安全性,提高 桌面计算机维护效率。 IT 资产管理:为网络管理者(或监测者)提供方便、快捷、准确,以及尽可能详细的网络辅助 信息,以便进行行政管理、故障定位,以及网络维护等。 历史记录:通过记录各主要网络“干道”的数据流量,各主要设备的负载状况,可以了解整个网 络的业务运行状况,得到改造、改进网络的技术资料。历史记录为用户进一步的网络改造和 调整,提供统计数据和依据。BTNM 历史记录存储采用自带的数据库,它具有体积小、执行 效率高等特点,同时亦支持使用 Oracle、Sybase、SQL 等常见大型数据库。 日志:通过日志查询,用户可了解到整个网络或单个设备的运维情况,和 BTNM 的使用轨迹。 报表:提供全网数据的历史记录和告警日志的报表输出,并支持自动生成报表。 上下级层次化管理:根据用户不同的组织结构、地理分布以及业务关系,实施跨地域层次化的统 一管理模式,从而使责权管理更加明确,拓扑图更加清晰,并能大幅度降低网络流量,提高 系统的工作效率。 远程服务:通过远程协助服务为用户提供及时响应的技术支持。只要用户的网管机可以连通互联 网,运行 BTNM 远程协助工具,北塔公司的技术人员就能远程桌面帮助用户解决相关问题。 - 2 -
北塔 BTNM3.9
安装和运行指南
<V1.0>
BETASoft Floor 15, No.55 West Huaihai Road, Shanghai, China 4008207719
版权
© 2010 上海北塔软件股份有限公司版权所有
版权保护声明
2.4. 2.5.
数据流分析探针安装..................................................................................................................... 16 PC 代理程序安装........................................................................................................................... 20
2.1.1. 2.1.2.
软件环境 ....................................................................................................................................... 3 硬件配置 ....................................................................................................................................... 3
BTNM 安装和运行指南
第一章 前言
北塔 BTNM ( Before Trouble Network Manager ) ,是上海北塔软件股份有限公司基于 Windows 操作系统发布的,拥有完全自主知识产权,跨平台、跨厂商, “立足于平台面向应用” 的通用网络管理平台。 作为北塔网管产品家族的核心产品之一,BTNM 已经广泛地应用在电力、教育、银行、政府、 能源、制造等各行各业,以其稳定、易用、全面等优点而广受青睐。
未经上海北塔软件股份有限公司书面许可,本文档不得整体或部分地复印、 复制、翻译或缩减成任何电子介质或计算机可以阅读的格式。随着产品的不 断完善、 发展, 本文档中描述的信息可能与正式发布版本的实际情况有出入, 如有出入应以后者为准。
目
第一章
1.1. 1.2.
录
前言 ............................................................................................................................ 1