.NET三层架构与三层架构下GridView控件增删改操作详解
三层架构下的GridView的增删改
三层架构下的GridView的增删改
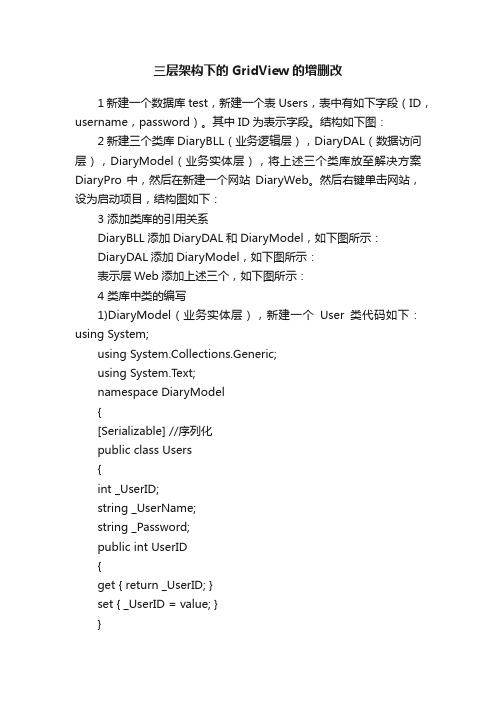
1 新建一个数据库test,新建一个表Users,表中有如下字段(ID,username,password)。
其中ID为表示字段。
结构如下图:
2 新建三个类库DiaryBLL(业务逻辑层),DiaryDAL(数据访问层),DiaryModel(业务实体层),将上述三个类库放至解决方案DiaryPro中,然后在新建一个网站DiaryWeb。
然后右键单击网站,设为启动项目,结构图如下:
3 添加类库的引用关系
DiaryBLL添加DiaryDAL和DiaryModel,如下图所示:
DiaryDAL添加DiaryModel,如下图所示:
表示层Web添加上述三个,如下图所示:
4 类库中类的编写
1)DiaryModel(业务实体层),新建一个User类代码如下:using System;
using System.Collections.Generic;
using System.Text;
namespace DiaryModel
{
[Serializable] //序列化
public class Users
{
int _UserID;
string _UserName;
string _Password;
public int UserID
{
get { return _UserID; }
set { _UserID = value; }
}
///
///用户名///。
.NET经典三层架构-表示层删除数据

Console.Write("请输入一个字母:");
var chr = Console.ReadLine();
//实例化StudentUI类
StudentUI sUI = new StudentUI();
switch (chr)
{
case "A"://添加数据。
{
sUI.AddStudent();
break;
的功能:
public class Menu
{
public static void Show()
{
Console.WriteLine("----------------------------------");
Console.WriteLine("A:添加数据
---------");
Console.WriteLine("B:更新数据
一都编程
.NET 经典三层架构开发
第 12 单元-表示层-删除数据
作者:李保军 未经允许,不得以任何方式传播,否则必追究法律责任
目录
.NET 经典三层架构深入编程-第 12 单元-表示层-删除数据
第 1 节. 概述
2
第 2 节. 编写代码
2
第 3 节. 调用代码
3
第 4 节. 运行结果
4
1/5
.NET 经典三层架构深入编程-第 12 单元-表示层-删除数据
} } Console.ReadKey(); } }
当用户在控制tudent()方法 执行删除学生操作。
第4节. 运行结果
编译一下解决方案,运行控制台应用程序:
图1 当在图 1 中输入字母 C 时,表示要执行删除操作,根据提示输入删 除的 ID 值,打回车键即可删除行数据。 查看一下 SQL Server 数据库:
asp.net中GridView编辑,更新,合计用法示例_
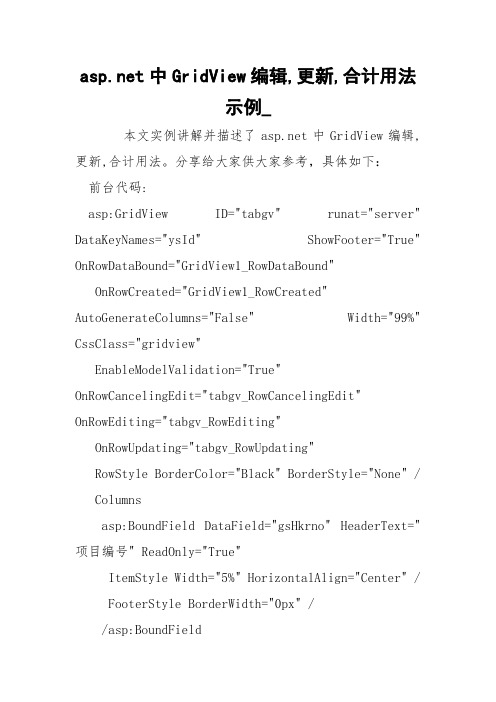
中GridView编辑,更新,合计用法示例_本文实例讲解并描述了中GridView编辑,更新,合计用法。
分享给大家供大家参考,具体如下:前台代码:asp:GridView ID="tabgv" runat="server" DataKeyNames="ysId" ShowFooter="True" OnRowDataBound="GridView1_RowDataBound"OnRowCreated="GridView1_RowCreated" AutoGenerateColumns="False" Width="99%" CssClass="gridview"EnableModelValidation="True"OnRowCancelingEdit="tabgv_RowCancelingEdit" OnRowEditing="tabgv_RowEditing"OnRowUpdating="tabgv_RowUpdating"RowStyle BorderColor="Black" BorderStyle="None" / Columnsasp:BoundField DataField="gsHkrno" HeaderText="项目编号" ReadOnly="True"ItemStyle Width="5%" HorizontalAlign="Center" / FooterStyle BorderWidth="0px" //asp:BoundFieldasp:TemplateField HeaderText="项目名称"ItemTemplateasp:HyperLink ID="Hyp_gsName" runat="server" ForeColor="Blue" Text='%# Bind("gsName") %'/asp:HyperLink/ItemTemplateItemStyle Width="25%" HorizontalAlign="left" / FooterTemplateasp:Label ID="Label4" runat="server" Font-Bold="True" Text="合计:" Width="61px"/asp:Label/FooterTemplateFooterStyle BorderColor="Black" BorderWidth="0px" HorizontalAlign="Right" //asp:TemplateFieldasp:TemplateField HeaderText="概算金额"ItemTemplateasp:Label ID="labgsMoney" runat="server" Text='%#Bind("gsMoney", "{0:N2}") %'/asp:Label/ItemTemplateItemStyle Width="8%" HorizontalAlign="right" / FooterTemplateasp:Label ID="labtotalgsMoney" runat="server" ForeColor="Red"/asp:Label/FooterTemplateFooterStyle BorderColor="Black" HorizontalAlign="Right" //asp:TemplateFieldasp:TemplateField HeaderText="开工至上年底\n累计完成概算"ItemTemplateasp:Label ID="labkgzsndwcGsMoney" runat="server" Text='%# Bind("footMoney", "{0:N2}") %'/asp:Labelasp:HiddenField ID="hdnysYear" runat="server" Value='%# Eval("ysYear") % ' /asp:HiddenField ID="hdngsId" runat="server" Value='%# Eval("gsId") % ' /asp:HiddenField ID="hdngsHkrno" runat="server" Value='%# Eval("gsHkrno") % ' /asp:HiddenField ID="hdnChildFlag" runat="server" Value='%# Eval("childFlag") % ' //ItemTemplateItemStyle Width="8%" HorizontalAlign="right" /asp:Label ID="labtotalfootMoney" runat="server" ForeColor="Red"/asp:Label/FooterTemplateFooterStyle BorderColor="Black" HorizontalAlign="Right" //asp:TemplateFieldasp:TemplateField HeaderText="投资方案金额"ItemTemplateasp:Label ID="labtzqysMoney" runat="server" Text='%# Bind("tzqysMoney", "{0:N2}") %'/asp:Label /ItemTemplateEditItemTemplateasp:TextBox ID="txttzqysMoney" runat="server" Text='%# Eval("tzqysMoney") % 'Style="text-align: right" Width="100px"onKeyPress="if (event.keyCode!=46 event.keyCode!=45 (event.keyCode48 || event.keyCode57))event.returnValue=false"/asp:TextBox/EditItemTemplateItemStyle Width="8%" HorizontalAlign="right" /asp:Label ID="labtotaltzqysMoney" runat="server" ForeColor="Red"/asp:Label/FooterTemplateFooterStyle BorderColor="Black" HorizontalAlign="Right" //asp:TemplateFieldasp:TemplateFieldItemTemplateasp:Label ID="labtzhysMoney" runat="server" Text='%# Bind("tzhysMoney", "{0:N2}") %'/asp:Label /ItemTemplateEditItemTemplateasp:TextBox ID="txttzhysMoney" runat="server" Text='%# Eval("tzhysMoney") % 'Style="text-align: right" Width="100px"onKeyPress="if (event.keyCode!=46 event.keyCode!=45 (event.keyCode48 || event.keyCode57))event.returnValue=false"/asp:TextBox/EditItemTemplateItemStyle Width="8%" HorizontalAlign="right" /asp:Label ID="labtotaltzhysMoney" runat="server" ForeColor="Red"/asp:Label/FooterTemplateFooterStyle BorderColor="Black" HorizontalAlign="Right" //asp:TemplateFieldasp:TemplateField HeaderText="备注"ItemTemplateasp:Label ID="labtremark" runat="server" Text='%# Eval("remark") % '/asp:Label/ItemTemplateEditItemTemplateasp:TextBox ID="txtremark" runat="server" Text='%# Eval("remark") % ' Width="100px"/asp:TextBox /EditItemTemplateItemStyle Width="10%" HorizontalAlign="Center" / /asp:TemplateFieldasp:TemplateField ShowHeader="False"EditItemTemplateasp:LinkButton ID="LkBtnUpdate" runat="server" CausesValidation="True" CommandName="Update"Text="更新"/asp:LinkButtonasp:LinkButton ID="LkBtnCtrl" runat="server" CausesValidation="False" CommandName="Cancel"Text="取消"/asp:LinkButton/EditItemTemplateItemTemplateasp:LinkButton ID="LinkButton2" runat="server" CausesValidation="False"CommandName='%#Eval("childFlag").ToString()== "0" ? "":"Edit"%'Text='%#Eval("childFlag").ToString()== "0" ? "锁定":"编辑"%'/asp:LinkButton/ItemTemplateItemStyle Width="8%" HorizontalAlign="Center" / /asp:TemplateField/Columns/asp:GridView留意:1、通过设置 ReadOnly="True" 表示此列不行以编辑;2、通过Text='%# Bind("tzhysMoney", "{0:N2}") %'进行金额格式化;3、重点的编辑\显示\合计asp:TemplateFieldItemTemplateasp:Label ID="labtzhysMoney" runat="server" Text='%# Bind("tzhysMoney", "{0:N2}") %'/asp:Label /ItemTemplateEditItemTemplateasp:TextBox ID="txttzhysMoney" runat="server" Text='%# Eval("tzhysMoney") % 'Style="text-align: right" Width="100px"/asp:TextBox/EditItemTemplateItemStyle Width="8%" HorizontalAlign="right" /FooterTemplateasp:Label ID="labtotaltzhysMoney" runat="server" ForeColor="Red"/asp:Label/FooterTemplateFooterStyle BorderColor="Black" HorizontalAlign="Right" //asp:TemplateField后台代码:行绑定时的操作:protected void GridView1_RowDataBound(object sender,GridViewRowEventArgs e){GridViewRow gr = e.Row;if (gr.RowType == DataControlRowType.DataRow) {HiddenField hdnysYear = (HiddenField)e.Row.FindControl("hdnysYear");HiddenField hdngsHkrno = (HiddenField)e.Row.FindControl("hdngsHkrno");HiddenField hdnChildFlag = (HiddenField)e.Row.FindControl("hdnChildFlag");HyperLink hy = (HyperLink)e.Row.FindControl("Hyp_gsName");if (hdnChildFlag.Value!="1"){//设置连接地址\参数hy.NavigateUrl = "ys_edit_right.aspx?gsHkrno=" + hdngsHkrno.Value + "sysObjNo=" + sysObjNo + "ysYear=" + hdnysYear.Value;hy.Font.Underline = true;hy.ForeColor = System.Drawing.Color.Blue;hy.Target = "mainFrame";}else{hy.ForeColor = System.Drawing.Color.Black;}//计算合计Label labgsMoney = (Label)(e.Row.FindControl("labgsMoney"));if (labgsMoney != null || labgsMoney.Text != "") {gsMoneytotal += Convert.ToDecimal(labgsMoney.Text);}Label labkgzsndwcGsMoney = (Label)(e.Row.FindControl("labkgzsndwcGsMoney"));if (labkgzsndwcGsMoney != null || labkgzsndwcGsMoney.Text != ""){footMoneytotal += Convert.ToDecimal(labkgzsndwcGsMoney.Text);}//编辑状态时,不然点击编辑时会出错,找不到控件if ((e.Row.RowState DataControlRowState.Edit) == DataControlRowState.Edit){TextBox txttzqysMoney = (TextBox)(e.Row.FindControl("txttzqysMoney"));if (txttzqysMoney != null || txttzqysMoney.Text != ""){tzqysMoneytotal += Convert.ToDecimal(txttzqysMoney.Text);}TextBox txttzhysMoney = (TextBox)(e.Row.FindControl("txttzhysMoney"));if (txttzhysMoney != null || txttzhysMoney.Text != ""){tzhysMoneytotal += Convert.ToDecimal(txttzhysMoney.Text);}}else //非编辑状态时{Label labtzqysMoney = (Label)(e.Row.FindControl("labtzqysMoney"));if (labtzqysMoney != null || labtzqysMoney.Text != ""){tzqysMoneytotal += Convert.ToDecimal(labtzqysMoney.Text);}Label labtzhysMoney = (Label)(e.Row.FindControl("labtzhysMoney"));if (labtzhysMoney != null || labtzhysMoney.Text != ""){tzhysMoneytotal += Convert.ToDecimal(labtzhysMoney.Text);}}}}//取消编辑protected void tabgv_RowCancelingEdit(object sender, GridViewCancelEditEventArgs e){tabgv.EditIndex = -1;string strysYear = (Convert.ToInt32(ysYear) - 1).ToString();GvDataBind(gsHkrno, "0002", ysYear, "1900-01-01 00:00:00", strysYear + "-12-25 00:00:00");}//编辑protected void tabgv_RowEditing(object sender, GridViewEditEventArgs e){tabgv.EditIndex = e.NewEditIndex;string strysYear = (Convert.ToInt32(ysYear) - 1).ToString();GvDataBind(gsHkrno, "0002", ysYear, "1900-01-01 00:00:00", strysYear + "-12-25 00:00:00");}//更新protected void tabgv_RowUpdating(object sender, GridViewUpdateEventArgs e){string sqlstr = "update ys_ysitem_list settzqysMoney=@tzqysMoney,tzhysMoney=@tzhysMoney,remar k=@remark where ysId=@ysId";SqlParameter[] para ={new SqlParameter("@tzqysMoney",SqlDbType.VarChar),newSqlParameter("@tzhysMoney",SqlDbType.VarChar),new SqlParameter("@remark",SqlDbType.VarChar), new SqlParameter("@ysId",SqlDbType.VarChar)};para[0].Value = ((TextBox)(tabgv.Rows[e.RowIndex].FindControl("txtt zqysMoney"))).Text.ToString().Trim();para[1].Value = ((TextBox)(tabgv.Rows[e.RowIndex].FindControl("txtt zhysMoney"))).Text.ToString().Trim();para[2].Value = ((TextBox)(tabgv.Rows[e.RowIndex].FindControl("txtr emark"))).Text.ToString().Trim();para[3].Value = tabgv.DataKeys[e.RowIndex].Value.ToString();pms.SqlHelper.ExecuteNonQuery(CommandType.Text, sqlstr, para);tabgv.EditIndex = -1;string strysYear = (Convert.ToInt32(ysYear) - 1).ToString();GvDataBind(gsHkrno, "0002", ysYear, "1900-01-01 00:00:00", strysYear + "-12-25 00:00:00");}盼望本文所述对大家程序设计有所关心。
VBDotNET三层架构数据库增删改查学习心得(原创)

(原创)三层架构数据库增删改查学习心得-WinForm通过一段时间对三层架构的学习,现将我的学习心得体会与大家分享。
本程序所使用的界面为Window应用程序(WinForm)界面,是客户端/服务器(C/S)模式的程序。
界面(UI)对三层架构来说使用WinForm还是WebForm异或移动设备都是一样的,无论换了什么皮肤都能基本使用才是三层架构意义之所在。
本程序在SQL-Server2005+2008下测试通过(附源码)。
一、首先说说三层架构的概念及作用,见下表。
三层架构(3-tier architecture) 通常意义上的三层架构就是将整个业务应用划分为:表现层(UI)、业务逻辑层(BLL)、数据访问层(DAL)。
区分层次的目的即为了“高内聚,低耦合”的思想。
再说说各层及类库之间的联系,见下图:其他的三层架构的优点及缺点本文就不论述了,请查阅相关资料。
二、本程序三层架构具体内容简介1、解决方案概览1、建立一张UserInfo表,源码如下:CREATE TABLE [dbo].[UserInfo]([UserID] [int] NULL,[UserName] [varchar](12) ,[UserPwd] [varchar](16) ,[UserBirth] [datetime] ,[UserQQ] [varchar](14)) ON [PRIMARY]2、建立一个Windows窗体应用程序文件→新建→项目→Visual Basic→Windows→Windows窗体应用程序。
这里是中文版2008,不同版本上述内容有些不同翻译。
3、建立Entity、DAL、BLL类库在第二步所创建的解决方案下,选择文件→添加→新建项目→Visual Basic→Windows →类库。
本程序是将所有类库建立在了一个解决方案之下,也可以独立分别建立独立的类库方案。
就是调用的时候不太方便。
4、设计UI操作界面如下:四、开始三层架构的代码设计顺序是数据库实体类(Entity)、数据访问层(DAL)、业务逻辑层(BLL)、表现层(UI)。
数据控件DataGridView添加、删除和修改数据库中的内容

数据控件DataGridView添加、删除和修改数据库中的内容作者:天涯来源:中国自学编程网发布日期:1214063638介绍一个数据控件DataGridView,它是 3.5中新增加的的重要控件。
它是一种网格形式的控件,能以表格的形式显示数据,它的优势是能多行显示数据,在数据库的操作中会经常用到。
(1)打开VS2008,在D:\C#\ch14目录下建立名为DataGridViewTest的Windows应用程序,打开工程,为当前窗体添加控件,如表14-2所示。
表14-2 添加控件列表控件名NameTextDataGridViewdataGridView1ButtonbtnRef更新设置ButtonbtnDelete删除(2)接下来需要设置DadaAdapter和DataSet,方法同上一节一样。
选中DataGridView的DataSource属性。
(3)单击“下一步”按钮,选择“数据连接”图标。
(4)最后一步需要选择数据库对象,本例是要操作StudentInf数据库中的表,所以选择“表”复选框。
(5)设置完毕后,整个程序界面就设置完了。
程序界面设计完毕后,接下来要做的工作就是通过修改dataGridView1中的数据来更新数据库中的内容。
它实现的原理很简单,通过studentInfDataSet把dataGridView1绑定到Class1表,studentInfDataSet处于中间位置,所以在dataGridView1中修改的数据必须要传递到studentInfDataSet后才能改变数据库中的内容。
(1)双击“更新设置”按钮,添加如下代码。
this.sqlDataAdapter1.Update(this.studentInfDataSet);该代码的功能是调用sqlDataAdapter1的Update()方法实现对studentInfDataSet的更新。
(2)按F5键,程序运行以后,对dataGridView1添加一行新的数据,然后单击“更新设置”按钮,完成后关闭程序再打开。
Asp.net中GridView使用详解(引)
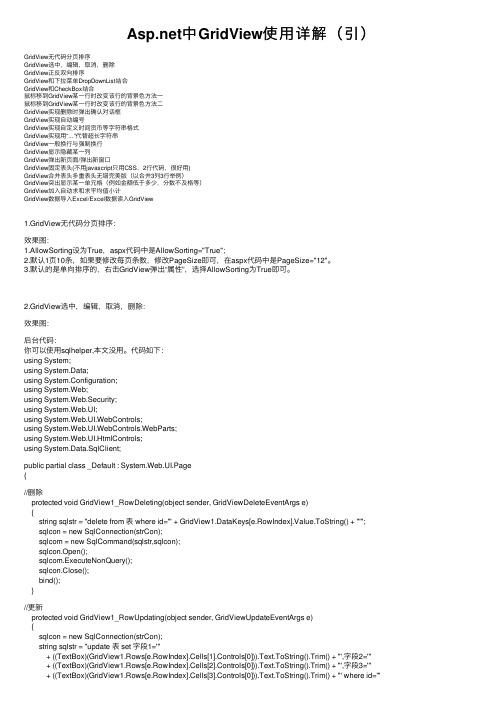
中GridView使⽤详解(引)GridView⽆代码分页排序GridView选中,编辑,取消,删除GridView正反双向排序GridView和下拉菜单DropDownList结合GridView和CheckBox结合⿏标移到GridView某⼀⾏时改变该⾏的背景⾊⽅法⼀⿏标移到GridView某⼀⾏时改变该⾏的背景⾊⽅法⼆GridView实现删除时弹出确认对话框GridView实现⾃动编号GridView实现⾃定义时间货币等字符串格式GridView实现⽤“...”代替超长字符串GridView⼀般换⾏与强制换⾏GridView显⽰隐藏某⼀列GridView弹出新页⾯/弹出新窗⼝GridView固定表头(不⽤javascript只⽤CSS,2⾏代码,很好⽤)GridView合并表头多重表头⽆错完美版(以合并3列3⾏举例)GridView突出显⽰某⼀单元格(例如⾦额低于多少,分数不及格等)GridView加⼊⾃动求和求平均值⼩计GridView数据导⼊Excel/Excel数据读⼊GridView1.GridView⽆代码分页排序:效果图:1.AllowSorting设为True,aspx代码中是AllowSorting="True";2.默认1页10条,如果要修改每页条数,修改PageSize即可,在aspx代码中是PageSize="12"。
3.默认的是单向排序的,右击GridView弹出“属性”,选择AllowSorting为True即可。
2.GridView选中,编辑,取消,删除:效果图:后台代码:你可以使⽤sqlhelper,本⽂没⽤。
代码如下:using System;using System.Data;using System.Configuration;using System.Web;using System.Web.Security;using System.Web.UI;using System.Web.UI.WebControls;using System.Web.UI.WebControls.WebParts;using System.Web.UI.HtmlControls;using System.Data.SqlClient;public partial class _Default : System.Web.UI.Page{//删除protected void GridView1_RowDeleting(object sender, GridViewDeleteEventArgs e){string sqlstr = "delete from 表 where id='" + GridView1.DataKeys[e.RowIndex].Value.ToString() + "'";sqlcon = new SqlConnection(strCon);sqlcom = new SqlCommand(sqlstr,sqlcon);sqlcon.Open();sqlcom.ExecuteNonQuery();sqlcon.Close();bind();}//更新protected void GridView1_RowUpdating(object sender, GridViewUpdateEventArgs e){sqlcon = new SqlConnection(strCon);string sqlstr = "update 表 set 字段1='"+ ((TextBox)(GridView1.Rows[e.RowIndex].Cells[1].Controls[0])).Text.ToString().Trim() + "',字段2='"+ ((TextBox)(GridView1.Rows[e.RowIndex].Cells[2].Controls[0])).Text.ToString().Trim() + "',字段3='"+ ((TextBox)(GridView1.Rows[e.RowIndex].Cells[3].Controls[0])).Text.ToString().Trim() + "' where id='"+ GridView1.DataKeys[e.RowIndex].Value.ToString() + "'";sqlcom=new SqlCommand(sqlstr,sqlcon);sqlcon.Open();sqlcom.ExecuteNonQuery();sqlcon.Close();GridView1.EditIndex = -1;bind();}//取消protected void GridView1_RowCancelingEdit(object sender, GridViewCancelEditEventArgs e){GridView1.EditIndex = -1;bind();}//绑定public void bind(){string sqlstr = "select * from 表";sqlcon = new SqlConnection(strCon);SqlDataAdapter myda = new SqlDataAdapter(sqlstr, sqlcon);DataSet myds = new DataSet();sqlcon.Open();myda.Fill(myds, "表");GridView1.DataSource = myds;GridView1.DataKeyNames = new string[] { "id" };//主键GridView1.DataBind();sqlcon.Close();}}前台主要代码:... ...<asp:GridView ID="GridView1" runat="server" AutoGenerateColumns="False" CellPadding="4"ForeColor="#333333" GridLines="None" OnRowDeleting="GridView1_RowDeleting" OnRowEditing="GridView1_RowEditing"OnRowUpdating="GridView1_RowUpdating" OnRowCancelingEdit="GridView1_RowCancelingEdit"> <FooterStyle BackColor="#990000" Font-Bold="True" ForeColor="White" /><Columns><asp:BoundField DataField="⾝份证号码" HeaderText="⽤户ID" ReadOnly="True" /><asp:BoundField DataField="姓名" HeaderText="⽤户姓名" /><asp:BoundField DataField="员⼯性别" HeaderText="性别" /><asp:BoundField DataField="家庭住址" HeaderText="家庭住址" /><asp:CommandField HeaderText="选择" ShowSelectButton="True" /><asp:CommandField HeaderText="编辑" ShowEditButton="True" /><asp:CommandField HeaderText="删除" ShowDeleteButton="True" /></Columns><RowStyle ForeColor="#000066" /><SelectedRowStyle BackColor="#669999" Font-Bold="True" ForeColor="White" /><PagerStyle BackColor="White" ForeColor="#000066" HorizontalAlign="Left" /><HeaderStyle BackColor="#006699" Font-Bold="True" ForeColor="White" /></asp:GridView>3.GridView正反双向排序:效果图:点姓名各2次的排序,点其他也⼀样可以。
c#gridview控件中添、删、改、查数据
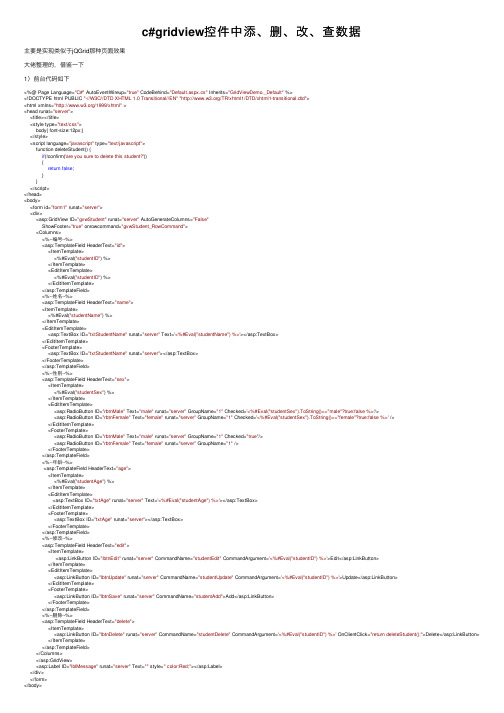
c#gridview控件中添、删、改、查数据主要是实现类似于jQGrid那种页⾯效果⼤佬整理的,借鉴⼀下1)前台代码如下<%@ Page Language="C#" AutoEventWireup="true" CodeBehind="Default.aspx.cs" Inherits="GridViewDemo._Default" %><!DOCTYPE html PUBLIC "-//W3C//DTD XHTML 1.0 Transitional//EN""/TR/xhtml1/DTD/xhtml1-transitional.dtd"><html xmlns="/1999/xhtml" ><head runat="server"><title></title><style type="text/css">body{ font-size:12px;}</style><script language="javascript" type="text/javascript">function deleteStudent() {if(!confirm('are you sure to delete this student?')){return false;}}</script></head><body><form id="form1" runat="server"><div><asp:GridView ID="gvwStudent" runat="server" AutoGenerateColumns="False"ShowFooter="true" onrowcommand="gvwStudent_RowCommand"><Columns><%--编号--%><asp:TemplateField HeaderText="id"><ItemTemplate><%#Eval("studentID") %></ItemTemplate><EditItemTemplate><%#Eval("studentID") %></EditItemTemplate></asp:TemplateField><%--姓名--%><asp:TemplateField HeaderText="name"><ItemTemplate><%#Eval("studentName") %></ItemTemplate><EditItemTemplate><asp:TextBox ID="txtStudentName" runat="server" Text='<%#Eval("studentName") %>'></asp:TextBox></EditItemTemplate><FooterTemplate><asp:TextBox ID="txtStudentName" runat="server"></asp:TextBox></FooterTemplate></asp:TemplateField><%--性别--%><asp:TemplateField HeaderText="sex"><ItemTemplate><%#Eval("studentSex") %></ItemTemplate><EditItemTemplate><asp:RadioButton ID="rbtnMale" Text="male" runat="server" GroupName="1" Checked='<%#Eval("studentSex").ToString()=="male"?true:false %>'/><asp:RadioButton ID="rbtnFemale" Text="female" runat="server" GroupName="1" Checked='<%#Eval("studentSex").ToString()=="female"?true:false %>' /></EditItemTemplate><FooterTemplate><asp:RadioButton ID="rbtnMale" Text="male" runat="server" GroupName="1" Checked="true"/><asp:RadioButton ID="rbtnFemale" Text="female" runat="server" GroupName="1" /></FooterTemplate></asp:TemplateField><%--年龄--%><asp:TemplateField HeaderText="age"><ItemTemplate><%#Eval("studentAge") %></ItemTemplate><EditItemTemplate><asp:TextBox ID="txtAge" runat="server" Text='<%#Eval("studentAge") %>'></asp:TextBox></EditItemTemplate><FooterTemplate><asp:TextBox ID="txtAge" runat="server"></asp:TextBox></FooterTemplate></asp:TemplateField><%--修改--%><asp:TemplateField HeaderText="edit"><ItemTemplate><asp:LinkButton ID="lbtnEdit" runat="server" CommandName="studentEdit" CommandArgument='<%#Eval("studentID") %>'>Edit</asp:LinkButton></ItemTemplate><EditItemTemplate><asp:LinkButton ID="lbtnUpdate" runat="server" CommandName="studentUpdate" CommandArgument='<%#Eval("studentID") %>'>Update</asp:LinkButton></EditItemTemplate><FooterTemplate><asp:LinkButton ID="lbtnSave" runat="server" CommandName="studentAdd">Add</asp:LinkButton></FooterTemplate></asp:TemplateField><%--删除--%><asp:TemplateField HeaderText="delete"><ItemTemplate><asp:LinkButton ID="lbtnDelete" runat="server" CommandName="studentDelete" CommandArgument='<%#Eval("studentID") %>' OnClientClick="return deleteStudent();">Delete</asp:LinkButton> </ItemTemplate></asp:TemplateField></Columns></asp:GridView><asp:Label ID="lblMessage" runat="server" Text="" style=" color:Red;"></asp:Label></div></form></body></html>2)后台代码如下using System;using System.Collections.Generic;using System.Linq;using System.Web;using System.Web.UI;using System.Web.UI.WebControls;using System.Data.Linq;using System.Data;namespace WebApplication7{public partial class _Default : System.Web.UI.Page{string nodata = "no data!";StudentClassesDataContext scdc = new StudentClassesDataContext(@"server=.\sqlexpress;database=School;uid=sa;pwd=1");protected void Page_Load(object sender, EventArgs e){if (!IsPostBack){BindStudent();}else//防⽌PostBack时页⾯显⽰变化{if (gvwStudent.Rows.Count == 1 && gvwStudent.Rows[0].Cells[0].Text == nodata){int columnCount = gvwStudent.Columns.Count;gvwStudent.Rows[0].Cells.Clear();gvwStudent.Rows[0].Cells.Add(new TableCell());gvwStudent.Rows[0].Cells[0].ColumnSpan = columnCount;gvwStudent.Rows[0].Cells[0].Text = nodata;gvwStudent.Rows[0].Cells[0].Style.Add("text-align", "center");}}}///<summary>/// bind student///</summary>private void BindStudent(){Table<Student> students = scdc.GetTable<Student>();//gvwStudent.DataSource = from student in students where student.studentSex == "male" select student;if (students.Count() > 0){gvwStudent.DataSource = students;gvwStudent.DataBind();}else//增加空⾏来显⽰GridView的结构{DataTable dtStudent = new DataTable();dtStudent.Columns.Add(new DataColumn("studentID"));dtStudent.Columns.Add(new DataColumn("studentName"));dtStudent.Columns.Add(new DataColumn("studentSex"));dtStudent.Columns.Add(new DataColumn("studentAge"));if (dtStudent.Rows.Count == 0){dtStudent.Rows.Add(dtStudent.NewRow());}gvwStudent.DataSource = dtStudent;gvwStudent.DataBind();int columnCount = gvwStudent.Columns.Count;gvwStudent.Rows[0].Cells.Clear();gvwStudent.Rows[0].Cells.Add(new TableCell());gvwStudent.Rows[0].Cells[0].ColumnSpan = columnCount;gvwStudent.Rows[0].Cells[0].Text = nodata;gvwStudent.Rows[0].Cells[0].Style.Add("text-align", "center");}}protected void gvwStudent_RowCommand(object sender, GridViewCommandEventArgs e){switch (mandName){case"studentAdd"://添加{//获取选中⾏GridViewRow gridViewRow = (GridViewRow)((LinkButton)mandSource).NamingContainer;//姓名TextBox txtStudentName = (TextBox)gridViewRow.FindControl("txtStudentName");string studentName = txtStudentName.Text.Trim();if (studentName == "") { lblMessage.Text = "please input student name!"; return; }//性别RadioButton rbtnMale = (RadioButton)gridViewRow.FindControl("rbtnMale");string studentSex = rbtnMale.Checked ? rbtnMale.Text : ((RadioButton)gridViewRow.FindControl("rbtnFemale")).Text;//年龄TextBox txtAge = (TextBox)gridViewRow.FindControl("txtAge");string age = txtAge.Text.Trim();int studentAge = 0;if (!Int32.TryParse(age, out studentAge)) { lblMessage.Text = "please input currect student age!"; return; }Student item = new Student();item.studentName = studentName;item.studentSex = studentSex;item.studentAge = studentAge;if (AddStudent(item)){lblMessage.Text = "add student success!";BindStudent();}else{lblMessage.Text = "add student failure!";}}break;case"studentDelete"://删除{int studentID = 0;if (!Int32.TryParse(mandArgument.ToString(), out studentID)) { lblMessage.Text = "student's id is error"; }if (DeleteStudent(studentID)){lblMessage.Text = "delete student success!";BindStudent();}else{lblMessage.Text = "delete student failure!";}}break;case"studentEdit"://修改{GridViewRow gridViewRow = (GridViewRow)((LinkButton)mandSource).NamingContainer;int index = gridViewRow.RowIndex;gvwStudent.EditIndex = index;BindStudent();break;}case"studentUpdate"://更新{int studentID = 0;if (!Int32.TryParse(mandArgument.ToString(), out studentID)) { lblMessage.Text = "student's id is error"; }Student item = GetStudent(studentID);//获取选中⾏GridViewRow gridViewRow = (GridViewRow)((LinkButton)mandSource).NamingContainer;//姓名TextBox txtStudentName = (TextBox)gridViewRow.FindControl("txtStudentName");string studentName = txtStudentName.Text.Trim();if (studentName == "") { lblMessage.Text = "please input student name!"; return; }//性别RadioButton rbtnMale = (RadioButton)gridViewRow.FindControl("rbtnMale");string studentSex = rbtnMale.Checked ? rbtnMale.Text : ((RadioButton)gridViewRow.FindControl("rbtnFemale")).Text;//年龄TextBox txtAge = (TextBox)gridViewRow.FindControl("txtAge");string age = txtAge.Text.Trim();int studentAge = 0;if (!Int32.TryParse(age, out studentAge)) { lblMessage.Text = "please input currect student age!"; return; }item.studentName = studentName;item.studentSex = studentSex;item.studentAge = studentAge;if (UpdateStudent(item)){lblMessage.Text = "update student success!";gvwStudent.EditIndex = -1;BindStudent();}else{lblMessage.Text = "update student failure!";}}break;default:break;}}///<summary>///更新///</summary>///<param name="item"></param>///<returns></returns>private bool UpdateStudent(Student item){bool flag = false;try{scdc.SubmitChanges();flag = true;}catch (Exception ex){flag = false;}return flag;}///<summary>///获取学⽣///</summary>///<param name="studentID"></param>///<returns></returns>private Student GetStudent(int studentID){Student item = new Student();item = scdc.Student.SingleOrDefault(s => s.studentID == studentID);return item;}///<summary>///删除///</summary>///<param name="studentID"></param>///<returns></returns>private bool DeleteStudent(int studentID){bool flag = false;try{Student item = scdc.Student.SingleOrDefault(s => s.studentID == studentID);scdc.Student.DeleteOnSubmit(item);scdc.SubmitChanges();flag = true;}catch (Exception ex){flag = false;}return flag;}///<summary>///添加///</summary>///<param name="item"></param>///<returns></returns>private bool AddStudent(Student item){bool flag = false;try{scdc.Student.InsertOnSubmit(item); scdc.SubmitChanges();flag = true;}catch (Exception ex){flag = false;}return flag;}}}。
使用三层框架搭建一个CRUD(增删改查)操作的程序使用UML分析学生成绩管理系统

编号《.NET架构与程序设计》课程设计题目1: _使用三层框架搭建一个CRUD(增删改查)操作的程序题目2:使用UML分析学生成绩管理系统二级学院计算机科学与工程专业软件工程班级软件工程6班学生姓名 xxx 学号 36542指导教师 2222评阅教师 2222时间 2017年1月一、课程设计概述:本次数据结构课程设计共完成三个题:1使用三层框架搭建一个CRUD(增删改查)操作的程序、2使用UML分析学生成绩管理系统。
使用语言:C#编译环境:VS2013二、课程设计题目使用三层框架搭建一个CRUD(增删改查)操作的程序[实验目标]熟悉三层框架的创建和每层相互的引用关系。
熟悉技术,实现对表的CRUD。
熟悉GrifView的使用。
[实验内容]练习三层框架编程,实现对宠物表的增加删除查询和修改,实现对数据表格的分页。
三层框架是表示层、业务逻辑层、数据访问层。
[依赖关系][运行结果及分析]程序运行界面插入页面编辑状态编辑成功[存储结构]Category表Product表[三层架构代码]Modelpublic class PetProduct{private string productId;private string name;private string descn;private string image;private PetCategory petCategory;public PetProduct(string productId,string name,string descn,string image,PetCategory petCategory){this.productId = productId; = name;this.descn = descn;this.image = image;this.petCategory = petCategory;}public string ProductId{get { return productId; }set { productId = value; }}public string Name{get { return name; }set { name = value; }}public string Descn{get { return descn; }set { descn = value; }}public string Image{get { return image; }set { image = value; }}public PetCategory PetCategory{get { return petCategory; }set { petCategory = value; }}BLLpublic class PetProductService{public List<PetModel.PetProduct> getData(){return new PetCategroyDAO().getData();}public static DataTable selectAllfromproduct_BLL(){return PetCategroyDAO.selectAllfromProduct_DAL(); }public static int deleteProductById(String id){return PetProductDAO.DeleteProductByProductID(id); }public static int update(PetProduct pro){return PetProductDAO.update(pro);}public static int insert(PetProduct pro){return PetProductDAO.insert(pro);}DALpublic class PetProductDAO{public static DataTable selectAllfromProduct_DAL(){return DBHelper.getData("selectAllfrompruduct");}public static int DeleteProductByProductID(string id){SqlParameter[] values = { new SqlParameter("@pruductId", 1) };values[0].Value = id;return DBHelper.ExecuteCommand("DeleteProductByPruductID", values); }public static int update(PetProduct pro){SqlParameter[] values = {new SqlParameter("@ProductById","1"), new SqlParameter("@Name","1"),new SqlParameter("@Descn","1")};values[0].Value = pro.ProductId;values[1].Value = ;values[2].Value = pro.Descn;return DBHelper.ExecuteCommand("UpdateProductByID", values);}public static int insert(PetProduct pro){SqlParameter[] values = {new SqlParameter("@ProductId","1"),new SqlParameter("@CategoryId","1"),new SqlParameter("@Name","1"),new SqlParameter("@Descn","1"),new SqlParameter("@Image","1")};values[0].Value = pro.ProductId;values[1].Value = pro.ProductId;values[2].Value = ;values[3].Value = pro.Descn;values[4].Value = @"/IMG/bird.jpg";return DBHelper.ExecuteCommand("InsertProduct", values); }}题目二使用UML分析学生成绩管理系统[问题描述][需求分析]1.编制用例图2.编制业务模型类图3.为每个用例编制时序图[概要设计]功能功能:此学生成绩管理系统基本能够实现学生成绩的查询的功能本系统对功能的要求,如下:1. 输入一个同学的姓名和学号,系统能够输出学生所在的学院、班级、成绩等学生信息2.对于已经录入学生成绩管理系统的学生信息可以进行修改,例如:删除、添加。
- 1、下载文档前请自行甄别文档内容的完整性,平台不提供额外的编辑、内容补充、找答案等附加服务。
- 2、"仅部分预览"的文档,不可在线预览部分如存在完整性等问题,可反馈申请退款(可完整预览的文档不适用该条件!)。
- 3、如文档侵犯您的权益,请联系客服反馈,我们会尽快为您处理(人工客服工作时间:9:00-18:30)。
.NET三层架构与三层架构下GridView控件增删改操作详解(一)所谓三层架构(3-tier application)就是将整个业务应用划分为:表现层(UI)、业务逻辑层(BLL)、数据访问层(DAL)。
区分层次的目的即为了“高内聚、低耦合”的思想。
1、表现层(UI):主要是指与用户交互的界面,用于显示数据和接受用户输入的数据,将用户输入的数据传递给业务逻辑层,一般不包含任何实际的业务处理,当业务逻辑层的数据发生变化时,表示层就会显示出更新的结果。
表示层提供应用程序的用户界面,通常为Windows 应用程序或Web应用程序。
2、业务逻辑层(BLL):是表示层和数据访问层之间的桥梁,它代表应用程序的核心功能,负责处理数据层的数据,实现业务逻辑。
业务逻辑层通常为类库。
3、数据访问层(DAL):主要实现对数据的保存和读取操作,将存储在数据库中的数据提交给业务层,同时将业务层处理的数据保存到数据库中。
数据访问层可以访问关系数据库、文本文件或者XML文档,通常为类库。
三层架构对应的图如下图所示:为了更好地让初学者轻松入门,这里仍然采用趣味性的方式聊一些常用技术点,致力于.NET 新手们的快速提高!知识都是普通的,关键是学习的思路。
技术源于生活,技术原来可以这样学。
抛砖引玉而已。
层次结构在现实社会里随处可见。
记得有个笑话讲有个村长得意地向他老婆吹牛:“全中国只有四个人比我官大,乡长、县长、省长和国务院总理”。
这个笑话也体现了真实社会中分层的现象。
社会人群会分层,公司人员结构也会分层,楼房是分层的,甚至做包子的笼屉都是分层的。
虽然分层的目的各有不同,但都是为解决某一问题而产生的。
所以,分层架构其实是为了解决某一问题而产生的一种解决方案。
1、常用的三层架构设计软件系统最常用的一般会讲到三层架构,其实就是将整个业务应用划分为表示层、业务逻辑层、数据访问层等,有的还要细一些,通过分解业务细节,将不同的功能代码分散开来,更利于系统的设计和开发,同时为可能的变更提供了更小的单元,十分有利于系统的维护和扩展。
常见的三层架构基本包括如下几个部分,如图1所示。
图1 常见的三层架构* 数据访问层DAL:用于实现与数据库的交互和访问,从数据库获取数据或保存数据到数据库的部分。
* 业务逻辑层BLL:业务逻辑层承上启下,用于对上下交互的数据进行逻辑处理,实现业务目标。
* 表示层Web:主要实现和用户的交互,接收用户请求或返回用户请求的数据结果的展现,而具体的数据处理则交给业务逻辑层和数据访问层去处理。
日常开发的很多情况下为了复用一些共同的东西,会把一些各层都用的东西抽象出来。
如我们将数据对象实体和方法分离,以便在多个层中传递,例如称为Model。
一些共性的通用辅助类和工具方法,如数据校验、缓存处理、加解密处理等,为了让各个层之间复用,也单独分离出来,作为独立的模块使用,例如称为Common。
此时,三层架构会演变为如图2所示的情况。
图2 三层架构演变结果*业务实体Model:用于封装实体类数据结构,一般用于映射数据库的数据表或视图,用以描述业务中客观存在的对象。
Model分离出来是为了更好地解耦,为了更好地发挥分层的作用,更好地进行复用和扩展,增强灵活性。
*通用类库Common:通用的辅助工具类。
在第 5.2节中我们讲过可以将对数据库的共性操作抽象封装成数据操作类(例如DbHelperSQL),以便更好地复用和使代码简洁。
数据层底层使用通用数据库操作类来访问数据库,最后完整的三层架构如图3所示。
图3 最后完整的三层架构数据库访问类是对的封装,封装了一些常用的重复的数据库操作。
如微软的企业库SQLHelper.cs,动软的DBUtility/DbHelperSQL等,为DAL提供访问数据库的辅助工具通过以上分析,我们知道如今常用的三层架构是个什么样子,同时,我们也知道了三层架构在使用过程中的一些演化过程。
那么,为什么要这样分层,每层结构到底又起什么作用呢?我们继续往下看。
2、趣味理解:三层架构与养猪看新闻报道今年猪肉价格一路高涨,据说有人养猪都发财致富奔小康了,程序员都说写代码没前途了,还不如去养猪,不过,可别认为养猪没有技术含量,比写代码容易,其实养猪也大有学问。
为了更好地理解三层架构,就拿养猪来做个例子吧。
俗话说:“没吃过猪肉,还没见过猪跑啊!”。
图4是三层架构化的养猪产业流水线趣味对此图。
图4 三层结构与养猪对比图3与图4,我们可以看出:* 数据库好比猪圈,所有的猪有序地按区域或编号,存放在不同的猪栏里。
* DAL好比是屠宰场,把猪从猪圈取出来进行(处理)屠杀,按要求取出相应的部位(字段),或者进行归类整理(统计),形成整箱的猪肉(数据集),传送给食品加工厂(BLL)。
本来这里都是同一伙人既管抓猪,又管杀猪的,后来觉得效率太低了,就让一部分人出来专管抓猪了(DBUtility),根据要求来抓取指定的猪。
* BLL好比食品加工厂,将猪肉深加工成各种可以食用的食品(业务处理)。
* Web好比商场,将食品包装成漂亮的可以销售的产品,展现给顾客(UI表现层)。
* 猪肉好比Model,无论是哪个厂(层),各个环节传递的本质都是猪肉,猪肉贯穿整个* 通用类库Common相当于工人使用的各种工具,为各个厂(层)提供诸如杀猪刀、绳子、剪刀、包装箱、工具车等共用的常用工具(类)。
其实,每个部门本来是可以自己制作自己的工具的,但是那样会使效率比较低,而且也不专业,并且很多工作都会是重复的。
因此,就专门有人开了这样的工厂来制作这些工具,提供给各个工厂,有了这样的分工,工厂就可以专心做自己的事情了。
当然,这里只是形象的比喻,目的是为了让大家更好地理解,实际的情况在细节上会有所不同。
这个例子也只是说明了从猪圈到商场的单向过程,而实际三层开发中的数据交互是双向的,可取可存。
不过,据说有一种机器,把猪从这头赶进去,另一头就噗噗噜噜地出火腿肠了。
如果火腿肠卖不了了,从那头再放进去,这头猪又原原本本出来了,科幻的机器吧,没想到也可以和三层结构联系上。
以上只是笑谈,不过也使三层架构的基本概念更容易理解了。
上面谈了那么多,有人会问,我直接从数据库取出内容直接操作不可以吗?为什么要这么麻烦地用三层架构呢?三层架构到底有什么好处呢?不分层,当然可以,就好比整个过程不分屠宰场、加工场之类的,都在同一个场所(工厂)完成所有的活(屠杀、加工、销售)。
但为什么要加工厂和商场呢?因为当规模比较大的时候,管理起来就会变得非常复杂,这样的养殖方式已经无法满足规模化的需要了。
并且,从社会的发展来看,社会分工是人类进步的表现。
社会分工的优势就是让适合的人做自己擅长的事情,使平均社会劳动时间大大缩短,生产效率显著提高。
能够提供优质高效劳动产品的人才能在市场竞争中获得高利润和高价值。
人尽其才,物尽其用最深刻的含义就是由社会分工得出的。
软件开发也一样,做小项目的时候,分不分层确实看不出什么差别,并且显得更麻烦啰嗦了。
但当项目变大和变复杂时,分层就显示出它的优势来了。
所以分不分层要根据项目的实际情况而定,不能一概而论。
NET三层架构与三层架构下GridView控件增删改操作详解(二)(由于代码过多文章发表不了,所以很多代码用截图表示)1 新建一个数据库test,新建一个表Users,表中有如下字段(ID,username,password)。
其中ID为表示字段。
结构如下图:2 新建三个类库DiaryBLL(业务逻辑层),DiaryDAL(数据访问层),DiaryModel(业务实体层),将上述三个类库放至解决方案DiaryPro中,然后在新建一个网站DiaryWeb。
然后右键单击网站,设为启动项目,结构图如下:3 添加类库的引用关系DiaryBLL添加DiaryDAL和DiaryModel,如下图所示:DiaryDAL添加DiaryModel,如下图所示:表示层Web添加上述三个,如下图所示:4 类库中类的编写1)DiaryModel(业务实体层),新建一个User类代码如下:该类可以获得User类的各个字段。
2)DiaryDAL(数据访问层)由于本层要用到数据库的相关操作,所以这里用到了微软封装的DBHelper.cs类。
DBHelper类访问了Web网站的配置文件,获得连接字符串,DiaryDAL要添加引用System.configuration。
Web网站的Web.config文件相关代码如下:(将DBHelper.cs类纺织DiaryDAL目录下,要注意的是DBHelper类下的命名空间要改为DiaryDAL)点击查看DBHelper类新建一个UserService.cs类,实现增删改查等相关操作,具体代码如下所示:3)DiaryBLL(业务逻辑层)新建一个UserManage.cs类,具体代码如下:4 Web网站的设计为了实现三层架构下的增删改操作,我们用到了GridView控件,界面如下如所示:GridView的设计过程如下:拖放一个GridView控件到页面中,然后添加三个BoundField字段,HeaderText属性分别为用户ID、用户名、密码,绑定字段分别为ID,username,password,一个CommandField字段,显示编辑按钮和删除按钮,然后再将上述四个字段转化为模板列。
Web网站的设计前台代码如下:<%@ Page Language="C#" AutoEventWireup="true" CodeFile="Default.aspx.cs" Inherits="_Default" %><!DOCTYPE html PUBLIC "-//W3C//DTD XHTML 1.0 Transitional//EN" "/TR/xhtml1/DTD/xhtml1-tran<html xmlns="/1999/xhtml" ><head runat="server"><title>无标题页</title></head><body><form id="form1" runat="server"><div>用户列表:<br /><asp:GridView ID="GridView1" runat="server" AutoGenerateColumns="False"BackColor="White" BorderColor="#CCCCCC" BorderStyle="None" BorderWidth="1px"CellPadding="3" PageSize="4" Width="778px" OnRowDeleting="GridView1_RowDeleting" OnRowDataBound="GridVie OnRowEditing="GridView1_RowEditing"OnRowCancelingEdit="GridView1_RowCancelingEdit" OnRowUpdating="GridView1_RowUpdating"><FooterStyle BackColor="White" ForeColor="#000066" /><RowStyle ForeColor="#000066" /><Columns><asp:TemplateField HeaderText="用户ID"><ItemTemplate><asp:Label ID="Label1" runat="server" Text='<%# Bind("UserID") %>'></asp:Label></ItemTemplate></asp:TemplateField><asp:TemplateField HeaderText="用户名"><EditItemTemplate><asp:TextBox ID="TextBox2" runat="server" Text='<%# Bind("UserName") %>'></asp:TextBox> </EditItemTemplate><ItemTemplate><asp:Label ID="Label2" runat="server" Text='<%# Bind("UserName") %>'></asp:Label></ItemTemplate></asp:TemplateField><asp:TemplateField HeaderText="密码"><EditItemTemplate><asp:TextBox ID="TextBox3" runat="server" Text='<%# Bind("Password") %>'></asp:TextBox> </EditItemTemplate><ItemTemplate><asp:Label ID="Label3" runat="server" Text='<%# Bind("Password") %>'></asp:Label></ItemTemplate></asp:TemplateField><asp:TemplateField HeaderText="操作" ShowHeader="False"><EditItemTemplate><asp:LinkButton ID="LinkButton1" runat="server" CausesValidation="True" CommandName="Update"Text="更新"></asp:LinkButton><asp:LinkButton ID="LinkButton2" runat="server" CausesValidation="False" CommandName="Cancel"Text="取消"></asp:LinkButton></EditItemTemplate><ItemTemplate><asp:LinkButton ID="LinkButton1" runat="server" CausesValidation="False" CommandName="Edit"Text="编辑"></asp:LinkButton><asp:LinkButton ID="LinkButton2" runat="server" CausesValidation="False" CommandName="Delete" OnClient 除么?');" Text="删除"></asp:LinkButton></ItemTemplate></asp:TemplateField></Columns><PagerStyle BackColor="White" ForeColor="#000066" HorizontalAlign="Left" /><SelectedRowStyle BackColor="#669999" Font-Bold="True" ForeColor="White" /><HeaderStyle BackColor="#006699" Font-Bold="True" ForeColor="White" /></asp:GridView></div><br /><br /><br />添加用户<br />用户名:<asp:TextBox ID="tb_username" runat="server"></asp:TextBox><br />密码: <asp:TextBox ID="tb_pwd" runat="server"></asp:TextBox><br /><asp:Button ID="Button1" runat="server" Text="添加" OnClick="Button1_Click" /></form></body></html>后台代码如下:using System.Data;using System.Configuration;using System.Web;using System.Web.Security;using System.Web.UI;using System.Web.UI.WebControls;using System.Web.UI.WebControls.WebParts;using System.Web.UI.HtmlControls;using DiaryModel;public partial class _Default : System.Web.UI.Page{protected void Page_Load(object sender, EventArgs e){if (!IsPostBack){Bind();}}protected void Bind(){GridView1.DataSource = erManage.GetAllUsers();GridView1.DataBind();}protected void Button1_Click(object sender, EventArgs e){Users user = new Users();erName = this.tb_username.Text.ToString().Trim();user.Password = this.tb_pwd.Text.ToString().Trim();bool bol=erManage.Add(user);if (bol){Response.Redirect("Default.aspx");}}protected void GridView1_RowDeleting(object sender, GridViewDeleteEventArgs e){int UserID = Convert.ToInt32((GridView1.Rows[e.RowIndex].FindControl("Label1") as Label).Text);bool bol = erManage.Delete(UserID);{Bind();}else{Response.Write("<script>alert('删除失败');location.href=Default.aspx;</script>");}}protected void GridView1_RowDataBound(object sender, GridViewRowEventArgs e){if (e.Row.RowType == DataControlRowType.DataRow){LinkButton lb = e.Row.FindControl("LinkButton2") as LinkButton;if (lb.Text == "删除"){lb.Attributes.Add("onclick", "return confirm('确认要删除么?');");}}}/// <summary>/// 让当前处于修改状态/// </summary>/// <param name="sender"></param>/// <param name="e"></param>protected void GridView1_RowEditing(object sender, GridViewEditEventArgs e){GridView1.EditIndex = e.NewEditIndex;Bind();}/// <summary>/// 让当前行处于绑定状态/// </summary>/// <param name="sender"></param>/// <param name="e"></param>protected void GridView1_RowCancelingEdit(object sender, GridViewCancelEditEventArgs e) {GridView1.EditIndex = -1;Bind();}/// <summary>/// 更新至数据库/// </summary>/// <param name="sender"></param>/// <param name="e"></param>protected void GridView1_RowUpdating(object sender, GridViewUpdateEventArgs e){Users user = new Users();erID = Convert.ToInt32((GridView1.Rows[e.RowIndex].FindControl("Label1") as Label).Text);erName = (GridView1.Rows[e.RowIndex].FindControl("TextBox2") as TextBox).Text.ToString();user.Password = (GridView1.Rows[e.RowIndex].FindControl("TextBox3") as TextBox).Text.ToString();bool bol = erManage.Modify(user);if (bol){Response.Write("<script>alert('修改成功');</script>");GridView1.EditIndex = -1;Bind();}else{Response.Write("<script>alert('修改失败');</script>");}}}。