【035】自建符号Symbol选择对话框
建筑工程钢筋符号及常用符号

目录特殊符号 (2)编辑器 (2)钢筋符号插入说明:EUDC (4)在CAD中输入钢筋符号及许多特殊字符字体 (10)编号序号(三号字) (12)编号序号(小二号宋体字) (14)编号序号(二号宋体字) (16)编号序号(三号字) (18)编号序号(小二号字) (20)编号序号(二号字) (21)特 殊 符 号编辑器打开数学编辑器2或3查:MS Reference Specialty ——数字式符号 查:Wingdings ——图案式符号 ᆼᆼ ⃝ ⃠²³⁴⁵⁶⁶⁷⁸⁹⅓⅔⅕⅖⅗⅘⅙⅚⅛⅜⅝⅞½⅓⅔¼¾⅛⅜⅝⅞⅓⅔⅛⅜⅝⅞⅓⅔⅕⅖⅗⅘⅙⅚⅛⅜⅝⅞⅓⅔⅕⅖⅗⅘⅙⅚⅛⅜⅝⅞⅓⅔⅕⅖⅗⅘⅙⅚⅛⅜⅝⅞查符号⇒字体(F )Batang 或DotumChe ⇒子集(U )CJK 兼容字符:㎠㎢㎟㎣㎤㎡㎥%%%%%%%%‰‰‰‰‰‰‰‰‱‱‱⑴⑵⑶⑷⑸⑹⑺⑻⑼⑽⑾⑿⒀⒁⒂⒃⒄⒅⒆⒇ ⑴⑵⑶⑷⑸⑹⑺⑻⑼⑽⑾⑿⒀⒁⒂×~@ ⒈⒉⒊⒋⒌⒍⒎⒏⒐⒑⒒⒓⒔⒕⒖⒗⒘⒙⒚⒛AQ1.2.1①②③④⑤⑥⑦⑧⑨⑩⑪⑫⑬⑭⑮⑯⑰⑱⑲⑳ⒶⒷⒸⒹⒺⒻⒼⒽⒾⒿⓀⓁⓂⓃⓄⓅⓆⓇⓈⓉⓊⓋⓌⓍⓎⓏⓐⓑⓒⓓⓔⓕⓖⓗⓘⓙⓚⓛⓜⓝⓞⓟⓠⓡⓢⓣⓤⓥⓦⓧⓨⓩ⓪ⓐⓑⓒⓓⓔⓕⓖⓗⓘⓙⓚⓛⓜⓝⓞⓟⓠⓡⓢⓣⓤⓥⓦⓧⓨⓩ⒜⒝⒞⒟⒠⒡⒢⒣⒤⒥⒦⒧⒨⒩⒪⒫⒬⒭⒮⒯⒰⒱⒲⒳⒴⒵ABCDEFGHIJKLMNOPQRSTUVWXYZabcdefghijklmnopqrstuvwxyz℃℅℉∘¥\$$$$$фф«»ΦΦΦ∑∑∑∑∑Σ∑∑∑钢筋符号插入说明:EUDC1、把EUDC这个字体文件直接复制粘贴到c:/windows/fonts/目录下;2、打开word或excel,菜单栏—>插入—>符号—>字体—>下拉选择EUDC;3、第一个为一级钢筋符号、第二个为二级钢筋符号、第三个为三级钢筋符号,如下所示:在进行AutoCAD软件的实际绘图中,我们经常需要输入一些特殊字符,如表示直径的Ф、表示地平面的±等,这些特殊字符无法直接从键盘上输入。
第二十二节代码-自定义符号选择框制作二

自定义符号选择框制作流程二:此方法的优点是可以定制,缺点是代码比较复杂。
SymbolSelectorFrm.cs 文件在工程文件中的位置:SymbolSelectorFrm.cs 的窗体制作:预览组:C#工具箱groupBox 控件name :groupBox1,text :预览 预览元素: C#工具箱PictureBox 控件Name :ptbPreview设置组:C#工具箱groupBox 控件name :grbMarker ,text :设置设置元素标签:五个标签分别是dotnetbar LableX 控件:Name :lblColor ,text :颜色 Name :lblSize ,text :大小Name :lblWidth ,text :宽度 Name :lblAngle ,text :角度Name :lblOutlineColor ,text :外观颜色两个按钮分别是dotnetbar buttonX 控件:Name :btnColor ,text :无Name :btnOutlineColor ,text :无三个数字列表分别是C# NumbericUpDown 控件:Name :nudSizeName :nudWidth Name :nudAngle在工具箱中引入AxSymbologyControl 组件,用鼠标在From 中拖出控件形状,命名Name :axSymbologyControl ;Un Re gi st er ed更多符号按钮 dotnetbar 工具箱 buttonX 控件Name :btnMoreSymbols ,text :更多符号 确定按钮 dotnetbar 工具箱 buttonX 控件Name :btnOK ,text :确定 取消按钮 dotnetbar 工具箱 buttonX 控件Name :btnCancel ,text :取消SymbolSelectorFrm.cs 窗体代码参考范例如下:using System;using System.Collections.Generic; using ponentModel; using System.Data; using System.Drawing; using System.Text;using System.Windows.Forms; using ESRI.ArcGIS.Carto; using ESRI.ArcGIS.Display; using ESRI.ArcGIS.esriSystem; using ESRI.ArcGIS.SystemUI; using ESRI.ArcGIS.Controls;namespace 实训三.调色板 { public partial class SymbolSelectorFrm : DevComponents.DotNetBar.Office2007Form {private IStyleGalleryItem pStyleGalleryItem; private ILegendClass pLegendClass; private ILayer pLayer; public ISymbol pSymbol; public Image pSymbolImage;/// <summary>/// 构造函数,初始化全局变量 /// </summary>/// <param name="tempLegendClass">TOC图例</param> /// <param name="tempLayer">图层</param>public SymbolSelectorFrm(ILegendClass tempLegendClass, ILayer tempLayer) {InitializeComponent();this .pLegendClass = tempLegendClass; this .pLayer = tempLayer; }/// <summary>/// 窗体Load,设好哪些空间可见,哪些不可见,设好按钮的颜色Un Re gi st er ed/// </summary>/// <param name="sender"></param> /// <param name="e"></param>private void SymbolSelectorFrm_Load(object sender, EventArgs e) {//Get the ArcGIS install locationstring sInstall = ReadRegistry("SOFTWARE\\ESRI\\CoreRuntime");//Load the ESRI.ServerStyle file into the SymbologyControlthis .axSymbologyControl.LoadStyleFile(sInstall + "\\Styles\\ESRI.ServerStyle");//确定图层的类型(点线面),设置好SymbologyControl的StyleClass,设置好各控件的可见性(visible)IGeoFeatureLayer pGeoFeatureLayer = (IGeoFeatureLayer )pLayer; switch (((IFeatureLayer )pLayer).FeatureClass.ShapeType) { case ESRI.ArcGIS.Geometry.esriGeometryType .esriGeometryPoint:this .SetFeatureClassStyle(esriSymbologyStyleClass .esriStyleClassMarkerSymbols);this .lblAngle.Visible = true ; this .nudAngle.Visible = true ; this .lblSize.Visible = true ; this .nudSize.Visible = true ;this .lblWidth.Visible = false ;this .nudWidth.Visible = false ; this .lblOutlineColor.Visible = false ; this .btnOutlineColor.Visible = false ; break ; case ESRI.ArcGIS.Geometry.esriGeometryType .esriGeometryPolyline:this .SetFeatureClassStyle(esriSymbologyStyleClass .esriStyleClassLineSymbols); this .lblAngle.Visible = false ; this .nudAngle.Visible = false ; this .lblSize.Visible = false ; this .nudSize.Visible = false ; this .lblWidth.Visible = true ; this .nudWidth.Visible = true ;this .lblOutlineColor.Visible = false ; this .btnOutlineColor.Visible = false ; break ;case ESRI.ArcGIS.Geometry.esriGeometryType .esriGeometryPolygon:this .SetFeatureClassStyle(esriSymbologyStyleClass .esriStyleClassFillSymbols); this .lblAngle.Visible = false ;Un Re gi st er edthis .nudAngle.Visible = false ; this .lblSize.Visible = false ; this .nudSize.Visible = false ; this .lblWidth.Visible = true ; this .nudWidth.Visible = true ; this .lblOutlineColor.Visible = true ; this .btnOutlineColor.Visible = true ; break ;case ESRI.ArcGIS.Geometry.esriGeometryType .esriGeometryMultiPatch:this .SetFeatureClassStyle(esriSymbologyStyleClass .esriStyleClassFillSymbols); this .lblAngle.Visible = false ; this .nudAngle.Visible = false ; this .lblSize.Visible = false ; this .nudSize.Visible = false ; this .lblWidth.Visible = true ; this .nudWidth.Visible = true ; this .lblOutlineColor.Visible = true ; this .btnOutlineColor.Visible = true ; break ; default :this .Close(); break ; } }/// <summary>/// 设置好SymbologyControl的StyleClass,如果有图例,把当前的TOC图例的符号添加到当前SymbologyStyleClass中去,并让之处于选中状态 /// </summary>/// <param name="symbologyStyleClass"></param>private void SetFeatureClassStyle(esriSymbologyStyleClass symbologyStyleClass) {this .axSymbologyControl.StyleClass = symbologyStyleClass; ISymbologyStyleClass pSymbologyStyleClass = this .axSymbologyControl.GetStyleClass(symbologyStyleClass); if (this .pLegendClass != null ) {IStyleGalleryItem currentStyleGalleryItem = new ServerStyleGalleryItem (); = "当前符号";currentStyleGalleryItem.Item = pLegendClass.Symbol; pSymbologyStyleClass.AddItem(currentStyleGalleryItem, 0); this .pStyleGalleryItem = currentStyleGalleryItem; }Un Re gi st er edpSymbologyStyleClass.SelectItem(0); }/// <summary>/// 读取注册表中的制定软件的路径 /// </summary>/// <param name="sKey"></param> /// <returns></returns>private string ReadRegistry(string sKey) {//Open the subkey for reading Microsoft.Win32.RegistryKey rk =Microsoft.Win32.Registry .LocalMachine.OpenSubKey(sKey, true ); if (rk == null ) return "";// Get the data from a specified item in the key. return (string )rk.GetValue("InstallDir"); }private void btnCancel_Click(object sender, EventArgs e){this .Close(); }private void axSymbologyControl_OnItemSelected(object sender, ISymbologyControlEvents_OnItemSelectedEvent e) {pStyleGalleryItem = (IStyleGalleryItem )e.styleGalleryItem; Color color; switch (this .axSymbologyControl.StyleClass){case esriSymbologyStyleClass .esriStyleClassMarkerSymbols: color =this .ConvertIRgbColorToColor(((IMarkerSymbol )pStyleGalleryItem.Item).Color as IRgbColor ); break ;case esriSymbologyStyleClass .esriStyleClassLineSymbols: color =this .ConvertIRgbColorToColor(((ILineSymbol )pStyleGalleryItem.Item).Color as IRgbColor ); break ;case esriSymbologyStyleClass .esriStyleClassFillSymbols:color=this .ConvertIRgbColorToColor(((IFillSymbol )pStyleGalleryItem.Item).Color as IRgbColor ); this .btnOutlineColor.BackColor =this .ConvertIRgbColorToColor(((IFillSymbol )pStyleGalleryItem.Item).Outline.Color asUn Re gi st er edIRgbColor );break ; default :color = Color .Black; break ; }this .btnColor.BackColor = color; this .PreviewImage(); }/// <summary>/// 把选中并设置好的符号在picturebox中预览 /// </summary>private void PreviewImage() {stdole.IPictureDisp picture =this .axSymbologyControl.GetStyleClass(this .axSymbologyControl.StyleClass).PreviewItem(pStyle GalleryItem, this .ptbPreview.Width, this .ptbPreview.Height);System.Drawing.Image image = System.Drawing.Image .FromHbitmap(new System.IntPtr (picture.Handle));this .ptbPreview.Image = image; }private void btnOK_Click(object sender, EventArgs e) {//pLegendClass.Symbol = (ISymbol)pStyleGalleryItem.Item; this .pSymbol = (ISymbol )pStyleGalleryItem.Item; this .pSymbolImage = this .ptbPreview.Image; this .Close(); }private void nudSize_ValueChanged(object sender, EventArgs e){((IMarkerSymbol )this .pStyleGalleryItem.Item).Size = (double )this .nudSize.Value; this .PreviewImage(); }private void nudAngle_ValueChanged(object sender, EventArgs e) {((IMarkerSymbol )this .pStyleGalleryItem.Item).Angle = (double )this .nudAngle.Value; this .PreviewImage(); }/// <summary>/// 将ArcGIS Engine中的IRgbColor接口转换至.NET中的Color结构Un Re gi st er ed/// </summary>/// <param name="pRgbColor">IRgbColor </param>/// <returns>.NET中的System.Drawing.Color结构表示ARGB颜色</returns> public Color ConvertIRgbColorToColor(IRgbColor pRgbColor) {return ColorTranslator .FromOle(pRgbColor.RGB); }/// <summary>/// 将.NET中的Color结构转换至于ArcGIS Engine中的IColor接口 /// </summary>/// <param name="color">.NET中的System.Drawing.Color结构表示ARGB颜色</param> /// <returns>IColor </returns>public IColor ConvertColorToIColor(Color color) {IColor pColor = new RgbColorClass ();pColor.RGB = color.B * 65536 + color.G * 256 + color.R; return pColor; }/// <summary> /// 将.NET中的Color结构转换至于ArcGIS Engine中的IRgbColor接口/// </summary>/// <param name="color">.NET中的System.Drawing.Color结构表示ARGB颜色</param> /// <returns>IRgbColor </returns> public IRgbColor ConvertColorToIRgbColor(Color color) {IRgbColor pRgbColor = new RgbColorClass ();pRgbColor.RGB = color.B * 65536 + color.G * 256 + color.R; return pRgbColor; }private void btnColor_Click(object sender, EventArgs e){if (this .colorDialog.ShowDialog() == DialogResult .OK) {this .btnColor.BackColor = this .colorDialog.Color; switch (this .axSymbologyControl.StyleClass) {case esriSymbologyStyleClass .esriStyleClassMarkerSymbols: ((IMarkerSymbol )this .pStyleGalleryItem.Item).Color = this .ConvertColorToIColor(this .colorDialog.Color); break ;case esriSymbologyStyleClass .esriStyleClassLineSymbols: ((ILineSymbol )this .pStyleGalleryItem.Item).Color = this .ConvertColorToIColor(this .colorDialog.Color);Un Re gi st er edbreak ;case esriSymbologyStyleClass .esriStyleClassFillSymbols:((IFillSymbol )this .pStyleGalleryItem.Item).Color=this .ConvertColorToIColor(this .colorDialog.Color);break ; }this .PreviewImage(); } }private void axSymbologyControl_OnDoubleClick(object sender, ISymbologyControlEvents_OnDoubleClickEvent e) {this .btnOK.PerformClick(); }private void axSymbologyControl_OnStyleClassChanged(object sender,ISymbologyControlEvents_OnStyleClassChangedEvent e) { switch ((esriSymbologyStyleClass )(e.symbologyStyleClass)) {case esriSymbologyStyleClass .esriStyleClassMarkerSymbols: this .lblAngle.Visible = true ;this .nudAngle.Visible = true ; this .lblSize.Visible = true ; this .nudSize.Visible = true ; this .lblWidth.Visible = false ; this .nudWidth.Visible = false ; this .lblOutlineColor.Visible = false ; this .btnOutlineColor.Visible = false ;break ;case esriSymbologyStyleClass .esriStyleClassLineSymbols: this .lblAngle.Visible = false ; this .nudAngle.Visible = false ; this .lblSize.Visible = false ; this .nudSize.Visible = false ; this .lblWidth.Visible = true ; this .nudWidth.Visible = true ;this .lblOutlineColor.Visible = false ; this .btnOutlineColor.Visible = false ; break ;case esriSymbologyStyleClass .esriStyleClassFillSymbols: this .lblAngle.Visible = false ; Un Re gi st er edthis .nudAngle.Visible = false ; this .lblSize.Visible = false ; this .nudSize.Visible = false ; this .lblWidth.Visible = true ; this .nudWidth.Visible = true ; this .lblOutlineColor.Visible = true ; this .btnOutlineColor.Visible = true ; break ; } }private void nudWidth_ValueChanged(object sender, EventArgs e) {switch (this .axSymbologyControl.StyleClass) {case esriSymbologyStyleClass .esriStyleClassLineSymbols: ((ILineSymbol )this .pStyleGalleryItem.Item).Width = Convert .ToDouble(this .nudWidth.Value); break ;case esriSymbologyStyleClass .esriStyleClassFillSymbols: ILineSymbol pLineSymbol =((IFillSymbol )this .pStyleGalleryItem.Item).Outline;pLineSymbol.Width = Convert .ToDouble(this .nudWidth.Value); ((IFillSymbol )this .pStyleGalleryItem.Item).Outline = pLineSymbol;break ; } this .PreviewImage();}private void btnOutlineColor_Click(object sender, EventArgs e) {if (this .colorDialog.ShowDialog() == DialogResult .OK) {ILineSymbol pLineSymbol = ((IFillSymbol )this .pStyleGalleryItem.Item).Outline; pLineSymbol.Color = this .ConvertColorToIColor(this .colorDialog.Color); ((IFillSymbol )this .pStyleGalleryItem.Item).Outline = pLineSymbol; this .btnOutlineColor.BackColor = this .colorDialog.Color; this .PreviewImage(); } }bool contextMenuMoreSymbolInitiated = false ;private void btnMoreSymbols_Click(object sender, EventArgs e) {Un Re gi st er edif (this .contextMenuMoreSymbolInitiated == false ) {string sInstall = ReadRegistry("SOFTWARE\\ESRI\\CoreRuntime"); string path = System.IO.Path .Combine(sInstall, "Styles");string [] styleNames = System.IO.Directory .GetFiles(path, "*.ServerStyle"); ToolStripMenuItem [] symbolContextMenuItem = new ToolStripMenuItem [styleNames.Length + 1];for (int i = 0; i < styleNames.Length; i++) {symbolContextMenuItem[i] = new ToolStripMenuItem (); symbolContextMenuItem[i].CheckOnClick = true ; symbolContextMenuItem[i].Text = System.IO.Path .GetFileNameWithoutExtension(styleNames[i]); if (symbolContextMenuItem[i].Text == "ESRI") {symbolContextMenuItem[i].Checked = true ; }symbolContextMenuItem[i].Name = styleNames[i]; symbolContextMenuItem[i].Click += new EventHandler (symbolContextMenuItem_Click); }symbolContextMenuItem[styleNames.Length] = new ToolStripMenuItem ();symbolContextMenuItem[styleNames.Length].Text = "更多符号"; symbolContextMenuItem[styleNames.Length].Click += newEventHandler (symbolContextMenuItemMoreSymbols_Click);this .contextMenuStripMoreSymbol.Items.AddRange(symbolContextMenuItem); this .contextMenuMoreSymbolInitiated = true ; } this .contextMenuStripMoreSymbol.Show(this .btnMoreSymbols.Location);}void symbolContextMenuItemMoreSymbols_Click(object sender, EventArgs e) {if (this .openFileDialog.ShowDialog() == DialogResult .OK) {this .axSymbologyControl.LoadStyleFile(this .openFileDialog.FileName); this .axSymbologyControl.Refresh(); } }private void symbolContextMenuItem_Click(object sender, EventArgs e) {ToolStripMenuItem pToolStripMenuItem = ((ToolStripMenuItem )sender); //Load the style file into the SymbologyControlUn Re gi st er edif (pToolStripMenuItem.Checked == true ){this .axSymbologyControl.LoadStyleFile();this .axSymbologyControl.Refresh();}else{this .axSymbologyControl.RemoveFile();this .axSymbologyControl.Refresh();}}}}MainForm 主窗体中TocCtrl 控件左键点击符号事件调用代码范例如下://第二种方法自定义窗体实现符号选择器 private void TOCCtrl_OnDoubleClick(object sender, ITOCControlEvents_OnDoubleClickEvent e) {esriTOCControlItem itemType = esriTOCControlItem .esriTOCControlItemNone; IBasicMap basicMap = null ;ILayer layer = null ;object unk = null ;object data = null ;this .TOCCtrl.GetSelectedItem(ref itemType, ref basicMap, ref layer, ref unk, ref data);this .TOCCtrl.HitTest(e.x, e.y, ref itemType, ref basicMap, ref layer, ref unk, refdata); if (e.button == 1){switch (itemType) {case esriTOCControlItem .esriTOCControlItemLegendClass:ILegendClass pLegendClass = ((ILegendGroup )unk).get_Class((int )data); newSymbolSelectorFrm = new SymbolSelectorFrm (pLegendClass, layer); if (newSymbolSelectorFrm.ShowDialog() == DialogResult .OK){this .MapCtrl.ActiveView.PartialRefresh(esriViewDrawPhase .esriViewGeography, null , null ); pLegendClass.Symbol = newSymbolSelectorFrm.pSymbol;this .TOCCtrl.Update();}break ;} U n R e g i s t e r e d}}运行结果如下:符号选择结果本章节完。
Symbol制作流程指导

1.New Library, 新建一个库,每个器件对应一个库2.Load ASCII…., 加载严宗立做好的封装库,里面包含了器件的PCB封装。
3.选择器件的封装,对应关系在Excel表格中。
点击封装,右键自动生成Component和Symbol,选择“Auto Create。
”生成后,在Footprints框中选中任意一个封装,点击右键,在弹出菜单中选择“Purge Unused”,将没有用到的封装删除掉。
此时一个Component,以及对应的Symbol,Footprint,以及Footprint对应的Pad Sytle已经全部齐备了。
下一步就是编辑Symbol的管脚对应关系,以及修改Component和Symbol的名称。
4.双击Component,进入子页面。
在子页面中点击“View Pin mapping”,点击后打开Excel5.在Excel中,修改相应的属性CompopnentPin Designator---------指的是管脚的号,比如1,脚,A1脚等等Pin FunctionName----------指的是管脚的名称,比如IO,VCC,GND等GateNumber-----------指的是有几个分模块,里面填写模块号,从1,开始SymbolSide-----------指的是管脚在Symbol中的位置,上下左右SymbolPinGroup------------指pin的组合以及位置关系,从1开始,1排完后排2,如果想隔开,就将Group 号空出来一个。
1到3,中间的2就是空出来的。
修改好该Excel后,点击Excel的保存,不要直接关闭Excel文件,然后打开小窗口,点击Step5,然后再点击Done,就修改好了,如果点击Done没有窗口自动关闭,证明有错,需要修改。
6.关闭子窗口,回到主窗口,修改Component和Symbol的名称,如果前面没有Purge Unused封装,则需要Purge Unused掉没有用到的Footprint。
VBA 中的自定义对话框设计与使用指南
VBA 中的自定义对话框设计与使用指南自定义对话框在VBA编程中经常被用于与用户进行交互,以便获取输入、显示消息或提供选项。
本文将介绍VBA中的自定义对话框的设计和使用指南,以帮助您更好地在VBA编程中使用自定义对话框。
1. 了解VBA中的常见对话框类型VBA中有多种类型的对话框可供选择,例如输入框、提示框、确认框、文件选择框等。
您需要了解每种对话框的特点和使用方法,以便正确选择适合您的需要的对话框类型。
2. 创建自定义对话框在VBA编程中,您可以使用用户窗体(UserForm)来创建自定义对话框。
用户窗体类似于界面设计工具,可以帮助您创建自定义的界面元素,如文本框、标签、按钮等。
通过在用户窗体上添加这些界面元素,您可以实现自定义对话框的功能。
3. 设计自定义对话框界面在设计自定义对话框界面时,您需要注意以下几点:- 界面元素的布局和位置应该合理,以便用户能够直观地理解其功能。
- 文本框、标签等界面元素的命名要具有描述性,方便代码编写和理解。
- 按钮的事件处理过程需要与相应的功能相匹配,确保用户操作的准确性和便捷性。
4. 处理用户输入在自定义对话框中,您经常需要从用户那里获取输入,并对输入进行处理。
VBA提供了各种方法来处理用户输入。
- 获取文本框中的文本:可以使用文本框的Value属性来获取用户输入的文本。
- 获取选择框的选项:可以使用选择框的Value属性来获取用户选择的选项。
- 检查输入的有效性:您可以在代码中对用户输入进行验证,并根据需要显示提示信息或进行警告。
5. 显示消息和提示除了从用户那里获取输入,您可能还需要向用户显示消息和提示。
在自定义对话框中,您可以使用标签或消息框来显示消息和提示。
根据需要,您可以在自定义对话框中添加相关的元素,并在用户执行某些操作时显示消息或提示。
6. 调用和显示自定义对话框在VBA编程中,您可以使用调用对话框的方法来显示自定义对话框。
您可以在代码中使用调用方法,并传递相关的参数,以便显示自定义对话框。
利用Excel和Symbol Wizard快速创建Symbol for dxdesigner

利用Excel和Symbol Wizard快速创建Symbol for dxdesignerhelsinlg54@2007-5-18摘要:本文以AD公司的AD9779(共100个引脚)为例,用图例讲解了利用Microsoft Excel和Mentor公司的dxdesigner中的Symbol Wizard快速创建Symbol的方法和技巧。
该方法充分利用了Excel强大的文本处理功能,来弥补Symbol Wizard 的某些缺点和不便,使得创建Symbol成为一件轻松愉快的事情,准确、快捷,能获得事半功倍的效果,充分提高了工作效率。
1 引言在超大规模集成电路技术飞速发展的今天,成百上千个管脚的芯片在印制板上随处可见。
对于电路原理图设计师来说,如果没有现成的Symbol,手动创建Symbol是一件麻烦和头疼的事情。
为了提高效率,Mentor公司推出了IO Designer,可以自动生成常见的FPGA和CPLD的Symbol和原理图,确实很方便。
但是对于FPGA和CPLD之外的芯片,比如DSP、AD、DA等,就无能为力了,还是要手动创建。
在dxdesigner中,利用Symbol Wizard创建Symbol相对来说比较方便,但是还是要一个一个的输入label和pin number。
经同事指点,发现Symbol Wizard 的Pin Setting界面中的输入表格,可以直接粘贴来自Excel文件中的文本行。
通过进一步钻究,提出了利用Excel和Symbol Wizard快速创建Symbol的方法。
2 Excel篇用Microsoft Excel新建一个空白的xls文件,在第一行的A、B、C、D这四列分别输入lable,pin number,pin type和side,分别表示引脚名称、引脚编号、引脚方向和引脚放在symbol符号的哪一边。
如图1所示。
图1用Acrobat Reader或Foxit Readrer打开AD9779的datasheet,找到AD9779引脚说明的那一页,用“选择文本”工具同理,把剩下的81个引脚的编号和名称分别拷贝到xls文件的第二列和第一列。
Mentor库管理工具Symbol的制作
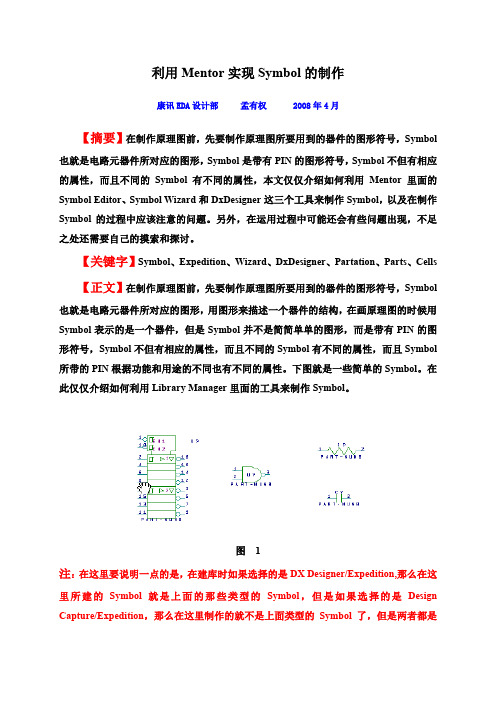
利用Mentor实现Symbol的制作康讯EDA设计部孟有权 2008年4月【摘要】在制作原理图前,先要制作原理图所要用到的器件的图形符号,Symbol 也就是电路元器件所对应的图形,Symbol是带有PIN的图形符号,Symbol不但有相应的属性,而且不同的Symbol有不同的属性,本文仅仅介绍如何利用Mentor里面的Symbol Editor、Symbol Wizard和DxDesigner这三个工具来制作Symbol,以及在制作Symbol的过程中应该注意的问题。
另外,在运用过程中可能还会有些问题出现,不足之处还需要自己的摸索和探讨。
【关键字】Symbol、Expedition、Wizard、DxDesigner、Partation、Parts、Cells 【正文】在制作原理图前,先要制作原理图所要用到的器件的图形符号,Symbol 也就是电路元器件所对应的图形,用图形来描述一个器件的结构,在画原理图的时候用Symbol表示的是一个器件,但是Symbol并不是简简单单的图形,而是带有PIN的图形符号,Symbol不但有相应的属性,而且不同的Symbol有不同的属性,而且Symbol 所带的PIN根据功能和用途的不同也有不同的属性。
下图就是一些简单的Symbol。
在此仅仅介绍如何利用Library Manager里面的工具来制作Symbol。
图 1注:在这里要说明一点的是,在建库时如果选择的是DX Designer/Expedition,那么在这里所建的Symbol就是上面的那些类型的Symbol,但是如果选择的是Design Capture/Expedition,那么在这里制作的就不是上面类型的Symbol了,但是两者都是可以用来制作原理图的,前者就是下面要制作的原理图,而后者目前只是知道能够用来实现电路的仿真、测试。
下面主要介绍在DX Designer/Expedition类型的库下来制作Symbol。
符号编辑器SymbolEditor2.0用户手册(doc 140页)
SymbolEditor新建一个符号库有两种方法:
从文件菜单新建符号库
第一步:选择菜单命令。
选择“文件>选择新建符号库”菜单项,如下图所示:
第二步:给出新建的符号库的名称。
完成第一步操作之后会弹出一对话框(如下图所示),在对话框中我们可以给出符号库的名称和路径。符号库的扩展名为SLB。
一般情况下,将SymbolEditor光盘插入CDROM驱动器后,位于光盘上的安装程序会自动运行。
软盘安装
直接运行软盘根目录下的安装程序。
网络下载安装
先将安装程序的ZIP压缩包从互联网上下载下来。接着,将包含在ZIP文件中的所有文件解压至您本机的任一位置。执行该位置下的安装程序即可。
欢迎您进入北京吉威数源站点下载SymbolEditor或吉威数源公司的其他资源。
通常以楷体字表示注释、提示、或警告。
本章将对SymbolEditor做一个总体的介绍。本章包括以下内容:
“关于SymbolEditor”一节,解释符号库概念,阐明使用符号库编辑器的意义,并且概括了SymbolEditor的基本功能。
“安装SymbolEditor”一节叙述如何将软件安装到您的计算机系统上。
内容简介
《Geoway SymbolEditor 2.0用户手册》由以下内容组成:
入门部分
我们主要对一些基本概念作一个介绍,让广大新用户就SymbolEditor有一个较完整的认识。
使用SymbolEditor 2.0部分
这一部分是软件使用的详细介绍部分。它跨越了SymbolEditor的整个流程,涵盖了制作符号库的各个工序。
“系统运行环境”一节给出了SymbolEditor运行的硬件和软件需求。
(完整版)ArcGIS符号库制作方法
第五步:右键单击该字体属性菜单,在弹出的属性对话框中,点击常规选项,可以添加该字体名称。点击映射选项卡,为字符添加映射值,这个步骤不可少,因为该映射值类似于唯一关键字,如果为空,在AcrGIS Style Manager样式编辑器的font栏,是无法查看与引用该字体符号的。
Font Creator中主要通过制图工具条与字形工具条对符号进行基础编辑和高级编辑。
另外,对于日常生活中约定俗成、大家都比较常见、比较熟悉的符号,可以下载各种图片格式,导入到Font Creator中。使用方法为:点击工具,选择导入图像,将选择的图片导入进来。导入图像对话框中,点击“生成”按钮,即完成了由图片转换成字体的过程。如下图所示,同样可以使用制图工具条与字形工具条对其进行进一步编辑工作。
第三步:创建与编辑字体符号。在建好的字体文件中,双击其中的一个方框,将弹出字符编辑窗口。字体库中符号的来源主要有两种,一种自己手动创建特定的字体,可通过在空白处右键单击->新建轮廓,或者在菜单中选择“插入”->“轮廓”或者是点击工具栏的 来绘制符号,见下图
Font Creator基于已有的sample创建symbol更高效,如下图所示。直接将界面中左边的示例符号拖拽到空白区域即可。在此基础上,可以再进行下一步编辑。
2)EMF:增强型图元文件
“增强型图元文件”是 32 位格式,可以同时包含矢量信息和位图信息。此格式是对“Windows 图元文件格式”的改进,包含了一些扩展功能,例如,下面的功能:内置的缩放比例信息·与文件一起保存的内置说明·调色板和设备独立性方面的。改进EMF 格式是可扩展的格式,这意味着程序员可以修改原始规范以添加功能或满足特定的需要。
- 1、下载文档前请自行甄别文档内容的完整性,平台不提供额外的编辑、内容补充、找答案等附加服务。
- 2、"仅部分预览"的文档,不可在线预览部分如存在完整性等问题,可反馈申请退款(可完整预览的文档不适用该条件!)。
- 3、如文档侵犯您的权益,请联系客服反馈,我们会尽快为您处理(人工客服工作时间:9:00-18:30)。
nudWidth.Value = Convert.ToDecimal(((ILineSymbol)pStyleGalleryItem.Item).Width 赋值线的宽度
{ IRgbColor pColor =
((IMarkerSymbol)pStyleGalleryItem.Item).Color as IRgbColor;
btColor.BackColor = Color.FromArgb(pColor.Red, pColor.Green, pColor.Blue); //赋值颜色
pSymbologyStyleClass.AddItem(pCurrentStyleGalleryItem, 0);
pSymbologyStyleClass.SelectItem(0); //同时 选中 }
5. 选择项的时候触发:
private void axSymbologyControl1_OnItemSelected(object sender, ISymbologyControlEvents_OnItemSelectedEvent e) {
4. 窗体加载事件:
private void SymbologyFrm_Load(object sender, EventArgs e) {
switch(((IFeatureLayer)pLayer).FeatureClass.ShapeType) // 判断图层中要素类的图形类型,不同类型显示的调节值的控件不同
axSymbologyControl1.LoadStyleFile(stylePath); //加 载此文件
axSymbologyControl1.StyleClass = pStyleClass; //将上面获得的 pStyleClass 赋值过去,显示 点、线还是面,由此决定!
IStyleGalleryItem pCurrentStyleGalleryItem = new StyleGalleryItem(); //新建当前符号的实例
} }
6. 将 pStyleGalleryItem 反映到 picture 上的方法:
private void PreviewPicture() {
ISymbologyStyleClass pSymbologyStyle = axSymbologyControl1.GetStyleClass(axSymbologyControl1.StyleCl 因为其有方法 PreviewStyle
lbWidth.Visible = true; lbWidth.Text = "框线宽度"; lbOutlineColor.Visible = true; btColor.Visible = true; btOutlineColor.Visible = true; nudWidth.Visible = true; cbColor.Visible = true; cbOutlineColor.Visible = true; break; default: this.Close(); break; } string strInstall = @"C:\Program Files (x86)\ArcGIS"; //安装目录,10中可以用函数获得 RuntimeManager 可以获取! //ESRI.ArcGIS. 可以获得 Engine 的安装目录 string stylePath = strInstall + @"\Styles\ESRI.ServerStyle"; //获取 ESRI.ServerStyle 文件
【035】自建符号Symbol选择对话框
第一步:建立独立的 Windows 窗体: 命名为:SymbologyFrmLee
1. 运行效果如下所示:
2. 全局参数: esriSymbologyStyleClass pStyleClass; //获取显示的为 点类、线类还是填充类等的,赋值给 symbologyControl 控件,然 后就显示这一类符号 public IStyleGalleryItem pStyleGalleryItem; //获取 选择的项 ILegendClass pLegendClass; //获取传递进来的图例 ILayer pLayer; bool contextMenuMoreSymbolInitiated = false; //判断右键菜 单是否已经初始化了
stdole.IPictureDisp picture = pSymbologyStyle.PreviewItem(pStyleGalleryItem, pictureBox1.Width, pictureBox1.Height); //建立实例
Image image = Image.FromHbitmap(new IntPtr(picture.Handle)); //转成 C# 支持的 Image 实例
pColor = ((IFillSymbol)pStyleGalleryItem.Item).Outline.Color as IRgbColor;
btOutlineColor.BackColor = Color.FromArgb(pColor.Red, pColor.Green, pColor.Blue); //赋值边框颜色
{ case
esriGeometryType.esriGeometryPoint: //点 pStyleClass =
esriSymbologyStyleClass.esriStyleClassMarkerSymbols;
lbColor.Visible = true; lbWidth.Visible = true; lbWidth.Text = "符号大小"; lbAngle.Visible = true; btColor.Visible = true; nudWidth.Visible = true; cbColor.Visible = true; nudAngle.Visible = true; break; case esriGeometryType.esriGeometryPolyline: //线 pStyleClass = esriSymbologyStyleClass.esriStyleClassLineSymbols; lbColor.Visible = true; lbColor.Location = System.Drawing.Point.Add(lbColor.Location, new Size(0, 12)); lbWidth.Visible = true; lbWidth.Location = System.Drawing.Point.Add(lbWidth.Location, new Size(0, 24)); lbWidth.Text = "线符号粗细"; btColor.Visible = true; cbColor.Visible = true; btColor.Location = System.Drawing.Point.Add(btColor.Location, new Size(0, 12)); cbColor.Location = System.Drawing.Point.Add(cbColor.Location, new Size(0, 12)); nudWidth.Visible = true; nudWidth.Location = System.Drawing.Point.Add(nudWidth.Location, new Size(0, 24)); break; case esriGeometryType.esriGeometryPolygon: //面 pStyleClass = esriSymbologyStyleClass.esriStyleClassFillSymbols; lbColor.Visible = true;
= "当前符号"; pCurrentStyleGalleryItem.Item = pLegendClass.Symbol; //将当前的图例 symbol 赋值过去 ISymbologyStyleClass pSymbologyStyleClass = axSymbologyControl1.GetStyleClass(axSymbologyControl1.StyleCl 加入这个新建项
pStyleGalleryItem = e.styleGalleryItem as IStyleGalleryItem; //获取选择项
PreviewPicture(); //在图片框中显示
if (((IFeatureLayer)pLayer).FeatureClass.ShapeType == esriGeometryType.esriGeometryPoint) //点,将属性传递 到调节的控件上
}
if (((IFeatureLayer)pLayer).FeatureClass.ShapeType == esriGeometryType.esriGeometryPolygon) //面
{ IRgbColor pColor =
((IFillSymbol)pStyleGalleryItem.Item).Color as IRgbColor; btColor.BackColor =
}
if (((IFeatureLayer)pLayer).FeatureClass.ShapeType == esriGeometryType.esriGeometryPolyline) //线
{ IRgbColor pColor =
((ILineSymbol)pStyleGalleryItem.Item).Color as IRgbColor;