KLDP29型空调机组说明书
青岛开利机组说明书
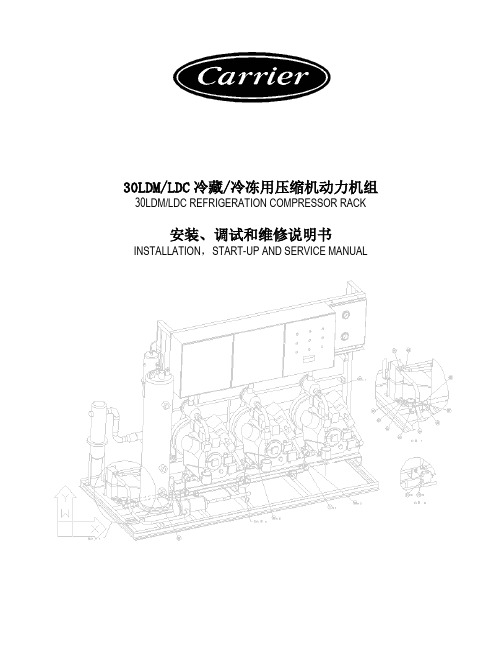
30LDM/LDC冷藏/冷冻用压缩机动力机组30LDM/LDC REFRIGERATION COMPRESSOR RACK安装、调试和维修说明书INSTALLATION,START-UP AND SERVICE MANUAL上海合众-开利空调设备有限公司SHANGHAI HEZHONG-CARRIER AIR-CONDITIONING EQUIPMENT CO., LTD. 内容1.介绍2.使用说明3.机组各主要部件名称以及外形尺寸4.机组的安装5.管路的连接6.开机程序6.1 泄漏测试6.2 抽真空充注制冷剂及开机之前的准备工作充注制冷剂并开机开机后的运行检查控制参数设定7.制冷原理7.1 30LDC制冷原理图7.2 30LDM制冷原理图8.电气原理图附件A. ELLIWELL压缩机控制器介绍A.1 通用描述A.2 人机界面A.3 输入输出A.4 进入编程模式A.5 显示/修改参数A.6 密码保护A.7 配置参数说明A.8 用户界面A.9 用户信息A.10 报警信息A.11 编码列表1.介绍30LDM/LDC冷藏/冷冻用压缩机动力机组适用于超市食品保鲜、冷库以及其它工业低温要求。
机组采用立式并联设计,结构紧凑。
使用Eliwell压缩机控制器,智能化控制系统简单可靠,可以灵活的设定机组正常运行工况点和经济运行工况点,达到节能的目的。
使用06CC单机双级压缩机,有效降低压缩比,提高机组效率和可靠性(30LDC特有)。
2. 使用范围4.机组的安装1)机组为非防雨型,应置于雨、水淋不到处;2)为防止机组结露、结霜后滴水,请对地面进行防水处理,或安装接水盘,同时,为保持并提高性能,请在吸气管上安装绝热材料;3)应做好机房通风系统,使其温度低于40℃;4)基础应采用重量为机组3倍的混凝土基础,机组的倾斜应在1°以内;5)机组采用整体减振设计,压缩机和机组管路均不设置单独的减振装置。
现场安装时,请在基础与机组间安装减振垫。
Daikin 环保液涡轮式空调技术手册说明书

421 51 5400 01 March 2006Specifications subject to change without notice.EFFICIENT 13 SEER AIR CONDITIONERENVIRONMENT ALLY SOUND R −410A REFRIGERANT1½ THRU 5 TONS SPLIT SYSTEM 208 / 230 Volt, 1−phase, 60 HzREFRIGERATION CIRCUITS Copeland SCROLL compressors on all modelsS Filter −Drier supplied with every unit for field installation S External high and low refrigerant service ports S Copper tube /aluminum fin coilS 5 ton model has 2−row coil for reduced height PERFORMANCES 2−speed Fan Motors factory wired on all models S Compressor Sound Jacket standardEASY TO INSTALL AND SERVICES Comfort Alert t Diagnostics device on all models S Easy Access service valves on all models S Compressor access panelS New, innovative control box design S High and Low pressure switches S Fan motor in −line disconnect plugS Only two screws to access control panel S Factory charged with R −410A refrigerantBUILT TO LASTS High gloss, baked −on powder coat finish over galvanized steelS Post −painted (black) coil finsS SermaGard ® coated cabinet screwsS Coated inlet grille with a ” spacing for extra protection S Corner Posts for extra strength and style S 5 year No Hassle replacement warrantyS 10 year limited compressor, 5 year limited coil and parts warrantiesRated in accordance with ARI Standard 210.Certification applies only when used with propercomponents as listed with ARI.s eew ar r an t y c e r t i f i c a t e fo rd et ai l sModel Number Size (tons)Nominal Btu/hr Min. Circuit Ampacity Max. Fuse or BreakerOperating Dimensions height x width x depth (in)Ship / Operating Weight (lbs)H4A318GKA 1½18,00011.720@(8 ~ #!x ~ #@c 187 / 160H4A324GKA 224,00016.525@(8 ~ #!x ~ #@c 189 / 162H4A330GKA 2½30,00018.730#%, ~ #!x ~ #@c 200 / 172H4A336GKA 336,00021.935#(a ~ #!x ~ #@c 215 / 187H4A342GKA 3½42,00025.940$#2 ~ #% ~ #^b 282 / 248H4A348GKA 448,00028.640$#2 ~ #% ~ #^b 285 / 251H4A360GKA560,00034.350#^w ~ #% ~ #^b299 / 265PRODUCT SPECIFICATIONS Split System Air Conditioner: H4A3421 51 5400 013Specifications subject to change without notice.PHYSICAL DATAModel Size18243036424860Nominal Cooling Capacity (BTU/hr)18,00024,00030,00036,00042,00048,00060,000Nominal SEER13.013.013.013.013.013.013.0Sound Rating, High Speed Fan (dBA)Low Speed Fan (dBA)7372737075707572767476747675PSC Fan Motor HP 1/121/121/51/51/51/41/4Fan RPM High Fan RPM Low 825750825750825750825750825750825750825750Fan CFM (High)2140214028002800327036703670Coil Face Area (ft 2)11.2611.2614.4716.0822.3622.3618.30Coil Rows − fins per inch 1−201−251−251−251−251−252−20Liquid Line Connection Size (in.)3/83/83/83/83/83/83/8Vapor Line Connection Size (in.)5/85/83/43/47/87/87/8Recommended Line Set Liquid TubeDiameter (in.)3/83/83/83/83/83/83/8Recommended Line Set Vapor TubeDiameter (in.) *5/8 *5/8 *3/4 *3/4 *7/8 *7/8 *18 **Recommended Vapor Tube Line size is for standard installations. These recommendations may not apply to “Long Line” installations. When the total equivalent line length exceeds 80 feet or there is more than 20 feet vertical separation between indoor and outdoor units, consult the Long Line Application Guideline document before purchasing/installing line sets.Factory Charge R −410A (lbs.) 3.90 4.25 5.75 5.857.138.409.35Required Subcooling (°F)10131712121312Weight, shipping (lbs.)187189200215282285299Weight, operating (lbs.)160162172187248251265ELECTRICAL DATA (208/230−1−60, voltage range 197V − 253V)Model Size18243036424860Minimum Circuit Ampacity −MCA (amps)11.716.518.721.925.928.634.3Maximum OverCurrentProtective device − MOCP (amps)20253035404050Compressor RLA (Rated Load Amps)LRA (Locked Rotor Amps)9.04812.858.314.17316.77919.910921.811726.3134Fan Motor FLA (Full Load Amps)0.50.51.11.11.11.41.4PRODUCT SPECIFICATIONS Split System Air Conditioner: H4A34421 51 5400 01Specifications subject to change without notice.R −410A COOLING CAPACITY LOSS FOR VARIOUS LINE LENGTHS & TUBE DIAMETERSModelSize Liquid Line(in.)Acceptable Vapor Line Sizes (in.)Cooling Capacity Loss (%) at Total Equivalent Line Length (ft.)Refer to Long Line Application Guideline to calculate equivalent length Standard Application Long Line Application (Requires Accessories)25’50’80’81’100’125’150’175’200’225’250’18as 0111222333424s 11223344566w 01111112222 d 0000111111130s 12334567899w 01111223334 d 0011111112236s 13445789111213w 11222333445 d 0111112222342w 11223345567 d 01111222333!80000011111148w 12333456788 d 01112233344!80000111111160w 13445689101113 d 11223344566!800111111122* Applications are considered “Long Line” if the total equivalent tubing length exceeds 80 feet or there is more than 20 foot vertical separation between indoor and outdoor units). These applications require additional accessories and system modifications for reliable system operation. Refer to the Long Line Application Guideline document for required piping and system modifications. Refer to Accessory Usage Guidelines below for required accessories.Applications in this shaded area may have height restrictions that limit allowable total equivalent length when outdoor unit is below indoor unit. Refer to the Long Line Application Guideline document for instructions.The maximum allowable total equivalent length is 250 feet.ACCESSORY USAGE GUIDELINESAccessoryREQUIRED FOR LOW −AMBIENTAPPLICATIONS (Below 55° F)REQUIRED FOR LONG LINEAPPLICATIONS*(Over 80 Ft.)Crankcase Heater Yes Yes Evaporator Freeze Thermostat Yes No Winter Start Control Yes No Hard Start Kit (Capacitor & Relay)Yes Yes Low Ambient Kit (Pressure Switch)Yes No Support Feet, 4” tall Recommended No Liquid Line Solenoid Valve No See Long −Line Application Guideline * For Line Set lengths between 80 and 200 ft horizontal, or more than 20 ft indoor −outdoor vertical separation,refer to the Long Line Application Guideline document.PRODUCT SPECIFICATIONS Split System Air Conditioner: H4A3421 51 5400 015Specifications subject to change without notice.ACCESSORIESPart Number DescriptionUsed On Model Size NASA001CH Crankcase Heater for Scroll Compressor (208/230 V)42, 48, 60NASA003CH Crankcase Heater for Scroll Compressor (208/230 V Star Body)18, 24, 30, 36NASA001SC Start Component − PTC Device ALL NASA001FS Evaporator Freeze Thermostat ALL NASA401LS Liquid Line Solenoid Valve, R −410A ALL NASA001TD Time Delay Relay, Indoor BlowerALL NASA001WS Winter Start ControlALL NASA001AC Anti −Cycle Timer (5 minute delay)ALL NASA005SC Hard Start Kit (Capacitor & Relay)ALL NASA401LA Low Ambient Kit (Pressure Switch), R −410AALL NASA001SF Support Feet, 4” tall ALL EBAC05TXVX TXV Kit, R −410A *18, 24, 30EBAC06TXVX TXV Kit, R −410A *36, 42EBAC07TXVX TXV Kit, R −410A *48EBAC08TXVXTXV Kit, R −410A *60* ONLY converts Fan Coils equipped with factory installed R −22 TXV.PRODUCT SPECIFICATIONS Split System Air Conditioner: H4A36421 51 5400 01Specifications subject to change without notice.COOLING PERFORMANCE FOR COMBINATION RATINGSCurrent Indoor ModelsOutdoor Model Current Indoor Model(‡ tested combo)Furnace ModelFactoryInstalled Cooling (95 °F)SEERBTU/hrS/TEERfactoryw/ field TDR w/ field R−410A TXVw/ field R−410A TXV+TDRH4A318GKA‡ ED*4X18B**TXV 17,4000.7711.0013.00ED*4X18B**MV08B15****TDR & TXV 18,0000.7711.7014.00ED*4X24B**TXV 17,7000.7711.0013.00ED*4X24B**MV08B15****TDR & TXV 18,4000.7712.0014.00ED*4X24F**TXV 17,7000.7711.0013.00ED*4X24F**MV12F19****TDR & TXV 18,0000.7712.0014.00EHD4X24A**TXV 17,7000.7711.0013.00EHD4X24A***9MPV050TDR & TXV 18,4000.7711.5014.00EHD4X24A***9MPV075TDR & TXV 18,4000.7711.2013.50EHD4X24A**MV08B15****TDR & TXV 18,4000.7712.0014.00EHD4X24A**MV12F19****TDR & TXV 18,0000.7712.0014.00EMA4X24D**TXV 17,5000.7711.0013.00FEM4X18****TDR & TXV 17,8000.7711.5014.00FEM4X24****TDR & TXV 18,0000.7711.7014.00FS(M,U)4X18****TDR & TXV 17,3000.7711.0013.00FS(M,U)4X24****TDR & TXV 17,6000.7711.0013.00H4A324GKA‡ ED*4X24B**TXV 24,0000.7611.0013.00ED*4X24B***8MPV050TDR & TXV 24,4000.7611.5014.00ED*4X24B**MV08B15****TDR & TXV 24,6000.7611.7014.00ED*4X24F**TXV 24,0000.7611.0013.00ED*4X24F***8MPV075TDR & TXV 24,8000.7611.5014.00ED*4X24F***9MPV050TDR & TXV 24,2000.7611.5014.00ED*4X24F***9MPV075TDR & TXV 24,4000.7611.5014.00ED*4X24F**MV12F19****TDR & TXV 24,4000.7611.7014.00ED*4X30B**TXV 24,2000.7611.0013.00ED*4X30B***8MPV050TDR & TXV 24,6000.7611.5014.00ED*4X30B**MV08B15****TDR & TXV 24,8000.7611.7014.00ED*4X30F**TXV 24,2000.7611.0013.00ED*4X30F***9MPV050TDR & TXV 24,6000.7611.5014.00ED*4X30F***9MPV075TDR & TXV 24,8000.7611.5014.00ED*4X30F**MV12F19****TDR & TXV 24,8000.7612.0014.00EHD4X24A**TXV 23,8000.7611.0013.00EHD4X24A***8MPV050TDR & TXV 24,2000.7611.2013.50EHD4X24A***8MPV075TDR & TXV 24,4000.7611.5014.00EHD4X24A***8MPV100TDR & TXV 24,8000.7611.5014.00EHD4X24A***8MPV125TDR & TXV 24,8000.7611.7014.00EHD4X24A***9MPV050TDR & TXV 24,2000.7611.5014.00EHD4X24A***9MPV075TDR & TXV 24,4000.7611.2013.50EHD4X24A***9MPV100TDR & TXV 24,2000.7611.5014.00EHD4X24A***9MPV125TDR & TXV 24,6000.7611.5014.00EHD4X24A**MV08B15****TDR & TXV 24,2000.7611.7014.00EHD4X24A**MV12F19****TDR & TXV 24,4000.7611.7014.00EHD4X24A**MV16J22****TDR & TXV 24,4000.7611.7014.00EHD4X24A**MV20N26****TDR & TXV 24,6000.7611.7014.00EHD4X30A**TXV 24,2000.7611.0013.00EHD4X30A***8MPV050TDR & TXV 24,6000.7611.5014.00EHD4X30A***8MPV075TDR & TXV 25,2000.7611.5014.00EHD4X30A***8MPV100TDR & TXV 25,2000.7611.7014.00EHD4X30A***8MPV125TDR & TXV 25,2000.7611.7014.00EHD4X30A***9MPV050TDR & TXV 24,6000.7611.5014.00EHD4X30A***9MPV075TDR & TXV 24,8000.7611.5014.00EHD4X30A***9MPV100TDR & TXV 24,8000.7611.7014.00EHD4X30A**MV08B15****TDR & TXV 24,8000.7611.7014.00EHD4X30A**MV12F19****TDR & TXV 24,8000.7611.7014.00EHD4X30A**MV16J22****TDR & TXV 25,0000.7612.0014.00EHD4X30A**MV20N26****TDR & TXV 24,8000.7612.0014.00EMA4X24D**TXV 23,8000.7611.0013.00FEM4X24****TDR & TXV 24,4000.7611.5014.00FEM4X30****TDR & TXV 24,6000.7611.7014.00FS(M,U)4X24****TDR & TXV 23,8000.7611.0013.00FS(M,U)4X30****TDR & TXV 24,4000.7611.0013.20H4A330GKA‡ ED*4X30B**TXV 29,0000.7711.0013.00ED*4X30B***8MPV050TDR & TXV 29,2000.7711.2013.50ED*4X30B**MV08B15****TDR & TXV 29,4000.7711.5014.00ED*4X30F**TXV 29,0000.7711.0013.00− continued on next page −PRODUCT SPECIFICATIONS Split System Air Conditioner: H4A3421 51 5400 017Specifications subject to change without notice.COOLING PERFORMANCE FOR COMBINATION RATINGS (continued)Current Indoor ModelsOutdoor SEERCooling (95 °F)Model w/ field R−410A TXV+TDRw/ field R−410A TXVw/ field TDRfactoryEERS/TBTU/hrFactoryInstalled Furnace ModelCurrent Indoor Model(‡ tested combo)H4A330GKA (continued)ED*4X30F***8MPV075TDR & TXV 29,4000.7711.5014.00ED*4X30F***9MPV050TDR & TXV 29,0000.7711.2013.50ED*4X30F***9MPV075TDR & TXV 29,2000.7711.2013.50ED*4X30F**MV12F19****TDR & TXV 29,8000.7711.5014.00ED*4X36B**TXV 29,0000.7711.0013.00ED*4X36B***8MPV050TDR & TXV 29,4000.7711.2013.50ED*4X36B**MV08B15****TDR & TXV 29,4000.7711.5014.00ED*4X36F**TXV 29,0000.7711.0013.00ED*4X36F***8MPV075TDR & TXV 29,4000.7711.5014.00ED*4X36F***9MPV050TDR & TXV 29,2000.7711.2013.50ED*4X36F***9MPV075TDR & TXV 29,2000.7711.2013.50ED*4X36F**MV12F19****TDR & TXV 29,8000.7711.7014.00ED*4X36J**TXV 29,0000.7711.0013.00ED*4X36J***8MPV100TDR & TXV 29,6000.7711.7014.00ED*4X36J***8MPV125TDR & TXV 29,6000.7711.7014.00ED*4X36J***9MPV100TDR & TXV 29,6000.7711.5014.00ED*4X36J**MV16J22****TDR & TXV 29,6000.7711.7014.00EHD4X30A**TXV 28,8000.7711.0013.00EHD4X30A***8MPV050TDR & TXV 29,2000.7711.2013.50EHD4X30A***8MPV075TDR & TXV 29,2000.7711.5014.00EHD4X30A***8MPV100TDR & TXV 29,6000.7711.5014.00EHD4X30A***8MPV125TDR & TXV 29,6000.7711.5014.00EHD4X30A***9MPV050TDR & TXV 28,8000.7711.0013.20EHD4X30A***9MPV075TDR & TXV 29,0000.7711.2013.50EHD4X30A***9MPV100TDR & TXV 28,8000.7711.5014.00EHD4X30A***9MPV125TDR & TXV 29,2000.7711.5014.00EHD4X30A**MV08B15****TDR & TXV 29,6000.7711.5014.00EHD4X30A**MV12F19****TDR & TXV 29,8000.7711.5014.00EHD4X30A**MV16J22****TDR & TXV 29,6000.7711.7014.00EHD4X30A**MV20N26****TDR & TXV 29,6000.7711.7014.00EHD4X36A**TXV 29,0000.7711.0013.00EHD4X36A***8MPV050TDR & TXV 29,4000.7711.5014.00EHD4X36A***8MPV075TDR & TXV 29,4000.7711.5014.00EHD4X36A***8MPV100TDR & TXV 29,4000.7711.7014.00EHD4X36A***8MPV125TDR & TXV 29,2000.7711.7014.00EHD4X36A***9MPV050TDR & TXV 29,2000.7711.2013.50EHD4X36A***9MPV075TDR & TXV 29,2000.7711.5014.00EHD4X36A***9MPV100TDR & TXV 29,6000.7711.5014.00EHD4X36A***9MPV125TDR & TXV 29,6000.7711.7014.00EHD4X36A**MV08B15****TDR & TXV 29,4000.7711.7014.00EHD4X36A**MV12F19****TDR & TXV 29,8000.7711.7014.00EHD4X36A**MV16J22****TDR & TXV 29,6000.7711.7014.00EHD4X36A**MV20N26****TDR & TXV 29,6000.7711.7014.00EMA4X36D**TXV 28,8000.7711.0013.00FEM4X30****TDR & TXV 29,2000.7711.5014.00FEM4X36****TDR & TXV 30,0000.7711.5014.00FS(M,U)4X30****TDR & TXV 28,8000.7711.0013.00FSU4X36****TDR & TXV 29,0000.7711.0013.00H4A336GKAED*4X36B**TXV 34,8000.7711.0013.00ED*4X36B**MV08B15****TDR & TXV 34,8000.7711.2013.50‡ ED*4X36F**TXV 35,0000.7711.0013.00ED*4X36F***8MPV075TDR & TXV 34,8000.7711.2013.50ED*4X36F***9MPV050TDR & TXV 34,4000.7711.0013.20ED*4X36F***9MPV075TDR & TXV 34,6000.7711.0013.20ED*4X36F**MV12F19****TDR & TXV 35,0000.7711.5014.00ED*4X36J**TXV 35,0000.7711.0013.00ED*4X36J***8MPV100TDR & TXV 35,2000.7711.5014.00ED*4X36J***8MPV125TDR & TXV 35,2000.7711.5014.00ED*4X36J***9MPV100TDR & TXV 35,2000.7711.2013.50ED*4X36J**MV16J22****TDR & TXV 35,0000.7711.7014.00ED*4X42J**TXV 35,2000.7711.0013.00ED*4X42J***8MPV100TDR & TXV 35,4000.7711.5014.00ED*4X42J***8MPV125TDR & TXV 35,4000.7711.5014.00ED*4X42J***9MPV100TDR & TXV 35,4000.7711.2013.50ED*4X42J**MV16J22****TDR & TXV 35,2000.7711.5014.00ED*4X42L**TXV 35,2000.7711.0013.00− continued on next page −PRODUCT SPECIFICATIONS Split System Air Conditioner: H4A38421 51 5400 01Specifications subject to change without notice.COOLING PERFORMANCE FOR COMBINATION RATINGS (continued)Current Indoor ModelsOutdoor SEERCooling (95 °F)Model w/ field R−410A TXV+TDRw/ field R−410A TXVw/ field TDR factoryEERS/TBTU/hrFactoryInstalled Furnace ModelCurrent Indoor Model(‡ tested combo)H4A336GKA (continued)ED*4X42L***9MPV125TDR & TXV 35,0000.7711.5014.00EHD4X36A**TXV 35,0000.7711.0013.00EHD4X36A***8MPV050TDR & TXV 34,8000.7711.2013.50EHD4X36A***8MPV075TDR & TXV 34,8000.7711.2013.50EHD4X36A***8MPV100TDR & TXV 35,0000.7711.5014.00EHD4X36A***8MPV125TDR & TXV 35,8000.7711.5014.00EHD4X36A***9MPV050TDR & TXV 34,4000.7711.2013.50EHD4X36A***9MPV075TDR & TXV 34,6000.7711.2013.50EHD4X36A***9MPV100TDR & TXV 34,8000.7711.5014.00EHD4X36A***9MPV125TDR & TXV 35,0000.7711.5014.00EHD4X36A**MV08B15****TDR & TXV 35,0000.7711.5014.00EHD4X36A**MV12F19****TDR & TXV 35,0000.7711.7014.00EHD4X36A**MV16J22****TDR & TXV 35,6000.7711.7014.00EHD4X36A**MV20N26****TDR & TXV 35,6000.7711.7014.00EHD4X42A**TXV 35,2000.7711.0013.00EHD4X42A***8MPV050TDR & TXV 35,2000.7711.2013.50EHD4X42A***8MPV075TDR & TXV 35,4000.7711.5014.00EHD4X42A***8MPV100TDR & TXV 35,4000.7711.5014.00EHD4X42A***8MPV125TDR & TXV 35,4000.7711.7014.00EHD4X42A***9MPV050TDR & TXV 34,8000.7711.2013.50EHD4X42A***9MPV075TDR & TXV 35,2000.7711.2013.50EHD4X42A***9MPV100TDR & TXV 35,6000.7711.5014.00EHD4X42A***9MPV125TDR & TXV 35,8000.7711.5014.00EHD4X42A**MV08B15****TDR & TXV 35,6000.7711.5014.00EHD4X42A**MV12F19****TDR & TXV 35,2000.7711.7014.00EHD4X42A**MV16J22****TDR & TXV 36,2000.7711.7014.00EHD4X42A**MV20N26****TDR & TXV 36,2000.7711.7014.00EMA4X36D**TXV 34,8000.7711.0013.00FEM4X36****TDR & TXV 35,6000.7711.5014.00FEM4X42****TDR & TXV 36,0000.7711.5014.00FS(M,U)4X42****TDR & TXV 35,4000.7711.0013.00FSM4X36****TDR & TXV 35,4000.7711.0013.00FSU4X36****TDR & TXV 34,4000.7711.0013.00H4A342GKA‡ ED*4X42J**TXV 42,0000.7511.0013.00ED*4X42J***8MPV100TDR & TXV 42,0000.7511.5014.00ED*4X42J***8MPV125TDR & TXV 42,0000.7511.5014.00ED*4X42J***9MPV100TDR & TXV 42,0000.7511.2013.50ED*4X42J**MV16J22****TDR & TXV 42,5000.7511.5014.00ED*4X42L**TXV 42,0000.7511.0013.00ED*4X42L***9MPV125TDR & TXV 42,5000.7511.0013.20ED*4X48F**TXV 43,0000.7511.0013.00ED*4X48F***8MPV075TDR & TXV 43,0000.7511.2013.50ED*4X48J**TXV 42,5000.7511.0013.00ED*4X48J***8MPV100TDR & TXV 42,5000.7511.5014.00ED*4X48J***8MPV125TDR & TXV 43,0000.7511.5014.00ED*4X48J***9MPV100TDR & TXV 43,0000.7511.0013.20ED*4X48J**MV16J22****TDR & TXV 43,5000.7511.7014.00ED*4X48L**TXV 42,5000.7511.0013.00ED*4X48L***9MPV125TDR & TXV 43,0000.7511.5014.00EHD4X42A**TXV 42,0000.7511.0013.00EHD4X42A***8MPV075TDR & TXV 42,0000.7511.2013.50EHD4X42A***8MPV100TDR & TXV 42,5000.7511.2013.50EHD4X42A***8MPV125TDR & TXV 42,0000.7511.5014.00EHD4X42A***9MPV100TDR & TXV 42,0000.7511.2013.50EHD4X42A***9MPV125TDR & TXV 42,0000.7511.2013.50EHD4X42A**MV16J22****TDR & TXV 42,0000.7511.7014.00EHD4X42A**MV20N26****TDR & TXV 42,0000.7511.5014.00EHD4X48A**TXV 43,0000.7511.0013.00EHD4X48A***8MPV075TDR & TXV 43,0000.7511.2013.50EHD4X48A***8MPV100TDR & TXV 42,5000.7511.5014.00EHD4X48A***8MPV125TDR & TXV 43,0000.7511.5014.00EHD4X48A***9MPV100TDR & TXV 43,0000.7511.2013.50EHD4X48A***9MPV125TDR & TXV 43,0000.7511.2013.50EHD4X48A**MV16J22****TDR & TXV 43,5000.7511.7014.00EHD4X48A**MV20N26****TDR & TXV 43,5000.7511.5014.00EMA4X48D**TXV 42,0000.7511.0013.00− continued on next page −PRODUCT SPECIFICATIONS Split System Air Conditioner: H4A3421 51 5400 019Specifications subject to change without notice.COOLING PERFORMANCE FOR COMBINATION RATINGS (continued)Current Indoor ModelsOutdoor SEERCooling (95 °F)Model w/ field R−410A TXV+TDRw/ field R−410A TXVw/ field TDRfactoryEERS/TBTU/hrFactoryInstalled Furnace ModelCurrent Indoor Model(‡ tested combo)H4A342GKA (continued)FEM4X42****TDR & TXV 43,0000.7511.5014.00FEM4X48****TDR & TXV 44,0000.7511.7014.00FS(M,U)4X42****TDR & TXV 42,0000.7511.0013.00FS(M,U)4X48****TDR & TXV 43,0000.7511.0013.20FSM4X36****TDR & TXV42,5000.7511.0013.00H4A348GKAED*4X48F**TXV 46,5000.7611.0013.00‡ ED*4X48J**TXV 47,0000.7611.0013.00ED*4X48J***8MPV125TDR & TXV 47,0000.7611.0013.20ED*4X48J**MV16J22****TDR & TXV47,0000.7611.2013.50ED*4X48L**TXV 47,0000.7611.0013.00ED*4X48L***9MPV125TDR & TXV46,5000.7611.0013.20ED*4X60J**TXV 48,0000.7611.0013.00ED*4X60J***8MPV100TDR & TXV 48,5000.7611.2013.50ED*4X60J***8MPV125TDR & TXV 47,5000.7611.2013.50ED*4X60J***9MPV100TDR & TXV 48,0000.7611.0013.20ED*4X60J**MV16J22****TDR & TXV49,0000.7611.5014.00ED*4X60L**TXV 48,0000.7611.0013.00ED*4X60L***9MPV125TDR & TXV48,0000.7611.2013.50EHD4X48A**TXV 47,0000.7611.0013.00EHD4X48A***8MPV100TDR & TXV 47,0000.7611.0013.20EHD4X48A***8MPV125TDR & TXV 47,0000.7611.0013.20EHD4X48A***9MPV125TDR & TXV 47,0000.7611.0013.20EHD4X48A**MV16J22****TDR & TXV 47,0000.7611.2013.50EHD4X48A**MV20N26****TDR & TXV47,0000.7611.2013.50EHD4X60A**TXV 48,0000.7611.0013.00EHD4X60A***8MPV100TDR & TXV 48,5000.7611.2013.50EHD4X60A***8MPV125TDR & TXV 47,5000.7611.2013.50EHD4X60A***9MPV125TDR & TXV 48,0000.7611.2013.50EHD4X60A**MV16J22****TDR & TXV 49,0000.7611.5014.00EHD4X60A**MV20N26****TDR & TXV49,0000.7611.5014.00EMA4X48D**TXV 46,0000.7611.0013.00FEM4X48****TDR & TXV 48,0000.7611.2013.50FEM4X60****TDR & TXV 49,0000.7611.5014.00FS(M,U)4X48****TDR & TXV 47,5000.7611.0013.00FS(M,U)4X60****TDR & TXV48,0000.7611.0013.00H4A360GKAED*4X60J**TXV 59,0000.7611.0013.00ED*4X60J***8MPV100TDR & TXV 58,5000.7611.0013.20ED*4X60J**MV16J22****TDR & TXV59,5000.7611.0013.20‡ ED*4X60L**TXV 59,5000.7611.0013.00ED*4X60L***9MPV125TDR & TXV57,5000.7611.0013.20EHD4X60A**TXV 59,5000.7611.0013.00EHD4X60A***8MPV100TDR & TXV 58,5000.7611.0013.20EHD4X60A***9MPV125TDR & TXV 57,0000.7611.0013.20EHD4X60A**MV16J22****TDR & TXV 59,5000.7611.0013.20EHD4X60A**MV20N26****TDR & TXV 59,5000.7611.2013.50FEM4X60****TDR & TXV 60,5000.7611.0013.20FS(M,U)4X60****TDR & TXV59,0000.7611.0013.00PRODUCT SPECIFICATIONS Split System Air Conditioner: H4A310421 51 5400 01Specifications subject to change without notice.COOLING PERFORMANCE FOR COMBINATION RATINGSObsolete Indoor ModelsOutdoor Model ObsoleteIndoorModelFurnace Model FactoryInstalled Cooling (95 °F)SEERBTU/hr S/T EER factoryw/ field TDRw/ field R−410A TXV w/ field R−410A TXV+TDRH4A318GKAEBP18****TDR 16,7000.7710.7012.40EBP24****TDR 17,5000.7710.7012.95EBV24****TDR & TXV 18,2000.7711.7014.00EBXX18****TDR & TXV 17,5000.7711.0013.00EBXX24****TDR & TXV 17,6000.7711.0013.20EL*18B****NONE 16,1000.7710.1011.65EL*24B****NONE 16,8000.7710.5512.20EL*24B****MV08B15****TDR 17,1000.7711.5014.00EMH24F****NONE 16,8000.7710.5512.20EP*18B****NONE 16,1000.7710.1011.65EP*24B****NONE 16,8000.7710.5512.20EP*24B****MV08B15****TDR 17,1000.7711.5014.00EP*24F****NONE 16,8000.7710.5512.20EP*24F****MV12F19****TDR 17,1000.7711.5014.00EPP024****NONE 15,8000.779.7511.50EXX*24B****TXV 17,7000.7710.7012.95EXX*24B****MV08B15****TDR & TXV 18,3000.7711.7014.00EXX*24F****TXV 17,7000.7710.7012.95EXX*24F****MV12F19****TDR & TXV 18,3000.7711.7014.00FWM18****TDR 16,8000.7710.7012.85FWM24****TDR 17,4000.7710.7012.75H4A324GKAEBP24****TDR 23,6000.7610.7012.95EBP30****TDR 24,0000.7611.0013.20EBV24****TDR & TXV 24,6000.7611.5014.00EBV36****TDR & TXV 24,6000.7611.7014.00EBXX18****TDR & TXV 23,6000.7610.7012.95EBXX24****TDR & TXV 24,0000.7611.0013.20EL*24B****NONE 22,4000.7610.7012.20EL*24B*****8MPV050TDR 22,6000.7611.0013.00EL*24B****MV08B15****TDR 23,0000.7611.2013.50EL*30B****NONE 22,8000.7610.7012.40EL*30B*****8MPV050TDR 23,0000.7611.0013.00EL*30B****MV08B15****TDR 23,2000.7611.2013.50EMH24F****NONE 22,4000.7610.7012.20EMH30F****NONE 22,8000.7610.7012.40EP*24B****NONE 22,4000.7610.7012.20EP*24B*****8MPV050TDR 22,6000.7611.0013.00EP*24B****MV08B15****TDR 23,0000.7611.2013.50EP*24F****NONE 22,4000.7610.7012.20EP*24F*****9MPV050TDR 22,8000.7611.0013.00EP*24F*****9MPV075TDR 22,6000.7611.0013.20EP*24F****MV12F19****TDR 22,8000.7611.2013.50EP*30B****NONE 22,8000.7610.7012.40EP*30B*****8MPV050TDR 23,0000.7611.0013.20EP*30B****MV08B15****TDR 23,2000.7611.2013.50EP*30F****NONE 22,8000.7610.7012.40EP*30F*****9MPV050TDR 23,0000.7611.2013.50EP*30F*****9MPV075TDR 23,2000.7611.0013.20EP*30F****MV12F19****TDR 23,4000.7611.5014.00EPP024****NONE 20,8000.769.8011.40EPP030****NONE 22,0000.7610.6512.00EXX*24B****TXV 24,0000.7611.0013.00EXX*24B*****8MPV050TDR & TXV 24,2000.7611.2013.50EXX*24B****MV08B15****TDR & TXV 24,2000.7611.7014.00EXX*24F****TXV 24,0000.7611.0013.00EXX*24F*****8MPV075TDR & TXV 24,4000.7611.2013.50EXX*24F*****9MPV050TDR & TXV 24,2000.7611.2013.50EXX*24F*****9MPV075TDR & TXV 24,0000.7611.2013.50EXX*24F****MV12F19****TDR & TXV 24,4000.7611.7014.00FWM24****TDR 23,6000.7610.7012.70FWM30****TDR 24,0000.7610.7012.90H4A330GKAEBP30****TDR 28,4000.7710.7012.90EBP36****TDR 28,6000.7710.7012.60EBV24****TDR & TXV 29,2000.7711.2013.50EBV36****TDR & TXV 29,4000.7711.5014.00EBV48****TDR & TXV 30,4000.7711.7014.00− continued on next page −COOLING PERFORMANCE FOR COMBINATION RATINGS (continued)Obsolete Indoor ModelsOutdoorSEER Cooling (95 °F)Modelw/ fieldR−410ATXV+TDRw/ fieldR−410ATXVw/ fieldTDRfactoryEERS/TBTU/hrFactoryInstalledFurnaceModelObsoleteIndoorModelH4A330GKA (continued)EBXX36****TDR & TXV29,0000.7711.0013.00EL*30B****NONE26,8000.7710.2511.90 EL*30B*****8MPV050TDR26,8000.7710.2012.25EL*30B****MV08B15****TDR27,0000.7710.7012.80EL*36B****NONE27,8000.7710.7012.40 EL*36B*****8MPV050TDR28,0000.7710.7012.80EL*36B****MV08B15****TDR28,0000.7711.0013.20EL*36F****NONE27,8000.7710.7012.40 EL*36F*****8MPV075TDR28,2000.7711.0013.20EL*36F*****9MPV050TDR27,8000.7710.7012.80EL*36F*****9MPV075TDR28,0000.7710.7012.90EL*36F****MV12F19****TDR28,4000.7711.2013.50EMH30F****NONE26,8000.7710.7011.90 EMH36F****NONE27,8000.7710.7012.40 EP*30B****NONE26,8000.7710.7011.90 EP*30B*****8MPV050TDR26,8000.7710.3012.25EP*30B****MV08B15****TDR27,0000.7710.7012.90EP*30F****NONE26,8000.7710.7011.90 EP*30F*****8MPV075TDR27,0000.7710.7012.70EP*30F*****9MPV050TDR26,8000.7710.2012.25EP*30F*****9MPV075TDR26,8000.7710.2512.30EP*30F****MV12F19****TDR27,4000.7711.0013.00EP*36B****NONE27,8000.7710.3512.40EP*36B*****8MPV050TDR28,0000.7710.7012.90EP*36B****MV08B15****TDR28,0000.7711.0013.20EP*36F****NONE27,8000.7710.3512.40 EP*36F*****8MPV075TDR28,2000.7711.0013.20EP*36F*****9MPV050TDR27,8000.7710.7012.80EP*36F*****9MPV075TDR28,0000.7710.7012.90EP*36F****MV12F19****TDR28,4000.7711.2013.50EP*36J****NONE27,8000.7710.3512.40 EP*36J*****8MPV100TDR28,0000.7711.2013.50EP*36J*****8MPV125TDR28,0000.7711.2013.50EP*36J*****9MPV100TDR28,0000.7711.0013.20EP*36J****MV16J22****TDR28,4000.7711.2013.50EPP030****NONE25,8000.779.5511.45 EPP036****NONE26,2000.779.8011.70 EXX*36B****TXV29,0000.7711.0013.00EXX*36B*****8MPV050TDR & TXV29,2000.7711.2013.50EXX*36B****MV08B15****TDR & TXV29,4000.7711.5014.00EXX*36F****TXV29,0000.7711.0013.00EXX*36F*****8MPV075TDR & TXV29,2000.7711.2013.50EXX*36F*****9MPV050TDR & TXV29,2000.7711.0013.20EXX*36F*****9MPV075TDR & TXV29,2000.7711.0013.20EXX*36F****MV12F19****TDR & TXV29,6000.7711.5014.00EXX*36J****TXV29,0000.7711.0013.00EXX*36J*****8MPV100TDR & TXV29,8000.7711.5014.00EXX*36J*****8MPV125TDR & TXV29,8000.7711.5014.00EXX*36J*****9MPV100TDR & TXV29,8000.7711.2013.50EXX*36J****MV16J22****TDR & TXV29,6000.7711.7014.00FWM30****TDR28,6000.7710.7012.65H4A336GKA EBP36****TDR34,0000.7710.7012.45 EBP42****TDR34,8000.7710.7012.75EBV36****TDR & TXV35,4000.7711.2013.50EBV48****TDR & TXV36,8000.7711.7014.00EBXX36****TDR & TXV34,8000.7710.7012.75EL*36B****NONE32,4000.7710.3012.30EL*36B****MV08B15****TDR33,0000.7711.0013.00EL*36F****NONE33,2000.7710.2512.25EL*36F*****8MPV075TDR33,0000.7710.7012.95EL*36F*****9MPV075TDR32,8000.7710.7012.65EL*36F****MV12F19****TDR33,4000.7711.0013.20EL*42F****NONE34,0000.7710.7012.70EL*42F*****8MPV075TDR34,2000.7711.0013.20EL*42F*****9MPV075TDR34,0000.7710.7012.80EL*42F****MV12F19****TDR34,4000.7711.2013.50− continued on next page −。
格力中央空调水冷柜机技术服务手册12_29

®离心式冷水机组水冷柜机技术服务手册珠海格力电器股份有限公司GREE ELECTRIC APPLIANCES INC. OF ZHUHAI目录产品篇 (1)1 产品种类 (1)2 产品命名规则 (3)3 产品特点 (3)4 产品技术参数表 (4)5 产品性能修正 (8)6 产品工作原理与控制 (10)6.1 产品工作原理 (10)6.2 机组控制 (10)7 机组安装空间要求 (11)7.1 机组外形和安装固定尺寸 (11)7.2 机组换热和维修空间的要求 (21)7.3 安装注意事项 (21)控制篇 (22)1 线控器 (22)1.2 显示板Z301A (23)1.3 显示板Z311 (24)1.4 显示板Z3010 (25)1.5 显示板Z381 (26)1.6 显示板Z301A、Z311、3010及Z381的操作说明 (26)维修篇 (28)1 机组故障一览表 (28)2 典型故障排查 (30)2.1 系统故障排查 (30)2.2 电气故障排查 (36)3 案例分析 (40)4 机组配电 (41)4.1 机组配电思想 (41)4.2 主要电气元器件介绍 (43)4.3 机组电路图 (46)5 机组部件拆装 (53)5.1 关键部件介绍 (53)5.2 关键部件拆装 (54)6 爆炸图及零部件清单 (56)6.1 A系列机组爆炸图和零部件清单 (56)6.2 B系列机组爆炸图和零部件清单 (64)产品篇1 产品种类系列机型 能力(kW) 外形图L(D)2525L(D)32 32L(D)40 40L(D)32S 32L(D)40S 40 L(D)49S49 L(D)65S 65L(D)80S 80 L(D)98S 98 L(D)116S 116 L(D)130S 130 L(D)145S 145 L(D)160S 160 A 系 列L(D)196S196续上表外形图系列机型能力(kW)L(D)28/B 28L(D)32/B 32L(D)49/B 49L(D)32S/B 322 产品命名规则开发序列号:A 系列不表示额定制冷量:数字×kW 出风方式:S 表示上出风式,侧送风不表示D 表示带辅助电加热单冷不表示水冷冷风型单元式空调机组代号SL D型号示例:L32:表示名义制冷量为32kW 的前出风式水冷冷风型单元式空调机组。
吉姆空调用户使用手册
吉姆空调用户使用手册(单冷机组)1.致用户:感谢您购买了吉姆暖通空调产品。
您所购买的吉姆空调产品将会给您提供四季如春的感觉。
下面简单介绍您所使用的空调产品的使用和操作方法,其中有很多是您应该熟悉的操作和简单维护的方法对该手册应仔细阅读,妥善保管,以备将来查阅。
建议将此手册放置在机组设备旁。
并与您的经销商和售后服务工程师保持联系。
制造厂商对因违规安装和违规操作的设备出现故障不负责任。
本手册教您如何保养和操作您的机组设备。
安装者应帮您看懂此操作手册,让您完全了解您的空调设备,而且知道如何才能使您的设备发挥最佳的作用。
2.空调机组的工作原理:空调系统是一种相对来说比较简单的设备。
由温控器的动作来控制机组的运行状态,无需专人调节机组的运行。
注意不要对温控器进行错误设置。
如对空调区域的感觉不太舒适,调整温控器的设置直到舒适为止。
3.机组的启动和关闭程序:制冷工况:1.检查所有的房间的送,回风口,将它们设置到开启位置。
2.将室内机和室外机的电源送上。
3.当第一次启动机组时,首先测试风机,将温控器的风机控制开关至于“ON”位置,风机将于10-15秒后启动。
然后将风机开关置于“AUTO”位置,风扇将于90秒后停止运转。
4.将温控器上系统开关置于“COOL(夏季)”位置,室外机,室内机将于几分钟后开始启动,室内机开始送出冷风。
5.调整各房间的送,回风口,使系统各个风口送回风均匀。
6.改变温控器的温度设置,机组运行直到达到所需要的设置温度后,机组将会自动停机。
7.当室内温度的变化到达温温控器所设置的偏差值时,机组将会自动启动并开始运行。
8.关机时,将温控器系统开关置于“OFF”位置,机组将于几分钟后自动停止运转。
4常规维护:建议在每个空调季节对机组进行一次检修和必要的清理外,在正常工作状态下无需看护和进行计划性的预防性维护措施。
特别注意不要让树叶,碎草进入室外机的吸风口侧。
这样会由于通风不畅造成系统出力不足,工作压力上升和运行费用增加。
Daikin 高压吸气机分离式空调产品说明书

0936Owner’s ManualTABLE OF CONTENTSPAGESAFETY PRECAUTIONS2 .....................................................................................GENERAL2 .................................................................................................INDOOR UNIT PART NAMES3 ................................................................................. REMOTE CONTROL PART NAMES4............................................................................DISPLAY PANELS5 .......................................................................................... REMOTE CONTROL6 ........................................................................................ REMOTE CONTROL FUNCTIONS7.............................................................................CLEANING,MAINTENANCE AND TROUBLESHOOTING9........................................................NOTE TO EQUIPMENT OWNER:Please read this Owner’s Information Manual carefully before installing and using this appliance and keep this manual for future reference.For your convenience,please record the model and serial numbers of your new equipment in the spaces provided.This information,along with the installation data and dealer contact information, will be helpful should your system require maintenance or service.UNIT INFORMATIONModel#___________________________________ Serial#___________________________________INSTALLATION INFORMATIONDate Installed_____________________________DEALERSHIP CONTACT INFORMATION Company Name:_________________________________ Address:_________________________________________ ________________________________________________ Phone Number:__________________________________ Technician Name:_________________________________ ________________________________________________SAFETY PRECAUTIONSAny time you see this symbol in manuals,instructions and on the unit,be aware of the potential for personal injury.There are three levels of precaution:DANGER identifies the most serious hazards which will result in severe personal injury or death.WARNING signifies hazards that could result in personal injury or death.CAUTION is used to identify unsafe practices which would result in minor personal injury or product and property damage. NOTE is used to highlight suggestions which will result in enhanced installation,reliability,or operation.GENERALThe high wall fan coil unit provides quiet,maximum comfort.In addition to cooling and/or heating,the high wall fan coil unit matched with an outdoor condensing unit will filter and dehumidify the air in the room to provide maximum comfort. IMPORTANT:The high wall fan coil unit should be installed by authorized personnel only;using approved tubing and accessories. If technical assistance,service or repair is needed,contact the installer.The high wall fan coil unit can be set up and operated from the remote control(provided).If the remote is misplaced,the system can be operated from the“Auto”setting on the unit. Operating Modes:The high wall fan coil unit has five operating modes.S Fan onlyS AutoS HeatingS CoolingS Dehumidification(DRY)Fan OnlyIn Fan Only mode,the system filters and circulates room air without changing room air temperature.AutoIn Auto mode,the system will automatically cool or heat the room according to the user-selected set point.HeatingIn Heating mode,the system heats and filters room air. CoolingIn Cooling mode,the system cools,dries and filters room air. Dehumidification(DRY)In Dehumidification mode,the system dries,filters and slightly cools room air e of this mode does not take the place of a dehumidifier.Remote ControlThe remote control transmits commands to set up and operate the system.The control has a window display panel that shows the current system status.The control can be secured to a surface when used with the mounting bracket provided.INDOOR UNIT PART NAMESFig.1-Indoor UnitFig.2-Remote ControllerDISPLAY PANELSNOTE:The display panel on the indoor unit can be turned on or off using the LIGHT button on the remote control.*The temperature readout will be replaced by an error code if there is a malfunction.heating temp.cooling power indicatorFig.3-Display PanelsREMOTE CONTROL PARTNAMESON/OFF button MODE button FAN button SWING button TURBO buttonTEMP button I FEEL button LIGHT button CLOCK button TIMER ON/TIMER OFF buttonSLEEP button 123456789101112Fig.4-Remote ControlRemote Control Display46.4 F heating function Fig.5-Remote Control DisplayREMOTE CONTROLNOTE:To switch between_C and_F,push the“MODE”and “▼”button simultaneously while the remote controller is off. IMPORTANT:The remote control can operate the unit from a distance of up to25ft.(7.6m)as long as there are no obstructions. This is one way communication only(from remote control to fan coil).The remote control can perform the following basic functions:S Turn the system ON and OFFS Select operating modeS Adjust room air temperature set point and fan speedS Adjust airflow directionBattery InstallationTwo AAA1.5v alkaline batteries(included)are required for operation of the remote control.To install or replace batteries:1.Slide the back cover off the control to open the batterycompartment.2.Remove old batteries if you are replacing the batteries.3.Insert batteries.Follow the polarity markings inside thebattery compartment.4.Replace battery compartmentcover.A08299 NOTE:1.When replacing batteries,do not use old batteries or a differenttype battery.This may cause the remote control to malfunction.2.If the remote is not going to be used for several weeks,removethe batteries.Otherwise battery leakage may damage the remote control.3.The average battery life under normal use is about6months.4.Replace the batteries when there is no audible beep from theindoor unit or if the Transmission Indicator fails to light.Remote Control Operation-Quick Start NOTE:When transmitting a command from the remote control to the unit,be sure to point the control toward the LED display on the front panel of the unit.The unit confirmsreceipt of a command by sounding an audible beep.1.Turn the unit on by pushing the ON/OFF button.2.Select the desired mode by pushing the mode button.Fig.6-Modes3.Select the temperature set point by pointing the controltoward the unit and pressing the“▲”or“▼”temperatureset point buttons until the desired temperature appears onscreen.4.Select the desired fan speed by pressing the FAN button toselect desired fan speed.5.Set the airflow direction.When the unit is turned on,thelouvers default to the cooling or heating position.The usercan adjust the default louver position by pushing the“SWING”buttons.For details on operating the SWINGlouvers,refer to the Remote Control Functions section.Emergency OperationIf the remote control is lost,damaged,or the batteries are exhausted, the ON/OFF button on the unit can be used to run the unit. Press the ON/OFF button once briefly when the system is off. To stop emergency operation,push the ON/OFF buttononce.WARNING:Use an insulated object to press the auto button.Fig.7-Emergency Operation REMOTE CONTROL FUNCTIONS The remote control is the interface between the user and the high-wall mands are entered by the user to control the system.Any command that has been entered with the remote control will remain in the memory until it is changed by the user or the batteries are replaced.NOTE:When entering commands,point the remote in the direction of the LED display on the front panel.appears for a short period of time on the remote control when the command is entered.The unit only emits an audible beep when the signals are received correctly.ON/OFF:Press this button to turn unit on and off.MODE:Each time this button is pressed,a mode is selected in a sequence that goes from AUTO,COOL,DRY,FAN and HEA T,as shownbelow:Fig.8-ModesAUTO:The AUTO mode is the default setting at start-up.In the AUTO mode,the set temperature will not appear on the LCD,and the unit automatically selects the suitable operation mode to provide comfort based on parameters set from the factory.COOL:To cool to the selected set point and remove moisture.System varies compressor speed to maintain desired temperature.DRY:Select the DRY MODE to increase moisture removal during warm humid conditions.The unit operates at low speed.The Fan Speed cannot be adjusted.Press the”SWING”button to adjust the fan blow angle.FAN:To circulate air without heating or cooling use the Fan Speed button to select speed from low to high.HEAT:To heat to the selected room set point.The system varies compressor speed to maintain desired room temperature.▼:Press this button once to decrease the setpoint by1_F.If the button is pressed for more than two seconds,the setpoint decreases rapidly in increments of1_F.In AUTO mode,set temperature is not adjustable.▲:Press this button to increase the setpoint by1_F.If the button is pressed for more than two seconds,the setpoint increases rapidly in increments of1_F.In AUTO mode,set temperature is not adjustable.FAN:Fig.9-FanspeedPress the Swing button to select different vertical(up and down) air discharge directions including Continuous Sweep.The Swing Louver icon appears.Press this button to set swing angle,which changesbelow.at current position)Fig.10-Swing buttonsTURBO:The desired room set point can be achieved faster in TURBO mode.After selecting the“HEAT”or“COOL”mode button, push the“TURBO”button.The TURBO icon appears on the remote controller and the unit runs at an ultra-high speed.To deactivate the feature,push the“TURBO”button again.The unit returns to normal operation.I FEEL:Press this button to use the I FEEL function,and the icon appears. The unit senses room temperature at the remote controller instead of at the indoor unit.It then adjusts airflow and temperature accordingly for the ultimate in personal comfort control and energy savings. Press the button again to exit this function.For best performance, keep remote controller away from heat or cold temperature sources while using this function.TEMP:By pressing this button,you can see the indoor set temperature, indoor ambient temperature or outdoor ambient temperature on the indoor unit’s display.The setting on remote controller is selected circularly as shown below:Fig.11-TempTimer ON-Timer OFFTo set when you want the unit to turn On at the end of a selected time period,use the button labeled“Time-ON”on the remote controller.Press this button to make the clock icon disappear, replaced with the word“ON”(blinking).Press“▲”or“▼”buttons to adjust timer setting1minute at a time.Press and hold “▲”or“▼”button to set timer more quickly.Press“Timer-ON”button again to confirm setting,and the word“ON”stops blinking. To cancel,press the“Timer OFF”.NOTE:Under Timer On and Off status,you can set T-ON and T-OFF simultaneously.Before setting timer,be sure toset clock to correct time.CLOCK SETTINGPress this button to set clock time.The Clock icon on remote controller blinks.Within5seconds,press“▲”or“▼”button to set clock time.With each press of the“▲”or“▼”buttons,the clock time increases or decreases by1minute.To quickly adjust the time setting,press and hold“▲”or“▼”button for2seconds. Release the button when you have reached the desired time setting. Press the“CLOCK”button to confirm the time,and clock icon stops blinking.NOTE:Clock time adopts24-hour mode.A12-hour format is not available.SLEEP:The unit automatically adjusts room temperature during your sleep time.This slight change in temperature will not affect your comfort level due to the natural effects that sleeping has on the body,however it saves on energy consumption and lowers your electric bill.The unit has four Sleep Modes to select from.Press the SLEEP button to select Sleep1,Sleep2,Sleep3,Sleep4modes or Cancel. The SLEEP icon appears.LIGHT:This function allows the user to turn the display ON or OFF on the front panel.Press the light icon to turn the indoor unit front panel ON or OFF.The remote control displays the Light Icon.WIFI Button:Press and hold this button for three seconds to turn WIFI function on or off.See the“Operation of Smart Control”section for more information.Only the set point temperature appears on the front panel and on the remote bination ButtonsCombination of“▲”and“▼”Buttons:Press“▲”and“▼”buttons simultaneously for8secondsor unlock the keypad.If the remoteis locked,is displayed.In this case,pressing any button,blinks three timesto acknowledge the keypad is locked.process to unlock the remote controller.Combination of“MODE”and“▼”Buttons: Switch between Fahrenheit and Centigrade.At unit OFF,press the “MODE’”and“-”buttons simultaneously to switch between_C and _F.Energy-Saving FunctionUnder the cooling mode,press the“TEMP”and“CLOCK”buttons simultaneously to start or stop the energy-saving function. When the energy-saving function starts”SE”displays on the remote controller,and the air conditioner adjusts the set temperature automatically according to the factory setting to reach the best energy-saving effect.Press the“TEMP”and“CLOCK”buttons simultaneously again to exit the energy-saving function. NOTE:S Under the Energy-Saving function,the fan speeddefaults to the auto speed and can not be adjusted.S Under the Energy-Saving function,the set temperature can not be adjusted.Press the“TURBO”button and theremote controller will not send the signal.S The Sleep and Energy-Saving functions can not operate at the same time.If the Energy-Saving function has beenset under the Cooling mode,press the Sleep button tocancel the Energy-Saving function,If the Sleep functionhas been set under the Cooling mode,start theEnergy-Saving function to cancel the Sleep function. 46_F Heating Functions:Under the heating mode,press the“TEMP”and“CLOCK”buttons simultaneously to start the46_F heating function.When this function starts,the“$”and46_F icons appear on the remote controller,and the air conditioner maintains the heating status. Press the“TEMP”and“CLOCK”buttons simultaneously again to exit the46_F heating function.NOTE:S Under the46_F heating function,the fan speed defaults to the auto speed and it can not be adjusted.S Under the46_F heating function,the set temperature can not be adjusted.Press the TURBO button and the remotecontroller will not send the signal.S The Sleep function and the46_F heating function can not operate at the same time.If the46_F heating functionhas been set under the Cooling mode,press the Sleepbutton to cancel the46_F heating function.If the Sleepfunction was set under the Cooling mode,the46_Fheating function cancels the Sleep function.CLEANING,MAINTENANCE AND TROUBLESHOOTINGPeriodic MaintenancePeriodic maintenance isrecommended to ensure proper operation of the unit.Recommended maintenance intervals may vary depending on the installation environment,e.g.,dusty zones,etc.Refer to Table 1.Cleaning the CoilClean the coil at the beginning of each cooling season,or when e a vacuum cleaner or a long-bristle brush to avoid damage to the coil fins.Air FiltersRemove and clean the air filters once a month.NOTE:If air filters show signs of excessive wear or are torn,they must be replaced.Contact your local dealer for replacement filters.1.Open front panel on unit.2.Pull filters down to remove.3.Vacuum filters.4.Clean with warm water.5.Shake filter to remove excess water and dry thoroughly.6.Replace filter by sliding into rack until filter snaps in place.7.Close front panel on unit.Indoor Unit Front PanelTo clean the front panel on the indoor unit,wipe the outside with a soft,dry cloth.If necessary,a mild liquid detergent can be applied and wiped off with a dry cloth.Preparing for Extended Shutdown PeriodClean the filters and reposition them in the unit.Operate the unit in Fan only mode for 12hours to dry all internal parts.Turn main power supply off and remove batteries from the remote control.System Operation RecommendationsThe items outlined in the following list helps to assure proper system operation:S Replace both remote control batteries at the same time.S Point the remote control toward the unit display panel when transmitting a command.S Keep doors and windows closed while unit is operating.S Contact an authorized service representative if a problem arises that cannot be easily resolved.S Do not perform cleaning or maintenance activities while unit is on.S Keep display panel on unit away from direct sunlight and heat as this may interfere with remote control transmissions.S Do not block air intakes and outlets on the indoor or outdoor units.Energy Saving RecommendationsThe following recommendations add greater efficiency to the ductfree system:S Select a comfortable thermostat setting and leave it at chosen setting.Avoid continually raising and lowering the setting.S Keep unit filter clean.Frequent cleaning may be necessary depending on indoor air quality.S Use drapes,curtains or shades to keep direct sunlight from heating room on very hot days.S Do not obstruct air intake on front panel.S Turn on air conditioning before indoor air becomes too uncomfortable.TroubleshootingRefer to Table 2before contacting your local dealer.Table1—Periodic MaintenanceINDOOR UNIT EVERY3MONTHS EVERY6MONTHS EVERY YEARClean Air Filter*Change Remote Control Batteries SSSOUTDOOR UNIT EVERY3MONTHS EVERY6MONTHS EVERY YEARClean Outdoor Coil from Outside Clean Outdoor Coil from Inside†Blow Air Over Electric Parts†Check Electric Connection Tightening†Clean Fan Wheel†Check Fan Tightening†Clean Drain Pans†SSSSSSS*Increase frequency in dusty zones.{Maintenance to be carried out by qualified service personnel.Refer to the Installation ManualTable2—TroubleshootingPROBLEM POSSIBLE CAUSE SOLUTIONIndoor unit emits a bad odor on start-up ∙Air filter dirty∙Output air still has odor after cleaning filter.∙Clean the air filter∙Contact your service representative.You hear water flowing noise when the unit is running ∙This is normal and is the refrigerant flowingthrough the system.∙No maintenance requiredIndoor unit produces a mist when the air conditioner is running ∙This is normal cooling and is caused by highhumidity and temperature in the room.∙No maintenance required.Mist should stop asroom is cooled down and the humidity is removed.Wireless remote control doesnot work∙Batteries are dead.∙Unit needs to be reset.∙See battery replacement section in this manual and replace batteries.∙Turn off power to indoor unit.Remove plug from wall and then reinsert plug.Restart unit.Water leaks into room from Indoor unit ∙Condensing water has overflowed∙Check indoor condensing drain or call yourrepresentative.Unit/System Does Not Work∙T o protect the unit upon an immediate restartafter a stop,the system controller delaysthe unit for3minutes before allowing the unitto start back up.∙The circuit breaker has tripped or a fusehas blown.∙Power failure.∙Error codes displayed∙Voltage is too low.∙After turning unit off,wait at least3minutes before trying to restart.∙Reset the circuit breaker or replace the fuse with the specified replacement fuse.∙Restart operation when the power is restored.∙Call your service representative.∙Call your service representative.Cooling is Not Working Properly ∙The filter is blocked with dust.∙T emperature is not set properly.∙A window or door is open.∙The outdoor unit is obstructed.∙The fan speed is too low.∙The operation mode is in Fan instead ofCool.∙Clean the air filter.∙Check the temperature and reset if necessary.∙Close the window or door.∙Remove the obstruction.∙Change the fan speed selection.∙Change the operating mode to Cool or reset theunit.Heating is Not Working Properly ∙The filter is blocked with dust.∙T emperature is set too low.∙A window or door is open.∙The outdoor unit is obstructed.∙Clean the air filter.∙Check the temperature and reset if necessary.∙Close the window or door.∙Remove the obstruction.Unit Stops During Operation∙The Off timer is not operating correctly.∙Error codes displayed ∙Restart the operating mode.∙Call your service representative.Copyright2015International Comfort Products Lewisburg,TN37091USAManufacturer reserves the right to change,at any time,specifications and designs without notice and without obligations.Catalog No:42102941000 Replaces:NEWEdition Date:06/15。
维克组合式空调操作规程(3篇)
第1篇一、操作前准备1. 确保空调机组电源正常,配电箱内各开关位置正确。
2. 检查空调机组各连接管道是否完好,无泄漏现象。
3. 检查风机皮带是否完好无损,无松动现象。
4. 检查空调机组各风阀状态是否正确,无异常情况。
5. 清除空调器及风管中的灰尘、杂物,确保系统畅通。
6. 安装初效板式空气过滤器。
二、开机操作1. 按下总控制柜上的相应空调机组电源按钮,指示灯亮,电源接通。
2. 按下空调机组主风机按钮,指示灯亮,机组开始运行。
3. 根据车间区域规定调节温湿度,温度设定在18~26℃之间,湿度设定在45~60%之间。
4. 检查冷媒为低温冷冻水(5~7℃),热媒为热水(40~50℃),水质宜软化处理。
5. 在调节新风量无法达到规定的温湿度时,使用热水和冷冻水对空气进行处理,冷冻水温度控制在7~13℃之间,表冷器工作压力为0.5MPa。
6. 调节冷热水在换热器内的流速,宜调节至0.6~1.8m/s,工作压力不应超过0.5MPa。
7. 根据环境、季节的变化,通过调节新风口开启的大小,以达到最佳空调效果。
三、运行中注意事项1. 监控空调机组运行状态,确保机组正常运行。
2. 定期检查冷媒、热媒管道,确保无泄漏现象。
3. 检查风机皮带松紧度,如有松动,及时调整。
4. 定期检查电气线路,确保无损坏现象。
5. 定期检查机组过滤网积尘情况,当终阻力达到规定值时,及时清洗或更换过滤器。
6. 机组运行一段时间后,重新调整皮带的松紧度,以后每运行三个月进行一次例行检查。
四、停机操作1. 关闭空调机组主风机按钮,指示灯灭,机组停止运行。
2. 关闭总控制柜上的相应空调机组电源按钮,指示灯灭,电源断开。
3. 关闭冷媒、热媒阀门,确保系统无压力。
4. 关闭新风阀门,确保系统封闭。
五、维护保养1. 定期进行机组运行状态检查,对机组进行长期而有效的维护和保养。
2. 机组盘管应定期冲洗、去除盘管外积灰,盘管使用2-3年后应清洗管内水垢,如有条件,机组盘管用冷、热水宜采用软化水。
地源热泵空调机组技术手册
编制审核会签批准青岛海尔空调电子有限公司目录一.新品推介……………………………………………………3~51.行销商标2.型号识别3.卖点4.上市背景介绍5.产品差异点6.新品与现有产品的对比二.使用说明……………………………………………………5~91.外观介绍2.产品功能介绍3.使用和保养4.技术参数5.选购常识6.主关件明细三.安装维修资料……………………………………………9~271. 易损件明细2. 管路系统3. 线路图4. 安装资料5. 常见故障及其排除6.电控操作指南7. 机组安装参考图8. 吊装图四.附录………………………………………………………28~401. 机组外观图2. 技术参数表3. 主要零部件清单4. 易损件清单5. 线路图一.新品推介资料1.行销商标:Haier2.型号识别3.卖点3.1一句话卖点:节能环保,冷热两用。
3.2三句话实惠:高效节能;充分利用地热等环保能源;制冷、制热两功能;3.3五句话技术支持:●成功运用柔性变容量技术调节负荷,比传统中央空调节能30%●热源多样化——充分利用地热资源:既可用地下水,又可用海水、生活废水、工业废水以及温度适宜的地表水。
●PLC控制——采用德国西门子高性能PLC控制器,根据现场不同情况可方便修改各项参数,提高系统适用性和能效比●冷热两用——通过水路的简单切换来实现机组制冷/热的功能转换,机组运行可靠,维护方便●完善的售后服务体系——买海尔空调,所有的事情都是我们的。
4.上市背景介绍原有水冷螺杆机HX/LSBLG系列产品为单冷机型,无法满足市场上对热泵型机组的需求。
LSBLGR系列地源热泵机组在原有单冷产品基础上增加了制热功能;通过水路的简单切换实现冷热两用。
与柔性变容量调节方式整合为一体,实现机组高效节能。
经过上述设计变更,能更好的满足市场的需要。
海尔公司以利用清洁能源、改善人类居住质量为己任,致力于发展地源热泵中央空调,在地源热泵中央空调技术领域始终保持领先水平。
KLDP29型空调机组说明书
K L D P29型铁路客车空调机组使用说明书二○○○年十月目录1.概述...........................22.主要技术参数.......................23.结构及用途........................54.工作原理概述.......................75.安装与操作........................86.保养与维修........................117.附图附图1-1 KLDP29客车空调机组制冷系统图附图1-2 KLDP29型客车空调机组附图1-3 KLDP29型客车空调机组安装图附图1-4 KLDP29客车空调机组插头编号图附图1-5 机组减震器图附图1-6 防水密封条截面图1.概述KLDP29型单元式客车空调机组是供铁路客车使用的舒适性空气调节设备。
空调机组的结构型式为车顶单元式,安装在车顶端部。
与空调机组配套的电气控制柜安装在车内配电室,空调机组与电气控制柜通过电气连接器(插头、插座)连接,由发电车集中供电(亦可由本车悬挂式发电机供电)。
KLDP29型空调机组是铁路客车专用空调设备。
耐振、抗冲击、能适应风吹、日晒、雨淋等露天环境。
适用于双层软座空调客车。
2.主要技术参数2.1空调机组的技术参数2.2 主要部件的技术参数(1)制冷压缩机:2台(2)冷凝用轴流风机(3)低温保护器: 1个型式: 环境温度式型号: VRS-C234动作: 18℃(4)蒸发用离心风机:1台(5)电加热器: 1台(6)高压压力开关: 2个型号: ACB-QB11动作: 电路断开 2.9±0.1MPa电路接通 2.4±0.15MPa(7)低压压力开关: 2个型号: LCB-QA02动作: 电路断开: 0.19±0.05MPa电路接通: 0.32±0.05MPa (8)配线连接器插头:连接器插头的接线图见附图1-4。
- 1、下载文档前请自行甄别文档内容的完整性,平台不提供额外的编辑、内容补充、找答案等附加服务。
- 2、"仅部分预览"的文档,不可在线预览部分如存在完整性等问题,可反馈申请退款(可完整预览的文档不适用该条件!)。
- 3、如文档侵犯您的权益,请联系客服反馈,我们会尽快为您处理(人工客服工作时间:9:00-18:30)。
K L D P29型铁路客车空调机组使用说明书二○○○年十月目录1.概述...........................22.主要技术参数.......................23.结构及用途........................54.工作原理概述.......................75.安装与操作........................86.保养与维修........................117.附图附图1-1 KLDP29客车空调机组制冷系统图附图1-2 KLDP29型客车空调机组附图1-3 KLDP29型客车空调机组安装图附图1-4 KLDP29客车空调机组插头编号图附图1-5 机组减震器图附图1-6 防水密封条截面图1.概述KLDP29型单元式客车空调机组是供铁路客车使用的舒适性空气调节设备。
空调机组的结构型式为车顶单元式,安装在车顶端部。
与空调机组配套的电气控制柜安装在车内配电室,空调机组与电气控制柜通过电气连接器(插头、插座)连接,由发电车集中供电(亦可由本车悬挂式发电机供电)。
KLDP29型空调机组是铁路客车专用空调设备。
耐振、抗冲击、能适应风吹、日晒、雨淋等露天环境。
适用于双层软座空调客车。
2.主要技术参数2.1空调机组的技术参数2.2 主要部件的技术参数(1)制冷压缩机:2台(2)冷凝用轴流风机(3)低温保护器: 1个型式: 环境温度式型号: VRS-C234动作: 18℃(4)蒸发用离心风机:1台(5)电加热器: 1台(6)高压压力开关: 2个型号: ACB-QB11动作: 电路断开 2.9±0.1MPa电路接通 2.4±0.15MPa(7)低压压力开关: 2个型号: LCB-QA02动作: 电路断开: 0.19±0.05MPa电路接通: 0.32±0.05MPa (8)配线连接器插头:连接器插头的接线图见附图1-4。
(9) 机组减震器:(参见附图1-5)6个(10) 新风过滤网: 8个(11) 蒸发器滤尘网: 2个2.3空调机组附件(1) 配线用连接器插座: 各1个(2)防水密封条: 4.1米共3根(截面尺寸见附图1-6)3.结构及用途3.1 空调机组客车空调机组各零部件组装在一个不锈钢板制成的箱体内,加盖板后形成一个整体。
空调机组的主要部件包括全封闭制冷压缩机2台、冷凝器2台、毛细管2组、蒸发器2台、气液分离器2台、干燥过滤器2个、电加热器2台、离心风机1台、轴流风机1台等。
箱体分为室内侧和室外侧两部份。
压缩机、离心风机、电加热器、蒸发器等安装在室内侧;轴流风机和冷凝器等安装在室外侧。
空调机组的箱体和上盖全部采用SUS304进口不锈钢板制成。
组成制冷系统的部件及配管全部用银钎焊连接,构成全封闭的制冷循环系统,作为制冷剂的R22封闭在制冷系统内。
空调机组的冷风出口在机组前端的底部中间处,回风口在机组底部冷风出口外侧,新风口在机组左右侧板的中间部位,空调机组蒸发器前和新风口处分别装有滤尘网和新风过滤网。
空调机组的外形和结构参见附图1-2。
3.2 主要部件3.2.1制冷压缩机制冷压缩机为全封闭式压缩机,是将电动机、压缩机构及供油系统组装在同一个密封的机壳内。
制冷压缩机通过橡胶减震器安装在空调机组箱体内。
制冷压缩机的作用是将来自蒸发器的低温低压的 R22气体压缩成高温高压的气体,并送往冷凝器。
3.2.2 蒸发用离心风机室内侧通风机为双轴伸直联多叶片式离心风机。
室内侧通风机可以强化冷媒在蒸发器中的蒸发过程,并将经蒸发器冷却降温的空气或经电加热器加热升温的空气送入车内。
3.2.3 冷凝用轴流风机室外侧通风机为直联轴流式风机,风机的叶轮安装在立式电机上,并采取防水结构。
室外侧通风机用于强化冷媒在冷凝器中的凝结放热过程。
3.2.4 蒸发器为铜管套铝肋片的直接蒸发式空气冷却器。
低温低压的气液混合的冷媒在蒸发器内蒸发,当车内循环空气和新鲜空气混合后,通过蒸发器时进行热交换。
这时,空气的热量被蒸发器内的冷媒吸收,温度降低。
3.2.5 冷凝器其结构型式与蒸发器相同。
高温高压的R22气体,通过冷凝器时,在外界空气的强制冷却下,变成常温(约50℃)高压的冷媒液体。
3.2.6毛细管为一组内径极小的细长铜管,当高压液体冷媒流经这组高阻力管时,起到节流降压的作用。
3.2.7气液分离器将来自蒸发器的冷媒气体与未蒸发的液体分离出来,只将气体的冷媒送给压缩机。
3.2.8干燥过滤器将滤网固定在容器内,并封入干燥剂,过滤冷媒中的残余杂质,吸取冷媒中的残留水份。
3.2.9电加热器电加热器的作用主要是为了给送入车内的新鲜空气预热。
电加热器的结构为不锈钢框架式结构,带不锈钢绕片的电热管,固定在框架内。
框架上装有温度继电器和温度熔断器,用于防火保护。
电热元件采用优质电热丝绕成螺旋形保持在不锈钢管的中心,其周围坚固地填满导热性能好的绝缘粉末。
电热丝通电后其电能可以全部转变为热,并迅速地通过管子表面散热。
3.2.10高压压力开关当制冷系统的压力异常高时,高压开关动作,停止压缩机的运转,保护制冷系统。
高压开关的复位方式为自动复位。
3.2.11低压压力开关当制冷系统的压力异常低时,低压开关动作,停止压缩机的运转,保护制冷系统。
低压开关的复位方式为自动复位。
3.2.12低温保护器在室内换热器吸入空气温度很低的情况下运转压缩机时,会引起室内换热器的表面结霜,有可能导致压缩机损伤。
所以,当室内换热器的吸入空气温度低于18℃时,低温保护器就会动作,停止压缩机的工作。
3.3电气控制柜电气控制柜安装在车内配电室内,通过它控制车顶上的空调机组。
控制柜内有各种控制开关、转换开关、接触器、继电器、计时器、温度调节器等组成保护和控制电路。
详见KLC29D[2]型客车空调电气控制柜使用说明书。
4.工作原理概述4.1制冷系统的工作过程空调机组制冷系统流程见附图 1-1。
由压缩机压缩成高温高压的R22蒸气,进入风冷冷凝器,经外界空气的强制冷却,冷凝成常温高压的液体,进入毛细管节流降压,变成低温低压的气液混合冷媒,然后进入蒸发器,吸收流过蒸发器的空气的热量,蒸发成低温低压的蒸气,再经过气液分离器,被压缩机吸入,完成一个制冷循环。
压缩机不断工作,达到连续制冷的效果。
车内的空气通过蒸发器时,空气中的水份冷凝成水滴,被引到车外而起除湿作用。
4.2降温车内的循环空气及由新风道引入的新鲜空气,由机组的通风机吸入,在蒸发器前混合,通过蒸发器得到冷却,并由机组底部出风口送入车顶通风道各格栅,向车内吹出冷风。
在制冷系统连续工作下使车内温度逐渐降低,并由温度调节器自动调节车内空气温度。
可在22℃~28℃范围内调节车内空温度。
冷凝器的冷凝借助于轴流风机,从机组上方吸进外界环境空气,经过冷凝器后,向客车两侧枕木方向排出。
4.3升温由新风口引入的新鲜空气及车内循环空气,被机组的通风机吸入在电加热器前混合,通过本装置的电加热器加热。
被加热的空气,由通风机送入车内风道各格栅,向车内送热风,使温度徐徐上升,并由温度调节器自动调节车内空气温度,保持车内的一定舒适温度。
本机组的电加热器,主要是用于在寒冷季节对送入车内的新鲜空气进行预热。
5.安装与操作5.1安装5.1.1拆箱空调机组的包装为木箱包装,拆箱时应注意不要碰伤空调机组。
5.1.2防水密封条的安装按照附图1-3所示的位置关系,将防水密封条安装好。
先在防水密封垫的安装槽内均匀地涂上密封胶,再将防水密封垫放入槽中。
为了防止雨水漏入车内,施工时要确保密封条粘接处的密封性。
5.1.3空调机组的吊装吊运空调机组时,必须使用专用吊具,在机组两侧吊座处将机组水平吊起,缓缓落至车顶安装座处。
机组减震器与车顶上空调机组安装座之间有间隙的话,应插入调整板(用户自备)进行调整,确保空调机组处于水平位置。
注意:严禁用螺栓强行联接,以免损坏减震器。
然后用螺栓(用户自备)将空调机组固定好。
5.1.4排水管的连接机组制冷时产生的凝结水由机组底部的排水管排出,把排水管端部管帽(靠近车体端部一侧)旋下,将排水过渡管(用户自备)与车体泻水管连接牢靠。
至此,车顶上作业全部完成。
5.1.5接线及电气连接器的安装将电气连接器插座侧的电线按线号要求,接到控制柜内的各接线端子上,将电源输入线接到控制柜内相应的接线端子上。
将电气连接器空调机组侧的插头与车体侧的插座连接好,并确保连接妥当。
5.1.6在风机运转下进行淋雨检查,水不得从回风口和出风口处漏入车内。
5.2运转前的检查在运转空调机组之前,必须对下列项点进行检查,在确认没有问题之后,方可开始运转。
5.2.1配线用的电气连接器是否确实接好。
5.2.2电气回路是否正常。
5.2.3主回路及控制回路的绝缘电阻是否均正常。
5.2.4对于装有防雪盖的空调机组,制冷运转前,是否已将防雪盖拆下。
5.2.5通风机的叶轮是否碰风筒的内壁。
5.3运转确认关于空调机组的操作,详见《客车空调机组电气控制柜使用说明书》。
5.3.1室内通风机的运转室内通风机运转时,请确认一下车内是否有风吹出,风量极小时,可认为是风机反转,请将电源相序调整正确,即将三相中的任意两相对调(注意,空调机组出厂时各电机的相序已调好,请不要随意调换),请确认一下是否有异常振动和异常噪音。
5.3.2送风均匀性的调整车内各出风口的送风量必须均匀,否则将影响制冷效果及车内舒适性。
可通过对车内出风口的调整,保证客室内送风均匀。
5.3.3室外通风机的运转请确认室外轴流风机的运转是否正常;旋转方向是否正确。
5.3.4制冷运转全制冷状态时,吸入和吹出的空气温差约为8~10℃时为正常。
请确认一下是否有异常振动、异常噪音,同时注意电流读数。
用电流表测定压缩机运转电流值在制冷剂泄漏判定线以下时,可判定为制冷剂泄漏。
5.3.5加热运转全加热状态时,吸入和吹出的空气温差约为7~9℃时为正常。
同时注意电流读数。
5.4空调机组的安全运行铁路客车空调的安全运行极为重要,安全运行的含义,一方面指空调机组的安全运转,另一方面指对行车安全的影响。
5.4.1空调机组的安全操作空调机组的操作和管理工作,必需由懂得制冷技术和电气技术的工人来担任。
开机之前,必须认真检查电气系统的安全性,严格按照电工操作规则进行操作。
在进行电气控制柜的检修时,必须切断电源,严禁带电作业。
5.4.2空调系统的保护措施为了确保空调机组可靠、安全地工作,空调机组在制冷系统和电气系统方面具有以下保护措施:(1)电源有过电压和欠电压保护。
(2)压缩机有空气开关保护、压力开关保护、过电流保护、低温保护、延时起动保护。
(3)风机有热继电器保护。
(4)电加热器有空气开关、温度继电器及温度熔断器保护。
当空调机组出现故障时,必须查明原因,排除故障后才允许重新起动,严禁带故障强行起动。
