Dreamweaver设计说明书
Dreamweaver网页设计工具入门指南

Dreamweaver网页设计工具入门指南Chapter 1: Introduction to DreamweaverDreamweaver is a powerful web design tool developed by Adobe. It provides web designers and developers with a comprehensive set of features and functionalities to create dynamic and visually appealing websites. This chapter will introduce the basics of Dreamweaver and how to get started with the software.1.1 Installing DreamweaverTo begin using Dreamweaver, you first need to install the software on your computer. Visit the Adobe website and download the installer file for your operating system. Follow the on-screen instructions to complete the installation process.1.2 Interface OverviewUpon launching Dreamweaver, you will be greeted with a user-friendly interface. The main components of the interface include the Document window, the Toolbar, and various panels that can be customized based on your needs. Familiarize yourself with these components to effectively navigate through the software.Chapter 2: Creating a WebpageIn this chapter, we will explore how to create a webpage using Dreamweaver. Whether you are starting from scratch or working withan existing template, Dreamweaver provides a variety of tools to help you build your website.2.1 HTML BasicsBefore diving into Dreamweaver, it is important to have a basic understanding of HTML. HTML stands for Hypertext Markup Language, which serves as the backbone of webpages. Learn the basic structure of an HTML document, including tags, attributes, and elements.2.2 Design View vs. Code ViewDreamweaver offers two distinct views for designing webpages: Design view and Code view. Design view allows you to visually create and layout elements, while Code view provides a more precise control over the HTML code. Understanding the differences between these views will enhance your overall web design experience.Chapter 3: Working with CSSChapter 3 will focus on Cascading Style Sheets (CSS), a powerful tool that enhances the appearance and layout of webpages. Dreamweaver offers comprehensive CSS editing capabilities, making it easier for designers to manage and style their websites.3.1 CSS BasicsBefore applying CSS in Dreamweaver, it is essential to understand the fundamental concepts of CSS. Learn about selectors, properties, and values in order to style HTML elements effectively.3.2 CSS DesignerDreamweaver's CSS Designer allows designers to visually create and edit CSS rules. This powerful tool streamlines the process of applying styles and managing CSS properties. Familiarize yourself with the CSS Designer to enhance your workflow.Chapter 4: Responsive Design with DreamweaverIn today's mobile-driven world, it is crucial to create websites that are responsive and accessible across various screen sizes. Dreamweaver provides features and tools to facilitate the creation of responsive web designs.4.1 Media QueriesMedia queries allow websites to adapt to different screen sizes by applying specific CSS rules based on the device's characteristics. Learn how to use Dreamweaver's built-in media query feature to create responsive designs.4.2 Fluid Grid LayoutsFluid grid layouts provide a flexible and grid-based structure for designing responsive webpages. Dreamweaver simplifies the creationof fluid grid layouts by offering pre-built templates and a visual interface for easy customization.Chapter 5: Website Management and PublishingOnce you have created your webpage, Dreamweaver offers features to help you manage and publish your website effectively. This chapter will cover the process of testing, previewing, and publishing your site.5.1 Testing and PreviewingDreamweaver allows you to test your webpage across different browsers and devices to ensure compatibility. In addition, you can preview your site in real-time to see how changes affect its appearance and functionality.5.2 Publishing Your WebsiteDreamweaver provides seamless integration with web hosting services, allowing you to publish your website with ease. Learn how to configure the FTP settings and upload your files directly from within the software.In conclusion, Dreamweaver is a comprehensive web design tool that empowers designers and developers to create visually stunning and functional websites. This article has provided an overview of the software, including installation, interface, webpage creation, CSS editing, responsive design, and website management. By masteringDreamweaver, you can unleash your creativity and design websites that captivate your audience.。
dreamweaver网页设计实验指导书
网页设计实验指导书(一)DreamWeaver静态网页制作第一章网站规划 ................................................................................................... - 3 - 第二章Dreamweaver静态网页设计实验 ...................................................... - 8 - 实验一在Dreamweaver中建立一个站点.................................................. - 8 - 实验二在网页中使用文本........................................................................... - 15 - 实验三超级链接的建立............................................................................... - 21 - 实验四网页图像的应用............................................................................... - 29 - 实验五网页表格操作 ..................................................................................... - 36 - 实验六利用表格进行网页布局..................................................................... - 39 - 实验七利用层进行网页布局....................................................................... - 48 - 实验八行为和图层的应用............................................................................. - 53 -实验九框架型网页的制作........................................................................... - 66 - 实验十一交互式表单的应用..................................................................... - 84 - 实验十二HTML语言基础应用 .................................................................... - 90 - 实验十三网页动态效果辑............................................................................. - 97 - 实验十四CSS样式表的创建及运用....................................................... - 106 -第一章网站规划一、网站建设的基本流程网站建设的基本流程是:网站规划,网页设计,网上安家以及网站维护与管理,如图1-1所示。
Dreamweaver设计说明书

学生信息管理系统设计说明书2014年12月一、选题背景1、各个高校的教育规模不断扩大2、各高校的学生人数急剧增加和各种信息的成倍增长3、提高学生信息管理工作的效率,做到信息的规范管理、科学统计和快速查询,以减少管理方面的工作量二、国内外研究现状国内高校现有的学生信息管理系统还存在很多的问题,主要是:1、功能单一2、系统孤立3、在软件的使用上,系统存在可扩充性和灵活性差,无法不断完善系统,来适应学校的发展需要。
国外的开发技术比国内的成熟,在开发过程中遵循了可扩展性和包容性,使得系统1、能接纳已有的数据结构,扩展时有效地保护已有的资源2、能方便地调整结构,易于扩充功能,升级方便。
三、可行性分析1、技术可行性:以Windows XP为操作系统,采用VB和ACCESS为开发工具设计与开发学生信息管理系统。
2、经济可行性:系统开发成本低,在现有的PC机上就可以提高所需的硬件设备环境,节省有人力、物力和经济效益。
3、操作可行性:用户使用系统时,通过输入正确的用户名和密码进入系统,就可以进行数据库的维护操作和运用。
四、研究内容学生信息管理系统实现的模块具体如下:1、用户登录模块2、学生信息管理模块:a.学籍信息管理模块:输入姓名或学号查询学号、性别、出生年月、联系电话、家庭住址等信息b.成绩信息管理模块:输入姓名或学号查询课程、成绩等信息c.课程信息管理模块:输入姓名或班级查询课程信息d.奖惩信息管理模块:输入姓名或学号查询学生的奖惩信息e.班级信息管理模块:输入姓名或学号查询专业、班级等信息3、个人信息管理模块:查询全面的学生信息4、管理员维护模块:a.学生档案管理:添加、删除、修改学生信息b.权限信息管理:根据情况分配不同的权限五、关键问题和难点一、关键问题1、编写程序完成用户界面等操作,并做好与数据库的连接,运用ACCESS来完成数据库的创建及生成2、数据库的设计与开发:前期和应用程序的开发以及后期数据的不断更新二、难点1、根据不同的用户分配不同的权限,提高数据的安全性。
【设计】中文版DreamweaverCS6网页设计教程IT168文库

【关键字】设计第1章Dreamweaver CS6简介Dreamweaver CS6是一款功能强大的可视化的网页编辑与管理软件。
利用它,不仅可以轻松地创建跨平台和跨浏览器的页面,也可以直接创建具有动态效果的网页而不用自己编写源代码。
Dreamweaver CS6 最主要的优势在于能够进行多任务工作,并且在操作方法、界面风格方面更加人性化。
用户可以根据自己的喜好和工作方式,重新排列面板和面板组,自定义工作区。
本章主要内容●Dreamweaver CS6的新增功能。
●Dreamweaver CS6的安装、删除和启动。
●Dreamweaver CS6的工作界面。
●Dreamweaver CS6的一般操作。
本章重点●Dreamweaver CS6常用面板的使用方法。
●Dreamweaver CS6的文件操作。
1.1 Dreamweaver CS6概述Dreamweaver CS6 是世界顶级厂商Adobe推出的一套拥有可视化编辑界面,用于制作并编辑网站和移动的软件。
在业界通常将Dreamweaver、Flash、Fireworks称为“网页三剑客”。
由于它支持代码、拆分、设计、实时视图等多种方式来创作、编写和修改网页,因此对于初级人员,无须编写任何代码就能快速创建Web页面。
其成熟的代码编辑工具更适用于Web开发高级人员的创作。
CS6新版本使用了版面创建页面,在发布前可使用多预览审阅设计,大大提高了用户的工作效率,而改善的FTP性能可更高效地传输大型文件。
“实时视图”和“多屏幕预览”面板可呈现HTML5 代码,用户能更方便地检查自己的工作。
1.2 Dreamweaver CS6的新增功能相对于以前的版本,Dreamweaver CS6的功能主要在以下方面进行了增强。
1. 可响应的自适应网格版面使用响应迅速的CSS 版面,可以创建跨平台和跨的兼容。
利用简洁、业界标准的代码可为各种不同设备和计算机开发项目,提高工作效率。
Dreamweaver 3 指南 本地网站设置、远程网站设置、网站文件夹概述等说明书

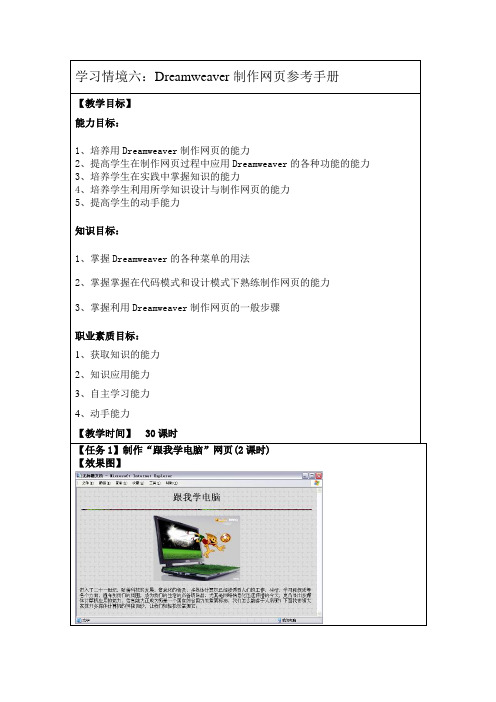
Dreamweaver GuidebookContentsDreamweaver 3 Setting up Your Local Site 4 Setting up Your Remote Site 6 Site Folder Overview 7 Uploading Local to Remote 9 Template Guidelines 12 Editing Your Web Page 20 Creating a New Section 31 Adding to the Main Menu 33 In-page Sub-navigation 35 Tips and Tricks 40 Feedback / Next Steps 42A Brief Introduction.In this guide, we will show you the basic fundamentals for updating and maintaining your Web site.Dreamweaver123Once you click OK,all the files and folders for your site will now be in your Files panel on the right. Now you can edit, delete and add files and folders to your site right here in the Files Dreamweaver.You are now ready to work on your site.42378561. Site name: Fill in the name for this site. (This name is only used in Dreamweaver and is only used to help you know which site you are working on.)2. Local Root Folder: Click on the folder icon to browse on your computer to the location of the root folder for your site. This is the folder where all the files for your site are kept.3. Default images folder : Leave blank4. Links relative to : Document should always be selected.5. HTTP address : Leave blank6. Case-sensitive link checking : Leave unchecked7. Cache : Make sure Enable cache is checked 8. Click OK :Fill in the basic site information on the right.5674123A brief description of the site files and how they work.The Web site is made up of many differentfolders.1. The main folder that contains all the other folders is called the Root Folder.2. The img folder contains all the images for your site. Inside the img folder there are two more folders: content and site .-The content folder is where all the images you add for your site will be stored. -The site folder is were all the images for the entire Web site are stored. You will not need to add or delete anything in this folder. 3. The includes folder is where all thecomponents that create the Web site are stored.-footer.php is the file where all the footer information is located. -header.php is the file where all the header information is located.-menu.php is where the navigation for the site is located.-rightrail.php is where the right side bar is located.4. index.php is the main home page for the site. It is the default page when you visit the Web site.5. The js folder (js stands for JavaScript) contains the files that makes the Web site dynamic. These files control the navigation drop-downs and many other things behind the scenes. You will not need to access or use any of these files.Site Folder Overview123456. The rss folder (rss stands for Really Simple Syndication) contains a special file thatproduces RSS feeds for press releases.7. The styles folder contains all the files thatcreate the look and feel for the Web site.67Expanded files view.12. At the top of the window, click on the button that looks like a plug that is unplugged. This button is how we will connect Dreamweaver to the remote server. Dreamweaver will make the connection and the button will turn into a solid plug.2A progress bar should appear letting you know that you are now copying over all the files. This step may take a while if you are copying over a lot of files.2. Once that is done, your entire site is now on the test server and you will see all your folders now on the test server.Using the link DoIt or IT Support has supplied, open your browser, paste or type the web address in and you will now see your test site in the browser window.1ABWhen copying folders and files, you may get a pop-up message similar to this:If you get this message,1. Check the box: Don’t show me this message again1221How to best work with the template.If you haven’t worked with to create your agency Web site or template, please start by visiting: /resource/There you will find the Webmaker’s resource, complete with tools, tips and tricks, and the Take a moment download, fill out and fax to at: (401) 831-8095, or email us at: First, before we begin to edit the pages, let’s break the page up into sections and look at each 13Each agency header is comprised of the following elements:1. 2. Agency seal, logo, or Rhode Island Seal (as appropriate)3. 4. Statewide sliver is placed at the top of the header of all pages.Agency logo should be 80 pixels x 80 pixels, and either an official state seal or emblem, or agency / municipality logo, with standard blue background. Please contact if you need a custom agency / municipality seal or logo Agency name should follow the standard template format - State or Rhode Island aligned top, followed by the agency name, with the department or division underneathTemplate Guidelines• where applicable. Header should be 80 pixels in height, and width should fit on a screen sized for 1024 x 768 resolution.If you need revisions to your header name graphic, please contact for a new copy.• Branding elements may be added to the right side of the header zone, with the following guidelines:agency name.All branding elements must be sized to allow for logo, name and branding elements to all fit horizontally on a screen sized at 1024 x 768 resolution.Header Bar Breadcrumb Trail1 2This area is designed to contain the following content elements:1. Agency Site Search boxNote: This is currently unavailable for municipality, or non-state agency sites.2. Secondary link categories Links can be added to this area links that are general enough in scope to pertain to the entire site, but are of secondary importance to the main navigation categories. Good examples of this include “Contact Us” and “Press Releases”. Header Bar Guidelines:• Secondary links should remain consistent throughout the site, and should be mirrored in the footer links are as well.• Links should be of secondary importance to main navigation categories.Where am I? The bread crumb is designed to illustrate to the user where they are in relation to the rest of the site, how they got there, and how to get back as needed. Example:Breadcrumb Guidelines:• Links should be placed at the home page, followed by each successive level to thecurrent page you are on, separated by a > sign.• All levels, or pages should be linked to the appropriate section or page, with theexception of the current page - this should remain unlinked to avoid confusion, as it is the page you are currently viewing and does not require a link.• Breadcrumb trail should always be used at the top of the content area, before the first content box h1 to avoid confusion and keep navigation consistency with other sitesusing the standard template.Main NavigationThe main navigation is limited to ONLY the following:Your main site categories. (That’s it!)Reason? It eliminates confusion by not cluttering the area withtoo much information. Only the main categories are shown andplacing secondary information in sub-navigation.Main Navigation Guidelines:• Main navigation items should link ONLY to pages, ormajor sections of your site.• Linking to other items such as PDFs, Word documents,or other Web sites should be reserved for the maincontent area, sub-navigation or right column asappropriate.Reason: Linking to other items or sites creates a breakin the user experience - rather than being presentedwith a section of the Web site to view, the user unexpectedly, or without warning ispresented with either a document, or entirely different Web site to navigate. If it isimportant to have a main category item link to either a document or another site, first have the main navigation item link to a page on your site that then links to this itemfrom the content area on the corresponding page with an appropriate descriptionSub NavigationSub Navigation can be used to assist the user in navigating major sub categories, or pages within a main navigation or category section. There are two styles available:• Dynamic drop down menus• In-page sub-navigationDynamic drop down menusControlled by javascript to show/hide subcategories as needed inthe main navigation.Guidelines:• Subcategories must go only one level deep - no “sub subcategories”.• Subcategory links should remain consistent throughoutthe main category selected.In-page sub-navigationA second option for secondary navigation is using the in-page navigation. This places thesecondary navigation next to the main content area.This right column area can include the following:• Related Links• Press release headlines• Highlights headlines (using the toolbox) - See /rex for more information• Short snippets of content general in scope to the entire site, or related to the main content.• Related association logos, sponsors, agency badges and seals.Featured Links Guidelines:Third column content should not overly extend the length of the screen beyond the main content area. In other words, if the third column becomes the main reason a page is as long as it is, consider summarizing the content in the third column and linking to a page with the full text in the main content area. Or consider, moving the content in it’s entirety to a main content area on a dedicated page.Example: Press releases list only the headline, while using a link to view the entire press release in the body of a page.Reason: This helps limit scrolling and intervention to navigate content, and makes for a better designed web page.Featured Links: (third column, or right column content)Footer Main Content Area: (Center Column)Much like the header bar, this are should accommodate links that are broad in scope to be used throughout the site, while not important enough to warrant space on the main navigation.The footer consists of 3-4 columns of additional links.Footer Guidelines:• All agency sites should use, or link directly to the privacy policy - located at: /policies/• Links placed here should mirror those in the header bar.• Links placed in this region should be of secondary importance to those in the main navigation, but broad enough in scope to justify placement on every page of the site. • ONLY text links should be placed here.The main content area is the location for all primary content on your site. Using the template’s CSS, (cascading style sheet) main content areas are divided into building blocks that can be assembled to best fit your content. The main content area options include:1. Single Blocks per page2. Multiple Blocks per page3. Headline Boxes4. Sub-headings5. Lists6. Images7. TablesMultiple BlocksThis format is useful if multiple content areas are needed that or are distinct enough to warrant their own content block, but are still related to the page as a whole.12TablesWhile the template uses a fully CSS (no tables) design, the main content area is fully optimized to work with tables where appropriate for tabular data.Guidelines:To make sure your table works well with the full liquid, or expandable nature of the template, template widths must either not be set, or set to a percentage of 100 percent or less to ensure they remain within the main content area.ImagesImages can easily be added to content area, and arranged as need be — this includes centering, as well as aligning left or right to allow for text to wrap around the image.Guidelines:Make sure the image is compressed for web (small enough for someone to download on a dial-up connection) and small enough in size to still fit in the main content area on an 800x600 screen.Editing Your Web Page How to add content to your Web site.In Dreamweaver, make sure you are in the Design view1. The first section is the heading. To change the heading, place your curser where you want your heading to be or highlight the heading that is already there to change. Type in the text you would like.With this content highlighted, look at the Properties panel. Where Format selected. If you don’t, click on the drop- should be used on the page.Editing the page content in Dreamweaver.3. To change the sub-heading, place your curser where you want your sub-heading to be or NOTE: There are other Heading choices that you can use. From the drop-down menu, you can select any of the following headings: Heading 2, Heading 3, or Heading4.All the styling and formatting for the Web site is located in an external file. This includes the font choices and colors. There is no need to change the font since that is already done for you. You can change basic formatting like bold or italic, similar to Word. In the panel, you will see similar icons to make type bold or italic (2.1)2.1Creating a List.Another type of content besides paragraphs is lists. A list will look like this:In code view, a list looks like this:<ul> <li>List Item 1</li> <li>List Item 2</li> <li>List Item 3</li> <li>List Item 4</li></ul>21Adding an Image.1. Make sure the image is small enough for someone to download on a dial-up and small enough to fit in the main content area on an 800x600 screen.2. Out side of Dreamweaver, locate your Web site files.3. Place the image into the content folder located in the img folder.3. Go back to Dreamweaver and open the page you want to place the image.4. Place the curser above, below or next to the content on the page where you want the image to be placed.5. Go to the top menu, select Insert / Image.6. In the window, navigate to the img folder then the content folder and select the image to use. Click Choose.7. The next window is for accessibility. Fill out the Alternate text option in the window below. This is a brief but detailed description of what the image is about. Click OK.NOTE: Filling out the Alternative text box satisfies the required State and Federal accessibility guidelines.The image is now inserted into the page.8. With the image selected, In the Properties panel,look for the Align option.9. Select the orientation you would like the image tohave from the drop down menu.1. To insert a table, place the curser where you want to insert the table, go to Insert / Table.2. In the window, input the number of Rows and Columns that are desired.3. Table width : : a brief summery about the contents of the table.You will now have a table similar to this in Dreamweaver, with your chosen number of rows and 23567Add the content to the table.1. Place the curser inside one of the boxes. Begin typing the data for that place.Below, this table example is 4 rows, 2 columns and has a header along the top and has a width of 100%Below, is an example of how it appears on the site.Creating a Link.There are three types of links: an email link, a link to a page within your site, and an external link.1. Highlight the text you want to use for the email link2. In the Properties panel, find the Link option.3.Typethisintothebox:mailto:*****************(makesuretoputintheactualemail address.) Then press Return or Enter on the keyboard.Email Links.32Internal Page Links: Linking to other pages on your site.1. Highlight the text you want to use for the link.4. A window will pop-up to navigate to the location of the page you would like to link to. Navigate to the page you want to link to, select it and click Choose . NOTE : You can also link to a PDF, Word, Excel and other files using the same method. See 2315. After you select the page or file, the path will show up in the Link box.6. The highlighted text will now be a link to a page on your site or a file.52A Single block of content.A single block of content will look like this on your Web site:Creating blocks of content.<div class=”lightblueContent”> <h1>About Us</h1> <p>Paragraph Content</p> <h3>Sub-heading</h3> <p>Paragraph Content</p></div>1. The <div>, </div> creates the block for the content.2. Inside the box, contains the first heading (<h1>, </h1>).-There are four different <h> tags: <h1>, <h2>, <h3>, and <h4>. The <h1> is used as the main heading for each block of content. The <h1> should only be used once per block. Using it more then once in a single block will cause aesthetic issues with the style sheet.2134To create the look for multiple blocks of content, use the following code:<div class=”lightblueContent”> <h1>About Us</h1> <p>Paragraph Content</p><h3>Sub-heading</h3> <p>Paragraph Content</p></div> <div class=”lightblueContent”> <h1>Second Block of Content - Heading</h1> <p>Paragraph Content</p><h3>Sub-heading</h3> <p>Paragraph Content</p></div>1. Copy the entire <div> from the opening tag, <div class=”lightblueContent”> to the closing tag, </div> and paste right below the <div> you just copied.2. Rename the <h1> for this second block of code. And fill in the rest of your content.21Creating a New Section Dreamweaver’s Files panel makes it easy to update and create new pages for your site.Creating a New Section.To create a new section for your site, duplicate an existing folder.Adding a section to the site.2. Right-click the folder to get the pop-up menu. -Choose Edit / Duplicate from the pop-up menu.-The new folder will be placed at the bottom of the 1. Select a folder to duplicate.124. Open the index.php in the new folder.5. Switch to Code view.6. At the very top, look for the first line of code that looks like this:This code is the title of the page. Between the double quotes, rename the new page. ( It may contain capital letters and spaces. ) Your new page is ready to go, you can switch back to design view and can edit your content accordingly.Next, you need to create the link for it in the menu. For instructions on how to do this, go to page 33.3. Rename the new folder that you just created.(Make sure to use all lowercase characters, nospaces and no special characters when renaming thenew folder.)<? $title=”About Us”; ?>32. Then click on Code to view the code.3. Find the part of the code that looks like this:NOTE: You will likely have more menu items then what appears here.<div id=”mainNav”> <ul> <li class=”home”><a href=”<?=$url_prefix?>/”>Home</a></li> <li class=”about”><a href=”<?=$url_prefix?>/about/”>About</a></li> </ul></div>13<div id=”mainNav”> <ul> <li class=”home”><a href=”<?=$url_prefix?>/”>Home</a></li> <li class=”about”><a href=”<?=$url_prefix?>/about/”>About</a></li> </ul></div><li class=”about”><a href=”<?=$url_prefix?>/about/”>About</a></li><div id=”mainNav”> <ul> <li class=”home”><a href=”<?=$url_prefix?>/”>Home</a></li> <li class=”about”><a href=”<?=$url_prefix?>/about/”>About</a></li><li class=”about”><a href=”<?=$url_prefix?>/about/”>About</a></li> </ul></div>5. Then find where you want the new menu item to be (here, it is pasted on the bottom of the list so it will be at the bottom of the menu on the Web site) and go to Edit / Paste6. Next, rename the new line that you just added. Make sure to change the name in three places: NOTE: A and B shown below should be the same and should match the new folder name.A. Change the class name. This must be all lowercase, no spaces and no special characters and should match the new folder name.B. Change the path name (URL). The path name is where the new menu item is located or the URL link for the new page. The name here should match the name of the folder you <div id=”mainNav”> <ul> <li class=”home”><a href=”<?=$url_prefix?>/”>Home</a></li> <li class=”about”><a href=”<?=$url_prefix?>/about/biography/”>About</a></li><li class=”contactus”><a href=”<?=$url_prefix?>/contactus/”>Contact Us</a></li> </ul></div>C A B 456In-page sub-navigation basics.For the creation of in-page sub-navigation, a sub-navigation template file will be used. Contact The sub-navigation resides within the content area, sliding over the main content for the page. The categories for the sub-navigation (A) should relate to the main navigation category (B).AIn-page Sub-navigation Creating a new sub-navigation.3. Place the new duplicated file into the folder we areadding the sub-navigation to.-For example: place the new duplicated file into theabout folder to add sub-navigation for the about page.Edit / Duplicate.3All the content should now be transferred to the new duplicated 12753. Rename the new duplicated folder.34. A pop-up window will ask if you want to update the links. Choose Update4a list of links. These are the sub-navigation links.12. Highlight and change the name for the link to match the main folder name.1. Open the index.php file in the sub-navigation folder.3. Highlight the type then go to the Properties Panel. -Click on the folder to open the window to navigate to the file we created in Part 2.14“My page is broken!”Nine times out of ten, this is due to either an extra closing </div> tag, or a missing closing </div> tag on your page.In other words:For a content box on your page:This content box is controlled by an opening and closing container, or in HTML, a pair of <div> tags - one to open <div> and one to close </div>This container (one called “light blue content” in the example above) is then transformed by the style sheet into the look you see above.However, what can happen if the box is not properly closed with a closing </div> tag (note the /), is that this style for the content box is no longer contained to the area it should be, and is now free to cascade into other page elements where it doesn’t belong.By the same token, if you end up with an additional </div> tag in your main content area, elements that need to control the layout and other style elements on the page, can be prematurely closed, resulting in errors when rendering the page.What to do:If you’re using Dreamweaver, use the “split” view, then highlight the text in your content box.Tips and TricksTips to get the most out of your Web site.You should now see your text highlighted in both the design area in the bottom half of the screen, as well as in the code view at the top of the screen. Check the code in the code view - your content box should begin with an opening div statement that looks like this:Your content in the middle, with a closing div at the end like the one in this example.<div class=”content”>Your padded content goes here</div>Feedback / Next Steps Get in touch with us.Questions? Comments? Get in touch with us!Contact us:Danny ChapmanE-mail:*****************Phone: (401) 831-8099 x240Leslie B. MannE-mail:**************Phone: (401) 831-8099 x280Visit the Web Maker’s resource online at: /resource/。
Dreamweaver制作网页(参考手册)
选中某一种工作区名称的单选项,再单击“确定”按钮,单击选中“设计器”单选项,再单击“确定”按钮,对话框。
通常在没有任何文档打开时,也会自动弹出“Macromedia由上图可以看出,Dreamweaver 8的工作区主要由标题栏、菜单栏、文档窗口、状态栏、(2)调整工作区布局后,单击“窗口”→“工作区布局”→“保存当前”菜单命令,可弹出“保存工作区布局”对话框,在“名称”文本框内输入名称,如下图所示:Dreamweaver 8工作区简介(1)文档窗口文档窗口用来显示和编辑当前的文档页面。
文档窗口的底部有状态栏,息。
在文档窗口最大化时,其标签顶部显示文档的名称。
文档工具栏和标准工具栏在文档窗种视图,单击文档工具栏中的按钮用鼠标拖曳标尺左上角处的小正方形,内合适的位置后松开鼠标左键,即可将原点位置改变。
击“查看”→“标尺”→“重设原点”菜单命令。
(5)“属性”栏“属性”栏也叫属性检查器或“属性”面板。
利用“属性”栏可以显示并精确调整网语言;如果在选中一个对象时单击面板的拆分:将鼠标指针移到面板左上角如果要将面板组合中的面板如,“CSS样式”标签),使它成为当前面板,再单击面板右上角的如图1-2-13所示。
单击该菜单中的“将文件组合在”→“新组合面板”菜单命令,板(例如,“CSS样式”面板)拆分出来,如下图所示:面板的组合:单击面板(例如,“CSS样式”面板)右上角的单击该菜单中的“将文件组合在”→“层”菜单命令,一起。
单击面板菜单中的“重命名面板组”菜单命令,关闭面板:单击面板(组)标题栏右上角的从该对话框可以看出,利用它可以建立各种类型的文件。
本页”选项,然后选择“基本页”列表框中的个空白的HTML网页文档。
打开网页文档:单击“文件”→“打开”菜单命令,内选中要打开的HTML文档,单击“打开”按钮,即可将选定的开前面编写的名字为1-1.htm文档。
(2)保存文档和关闭文档单击“文档”→“保存”菜单命令,可以原名字保存当前的文档。
Dreamweaver网站制作毕业设计说明书
Dreamweaver学习网站制作设计说明书系部:信息工程系学生姓名:***专业班级:网络08D1学号:*********指导教师:密海英2010年10月25日目录内容摘要 (1)一、引言 (1)1、Dreamweaver发展前景与现状 (1)2、Dreamweaver专题学习网站的内容和意义 (2)二、开发工具的介绍 (2)三、网站的具体规划 (3)1、网站的功能结构 (3)2、网站的主题思想 (3)3、网站LOGO设计 (3)4、网站布局设计 (4)5、网站的内容 (4)四、页面设计过程 (4)1、一级导航页面设计 (4)2、二级导航页面设计 (6)3、三级导航页面设计 (8)五、总结 (9)致谢 (10)参考文献 (11)Dreamweaver学习网站的设计与开发内容摘要本课题通过对Dreamweaver学习网站的制作,为使用者提供一个自主学习、测试的Dreamweaver的平台。
网站采用了清新自然的绿色为主色调,颜色明快柔和,界面美观简洁。
清新的绿色让学习者产生视觉上的放松。
本网站文本简明、通俗易懂,整体结构清晰、统一,便于学习。
网站资源丰富、层次清楚、内容严谨。
页面多处插入了flash,使得页面更加生动、活泼,富有感染力。
网站导航清晰,布局简单却不单调,让学习者能够一目了然,方便快捷。
本网站采用了实例教学的手法,使得学习者能够更加直观地去学习。
此外,还增加了在线测试的功能,打破了以往只能够“教”而不能够“测”的网站,这样才能使学习者更加直接地了解自己的学习情况,从而提高自己的学习能力一、引言(一)Dreamweaver的发展前景与现状Dreamweaver是美国MACROMEDIA公司开发的集网页制作和管理网站于一身的所见即所得网页编辑器,它是第一套针对专业网站设计师特别发展的视觉化网页开发工具,利用它可以轻而易举地制作出跨越平台限制和跨越浏览器限制的充满动感的网页。
它于1997年首次推出。
dreamweaver网页设计实验指导书(实验二在网页中使用文本)
实验二在网页中使用文本一、实验目的掌握“插入面板”中的“文本面板”、“常用面板”,“文本菜单”和“文本属性面板”的使用及设置文本格式的方法。
二、实验内容1、在页面中插入特殊符号,如:“¥和空格符”。
2、在页面中插入日期,要求日期格式为“××××年×月×日星期×××: (时)××(分)”。
3、在页面中插入水平线。
4、在新的页面中编辑一个项目列表,如图2-2-1所示,要求:字体为“楷体”、大小为“16pt”、颜色为“黄色”,网页背景颜色为绿色。
图2-2-1三、实验步骤内容1的实验步骤如下:1、将光标定位到插入特殊字符的位置。
2、单击“插入”面板中的“文本”选项卡,如图2-2-2所示。
图2-2-23、单击按钮,展开如图2-2-3所示的“字符”下拉列表。
图2-2-34、单击相应的选项即可在Web页面中添加相应的特殊字符,如图2-2-3所示。
图2-2-35、插入不换行空格,可执行如下操作之一。
(1)在“插入”面板的“文本”选项卡中,单击“字符”按钮,在下拉列表中选择“插入不换行空格”选项。
(2)选择[插入]/[HTML]/[特殊字符]/[不换行空格]菜单命令。
(3)按【Ctrl+Shift+空格键】键输入。
(4)将输入法切换到全角状态再按空格键。
内容2的实验步骤如下:1.选择[插入]/[日期]菜单命令,或者选择“插入”面板的“常用”选项中,然后单击“插入日期”按钮,则打开如图2-2-4所示的“插入日期”对话框。
图2-2-42.在弹出的“插入日期”对话框中选择星期格式为“星期四”、日期格式为“1974年3月7日”、时间格式为“22:18”。
注意:如果希望网页在保存时系统都会自动更新日期信息,则选中选中复选框。
1、单击“确定”按钮即可插入日期。
内容3的实验步骤:1、在“文档”窗口中,将插入点放在要插入水平线的位置。
Dreamweaver_CS3实用教程完整版
1.1.1 网页和网站的概念
网页(web),也就是网站上的某一个页面,它是一个纯文本文件,是向浏览 者传递信息的载体,以超文本和超媒体为技术,采用HTML、CSS、XML等语 言来描述组成页面的各种元素,包括文字、图像、音乐等,并通过客户端浏览 器进行解析,从而向浏览者呈现网页的各种内容。 网站(Website),它是指在互联网上,根据一定的规则,使用HTML等工具 制作的用于展示特定内容的相关网页集合,它建立在网络基础之上,以计算机、 网络和通信技术为依托,通过一台或多台计算机向访问者提供服务。平时所说 的访问某格站点,实际上访问的是提供这种服务的一台或多台计算机。
第1章 网站的设计与制作简述
Dreamweaver CS3是一款专业的网页制作软件,它具有简单易学、操作 方便以及适用于网络等优点。通过对Dreamweaver CS3的学习,即使没有任 何网页制作经验的用户,也能很容易上手,制作出精美的网页。本章主要介绍 了网页的基本概念、网页设计的构思和设计流程,以及Dreamweaver CS3的 新增特色功能和工作环境等。
1.2.2 网页的设计构思
在制作网页之前,首先要进行网页的设计与构思,主要包括网页的主题、 网页的命名、网站标志、色彩搭配和字体等要素。
1.2.3 网页的布局
网页布局的好坏是决定网页美观与否的一个重要方面。通过合理的布局, 可以将页面中的文字、图像等内容完美、直观地展现给访问者,同时合理安排 网页空间,优化网页的页面效果和下载速度。反之,如果页面布局不合理,网 页在浏览器中的显示将十分糟糕,页面中的各个元素显示效果可能会重叠或丢 失。因此,在对网页进行布局设计时,应遵循对称平衡、异常平衡、对比、凝 视和空白等原则。常见的网页布局形式包括:型布局、T型布局、“三”型布 局、对比布局和POP布局等。
Adobe Dreamweaver入门指南说明书
ActivityTiming: 2 to 3 hours Level: Ages 15 and upActivity Steps1. Introduce Adobe Dreamweaver as an industry-leading tool that allows students to design, develop, andpublish web projects for any screen size. Introduce students to the goals of this activity:•Understand the Dreamweaver interface, terminology, and workspaces.•Set up a web project.2. Distribute the technical guides and introduce students to the interface, terminology, and workspaces in AdobeDreamweaver. Using the “I do, we do, you do” method, discuss and demonstrate the following techniques:•Identifying elements of the Dreamweaver interface.•Using the workspace switcher and customizing the Dreamweaver workspace.•Showing the views: Design, Code, Split, Live.•Setting up a local root folder and creating a new document.Dreamweaver guide: Overview of Adobe Dreamweaver 3.1, 3.62. Distribute the technical guides, and briefly discuss the options for setting up a web project by asking studentsto open a new document, save it, define the site structure, and name the file index.html. As you do, discuss the following: 4.3•Extensions for filenames and what each means (e.g., .html, .htm, .php)•How to determine the kind of web project to create. Discuss the differences between HTML1.x, HTML4, and HTML5 DOCTYPES.4.1•Using index.html or default.html as the default filename for a home page•Rules and best practice for naming HTML files (e.g., maximum characters, forbidden characters, lower-case letters, underscores and spaces)•How to create a new blank page.4.3•How to set up a local root folder and site structure.4.2•How to define and modify document properties.5.1Dreamweaver guide: How to set document properties 3.3, 5.1Dreamweaver guide: How to set up a local root folder and site structure 4.2, 4.3Note: Instruction on how to set up and use templates and Fluid Grid Layouts is available in the Implementing reusable web design and Designing for multiple screens activities, respectively.3. Using the web page they created, explain they can use it as a home page to build a larger web site.Alternatively encourage them to learn what they have used to set up all of their web projects. Encourage students to customize their workspaces and use the different views to check the progress of their site during the web development process.Assessment0 – Does not meetexpectations3 – Meets expectations 5 – Exceeds expectationsWeb page Absent or incomplete.Students create a web pageand save it as index.html.Students set up a local rootfolder and define a sitestructure. Students create a HTML5 DOCTYPES web page and save it as index.html. Students set up a local root folder and define a site structure. Students customize their workspace and use all 4 views to see their web page from within Dreamweaver.Background preparation resources:•To view video tutorials aligned with the skills required to complete this project, visit Adobe TV:•For more teaching and learning resources on the topics in this project, search for resources from the community on the Adobe Education Exchange: /•For an overview of the interface and for more information on the technical aspects of Adobe Dreamweaver, see Dreamweave r Help.ISTE NETS*S Standards for StudentsThis project is aligned to the ISTE NETS*S Technology Standards. Depending on the subject and content area the student selects you may research your own state content standards to see how this project aligns to your state requirements.ISTE NETS*S: Curriculum and Content Area Standards – NETS for Students6. Technology Operations and ConceptsStudents demonstrate a sound understanding of technology concepts, systems, and operations. Students:a. understand and use technology systems.b. select and use applications effectively and productively.d. transfer current knowledge to learning of new technologies.For more informationFind more teaching materials for using Adobesoftware in your classroom on the AdobeEducation Exchange: /.Adobe Systems Incorporated345 Park AvenueSan Jose, CA 95110-2704USA Adobe and the Adobe logoare either registered trademarks or trademarks of Adobe Systems Incorporated in the United States and/or other countries. All other trademarksare the property of their respective owners.© 2013 Adobe Systems Incorporated. All rights reserved.Adobe Certified Associate Exam ObjectivesAdobe Certified Associate, Web Authoring objectives 3.1 Identify elements of the Dreamweaver interface.3.3 Use the Property inspector.3.6 Customize the workspace.4.1 Demonstrate knowledge of Hypertext Markup Language. 4.2 Define a Dreamweaver site.4.3 Create, title, name, and save a web page.5.1 Set and modify documen t properties.。
- 1、下载文档前请自行甄别文档内容的完整性,平台不提供额外的编辑、内容补充、找答案等附加服务。
- 2、"仅部分预览"的文档,不可在线预览部分如存在完整性等问题,可反馈申请退款(可完整预览的文档不适用该条件!)。
- 3、如文档侵犯您的权益,请联系客服反馈,我们会尽快为您处理(人工客服工作时间:9:00-18:30)。
学生信息管理系统设计说明书2014年12月一、选题背景1、各个高校的教育规模不断扩大2、各高校的学生人数急剧增加和各种信息的成倍增长3、提高学生信息管理工作的效率,做到信息的规范管理、科学统计和快速查询,以减少管理方面的工作量二、国内外研究现状国内高校现有的学生信息管理系统还存在很多的问题,主要是:1、功能单一2、系统孤立3、在软件的使用上,系统存在可扩充性和灵活性差,无法不断完善系统,来适应学校的发展需要。
国外的开发技术比国内的成熟,在开发过程中遵循了可扩展性和包容性,使得系统1、能接纳已有的数据结构,扩展时有效地保护已有的资源2、能方便地调整结构,易于扩充功能,升级方便。
三、可行性分析1、技术可行性:以Windows XP为操作系统,采用VB和ACCESS为开发工具设计与开发学生信息管理系统。
2、经济可行性:系统开发成本低,在现有的PC机上就可以提高所需的硬件设备环境,节省有人力、物力和经济效益。
3、操作可行性:用户使用系统时,通过输入正确的用户名和密码进入系统,就可以进行数据库的维护操作和运用。
四、研究内容学生信息管理系统实现的模块具体如下:1、用户登录模块2、学生信息管理模块:a.学籍信息管理模块:输入姓名或学号查询学号、性别、出生年月、联系电话、家庭住址等信息b.成绩信息管理模块:输入姓名或学号查询课程、成绩等信息c.课程信息管理模块:输入姓名或班级查询课程信息d.奖惩信息管理模块:输入姓名或学号查询学生的奖惩信息e.班级信息管理模块:输入姓名或学号查询专业、班级等信息3、个人信息管理模块:查询全面的学生信息4、管理员维护模块:a.学生档案管理:添加、删除、修改学生信息b.权限信息管理:根据情况分配不同的权限五、关键问题和难点一、关键问题1、编写程序完成用户界面等操作,并做好与数据库的连接,运用ACCESS来完成数据库的创建及生成2、数据库的设计与开发:前期和应用程序的开发以及后期数据的不断更新二、难点1、根据不同的用户分配不同的权限,提高数据的安全性。
2、学生信息管理系统结构流程复杂、庞大。
开发人员需要根据实际情况,较快地确定需求,将系统需具备的功能逐渐增加上去,直到所有的功能全部满足。
六、总体设计1、处理流程2、总体结构与模块外部设计实时处理模块图功能分配数据更新功能分为三部分:数据添加、数据删除和数据修改。
数据添加功能提供便捷的录入界面,通过应用程序将原始数据追加到数据库中。
数据删除将满足用户要求的相应记录从数据库中删除。
数据修改功能允许用户对他所指定记录的相关信息进行修改。
数据导入/出:允许用户将全部记录导入至数据库或其他存储设备七、实现登陆界面<%@ page language="java" import="java.util.*" pageEncoding="UTF-8"%><%@ taglib uri="/struts-tags" prefix="s"%><%@ taglib uri="/jsp/jstl/core" prefix="c"%> <!DOCTYPE HTML PUBLIC "-//W3C//DTD HTML 4.01 Transitional//EN"> <html ><title>XXX大学教务处登录系统</title><meta http-equiv="pragma" content="no-cache"><meta http-equiv="cache-control" content="no-cache"><meta http-equiv="expires" content="0"></head><body background="bg-0106.gif"><center><h3>XXX大学教务处登录系统</h3><s:form action="logincheck.jsp"><table><tr>用户名: <s:textfield name="username"/></tr><tr>密码:<s:password name="password"/></tr><tr><td> <input type="submit" value="登录"/></td><td><input type="reset" value="重填"/></td></tr></table></s:form></center></body></html>学生登录系统界面<%@ page language="java" import="java.util.*" pageEncoding="utf-8"%><%@ taglib uri="/struts-tags" prefix="s"%><!DOCTYPE HTML PUBLIC "-//W3C//DTD HTML 4.01 Transitional//EN"><html><head><title>学生登陆界面</title></head><body background="bg-0106.gif"><div align="right"><a href="index.jsp" >安全退出</a></div><font size="9" color="blue">XXX大学教务处欢迎您,同学!</font> <table cellspacing="20"><tr><td><font size="6">模块1:</font></td><td>请输入您的学号:</td><td><s:form action="manage_select" namespace="/student" method="post"><input type="text" name="id"/><input type="submit" value="查询个人信息"/></s:form></td></tr><tr><td><font size="6">模块2:</font></td><td>请输入您的学号:</td><td><s:form action="manage2_select" namespace="/score"method="post"><input type="text" name="var"/><input type="submit" value="查询个人成绩"/></s:form></td></tr></table></center></body></html>老师登录系统界面<%@ page language="java" import="java.util.*" pageEncoding="utf-8"%><%@ taglib uri="/struts-tags" prefix="s" %><!DOCTYPE HTML PUBLIC "-//W3C//DTD HTML 4.01 Transitional//EN"> <html><head><title>欢迎进入教师登陆界面</title></head><body background="bg-0106.gif" ><div align="right"><a href="index.jsp" >安全退出</a></div><center><font size="9" color="blue">XXX大学教务处欢迎您,老师!</font> <table cellspacing="20"><tr><td><font size="6">模块1:</font></td><td><a href="student_add.jsp">添加学生信息</a></td></tr><tr><td> <font size="6">模块2:</font></td><td><a href="student_select.jsp">查询学生信息</a></td></tr><tr><td><font size="6">模块3:</font></td><td> <s:form action="manage_all" namespace="/student"method="post"><input type="submit" value="查询所有学生信息"/></s:form></td></tr><tr><td> <font size="6">模块4:</font></td><td><a href="student_delete.jsp">删除学生信息</a></td></tr><tr><td> <font size="6">模块5:</font></td><td><a href="score_add.jsp">录入学生成绩</a></td></tr></table></center></body></html>添加学生信息界面<%@ page language="java" import="java.util.*" pageEncoding="utf-8"%><%@ taglib uri="/struts-tags" prefix="s"%><!DOCTYPE HTML PUBLIC "-//W3C//DTD HTML 4.01 Transitional//EN"> <html><head><title>添加学生信息</title></head><body background="bg-0106.gif"><center><h1><font color="red"> 欢迎老师您添加学生信息,您辛苦啦!</font></h1><s:form action="manage_add" namespace="/student" method="post"> <table><tr>姓名:<s:textfield name=""/></tr><tr>性别:<s:textfield name="student.sex"/></tr><tr>籍贯:<s:textfield name="student.origin"/></tr><tr>地址:<s:textfield name="student.address"/></tr><tr>邮箱:<s:textfield name="student.email"/></tr><tr>联系方式:<s:textfield name="student.mobile"/></tr><tr><input type="submit" value="保存"/></tr><tr><input type="reset" value="重填"/></tr></table></s:form></center></body></html>查询学生信息界面<%@ page language="java" import="java.util.*" pageEncoding="utf-8"%><%@ taglib uri="/struts-tags" prefix="s"%><!DOCTYPE HTML PUBLIC "-//W3C//DTD HTML 4.01 Transitional//EN"> <html><head><title>学生信息查询模块</title></head><body background="bg-0106.gif"><center><h1><font color="red"> 欢迎老师您查询学生信息,您辛苦啦!</font></h1><s:form action="manage_select" namespace="/student"method="post"><table><tr>请输入您要查询的学生学号:<s:textfield name="id"/></tr><tr><input type="submit" value="保存"/></tr><tr><input type="reset" value="重填"/></tr></table></s:form></center></body></body></html>成绩录入界面<%@ page language="java" import="java.util.*" pageEncoding="utf-8"%><%@ taglib uri="/struts-tags" prefix="s" %><!DOCTYPE HTML PUBLIC "-//W3C//DTD HTML 4.01 Transitional//EN"> <html><head><title>学生成绩录入</title></head><body background="bg-0106.gif"><center><h1><font color="red"> 欢迎老师录入学生信息,您辛苦啦!</font></h1><s:form action="manage2_add" namespace="/score" method="post"> <table><tr>学号:<s:textfield name="score.id"/></tr><tr>大学英语:<s:textfield name="score.english"/></tr><tr>高等数学:<s:textfield name="score.math"/></tr><tr>大学物理:<s:textfield name="score.physics"/></tr><tr>java语言程序设计:<s:textfield name="score.java"/></tr><tr>.net基础:<s:textfield name=""/></tr><tr>C语言基础:<s:textfield name="score.c"/></tr><tr>社会实践:<s:textfield name="score.practice"/></tr><tr><input type="submit" value="保存"/></tr><tr><input type="reset" value="重填"/></tr></table></s:form><s:property value="#request.add"/></center></body></html>八.总结通过编写学生信息管理系统,我们对网站的运行有了深刻的认识,网站的实现不仅仅需要页面的设计,还需要相关技术的支持。