淋浴系统安装说明书 英文版
尚高淋浴房多林1661-1安装使用说明书
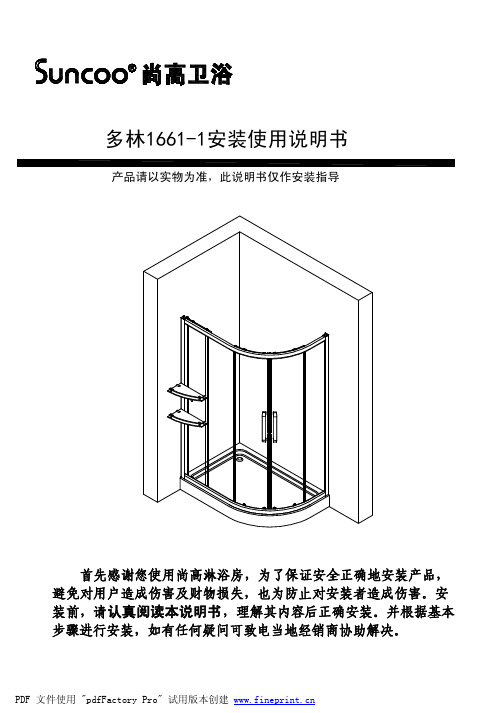
多林1661-1安装使用说明书首先感谢您使用尚高淋浴房,为了保证安全正确地安装产品,避免对用户造成伤害及财物损失,也为防止对安装者造成伤害。
安装前,请认真阅读本说明书,理解其内容后正确安装。
并根据基本步骤进行安装,如有任何疑问可致电当地经销商协助解决。
产品请以实物为准,此说明书仅作安装指导钢化玻璃不能进行切割、钻孔或硬物敲击;搬移或安装过程中,小心确保玻璃边、角部位不受撞击,以防爆裂伤人。
建议:将本产品安装在尚高淋浴底盆或石基上,开始淋浴房安装前,请拿出、排列并确认所有的零部件。
1.贴墙铝材 2支2.带磁条边铝材 1支3.11*10软平磁条 1支4.双齿单边胶条 2支5.6厘180°磁条 1支6.上导轮 6套7.小活动玻璃 1片8.F形挡水胶条 6支9.细夹铝材 1支10.固定玻璃共2片11.弧玻 2片12.上、下路轨各1支13.90°、135°磁条各1支14.边铝材 1支15.置物架 2套16.小锥形拉手 1套17.下导轮 6套18.拉手 2套19.去水器 1个20.底盆 1套安装步骤:è①将底盆去水安装好并放置到指定的安装位置,调整底部水平支撑角上螺母并观察支撑角,直至盆面水平,要求每个支撑点都应与地面直接接触(如图1);若使用石基,则将其放置在指定的安装位置,用卷尺测量两边是否符合尺寸,并用水平尺测量石基表面是否水平,用水泥或玻璃胶将其固定密封。
Arrayè②(注意区分上、下框架放置在底盆位置与其呈一平行线位标记,(如图2)è③移开贴墙铝材及框架,在已画记号地方钻孔,打入膨胀胶粒,用锤子将其打入墙体内,然后把淋浴房框架放置在底盆(或石基)上,用的自攻螺丝将贴墙铝材固定在墙上,并盖上装饰盖。
(如图3)图3è④将框架两边卡入贴墙铝材,如发现安装位置与墙面上下不垂直时,需调整直至贴墙铝材和边铝材完全吻合,然后在调节位置(一般均在边铝材的上端或下端)各钻一个3.2的孔,用STX14的自攻螺丝左右各一个将其固定并盖上装饰盖。
Rise N Tilt淋浴马桶用户手册说明书

Rise N Tilt Shower CommodeThe world’s first shower commode that lifts and tilts the bariatric user to a 30° angle. A carefully considered and safe combination chair that takes both the user and the caregiver into consideration in any bathing situation.Rise N Tilt Shower Commode is used in care homes, institutions, and hospitals. User weight up to 325 kg.Cobi Rehab and Cobi Rehab suppliers comply with the UN conventionsUSER MANUALUP TO 325 KGScan or click on the code and •Brakes on all four wheels. •Washable in a cabinet washer.•Optional extra-wide butterfly arm rests. •Remote control provides the carer witheasy access to the electrical functions.•Ensures a better working environment for the carer and a comfortable and safe bathing experience for the user. •Adjustable seat height and seat depth. •Several types of leg rests.Table of content1. Safety (3)2. Explanation of symbols (4)3. General comments (5)4. Application (5)5. Use (6)6. Charging and operation (7)7. Actuators (8)8. Maintenance and cleaning (9)9. Transport and storage (9)10. Recycling and disposal (10)11. Warranty (10)12. Specifications (11)13. Accessories and spare parts (12)WARNINGDo not use the Rise N Tilt Shower Commode without thorough instruction from trained staff or from persons who have received instruction in the use of the shower commode. Improper operation may injure the user.Using the Rise N Tilt Shower Commode for people weighing more than the maximum user weight of 325 kg increases the risk of damaging the commode.Read this user manual carefully before using the Rise N Tilt Shower Commode. Pay particular attention to Safety Instructions marked .Cobi Rehab assumes no responsibility for any damage to the product nor for personal injury caused by incorrect installation, incorrect mounting, or incorrect use of the Rise N Tilt Shower Commode.Immediately contact Cobi Rehab if parts are damaged or missing. Never use your own spare parts.Cobi Rehab cannot be held responsible for errors or accidents occurring after repairs are made without written permission from Cobi Rehab.SAFETY INSTRUCTIONSIn this user manual, the symbol indicates a safety instruction. Follow safety instructions carefully.The caregiver staff assesses whether the user should be restrained in the Rise N Tilt during use for safety reasons.Always lift users not able to stand and walk in and out of the Rise N Tilt. Always take care when using the tilt-in-space and recline function to avoid jerky movements.The maximum user weight of the Rise N Tilt is 325 kg.The surface temperature can rise when the shower commode is exposed to external heat sources e.g., sunlight.Due to its large width, the Rise N Tilt Shower Commode may have difficulty passing through ordinary doorways and emergency exits. Always use helper control for users with impaired cognitive function. Always ensure that the wheelchair is charged.The charging cable must always be disconnected from the control box in bathing situations.Rise N Tilt Shower Commode may only be used on a flat, hard floor witha maximum inclination of 3 °. Larger slope increases the risk of tipping.1. Safety2. Explanation of symbolsCaution!Double insulated (class II)Declaration of conformity, Medical DeviceRegulation, EU 2017/745IPX6IP-classificationDispose of through correct waste managementCobi Catalogue numberSerial numberYear of manufactureManufacturerMedical deviceMax. user weightConsult the manualCE label located at the frame.See an example of an CE-label below.4. ApplicationThis user guide contains important information about the use of the Rise N Tilt Shower Commode and the target group for the shower commode. It also includes a wide range of specifications on the Rise N Tilt Shower Commode.The most recent version of this user guide can be found on our website. Check if the version you are reading now is the most recent.If you need a user guide that is written in a larger font size, the product sheet is available in PDF format at , which can be scaled up to the required font size.You can always contact Cobi Rehab on telephone +*************************************information about the Rise N Tilt Shower Commode.Cobi Rehab reserves the right to change the product specifications without providing prior notice.The UDI number of the shower commode appears on the label, which is located on the side of the frame.Product safety notices and product recalls can be viewed on the website.3. General commentsRise N Tilt Shower Commode is designed for indoor use in e.g., hospitals, care centres and institutions.The Shower Commode is intended for bariatric users of up to 325 kg with reduced physical functional capacity.Rise N Tilt Shower Commode is not intended for traversing obstacles such as door steps, etc. The shower commode should only be used on a firm surface to avoid the risk of tipping.The intended operator of the Rise N Tilt Shower Commode is a health professional, such as atherapist, nurse, or social and healthcare worker. Rise N Tilt Shower Commode can be used inenvironments with a temperature range of 0-40°C and a humidity interval of 20-80 %. ContraindicationsMonitor users with cognitive impairment while using the Rise N Tilt Shower Commode.5. UseBefore useThe arm rests must be correctly mounted in the holes on the side of the shower commode. The width of the foot rests may be gradually adjusted. Always mount the lock bolts under the foot rests correctly in the foot rest holes. The lock bolts must not be tightened against the foot rest outside the holes.Ensure that the seat is correctly mounted on the seat frame of the shower commode.Do not use the shower commode until both arm rests have been mounted. Without arm rests, the user may fall sideways.Rise N Tilt makes it easier for care staff to performdaily hygiene and care for skin and tissue.While in useThe user must not use the foot rests to stand on or as a step during transfer as this may lead to a risk of tipping. Risk of trapping- Mounting the arm rests while the user occupies the shower commode, may cause trappingbetween the arm rest and the side of the chair. - A foot may be trapped between the foot rests if the lock bolts are not correctly mounted in the foot rests.- Fingers and other body parts may be trapped between the seat frame of the shower commode and a toilet bowl or the bedpan. Therefore, always exercise great care when moving the shower commode above a toilet, or when the bedpan is inserted underneath the seat.- A caregiver’s hand may be trapped between the handlebar and the seat frame when the seat is inthe top-most position.Always make sure to brake at least two wheels when transferring the user to and from Rise N Tilt Shower commode and when the useroccupies the shower commode.When transporting the user, the seat must be lowered as far down as possible, as it may otherwise tip.The charging cable must always bedisconnected from the control box in bathing situations. Rise N Tilt is a unique combination of a commode chair and a shower chair.Bedpan with cover. Easy to insert and empty.6. Charging and operationBefore using the shower commode, the battery must be charged. The battery is located inside the control box which is mounted on the handlebar. Charging the battery takes up to 10 hours.When connecting the control box with the battery to the power supply, the yellow LED on the battery lights up. Once the battery has been charged, the yellow LED switches off.Once the charge is complete, all three LEDs on the remote control light up at the same time. Charging the shower commode every day after use is recommended. Low battery levelWith a 25% charge, the shower commode can only move downwards. This ensures that the user can always be lifted down. Hard strain on batteryIf the battery is heavily strained with manysuccessive up-and-down movements, the battery may become too hot, thus activating the safety thermostat inside the battery.This means that the control box will stop working. The battery must be allowed to cool down for at least 30 minutes before being used again. At least one minute must be allowed to pass before another battery is installed in the control. Always having a charged battery to hand is recommended.6.1 PreparationAccompanying battery for charging. Located in thecontrol bo x and charged directly from there.The Rise N Tilt Shower commode is equipped with four actuators located under the seat. These four actuators provide the lifting and tilting function of the shower commode. Please note that the battery must not be removed from the control box until five seconds after the last actuator has stopped. Should this occur, the bath-and commode chair must be calibrated. See section 7.1.If e.g., the two actuators that control the tilt have been lowered, the control box will shut these down. This also applies if the two actuators that control lifting run skewed, or if all four actuators run skewed at the same time.Should this occur, the shower commode must be calibrated. See section 7.1.7. Actuators If issues with operation arise, it is important to check that all plugs are correctly connected to the control box and the remote control as well as between the battery and the control box. If the actuators do not work, the shower commode must be 0-point calibrated.A 0-point calibration is performed by pressing the two bottom buttons of the remote control until the shower commode has reached ”b ottomposition ”. The calibration has not been completed and the actuators are able to move again. Charging errorIn case of charging errors, the yellow battery LED will blinks.1. Remove the lead from the power supply.2. Wait to minutes and reconnect the lead. If all LEDs blink, this is a signal of irregularities in the electrical functions of the shower commode. This requires a 0-point calibration:Press the two bottom buttons of the remote control until the shower commode has reached ”b ottom position ”.In case of other irregularities, please contact Cobi Rehabat+**************************.7.1 Calibrating the actuators using the remote controlThe Tilt Shower Commode frame, seat and armrests can be cleaned using water and a regular cleaning agent.The seat can be removed and disinfected using ethanol 70-85 % or a chlorine product of min. 1000 ppm and max. 10000 ppm.The Tilt Shower Commode can be washed in a cabinet washer tunnel in e.g., a hospital.The remote control and control box can be disinfected using ethanol 70-85 % or a chlorine product of min. 1000 ppm and max. 10000 ppm. Bolts and lock nuts must be regularly inspected and possibly retightened. Failure to inspect bolts may result in malfunction. Battery handlingAlways use batteries that are in good condition and fully charged when installed in the control box.Battery life can be extended by recharging it albeit if it is not entirely flat.If the control box is not to be used for a considerable period (days and weeks), the battery should be removed from the control box to prevent it from being completely discharged which could cause permanent damage to the battery.When the shower commode is not in use, store itin a dry place and between -10 – 40°C.The Rise N Tilt Shower Commode is suitable for land and/or air transport (without the user). The Rise N Tilt Shower Commode cannot be folded as the frame is fixed.To avoid injuries to e.g., the back, care staffshould refrain from carrying the 46 kg shower commode. If it is to be transported, the Rise N Tilt Shower Commode can be lifted by the frame, without the user being seated in it, into a motor vehicle.9. Transport and storageWhen storing the Rise N Tilt Shower Commode for a longer period (more than three months), store it in 0-40°C and a humidity not exceeding 80 %.It is recommended that the battery is charged to 60 % prior to storage. When putting the Rise N Tilt Shower Commode into use again after long-term storage, it must be connected to the power supply and charged for at least ten hours.Keep an eye on the battery capacity as the Rise N Tilt Shower Commode will discharge over time.9.1 Long-term storage8. Maintenance and cleaningDispose of products that are no longer in use in an environmentally safe manner.Contact your local authority or Cobi Rehab for further information on disposal. Contact Cobi Rehab for more information on the recycling of Lithium batteries and parts of the Rise N Tilt Shower Commode .Cobi Rehab warrants that the Rise N Tilt Shower Commode is without defects on delivery. If, against all expectations, the Rise N Tilt Shower Commode is subject to deficiencies or defects on receipt, please contact Cobi Rehab immediately. The warranty period for the Rise N Tilt Shower Commode is one year from the date of purchase and covers manufacturing defects or defect on receipt. The invoice is your certificate of warranty. The warranty does not apply to:- products on which the serial number, batch number or the like have been removed or significantly damaged.- products which have been repaired by unauthorised personnel. The warranty does not cover:- wearing parts.This warranty does not apply when Cobi Rehab assesses that the Rise N Tilt Shower Commode has been improperly operated.For damage caused by improper operation, an invoice will be issued for both the service and the spare parts used.Lack of maintenance can damage the product, shorten the life, or affect the performance of the Rise N Tilt Shower Commode.11. Warranty10. Recycling and disposalReport any incidents related to the use of the RiseN Tilt Shower Commode to Cobi Rehab.11.1 Unintended eventAfter the expected service life, it is important thatan overall assessment of the product is madebefore continued use.After the expected service life, Cobi Rehabcannot guarantee the suitability and safety of theproduct, as Cobi Rehab has no control over howthe product is used and wear and tear.The overall assessment of the product must becarried out by qualified professionals, and as aminimum, consideration must be given to how theproduct has been used, the condition of theproduct and its components.Cobi Rehab can always make such an assessment.11.2 After expiry of the expected service life12. SpecificationsMax. user weight 325 kg Risk class I Basic UDI DI 5740000100005N4 Expected product service life 7 years Expected battery service life 2-3 years Total length in low position 1400 mm Total width standard arm rests/butterfly arm rests 760/850 mm Seat width 610 mm Seat depth adjustable 420/480/540 mm Seat angle electric backwards 0-30° Seat angle independent of height adjustment Yes Width between standard arm rest/butterfly arm rest 610 mm/750 mm Width toilet opening Ø 240 mm, 350 mm long Seat height electric adjustable 550-1110 mm Distance from ground to seat underside 445 mm Distance from ground to pushbar1000 mm Distance from seat to foot rests390/420/450/480 mm Distance from seat to arm rests 220 mm Total weight of Rise N Tilt Shower Commode 46 kg Swing away arm rests Yes Foot rests and folding Yes Foot rests swing away, hight adjustable Yes Neck support Yes Lockable wheels Yes, 4 Up/down capacity with fully charged battery Approx. 15 times Turning radius 1560 mm Frame Powder-coated chrome molybdenum steel Wheels Ø150 mm with brake Seat/back/arm rests Polyurethane IP-classification IPX6 ISO-classification 09 12 03 - 23 Four actuators LINAK A20/A40Control box LINAK Remote control LINAK Risk assessment EN/ISO 14971: 2012 General requirements and test methods EN 12182:201213. Accessories and spare partsAccessory Part number Butterfly arm rest right (adds 7 cm width between the arm rest) 0150-999-012R Butterfly arm rest left (adds 7 cm width between the arm rest) 0150-999-012L Neck support adjustable 0156-999-020 Seat entirely with cover for shower commode 0150-999-023 Bedpan with cover plastic 0140-999-001 Foot rest standard shower commode right 0156-999-090H Foot rest standard shower commode left 0156-999-090V Lateral leg rest for shower commode right 0156-999-030 Lateral leg rest for shower commode left 0156-999-031 Battery for Rise N Tilt Shower Commode 0157-999-050MANUFACTURER Cobi Rehab Fuglebækvej 1D DK-2770 KastrupDenmark+45 7025 2522 。
摩恩 2264 淋浴杆 安装说明书
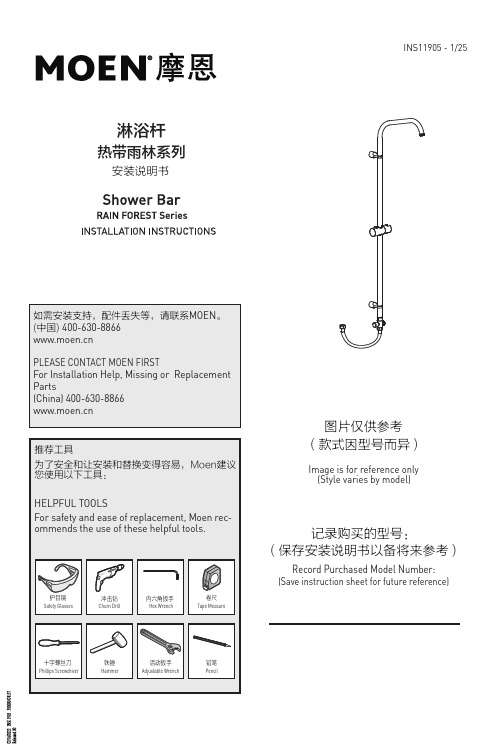
Record Purchased Model Number:(Save instruction sheet for future reference)记录购买的型号:(保存安装说明书以备将来参考)安装说明书淋浴杆INS11905 - 1/25热带雨林系列Image is for reference only 图片仅供参考 (款式因型号而异)(Style varies by model)Parts List零件清单A.B.C.D.A.B.C.D.E.F.G.H.I.J.K.E.F.G.H.I.J.K.警告:在墙上钻任何孔时,请确保在您准备钻孔的地方没有隐蔽的管道和线缆!申明:本公司保留更改产品结构不另行通知的权利。
1. 本产品已经出厂检测及调试,请勿自行拆卸。
2. 安装前,请务必先清除墙体预埋水管内的杂质及污泥,以免影响出水功能。
3. 本产品的工作压力:0.05MPa~0.6MPa,推荐工作压力:0.2MPa~0.5MPa。
4. 当您在钻孔和安装时请注意安全。
安装注意事项:Warning: Please make sure there are no hidden service pipes orcables where you start to drill the wall.Declare: We hereby reserve the rights to amend the specificationwithout prior notification.ATTENTIONS BEFORE INSTALLATION1. The product has passed functionality tests before sale, pleasedo not disassemble the product by yourself at will.2. Clear your plumbing to avoid any debris from impacting onproduct performance.3. The working pressure of this product is 0.05MPa~0.6MPa. Therecommended working pressure is 0.2MPa~0.5MPa.4. Be careful in your installation.安装前注意事项Precautions before installation上弯管上墙座自攻螺钉固定座膨胀管紧定螺钉下直管滑 座下墙座提拉阀进水管Bended TubeUpper CradleSelf-tapping ScrewFixing RingScrew ChassisSetting ScrewStraight TubeBracketBelow CradleDiverterFlexible Hose组装管组件:1. 拆下滑座。
安全淋浴器使用说明书

安全淋浴器Safety shower 使用说明书Operating InstructionJNLQ型安全淋浴器由常州市江南环保设备有限公司制造,主要用于化水处理加酸加碱系统的应急安全保护。
JNLQ type safety shower made by changzhou jiangnan environmental protection equipment co., LTD., mainly used in chemical water treatment plus acid and alkali system security protection in emergency.一、该装置主要有以下几部分组成The device has the following several parts:1.进水口Water inlet;2.洗眼器Eye bath;3.淋浴器Shower;4.支架Stents;5.备用水箱Buffer tank;6.其它附件Other accessories。
7.材质Materials:304SS。
二、结构型式structural style:1.JNLQ-I型:进水口为手动球阀。
1.JNLQ - I type : Water inlet for manual ball valve.2.JNLQ-II型:进水口为脚踏式开关。
2.JNLQ - II type :Water inlet for the pedal switch.3.JNLQ-III型:顶部配有备用水箱,并配备球阀,进水口可为手动球阀亦可脚踏式。
3.JNLQ - III type :The top with a spare tank, and equipped with ball valve, inlet can be usedequally for manual ball valve beeline of water route.三、使用和注意事项Use and matters needing attention:1.首先须将安全淋浴器固定牢靠;1. First of all should be the safety shower fixation;2.地基中心须留有DN50的排水孔,以便洗眼器的回水排放;2. The foundation center must leave (drain, so that the eye bath water discharge;3.水量要充足;3.Water should be adequate;4.使用时需打开进水阀;4.When used to open the inlet valve;5.备用水箱须充满水,应经常清洗并经常检查箱内水质情况;5.The spare tank shall be filled with water, should often clean and check the water quality situation in the cabinet;6.须做好防冻工作,以免装置结冻面不得使用或损坏装置;6.To avoid device, to do a good job of antifreeze, frozen surface shall not use or damage to the device;7.经常检查各控制阀及主要部件。
SIKO SATSSTK SAT淋浴系统使用说明书

Manuals+— User Manuals Simplified.SIKO SATSSTK SAT Shower System Instruction Manual Home » SIKO » SIKO SATSSTK SAT Shower System Instruction ManualContents1 SIKO SATSSTK SAT ShowerSystem2 Product Information3 Product Usage Instructions4 PRODUCT DIMENSION5 INSTALLATION INSTRUCTION6 PART LIST7 Cleaning Recommendation8 SAFETY INSTRUCTION9 ABOUT COMPANY10 Documents / Resources10.1 ReferencesSIKO SATSSTK SAT Shower SystemProduct InformationThe product is a SATSSTK SATSSTKC, designed for cleaning and maintenance purposes. It is manufactured by SIKO KOUPELNY a.s. The product is made in P.R.C. and imported by SIKO KOUPELNY a.s.Product Usage InstructionsTo ensure proper usage and avoid damage, please follow these instructions:1. When cleaning the fittings and showers, do not use cleaning powders, sponge pads, or microfiber cloths withan abrasive effect.2. Use the specified cleaner dosage and contact time recommended for the product.3. Rinse the surfaces with clean water after using liquid soaps, shampoos, and shower foams to avoid damage.4. If the surfaces are already damaged, they must be exchanged to prevent further deterioration under the effectof cleansers.5. Improper treatment that causes damage will not be covered by the guarantee.6. Install filtration equipment distribution (corner valve filter) as per the guarantee terms.***********************************.swatec.chformoreinformationabouttheproduct.PRODUCT DIMENSIONINSTALLATION INSTRUCTIONPART LIST1-11NDSSTKTERMSET12-13NDSSTK1215NDSSTKPREP16-21NDSSTK2013, 22-24NDSSTK2428NDSIKOBSTPREVLMAT 30-31NDSIKOBSTROZETASET 33NDSSTKJEZDEC34SATHADICE35SATBSRS3636SATBSHS361-11NDSSTKCTERMSET12-13NDSSTK12C15NDSSTKPREP16-21NDSSTK20C13, 22-24NDSSTK24C28NDSIKOBSTPREVLMATC30-31NDSIKOBSTROZETASETC33NDSSTKCJEZDEC34SATBSHPBW35SATBSRS37C36SATBSHS37CCleaning RecommendationTo avoid damage and reclamations, it is necesary to consider certain criteria when cleaning.At the cleaning of the fittings and showers, in principle, it must be pointed out:Only use cleaning material which is explicitly provided for this type of application.Never use cleaning materials, which contain hydrochloric acid, formic acid, chlorine pale lye or acetic acid, as they cause considerable damage.Phosphorus acidic cleaners are only conditionally applicable.Mixing cleaning agents is not permitted, generally.Never use cleaning materials or appliances with an abrasive effect, such as unsuitable clearing powders, sponge pads or micro fibre cloths.The instructions of the cleaning agent manufacturers have to be followed absolutely.Cleaning has to be carried out with a specified cleaner dosage, contact time, object-related and adapted to the needs.The building up of calcifications has to be removed by cleaning regulary.When using spray cleaners, spray first onto a soft cloth or sponge never directly onto the sanitary tapware, as drops could enter openings and gaps and cause damage.After cleaning rinse thoroughly with clean water to remove any cleaner residue.The use of steam cleaners is not permitted. The high temperatures can damage the products.ImportantResidues of liquid soaps, shampoos and shower foams can also cause damage, so rinse with cleanwater after using.The damage of already damaged surfaces will deteriorate under the effect of the cleansers. Components with damaged surfaces must be exchanged, otherwise there could be an injury danger.Damage caused by improper treatment will not be covered by guarantee.Under terms of the guarantee is necessary to install filtration equipment distribution (corner valve filter).SIKO SATSSTK SAT Shower System [pdf] Instruction ManualSATSSTK SAT Shower System, SATSSTK, SAT Shower System, Shower SystemReferencescleaning.atSwiss Aqua Technologies AG - Swiss Aqua TechnologiesManuals+,。
浴缸使用说明书
抗衰老长寿浴缸是一款适合所有人群使用的卫浴产品,可高效地产生活性水合体,普通人通过此浴缸来进行日常的泡浴,能够使人体在20分钟内快速、有效地获得中国十大寿乡长寿人群独有的、神奇的抗衰老益寿能量和人体特征。
人体充分获得养生能量后,可进一步激活身体内营养物质和器官的各项生命功效,可对某些疾病起到辅助治疗作用,达至祛病养生。
活性水合体对人体的改善是全方位的,不特定针对某种疾病,改善程度也因人的敏感度而异。
使用方法:▲每次使用浴缸时,应让浴缸外表面保持比较干燥的状态。
若浴缸外壁和外底部沾有大量水滴,如淋浴过程中洒到外壁上的水滴,记得用软布擦干;▲定期使用专用洗涤剂来清洁浴缸外壁(配合专用浴缸刷子清洁更方便),即可保持功效;▲清洗浴缸内壁,使用中性液体清洁剂(切忌使用含磨损成份及高碱性的清洁剂)。
避免使用深色或者浓的腐蚀性液体,避免色素浸入缸体,或者缸体受到腐蚀;▲清洁时,使用专用浴缸刷子或柔性布料、海绵,切勿用刷子硬刷,以免产生划痕;▲亚克力浴缸的亚克力层出现擦伤时,应用1500#以上水磨砂进行砂磨,清洁后再用绒布蘸牙膏进行擦拭即可(用布轮绒或羊毛抛光更佳)▲除了下述的使用注意事项,可按普通浴缸那样使用,正常泡浴即可;注意事项:1. 第一次使用时,切忌泡浴时水温过高,应以舒适的温度为宜。
体质虚弱者,第一次泡浴时的水温避免超过37度(与人的体温接近);2. 第一次使用时,请控制泡浴用水量。
首次使用应以水刚浸没过双腿为宜,然后用水量可逐日增加20%~30%,最终达到个人喜好的泡浴用水量。
3. 第一次使用时,请控制泡浴时间,应不超过5分钟时间。
以后可每次增加5分钟,直至使用者个人喜好。
4. 一般人只需要3~5次的适应期,个别人群可能需要1~2周时间的才完全适应。
5. 浴缸务必定期清洁,才能保持功效。
每使用10人次后,需用专用清洗剂来正确清洗一次。
6. 确保浴缸闲置时保持干爽洁净。
7. 在身体完全适应后,若只是维持人体效果,只需要每10天泡浴一次即可。
科勒 齐悦 JULY 恒温三出水淋浴柱(硬管连接) 安装说明书
冷 1 热
2 150mm
3 5
6 4
7 8 9 10 13
11 14 15 12
17 6
16
如何安装手持花洒
安装手持花洒(18)之前,调整切换把手(19)和切换器(20)处于手持花洒 出水位置,并打开冷热水源冲掉管路中的杂质。
根据需要将限流器(21)塞入花洒进水口,用软管(22)连接接头(23)和花 洒。锁紧所有衔接螺母。
将花洒挂在花洒挂架(24)上。
19 23
24
18 20
21
22
1226340-2-A
2
如何安装头顶花洒
装头顶花洒(25)之前调整至头顶花洒出水状态,打开水源冲掉管路中的杂质。
26
27
取出垫片(26),根据需要将限流器(27)放入到花洒头,再装回垫片。将头顶花
25
洒旋到弯管组件出水口上,用带状扳手锁紧。
装入温控阀并锁紧螺母(Fig.4)。
注意:确保拆卸、安装过 程中,不要转动温控阀轴 。如不小心转动了阀轴, 要调整阀轴使外齿上的圆 孔标识与相邻的塑套上的 凹槽对齐(Fig.5),或者按 前述方法调整。
安装温控把手(不要转动温 控阀轴),使参考标识同数 字37对齐,拧紧螺钉。安 装把手上盖。(Fig.1)
处于打开位置后进行温控阀的拆卸作业。温控阀
是较敏感的配件,所以要十分小心。
拆卸前确保指示标识与数字37对齐。拆卸把手组 件(Fig.1),然后将螺母和料套卸下(Fig.2)。小心地 卸下温控阀(Fig.2)。用热醋进行清洗。清洗后, 将塑料套和螺母 (限位组件)装到温控阀上,将塑料套的定位柱与龙头本体内孔凹槽对齐,
维护与保养
30
29 32
31
科勒诗乐开门淋浴房一固一活安装说明书
SKYLINE 诗乐INSTALLATION INSTRUCTIONS安装说明书PIVOT, SCREEN, 1D1P (ON WALL), 8mm 开门淋浴房,一字型,一固一活(上墙),8mmK-81017T-FM-SHPZHONGSHAN KOHLER SHOWER CO., LTD. NO13-1, XINGYE ROAD, ZHONGSHAN TORCHDEVELOPMENT ZONE, ZHONGSHAN, GUANGDONG, CHINA POST CODE: 528437中山科勒卫浴有限公司 广东省中山市中山火炬开发区兴业路 13-1 号 邮编:528437• 说明书中所有的资料是按最新出版的产品资料编写而成。
科勒中国有限公司保留任何时候无须通知即可改变产品特性、包装或产品可供类型的权利。
• 说明书包括重要的安装、清洁及保养方面的内容,请把这些资料交给用户阅读,保管。
• 确保在安装淋浴房之前已经完整正确地安装了浴室和完工墙面材料。
淋浴区墙地面应做防水处理,并不得布置有电器开关、插座。
确保地面排水通畅。
• 在进行淋浴房安装之前,请拿出、排列并确认所有的零部件。
请参考第 2 页上所示的分解图。
• 对尺寸与本标准产品不同的定制淋浴房,参照本说明书进行安装。
• 本产品符合 QB 2584-2007。
• All information is based on the latest product informationavailable at the time of publication. Kohler China Ltd. reserves the right to make changes in productcharacteristics, packaging, or availability at any time without notice.• These instructions contain important care, cleaning, andwarranty information-please leave these instructions for the consumer.• Make sure that the bath and the finished wall material arecompletely and correctly installed prior to installing your shower door. Prepare waterproof layer to wall and floor of the showering area. It is not allowed for any presence of electric switches and sockets. Make sure the floor drain runs smoothly.• Before starting the door installation, lay out and identify allthe parts. Use the exploded view illustrated on page 2 for reference.• For the installation method of customized shower withdifferent dimensions, please refer to this instructions.• The product complies with QB 2584-2007.警告:可能有人员伤害或者产品损坏的危险。
淋浴房安装指南IG0122说明书
Thanks for choosing our products,we'll provide best service for you.Please carefully read the manual before mounting.
Index Theshowerroomstructureandmountingplace Installationofshowertrayandprofile Installatiooffixedglassdoor Installationofslidingglassdoor
cm 50 ≥
≥ 50 cm
Place choosing for mounting
2
The plastic feet Nut
Level measure Plastic gasket
Plastic cap
Panel Pedestal
Screw
Adjust the plastic feet and make the tray in level , If you want remove the panel you can take-down the plastic cap and screw in the panel.
Plastic cap
Wall
Plastic gasket Screw
Put the alum.profile on the shower tray,close to the corner of wall,make marks on the wall, the use the screws(M4X26) to fix it to the wall; use the plastic cap cover the screw top. details please refer to the above drawing.
hansgrohe 产品指南 选择—汉斯格雅的全新操作方案说明书
汉斯格雅技术指南Select—全新的汉斯格雅操作方案“按”出您的乐趣:创新型的水体验方式Select:打造浴室内更多乐趣的创新技术作为卫浴行业的技术领导者,汉斯格雅具有很高的要求和目标:我们不仅想通过我们的创意对水的使用和处理带来革新变化,而且希望在舒适性和操作性方面设立新的标杆。
我们的标杆就是为用户带来真正的益处。
例如对于许多人而言,“按压”比“旋转”操作起来更简便。
我们将这种理念引入到了汉斯格雅的花洒和龙头中。
只需轻轻点按一下,就可切换喷淋模式或开启水流。
这种创新型技术叫作:“Select一键选择技术”。
直观化的按钮操作方案能够为您的客户带来更多的浴室乐趣,从而为您带来更多的销售依据。
2飞雨 Select E 300 2速头顶花洒飞雨 Select E 120 3速手持花洒ShowerTablet® Select 300 恒温淋浴龙头汉斯格雅 Select“按”出您的乐趣34Select :按钮创造出更多的乐趣和销售潜力科技不应让生活更复杂,而应更方便、舒适。
汉斯格雅作为行业首家采用按钮喷淋模式切换的企业,实现了直观化的操作原理。
从手持花洒、头顶花洒到恒温龙头和淋浴管。
不同大小、造型和表面。
始终配有Select 按钮,为切换喷淋模式或用户选择带来乐趣。
该技术为纯机械式—并特别耐用且具有价格优势。
这些都是能够确保Select 系列产品销售同样易如反掌的原因。
飞雨 Select E 120 3速 手持花洒为手持花洒直接带来更多舒适度的方法革命化的设计通过按钮可以方便地进行喷淋模式切换。
Select 按钮位于手持花洒的正面。
在淋浴过程中确保方便而直观的切换。
内置导水装置喷淋孔Rain 雨淋式在RainAir 空气雨淋模式下混合水和空气喷淋孔RainAir 空气雨淋式喷淋孔Whirl 漩动式Select 按钮具有能够切换喷淋模式的功能汉斯格雅Select技术飞雨 Select E 300 2速头顶花洒喷淋模式1喷淋模式2轻触按键即可改变出水模式喷淋切换装置的核心部件位于头顶花洒中心创新的分水器单元能够根据Select原理进行方便的喷淋切换。
- 1、下载文档前请自行甄别文档内容的完整性,平台不提供额外的编辑、内容补充、找答案等附加服务。
- 2、"仅部分预览"的文档,不可在线预览部分如存在完整性等问题,可反馈申请退款(可完整预览的文档不适用该条件!)。
- 3、如文档侵犯您的权益,请联系客服反馈,我们会尽快为您处理(人工客服工作时间:9:00-18:30)。
step1
wall bracket
step2
square stainless steel cover
step3
The finished shower head is closed to the wall,and sliding down into the fixed plate.
step7
screw
27MM 1.8M~2.2M left port
floor floor
Prize up the square stainless Lock the bracket to the wall tightly by screw. steel cover along the end of the magic box. Sliding down the finished magic box into the fixed plate as the view until the fixed plate through the square groove.
step4
C loop
step5
square stainless steel cover
step6
shower will be fixed into the flushing port. 2.As the view,insert the magic hand shower into the left port. When turn on the faucet,water flow into the left port , and the waterfall will outflow from the flushing port; Then turn off the
Aim the square stainless steel cover Hook the hole in the fixed plate by C loop after the magic box was installed into the wall,in case of falling off. to the back of the magic box,and press the edge of cover until flatted.
right port
ቤተ መጻሕፍቲ ባይዱ
↑
magic shower
Instruction:
1.Insert the magic shower with hose into the end of the flushing port of magic box. The magnet on the top of the magic box can suction the magnet on the top of the magic shower. So that the magic
↑
flange
hose
faucet,insert the magic shower into the right port,then turn on faucet,water flow into the right flushing port,and the saturating will outflow. 3.When saturating outflow,turn off the faucet,pull out the magic shower from the magic box,then turn on faucet,the magic shower
Slip the flange into the magic box following the arrowhead direction, until the subface flatted. constant temperature faucet.
can be used alone. After finishing the bath,turn off the faucet,and fix the magic shower into the flushing port of magic box.