主板测试卡说明书
稳定性测试及诊断二合一卡说明书

电脑故障诊断与稳定性测试
二合一卡
使用说明书V1.1
先进独特,用卡必读
中国发明专利号:03126857.9
专利证书号:208776
侵权必究
中国·广东·奇冠电子有限公司研制
前言
非常感谢您选择奇冠公司的二合一卡系列产品,如果您有什么疑问,请登陆我司网站查询详情解答;您还可以将具体问题发E-mail ,我们会及时回复您。
感谢您的信赖和支持!
奇冠电子电脑故障诊断与稳定性测试二合一卡,是一款高性能卡,即能对电脑故障诊断,又可对其稳定性测试。
功能二卡合一,方便适用。
本卡采用大规模IC集成模块,结构紧凑,稳定可靠,确保产品品质符合高标准要求。
内部资源更丰富,抗干扰性能更优越,自身故障率极低。
无须用户安装软件,软件全部内置,我们将前沿科技与使用者行为科学相结合,进行了人性化功能设计,使用非常方便。
本公司是一家专业研发、生产诊断卡的企业,生产的新一代、准确王、及二合一卡系列产品已获CE认证并受中国国家专利保护(专利号:03126857.9),侵权必究。
我公司已不再生产传统诊断卡,请广大用户在购买时认准“奇冠”字样商标及防伪标识。
本用户手册所提到的产品规格及资讯仅供参考,实际内容亦会随时更新,恕不另行通知。
如果您要了解最新产品资讯,请访问我公司网站。
欢迎访问广州奇冠电子公司网。
开机后主板测试卡直接显示FF或的故障原因及排除方法

开机后主板测试卡直接显示“FF或00”的故障原因及排除方法(附:电开机后主板测试卡直接显示“FF或00”的故障原因及排除方法(附:电脑主板故障诊断卡代码表)看了6604856猫友原创的“主板侦错卡的使用方法”的帖子,我觉得写的很好很,简单易懂且说明问题,关于对内存和显卡的说法都比较正确,但是对于帖子中说的“如果插上后直接显示FF或00那就说明CPU还没有开始工作,最糟糕的情况就是你的CPU完蛋了,默哀3分钟然后赶往电脑城花钱吧”我想加一点补充,和猫友们交流一下,欢迎高手指正!以我修理主板的经验来看,开机直接显示FF或00,确实是CPU没有工作,但是CPU损坏的可能性远远低于下列四种原因:一. ATX电源损坏,缺少供给CPU的某组电压,也会出现FF或00,可以换一个好的电源试一下,如果正常了说明原来的电源损坏,可以用万用表测量电源的20芯插头里面的各组电压与好的电源作比较,肯定会发现毛病;二. 主板CPU座下的焊点因为长时间的热胀冷缩,会出现脱焊(焊点开裂),也会出现FF 或00,尤其是是用老式直立式转接卡的CPU,转接卡的CPU座焊点开裂情况比较多,一般肉眼不容易看出来,要用放大镜。
修理方法:用热风枪对焊点均匀加热至焊点熔化;三. 检查CPU附近的电解电容是否有爆裂,爆裂的电容上下都会鼓起,用肉眼很容易发现,可以用相同规格的电容换上,故障就会排除;四. CPU附近的功率三极管烧毁,可以用万用表测量这些三极管,一般都表现为击穿(电阻值接近为零),找相同或可以代用的三极管更换即可,搞修理多的朋友一般会从报废主板上拆。
附:【电脑主板故障诊断卡代码】代码 Award BIOS Ami BIOS Phoenix BIOS或Tandy 3000 BIOS00 . 已显示系统的配置;即将控制INI19引导装入。
.01 处理器测试1,处理器状态核实,如果测试失败,循环是无限的。
处理器寄存器的测试即将开始,不可屏蔽中断即将停用。
电脑主板故障诊断检测卡代码表与解决方案
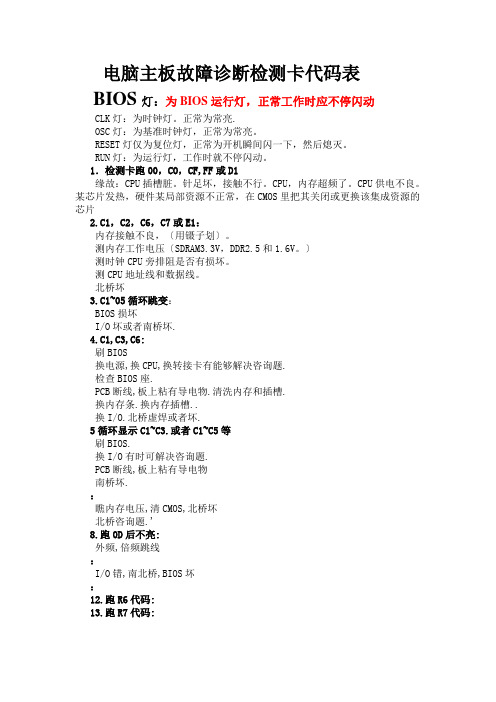
电脑主板故障诊断检测卡代码表BIOS灯:为BIOS运行灯,正常工作时应不停闪动CLK灯:为时钟灯。
正常为常亮.OSC灯:为基准时钟灯,正常为常亮。
RESET灯仅为复位灯,正常为开机瞬间闪一下,然后熄灭。
RUN灯:为运行灯,工作时就不停闪动。
1.检测卡跑00,CO,CF,FF或D1缘故:CPU插槽脏。
针足坏,接触不行。
CPU,内存超频了。
CPU供电不良。
某芯片发热,硬件某局部资源不正常,在CMOS里把其关闭或更换该集成资源的芯片2.C1,C2,C6,C7或E1:内存接触不良,〔用镊子划〕。
测内存工作电压〔SDRAM3.3V,DDR2.5和1.6V。
〕测时钟CPU旁排阻是否有损坏。
测CPU地址线和数据线。
北桥坏3.C1~05循环跳变:BIOS损坏I/O坏或者南桥坏.4.C1,C3,C6:刷BIOS换电源,换CPU,换转接卡有能够解决咨询题.检查BIOS座.PCB断线,板上粘有导电物.清洗内存和插槽.换内存条.换内存插槽..换I/O.北桥虚焊或者坏.5循环显示C1~C3.或者C1~C5等刷BIOS.换I/O有时可解决咨询题.PCB断线,板上粘有导电物南桥坏.:瞧内存电压,清CMOS,北桥坏北桥咨询题.'8.跑0D后不亮:外频,倍频跳线:I/O错,南北桥,BIOS坏:12.跑R6代码:13.跑R7代码:显卡初始化没有完成.是内存错,或者是显卡没有插好.清洗插槽.反复插试内存.14.跑E0代码:CPU没有工作.插槽脏,针足坏15D5:是内存旁边的3极管坏了--诊断卡代码表特别代码"00"和"ff"及其它起始码有三种情况出现:①已由一系列其它代码之后再出现:"00"或"ff",那么主板ok。
②要是将cmos中设置无错误,那么不严重的故障可不能碍事bios自检的接着,而最终出现"00"或"ff"。
主板检测卡错误代码含义

主板检测卡错误代码含义收集主板检测卡错误代码含义:00 . 已显示系统的配置;即将控制INI19引导装入。
.01 处理器测试1,处理器状态核实,如果测试失败,循环是无限的。
处理器寄存器的测试即将开始,不可屏蔽中断即将停用。
CPU寄存器测试正在进行或者失败。
02 确定诊断的类型(正常或者制造)。
如果键盘缓冲器含有数据就会失效。
停用不可屏蔽中断;通过延迟开始。
CMOS写入/读出正在进行或者失灵。
03 清除8042键盘控制器,发出TESTKBRD命令(AAH)通电延迟已完成。
ROM BIOS 检查部件正在进行或失灵。
04 使8042键盘控制器复位,核实TESTKBRD。
键盘控制器软复位/通电测试。
可编程间隔计时器的测试正在进行或失灵。
05 如果不断重复制造测试1至5,可获得8042控制状态。
已确定软复位/通电;即将启动ROM。
DMA初如准备正在进行或者失灵。
06 使电路片作初始准备,停用视频、奇偶性、DMA电路片,以及清除DMA电路片,所有页面寄存器和CMOS停机字节。
已启动ROM计算ROM BIOS检查总和,以及检查键盘缓冲器是否清除。
DMA初始页面寄存器读/写测试正在进行或失灵。
07 处理器测试2,核实CPU寄存器的工作。
ROM BIOS检查总和正常,键盘缓冲器已清除,向键盘发出BAT(基本保证测试)命令。
.08 使CMOS计时器作初始准备,正常的更新计时器的循环。
已向键盘发出BAT 命令,即将写入BAT命令。
RAM更新检验正在进行或Я椤?09 EPROM检查总和且必须等于零才通过。
核实键盘的基本保证测试,接着核实键盘命令字节。
第一个64K RAM测试正在进行。
0A 使视频接口作初始准备。
发出键盘命令字节代码,即将写入命令字节数据。
第一个64K RAM芯片或数据线失灵,移位。
0B 测试8254通道0。
写入键盘控制器命令字节,即将发出引脚23和24的封锁/解锁命令。
第一个64K RAM奇/偶逻辑失灵。
开机后主板测试卡直接显示“FF或00”的故障原因及排除方法

开机后主板测试卡直接显示“FF或00”的故障原因及排除方法(附:电开机后主板测试卡直接显示“FF或00”的故障原因及排除方法(附:电脑主板故障诊断卡代码表)看了6604856猫友原创的“主板侦错卡的使用方法”的帖子,我觉得写的很好很,简单易懂且说明问题,关于对内存和显卡的说法都比较正确,但是对于帖子中说的“如果插上后直接显示FF或00那就说明CPU还没有开始工作,最糟糕的情况就是你的CPU完蛋了,默哀3分钟然后赶往电脑城花钱吧”我想加一点补充,和猫友们交流一下,欢迎高手指正!以我修理主板的经验来看,开机直接显示FF或00,确实是CPU没有工作,但是CPU 损坏的可能性远远低于下列四种原因:一. A TX电源损坏,缺少供给CPU的某组电压,也会出现FF或00,可以换一个好的电源试一下,如果正常了说明原来的电源损坏,可以用万用表测量电源的20芯插头里面的各组电压与好的电源作比较,肯定会发现毛病;二. 主板CPU座下的焊点因为长时间的热胀冷缩,会出现脱焊(焊点开裂),也会出现FF或00,尤其是是用老式直立式转接卡的CPU,转接卡的CPU座焊点开裂情况比较多,一般肉眼不容易看出来,要用放大镜。
修理方法:用热风枪对焊点均匀加热至焊点熔化;三. 检查CPU附近的电解电容是否有爆裂,爆裂的电容上下都会鼓起,用肉眼很容易发现,可以用相同规格的电容换上,故障就会排除;四. CPU附近的功率三极管烧毁,可以用万用表测量这些三极管,一般都表现为击穿(电阻值接近为零),找相同或可以代用的三极管更换即可,搞修理多的朋友一般会从报废主板上拆。
附:【电脑主板故障诊断卡代码】代码A ward BIOS Ami BIOS Phoenix BIOS或Tandy 3000 BIOS00 . 已显示系统的配置;即将控制INI19引导装入。
.01 处理器测试1,处理器状态核实,如果测试失败,循环是无限的。
处理器寄存器的测试即将开始,不可屏蔽中断即将停用。
奇冠诊断电脑故障传统诊断与稳定性测试卡

奇冠诊断电脑故障传统诊断与稳定性测试卡电脑故障传统诊断、奇冠诊断与稳固性测试卡使用说明书V1.1(适用于台式机和笔记本电脑)全球唯独,用卡必读中国发明专利号:03126857.9专利证书号:208776侵权必究中国·广东·奇冠电子研制前言专门感谢您选择奇冠公司的传奇稳(传统诊断——BIOS POST代码、奇冠诊断、奇冠稳固性测试,简称“传奇稳”)系列产品,假如您有什么疑问,请登陆我司网站61131568 查询详情解答;您还能够将具体问题发E-mail 到p678@,我们会及时回复您。
感谢您的信任和支持!本卡采纳大规模IC集成模块,结构紧凑,稳固可靠,确保产品品质符合高标准要求。
内部资源更丰富,抗干扰性能更优越,自身故障率极低。
无须用户安装软件,软件全部内置,我们将前沿科技与使用者行为科学相结合,进行了人性化功能设计,使用专门方便。
本公司是一家专业研发、生产诊断卡的企业,生产的新一代、准确王、二合一卡系列及传奇稳系列产品已获CE认证并受中国国家专利爱护(专利号:03126857.9),侵权必究。
我公司已不再生产传统诊断卡,请宽敞用户在购买时认准“奇冠”字样商标及防伪标识。
本用户手册所提到的产品规格及资讯仅供参考,实际内容亦会随时更新,恕不另行通知。
假如您要了解最新产品资讯,请访问我公司网站。
本说明书不断改进,欢迎用户向我司多提意见和建议。
免责声明:对使用本卡给用户造成的缺失,本公司恕不承担。
欢迎访问广州奇冠电子公司网:// 61131568名目一、用户必读 (1)(一)传统诊断部分 (1)(二)奇冠诊断部分 (1)(三)稳固性测试部分 (1)二、传奇稳卡功能特点 (2)(一)传统故障诊断功能特点 (2)(二)奇冠诊断功能特点 (2)(三)稳固性测试功能特点 (2)三、传奇稳卡部件介绍 (3)四、传奇稳卡指示灯介绍 (4)(一)传奇稳卡指示灯含义 (4)1.什么缘故CLK、FRAME、IRDY指示灯要改进,改进后有何好处? (4)(二)代码性质与稳固性测试结果结合分析及处理方法说明表 (5)(三)稳固性测试状态说明 (6)(四)依照指示灯显示状态找出故障部位及其解决方法 (6)五、奇冠代码含义说明 (7)六、传统诊断功能的POST代码含义 (30)1.AMI BIOS (30)2.Award BIOS (36)3.Phoenix BIOS (39)七、声音代码含义表 (43)1.AMI BIOS自检鸣响含义 (43)2.Award BIOS自检鸣响含义 (44)3.Phoenix BIOS自检鸣响含义 (44)八、流程图 (45)图1、检测流程总图 (45)图2:稳固性测试流程图 (46)图3:如何利用本卡判定“不稳固”缘故流程图 (47)图4:如何利用本卡判定引起“不稳固”故障部位及排除流程图 (48)图5:如何利用本卡采纳相应手段诱发出引起“不稳固”缘故流程图 (49)图6:如何利用本卡判定复位故障流程图 (50)图7:如何利用本卡判定是否为市电引起流程图 (51)图8:如何利用本卡判定是否为内存条混插引起流程图 (52)图9:如何利用本卡判定是否为电源负载能力不够引起流程图 (53)图10:如何利用本卡判定是否为散热不良引起流程图 (54)图11:如何利用本卡判定是否为灰尘引起流程图 (55)图12:如何利用本卡判定是否为强磁干扰引起流程图 (56)图13:如何利用本卡判定是否为接触不良引起流程图 (57)九、常见问题与解决方法:.........................................................................................1.如何利用本卡选配电脑工作稳固的UPS? (58)2.如何利用本卡检验开发的外围设备对电脑的干扰? (60)3.如何利用本卡选择用于重要场合的电脑? (59)4.测试时不拔除硬盘是否会对电脑不利? (60)5.如何选购稳固性测试卡? (60)6.显示“no”是什么意思?如何样处理? (30)一、用户必读(一)传统诊断部分1.诊断卡显示一系列代码后,BIOS代码停在“FF”或“00”,则表示主板自检已通过。
电脑主板测试卡代码全
主板测试卡代码00 . 已显示系统的配置;即将控制INI19引导装入。
01 处理器测试1,处理器状态核实,如果测试失败,循环是无限的。
处理器寄存器的测试即将开始,不可屏蔽中断即将停用。
CPU寄存器测试正在进行或者失败。
02 确定诊断的类型(正常或者制造)。
如果键盘缓冲器含有数据就会失效。
停用不可屏蔽中断;通过延迟开始。
CMOS写入/读出正在进行或者失灵。
03 清除8042键盘控制器,发出TESTKBRD命令(AAH)通电延迟已完成。
ROM BIOS检查部件正在进行或失灵。
04 使8042键盘控制器复位,核实TESTKBRD。
键盘控制器软复位/通电测试。
可编程间隔计时器的测试正在进行或失灵。
05 如果不断重复制造测试1至5,可获得8042控制状态。
已确定软复位/通电;即将启动ROM。
DMA初如准备正在进行或者失灵。
06 使电路片作初始准备,停用视频、奇偶性、DMA电路片,以及清除DMA电路片,所有页面寄存器和CMOS停机字节。
已启动ROM计算ROM BIOS检查总和,以及检查键盘缓冲器是否清除。
DMA 初始页面寄存器读/写测试正在进行或失灵。
07 处理器测试2,核实CPU寄存器的工作。
ROM BIOS检查总和正常,键盘缓冲器已清除,向键盘发出BAT(基本保证测试)命令。
.08 使CMOS计时器作初始准备,正常的更新计时器的循环。
已向键盘发出BAT命令,即将写入BAT命令。
RAM更新检验正在进行或失灵。
09 EPROM检查总和且必须等于零才通过。
核实键盘的基本保证测试,接着核实键盘命令字节。
第一个64K RAM测试正在进行。
0A 使视频接口作初始准备。
发出键盘命令字节代码,即将写入命令字节数据。
第一个64K RAM 芯片或数据线失灵,移位。
0B 测试8254通道0。
写入键盘控制器命令字节,即将发出引脚23和24的封锁/解锁命令。
第一个64K RAM奇/偶逻辑失灵。
0C 测试8254通道1。
主板诊断卡常见代码含义及处理方法
主板诊断卡常见代码含义及处理方法DEBUG诊断卡的工作原理DEBUG卡是一种可检测电脑故障的测试卡,有PCI和ISA接口两种,以方便在不同型号的主板上使用。
当DEBUG卡插入PCI或ISA插槽后,启动电脑时卡上自带的显示屏就会根据启动的进度显示出各种代码。
主板加电后,首先要对CPU进展检测,测试它各个部存放器是否正常;接着BIOS将对CPU中其他所有的存放器进展检测,并判断是否正确;然后是检测和初始化主板的芯片组;接下来检测动态存的刷新是否正常;然后将屏幕清成黑屏,初始化键盘;接下来检测CMOS接口及电池状况。
如果某个设备没有通过测试,系统就会停下来不再继续启动,而这时,DEBUG卡上所显示的代码也就不再变化了。
这样,我们通过对照说明书查询代码所对应的硬件,就可较容易地判断出故障大概是出现在哪个部件上。
由于DEBUG卡的价格并不高〔15元左右〕,因此它已成为很多DIY爱好者的必备工具之一。
BIOS灯:为BIOS运行灯,正常工作时应不停闪动CLK灯:为时钟灯。
正常为常亮.OSC灯:为基准时钟灯,正常为常亮。
RESET灯仅为复位灯,正常为开机瞬间闪一下,然后熄灭。
RUN灯:为运行灯,工作时就不停闪动。
+12V,-12V,+5V,+3.3V灯正常为常亮正常启动电脑时,主板检测卡显示的代码从开场显示FF(或者00),然后不停跳动代码,最后又显示FF(或者00).如果主板有问题了,检测卡显示的代码就会停在某个位置不动.实战DEBUG诊断卡的使用DEBUG卡的使用也很简单,下面针对几种常见的故障代码和大家讨论一下解决问题的方法。
需说明的是,目前市场上的主板绝大局部使用的是AWARD BIOS或AMI BIOS,由于目前DEBUG卡实际上是调用了主板BIOS的自检过程,所以主板BIOS程序的不同,DEBUG卡显示的代码也不同,解决问题的方法也不可一概而论。
因此我们也将分两个局部讨论。
以下的说明中将选择最常见的故障代码及解决方法,至于其他更详细的代码含义,请读者参考DEBUG卡的说明手册。
主板诊断卡代码
主板诊断卡代码
主板诊断卡是一种用于测试和诊断计算机主板故障的工具,它通常会显示一系列的代码,以指示主板上的故障或错误。
以下是一些常见的主板诊断卡代码及其含义:
1. 00 - 系统正常,无故障。
2. 01 - 主板电源故障。
3. 02 - CPU故障。
4. 03 - 主板BIOS故障。
5. 04 - 内存错误。
6. 05 - 显卡错误。
7. 06 - 键盘错误。
8. 07 - 鼠标错误。
9. 08 - 主板芯片组错误。
10. 09 - 声卡错误。
11. 0A - 网络卡错误。
12. 0B - USB设备错误。
13. 0C - 硬盘错误。
14. 0D - 风扇错误。
15. 0E - CMOS电池错误。
16. 0F - 温度传感器错误。
这只是一些常见的代码,不同品牌和型号的主板可能会有不同的代码和含义。
如果遇到了主板故障,您可以参考主板诊断卡的说明书或联系厂商获取更多信息。
card test mainboard 主板测试卡
Computer Main Board Malfunction Post Card Test Debug CardOperating InstructionsStar Empery Electronics, Inc.E-mail:debugcard@;Website:/CatalogueI. ⒈ SYNOPSIS (1)II. ⒉Description of LED displays (1)III. ⒊ Error code table (3)⑴ OBLIGATORY CONTENTS (3)⑵ AMI BIOS (4)⑶ Award BIOS (8)⑷ Award BIOS (10)⑸ beep codes (16)①AMI BIOS beep codes (Non-fatal error) (16)②Award BIOS beep codes (17)③Phoenix BIOS beep codes (18)④IBM BIOS beep codes (22)IV. ⒌ Corrective Action (22)⑴ Omnipotent password (22)⑵ Software (24)⑶hardware jumper discharge to CMOS BIOS (25)⑷Get helps from your dealertent password (25)V. ⒍How to enter COMS SETUP (26)VI. ⒎Answers of frequently-asked questions (26)VII. ⒏How to enter COMS SETUP (28)⒈ SYNOPSISThe card is named POST (Power On Self Test ) card too, it could display the error code by the result of POST ,then you would soon determine cause of the error by error codes table. Especially when the PC can’t boot operating system, or it is a black screen, or the card and motherboard couldn’t issue an audible beep. It is a powerful diagnostic tool. Now just use it, you’ll get twice the result with half the effort.When the power is turned on, the BIOS first would have a strict test with system circuit、memory、keyboard、video、hard disc、floppy drive and so on. It analyzes the system configuration and initializes the base I/O setup. At last when all is normal, it boots the operating system .The obvious feature of testing crucial components is demarcate by curse’s appearing .At first, the BIOS tests the crucial components .If the testing is abnormal, the computer stopped compulsively; The curse cannot appear in the screen; There is no response to the screen. The BIOS tests common components afterwards .If the testing is abnormal, the computer continues to run and displays the information of error. When there is some trouble with the computer and the testing is abnormal, especially the testing crucial component, no displaying in the screen, the black screen, you can put the Post card in the expansive slot .You will know the cause of the trouble by the code that the card indicates and the error codes table of this manual.⒉Description of LED displaysLED Signal DescriptionIRDY Main equipmentsis readyThe LED sparkles when there is a IRDYsignal.BIOS Base input/outputsignalsAs long as the CPU is reading to BIOS whenthe board is on powered, the LED sparkles.FRAME Frame periods It is cycle frame signal of PCI slot. The LED should be on, As long as the Power is on after you plug the card in the PCI slot on the main board.The LED sparkles when the FRAME signal is coming.Or else there is noFRAME signal. Lights all the time.OSC OscillationsignalIt is oscillation signal of ISA slot. The LEDshould be on, As long as the Power is on after youplug the card in the ISA slot on the main board.Or else the crystal oscillation circuit is broken,and there is no OSC signal.CLK Bus clock As long as the main board is on power after you plug the card in either PCI slot or ISA slot, the LED is on. or else there is no bus clock signal.RESET ResettingsignalThe LED ought to have been on for half secondsince you press the power switch or the resetswitch. If it is on all the time, please checkwhether the resetting pin connects to theaccelerating switch or makes up a short circuit orthere is some trouble with the resetting circuit.12V Power The LED should be on, As long as the Power is on after you plug the card in the slot. Or else there is no voltage of 12V or there is short circuit.-12V Power The LED should be on, As long as the Power is on after you plug the card in the slot. Or else there is no voltage of-12V or there is short circuit.5V Power The LED should be on, As long as the Power is on after you plug the card in the slot. Or else there is no voltage of 5V or there is short circuit.-5V Power The LED should be on, As long as the Power is on after you plug the card in the ISA slot. Or else there is no voltage of-5V or there is short circuit. (There is own -5V of ISA slot.)3V3 Power There is the proper voltage of 3V3 of the PCI volt. The LED should be on, As long as the Power is on after you plug the card in the PCI slot, but sometimes the LED may be off by the reason that there is no voltage of 3V3 of a few PCI slot or there is open circuit.VIII.⒊ Error code table⑴OBLIGATORY CONTENTS①. The error codes table is in the order of the codes’ value from small to big. The sequence in which the code displays is decided by BIOS of the motherboard.②. The codes that haven’t been defined is not included in the table.③. For the different BIOS (such as AMI、Award、Phoenix ), the code ismeaning differently . So you must make sure that which kind of BIOS you are testing by viewing the users’ guide、 Seeing symbol on the BIOS IC of the motherboard or seeing the screen directly while the computer booting④. There is no more than some code displayed when you insert the cardinto the PCI slot on a few brands of motherboards, but when you plug it into the ISA slot, all the code can be displayed. At present, it has be discovered that all codes is displayed when you insert the card into the PCI slot of several brands of computers which not all codes is displayed when you plug the card in the ISA slot. So we suggest that you need plug the card from one slot to another slot when consulting the code is unsuccessful. In addition, the different slot on the certain motherboard in the different states. For example, all codes can be displayed from “00” to “FF”when you plug the card in the PCI slot that is near the CPU on the motherboard DELL810 while only a part of codes can be displayed from “00” to”38” when you plug the card in the other PCI slot on the motherboard DELL810.⑤. The time of PCI that the resetting signal needs is not always synchronized with the time of ISA .So sometimes the code begin to be displayed when the card in the ISA, but the resetting light of PCI has not been off while the card stops to display the original code.⑵ AMI BIOS00 Control to Int 19 boot loader01 Disable NMI02 Power-on delay03 Soft reset power-on05 Disable cache06 Uncompressed POST code08 CMOS checksum08 CMOS initialization0A CMOS initialization for date and time0B Initialization before keyboard batch0C Batch command to keyboard controller0D Verify batch command0E Initialize after KB controller batch0F Write KB command byte10 Pin 23/24 block/unblock command11 Check for <INS> key command12 DMA/PIC disable13 Chipset initialization14 8254 timer test19 Memory refresh test20 Base 64K memory test23 Set BIOS stack, setup before int. vector init24 Interrupt vector initialization25 Read input port of 9042 chip, clear password26 Initialize global data for turbo switch27 Initialize before setting video mode28 Set video mode2A Initialize BUS2B Setup before operational video check2C Control to optional video ROM2D Proc. after optional video ROM routine2E Display memory Read/Write test if no EGA/VGA 2F Display memory Read/Write test30 Retrace check31 Display alternate memory Read/Write check32 Alternate display retrace check34 Set display mode37 Display power-on message38 Initialize BUS types39 Display BUS initialization error messages3A Display the hit <DEL> message3B Virtual modem memory test40 Prepare descriptor tables42 Enter virtual mode for memory test43 Enable Interrupts for diagnostic mode44 Initialize data to check memory wrap at 0:045 Check memory wrap, find total memory amount46 Memory write test47 640K base memory write test48 Determine memory below 1MB49 Determine memory above 1MB4B Check for soft reset, clear memory below 1MB 4C Clear memory above 1MB4D Save memory size4E Display first 64K memory size4F Sequential and random memory test50 Displayed memory size51 Above 1MB memory test52 Save memory size information53 Enter real mode54 Disable gate A-20 line57 Adjust memory size58 Clear hit <DEL> message59 DMA/PIC test60 DMA #1 base register test62 DMA #2 base register test65 Program DMA unit 1 and 266 Initialize 8259 Interrupt controller67 Keyboard test7F Enable extended NMI sources80 Stuck key and batch test81 Keyboard controller test82 Write command byte, initialize circular buffer83 Lock key check84 Compare memory size with CMOS85 Password/soft error check86 Programming before check87 Execute CMOS setup88 Programming after setup89 Power-on display8B Shadow main and video BIOS8C Setup options after CMOS setup8D Initialize mouse8E Reset hard disk controller8F Floppy setup91 Hard disk setup94 Base/extended memory size95 Init. PCI/VLB BUS optional ROM's from C80096 Initialize before C800 optional ROM control97 Control to optional ROM98 Processing after optional ROM control99 Setup timer data area/printer base address 9A Set RS-232 base address9B Initialize before NPU test9C NPU initialization9D Initialization after NPU test9E Check extended KB, KB ID and num-lock 9F Issue keyboard ID commandA0 Reset keyboard ID flagA1 Cache memory testA2 Display and soft errorsA4 Program memory wait statesA5 Clear screen, enable parity NMIA7 Init. needed before control to E000 ROM A8 Control to E000 ROMA9 Init. needed after control to E000 ROM AA Display system configurationB0 Uncompressed SETUP code for hot-keyB1 Copy any code to specific areaC2 Disable NMI, power-on delayC5 Enable ROM, disable cacheC6 ROM BIOS checksumC7 CMOS shutdown register testC8 CMOS shutdownCA Initialize CMOS date and timeCB Initialization before keyboard batchCD BAT command to keyboard controllerCE Installation after keyboard controller batch CF Write keyboard command byteD1 Check for <INS> key commandD2 Disable DMA and Interrupt controllersD3 Chipset initialization/auto detect memoryD4 Uncompressed RUNTIME codeD5 RUNTIME code uncompressedDD Control to shadow RAM at F000:F000⑶ Award BIOS01 Reserved02 Reserved03 Initialize EISA registers (EISA BIOS only)04 Reserved05 Keyboard controller self-tested06 Reserved07 Verify CMOS Read/Write09 OEM specific initialization; Configure Cyrix CPU register0A Issue CPU ID instruction; Initialize the first 32 interrupt vectors, initialize Int.'s 33 to 120, power management initialization0B PnP initialization; verify the RTC time, detect bad battery, read the CMOS data into the BIOS stack area, assign I/O and memory for any PCI devices0C Initialization of BIOS data area0D Program some of chipset's value; Measure the CPU for display, initialize the video0E Initialize APIC (multiprocessor BIOS only); Show startup screen message0F DMA channel 0 tested10 DMA channel 1 tested11 DMA page registers tested12 Reserved13 Reserved14 Test 8254 0 counter 215 Test 8259 interrupt mask bit for channel 116 Test 8259 interrupt mask bit for channel 217 Reserved19 Test 8259 functionality1A Reserved1B Reserved1C Reserved1D Reserved1E If an EISA NVM1F-29 Reserved30 Get size of base and extended memory31 Test base and extended memory, Test base memory from 256K to 640K , test extended memory above 1MB32 Test all on-board super I/O ports33 Reserved3A Reserved3B Reserved3C Set flag to allow CMOS setup utility3D Install PS/2 mouse3E Try to turn on level 23F Reserved40 Reserved41 Initialize floppy drive controller42 Initialize hard drive controller43 Initialize serial & parallel ports (PnP BIOS only) 45 Initialize math coprocessor46-4D Reserved4E Show all error messages on screen4F Ask for password, if needed50 Write all CMOS values located in the BIOS stack back to CMOS51 Reserved52 Initialize all ISA ROM's; PCI initializations (PCI BIOS only), PnP initialization (PnP BIOS Only), setup shadow RAM, initialize power management53 If not PnP BIOS, initialize ports; Initialize time in BIOS data area54-5F Reserved60 Setup virus protection for the boot sector61 Try to turn on level 2 cache62 program numlock & typematic speed63 Boot system via Int 19hB0 Unexpected interrupt in protected modeB1 Unclaimed NMI occurredBE Program defaults into chipsetBF Program remaining chipset valuesC0 Init. all standard devices with defaultsC1 Auto detect on-board DRAM & cacheC3 Test first 26K DRAMC5 Copy ROM BIOS to E000-FFFFFF SystembootingIX.⑷ Award BIOS2 Verify real mode3 Disable non-maskable interrupt (NMI)4 Get CPU type6 Initialize system hardware7 Disable shadow and execute code from the ROM8 Initialize chipset with initial POST values9 Set IN POST flag0A Initialize CPU registers0B Enable CPU cache0C Initialize caches to initial POST values0E Initialize I/O component0F Initialize the local bus IDE10 initialize power management11 Load alternate registers with initial POST values12 Restore CPU control word during warm boot13 Initialize PCI bus mastering devices14 Initialize keyboard controller16 BIOS ROM checksum17 Initialize cache before memory autosize18 8254 programmable interrupt timer initialization1A 8237 DMA controller initialization1C Reset programmable interrupt controller20 Test DRAM refresh22 Test 8742 keyboard controller24 Set ES segment register to 4GB26 Enable gate A20 line28 Autosize DRAM29 Initialize POST memory manager2A Clear 512KB base RAM2C RAM failure on address line xxxx2E RAM failure on data bits xxxx of low byte of memory bus 2F Enable cache before system BIOS shadow30 RAM failure on data bits xxxx of high byte of memory bus32 Test CPU bus clock frequency33 Initialize Phoenix Dispatch Manager36 Warm start shut down38 Shadow system BIOS ROM3A Autosize cache3C Advanced configuration of chipset registers3D Load alternate registers with CMOS values41 Initialize extended memory for RomPilot42 Initialize interrupt vectors45 POST device initialization46 Check ROM copyright notice47 Initialize I20 support48 Check video configuration against CMOS49 Initialize PCI bus and devices4A Initialize all video adapters in system4B QuietBoot start (optional)4C Shadow video BIOS ROM4E Display BIOS copyright notice4F Initialize MultiBoot50 Display CPU type and speed51 Initialize EISA board52 Test keyboard54 Set key click if enabled55 Enable USB devices58 Test for unexpected interrupts59 Initialize POST display service5A Display prompt "Press F2 to enter SETUP"5B Disable CPU cache5C Test RAM between 512KB and 640KB60 Test extended memory62 Test extended memory address lines64 Jump to UserPatch166 Configure advanced cache registers67 Initialize Multi Processor APIC68 Enable external and CPU caches69 Setup system management mode (SMM) area 6A Display external L2 cache size6B Load custom defaults (optional)6C Display shadow area message6E Display possible high address for UMB recovery70 Display error messages72 Check for configuration errors76 Check for keyboard errors7C Set up hardware interrupt vectors7D Initialize Intelligent System Monitoring7E Initialize coprocessor if present80 Disable onboard super I/O ports and IRQ's81 Late POST device initialization82 Detect and install external RS232 ports83 Configure non-MCD IDE controllers84 Detect and install external parallel ports85 Initialize PC compatible PnP ISA devices86 Reinitialize onboard I/O ports87 Configure motherboard configurable devices (optional)88 Initialize BIOS data area89 Enable non-maskable interrupts (NMI's)8A Initialize extended BIOS data area8B Test and initialize PS/2 mouse8C Initialize floppy controller8F Determine number of ATA drives (optional)90 Initialize hard disk controllers91 Initialize local bus hard disk controllers92 Jump to UserPatch293 Build MPTABLE for multi processor boards95 Install CD ROM for boot96 Clear huge ES segment register97 Fixup multi processor table98 Search for option ROM's99 Check for SMART drive (optional)9A Shadow option ROM's9C Set up power management9D Initialize security engine (optional)9E Enable hardware interrupts9F Determine number of ATA and SCSI drivesA0 Set time of dayA2 Check key lockA4 Initialize typematic rateA8 Erase F2 promptAA Scan for F2 key strokeAC Enter setupAE Clear boot flagB0 Check for errorsB1 Inform RomPilot about the end of POSTB2 POST done - prepare to boot operating system B4 One short beepB5 Terminate QuietBoot (optional)B6 Check passwordB7 Initialize ACPI BIOSB9 Prepare bootBA Initialize DMI parametersBB Initialize PnP option ROM'sBC Clear parity checkersBD Display multiboot menuBE Clear screenBF Check virus and backup remindersC0 Try to boot with interrupt 19C1 Initialize POST Error Manager (PEM)C2 Initialize error loggingC3 Initialize error display functionC4 Initialize system error handlerC5 PnP dual CMOS (optional)C6 Initialize notebook docking (optional)C7 Initialize notebook docking lateC8 Force check (optional)C9 Extended checksum (optional)CA Redirect Int 15h to enable remote keyboardCB Redirect Int 13 to Memory Technologies Devices such as ROM, RAM, PCMCIA, and serial diskCC Redirect Int 10h to enable remote serial videoCD Re-map I/O and memory for PCMCIACE Initialize digitizer and dispaly messageD2 Unknown interruptThe following are for boot block in Flash ROM E0 Initialize the chipsetE1 Initialize the bridgeE2 Initialize the CPUE3 Initialize the system timerE4 Initialize system I/OE5 Check force recovery bootE6 Checksum BIOS ROME7 Go to BIOSE8 Set Huge SegmentE9 Initialize Multi ProcessorEA Initialize OEM special codeEB initialize PIC and DMAEC Initialize Memory typeED Initialize Memory sizeEE Shadow Boot BlockEF System memory testF0 Initialize interrupt vectorsF1 Initialize Run Time ClockF2 Initialize videoF3 Initialize System Management MenagerF4 Output one beepF5 Clear Huge SegementF6 Boot to mini DOSF7 Boot to Full DOS⑸ beep codes①AMI BIOS beep codes (Non-fatal error)Beeps ErrorMessage Description1 short DRAMrefresh failureThe programmable interrupt timer orprogrammable interrupt controller hasprobably failed2 short Memory parity error A memory parity error has occurred inthe first 64K of RAM. The RAM IC isprobably bad3 short Base 64K memoryfailureA memory failure has occurred in thefirst 64K of RAM. The RAM IC isprobably bad4 short System timer failure The system clock/timer IC has failed orthere is a memory error in the first bankof memory5 short Processor error The system CPU has failed6 short Gate A20 failure The keyboard controller IC has failed,which is not allowing Gate A20 toswitch the processor to protected mode.Replace the keyboard controller7 short Virtual modeprocessor exceptionThe CPU has generated an exceptionerror because of a fault in the CPU orerror motherboardcircuitry8 short Display memoryread/write errorThe system video adapter is missing ordefective9 short ROM checksum error The contents of the system BIOS ROMdoes not match the expected checksumvalue. The BIOS ROM is probablydefective and should be replaced10 short CMOS shutdownregister read/writeerrorThe shutdown for the CMOS has failed11 short Cache error The L2 cache is faulty1 long,2 short Failure in videosystemAn error was encountered in the videoBIOS ROM, or a horizontal retracefailure has been encountered1 long, 3 short Memory test failure A fault has been detected in memoryabove 64KB1 long, 8 short Display test failure The video adapter is either missing ordefective2 short POST Failure One of the hardware testa have failed1 long POST has passed all tests②Award BIOS beep codesBeeps ErrorMessage Description1long, 2 short Video adapter error Either video adapter is bad or is notseated properly. Also, check to ensurethe monitor cable is connectedproperly.Repeating (endless loop) Memory error Check for improperly seated ormissing memory.1long, 3short No video card or bad video RAMReseat or replace the video card.High frequency beeeps while runningOverheated CPU Check the CPU fan for proper operation. Check the case for proper air flow.Repeating High/Low CPU Either the CPU is not seated properly or the CPU is damaged. May also bedue to excess heat. Check the CPU fanor BIOS settings for proper fan speed.③ Phoenix BIOS beep codesBeeps Error Message Description2001-1-2 CPU test failure The CPU is faulty. Replace the CPULow 1-1-2 System board select failure The motherboard is having an undetermined fault. Replace the motherboard2001-1-3 CMOS read/write error The real time clock/CMOS is faulty.Replace the CMOS if possibleLow 1-1-3 Extended CMOS RAM failure The extended portion of the CMOS RAM has failed. Replace the CMOS if possible2001-1-4 BIOS ROM checksum error The BIOS ROM has failed. Replace the BIOS or upgrade if possible2001-2-1 PIT failure The programmable interrupt timer has failed. Replace if possible2001-2-2 DMA failure The DMA controller has failed. Replace the IC if possible2001-2-3 DMA read/write failure The DMA controller has failed. Replace the IC if possible2001-3-1 RAM refresh failureThe RAM refresh controller has failed 2001-3-2 64KB RAM The test of the first 64KB RAM has failedfailure tostart2001-3-3 First 64KB RAMfailureThe first RAM IC has failed. Replace theIC if possible2001-3-4 First 64KB logicfailureThe first RAM control logic has failed2001-4-1 Address linefailureThe address line to the first 64KB RAM hasfailed2001-4-2 Parity RAMfailureThe first RAM IC has failed. Replace ifpossible2001-4-3 EISA fail-safetimer testReplace the motherboard2001-4-4 EISA NMI port462 testReplace the motherboard2002-1-1 64KB RAMfailureBit 0; This data bit on the first RAM IC hasfailed. Replace the IC if possible2002-1-2 64KB RAMfailureBit 1; This data bit on the first RAM IC hasfailed. Replace the IC if possible2002-1-3 64KB RAMfailureBit 2; This data bit on the first RAM IC hasfailed. Replace the IC if possible2002-1-4 64KB RAMfailureBit 3; This data bit on the first RAM IC hasfailed. Replace the IC if possible2002-2-1 64KB RAMfailureBit 4; This data bit on the first RAM IC hasfailed. Replace the IC if possible2002-2-2 64KB RAMfailureBit 5; This data bit on the first RAM IC hasfailed. Replace the IC if possible2002-2-3 64KB RAMfailureBit 6; This data bit on the first RAM IC hasfailed. Replace the IC if possible2002-2-4 64KB RAMfailureBit 7; This data bit on the first RAM IC hasfailed. Replace the IC if possible2002-3-1 64KB RAM Bit 8; This data bit on the first RAM IC hasfailure failed. Replace the IC if possible2002-3-2 64KB RAMfailureBit 9; This data bit on the first RAM IC hasfailed. Replace the IC if possible2002-3-3 64KB RAMfailureBit 10; This data bit on the first RAM IChas failed. Replace the IC if possible2002-3-4 64KB RAMfailureBit 11; This data bit on the first RAM IChas failed. Replace the IC if possible2002-4-1 64KB RAMfailureBit 12; This data bit on the first RAM IChas failed. Replace the IC if possible2002-4-2 64KB RAMfailureBit 13; This data bit on the first RAM IChas failed. Replace the IC if possible2002-4-3 64KB RAMfailureBit 14; This data bit on the first RAM IChas failed. Replace the IC if possible2002-4-4 64KB RAMfailureBit 15; This data bit on the first RAM IChas failed. Replace the IC if possible2003-1-1 Slave DMAregister failureThe DMA controller has failed. Replacethe controller if possible2003-1-2 Master DMAregister failureThe DMA controller had failed. Replacethe controller if possible2003-1-3 Master interruptmask registerfailureThe interrupt controller IC has failed2003-1-4 Slave interruptmask registerfailureThe interrupt controller IC has failed2003-2-2 Interrupt vectorerrorThe BIOS was unable to load the interruptvectors into memory. Replace themotherboard2003-2-3 Reserved2003-2-4 Keyboardcontroller failureThe keyboard controller hasfailed. Replace the IC if possible2003-3-1 CMOS RAMpower badReplace the CMOS battery or CMOS RAMif possible2003-3-2 CMOSconfigurationerrorThe CMOS configuration hasfailed. Restore the configuration orreplace the battery if possible2003-3-3 Reserved2003-3-4 Video memoryfailureThere is a problem with the videomemory. Replace the video adapter ifpossible2003-4-1 VideoinitializationfailureThere is a problem with the videoadapter. Reseat the adapter or replace theadapter if possible2004-2-1 Timer failure The system's timer IC has failed. Replacethe IC if possible2004-2-2 Shutdown failure The CMOS has failed. Replace the CMOSIC if possible2004-2-3 GateA20failureThe keyboard controller hasfailed. Replace the IC if possible2004-2-4 Unexpectedinterrupt inprotected modeThis is a CPU problem. Replace the CPUand retest2004-3-1 RAM test failure System RAM addressing circuitry isfaulty. Replace the motherboard2004-3-3 Interval timerchannel 2 failureThe system timer IC has failed. Replacethe IC if possible2004-3-4 Time of dayclock failureThe real time clock/CMOS hasfailed. Replace the CMOS if possible2004-4-1 Serial port failure A error has occurred in the serial portcircuitry2004-4-2 Parallel portfailureA error has occurred in the parallel portcircuitry2004-4-3 Math coprocessorfailureThe math coprocessor has failed. Ifpossible, replace the MPU④IBM BIOS beep codesBeeps ErrorMessage Description1 short Normal POST System is booting properly2 short Initialization error Error code is displayed1 long, 1 short System board error1 long,2 short Video adapter error1 long, 3 short EGA/VGA adapter error3 long 3270 keyboard adapter errorContinuous Power supply error Replace the power supply999s Power supply error Replace the power supplyNo beep Power supply Replace the power supply⒌ Corrective Action⑴.If I forget the password, what can I do?If you forget your password, don’t worry! The following will help you:⑴ Omnipotent passwordFor the BIOS from different manufacturer, their password is different too. Both omnipotent password and password that users set are able to unlock the computer. Try the abbreviation of manufacturer or the character string which formed by the first letter of each word. May be it。
- 1、下载文档前请自行甄别文档内容的完整性,平台不提供额外的编辑、内容补充、找答案等附加服务。
- 2、"仅部分预览"的文档,不可在线预览部分如存在完整性等问题,可反馈申请退款(可完整预览的文档不适用该条件!)。
- 3、如文档侵犯您的权益,请联系客服反馈,我们会尽快为您处理(人工客服工作时间:9:00-18:30)。
主板测试卡说明书 [ 2006-01-02 09:06:00 ] 标签:无 阅读对象:所有人
一卡在手 查障无忧 电脑主板故障诊断卡
Computer Main Board Post Card 查 询 手 册 有声音编码报障功能 一块卡可插ISA、也可插PCI 插错槽或插反后通电不烧任何部件 能显示黑屏下反复自动复位的死机 不插CPU、内存、显卡等一块空的主板接通电源 即可诊断出板中的重要信号情况 本卡采用十多个芯片的结构,兼容性最广,彻 底解决了PCI卡应出“31”而在部分主板上出 “00”等假码问题 说明书最后含有cmos的破解方法和万能密码及各种主板的进cmos的方法!
一、概述 诊断卡的工作原理是利用主板中BIOS内部自检程序的检测结果,通过代码一一显示出来,结合本书的代码含义速查表就能很快地知道电脑故障所在。尤其在PC机不能引导操作系统、黑屏、喇叭不叫时,使用本卡更能体现其便利,使您事半功倍。 BIOS在每次开机时,对系统的电路、存储器、键盘、视频部分、硬盘、软驱等各个组件进行严格测试,并分析硬盘系统配置,对已配置的基本I/O设置进行初始化,一切正常后,再引导操作系统。其显著特点是以是否出现光标为分界线,先对关键性部件进行测试。关键性部件发生故障强制机器转入停机,显示器无光标,则屏幕无任何反应。然后,对非关键性部件进行测试,对有故障机器也继续运行,同时显示器无显示时,将本卡插入扩充槽内。根据卡上显示的代码,参照你的机器是属于哪一种BIOS,再通过本书查出该代码所表示的故障原因和部位,就可清楚地知道故障所在。
二、十六进制字符表 三、诊断卡的部件说明图 四、指示灯功能速查表 灯名 中文意义 说 明
CLK 总线时钟 不论ISA或PCI只要一块空板(无CPU等)接通电源就应常亮,否则CLK信号坏。
BIOS 基本输入输出 主板运行时对BIOS有读操作时就闪亮。 IRDY 主设备准备好 有IRDY信号时才闪亮,否则不亮。 OSC 振荡 ISA槽的主振信号,空板上电则应常亮,否则停振。 FRAME 帧周期 PCI槽有循环帧信号时灯才闪亮,平时常亮。 RST 复位 开机或按了RESET开关后亮半秒钟熄灭必属正常,若不灭常因主板上的复位插针接上了加速开关或复位电路坏。
12V 电源 空板上电即应常亮,否则无此电压或主板有短路。
-12V 电源 空板上电即应常亮,否则无此电压或主板有短路。 5V 电源 空板上电即应常亮,否则无此电压或主板有短路。 -5V 电源 空板上电即应常亮,否则无此电压或主板有短路。(只有ISA槽才有此电压) 3V3 电源 这是PCI槽特有的3.3V电压,空板上电即应常亮,有些有PCI槽的主板本身无此电压,则不亮。
五、使用流程图(以最不系统为例) 六、故障代码含义速查表 查表必读:(注意事项) 1、特殊代码“00”和“FF”及其它起始码有三种情况出现: ①已由一系列其它代码之后再出现:“00”或“FF”,则主板OK。
②如果将CMOS中设置无错误,则不严重的故障不会影响BIOS自检的继续,而最终出现“00”或“FF”。
③一开机就出现“00”或“FF”或其它起始代码并且不变化则为板没有运行起来。
2、本表是按代码值从小到大排序,卡中出码顺序不定。 3、未定义的代码表中未列出。 4、对于不同BIOS(常用的AMI、Award、Phoenix)用同一代码所代表的意义有所不同,因此应弄清您所检测的电脑是属于哪一种类型的BIOS,您可查问你的电脑使用手册,或从主板上的BIOS芯片上直接查看,也可以在启动屏幕时直接看到。 5、有少数主板的PCI槽只有前一部分代码出现,但ISA槽则有完整自检代码输出。且目前已发现有极个别原装机主板的ISA槽无代码输出,而PCI槽则有完整代码输出,故建议您在查看代码不成功时,将本双槽卡换到另一种插槽试一下。另外,同一块主板的不同PCI槽,有的槽有完整代码送出,如DELL810主板只有靠近CPU的一个PCI槽有完整的代码显示,一直变化到“00”或“FF”,而其它槽走到“38”则不继续变化。 6、复位信号所需时间ISA与PCI不一定同步,故有可能ISA开始出代码,但PCI的复位灯还不熄,故PCI代码停在起始码上。
代码 Award BIOS Ami BIOS Phoenix BIOS或Tandy 3000 BIOS
00 . 已显示系统的配置;即将控制INI19引导装入。 . 01 处理器测试1,处理器状态核实,如果测试失败,循环是无限的。 处理器寄存器的测试即将开始,不可屏蔽中断即将停用。 CPU寄存器测试正在进行或者失败。
02 确定诊断的类型(正常或者制造)。如果键盘缓冲器含有数据就会失效。 停用不可屏蔽中断;通过延迟开始。 CMOS写入/读出正在进行或者失灵。 03 清除8042键盘控制器,发出TESTKBRD命令(AAH) 通电延迟已完成。 ROM BIOS检查部件正在进行或失灵。 04 使8042键盘控制器复位,核实TESTKBRD。 键盘控制器软复位/通电测试。 可编程间隔计时器的测试正在进行或失灵。
05 如果不断重复制造测试1至5,可获得8042控制状态。 已确定软复位/通电;即将启动ROM。 DMA初如准备正在进行或者失灵。
06 使电路片作初始准备,停用视频、奇偶性、DMA电路片,以及清除DMA电路片,所有页面寄存器和CMOS停机字节。 已启动ROM计算ROM BIOS检查总和,以及检查键盘缓冲器是否清除。 DMA初始页面寄存器读/写测试正在进行或失灵。
07 处理器测试2,核实CPU寄存器的工作。 ROM BIOS检查总和正常,键盘缓冲器已清除,向键盘发出BAT(基本保证测试)命令。 . 08 使CMOS计时器作初始准备,正常的更新计时器的循环。 已向键盘发出BAT命令,即将写入BAT命令。 RAM更新检验正在进行或失灵。 09 EPROM检查总和且必须等于零才通过。 核实键盘的基本保证测试,接着核实键盘命令字节。 第一个64K RAM测试正在进行。 0A 使视频接口作初始准备。 发出键盘命令字节代码,即将写入命令字节数据。 第一个64K RAM芯片或数据线失灵,移位。
0B 测试8254通道0。 写入键盘控制器命令字节,即将发出引脚23和24的封锁/解锁命令。 第一个64K RAM奇/偶逻辑失灵。 0C 测试8254通道1。 键盘控制器引脚23、24已封锁/解锁;已发出NOP命令。 第一个64K RAN的地址线故障。 0D 1、检查CPU速度是否与系统时钟相匹配。2、检查控制芯片已编程值是否符合初设置。3、视频通道测试,如果失败,则鸣喇叭。 已处理NOP命令;接着测试CMOS停开寄存器。 第一个64K RAM的奇偶性失灵 0E 测试CMOS停机字节。 CMOS停开寄存器读/写测试;将计算CMOS检查总和。 初始化输入/输出端口地址。 0F 测试扩展的CMOS。 已计算CMOS检查总和写入诊断字节;CMOS开始初始准备。 . 10 测试DMA通道0。 CMOS已作初始准备,CMOS状态寄存器即将为日期和时间作初始准备。 第一个64K RAM第0位故障。 11 测试DMA通道1。 CMOS状态寄存器已作初始准备,即将停用DMA和中断控制器。 第一个64DK RAM第1位故障。 12 测试DMA页面寄存器。 停用DMA控制器1以及中断控制器1和2;即将视频显示器并使端口B作初始准备。 第一个64DK RAM第2位故障。 13 测试8741键盘控制器接口。 视频显示器已停用,端口B已作初始准备;即将开始电路片初始化/存储器自动检测。 第一个64DK RAM第3位故障。 14 测试存储器更新触发电路。 电路片初始化/存储器处自动检测结束;8254计时器测试即将开始。 第一个64DK RAM第4位故障。 15 测试开头64K的系统存储器。 第2通道计时器测试了一半;8254第2通道计时器即将完成测试。 第一个64DK RAM第5位故障。 16 建立8259所用的中断矢量表。 第2通道计时器测试结束;8254第1通道计时器即将完成测试。 第一个64DK RAM第6位故障。 17 调准视频输入/输出工作,若装有视频BIOS则启用。 第1通道计时器测试结束;8254第0通道计时器即将完成测试。 第一个64DK RAM第7位故障。 18 测试视频存储器,如果安装选用的视频BIOS通过,由可绕过。 第0通道计时器测试结束;即将开始更新存储器。 第一个64DK RAM第8位故障。 19 测试第1通道的中断控制器(8259)屏蔽位。 已开始更新存储器,接着将完成存储器的更新。 第一个64DK RAM第9位故障。 1A 测试第2通道的中断控制器(8259)屏蔽位。 正在触发存储器更新线路,即将检查15微秒通/断时间。 第一个64DK RAM第10位故障。 1B 测试CMOS电池电平。 完成存储器更新时间30微秒测试;即将开始基本的64K存储器测试。 第一个64DK RAM第11位故障。 1C 测试CMOS检查总和。 . 第一个64DK RAM第12位故障。 1D 调定CMOS配置。 . 第一个64DK RAM第13位故障。 1E 测定系统存储器的大小,并且把它和CMOS值比较。 . 第一个64DK RAM第14位故障。 1F 测试64K存储器至最高640K。 . 第一个64DK RAM第15位故障。 20 测量固定的8259中断位。 开始基本的64K存储器测试;即将测试地址线。 从属DMA寄存器测试正在进行或失灵。
21 维持不可屏蔽中断(NMI)位(奇偶性或输入/输出通道的检查)。 通过地址线测试;即将触发奇偶性。 主DMA寄存器测试正在进行或失灵。 22 测试8259的中断功能。 结束触发奇偶性;将开始串行数据读/写测试。 主中断屏蔽寄存器测试正在进行或失灵。 23 测试保护方式8086虚拟方式和8086页面方式。 基本的64K串行数据读/写测试正常;即将开始中断矢量初始化之前的任何调节。 从属中断屏蔽存器测试正在进行或失灵。 24 测定1MB以上的扩展存储器。 矢量初始化之前的任何调节完成,即将开始中断矢量的初始准备。 设置ES段地址寄存器注册表到内存高端。
25 测试除头一个64K之后的所有存储器。 完成中断矢量初始准备;将为旋转式断续开始读出8042的输入/输出端口。 装入中断矢量正在进行或失灵。
26 测试保护方式的例外情况。 读出8042的输入/输出端口;即将为旋转式断续开始使全局数据作初始准备。 开启A20地址线;使之参入寻址。 27 确定超高速缓冲存储器的控制或屏蔽RAM。 全1数据初始准备结束;接着将进行中断矢量之后的任何初始准备。 键盘控制器测试正在进行或失灵。 28 确定超高速缓冲存储器的控制或者特别的8042键盘控制器。 完成中断矢量之后的初始准备;即将调定单色方式。 CMOS电源故障/检查总和计算正在进行。