帝尔 DR-08 系列 复读机使用说明
LBC 烘焙设备 LRC7 重温机操作、安装、维修和配件手册说明书

Model LRC7 Rethermalizing OvenOPERATION, INSTALLATION, SERVICE and PARTS MANUALLBC Bakery Equipment, Inc.6026 31st Ave NETulalip, WA 98271, USAPhone: 888-RACKOVN (888-722-5686)Email: *******************Website: REV C 1/2017TTHIS MANUAL MUST BE RETAINED FOR FUTURE REFERENCE. READ, UNDERSTAND AND FOLLOW THE INSTRUCTIONS AND WARNINGS CONTAINED IN THIS MANUAL.This LBC Rethermalizer was manufactured to rigid standards. The appliance has been tested and is listed by Intertek Testing Services (ETL Semko) and meets applicable safety and sanitation standards.A) The responsibility of the manufacturer is to supply suitable, comprehensive instructions and recommendations forproper operation and maintenance.B) All operations, maintenance and repair of this or any LBC Bakery Equipment, Inc. appliance must be performed byproperly trained and qualified personnel, and all such operations, maintenance and repair must be performed in a diligent manner. It is the responsibility of the owner/operator to ensure proper training and diligence of any person coming into contact with either the subject units or the output (product, fumes or otherwise) of the subject units. It is the responsibility of the owner/operator to ensure that the subject units are installed and operated in accordance with OSHA Standard 1910.263.C) A regular periodic program of cleaning, inspection and maintenance must be established and comprehensivemaintenance records maintained. It is the sole responsibility of the owner/operator to establish, schedule and enforce the frequency and scope of these programs in keeping with recommended practice and with due consideration given to actual operating conditions.D) The appliance must be operated within limits which will not exceed its working limits. It is the responsibility of theuser to operate this appliance in accordance with the rules and limits described in this manual and the published product specification sheet, and in accordance with the directions and instructions of the owner/operator of the appliance or employer, and in accordance with applicable federal, state and local laws and ordinances.T Read First . . . . . . . . . . . . . . . . . . . . . . . . . . . . . . . . . . . . . . . . . . . . . . . . . . . . . . . . . . . . . . . . . . . . . . 2 Specifications . . . . . . . . . . . . . . . . . . . . . . . . . . . . . . . . . . . . . . . . . . . . . . . . . . . . . . . . . . . . . . . . . . 4 Configurations . . . . . . . . . . . . . . . . . . . . . . . . . . . . . . . . . . . . . . . . . . . . . . . . . . . . . . . . . . . . . . . . . . 5Safe Operating Rules . . . . . . . . . . . . . . . . . . . . . . . . . . . . . . . . . . . . . . . . . . . . . . . . . . . . . . . . . . . . . 6 Control Overview . . . . . . . . . . . . . . . . . . . . . . . . . . . . . . . . . . . . . . . . . . . . . . . . . . . . . . . . . . . . . . . 8 Maintenance and Cleaning . . . . . . . . . . . . . . . . . . . . . . . . . . . . . . . . . . . . . . . . . . . . . . . . . . . . . . . 10 Conditions of Installation . . . . . . . . . . . . . . . . . . . . . . . . . . . . . . . . . . . . . . . . . . . . . . . . . . . . . . . . . 11 Receiving and Unpacking . . . . . . . . . . . . . . . . . . . . . . . . . . . . . . . . . . . . . . . . . . . . . . . . . . . . . . . . . 11 Installation . . . . . . . . . . . . . . . . . . . . . . . . . . . . . . . . . . . . . . . . . . . . . . . . . . . . . . . . . . . . . . . . . . . . . 12Part List . . . . . . . . . . . . . . . . . . . . . . . . . . . . . . . . . . . . . . . . . . . . . . . . . . . . . . . . . . . . . . . . . . . . . . . 14 Wiring Schematic . . . . . . . . . . . . . . . . . . . . . . . . . . . . . . . . . . . . . . . . . . . . . . . . . . . . . . . . . . . . . . . 18 Warranty . . . . . . . . . . . . . . . . . . . . . . . . . . . . . . . . . . . . . . . . . . . . . . . . . . . . . . . . . . . . . . . . . . . . . . 20T[114mm]SCountertop orFloor MountRethermalizerCountertop: 4.0” LegsFloor: 6.0” Legs or4.5” Swivel Casters with BrakesStand MountRethermalizerLST7 StandStacked AppliancesCombinations:∙ 2 ea LRC7 Rethermalizers or∙ 1 ea LCR7 Rotisserie + 1 ea LRC7 Rethermalizer6.0” Legs or4.5” Swivel Casters with BrakesYOU MUST READ AND UNDERSTAND THIS SECTION BEFORE YOU OPERATE THIS APPLIANCE.Hot Surfaces∙The appliance may be hot. Do not contact hot surfaces in the appliance interior without proper protection. Contact with hot surfaces can cause serious burns, loss of skin and hair and the use of limbs.∙The appliance door may not stay open and may close on its own.∙Avoid contact with hot surfaces when loading or unloading the oven. Use appliance mitts to handle spits, forks or baskets. Contact with hot product can cause you to react suddenly and result in spilling or dropping the product, which can cause physical harm.Hot Water and Steam∙This appliance produces steam in the process of cooking. When opening the loading door, hot air and steam will be released from the oven interior. Steam is very hot and contact can cause serious burns, loss of skin and hair, loss of the use of limbs and serious injury to eyes and internal organs. Excessive contact with steam can even result in loss of life. Open the loading door slowly and keep your face and hands clear of the opening.∙Steam produced by the appliance can cause the floor to become wet. If this happens, wipe or mop up the water and alert other employees of the hazard.∙Steam and/or hot water may be expelled through the appliance drain. The drain line should be connected to a proper air gap drain during installation to allow excess water to be evacuated from the work area.Steam and water from the drain may be very hot and contact can cause serious burns, loss of skin and hair, loss of the use of limbs and serious injury to eyes and internal organs.∙Use caution to avoid slipping when operating this appliance or when in the area of the appliance. In the event that the drain becomes clogged, continued use of the appliance may result in water spilling onto the floor in the general work area around the appliance. If the drain becomes clogged and water spills on the floor:o Stop using the appliance to prevent more water spillage.o Mop up and clean up any water on the floor in front of the appliance or in the surrounding work area.o Alert other personnel, employees, customers or observers of the hazard.o Notify supervisor, servicer or maintenance persons and have the drain unclogged.∙In the normal operation of the appliance, product intended for cooking may spill onto the floor. If this happens:o Mop up and clean up any product on the floor in front of the appliance or in the surrounding work area.o Alert other personnel, employees, customers or observers of the hazard.Sharp Edges and Pinch Hazards∙Use caution to avoid contact with sharp edges. Doors, covers, etc. may have edges that can cut or snag skin and clothes. Use caution when working on, cleaning or servicing the appliance.∙Keep hands and fingers out of the path of the loading door when closing to avoid pinching.Strains, Over-Extension, Over-Exertion and Lifting Hazards∙Use caution when loading or unloading heavy product from the appliance. Cooked product may be heavy and result in sprains, strains or injury to back, arms, hands or legs. Do not lift more than you are safely capable of lifting.Other Precautions∙Never stand on top of the appliance for any reason.∙Do not store anything on top of the appliance.∙The oven is not a self-cleaning appliance – do not attempt to burn off surface contamination.YOU MUST READ AND UNDERSTAND THIS SECTION BEFORE YOU OPERATE THIS APPLIANCE.Smoke or Fire Hazard∙If you see flames or smoke in or around the appliance:o Turn the appliance off and contact your supervisor or an authorized service provider.o Call 911 or contact fire safety personnel in accordance with your employer’s emergency plan.o Do not open the loading door as this will allow oxygen to reach any flames and may cause injury to persons, property damage and may cause loss of life.∙Do not operate the appliance or any other appliance if you hear bangs, pops or other abnormal noises.Turn off the appliance and contact your supervisor or authorized service provider.∙Do not allow any flammable materials to be put into the appliance. The following materials are flammable:o Gasoline and petroleum products, including wax and tar.o Wood chips, wood and paper.o Flour dust and fine corn meal that can become airborne.o Charred baked products or any other burned material.o Animal and vegetable fats that vaporize or become overheated.∙Do not operate the appliance if an attached fire suppression system or fire alarm system is dysfunctional or has been discharged. Contact your supervisor or contact the fire safety system servicer.∙If a fire suppression system discharges while you are operating the appliance, turn off the appliance and follow your employer’s emergency plan, or exit the building or work area.Electrical Hazard∙Do not operate the appliance if electrical covers are removed or there are frayed, burned or exposed wires or if any live electrical terminals are exposed. Turn off the appliance and any circuit breaker or disconnect device supplying electrical power to t he appliance as described in your employer’s emergency plan.∙Do not operate the appliance if any circuit breaker or fuse connected to the appliance becomes tripped and cannot be reset. Contact your supervisor or authorized servicer or electrician to correct the condition before operating the appliance. Alert other employees and service personnel to the hazard.∙Do not operate the appliance if you feel an electrical shock when in contact with the appliance or other devices attached to the appliance. Contact your supervisor or authorized servicer or electrician to correct the condition before operating the appliance. Alert other employees and service personnel to the hazard.Improper Operation∙Do not operate the appliance if covers, doors or other components are removed.∙Do not operate the appliance if any other person has applied a lock-out on the electrical supply or has tagged the appliance in a way to suggest that the appliance not be used. Contact your supervisor for further instructions or refer to yo ur employer’s safety plan.Health and Safety in Cooked Products∙For the safety and health of those who will consume goods produced through the use of the appliance, use all caution and diligence to prevent the ingestion of any item or material that is unsafe or unfit for human consumption.∙Do not use the appliance if you see any material floating in the air in the appliance or if you see any foreign matter in the finished food product.∙Do not use the appliance if you smell unfamiliar smells or if you smell any odor that you know to be unhealthy.∙Do not under-cook any product that can carry bacteria such as but not limited to e-coli, salmonella or any other pathogen.∙Do not cook, roast or handle any meat or meat product that contains any known diseases or pathogens.∙In all cases, follow all food-safe practices as mandated by law and your employerLD. Timer Start/Stopand Reset Button Press to start/stop timer;press-and-hold for 3seconds to reset timerC. Set Point ArrowsUse to select desired set pointB. Change Temperature Scale Simultaneously press-and-hold up and down arrows for 3 seconds to change scale from o F to o C and backD. Timer ArrowsUse to set desired timeA.Power ButtonC. Set Point C. Actual Temp( Con tinu )A Power Button. Press this button to turn the oven on or off. The Power indicator light will remain on wheneverthe appliance is connected to an electrical supply.B Change Temperature Scale. The oven can display temperatures in either o F or o C. To change from one scaleto the other, simultaneously press-and-hold both Set Point arrows for 3 seconds. Unless selected otherwise,this scale will remain active for all future startups. Saved recipes will automatically change to the selectedscale.C Set Point and Actual Temperature. Use the set point arrows to enter the desired temperature, which willappear in the adjacent set point display. The oven will heat or cool to match the set point and the oventemperature will appear in the actual temp displayD Cook Timer. Use the set point arrows to enter the desired temperature, which will appear in the adjacenttimer display. The timer start/stop and reset button can be used in the following ways:1Start the Timer. Press the start/stop button once to start the timer. When the timer is counting, the timer colon will flash. If the loading door is opened while the timer is counting, the countdown willautomatically pause. The countdown will resume when the door is closed. A buzzer will sound whenthe timer has counted to zero. Press any button on the control to silence the buzzer.2Stop the Timer. If the timer is counting, press the start/stop button again to stop the countdown.When the timer is stopped, the entire timer display will also flash.3Reset the Timer. Press-and-hold the button to reset the timer.WDaily∙ Remove the racks and rack supports. Sink-wash these parts with warm water and soap.∙ Clean the oven interior and exterior with warm water, soap and a soft cloth. Clean the control with a damp cloth only. Do not allow water to run down the face of the control.∙With the loading door open, hinge the inner glass frame outward for cleaning. Do not use abrasive cleaners or wash pads as abrasives will damage the low-energy coating.Monthly∙ Inspect the cooling fan in the front panel for lint or other build up. Clean with a dry rag as needed. ∙ Inspect rear motor for lint or other contaminant build up. Clean with a dry rag as needed.As Needed∙ Remove the rear fan panel (covers fan at rear interior of oven). Sink-wash this part with warm soap andwater. Clean the area behind the panel with warm soap and water.LBC Bakery Equipment Co. shall, for a fee contingent on site location and provided that conditions of installation are met, provide a factory-authorized service agency to install the LBC Rotisserie. The job site must be ready for the installation before LBC Bakery Equipment, Inc. or its authorized agent arrives. If the installation site is not properly prepared or if there are construction delays, the customer shall be responsible for all expenses incurred during this delay. All expenses resulting from job delay or extension, for reasons beyond the control of LBC Bakery Equipment, Inc., shall be the responsibility of the customer. Installation shall be conducted during normal business hours. This installation is for a single trip. Start-up and training are not included.IN ALL CASES, THE ELECTRICAL, MECHANICAL CONNECTIONS AND VENTILATION MUST MEET ALL FEDERAL, STATE AND LOCAL CODES OR ORDINANCES.It is the responsibility of the owner/operator to do the following: A) Secure all required permits and meet all local code requirements. B) Ensure the installation site is cleared and ready for installation before the authorized installer arrives on site. The site shall be smooth and level. C) Provide electrical utilities within five (5) feet of the installation location per the specifications provided by LBC Bakery Equipment, Inc. D) Provide licensed trades person to make the final electrical connections. E) Provide adequate ventilation, including vented hoods and associated roof penetrations. F) Remove all packing materials, crates, etc. resulting from the installation. G) Provide any sheet metal work required by local codes or otherwise to bridge gaps between appliance and adjacent walls or other building structures.ReceivingUpon receiving the appliance, immediately check for damage (visible and concealed) and loss. Visible damage must be noted on the freight bill at the time of delivery and signed by the carrier’s agent. Concealed damage or loss means damage or loss which does not become apparent until the merchandise has been unpacked. If concealed damage or loss is discovered upon unpacking, make a written request for inspection by the carrier’s agent within 15 days of delivery. All packing material should be kept for the inspection. DO NOT return damaged merchandise to LBC Bakery Equipment, Inc.; file your claim with carrier.LocationPrior to unpacking, move the appliance as near to its intended location as practical. Existing packaging will help protect the oven from physical damage normally associated with moving it through hallways and doorways.UnpackingThe appliance will arrive inside a wood frame and affixed to a pallet. Remove the wood frame and strapping bands before lifting the unit from the pallet and placing in its intended location.ClearancesMinimum clearance from combustible construction: 0” [0mm] from sides, 0” [0mm] from back and 12” [305mm] from top. This appliance may be installed on combustible surfaces. The installation location must allow adequate clearances for servicing and for the proper operation of the loading door.Legs, Casters or StandLegs or casters are available for single and stacked appliance combinations. Additionally, a single unit may have a stand. install the appliance on legs, casters or a stand with the stainless steel hardware provided (16 ea of the following: 10-1.2 x 20mm hex bolts, 10mm split lock washer and 10mm plain washers).StackingIf stacking appliances, gently place the top oven on the bottom oven with the doors and sides aligned. Secure the appliances through the pre-attached stacking brackets at the underside of the rotisserie and into the threaded receiving holes at the topside of the rethermalizer. Use the stainless steel hardware provided (16 ea of the following: 10-1.2x20mm hex bolts, 10mm split lock washers and 10mm plain washers). Check both appliances to ensure they are level.Electrical Power ConnectionA mounting plate with a 1.25” [32mm] hole to connect an electrical conduit connector is installed at the bottom of the control compartment. The plate may be moved to the top of the appliance to accommodate different connection points as shown in the Specifications section of this manual. Use flexible conduit or cord if the oven is installed with casters, providing sufficient length to allow the oven to be moved for cleaning without applying tension to the electrical connections.Safety TetherUnits on casters must be secured to a building structure with the safety tether provided. Affix one end of the tether to a side panel of the unit (the non-control side is recommended) using any existing panel mount screw. An additional hole must be drilled next to the existing mount screw to affix the 2-hole plate located on either end of the tether. A drill bit and mounting hardware are provided in the tether kit. Attach the loose end of the tether to a secure structure and affix the warning label prov ided (“WARNING – ATTENCION: RI SK OF ELECTRIC SHOCK …”) to the control-side panel.Interim InspectionPrior to turning oven on, verify the following:∙Loading door(s) open/close freely past 90o without obstruction∙All packing materials have been removed from inside oven∙Clear protective plastic covering data plate has been removed∙Fingerprints, tape residue, etc. have been cleaned from oven interior and exterior∙Any loose screws have been tightened; any loose power connections have been tightenedController Startup Check (Refer to Controller Operation section)While oven is connected to live power, press the control panel power button and verify that the following conditions occur on initial startup:∙Oven pre-heats (elements are energized) to the temperature programmed in the open recipe∙Interior ceiling and rear wall heat-circulation fans are on∙Control compartment axial fan is on∙Values appear in the actual temp, set point and timer LED displaysLoading Door Switch CheckWhile the oven is preheating, open the loading door and verify the following conditions:∙The word “door” flashes in the timer∙Heat turns off (elements are de-energized)∙Interior ceiling and rear wall heat-circulation fans turn offInterior Lights CheckWhile the oven is preheating, press the start/stop button and verify that both interior lights illuminate.Set Temperature ScaleSimultaneously press-and-hold set point up and down arrows for 3 seconds to change scale from o F to o C and back.Controller CalibrationInsert a thermocouple inside the appliance cook chamber at the center of any oblong hole in the fan cover. Route the probe wire out of the loading door opening and adjust the oven set point to 350o F (177o C). Allow the oven to reach the set point and stabilize for at least 90 minutes. If the thermocouple reading and the controller actual temperature differ by more than a couple degrees, the control must be calibrated. To begin, make a note of the temperature difference between the thermocouple and the controller actual temperature, then turn the control power button off and hold the probe button for 3 seconds until a value appears in the set point display. Use the set point up or down arrow to add or subtract the difference in temperature. (EXAMPLE: If the thermocouple is 10o higher than the actual temperature, add 10. If the thermocouple is 10o lower than the actual temperature, subtract 10.) Turn the control button on and re-check the thermocouple against the controller actual temperature. Repeat this procedure until the two temperatures match.W1 Control2 Fuses3 Fuse Holders4 Axial Fan5 Caster8 Inner Door9 Outer Door7 Rack Support6 RackW21 Element22 Buzzer23 Thermocouple26 Relay27 Terminal Block25 Contactor24 Transformer28 High LimitControl CompartmentWInterior Light (Front View) Interior Light (Reverse View)。
MR08EX SD卡读写器说明书
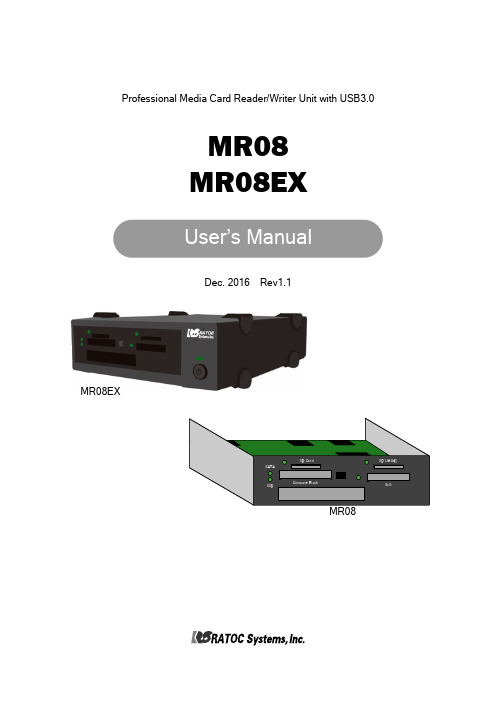
Professional Media Card Reader/Writer Unit with USB3.0MR08MR08EXRev1.1Dec. 2016 MR08EX<Cautions>1.©2016 RATOC Systems, Inc. All rights reserved.2.This user’s manual was created with thorough attention to its content.If, however, you have a question, spot an error, or find a description lacking, please contact us.3.RATOC Systems, Inc. doesn’t take responsibility for any damage arising from the use of this product.4.This publication may not be reproduced or used in whole or in part without permission of RATOC Systems,Inc.5.Design and specifications are subject to change without notice.● “REX” is a trademark owned by RICOH COMPANY, LTD. RICOH allows RATOC Systems,Inc. to use this trademark under license agreement.●SxS、SxS-1、SxS PRO、SxS PRO+ are trademark of Sony Corporation.●Apple、Mac、Mac OS are registered trademarks of Apple Inc. in the United States of America and other countries.●Windows is a registered trademarks of Microsoft Corporation in the United State of America and other countries.●All other product and company names are trademarks or registered trademarks of their respective companies.Introduction41-1.Package Contents------------41-2.System Requirement------------51-3.Supported media------------51-4.Description of each part------------62Setup82-1.Procedure to install this product-------- 82-2.Connection of a USB------------82-3.Installation of HotPlug tool and how to use it ---92-4.Direction of each media insertion---------113Drive letters123-1.Windows10------------123-2.Windows8.1------------123-3.Windows7 ------------134Installation and confirmation inMac OS X15 Thank you for purchasing our product.Be sure to read this user’s manual before using our product.<Features>●This product is a media card reader/writer with USB3.0 interface.●HotPlug tool is included. By this tool, you can centrally manage removal/insertion of all media which this product supports.-1.Package ContentsConfirm all of the items are included in the package.-2.System Requirement●Supported OS:Windows10 / 8.1 / 7 ※Compatible with both 64bit and 32bit OS Mac OS X 10.10 or later●Supported PC:WindowsPC with USB3.0/2.0 ports(It is recommended to connect USB3.0 ports) Mac with USB3.0/2.0-3.Supported media●SD SD memory card, SD memory cardSD High Speed(ver1.1), SD Pro High SpeedSDHC memory card, SDXC memory cardSDXC memory card UHS-I●SxS SxS-1、SxS PRO●CF Compact flash Type I / II、UDMA0~7●SSD SATA2.0(3Gbps) / SATA1.0(1.5Gbps)SD card slot 2, access LED-4.Description of each part UHS-II compatible SD card slot,1-4-1.MR08●Front panel●Back side of PCBAPower connectorMicro-USB port※Be sure to use the SATA cable, and power cable which are attached to this product from the beginning without removing, replacing them.1-4-2.MR08EX●Front panelEach part of memory card is the same as MR08, as described in the previous page.●Back panel2Set up2-1.Procedure to install this productConnect MR08/MR08EX to a PCvia a USB cableSet up HotPlug toolPreparation is complete2-2.Connection of a USB cable 2-2-1.Connection of MR08●It is required to install MR08 into a 5 inch bay of a PC. For further information, please refer to the User’s Manual which accompanies a PC, PC case.●Attach the bundled USB cable into the Micro-B connector of MR08. And connect the USB cable to a PC.●MR08 -----------Page 8●MR08EX-----------Page 9※The bundled HotPlug tool is for the use of Windows only. For Mac, this tool is not required, because standard removal tool in Mac is used instead.●Connect SATA-HDD 15pin power cable to the power connector of MR08.Connected MR08 PCBA alreadyAvailable from power supply unit of a PC2-2-2.Connection of MR08EX2-3-1.Installation of HotPlug toolThis section explains installation of HotPlug tool for Windows and how to use it.Mac users don’t need to install HotPlug tool. Refer to Chapter 2-3-3 for hot-plug instruction.●Before installation of Hot-Plug tool, confirm MR08/MR08EX is connected to the PC.And then, start [ REX-MRHotPlugTool-Setup.exe] at the bundled CD-ROM and follow the on-screeninstructions to finish installation.●Restart the PC. And then, connect MR 08/MR 08EX . And then, the icon will appear at the task tray at the bottom right corner.For Windows users, proceed to Chapter 2-3.Installation of HotPlug tool and how to use it.For Mac users, you have finished installation already.Proceed to Chapter 2-4.Direction of each media insertion and get started with this product.Connected SSD slot already●Connect MR08EX to a PC via a USB cable.2-3-2.How to use HotPlug tool●Click the icon at bottom right.●Black letters mean media which are inserted into the slot now.Gray letters mean media which aren’t inserted into the slot now.●If you click a media you want to remove, it will be ready for removal.Black :2-3-3.HotPlug with Mac●Mac users can hotplug each media by standard function in OS.To remove media, select [Eject] for each media.Gray :Media slot without media●SD Card+Insert SD card with the SD label facing up.+Insert it until it clicks into place.+When removing, push the media again to eject it.2-4. Direction of each media insertion Caution●Be careful of direction of media insertion when each media is inserted.●If media is inserted in the wrong direction, media or MR08/MR08EX may have damaged.Put both connectors at the right side and insert SSD into the slot slowly.●CF Card+Insert CF card with CF label facing up.+Insert it firmly.+When removing, push the eject switch.●SSD+Set the direction of SSD insertion, as shown in the bottom right.+Insert it until some part of SSD goes approx 0.6 inch beyond the front panel.+When removing, pinch the SSD protruding fromthe panel and slide it out slowly.●SxS Card+Insert SxS card with SxS label facing up.+Insert it until some part of SxS card goesapprox 0.6 inch beyond the front panel.+When removing, pinch the SxS protruding from the paneland slide it out slowly.0.6 inch●A drive letter in each media slot will be assigned automatically by Windows after installation of MR08/MR08EX. If drive letters aren’t used, a user can assign any drive letter by following the next steps.●Once the setting is made, Windows will keep the setting, and when Windows starts next time, the assigned drive letter can be used.But, the assigned drive letter may change at the following time:-At the time when a USB port of a PC connected to MR08/MR08EX change.-At the time when a PCIExpress bus slot change if a PCIExpress board for additional USB ports are used.●Right-click at Windows mark at the bottom left corner and select [Disk Management]. Next steps are the same as Windows 7. Proceed to 3-3.Windows 7. 3-1.Windows103Drive letters 3-2.Windows8.1●After selecting [Disk Management], procedure is the same as Windows 7. Proceed to 3-3.Windows 7.●Right-click at [Computer] and click [Manage].●Click [Disk Management] at the [Computer Management] window.3-3.Windows7●Right-click at a drive you want to change, and click the [Change Drive Letter and Paths...].●Select the drive letter and click [Change].●Allocable drive letter will be shown. Select a drive letter and click [OK].●The warning window will appear. Click [Yes].●Drive letter changed to the one you selected.Installation and confirmation in MacOS X4MacOS X(10.10 or later) will load driver software automatically once MR08EX is connected to Mac.∙Select [System information] –[USB]. The screen shown below will appear.This screen shows device information with MR08EX.∙[MR08(SATA-HDD)] appears only when SSD is recognized.。
藍牙立體聲耳機使用指南-Novero说明

藍牙立體聲耳機使用指南目錄歡迎使用安全使用前產品一覽產品包裝內容使用方式為充電配戴將與藍牙裝置配對開啟/關閉使用進行音樂播放使用撥打電話指示燈指示聲維護及保養常見問題技術規格詞彙表附錄棄置說明保固認證與安全規範商標歡迎使用感謝您購買由所製造的通用藍牙立體聲耳機。
本產品具備可摺疊及伸縮的設計,非常適宜配戴和隨身攜帶。
使用前請詳閱本使用指南。
藍牙是一種短距離無線電通訊技術標準,適用於行動電話、電腦、印表機、及其他裝置間的高傳輸速率。
另請參閱第章〈藍牙詞彙表〉。
使用本可利用無線傳輸的方式,享受您的音樂及撥打電話。
本產品擁有下列功能:與藍牙行動電話或支援協定的配對。
接聽電話、結束通話及拒接電話。
重撥上一次的撥號。
語音撥號,若行動電話支援。
調整音量。
在耳機與藍牙行動電話間進行通話傳輸。
麥克風靜音。
與支援協定的藍牙音樂裝置配對。
利用無線傳輸方式享受音樂。
調整音量。
遙控暫停/播放。
遙控上一首/下一首曲目。
可輕鬆於通話與音樂間切換,讓您在聆聽音樂時不會漏接任何來電。
開啟耳機時,會自動連接上次連接的裝置。
備註即使已配對的裝置和耳機皆支援相同的藍牙協定,由於配對裝置規格及版本的差異,可用的功能會有所不同。
安全使用請將音量調至最低。
然後開啟耳機,再慢慢調整至舒適的音量。
請儘可能保持最低音量,並避免在嘈雜的環境中使用耳機,否則您可能需要調高音量。
若需要調整音量,請慢慢操作,避免突然出現非預期的高音量。
若您感覺不適或產生耳鳴,請立即停止使用耳機並諮詢醫師。
持續以高音量使用耳機,會使您的聽覺習慣於該音量,而在不知不覺間造成聽覺的永久性損害。
在參加任何需要您全神貫注的活動時,使用耳機須特別小心。
請取下或關閉耳機,避免因分心而導致意外發生。
在駕駛汽車、機車、船艇或騎乘自行車時使用立體聲耳機,可能會釀成危險,在某些司法管轄區屬於違法行為,請務必遵守當地法律。
若您使用心律調節器、助聽器或其他電子醫療裝置,在使用本產品前請向醫師洽詢。
诺亚舟 点读学习机NP10 说明书

随机配件非常感谢您购买我们的产品。
当您打开包装彩盒后,首先请您检查,其中是否包含以下所有物品。
如有缺少,请及时联系购买本机的销售商找回您的物品。
NP10点读学习机1台点读笔1支电源适配器1个USB传输线1根说明书1份三包卡1份合格证1张温馨提示1.点读机适合使用人群:本产品主要针对小学初中英语、语文学习而设计,同时有丰富的故事资源,因此理想的使用年龄段为5-15岁。
2.点读学习机教材下载:通常情况下,出版社每学期都会对教材内容进行修订,用户在新学期开学之初,到网站上更新下载最新的书本资料文件,若因出版社对教材内容进行修改延误您的下载时间,敬请见谅,我们会尽量在最短的时间内上传最新的数据资料。
目录一 注意事项.............................1二 基本知识.............................2三 安装操作.............................3四 基本使用说明.........................51 开/关机 ...........................52 音量调节 ..........................53 主要功能介绍 ......................54 功能按键说明 ......................65 课本选择 ..........................66 文件下载功能 ......................77 系统升级 ..........................8五 具体功能操作 (9)1 课本点读 ..........................92 新课标英汉词典 ...................123 故事城堡 .........................124 MP3音乐 ..........................13六 常见故障排除........................14七 技术规格. (15)八 售后服务............................15九 环保使用说明 (16)一 注意事项● 本机由高精密元器件组成,禁止用户自行拆卸、修理、改装或重摔,以免对本机造成损坏。
UCLEAR Commander 車用藍牙耳機使用說明書说明书

Bluetooth Headset使用說明書1目錄目錄包裝內容物主機按鍵功能接聽來電配對操作One Touch語音快速撥號簡介One Touch─AndroidOne Touch─iOS支架安裝支架與充電座使用方式充電方式123456 7~9 10~12131415歡迎使用U CLEAR Commander感謝您購買UCLEAR Commander車用藍牙耳機,此耳機專為全球駕駛人士開發的車用藍牙耳機,配合UCLEAR全球獨創「One Touch」藍牙語音播號和快速連接功能,實現免觸碰手機播號通話,準確率可達99.5%以上,使您在駕駛時能完全釋放雙手,專注於路況的同時,也能繼續保持聯繫通話。
車用12V充電器USB充電線耳塞套(L、M、S)Commander主機車用遮陽板專用支架多功能充電插座掛繩透明耳勾說明書2包裝內容物U CLEAR Commander 簡介開/關機接聽/掛斷多功能按鍵LED指示燈降低音量音量增大3主機按鍵功能開機如耳機在車用遮陽板支架或充電插座上時,取出後便自動開機 多功能按鍵長按5秒即可開機關機耳機放回車用遮陽板支架或充電插座上時,置入後便自動關機 多功能按鍵長按5秒即可關機接聽來電4接聽來電如耳機放置於車用遮陽板支架或多功能充電插座上時,將耳機取下 即可接聽電話。
如耳機於關機狀態下,須先長按 2 秒多功能按鍵開機後即可接聽來 電。
如耳機呈現開機狀態,只需輕按多功能按鍵即可接聽來電。
結束通話通話過程中短按多功能按鍵即掛斷電話對方掛斷電話即可掛斷電話保留通話接聽新來電當在通話中有新來電時,短按多功能鍵便可接聽新的來電通話,同時保留原有的通話在等待狀態下,在通話當中短按多功能按鍵 便可在兩通話之間轉換。
在等待狀態下,連續短按兩次多功能鍵便會把當前的通話掛斷。
多功能配掛方式配對操作5配對連結為保證Commander藍牙耳機和手機正常連接,請先與手機進行配對程序。
當第一次配對成功後,往後開啟Commander藍牙耳機時,會自動與手機連線。
得力 彩色数码多功能复合机M351R入门指南 说明书

M351R快速设置第 8 页快速操作第 11 页使用说明书在使用本产品之前,请务必先仔细阅读本使用说明书。
请务必保留备用。
请在充分理解内容的基础上,正确使用。
操作本产品前,请阅读“重要安全指示”(⇒第 2 页)。
阅读完本指南后,请将其存放在安全的地方,以备将来参考。
本文档中的信息可能会有所变更,敬请留意。
重要安全指示本章介绍相关重要安全指示,预防对本机用户和他人造成伤害并防止造成财产损失。
请在使用本机前阅读本章节,然后按照说明正确使用本机。
请勿实施本手册中未提及的任何操作。
在法律允许的范围内,得力对于因本说明书中未说明的操作、使用不当或者非得力或非得力授权的第三方所进行的维修或改装而导致的任何间接的、偶然的或其他形式的损失(包括但不限于商业利润损失、业务中断或商业信息丢失)不承担责任。
对本机的不当操作或使用可能会造成人身伤害和/或不在“有限保修”范围内的需要大规模维修的机器损坏。
安装若要安全舒适地使用本机,请仔细阅读以下注意事项并将本机安装在适当的位置。
警告请勿安装在可能会造成火灾或触电的位置• 通风槽被堵塞的位置(过于靠近墙壁、床、沙发、地毯或类似物体)• 潮湿或多尘的位置• 会受到阳光直射的位置或室外• 会受到高温影响的位置• 会受到明火影响的位置• 酒精、油漆稀释剂或其他易燃物附近其他警告• 请勿将未经许可的电缆连接到本机,否则可能会导致火灾或触电。
• 请勿将项链和其他金属物或装满液体的容器放在本机上。
如果异物与本机内部的电气部件接触,可能会导致火灾或触电。
请将电源线插头插入专用电源插座,并在本机和其他电子设备之间保持尽可能大的空间。
请勿将本机安装在低热阻材料制成的薄板或类似物体上。
本机内置一个纸盒加热器,通电后主机底部会发热。
因此,在将本机安装在桌面上时,若未安装选购纸盒,请尽量避免在本机和桌面之间使用耐热性差的薄板或垫子,如乙烯基塑料桌垫。
使用无线 LAN 时• 请将本机安装于距离无线 LAN 路由器 50 米及以内处。
K6复读机使用说明

K6复读机使用说明开关机:长按6号“播放键”即可开机和关机。
音量调节:在播放界面,按一下4号“VOL”键,会显示音量大小的图标,然后按1号“上一曲”键加音量。
按2号“下一曲”键减音量复读功能:在播放界面,按一下3号“A-B”键,则屏幕左下角的图标“A”会闪烁,即表示已经设置复读起点,此时屏幕左下角的图标“B”会闪烁,再按一下“A-B”键,即表示已经设置复读终点,然后播放器就会重复起点和终点这一段音频。
【举个例子:播放到第10秒的时候。
按一下“A-B”键。
那么就设置了复读起点,播放到第30秒的时候,在按一下“A-B”键,那么就设置了复读终点,播放器就会复读第10秒至第30秒这一段音频,如果需要取消复读,按一下“A-B”键即可】变速功能:在播放界面,按一下5号“SPEED”键,右上角的“白色圆形图标闪烁”此时,按1号“上一曲”键即可加快语速,白色图标内的数字会从1加到8,最大加速是8级。
同理,当右上角白色图标闪烁是,按2号“下一曲”键,即可减慢语速,最大减速是-8级。
(注意:白色图标内默认数字为0,即常规速度)快进/快退功能:在播放界面,长按2号“下一曲”键,即可实现快进,同理,长按1号“上一曲”键,即可实现快退。
设置循环模式:在播放界面。
长按7号“返回键”即可显示菜单,进入“播放模式”即可设置“重复播放”和“随机播放”。
注意:如果无需随机播放,需要进入“随机播放”里面关闭,设置好之后按播放键确认保存。
音效设置:在播放界面。
长按7号“返回键”即可显示菜单,进入“声音设置”即可设置均衡器,可设置摇滚,电子乐,放克等音效。
设置好之后按播放键确认保存。
复读设置:在播放界面。
长按7号“返回键”即可显示菜单,进入“复读设置”即可设置"复读次数”和“复读间隔”。
这两项设置都是配合1号上一曲和2号下一曲键完成,设置好之后按播放键确认保存。
录音模式:在播放器主界面,按上一曲或者下一曲键,切换到“录音”的图标,按播放键进入,一共有5个选项【开始语音录音】【录音库】【录音格式】【录音比特率】【录音灵敏度】(1)录音操作:当光标在【开始语音录音】上,按播放键即可录音,按返回键,系统会提示是否保存,选择好之后,按播放键确认即可。
复读机

复读机简介复读机就是可以把声音存储下来并且重复播放的一种机器。
是在便携式收录机的基础上,增加了微处理芯片、数字存储芯片后形成的多功能语言信号存取设备。
它是在磁带放音的同时将模拟信号转换为数字信号,储存在数字存储芯片中;复读状态时再将数字存储器中的信号转换为模拟信号,通过功率放大后由扬声器还原出声音。
复读机所有状态的转换均是在电脑微处理芯片的控制下来完成的。
最先发明复读机的是曾任南京某军事院校副院长的钟道隆教授,并且发明复读机只是他学习英语的副产品。
复读机标准解读为规范市场,引导消费,指导企业对产品进行正确的设计、生产和检验,信息产业部于2001年颁布了行业标准《语言复读机通用规范》,该标准包括对产品的性能参数、安全要求、电磁兼容性、环境适应性、可靠性等方面的要求和试验方法,并对企业生产中的交收检验和例行试验进行了规定。
性能参数性能参数包括反映磁带放音、录音性能的带速允差、抖晃率、频道频响、信噪比、谐波失真、通道隔离等指标,反映复读特性的复读时间、复读信噪比、复读谐波失真、复读频率响应等指标。
另外还有带收音功能的产品的接收频率范围、灵敏度等调幅、调频性能指标。
性能参数反映了复读机在正常使用情况下磁带放音、录音是否清晰、准确,有无变调、杂音,复读时间是否够长,复读后的音质是否理想,接收调幅调频信号是否灵敏、可靠等。
安全性语言复读机的安全性主要是指与之相配套的电源适配器的安全性,包括标记和使用说明、正常工作下的防触电、连接端子、绝缘要求、连接到电网电源的元件、外接软线等。
安全性反映了复读机在正常使用时会不会造成触电、起火等人身伤害。
电磁兼容性语言复读机的电磁兼容性主要是指注入电源的骚扰电压,反映了复读机的电源产生的干扰对供电电网的影响。
环境适应性环境适应性包括高温负荷、高温贮存、恒定湿热、低温负荷、低温贮存、振动、碰撞、跌落等,反映了语言复读机在不同环境条件下的使用和存放时对机器的影响,及在正常的运输环境中的抗振动、碰撞和跌落的能力。
- 1、下载文档前请自行甄别文档内容的完整性,平台不提供额外的编辑、内容补充、找答案等附加服务。
- 2、"仅部分预览"的文档,不可在线预览部分如存在完整性等问题,可反馈申请退款(可完整预览的文档不适用该条件!)。
- 3、如文档侵犯您的权益,请联系客服反馈,我们会尽快为您处理(人工客服工作时间:9:00-18:30)。
巧妙使用DR-08系列可视复读机
DR-08系列复读机的功能设置凝集了1000多位外语学习者与外语老师的提议。
由广东省中山市帝尔科技有限公司外语教学研发部历经三年研制成功。
DR-08系列复读机更新了传统磁带复读机的缺点,给外语学习带来了事半功倍的学习效果。
下面教你如何巧妙应用本机的各项功能。
在复读机模式下,当你要重复聆听刚刚放过的那段内容时,请按“放音/复读”键。
你可以重复聆听刚刚放过的那段内容。
直至听熟悉后再按“放音/复读”键接着听下一段。
当你在聆听一篇课文时,突然觉得有一小段没听明白,想重复听。
按“追述”键,本机将重复播放最后5秒(默认追述复读时间)内容。
在追述复读状态下按“上一曲”或“下一曲”键可以选择调整3-15秒的追述复读时间。
当你觉得刚刚听过的内容不想再重复听了,要从现在起重新设置复读起点,请按“清零”键,屏幕上复读时间显示“000”,这个时刻开始播放的内容将成为下次复读内容的起点。
在一篇时长10分钟的课文里,如果你想重复练习从5分30秒开始到5分50秒结束的内容,请长按“快进”键或“快退”键配合显示屏上的时间,12倍于放音速度行进至5分30秒松键,放到5分50秒时按“复读/放音”键,你可以重复聆听这20秒的内容。
听熟悉一段句子后,应该大胆开口读。
放音或复读状态下,按“跟
读/复读II”键,这时,你可以学着原音大声读,读完后再按“跟读/复读II”键。
你将重复听到你刚刚的说话声。
仔细聆听有无错误或不准的地方。
再次按此键,纠正发音再读。
直至满意。
(功夫不负有心人)
在复读II状态下,如果你想试听刚刚听过的原音与自己朗读的有何差别,请按“对比”键,这时,你可以重复交替地听到原音与自己朗读的声音。
对比状态下,当你发现了自己发音不准的地方,想要重新朗读,请按“跟读/复读II”后再郎读,再次对比时,原音不变,跟读声更新。
在放音、复读、追述复读状态下,按“变速”键,可以将本机的播放速度变快或变慢播放,有“正常、慢I、慢II、快II 、快I”这五个段可选,变速不变调。
记忆播放可以帮助您记住上次停播的地方。
当一课内容没有听完你要关机而且想记住这个地方时,请长按“开机/播放/暂停”键;下次再开机进入这模式时,会接着上次的断点播放。
在播放时长按“M”键退出播放主菜单也有记忆功能。
(用电源开/关键关机不会有记忆)
很多用户问:我一开机进入复读机就自动播放了,找不到想找的文件,怎么办?其实,这是上次关机时进入了记忆状态。
在这种情况下,短按“M”键进入当前文件夹里选择文件,在当前文件夹里,可再次短按“M”键退出当前文件夹并重新选择下一个文
件或文件夹。
在“数码复读机”或“录音播放”主菜单播放时,想删除当前播放文件,先按“播放/暂停”键暂停播放,长按“清零”键显示屏显示“Delete...”,放开后显示屏显示“Delete OK”并返回文件选择。
文件夹只能在电脑上删除。
感谢你使用帝尔多媒体外语通--- 一款可下载的同步可视复读机!。