无无限互联iOS开发第三框架之导航栏篇XHYScrollingNavBarVC 和 NavigationMenu-master集成。
iOS自定义可展示、交互的scrollView滚动条

iOS⾃定义可展⽰、交互的scrollView滚动条上⼀篇简述了封装,本篇在此基础上添加了⼀个⾃定义的scrollView滚动条,可展⽰、交互,⾸先看⼀下效果图:简单阐述⼀下实现逻辑:⾃定义滚动条视图继承UIView,添加滚动条滑动事件、其他区域点击事件,通过代理⽅法与列表关联。
在列表刷新完成及scrollView代理⽅法中更新滚动条。
简单说⼀下计算逻辑,如上图(原谅博主的图)所⽰,其中b、c、d是已知的。
⾸先计算滚动条的⾼度a,理想情况下它与整个滚动区域b的⽐值应该等于scrollView的展⽰区域b与scrollView的内容⾼度d的⽐值,就是 a/b = b/d,即 a = b*b/d,也是就代码中的“_scrollBar.barHeight = pow(tableView.bounds.size.height,2) / tableView.contentSize.height;”这句话。
既然是理想情况,就有特殊情况,⾸先如果内容⾼度d⼩于展⽰区域b,就是说不需要滑动时,这⾥可以有两种处理,第⼀种是隐藏滚动条,第⼆种是将滚动条⾼度设为与滚动区域⼀致,⽅便观察,这⾥使⽤后⼀种。
还有⼀种特殊情况就是,如果内容区域d⽆限增⼤,则滚动条⾼度a⽆限减⼩,所以需要给定⼀个最⼩⾼度限制。
好了,上⾯计算出滚动条⾼度a,然后计算滚动条Y向位置x,很容易看出来 x/b = c/d,正常情况下这是没有问题的,但是当滚动条⾼度⾮常⼩,⼩于我们设定的最⼩⾼度时就会有误差,那么换另⼀种写法 x/(b-a) = c/(d-b),即 x = (b-a)*c/(d-b),代码中“_scrollBar.yPosition = (_scrollBar.bounds.size.height - _scrollBar.barHeight) *_tableView.contentOffset.y / (_tableView.contentSize.height -_scrollBar.bounds.size.height);”这句话。
《iOS开发实战》教学课件 ios实战开发第四章

4.1.1 导航控制器的工作原理
4.1 导航控制器(UINavigationController)
导航控制器是一个容器视图控制器,它采用了堆栈的 设计模式,以栈的形式保存子控制器。堆栈模式的特点是: 先进后出,后进先出。
当用户切换场景时,导航控制器会将子控制器依次压 入栈中,展现在屏幕界面上的永远是栈顶的子控制器中的 视图。反之,当返回上一级时,后压入栈中的视图控制器 会被先弹出。
A的视图控制器 B的视图控制器 C的视图控制器
ABC
标签控制器的工作原理
4.2.2 标签控制器的组成
与导航控制器类似,标签控制器主要由标签 栏〔Tab bar〕、标签控制器视图〔Tab bar controller view〕和内容视图〔Custom content〕组成,右图所示为标签控制器的层 级结构图。
4.1 视图控制器和视图 4.2 常用的界面构建方式 4.3 常用视图控件的用法 4.4 常用的界面构建方式 4.5 常用视图控件的用法
4.2标签控制器(UITabBarController)
与导航控制器类似,标签控制器 〔UITabBarController〕也是用于管理视图控制 器的一个UI控件,它是一个容器类,且内部封装 了一个标签栏。
4.1 视图控制器和视图 4.2 常用的界面构建方式 4.3 常用视图控件的用法 4.4 常用的界面构建方式 4.5 常用视图控件的用法
4.1 导航控制器(UINavigationController)
导航控制器用UINavigationController表示,它是 UIViewController的一个很重要的子类。严格来说, 导航控制器并不是视图控制器,它是一种搭建多 视图架构的模式,用于实现多个视图控制器之间 的切换。
Bootstrap多级导航栏(级联导航)的实现代码
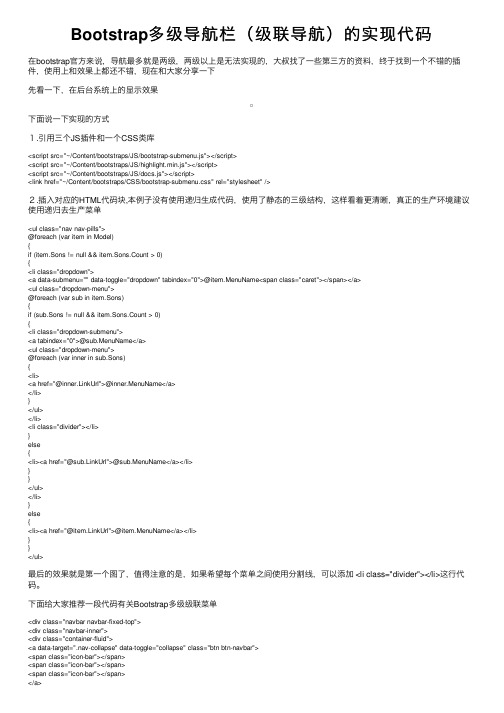
Bootstrap多级导航栏(级联导航)的实现代码在bootstrap官⽅来说,导航最多就是两级,两级以上是⽆法实现的,⼤叔找了⼀些第三⽅的资料,终于找到⼀个不错的插件,使⽤上和效果上都还不错,现在和⼤家分享⼀下先看⼀下,在后台系统上的显⽰效果下⾯说⼀下实现的⽅式1.引⽤三个JS插件和⼀个CSS类库<script src="~/Content/bootstraps/JS/bootstrap-submenu.js"></script><script src="~/Content/bootstraps/JS/highlight.min.js"></script><script src="~/Content/bootstraps/JS/docs.js"></script><link href="~/Content/bootstraps/CSS/bootstrap-submenu.css" rel="stylesheet" />2.插⼊对应的HTML代码块,本例⼦没有使⽤递归⽣成代码,使⽤了静态的三级结构,这样看着更清晰,真正的⽣产环境建议使⽤递归去⽣产菜单<ul class="nav nav-pills">@foreach (var item in Model){if (item.Sons != null && item.Sons.Count > 0){<li class="dropdown"><a data-submenu="" data-toggle="dropdown" tabindex="0">@item.MenuName<span class="caret"></span></a><ul class="dropdown-menu">@foreach (var sub in item.Sons){if (sub.Sons != null && item.Sons.Count > 0){<li class="dropdown-submenu"><a tabindex="0">@sub.MenuName</a><ul class="dropdown-menu">@foreach (var inner in sub.Sons){<li><a href="@inner.LinkUrl">@inner.MenuName</a></li>}</ul></li><li class="divider"></li>}else{<li><a href="@sub.LinkUrl">@sub.MenuName</a></li>}}</ul></li>}else{<li><a href="@item.LinkUrl">@item.MenuName</a></li>}}</ul>最后的效果就是第⼀个图了,值得注意的是,如果希望每个菜单之间使⽤分割线,可以添加 <li class="divider"></li>这⾏代码。
Bootstrap3基础教程03导航栏

Bootstrap3基础教程03导航栏Bootstrap导航栏创建⼀个默认的导航栏的步骤如下:1.向 <nav> 标签添加 class .navbar、.navbar-default。
2.向上⾯的元素添加 role="navigation",有助于增加可访问性。
3.向 <div> 元素添加⼀个标题 class .navbar-header,内部包含了带有 class navbar-brand 的 <a> 元素。
这会让⽂本看起来更⼤⼀号。
(⼿机端的导航按钮放在这⾥,然后通过⼀个容器隐藏导航项)4.为了向导航栏添加链接,只需要简单地添加带有 class .nav、.navbar-nav 的⽆序列表即可。
(⽤⼀个class containter 包裹导航居中)<!DOCTYPE html><html><head><meta charset="utf-8"><meta http-equiv="X-UA-Compatible" content="IE=edge"><meta name="viewport" content="width=device-width, initial-scale=1"><link href="bootstrap/css/bootstrap.min.css" rel="stylesheet"/><link href="Script/Style.css" rel="stylesheet"/><title></title></head><body><!--导航栏:navbar ⾼度为50px--><div class="container"><nav class="navbar navbar-inverse navbar-fixed-top"><div class="navbar-header"><a href="#" class="nav navbar-brand"><strong>logo</strong></a><button type="button" class="navbar-toggle" data-toggle="collapse"data-target="#target"><span class="icon-bar"></span><span class="icon-bar"></span><span class="icon-bar"></span></button></div><div class="collapse navbar-collapse " id="target"><ul class="nav navbar-nav"><li class="active"><a href="#">课程</a></li><li><a href="#">博客</a></li><li><a href="#">⼿册</a></li></ul></div></nav></div><script src="Script/2.1.1jquery.min.js"></script><script src="bootstrap/js/bootstrap.min.js"></script></body></html>响应式的导航栏1.将要折叠的内容必须包裹在带有 class .collapse、.navbar-collapse 的 <div> 中.2.折叠起来的导航栏实际上是⼀个带有 class .navbar-toggle 及两个 data- 元素的按钮。
ios jxcategoryview用法
标题:iOS JXCategoryView用法详解1. 介绍JXCategoryView及其作用在iOS开发中,JXCategoryView是一个非常常用的控件,用于实现页面切换、导航栏等功能。
它能够快速、方便地实现各种样式的页面切换效果,为用户提供良好的交互体验。
下面将详细介绍JXCategoryView的用法。
2. JXCategoryView的基本用法要使用JXCategoryView,首先需要在工程中引入JXCategoryView 库,并在需要的地方进行相关初始化操作。
通常情况下,我们可以通过代码创建JXCategoryView,并设置其各种属性,包括样式、宽高、位置等。
接下来,可以将JXCategoryView添加到页面上,并设置相关的数据源和代理。
3. JXCategoryView的样式定制JXCategoryView支持多种样式的定制,包括文字样式、指示器样式、滚动样式等。
通过设置相应的属性,可以实现文字的大小、颜色、字体等的定制,还可以设置指示器的样式、颜色、位置等。
还可以通过设置滚动样式的属性,实现页面切换时的滚动效果。
4. JXCategoryView的数据源和代理在使用JXCategoryView时,通常需要设置其数据源和代理。
数据源用于提供JXCategoryView所需的数据,包括标题、图片、样式等。
代理则用于监听JXCategoryView的各种事件,包括页面切换、点击事件等。
通过设置数据源和代理,可以实现更加灵活和个性化的功能。
5. JXCategoryView的进阶用法除了基本的使用方法,JXCategoryView还支持一些进阶的用法。
可以通过自定义JXCategoryView的子类,实现更加个性化的样式和功能。
还可以结合其他控件,如UIScrollView、UICollectionView等,实现更加复杂的页面切换效果。
通过进阶的用法,可以实现更加丰富和独特的功能。
Bootstrap导航栏navbar源码分析

Bootstrap导航栏navbar源码分析1.本⽂⽬地:分析bootstrap导航栏及其响应式的实现⽅式,提升⾃⾝css⽔平先贴⼀个bootstrap的导航栏模板2.代码如下1<nav class="navbar navbar-default navbar-fixed-top">2<div class="container-fluid">3<div class="navbar-header">4<button type="button" class="navbar-toggle collapsed" data-toggle="collapse" data-target="#navbar" aria-expanded="false" aria-controls="navbar">5<span class="sr-only">Toggle navigation</span>6<span class="icon-bar"></span>7<span class="icon-bar"></span>8<span class="icon-bar"></span>9</button>10<a class="navbar-brand" href="#">Project name</a>11</div>12<div id="navbar" class="navbar-collapse collapse">13<ul class="nav navbar-nav">14<li class="active"><a href="#">Home</a></li>15<li><a href="#">About</a></li>16<li><a href="#">Contact</a></li>17<li class="dropdown">18<a href="#" class="dropdown-toggle" data-toggle="dropdown" role="button" aria-haspopup="true" aria-expanded="false">Dropdown <span class="caret"></span></a>19<ul class="dropdown-menu">20<li><a href="#">Action</a></li>21<li><a href="#">Another action</a></li>22<li><a href="#">Something else here</a></li>23<li role="separator" class="divider"></li>24<li class="dropdown-header">Nav header</li>25<li><a href="#">Separated link</a></li>26<li><a href="#">One more separated link</a></li>27</ul>28</li>29</ul>30<ul class="nav navbar-nav navbar-right">3132</ul>33</div><!--/.nav-collapse -->34</div><!--/.container-fluld -->35</nav>效果如下;移动端:3.代码分析从外到内分析每⼀个标签及其样式的作⽤3.1最外层的div容器(样式为navbar navbar-default navbar-fixed-top):源码.navbar {position: relative;min-height: 50px;/**导航条最⼩宽度为50px**/margin-bottom: 20px;/****/border: 1px solid transparent;}@media (min-width: 768px) {/**>=768的设备,其实就是pc,移动设备width属性都⼩于768px**//**可能有很多⼈不理解,实际上移动端的width属性是以device-width来计量的,不是单纯的像数的概念,建议有疑问的同学⾃⾏搜索device-width关键字 .navbar {border-radius: 4px;/****/}}.navbar-default {/**设备导航栏的配⾊**/background-color: #f8f8f8;border-color: #e7e7e7;}.navbar-fixed-top,.navbar-fixed-bottom {position: fixed;/**相对浏览器定位**/right: 0;left: 0;z-index: 1030;/**样式层叠在上层的优先级**/}由源码可见,最外层div容器主要的作⽤是创建⼀个最⼩⾼度为50px的条形容器(.navbar),相对于于浏览器定位(.navbar-fixed-top),确定导航栏的配⾊(.navbar-default)3.2 样式为navbar-header的div容器其css源码如下/**在pc端显⽰时向右浮动,在移动端此样式⽆效**/@media (min-width: 768px) {.navbar-header {float: left;}}此div在pc端和移动端显⽰效果如下pc端:移动端:可见在pc端时,浏览器宽度⾜够,此div仅作为⼀个⼩的块级元素存在;⽽在移动端时,由于屏幕宽度不够,故将导航栏的其他元素以下拉菜单的形式实现,此div单独填满⽗容器。
ios uumarqueeview 用法

ios uumarqueeview 用法[iOS UUMarqueeView 用法] - 构建无限滚动广告栏随着智能手机的广泛应用,移动广告已成为企业在市场推广中的重要手段之一。
而在移动应用开发中,添加一个无限滚动的广告栏也成为了许多开发者关注的话题。
在iOS开发中,我们可以利用第三方库"UUMarqueeView" 来轻松实现该功能。
这篇文章将一步一步地回答如何使用"UUMarqueeView" 构建无限滚动广告栏。
在开始之前,请先确保你的开发环境已经配置好,并且具备一定的iOS开发基础知识。
接下来我们将按照以下步骤进行讲解:1. 导入UUMarqueeView2. 创建UUMarqueeView 实例3. 设置UUMarqueeView 样式4. 添加广告内容5. 处理广告点击事件接下来我们将详细讲解每一步的具体操作。
# 1. 导入UUMarqueeView首先,我们需要在项目中导入UUMarqueeView。
你可以通过Cocoapods 进行安装,只需在你的`Podfile` 文件中添加以下代码:pod 'UUMarqueeView'然后在终端中执行命令`pod install` 进行安装。
或者,你也可以手动下载UUMarqueeView 的源代码,并将其拖拽到你的项目中。
# 2. 创建UUMarqueeView 实例在导入UUMarqueeView 之后,我们需要创建一个`UUMarqueeView` 的实例,用于承载我们的广告内容。
可以在ViewController 的`viewDidLoad` 方法中添加以下代码:swiftimport UUMarqueeViewclass ViewController: UIViewController {var marqueeView: UUMarqueeView!override func viewDidLoad() {super.viewDidLoad()marqueeView = UUMarqueeView(frame: CGRect(x: 0, y: 100, width: view.frame.width, height: 50))self.view.addSubview(marqueeView)}}上述代码中,我们在`viewDidLoad` 方法中创建了一个`marqueeView` 实例,并将其添加到ViewController 的视图中。
无限互联iOS开发之KYCircleMenu框架
【无线互联】IOS开发之KYCircleMenu框架KYCircleMenu框架的功能实现一种弹出菜单按钮,用户点击主按钮,会依次弹出一圈按钮,围绕主按钮圆环状排列,按钮数自定,但在此封装的类中,按钮数至多为6个。
点击其中一个弹出按钮,将通过动画进入到第二个界面,在第二个界面中,点击返回按钮通过动画返回到菜单界面中。
再次点击主按钮,弹出的按钮将收进主按钮中。
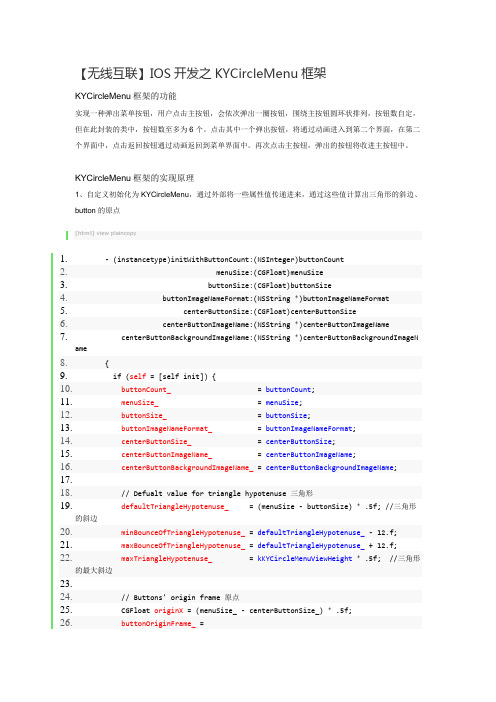
KYCircleMenu框架的实现原理1、自定义初始化为KYCircleMenu,通过外部将一些属性值传递进来,通过这些值计算出三角形的斜边、button的原点[html]view plaincopy1.- (instancetype)initWithButtonCount:(NSInteger)buttonCount2. menuSize:(CGFloat)menuSize3. buttonSize:(CGFloat)buttonSize4. buttonImageNameFormat:(NSString *)buttonImageNameFormat5. centerButtonSize:(CGFloat)centerButtonSize6. centerButtonImageName:(NSString *)centerButtonImageName7. centerButtonBackgroundImageName:(NSString *)centerButtonBackgroundImageName8.{9. if (self = [self init]) {10.buttonCount_ = buttonCount;11.menuSize_ = menuSize;12.buttonSize_ = buttonSize;13.buttonImageNameFormat_ = buttonImageNameFormat;14.centerButtonSize_ = centerButtonSize;15.centerButtonImageName_ = centerButtonImageName;16.centerButtonBackgroundImageName_ = centerButtonBackgroundImageName;17.18. // Defualt value for triangle hypotenuse 三角形19.defaultTriangleHypotenuse_ = (menuSize - buttonSize) * .5f; //三角形的斜边20.minBounceOfTriangleHypotenuse_ = defaultTriangleHypotenuse_ - 12.f;21.maxBounceOfTriangleHypotenuse_ = defaultTriangleHypotenuse_ + 12.f;22.maxTriangleHypotenuse_ = kKYCircleMenuViewHeight * .5f; //三角形的最大斜边23.24. // Buttons' origin frame 原点25. CGFloat originX = (menuSize_ - centerButtonSize_) * .5f;26.buttonOriginFrame_ =27. (CGRect){{originX, originX}, {centerButtonSize_, centerButtonSize_}};28. }29. return self;30.}2、在加载视图(loadView)中,计算出self.view的frame; 在计算self.view 的高度时,还判断了当前控制器是否隐藏了导航栏,如果隐藏了,则此视图的高度就为整个屏幕的高度,否则,就要减去导航栏的高度[html]view plaincopy1.- (void)loadView2.{3. CGFloat viewHeight =4. (self.navigationController.isNavigationBarHidden5. ? kKYCircleMenuViewHeight : kKYCircleMenuViewHeight - kKYCircleMenuNavigationBarHeight);6. CGRect frame = CGRectMake(0.f, 0.f, kKYCircleMenuViewWidth, viewHeight);7. UIView * view = [[UIView alloc] initWithFrame:frame];8.self.view = view;9.}3、在viewDidLoad方法中,作了以下操作<1>设置menu_视图,这个用来装载button菜单按钮的<2>根据buttonCount_外部传进来的值来确定button菜单按钮的个数,来创建button,并将这些button全都叠放在menu_视图的中间<3>并创建了中间的主按钮centerButton,用来控制是否显示菜单按钮,将centerButton添加到了当前视图的正中间,与菜单按钮的原始frame重叠<4>监听了菜单按钮关闭的通知[html]view plaincopy1.- (void)viewDidLoad2.{3. [super viewDidLoad];4.5. // Constants6. CGFloat viewHeight = CGRectGetHeight(self.view.frame);7. CGFloat viewWidth = CGRectGetWidth(self.view.frame);8.9. //菜单视图的frama10. CGRect centerMenuFrame =11.CGRectMake((viewWidth - menuSize_) * .5f, (viewHeight - menuSize_) * .5f, menuSize_, menuSize_);12. //menu_指菜单视图13.menu_ = [[UIView alloc] initWithFrame:centerMenuFrame];14. [menu_ setAlpha:0.f];15. [self.view addSubview:menu_];16.17. // Add buttons to |ballMenu_|, set it's origin frame to center18. //buttonCount_ 周围菜单按钮的个数19. NSString * imageName = nil;20. for (int i = 1; i <= buttonCount_; ++i) {21. UIButton * button = [[UIButton alloc] initWithFrame:buttonOriginFrame_];22. [button setOpaque:NO]; //NO 设置控件透明, YES 设置控件不透明,默认为YES23. [button setTag:i];24.imageName = [NSString stringWithFormat:self.buttonImageNameFormat, button.tag];25. [button setImage:[UIImage imageNamed:imageName]26. forState:UIControlStateNormal];27. [button addTarget:self action:@selector(runButtonActions:) forControlEvents:UIControlEventTouchUpInside];28. [self.menu addSubview:button];29. }30.31. // Main Button32. CGRect mainButtonFrame =33.CGRectMake((CGRectGetWidth(self.view.frame) - centerButtonSize_) * .5f,34. (CGRectGetHeight(self.view.frame) - centerButtonSize_) * .5f,35. centerButtonSize_, centerButtonSize_);36.37.centerButton_ = [[UIButton alloc] initWithFrame:mainButtonFrame];38. [centerButton_ setBackgroundImage:[UIImage imageNamed:self.centerButtonBackgroundImageName]39. forState:UIControlStateNormal];40. [centerButton_ setImage:[UIImage imageNamed:self.centerButtonImageName]41. forState:UIControlStateNormal];42. [centerButton_ addTarget:self43. action:@selector(_toggle:)44. forControlEvents:UIControlEventTouchUpInside];45. [self.view addSubview:centerButton_];46.47. // Setup notification observer48. //监听关闭menu_视图的通知49. [self _setupNotificationObserver];50.}4、在viewWillAppear视图将要显示时,隐藏导航栏,并判断它的子视图是否按下按钮,如果是则将菜单通过recoverToNormalStatus方法将其恢复到原始的位置由于此处使用的是ios7,所以当我们隐藏导航栏时,状态栏也会跟着隐藏,如果是ios6,则状态栏不会隐藏,所以应该进行版本的判断,对其做出相应的处理,则不会出现此处不兼容的情况(此处我作了相应的修改,代码如下:)[html]view plaincopy1.- (id)init2.{3. if (self = [super init]) {4.isInProcessing_ = NO;5.isOpening_ = NO;6.isClosed_ = YES;7.shouldRecoverToNormalStatusWhenViewWillAppear_ = NO;8.#ifndef KY_CIRCLEMENU_WITH_NAVIGATIONBAR9.10. //隐藏导航栏11. if (ios7) {12. [self setNeedsStatusBarAppearanceUpdate];13. }14. else {15.16. [[UIApplication sharedApplication] setStatusBarHidden:YES];17. }18. [self.navigationController setNavigationBarHidden:YES];19.#endif20. }21. return self;22.}到此时,视图已经显示出来,其效果为5、当我们点击主按钮centerButton,则会触发此按钮的事件[html]view plaincopy1.//循环切换菜单(关闭、打开)2.- (void)_toggle:(id)sender3.{4. (isClosed_ ? [self open] : [self _close:nil]);5.}通过此方法,循环切换菜单(关闭、打开)因为是第一次触发此按钮,isClosed_的初始值为YES,则会调用open方法6、open方法:此方法是用来打开菜单视图<1>通过动画效果来打开菜单视图,通过传递不同的三角形斜边的值来实现缩放的动画效果<2>通过调用_updateButtonsLayoutWithTriangleHypotenuse,将三角形的斜边值传递给此方法来改变菜单按钮的frame,实现过程:_updateButtonsLayoutWithTriangleHypotenuse根据三角形斜边的值来更新按钮的布局,通过三角函数计算出各个按钮的x、y坐标,将point值以及按钮的tag值传递给_setButtonWithTag:origin:此方法,<3>_setButtonWithTag:origin:此方法的作用:根据tag值取出menu视图中的button,再根据CGPoint设置其frame[html]view plaincopy1.- (void)open2.{3. if (isOpening_) return;4.5.isInProcessing_ = YES;6. // Show buttons with animation7. [UIView animateWithDuration:.3f8. delay:0.f9. options:UIViewAnimationCurveEaseInOut10. animations:^{11. //将menu视图透明度设为112. [self.menu setAlpha:1.f];13. // Compute buttons' frame and set for them, based on |buttonCount|14. //计算按钮的frame15. [self _updateButtonsLayoutWithTriangleHypotenuse:maxBounceOfTriangleHypotenuse_];16. }17. completion:^(BOOL finished) {18. [UIView animateWithDuration:.1f19. delay:0.f20. options:UIViewAnimationCurveEaseInOut21. animations:^{22. [self _updateButtonsLayoutWithTriangleHypotenuse:defaultTriangleHypotenuse_];23. }24. completion:^(BOOL finished) {25.isOpening_ = YES;26.isClosed_ = NO;27.isInProcessing_ = NO;28. }];29. }];30.}[html]view plaincopy1.- (void)_updateButtonsLayoutWithTriangleHypotenuse:(CGFloat)triangleHypotenuse2.{3. //4. // Triangle Values for Buttons' Position5. //6. // /| a: triangleA = c * cos(x)7. // c / | b b: triangleB = c * sin(x)8. // /)x| c: triangleHypotenuse9. // ----- x: degree10. // a11. //12. //通过设置按钮中心点来来更新按钮的布局13. //通过三角函数计算出各个按钮的中心点14. CGFloat centerBallMenuHalfSize = menuSize_ * .5f;15.// CGFloat buttonRadius = centerButtonSize_ * .5f;16.17. //triangleHypotenuse:三角形的斜边18. if (! triangleHypotenuse) triangleHypotenuse = defaultTriangleHypotenuse_;// Distance to Ball Center 距离球中心19.20.21. //22. // o o o o o o o o o o o o o23. // \|/ \|/ \|/ \|/ \|/ \|/24. // 1 --|-- 2 --|-- 3 --|-- 4 --|-- 5 --|-- 6 --|--25. // /|\ /|\ /|\ /|\ /|\ /|\26. // o o o o o o o o27. //28. switch (buttonCount_) {29. case 1:30. [self _setButtonWithTag:1 origin:CGPointMake(centerBallMenuHalfSize -buttonRadius,31. centerBallMenuHalfSize - triangleHypotenuse - buttonRadius)];32. break;33.34. case 2: {35. CGFloat degree = M_PI / 4.0f; // = 45 * M_PI / 18036. CGFloat triangleB = triangleHypotenuse * sinf(degree);37. CGFloat negativeValue = centerBallMenuHalfSize - triangleB - buttonRadius;38. CGFloat positiveValue = centerBallMenuHalfSize + triangleB - buttonRadius;39. [self _setButtonWithTag:1 origin:CGPointMake(negativeValue, negativeValue)];40. [self _setButtonWithTag:2 origin:CGPointMake(positiveValue, negativeValue)];41.42. break;43. }44.45. case 3: {46. // = 360.0f / self.buttonCount * M_PI / 180.0f;47. // E.g: if |buttonCount_ = 6|, then |degree = 60.0f * M_PI / 180.0f|;48. // CGFloat degree = 2 * M_PI / self.buttonCount;49. //50. CGFloat degree = M_PI / 3.0f; // = 60 * M_PI / 18051. CGFloat triangleA = triangleHypotenuse * cosf(degree);52. CGFloat triangleB = triangleHypotenuse * sinf(degree);53. [self _setButtonWithTag:1 origin:CGPointMake(centerBallMenuHalfSize -triangleB - buttonRadius,54. centerBallMenuHalfSize - triangleA - buttonRadius)];55. [self _setButtonWithTag:2 origin:CGPointMake(centerBallMenuHalfSize +triangleB - buttonRadius,56. centerBallMenuHalfSize - triangleA - buttonRadius)];57. [self _setButtonWithTag:3 origin:CGPointMake(centerBallMenuHalfSize -buttonRadius,58. centerBallMenuHalfSize + triangleHypotenuse - buttonRadius)];59.60. break;61. }62.63. case 4: {64. CGFloat degree = M_PI / 4.0f; // = 45 * M_PI / 18065. CGFloat triangleB = triangleHypotenuse * sinf(degree);66. CGFloat negativeValue = centerBallMenuHalfSize - triangleB - buttonRadius;67. CGFloat positiveValue = centerBallMenuHalfSize + triangleB - buttonRadius;68. [self _setButtonWithTag:1 origin:CGPointMake(negativeValue, negativeValue)];69. [self _setButtonWithTag:2 origin:CGPointMake(positiveValue, negativeValue)];70. [self _setButtonWithTag:3 origin:CGPointMake(negativeValue, positiveValue)];71. [self _setButtonWithTag:4 origin:CGPointMake(positiveValue, positiveValue)];72. break;73. }74.75. case 5: {76. CGFloat degree = M_PI / 2.5f; // = 72 * M_PI / 18077. CGFloat triangleA = triangleHypotenuse * cosf(degree);78. CGFloat triangleB = triangleHypotenuse * sinf(degree);79. [self _setButtonWithTag:1 origin:CGPointMake(centerBallMenuHalfSize -triangleB - buttonRadius,80. centerBallMenuHalfSize - triangleA - buttonRadius)];81. [self _setButtonWithTag:2 origin:CGPointMake(centerBallMenuHalfSize -buttonRadius,82. centerBallMenuHalfSize - triangleHypotenuse - buttonRadius)];83. [self _setButtonWithTag:3 origin:CGPointMake(centerBallMenuHalfSize +triangleB - buttonRadius,84. centerBallMenuHalfSize - triangleA - buttonRadius)];85.86. CGFloat centerX1 = centerBallMenuHalfSize - triangleB;87. CGFloat centerY1 = centerBallMenuHalfSize - triangleA;88. CGFloat centerX2 = centerBallMenuHalfSize + triangleB;89. CGFloat centerX3 = centerBallMenuHalfSize;90. CGFloat centerY3 = centerBallMenuHalfSize - triangleHypotenuse;91. [self _setButtonCenterWithTag:1 origin:CGPointMake(centerX1, centerY1)];92. [self _setButtonCenterWithTag:2 origin:CGPointMake(centerX2, centerY1)];93. [self _setButtonCenterWithTag:3 origin:CGPointMake(centerX3, centerY3)];94.95.96.degree = M_PI / 5.0f; // = 36 * M_PI / 18097.triangleA = triangleHypotenuse * cosf(degree);98.triangleB = triangleHypotenuse * sinf(degree);99. [self _setButtonWithTag:4 origin:CGPointMake(centerBallMenuHalfSize -triangleB - buttonRadius,100. centerBallMenuHalfSize + t riangleA - buttonRadius)];101. [self _setButtonWithTag:5 origin:CGPointMake(centerBallMenuHalfSize + triangleB - buttonRadius,102. centerBallMenuHalfSize + tr iangleA - buttonRadius)];103. break;104. }105.106. case 6: {107. CGFloat degree = M_PI / 3.0f; // = 60 * M_PI / 180108. CGFloat triangleA = triangleHypotenuse * cosf(degree);109. CGFloat triangleB = triangleHypotenuse * sinf(degree);110. [self _setButtonWithTag:1 origin:CGPointMake(centerBallMenuHalfSize - triangleB - buttonRadius,111. centerBallMenuHalfSize - t riangleA - buttonRadius)];112. [self _setButtonWithTag:2 origin:CGPointMake(centerBallMenuHalfSize - buttonRadius,113. centerBallMenuHalfSize - t riangleHypotenuse - buttonRadius)];114. [self _setButtonWithTag:3 origin:CGPointMake(centerBallMenuHalfSize + triangleB - buttonRadius,115. centerBallMenuHalfSize - t riangleA - buttonRadius)];116. [self _setButtonWithTag:4 origin:CGPointMake(centerBallMenuHalfSize - triangleB - buttonRadius,117. centerBallMenuHalfSize + t riangleA - buttonRadius)];118. [self _setButtonWithTag:5 origin:CGPointMake(centerBallMenuHalfSize - buttonRadius,119. centerBallMenuHalfSize + t riangleHypotenuse - buttonRadius)];120. [self _setButtonWithTag:6 origin:CGPointMake(centerBallMenuHalfSize + triangleB - buttonRadius,121. centerBallMenuHalfSize + tr iangleA - buttonRadius)];122.123. }124.125. default:126. break;127. }128.}此时,所有的菜单按钮都显示出来了7、当我们再次点击主按钮时,此时的isClosed的值为NO,则会调用_close方法,将所有的按钮的frame都设置为菜单按钮的初始值buttonOriginFrame_,并为其设置动画,这样所有的按钮将会回到原先最初始的frame[html]view plaincopy1.- (void)_close:(NSNotification *)notification2.{3. if (isClosed_)4. return;5.6.isInProcessing_ = YES;7. // Hide buttons with animation8. [UIView animateWithDuration:.3f9. delay:0.f10. options:UIViewAnimationCurveEaseIn11. animations:^{12. for (UIButton * button in [self.menu subviews]) {13. [button setFrame:buttonOriginFrame_];14. }15. [self.menu setAlpha:0.f];16. }17. completion:^(BOOL finished) {18.isClosed_ = YES;19.isOpening_ = NO;20.isInProcessing_ = NO;21. }];22.}8、当我们点击菜单按钮时,则会触发此按钮的事件方法:runButtonActionsrunButtonActions:此方法可以通过使用此框架的用户自己调用此方法来设置其所要跳转的页面,此处演示是跳转到导航控制器,在runButtonActions中通过此方法pushiViewController 跳转到另一个控制器,并设置按钮的动画消失效果,实现过程就是将三角形的斜边设为最大的三角形斜边maxTriangleHypotenuse_,再通过_updateButtonsLayoutWithTriangleHypotenuse方法计算出按钮的frame[html]view plaincopy1.- (void)pushViewController:(id)viewController2.{3. [UIView animateWithDuration:.3f4. delay:0.f5. options:UIViewAnimationOptionCurveEaseInOut6. animations:^{7. // Slide away buttons in center view & hide them8. [self _updateButtonsLayoutWithTriangleHypotenuse:maxTriangleHypotenuse_];9. [self.menu setAlpha:1.f];10.11. /*/ Show Navigation Bar12. [self.navigationController setNavigationBarHidden:NO];13. CGRect navigationBarFrame = self.navigationController.navigationBar.frame;14. if (navigationBarFrame.origin.y <0) {15.navigationBarFrame.origin.y = 0;16. [self.navigationController.navigationBar setFrame:navigationBarFrame];17. }*/18. }19. completion:^(BOOL finished) {20. [self.navigationController pushViewController:viewController animated:YES];21. }];22.}9、从跳转的控制器返回到菜单页面时,再将按钮通过动画返回到原先的位置,将三角形斜边从最大值到默认三角形斜边,_updateButtonsLayoutWithTriangleHypotenuse方法根据给定的三角形斜边,计算出按钮的frame,也就是回到了如下的效果图KYCircleMenu框架的使用KYCircleMenu框架的使用其实很简单,首先需要创建一个KYCircleMenu的控制器,将此控制器显示在window上,再根据用户的需求,设置菜单按钮的个数,按钮的大小,以及点击菜单按钮后所要push到的页面等等,部分实现代码如下:[html]view plaincopy1.UINavigationController * navigationController = [UINavigationController alloc];2.3. // Setup circle menu with basic configuration4. CircleMenuViewController * circleMenuViewController;5.circleMenuViewController = [CircleMenuViewController alloc];6. (void)[circleMenuViewController initWithButtonCount:kKYCCircleMenuButtonsCount7. menuSize:kKYCircleMenuSize8. buttonSize:kKYCircleMenuButtonSize9. buttonImageNameFormat:kKYICircleMenuButtonImageNameFormat10. centerButtonSize:kKYCircleMenuCenterButtonSize11. centerButtonImageName:kKYICircleMenuCenterButton12. centerButtonBackgroundImageName:kKYICircleMenuCenterButtonBackground];13.14. // Set the cricle menu vc as the root vc15. (void)[navigationController initWithRootViewController:circleMenuViewController];16. [navigationController.navigationBar setBarStyle:UIBarStyleBlackTranslucent];17.18. // Set navigation controller as the root vc19. [self.window setRootViewController:navigationController];[html]view plaincopy1.- (void)runButtonActions:(id)sender2.{3. [super runButtonActions:sender];4.5. // Configure new view & push it with custom |pushViewController:| method6. UIViewController * viewController = [[UIViewController alloc] init];7. [viewController.view setBackgroundColor:[UIColor blackColor]];8. [viewController setTitle:[NSString stringWithFormat:@"View %d", [sender tag]]];9. // Use KYCircleMenu's |-pushViewController:| to push vc10. [self pushViewController:viewController];11.}。
- 1、下载文档前请自行甄别文档内容的完整性,平台不提供额外的编辑、内容补充、找答案等附加服务。
- 2、"仅部分预览"的文档,不可在线预览部分如存在完整性等问题,可反馈申请退款(可完整预览的文档不适用该条件!)。
- 3、如文档侵犯您的权益,请联系客服反馈,我们会尽快为您处理(人工客服工作时间:9:00-18:30)。
【无线互联】iOS开发第三框架之导航栏篇XHYScrollingNavBarVC 和NavigationMenu-master集成。
XHYScrollingNavBarVC 和NavigationMenu-master集成
此框架结合了XHYScrollingNavBarVC 和 NavigationMenu-master,拥有如下功能和特点
1、支持UIWebView以及UITableView和scrollView。
2、当视图上拉时,导航栏隐藏,避免了导航栏占用了多余的空间。
3、当视图下拉时,导航栏显示,导航栏功能出现可以使用。
4、在导航栏标题改为了一个按钮,点击打开(或关闭)菜单按钮。
具体用法和实现。
注意:要设置self.navigationController.navigationBar.barTintColor 属性导航栏的颜色属性不会被失真。
2.将对应的scrollView、tableview、WebView:调用方法
[self followRollingScrollView:self.webView];//可以是scrollView或者tableview和WebView。
[self followRollingScrollView:_tabelView];
对应属性如下:
@property (weak, nonatomic) UIView *scrollView; //添加在控制器上的子视图
@property (retain,nonatomic)UIPanGestureRecognizer *panGesture; //平滑手指
@property (retain,nonatomic)UIView *overLay; //添加在导航栏上的覆盖视图
@property (assign,nonatomic)BOOL isHidden; //记录导航栏的隐藏
3.设置标题处的菜单按钮:将需要添加的菜单名字装在一个数组中赋值给self.items。
会自动生成相应按钮。
self.items =@[@"News",@"Top Articles", @"Messages",@"Account",@"Settings",@"Top Articles",@"Messages"];
4.实现点击相应菜单按钮的事件方法:- (void)didSelectItemAtIndex:(NSUInteger)index,index 为点击的第几个按钮的下表。
//导航栏的菜单按钮被点击了的事件方法
- (void)didSelectItemAtIndex:(NSUInteger)index{
NSLog(@"%d",index);
}
具体实现请看源代码......。