Microsoft Project 2013操作手册
Microsoft Project 2013
Microsoft Project 2013Microsoft Project 是一个国际上享有盛誉的通用的项目管理工具软件,凝集了许多成熟的项目管理现代理论和方法,可以帮助项目管理者实现时间(进度)、资源、成本的计划、控制,还可以帮助您实现工作管理、团队协作。
Project 2013是微软最新版本的项目管理产品。
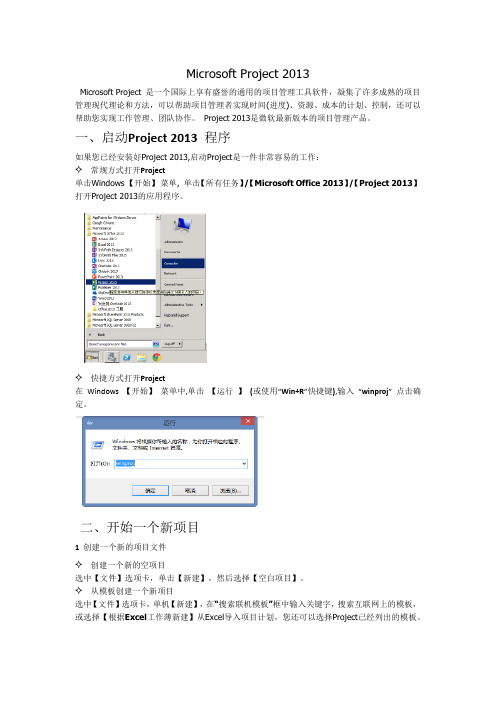
一、启动Project 2013 程序如果您已经安装好Project 2013,启动Project是一件非常容易的工作:✧ 常规方式打开Project单击Windows 【开始】菜单, 单击【所有任务】/【Microsoft Office 2013】/【Project 2013】打开Project 2013的应用程序。
✧ 快捷方式打开Project在Windows 【开始】菜单中,单击【运行】(或使用“Win+R”快捷键),输入“winproj”点击确定。
二、开始一个新项目1 创建一个新的项目文件✧ 创建一个新的空项目选中【文件】选项卡,单击【新建】,然后选择【空白项目】。
✧ 从模板创建一个新项目选中【文件】选项卡,单机【新建】,在“搜索联机模板”框中输入关键字,搜索互联网上的模板,或选择【根据Excel工作薄新建】从Excel导入项目计划,您还可以选择Project已经列出的模板。
✧ 利用SharePoint 2013上的任务列表创建一个新项目如果您已使用Project Professional 2013,且SharePoint 2013环境也已就绪。
选中【文件】选项卡,单机【新建】,点击【根据SharePoint新建任务列表】将存在SharePoint 2013上面的任务转化为一个项目计划。
✧ 利用Project Server 2013中的企业项目模板创建一个新项目如果您的Project Server 2013环境也已就绪。
且已使用Project Professional 2013连接至Project Server 2013选中【文件】选项卡,单机【新建】,点击【企业】,选择已经保存在Project Server 2013上面的企业项目模板。
Microsoft Project 2013操作手册

Project 2013操作手册目录目录1、启动阶段 (3)1.1、前期准备 (3)1.1.1、新建项目文件 (3)1.1.2、设置项目信息 (3)2、计划阶段 (5)2.1、定义资源 (5)2.2、建立任务 (6)2.2.1、任务列表 (6)2.2.2、插入周期性任务 (7)2.2.3、任务日历 (8)2.2.4、任务工期 (8)2.2.5、建立限制条件 (8)2.2.6、建立依赖关系 (9)2.3、资源分配 (9)3、跟踪阶段 (9)3.1、比较基准 (9)3.2、跟踪完成进度 (10)4、报告与分析 (10)4.1、盈余分析 (10)5、多项目管理 (11)5.1、创建共享资源 (11)5.2、使用共享资源 (11)6、其它 (11)6.1、如何在“跟踪甘特图”中显示其它比较基准 (11)6.2、基准保存技巧 (11)6.4、如何进行计划的调整 (11)6.5、查询可以调整的时间 (11)6.6、关于加班 (12)1、启动阶段1.1、前期准备1.1.1、新建项目文件选择 File—new 菜单,选择项目模版:1.1.2、设置项目信息自定义日历选择“Project”下的“Change Working Time”菜单:项目信息定义在“Project”中选择“Project Information”,打开项目信息窗口,在这个窗口中有几个重要信息要设置:开始日期、排序方法、项目日历:2、计划阶段2.1、定义资源在“Task”中选择将视图切换为“Resource Shee t”:资源分三类,分别为“work”、“Material”、“Cost”,三种类型均可以设置为费率;但是只有“Wo rk”类型有可用数量限制;可以双击打开资源进行详细设置,比如分时费用,核算方式,可用时间等等。
2.2、建立任务2.2.1、任务列表回到“Task”的“Gantt Chart”,输入任务名称建立任务:使用升级和降级的按钮设定任务级别,形成层次关系从而展示任务分解结构,完整的项目可以参见下图。
Project2013教程

Project2013 教程项目管理是一门实践性很强的技术,其实也是一门艺术。
好的项目管理不一定能确保项目成功,但是糟糕的项目管理基本上注定了项目的失败。
我们经常会潜意识的认为项目是一个很大的东西。
其实不然,英文project,我们可以翻译为项目、方案、计划、事业等中文意思。
但凡需要一定的时间、一定的人力物力去完成的事情,都在项目管理的范畴之内。
在这个意义上,科研课题当然是项目,写论文是项目,结婚筹备是项目,学习一门新知识也是项目。
以此看来,项目管理确实是必要的,甚至是必须的。
项目管理的核心,可以用项目三角说明:时间赞用-----------项目管理的三要素即时间、费用、范畴。
很好理解,即在一定时间下,使用一定的资金(费用),做成某/多个特定的事情(范畴)。
三者是相互联系的。
比如扩大范畴(如增加了一个研究点),一般会引起时间和费用的增加;在范畴不变情况下缩短时间,费用一般要提高等等。
以项目三角为核心,体现在项目管理中更为具体的要求一个项目管理者必须能够回答的问题主要是这么几个:本项目涉及到哪些任务?以何种顺序出现?各任务的截止日在何时?谁来完成这些任务?各任务花费多少钱?如果某个任务未能及时完成,怎么办?如何向和项目相关的人呈现项目细节?那么实际中怎么操作呢?当然,我们不会去用纸笔写画。
MS Office系列的单独套件Project就是一个很好的项目管理专门软件。
利用这个软件,我们可以轻松的做好项目管理工作。
pgProject 2013号外:==Project 2013 下载==中文版:;英文版(x64):;破解激活工具:。
两个破解激活工具使用其中之一即可。
后文,将结合具体实例,介绍一下Microsoft Office Project 2013用于项目管理的用法精华。
敬请期待从外观上看,Project和同属Office系列的其他组件如Word是类似的。
考虑到大家都熟悉Word的基本操作,又微软的Office 不同组件的相同名称的按钮具有类似功能,所以,对于Project的基本操作(如打开、关闭、复制、粘贴、新建、字体等)此处不必赘述。
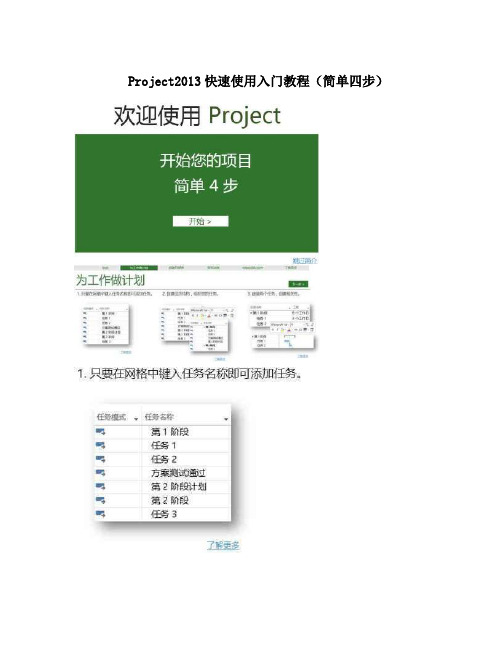
Project2013快速使用入门教程(简单四步)
Project2013快速使用入门教程(简单四步);CorrelationId=542f5246-7573-445e-9232-5243a3b6e488&ui=zh-CN&rs=zh-CN&ad=CN添加新任务使用 Project,您可以在计划中添加任务以将工时分解为可管理的部分。
要快速创建任务,请转到甘特图,在任务列表的底部选择一个空的“任务名称”域,然后按下 Enter。
提示如果有一个在有规律的日程内重复的任务,您只需要创建一次。
显示内容创建周期性任务。
本文中的其他内容在现有任务之间插入任务向网络图中添加一个任务一次添加多个任务添加完这些任务后…在现有任务之间插入任务 1. 选择要在其下显示新任务的行。
2. 单击“任务”>“任务”在插入的行中键入任务名称。
3.重新对任务标识号自动编号,但已插入的任务不会自动与外围任务链接。
您可以将“项目”设置成将已插入的任务与外围任务自动链接。
返回页首向网络图中添加一个任务 1. 单击“视图”>“网络图”。
2. 单击“任务”>“任务”3. 在新任务框中键入任务名称。
返回页首一次添加多个任务任务表单可以帮助您一次添加多个任务,尤其是有资源工作分配和任务相关性的任务。
1. 单击“视图”>“甘特图”。
2. 单击“视图”,然后选中“详细信息”复选框。
窗口拆分为在顶部显示“甘特图”,在底部显示“任务表单”。
3. 在“甘特图”(顶部)中,单击任务列表末尾的第一行空行。
4. 在“任务表单”(底部)中,键入有关新任务的信息: o 在“名称”框中,键入新任务的名称。
o 在“工期”框中,键入任务工期。
o 如果希望任务工期保持固定(不因资源分配而变化),请选中“投入比导向”复选框。
o 在窗体列中,键入有关任务(例如分配的资源和前置任务)的详细信息。
5. 单击“确定”保存新任务,然后单击“下一步”移动到“甘特图”视图中的下一行。
Project 2013 快速入门指南
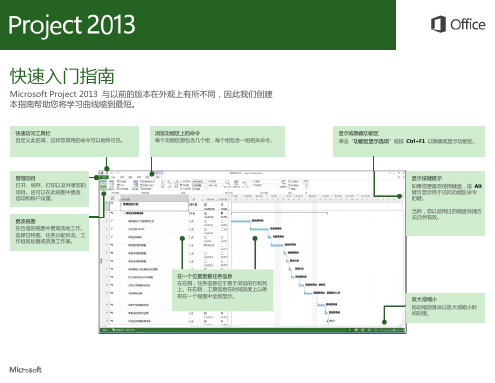
快速入门指南Microsoft Project 2013 与以前的版本在外观上有所不同,因此我们创建本指南帮助您将学习曲线缩到最短。
在一个位置查看任务信息在左侧,任务信息位于易于浏览的行和列上。
在右侧,工期信息在时间刻度上以条形在一个视图中全部显示。
如何开始使用Project 2013 当您打开Project 2013 时,首先看到的是它全新的外观。
但是不止于此。
请进一步了解与Project 2007 相比有哪些重大改进。
Project 2013 不会直接给您显示一个空白文件,而是使您转到一站式中心开始创建项目。
单击“文件”>“新建”,然后开始创建项目。
创建新项目时,浏览常用项目模板,从Excel 或SharePoint 网站导入信息,或者仅单击“空白项目”获取一个空白甘特图。
您可以从计算机、网络、Project Online、甚至SkyDrive 打开以前的项目。
项目管理四步曲如果您不太熟悉项目管理,Project 2013 的内置Project 指南使您可以顺利开始。
首先,单击“文件”>“新建”>“入门”。
使用此四步指南,您可以学习如何使用SharePoint 和Lync 安排任务、创建日程表、报告进度以及与您的团队合作,而无需退出Project。
常用工具和命令的路径使用下面的列表查找Project 2013 中一些常用的工具和命令。
展示项目数据使用Project 2013,您可以创建简洁、多彩的专业报表,而无需将数据导出到其他程序。
添加图片、图表、动画、链接等- 您与利益干系人和团队成员明确有效地共享项目状态信息所需的一切。
单击“报表”选项卡(Project 2013 的新增功能),然后选择您需要的报表。
许多报表绘图工具与Excel、Word、PowerPoint 以及Project 中的相同。
跟踪任务路径您的甘特图是否看起来像一团乱麻?对于复杂的项目,您的甘特图可能看起来像由无数的条形和链接线条纠缠在一起的网结。
Project2013教程
如果您已经安装好 Project 2013,启动 Project 是一件非常容易的工作:
常规方式打开 Project
单击 Windows 【开始】 菜单, 单击【所有任务】/【Microsoft Office 2013】/【Project 2013】打开 Project 2013 的应用程序。
二、开始一个新项目
1 创建一个新的项目文件 创建一个新的空项目 选中【文件】选项卡,单击【新建】,然后选择【空白项目】。
从模板创建一个新项目 选中【文件】选项卡,单机【新建】,在“搜索联机模板”框中输入 关键字,搜索互联网上的模板,或选择【根据 Excel 工作薄新建】 从 Excel 导入项目计划,您还可以选择 Project 已经列出的模板。
使用企业资源
如果您已使用 Project Professional 2013,且 Project Server 2013 环境 也已就绪。您可以从企业资源池中添加资源。选择【资源】选项卡,在 【插入】选项组中单击【添加资源】,然后选中【自企业建立工作 组】。
注意:此功能需要 Project Professional 2013 与 Project Server 2013 连 接,并已经将项目保存至 Project Server 2013 上。
15 了解您的任务类型
一旦您为“自动安排”的任务分配了资源,Project 2013便会根据任务的 类型确定如何安排该任务(手动任务无需使用任务类型),当您为任务 分配了资源后,工期可能会发生变化。工时、工期、资源三种之间的关系 如下:
工时=工期*资源单位
锁定工时,当投入的资源发生变化时,工期将缩短,以此类推。 双击“甘特图”视图中的某条任务,在弹出的“任务信息”对话框中, 下拉“任务类型”选择需要锁定的类型。
Microsoft MS Project 2013 教程:项目管理软件的功能和应用说明书

About the T utorialMS Project, the project management software program by Microsoft, is a very handy tool for project managers that helps them develop a schedule, assign resources to tasks, track the progress, manage the budget, and analyze workloads for an ongoing project. This tutorial discusses the various features of the software program with examples for easy understanding.AudienceThis tutorial has been designed keeping in mind the needs of beginner level MS Project user. Project managers and Project planners from varied backgrounds who have not used MS Project, especially the 2013 edition before can use this tutorial for scheduling, planning, and reporting their projects of any size. This tutorial is designed with Project Standard features, hence there is no need of Project Professional.PrerequisitesA basic understanding of Computers and Windows Operating System is all it takes to get started. Hardware: A reasonable home desktop configuration. Software: MS Project 2013 on Windows OS. (At the time of writing this tutorial, Project 2013 is not available for Mac) Disclaimer & CopyrightCopyright 2018 by Tutorials Point (I) Pvt. Ltd.All the content and graphics published in this e-book are the property of Tutorials Point (I) Pvt. Ltd. The user of this e-book is prohibited to reuse, retain, copy, distribute or republish any contents or a part of contents of this e-book in any manner without written consent of the publisher.We strive to update the contents of our website and tutorials as timely and as precisely as possible, however, the contents may contain inaccuracies or errors. Tutorials Point (I) Pvt. Ltd. provides no guarantee regarding the accuracy, timeliness or completeness of our website or its contents including this tutorial. If you discover any errors on our website or inthistutorial,******************************************.T able of ContentsAbout the Tutorial (i)Audience (i)Prerequisites (i)Disclaimer & Copyright (i)Table of Contents ...................................................................................................................................... i i1.MS PROJECT 2013 – SETTINGS (1)2.MS PROJECT 2013 – INTRODUCTION (8)Project Management (8)3.MS PROJECT 2013 – GETTING STARTED (10)MS Project UI (10)4.MS PROJECT 2013 – CREATE A NEW PLAN (12)Launch MS Project (12)Create Blank Project (12)Project Information (13)Change File Properties (18)Build Task List (19)Enter Task (20)Enter Duration (20)Change Default Time Dimensions (21)Enter Task Duration (22)Elapsed Duration (22)Create Milestones (24)Create Summary Task (25)Link Tasks (27)Respect Links (29)Switching Task – Manual to Automatic (31)Converting Task to Automatic Schedule (31)5.MS PROJECT 2013 – SET UP RESOURCES (34)Resource Types (34)Enter Work Resource Names (34)Resource Max Capacity (35)Enter Resource Cost (37)Add Notes to Resources (38)Set Up Cost Resources (39)6.MS PROJECT 2013 – ASSIGN RESOURCES TO TASK (41)Assign Material Resource to Task (41)Assign Cost Resource to Tasks (44)7.PLAN DURATION, COST, & TIME (46)Check Plan’s Duration (46)Check Plan’s Cost (46)Check Plan’s Work (47)8.MS PROJECT 2013 – TRACK PROGRESS (49)Save a Baseline (49)Create a Baseline (49)View Baseline on Gantt Chart (50)Update a Baseline (51)Track Plan by Specific Date (53)Track Plan as % Complete (54)Track Plan by Actual Values (55)9.ADVANCED SCHEDULING (57)Adjust Task Link Relationship (57)Enter Fixed Cost (61)Enter a Recurring Task (61)View Critical Path (62)Check Resource Allocations (63)Resolve Resource Over Allocation (65)Level Overallocated Resources (69)Check Plan’s Cost (72)10.PROJECT STATUS REPORTING (75)Task Slippage (75)Task Costs (76)Resource Cost (77)Project Report (78)MS Project 20131Each one of you might be using a different setting for MS Project 2013. To ensure the results are not different from what is shown in this tutorials, ensure the settings as follows. Remember all these are the default settings you will have when you first install MS Project 2013 on your computer.Step 1: File -> Options -> General tab -> Project view -> Default view.Select “Gantt with Timeline” from the dropdown box.1.Step 2: File -> Options -> Display tab -> Show Indicators and Options Buttons For. Check all options.2Step 3: File -> Options -> Schedule tab -> Schedule -> Show Assignment Units. Choose “percentage” from the dropdown box.Step 4: File -> Options -> Schedule tab -> Calculation -> Calculate Project after Each Edit.Check the On button.3Step 5: File -> Options -> Save tab -> Save projects -> Save Files In this format. Select Project (*.mpp).4Step 6: File -> Options -> Advanced tab -> Edit. Check all options.Step 7: File -> Options -> Advanced tab -> Display -> Show Status Bar -> Show Scroll Bar.Both options, Status Bar and Scroll Bar should be checked.5Step 8: Resources -> Level -> Leveling Options -> Leveling Calculations.Set to manual.6Step 9: Resources -> Level -> Leveling Options -> Leveling calculations -> Look for Overallocations.Select “Day By Day” from dropdown box.7MS Project 20138Microsoft Project is a project management software program developed and sold by Microsoft, designed to assist a project manager in developing a schedule, assigning resources to tasks, tracking progress, managing the budget, and analyzing workloads. Project creates budgets based on assignment work and resource rates. As resources are assigned to tasks and assignment work estimated, the program calculates the cost, equal to the work times the rate, which rolls up to the task level and then to any summary task, and finally to the project level.Each resource can have its own calendar, which defines what days and shifts a resource is available. Microsoft Project is not suitable for solving problems of available materials (resources) constrained production. Additional software is necessary to manage a complex facility that produces physical goods.Project ManagementMS Project is feature rich, but project management techniques are required to drive a project effectively. A lot of project managers get confused between a schedule and a plan. MS Project can help you in creating a Schedule for the project even with the provided constraints. It cannot Plan for you. As a project manager you should be able to answer the following specific questions as part of the planning process to develop a schedule. MS Project cannot answer these for you.∙ What tasks need to be performed to create the deliverables of the project and inwhat order? This relates to the scope of the project.∙ What are the time constraints and deadlines if any, for different tasks and for the project as a whole? This relates to the schedule of the project.∙ What kind of resources (man/machine/material) are needed to perform each task?∙ How much will each task cost to accomplish? This would relate to the cost of the project.∙What kind of risk do we have associated with a particular schedule for the project? This might affect the scope, cost and time constraints of your project. Strictly speaking, from the perspective of Project Management Methodology, a Plan and Schedule are not the same. A plan is a detailed action-oriented, experience and knowledge-based exercise which considers all elements of strategy, scope, cost, time, resources, quality and risk for the project.Scheduling is the science of using mathematical calculations and logic to generate time-effective sequence of task considering any resource and cost constraints. Schedule is part of the Plan. In Project Management Methodology, schedule would only mean listing of a project's milestones, tasks/activities, and deliverables, with start and finish dates. Of course the schedule is linked with resources, budgets and dependencies.2.MS Project 2013 However, in this tutorial for MS Project (and in all available help for MS Project) the word ‘Plan’ is used as a ‘Schedule’ being created in MS Project. This is because of two reasons. One, MS Project does more than just create a schedule it can establish dependencies among tasks, it can create constraints, it can resolve resource conflicts, and it can also help in reviewing cost and schedule performance over the duration of the project. So it does help in more than just creating a Schedule. This it makes sense for Microsoft to market MS Project as a Plan Creator rather than over-simplifying it as just a schedule creator.Two, it is due to limitation of generally accepted form of English language, where a schedule can be both in a noun as well as verb form. As a noun, a Schedule is like a time table or a series of things to be done or of events to occur at or during a particular time or period. And in the verb form, schedule is to plan for a certain date. Therefore it is much easier to say that, “O ne can schedule a plan from a start date” but very awkward to say, “One can schedule a schedule from a start d ate”. The distinction is important for you as a project manager, but as far as MS project is concerned the noun form of Schedule is a Plan.Of course, a project manager should also be able to answer other project-related questions as well. For example:∙Why this project needs to be run by the organization?∙What’s the best way to c ommunicate project details to the stakeholders?∙What is the risk management plan?∙How the vendors are going to be managed?∙How the project is tracked and monitored?∙How the quality is measured and qualified?MS Project can help you:∙Visualize your project plan in standard defined formats.∙Schedule tasks and resources consistently and effectively.∙Track information about the work, duration, and resource requirements for your project.∙Generate reports to share in progress meetings.9MS Project 201310In this chapter, we will take a close look at the user interface of MS Project.MS Project UI∙ Windows 7: Click on Start menu, point to All Programs, click Microsoft Office, andthen click Project 2013.∙ Windows 8: On the Start screen, tap or click Project 2013.∙Windows 10: Click on Start menu -> All apps -> Microsoft Office -> Project 2013. The following screen is the Project’s start screen . Here you have options to open a new plan, some other plans, and even a new plan template.Click the Blank Project Tab. The following screen pops up.3.The screen should have the MS Project interface displayed. The major part of this interface are:∙Quick Access Toolbar: A customizable area where you can add the frequently used commands.∙Tabs on the Ribbon, Groups: With the release of Microsoft Office 2007came the "Fluent User Interface" or "Fluent UI", which replaced menus and customizable toolbars with a single "Office menu", a miniature toolbar known as "quick-access toolbar" and what came to be known as the ribbon having multiple tabs, each holding a toolbar bearing buttons and occasionally other controls. Toolbar controls have heterogeneous sizes and are classified in visually distinguishable Groups.Groups are collections of related commands. Each tab is divided into multiple groups.∙Commands: The specific features you use to perform actions in Project. Each tab contains several commands. If you point at a command you will see a description in a tooltip.∙View Label: This appears along the left edge of the active view. Active view is the one you can see in the main window at a given point in time. Project includes lots of views like Gantt Chart view, Network Diagram view, Task Usage view, etc.The View label just tells you about the view you are using currently. Project can display a single view or multiple views in separate panes.∙View Shortcuts: This lets you switch between frequently used views in Project.∙Zoom Slider: Simply zooms the active view in or out.∙Status bar:Displays details like the scheduling mode of new tasks (manual or automatic) and details of filter applied to the active view.11End of ebook previewIf you liked what you saw…Buy it from our store @ https://12。
Project 2013第2章创建项目
第2章创建项目Project的主要功能是管理项目,而管理项目的基础是创建项目并设置相关属性。
本章介绍项目的创建、属性设置和项目的基本操作。
本章学习要点:●了解创建项目的基础。
●掌握创建项目的几种方式。
●了解如何查看项目信息。
●掌握项目信息的设置。
●掌握日历选项的设置。
●掌握项目日历的设置。
2.1 项目文档创建项目文档是管理项目的首要步骤,而创建项目文档之前需要明确项目的总体目标、项目范围、时间限制、详细任务和规定的费用等。
本节介绍项目文档的创建。
2.1.1 项目计划项目的创建并不是盲目的,而是要提前计划项目的步骤、任务、时间等信息,通常需要实现下列步骤。
(1) 确定项目的主要步骤,即将项目所要实现的内容一步步列举出来。
(2) 确定项目任务,将主要步骤分解成详细的任务。
(3) 设置时间限制,准备资源。
上述步骤实现之后,即可创建项目文件,编写项目的具体事项。
项目管理的一般步骤如下。
(1) 创建项目文件。
(2) 编写项目进度计划。
项目的进度计划需要使用项目日历来实现,项目日历是项目中所有任务、资源的默认日历。
个别任务的日历与项目日历有冲突,需要给该任务设置单独的任务日历。
编写项目进度计划又分为如下几个步骤。
①设置项目日历;②进行任务分解;③设置每个任务的工期;④设置任务日历;⑤设定任务之间的关联性。
(3) 编写项目资源计划。
包括如下几个步骤:①建立资源;②建立资源日历;③给每个任务分配资源。
(4) 编写成本计划。
(5) 发布项目计划信息,保存比较基准。
2.1.2 创建项目文档创建项目文档有多种形式,可创建空白项目文档、创建模板项目文档或根据现有内容创建项目文档。
1.创建空白项目文档Project 2013在安装之后,在打开的初始界面中即可创建空白项目文档,如图2-1所示。
右侧第一个选项即为【空白项目】,可创建空白的项目文档。
第二个选项【根据现有项目新建】选项可根据现有的项目创建项目文档。
图2-1 Project启动界面除了在启动界面创建空白项目文档以外,还有以下几种方法可以创建空白项目文档。
- 1、下载文档前请自行甄别文档内容的完整性,平台不提供额外的编辑、内容补充、找答案等附加服务。
- 2、"仅部分预览"的文档,不可在线预览部分如存在完整性等问题,可反馈申请退款(可完整预览的文档不适用该条件!)。
- 3、如文档侵犯您的权益,请联系客服反馈,我们会尽快为您处理(人工客服工作时间:9:00-18:30)。
Project 2013操作手册
目录
目录
1、启动阶段 (3)
1.1、前期准备 (3)
1.1.1、新建项目文件 (3)
1.1.2、设置项目信息 (3)
2、计划阶段 (5)
2.1、定义资源 (5)
2.2、建立任务 (6)
2.2.1、任务列表 (6)
2.2.2、插入周期性任务 (7)
2.2.3、任务日历 (8)
2.2.4、任务工期 (8)
2.2.5、建立限制条件 (8)
2.2.6、建立依赖关系 (9)
2.3、资源分配 (9)
3、跟踪阶段 (9)
3.1、比较基准 (9)
3.2、跟踪完成进度 (10)
4、报告与分析 (10)
4.1、盈余分析 (10)
5、多项目管理 (11)
5.1、创建共享资源 (11)
5.2、使用共享资源 (11)
6、其它 (11)
6.1、如何在“跟踪甘特图”中显示其它比较基准 (11)
6.2、基准保存技巧 (11)
6.4、如何进行计划的调整 (11)
6.5、查询可以调整的时间 (11)
6.6、关于加班 (12)
1、启动阶段
1.1、前期准备
1.1.1、新建项目文件
选择 File—new 菜单,选择项目模版:
1.1.2、设置项目信息
自定义日历
选择“Project”下的“Change Working Time”菜单:
项目信息定义
在“Project”中选择“Project Information”,打开项目信息窗口,在这个窗口中有几个重要信息要设置:开始日期、排序方法、项目日历:
2、计划阶段
2.1、定义资源
在“Task”中选择将视图切换为“Resource Shee t”:
资源分三类,分别为“work”、“Material”、“Cost”,三种类型均可以设置为费率;
但是只有“Wo rk”类型有可用数量限制;可以双击打开资源进行详细设置,比如分时费用,核算方式,可用时间等等。
2.2、建立任务
2.2.1、任务列表
回到“Task”的“Gantt Chart”,输入任务名称建立任务:
使用升级和降级的按钮设定任务级别,形成层次关系从而展示任务分解结构,完整的项目可以参见下图。
2.2.2、插入周期性任务
点击“Task”中“Task”图标的下拉按钮,选择插入“Recurring Task”打开周期性任务对话框:
在周期性任务对话框中输入任务名称、周期间隔等信息:
2.2.3、任务日历
您可以根据任务情况,设定任务的日历。
日历有三个“项目日历”、“任务日历”、“资源日历”;
默认情况下,资源日历优先级最高、任务日历、然后是项目日历;可以将任务日历调整高一位。
2.2.4、任务工期
设定任务级别之后进行工期(Duration)输入,直接输入工期:
2.2.5、建立限制条件
在任务信息对话框中的“Contrain type”可以选择限制类型:
2.2.6、建立依赖关系
排定工期后设定项目间依赖关系和延隔时间。
2.3、资源分配
选定一个任务,点击“Resource”中的“Assig n Resource”打开资源分配窗口进行资源分配:
3、跟踪阶段
3.1、比较基准
在“Projec t”中的“Set B a s e l i n e”打开对话框设置比较基准。
比较基准最多可以设定11 个。
在“Task”中将视图切换为“Tracking Gantt”上显示的灰色条就是比较基准:
3.2、跟踪完成进度
可以直接修改完成百分比(%Complete),也可以修改“实际工期”、“剩余工期”:实际工期(Actual Work):做这个任务实际花费了多少工时剩余工期:完成剩余部分预计工时;
4、报告与分析
4.1、盈余分析
工程项目中也叫挣值分析:
BCWS:计划工作量的预算成本
BCWP:已经完成工作量的预算成本
ACWP:已经完成工作量的实际成本
SV:进度差异
CV:成本差异
EAC:完工估算
BAC:完成预算
VAC:完成偏差
如果B CWP>BCWS 说明项目超前完成
5、多项目管理
5.1、创建共享资源
新建一个项目文件,打开资源工作表,将所有用到的资源及成本设置好,保存项目文件,命名为Res.Mpp (也可以是其他名称) :
5.2、使用共享资源
打开其他项目时一定要同时打开 res.Mpp 文件这样就可以将共享资源分配到项目中需要注意的部分:
1.只能通过 Res.mpp 可以看到资源冲突
2.只能在 Res.mpp 文件中进行资源冲突的调整
6、其它
6.1、如何在“跟踪甘特图”中显示其它比较基准
在跟踪甘特图的图形区域,双击只需要修改“比较基准”的,从…到…的时间即可。
6.2、基准保存技巧
Project 2010 可以保存11 个比较基准,分别是“比较基准”、“比较基准1”…“比较基准10”。
一般情况下在跟踪甘特图上显示当前最新的比较基准,如何将历史基准也保留下来。
第一次设置比较基准时,在保存到“比较基准”的同时也保存到“比较基准10”;第二次设置比较基准时,在保存到“比较基准”的同时也保存到“比较基准9”;这样一次类推。
6.4、如何进行计划的调整
从关键路径上要时间,从非关键路径上要资源
6.5、查询可以调整的时间
选择“Task”,选择“D etail Gantt”,从这个图上可以看到可以调整的时间空间,然后可以调整时间:、
6.6、关于加班
点击“Task”的“P roperties”区域的“Displ ay Task Detail”按钮(红色圈圈),屏幕分栏,下方显示任务详细信息。
在下方空白处单击鼠标右键,选择“work”出现资源工时表格,在“Ovt Work”字段中输入加班时间即可:。