sk750麦克风使用说明书
KS-750M带屏纽扣英文说明书

迷你便攜式MPEG-4 錄影機Mini Portable MPEG-4 DVR 使用說明書User Manual安全說明Security InstructionIn order when questions,Security Instruction●Do not use a damaged battery or charger● Do not allow battery charging time exceeds the allotted time● At first the use of batteries or battery unused in a few months after the re-use, pleasefully charge the battery.● for the battery is fully charged, the use of its fully discharged, then re-charge in order toensure its longer life,●At short-term use after the battery will shorten battery life, in this case, repeatedly for thebattery is fully charged and then fully discharged several times, so you can use the battery a longer period of time● overcharging or excessive discharge will shorten the life of rechargeable batteries● When the rechargeable battery life than the use of a new rechargeab le battery short time,replace the new rechargeable batteries.● because of rechargeable batteries are consumables, so battery life will be shortened overtime.● careful not to let any conductor (such as necklaces, bracelets, etc.) to enable access toDC converter or a rechargeable battery side short-circuit, or may cause electric shock or fire :Product features●storage full over write automatically●Fast video recording by one key function●Recording, power ON/OFF via remote control●Real time Display/Recording at 30fps with date and time stamp●960 * 240 high-definition 2.5-inch LCD screen●built-in high sensitivity microphone recording●support 8GB TF memory card●Video resolution: 640 * 480/320 * 240 optional●video frames 10-30 frames / second optional●High-speed USB2.0 interface.●audio and video input / output;●configuration removable high-capacity lithium battery, 5 hours of continuous playback,video recording up to 3 hours standbyParts Introduction1. Power Switch 9. Built-in microphone2. Record button10. Video / audio input3. Select Key 11. Charging Indicator4. Select Key12. Recording Indicator LED5. ESC button13. Video / audio output6. Enter button 14. USB port7. TF card slot 15. Mode switching key8. LoudspeakersRemote controller Introduction1. Antenna 4. Power ON2. LED Indicator 5.key ring3. Power OFFUser GuideHold the Power On/Off button for 3 Seconds to turn On/Off the Device. Interface Diagram:Mode selection●Video Record - Video Recording Mode●video playback - the video file playback mode●Audio recording –Audio recording mode●audio playback - the audio file playback mode●System Setting - System Settings●The use of model selection■Video Record Mode --■At the main menu select [video Record] icon to enter the video mode1. Into the (video Record) mode. Screen appears to the camera collected images,2. By [OK] button to enter the [Record Settings], then [Menu] key to exit. (Note: this function should not operate simultaneously at the next video). This feature please refer to[Record Settings]Operational Guidelines.3. According to [●] key to record the audio and video camera images, the left video lantern light. Press ESC button to quit recording.Quit recording after recording the file will be automatically stored in the (video playback) file folder. Man-in memory, the recording will automatically stop and automatically stored in the (video playback) file folder.Mode Selection■Recorder Video Playback Mode - Select [ Playback] Icon in the Main MenuOperational Guidelines:1. To enter the menu (video playback) mode. Screen appears all the fragments of the screen recording, use the button to select the necessary watch footage recorded by the OK key to watch.2. Such as to delete files, press the [●] key and then select [Delete] and press [OK] button to confirm.3. Such as to copy files, press the [●] key and then select [Copy ways] and [OK] button to confirm. Mode Selection■Audio Recording mode - Select [ Audio Record ] Icon in the MainnuOperational Guidelines:. The main menu to enter the (Audio recording) mode appears when the screen interface to record instructions.By recording [●] button to record the local built-in microphone / external active high-sensitivity microphone to receive all the audio. In the recording studio when the left pulse of flashing lights.(Built-in microphone / external active high-sensitivity microphone selection) this feature please refer to [Record Settings] – mic select.Press [ESC] key to stop recording.Quit recording after recording the file will be automatically stored in the (audio playback) file folder.Man-in memory, the recording will automatically stop and automatically stored in the (audio playback) file folder.Mode Selection■Audio playback mode - at the main menu select [sound recording playback] icon to enter the recording modeOperational Guidelines:1. To enter the (Audio playback) mode, the screen appears all the good information has been recorded, use the buttons necessary to enter the selection mode then select the required recording playback for playback.2. Such as to delete files, press the [●] key and then select [Delete] and press [OK] button.3. Such as to copy files, press the [●] key and then select [Copy ways] and [OK] button.Mode Selection■System Configuration Mode - At the main menu select [Settings] icon to enter the system settings modeOperational Guidelines:Use keys to select and then click [OK] to enter sub-menu.1. Storage select - set the video store directory- Memory- SD Card2. Storage info - has been used to check the memory status- Memory- SD Card3. Formatting - set storage format- Memory- SD Card(One was confirmed that all data will be deleted.)4. System Time settings - set the system date and time (recommended prior to first use the set)5. Display settings - set A V Output- LCD output- TV_PAL output- TV_ NTSC output6. Brightness – Setting for the system BrightnessButton to reduce the brightness or increase the brightness.7. Language settings - set the system language- Chinese / 中文- English /英文(In the updated version will be more language selection)1.8. Default – Setting for reset the factory original setting- Yes- No■Video settings - in the [video] mode, press [OK] button to enter the [Video Settings] menu, press [Esc] key to exit.Operational Guidelines:Use keys to select and then click [OK] to enter sub-menu.1. Video Resolution - Set the video resolution(Video information screen size and great little noodle file settings depending on the resolution)- 640 x 480- 320 x 2402. switch settings - set DIP switch-Q position- Lock and StandbyIn this mode selection: In the case of shutdown when the Slide Switches Q assigned to the location of the shortcut to start the machine automatically to enter the video mode, the screen appears to the camera images collected at the same time display backlight lamp clearance out, open the lock button function. (DIP switch back position N, the machine back the video mode, all functionsreturn to normal)At any boot mode DIP switch assigned to put the location of Q: The display's backlight to turn off lights, open the lock button function. (N Slide Switches back position, the screen backlight lights opened out, key lock feature off, return the original model.)- Lock,Standby and Record VideoSelection in this mode: Regardless of the machine in any status under the DIP switch assigned tothe location of Q, the faster boot drive (shock oscillation time) and enter the video mode to recordaudio and video camera images of the left video lantern light, while the screen backlight to turnoff lights, open the lock button function. (DIP switch back position N, the machine (a vibratorvibration twice) the left side of the video after the lights went out save by recording just the audioand video camera data to the screen (video playback) file folder and then shutdown .- Lock,Standby and Record AudioSelection in this mode: Regardless of the machine in any status under the DIP switch assigned to the location of Q, the faster boot drive (shock oscillation time) and enter the recording mode to record the local built-in microphone / external active high sensitive microphone to receive all the audio, the left recording pulse of flashing lights. At the same time, the backlight display lights are switched off, open the lock button function. (DIP switch back position N, the machine (a vibrator vibration twice) just after the preservation of audio data to recording (audio playback) file folder and then shutdown.Note:can’t connect USB with computer under Q mode at the same time3. Mic settings - settings used when recording microphone- Internal mice- External mic(Note: must use the following DC-5V active high-sensitivity microphone professional. If you have any questions may consult the local vendors)4. date stamp - set the video information is incidental to the time display- On- Off5. FPS - set the video frame rate when the data information(Video data quality and file sizes depend on the quality of frame rate settings)- 10FPS- 20FPS- 30FPS6. Remote Control - Set the remote control function- Remote control OFFSelection in this mode: the machine from the controller to control- Boot and Record videoSelection in this mode: the machine status at shutdown by remote control under the C button, the machine faster boot (vibrator vibration once) and enter the video mode to record audioand video camera images, the left video lantern light At the same time, the screen's backlight toturn off lights, open the lock button function.D button by remote control, the machine (a vibrator vibration twice) the left side of the videoafter the lights went out save by recording just the audio and video camera data to the screen(video playback) file folder and then shutdown- Boot and record audioSelection in this mode: the machine status at shutdown by remote control under the C button, the machine faster boot (vibrator vibration time) to enter the recording mode to record the local built-in microphone / external active high-sensitivity microphone to receive all the audio , at the left side of recording when recording pulse of flashing lights. At the same time, the backlight display lights are switched off, open the lock button function.D button by remote control, the machine (a vibrator vibration twice) just after the preservation of audio data to recording (audio playback) file folder and then shutdown.Note: not at Slide Switches Slide Switches Q appropriated for state use.7. Standby settings - standby time video settings- 10 second- 20 second- NeverNote: This function only at the status N Slide Switches can be achieved.Note: not at Slide Switches Slide Switches Q appropriated for state use.8.Overwrite Enable - storage replication function to automatically set- ONON mode selection: the system default local storage is set to automatic replication, when the memory storage of video data at the remaining space 1MB, the machine will delete the earliest days of video information, then continue to the video storage, preservation the latest video information.Note: This function must be careful to use to open the automatic replication feature will be automatically deleted when the first video information!- OFFTurn off selection mode: the local system will be at the remaining storage space 0MB, stop recording, then the screen shows the storage space is full tips, issued a vibrator storage space is full signal: (signals: Indirect non-stop vibration)█Fittings Come Ks-650 Digital Video Recorder1. KS-650 Mobile Video Recorder * 1PCS2 KS-303 MINI CAMERA3. DC5V 2A charger * 1PCS4. User Guide * 1PCS5. USB PC Line * 1PCS6. A V Line * 1PCS7. Headset * 1PCS8. Lithium electric 1800MA * 1PCSParts Instruction来源:/article.php?id=76。
K750快捷键使用大全

【转载】 2006-4-18 14:42:21-------------------------------------------------------------------------------- 一、在纯音乐模式时按左侧播放键,切换暂停(播放)按摇杆左右键,选择下一首(上一首)持续按向右键(不松手),本首歌快速前进(快进)持续按向左键(不松手),本首歌快速后退(倒带)按右侧+/-键,调整播放音量不管是否最小化状态,长按右侧+/-键可以跳转到上一首或下一首歌。
进入纯收音机模式方法:右*左左*左*:进入工程模式(左右指摇杆方向),然后选择服务测试,选择收音机,用数字键输入频率,就可以收听了。
手动锁键盘后,可以打开照相机。
(网友提醒)二、在休眠模式时按左侧播放键可以开启(关闭)音乐播放或者收音机(插上免提时)注意:至于到底开启的是音乐播放还是收音机,视上次关闭时状态而定,如果上次是听收音机关闭的,那么这次就是开了收音机,反之就是音乐播放。
开启镜头盖:进入有声照相(摄像)模式三、在待机模式时右*左左*左*:进入工程模式(左右指摇杆方向)注意:工程模式可以检测手机各功能是否工作正常,还可以查看手机使用总时间按左侧音乐播放快捷键可以启动音乐(或收音)播放打开镜头盖可以拍照按+/-键查看手机状态(可以看到电池剩余电量)长按+/-键启动语音拨号*+右键=锁键盘,再次操作,关闭锁键盘(当然你可以设置成自动锁键盘,个人觉得系统默认的锁键盘时间太短,还不如自己手动的好)长按#进入静音模式,再次长按关闭该模式按0-9数字键后再按通话键(左键)可以启动快速拨号(前提是你已经在通讯录中设置了快速拨号)长按1-9数字键,直接跳入通讯录里面1-9开头的条目按当中音乐键启动音乐播放界面正按摇杆键可以调出主菜单上下左右拨动摇杆可以进入预先设置的快捷功能比如:你可以把右拨设置成开灯;左拨设置成通讯录;下拨设置成编写新短信息。
蓝牙麦克使用说明

蓝牙麦克使用说明
1、新蓝牙麦克使用前应充电2小时以上,此时麦克可使用20
小时以上。
2、打开钢制操作台。
3、按系统启动开关,继电器自动吸合,使多媒体设备加电。
4、将蓝牙麦克电源开关⑤位于“ON”。
5、此时蓝牙麦克蓝色指示灯②将快速闪烁,此时麦克与接收
机处于对频状态,数秒后,蓝色指示灯常亮,表示麦克与接收机对频完毕,可正常使用。
蓝牙麦克示意图如下:
①挂绳安装口②指示灯③ USB充电接口④麦克插孔
⑤电源开关⑥音量增大按键⑦音量减小按键
6、若发现音量过大或过小时,可调节蓝牙麦克⑥或⑦按钮,当
扩声系统发出“叮咚”声响时,表示调节已到极限。
7、若蓝牙麦克充电不当,使用中突然电压不足时,蓝牙麦克不
工作,教室原有扩声系统自动切换到有线扩声状态,原有界面麦克照常使用。
8、使用过程中红灯闪烁,为电池告警,请立即充电,充电时红
灯常亮,红灯熄灭表示充电完毕。
9、我校购置的蓝牙无线话筒发射机招标时供应商已提供国家
权威部门检测报告,对人体无伤害,请教师放心使用。
10、注意事项
⑴、对频时间超过20秒后仍不能正常工作,请切断麦克电源,
重新开机。
⑵、咪头具有指向性,请将咪头指向声源。
⑶、使用完毕请立即关闭电源,以免损坏锂电池。
⑷、麦克距离操作台越近,对频越快,有效通讯距离为15米。
Jabra Speak 750 用户手册说明书

Jabra用户手册UC-certified© 2020 GN Audio A/S。
保留所有权利。
Jabra®是 GN Audio A/ S 的注册商标。
Bluetooth®(蓝牙®)字标和徽标是 Bluetooth SIG, Inc.的注册商标,GN Audio A/S 经许可使用该标记。
在丹麦设计开发中国制造型号:PHS040Wa / END040W1. 欢迎 (5)2. 概览 (6)3. 摆放位置 (7)3.1 小型协作空间3.2 大型会议室3.3 桌面3.4 立体声媒体4. 如何充电 (11)4.1 USB 充电4.2 自动断电4.3 电池电量状态5. 连接方式 (13)5.1 连接到电脑(蓝牙适配器)5.2 连接到电脑(USB 线缆)5.3 连接到智能手机或平板电脑6.使用方式 (15)6.1 按钮可见性6.2 典型使用6.3 处理多个通话6.4 连接(Link)按钮6.5 智能(Smart)按钮6.6 语音提示6.7 共享使用6.8 恢复出厂设置7. 软件和固件 (22)7.1 Jabra Direct7.2 更新固件8. 支持 (23)8.1 常见问题解答和技术规格8.2 如何保养您的 Jabra 设备1. 欢迎感谢您使用 Jabra Speak 750。
希望您使用愉快!Jabra Speak 750 的功能• 拟真的通话和音乐音质• 直观的即插即用连接-通过 USB 或蓝牙适配器连接到电脑,或通过蓝牙连接到智能手机和平板电脑• 轻巧的设计、旅行保护袋和约 10 小时电池续航时间• 专用连接(Link)按钮将两台 Jabra Speak 750 配对组合,实现灵活且可扩展的会议2. 概览桌面支架和蓝牙适配器存放Jabra Link 370 蓝牙适配器)3. 摆放位置3.1 小型协作空间为了获得最佳的音质,请将免提电话放在桌子中间,与每名与会者的距离不超过 2 米/6.5 英尺。
mijiak歌麦克风说明书
mijiak歌麦克风说明书一、产品概述Mijia k歌麦克风是一款智能麦克风产品,集成了高保真录音、降噪处理、蓝牙连接等多项功能。
它能够满足用户对高质量录音以及悦耳歌声的需求,是一款非常适合KTV、录音室等场合使用的产品。
二、产品特点1. 高保真录音:Mijia k歌麦克风采用了先进的录音技术和高质量的麦克风元件,能够实现高保真的录音效果。
用户录制的音频可以还原到最真实的状态,使声音更加清晰、逼真。
2. 降噪处理:内置的降噪芯片能够有效地抑制周围环境的杂音和噪声,提高录音的质量。
无论是在嘈杂的场合还是在室内静音的环境下,Mijia k歌麦克风都能够有效地降低噪声干扰,确保录音效果的纯净。
3. 蓝牙连接:Mijia k歌麦克风支持蓝牙连接,可以和智能手机、平板电脑等设备无线连接。
用户只需要打开手机的蓝牙功能,将其与麦克风进行配对,就可以实现无线录音和播放,让用户更加自由地享受音乐。
4. 多功能按钮:Mijia k歌麦克风上配备了多功能按钮,用户可以通过按键操作来进行播放、暂停、切换歌曲等操作。
这样用户就不用频繁地操作手机,可以更加方便地进行录音和歌曲切换,提高使用体验。
5.可调节音量:麦克风上的音量按钮可以调节录音时的音量大小,让用户根据自己的需要进行调整。
用户可以根据不同场合的需求,自行调整音量大小,达到最佳录音效果。
三、产品使用方法1. 打开麦克风:长按电源键3秒,可以打开Mijia k歌麦克风。
2.连接蓝牙:打开手机的蓝牙功能,并连接麦克风的蓝牙信号,配对成功后,手机会有提示音。
3.录制歌曲:打开K歌软件,选择自己想要录制的歌曲,点击开始录制按钮。
4.调节音量:根据自己的需求,通过麦克风上的音量按钮进行音量调节。
5.播放录音:录制完成后,通过按下麦克风上的播放按钮,可以进行录音回放。
6.切换歌曲:通过按下麦克风上的切换歌曲按钮,可以切换到下一首歌曲。
四、注意事项1.使用时请确保麦克风的电量充足,以免影响正常使用。
JUKI-750 760中文说明书
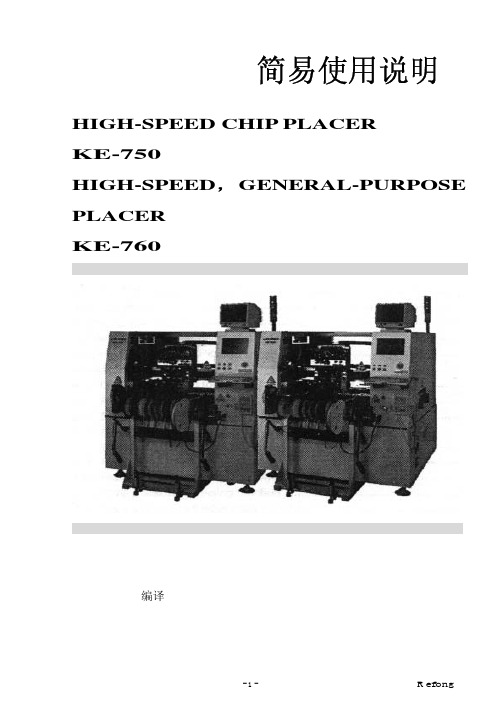
简易使用说明 HIGH-SPEED CHIP PLACERKE-750HIGH-SPEED,GENERAL-PURPOSE PLACERKE-760TSUI_R efong 编译 目录第一章机台简介1-1 机台构造简介 (4)1-2 规格 (4)1-3 雷射检测 (5)1-4 零件的型态 (7)1-5 英文缩写说明 (9)1-6 输送带简介 (10)1-7 FEEDER(送料器)简介 (11)1-8 ATC简介 (12)1-9 NOZZLE(吸嘴)简介 (13)1-10 键盘功能键 (14)1-11 HOD手持控制器 (15)1-12 机台上的其它按键 (16)1-13 IC CONVEYOR (16)第二章生产画面介绍2-1 画面 (17)2-2 选单 (19)2-3 暂停画面 (21)2-4 选单介绍(主选单及Data Input选单) (22)Input(资料输入) T Data3-1 基本资料 (24)3-2 PWB DTAT (25)3-3 PLACEMENT DATA(着装资料) (27)3-4 COMPONENT DATA(零件数据) (29)3-5 PICK DATA(料站资料) (35)3-6 VISION DATA(视觉资料) (37)机械设定4-1 选单说明 (40)4-2 1/Units of measure (40)4-3 2/Opt. Option (41)4-4 3/Machine setup (43)4-5 Maual Control (47)快速入门5-1 开机 (50)5-2 关机 (50)5-3 异常处理 (50)5-5 双挂料改为单挂料 (50)5-6 BOC Mark点制作 (51)5-7 换线 (52)5-8 换料 (52)5-9 零件检测 (52)5-10最优化 (53)如何写一程序6-1 基本观念 (54)6-2 写程序 (55)机台简介1-1. 机台构造简介 KE-750装置三组HEAD,可装着最大2Omm。
话筒使用技巧

话筒使用技巧话筒使用技巧话筒使用技巧1话筒基本介绍如今无线话筒得到了普及以及广泛使用,市场上销售的一种无线话筒,价格在几百元左右。
该话筒采用UHF超高频段,比传统的VHF 频段干扰更少,还有独特的降噪设计,使用户在K歌过程中享受还原自己最真实的声音。
这里我们主要讲解下无线话筒在使用时的一些技巧性问题。
1、怎样选购无线话筒发射机机的电池为保证系统正常使用时不至出现信号失真和频率干扰,必须使用能是充足的电池,在选购时有条件的话最好选用碱性9V电池。
2、怎样才能尽早知道发射机电池能量是否充足在各种品牌和型号的无线话筒系统中,绝大多数接收机不具备发射机电池能量显示功能。
尽管有的无线发射器上有电池低压显示,但使用者在使用中一般很少会注意这个问题。
在无线话筒正常使用中,出现电池不足引起音频信号失真或频率干扰是时有发生的事。
为了防止发生这种现象,操作人员可在无线话筒正常使用中,适时地使用调音台PFL预听功能,用耳机监听无线话筒的信号,若声音清晰度稍有降低或噪声稍有增大时,就应马上更换电池,这样才能尽可能避免由于电池能量不足给操作者带来的心理压力。
3、怎样才能防止和避免外界对无线话筒的干扰在选购非变频无限话筒前应先弄清当地电视台的发射频率,选购时应错开电视台的发射频率免受干扰,选购多个无线话筒系统时还应注意,各系统的频率不能重复,以避免频率重叠时的相互干扰。
4、怎样消除无线话筒受外界干扰非变频的分集无线话筒系统在受到外界干扰时(指发射机电源关闭时,在接受机显示器上仍有RF射频、AF音频或DIVERSITY分集通到A、B中任一或二者的LED显示器有信号显示的话,则表明接收器正处于外界无线电波干扰),可通过调校SQUEICH静躁器以改善接收,减少干扰。
其具体做法是,调好天线位置,发射机仍处于关闭状态,将接收机音量输出增益关死,最后顺时针方向调校SQUEICH静躁器,直至所有干扰信号消失(此时接收机除电源显示外没有任何信号显示),再顺时针转少许,调试时一定要使用无感应螺丝刀。
USB无线麦说明书--新版
USB无线K歌麦产品使用说明书(娱乐版)USB无线麦克风为专业酷我K歌电脑平台系统(电脑版)和专业版K歌设计的。
该产品采用无线2.4G通用频段技术,声音传输是通过数字化处理和传输方式,具有较强的抗干扰性,使输出的声音具有高保真的音质;接收部分是通过USB数字接口传送到电脑,可抗数模转换和电流音,是一款具有专业级的无线K 歌专用麦。
无线麦克风适用于电脑K歌、电脑录音和在线聊天、教学和商务演讲的专业工具,它的有效使用范围在30平方米内,频率响应宽度(在20~16KHz之间),它的使用效果会是称心如意,是唱K歌与商用演讲的好工具。
主要特点:※据了解是全球第一款采用USB接口技术的无线麦克风;※麦克风(话筒,又称发射器)采用锂电池供电,充一次电可以使用13-15 小时左右;※麦克风具有低压提示指示灯,提示充电;※麦克风采用电容咪与电脑的电气特性相匹配;※麦克风具有遥控电脑的功能,如:选歌和音量控制、播放暂停等;※麦克风外观采用塑胶与金属的完美结合,大小适中,有多种时尚的色彩选择可选择。
※USB接收器采用电脑USB接口技术--即插即用方式,无需安装驱动程序。
产品说明:操作说明:在使用无线麦克风系统前,首先要配对好麦克风(话筒)与USB接收器,再设置好电脑“酷我K歌”软件的相关设置项,无线麦克风系统才能正常使用。
具体操作步骤如下:第一步:麦克风(话筒)与USB接收器配对操作打开带多媒体音箱的电脑,取出麦克风(话筒)和USB接收器,用手指按住话筒的“开关键”,话筒上的指示灯的变化为:红灯亮转为蓝灯亮,再转为红蓝灯快闪,此时可以松开手指,同时把USB接收器插上电脑的USB接口上,这时USB接收器的指示灯会由快闪变为慢闪,并与话筒上的指示灯同步变为慢闪,这就说:话筒与USB接收器配对成功(配对成功后,第二次只需打开话筒和电脑系统就可直接使用;另:一支麦克风只能与一个USB接收器配套使用,要用另一支麦克风与原USB接收器使用的话,需进行重新配对。