LG空调简易产品手册
LG 移动空调 LP0815WNR 用户手册.pdf_1702051041.059613说明书

Please read this manual carefully before operatingyour set and retain it for future reference.TYPE : PORTABLE AIR CONDITIONERMODEL : LP0815WNRINTRODUCCIÓN 26INSTRUCCIONES DE SEGURIDAD IMPORTANTES27INSTRUCCIONES DE SEGURIDAD IMPORTANTES28INSTRUCCIONES DE SEGURIDAD IMPORTANTES29INSTRUCCIONES DE SEGURIDAD IMPORTANTES30INSTRUCCIONES DE SEGURIDAD IMPORTANTES31PIEZAS Y CARACTERÍSTICAS 32CÓMO UTILIZAR EL ARTEFACTO33CÓMO UTILIZAR EL ARTEFACTO 34Timer CÓMO UTILIZAR EL ARTEFACTOESPAÑOLCÓMO UTILIZAR EL ARTEFACTOTimerTimerINSTRUCCIONES DE INSTALACIÓNINSTRUCCIONES DE INSTALACIÓNINSTRUCCIONES DE INSTALACIÓNINSTRUCCIONES DE INSTALACIÓNINSTRUCCIONES DE INSTALACIÓNINSTRUCCIONES DE INSTALACIÓNINSTRUCCIONES DE INSTALACIÓNCUIDADO Y LIMPIEZACUIDADO Y LIMPIEZA45CUIDADO Y LIMPIEZA 46DETECCIÓN DE PROBLEMAS47DETECCIÓN DE PROBLEMAS 48GarantíaGARANTÍA LIMITADA DEL AIRE ACONDICIONADO LG - EE.UU.COBERTURA DE LA GARANTÍA:LG Electronics Inc. (“LG”) garantiza que reparará o sustituirá, gratuitamente, su producto si resulta defectuoso en materiales o mano de obra bajo condiciones normales de uso durante el periodo de garantía mencionado más abajo, efectivo a partir dela fecha de compra del producto original por parte del consumidor. Esta garantía limitada sólo es válida para el comprador original del producto y no es asignable ni transferible a ningún otro comprador o usuario final subsecuentes, y efectivaúnicamente cuando el producto se compra a través de un distribuidor autorizado de LG y se utiliza en los Estados Unidos ("EE UU") o en cualquiera de sus territorios.Nota: Los recambios y piezas de repuesto pueden ser nuevos o estar reconstruidos de fábrica y están garantizados durante el tiempo restante del periodo de garantía de la unidad original o noventa días (90), el periodo de los dos que sea más largo. Por favor, guarde el recibo de compra o la nota de entrega como prueba de la fecha de compra como comprobante de garantía (se le puede pedir que presente una copia a LG o a su representante autorizado).PERIODO DE GARANTÍA:1 año desde la fecha de compra: Cualquier repuesto interno/funcional y mano de obraPROCESO DE SERVICIO: Servicio a domicilioLos servicios a domicilio se prestarán durante el periodo de garantía sujeto a disponibilidad en los Estados Unidos. El servicio a domicilio puede no estar disponible en todas las áreas. Para recibir asistencia técnica a domicilio, el producto debe estar en un entorno despejado y accesible al personal técnico. Si durante el servicio a domicilio la reparación no se puede llevar a cabo, es posible que sea necesario desplazarlo a nuestras instalaciones, repararlo y devolverlo a su hogar. Si este fuera el caso, LG puede optar, a petición nuestra, a utilizar el transporte de nuestra elección para desplazar la unidad al y del centro de servicio autorizado de LG.ESTA GARANTÍA LIMITADA NO SE APLICA A:1. Las visitas de Asistencia a domicilio para entregar, recoger y/o instalar el producto, instruir o sustituir fusibles.2. Sustitución de fusibles de la casa o reajuste de interruptores de circuito, la corrección del cableado de la casa o de la tubería, o la corrección de la instalación del producto.3. Los daños o averías causados por fugas / roturas/ congelación de tuberías de agua, líneas de drenaje restringido, suministro insuficiente de agua o interrumpido, o suministro insuficiente de aire.4. Los daños o averías causados por accidentes, plagas e insectos, rayos, viento, fuego, inundaciones o actos de Dios.5. Los daños o fallos ocasionados por el mal uso, abuso, instalación inadecuada, reparación o mantenimiento. Se considera reparación inadecuada aquella en que se hayan utilizado piezas no aprobadas o especificadas por LG.6. Los daños o averías causados por modificaciones no autorizadas o alteraciones del producto.7. Los daños o averías causados por la utilización de una corriente eléctrica, tensión o código de plomería incorrectos. 8. Daños estéticos, incluyendo arañazos, abolladuras, desportilladuras u otros daños en el acabado del producto, a menos que dichos daños sean el resultado de defectos en los materiales o mano de obra y se informe a LG en el plazo de siete días naturales (7) a partir de la fecha de entrega.9. Los daños o la pérdida de componentes de cualquier producto cuya caja haya sido abierta, haya sido objeto de un descuento o se haya restaurado.10. Los productos cuyos números de serie de fábrica originales hayan sido quitados, borrados o cambiados de ninguna manera.11. Las reparaciones cuando el producto se utiliza para cualquier cosa fuera de lo normal y del uso doméstico habitual (por ejemplo su alquiler, uso comercial, en oficinas o en instalaciones de ocio) o en contra de la instrucciones que se indican en el manual del propietario.12. La extracción y reinstalación del producto si está instalado en un lugar inaccesible.ESTA GARANTÍA SE OTORGA EN SUSTITUCIÓN O EXCLUSIÓN DE TODA OTRA GARANTÍA, EXPRESA O IMPLÍCITA, INCLUYENDO SIN LIMITAR CUALQUIER GARANTÍA DE CALIDAD O IDONEIDAD CON UN PROPÓSITO CONCRETO. EN LA MEDIDA EN QUE CUALQUIER GARANTÍA IMPLÍCITA ES OBLIGADA POR LA LEY, ESTÁ LIMITADA EN DURACIÓN AL PERIODO DE GARANTÍA YA MENCIONADO. LA REPARACIÓN O REEMPLAZO DE PIEZAS, SEGÚN LO ESTABLECIDO EN ESTA GARANTÍA, ES EL ÚNICO QUE PUEDE RECLAMAR EL CLIENTE. NI EL FABRICANTE NI SU DISTRIBUIDOR EN LOS EE.UU. SE HACE RESPONSABLE DE CUALQUIER DAÑO (DERIVADO, INDIRECTO, ESPECIAL O PENAL) DE CUALQUIER NATURALEZA, INCLUYENDO, SIN LIMITACION, LA PÉRDIDA DE INGRESOS O BENEFICIOS O CUALQUIER OTRO TIPO DE DAÑO, AÚN BASADO EN UN CONTRATO, SEA UN AGRAVIO O DE CUALQUIER OTRA MANERA.ALGUNOS ESTADOS NO PERMITEN LA EXCLUSIÓN O LIMITACIÓN DE DAÑOS IMPREVISTOS O RESULTANTES, O LIMITACIONES A LA DURACIÓN DE LAS GARANTÍAS IMPLÍCITAS, POR LO QUE LA EXCLUSIÓN O LIMITACIÓN MENCIONADA ANTERIORMENTE NO SERÁ APLICABLE AL USUARIO. ESTA GARANTÍA LE OTORGA DERECHOS LEGALES ESPECÍFICOS Y TAMBIÉN PUEDE TENER OTROS QUE VARIARÁN DE UN ESTADO A OTRO.COMO OBTENER EL SERVICIO DE ESTA GARANTÍA E INFORMACIÓN ADICIONAL:Llame al 1-800-243-0000 o visite nuestra página web: .Dirección de correo ordinario: LG Customer Information Center (ATTN: CIC)201 James Record Road, Huntsville, AL 35824491-800-243-0000 LG ELECTRONICS,INC.1000 Sylvan Ave.,Englewood Cliffs,NJ 。
LG 移动空调 LP1015WSR 用户手册说明书

Please read this manual carefully before operatingyour set and retain it for future reference.TYPE : PORTABLE AIR CONDITIONERMODEL : LP1015WSR234567The adjustable louvered air discharge opens automaticallywhen the air conditioner is turned on, and closes when itis turned off. It can also be set to oscillate to distribute airmore evenly through the room.8910LG logo on front panel.It is convenient to set the timer on with TIMERON/OFF before you leave so that you will come back to the comfortable room temperature you set.This function can be activated from the remote only.TIMER ON can be set in the air conditioner operation off and TIMER OFF can be set in the air conditioner operation on.Setting method is the same that TIMER ON/OFF.TIMER button can be used to turn on the unit automatically at the time you set.Use the ƞ / Ơ buttons to adjust the delay time from 0 to 24 hours, in one hour increments or decrements.When your desired time displayed on LCD, press the TIMER button to confirm it. Press TIMER button again, a “beep” can be heard and the indicator disappears, the TIMER mode has been canceled.TIMER OFF of the set time, with the exception of when you want to set the display LED of control panel, can not be confirmed.You can be check in only on the remote control.Turns the air conditioner on and off. When turning on, a rising tone will sound to confirm. When turning off, adescending tone will sound.TIMERSets the motorized air discharge to oscillate, improv-ing air circulation in the room. This function can be activated from the remote only.If air discharge is not closed by any operation, please disconnect and reconnect the power cord.SLEEP mode can be set in Cool, Dry, Fan operation mode. This function gives you a more comfortable environment for sleep.The appliance will stop operation automatically after operating for 8 hours.Fan speed is automatically set at low speed.This function can be activated from the remote only.SWINGLED display shows the set temperature, fan speed, or the selected TIMER delay.Indicators will light to show active mode andadditional settings. The LED display will show the E5 to indicate when the internal water drain tank needs to be emptied.LED DISPLAYTIMERLG logo on front panel.In COOL modes, the / buttons adjust the set tempera-ture up to 86°F or down to 60°F, in one degree increments.When the TIMER function is selected, use the / buttons to adjust the delay time from 0 to 24 hours, in one hour increments. If you press and hold the / buttons, the set temperature or time will change automatically after a few seconds.NOTE: The displayed temperature is the SET temperature, not the room temperature. In COOL mode, the thermostat in the air conditioner will run the compressor until the set temperature is reached, then cycle the compressor on and off to maintain the set temperature.For best performance, allow at least 20 in (50.8 cm) of air space on all sides of the unit for good air circulation.(46 to 127 cm)165/8E5E575ENGLISH2122E523E5EA When have softwareproblem, display "EA" 2425LG Customer Information Center1-800-243-0000Register your product Online!LG ELECTRONICS,INC.1000 Sylvan Ave.,Englewood Cliffs,NJ 。
LG 壁挂式空调用户手册说明书

Please read this manual carefully beforeoperating your set and retain it for future reference.TYPE : WALL MOUNTEDRev : 01 (01T15)*MFL68781203*2TIPS FOR SAVING ENERGYTIPs FOR sAVING ENERGYHere are some tips that will help you to minimize the power consumption when you use the air conditioner. You can use your air conditioner more efficiently by referring to the instructions below :• Do not cool the indoor excessively. This may be harmful for your health and may consume more electricity.• Block sunlight with blinds or curtains while you are operating the air conditioner.• Keep doors or windows closed tightly while you are operating the air conditioner.• Adjust the direction of the air flow vertically or horizontally to circulate indoor air.• Speed up the fan to cool or warm indoor air quickly, in a short period of time.• Open windows regularly for ventilation as the indoor air quality may deteriorate if the air conditioner is used for many hours.• Clean the air filter once every 2 weeks. Dust and impurities collected in the Air filter may block the air flow or weaken the cooling / dehumidifying functions.For your recordsStaple your receipt to this page in case you need it to prove the date of purchase or for warranty purposes. Write the model number and the serial number here:Model number :Serial number :You can find them on a label on the side of each unit.Dealer’s name :Date of purchase :3IMPORTANT SAFETY INSTRUCTIONS Always comply with the following precautions to avoid dangerous situation and ensure peak perfor -mance of you product.It can result in serious injury or death when the directions are ignored.It can result in minor injury or product damage when the directions are ignored.• Installation or repairs made by unqualified persons can result in hazards to you and others.• Air conditioner shall be installed in accordance with national wiring regulations.• The information contained in the manual is intended for use qualified service technician familiar with safety procedures and equipped with the proper tools and test instruments.• Failure to carefully read and follow all instructions in this manual can result in equipment malfunction, property damage, personal injury and/or death.• This appliance is not intend for use by persons (including children) with reduced physical, senary or mental capabilities, or lack of experience and knowledge, unless they have been given supervision or instruction concerning use of the appliance by a person responsible for theirs safety.• Children should be supervised to ensure that they do not play with the appliance.• When the power cord is to be replaced,replacement work shall be performed by authorized personnel only genuine replacement parts.• Use a standard circuit breaker and fuse conforming with the rating of the air conditioner. Failure to do so may result in electric shock or product failure.• Contact an authorized service center when you install or relocate the air conditioner. Failure to do so may result in serious injury or product failure.• Always use a power plug and socket with a ground terminal. Failure to do so may result in electric shock or product failure.• Install the panel and the cover of the control box safely. Failure to do so may result in explosion or fire.• Install a dedicated electric outlet and circuit breaker before you use the air conditioner. Failure to do so may result in electric shock or product failure.• Do not modify or extend the power cable. If the power cable or cord has scratches or skin peeled off or deteriorated then it must be replaced. It may result in fire or electric shock.• Be cautious when you unpack or install the air conditioner. Failure to do so may result in serious injury or product failure.• Do not install the air conditioner on an unstable surface or where there may be a danger of it falling. It may result in death, serious injury, or product failure.READ ALL INsTRUCTIONs BEFORE UsING THE APPLIANCE.WARNING CAUTIONWARNINGINsTALLATION!IMPORTANT sAFETY INsTRUCTIONs4IMPORTANT SAFETY INSTRUCTIONSOPERATION• Do not let the air conditioner run for a long time when the humidity is very high or when a door or window has been left open. Failure to do so may result in product failure.• Make sure that the power cord is not pulled or damaged while the air conditioner is operating. Failure to do so may result in fire, electric shock, or product failure.• Do not place any objects on the power cord. It may result in electric shock or product failure.• Do not turn on or off the air conditioner by plugging in or unplugging the power plug. It may result in fire or electric shock.• Do not touch, operate or repair the air conditioner with wet hands. It may result in electric shock or product failure.• Do not place a heater or other heating appliances near the power cable. It may result in fire, electric shock, or product failure.• Do not allow water to run into the air conditioner. It may result in explosion or fire.• Do not leave flammable substances such as gasoline, benzene and thinner near the air conditioner. It may result in explosion or fire.• Do not use the air conditioner for an extended period of time in a small place without ventilation. Ventilate the place regularly. Failure to do so may result in explosion or fire.• When there is a gas leak, ventilate sufficiently before using the air conditioner again. Failure to do so may result in explosion or fire.• Unplug the power plug if there is a noise, smell or smoke coming from the air conditioner. Failure to do so may result in explosion or fire.• Stop operating and close the window in storm or hurricane. If possible remove the product from the window before hurricane arrives.• Do not touch the electrostatic filter after opening the front grille. Failure to do so may result in electric shock or product failure.• Contact an authorized service center when the air conditioner is submerged into water due to flooding. Failure to do so may result in explosion or fire.• Be cautious water could not enter the product.• Make sure to ventilate sufficiently when this air conditioner and a heating appliance such as a heater are used simultaneously. Failure to do so may result in explosion or fire, serious injury, or product failure.• Turn the main power off and unplug the power plug when you clean or repair the air conditioner. Failure to do so may result in death, serious injury, or product failure.• Unplug the power plug when the air conditioner is not used for an extended period of time. Failure to do so may result in product failure.• For inner cleaning, contact an Authorized Service Center or a dealer.• Do not use harsh detergent that causes corrosion or damage on the unit. Harsh detergent may also cause failure of product, fire, or electric shock.5IMPORTANT SAFETY INSTRUCTIONS • Make sure to check if there is a refrigerant leak after you install or repair the air conditioner. Failure to do so may result in product failure.• Install the drain hose properly for smooth drainage of condensed water. Failure to do so may result in product failure.• Keep level even when installing the product.• Install the air conditioner where the noise from the outdoor unit or the exhaust gas will not inconvenience the neighbors. Failure to do so may result in conflict between neighbors.• When transporting the equipment, there should be at least 2 or more people, or a forklift. It may result in serious injury.• Do not install the air conditioner where it will be exposed to sea wind (salt spray) directly. It may result in product failure.• Do not turn on the breaker or power under condition that front panel, cabinet, top cover, control box cover are removed or opened. Otherwise, it may cause fire, electric shock, explosion or death.• Do not expose people, animals or plants to the cold or hot wind from the air conditioner. It mayresult in serious injury.• Do not use the product for special purposes, such as preserving foods, works of art, etc. It is a consumer air conditioner, not a precision refrigeration system. It may result in death, fire or electric shock.• Do not block the inlet or outlet of air flow. It may result in explosion or product failure.• Do not use strong cleaning agents or solvents when you clean the air conditioner, or spray water. Use a smooth cloth. It may result in serious injury or product failure.• Never touch the metal parts of the air conditioner when you remove the air filter. It may result serious injury or product failure.• Do not place any objects on the air conditioner. It may result in product failure.• Always insert the filter securely after cleaning. Clean the filter every two weeks or more often if necessary.• Do not insert hands or other objects through the air inlet or outlet while the air conditioner is operating. It may result in electric shock.• Do not drink the water drained from the air conditioner. It may result in serious health complications. • Use a sturdy stool or ladder when you clean, maintain or repair the air conditioner at a height. Failure to do so may result in serious injury or product failure.• Do not mix the batteries for the remote control with other types of batteries or mix new batteries with used batteries. Failure to do so may result in product failure.• Do not recharge or disassemble the batteries. Failure to do so may result in explosion, fire or serious injury.• Stop using the remote control if there is a battery fluid leak. If your cloth or skin is explosion to the battery fluid from a leak, wash it off with clean water. Failure to do so may result in serious injury.• If you swallow the battery fluid from a leak. Wash out the inside of your mouth thoroughly and then consult a doctor. Failure to do so may result in serious health complications.CAUTIONINsTALLATIONOPERATION!6CONTENTS CONTENTs2 TIPs FOR sAVING ENERGY3 IMPORTANT sAFETY INsTRUCTIONs7 BEFORE UsE7 COMPONENTS7 - INDOOR UNIT TYPE 17 - INDOOR UNIT TYPE 28 - OUTDOOR UNIT9 INSerTINg BATTerIeS9 INSTALLING THE REMOTE CONTROL HOLDER9 OPERATING METHOD10 UsING THE REMOTE CONTROL10 WIRELESS REMOTE CONTROL11 BAsIC FUNCTIONs11 COOLING YOUR ROOM (COOLINGOPERATION)11 REMOVING HUMIDITY (DEHUMIDIFYINGOPERATION)11 AIRING YOUR ROOM (AIR CIRCULATIONOPERATION)11 ADjUSTING THE FAN SPEED12 ADjUSTING THE AIR FLOW DIRECTION12 SETTING THE TIMER12 - SETTING THE CURRENT TIME12 - TURNING ON THE AIR CONDITIONERAUTOMATICALLY AT A SET TIME12 - TURNING OFF THE AIR CONDITIONERAUTOMATICALLY AT A SET TIME12 - CANCELING THE TIMER SETTING13 SETTING SLEEP MODE 13 ADVANCED FUNCTIONs13 CHANgINg rOOM TeMperATUre qUICKly(jET COOL) (OPTIONAL)14 INDOOR AIR PURIFICATION (AUTO CLEANOPERATION)14 DISplAy SCreeN BrIgHTNeSS14 AUTO OPERATION (ARTIFICIALINTELLIGENCE)15 1 TOUCH SOFT AIR OPERATION (COMFORTVANE OPERATION) (OPTIONAL)15 MOSqUITO AWAY OPERATION16 ACTIVE ENERGY CONTROL OPERATION17 OPERATING THE AIR CONDITIONERWITHOUT THE REMOTE CONTROL17 RESTARTING THE AIR CONDITIONERAUTOMATICALLY17 - DISABlINg AUTO reSTArT18 MAINTENANCE19 CLEANING THE AIR FILTER19 CLEANING ALLERGY FREE FILTER ANDTRIPLE FILTER (OPTIONAL)20 CLEANING 3M FILTER (OPTIONAL)21 TROUBLEsHOOTING21 SELF-DIAGNOSIS FUNCTION21 BeFOre reqUeSTINg SerVICe7BeFOre USe INDOOR UNIT TYPE 1*The feature can be changed according a type of model.Air InletAir filterFront cover3M filter (Optional)Triple filter (Optional)Air outletVertical louverHorizontal vaneMosquito Away deviceDisplay screenSignal Receiver On/off buttonCOMPONENTs BEFORE UsEAir InletAir filterFront cover3M filter (Optional) Triple filter (Optional)Air outletVertical louver Horizontal vaneOperation lampSignal ReceiverOn/off button3M filter (Optional)INDOOR UNIT TYPE 2Mosquito Away device 3M filter (Optional)8BeFOre USeBase plate*The feature can be changed according a type of model.9BeFOre USe INsERTING BATTERIEsINsTALLING THE REMOTE CONTROL HOLDERInsert batteries before using the remote control. The battery type used is AAA (1.5 V).1. Remove the battery cover.Install the holder where there is no direct sun-light to protect the remote control.1. Choose a safe and easily-accessible place.2. Insert the new batteries and make sure that the(+) and (-) terminals of the batteries are installed3. Reattach the battery cover.2. Fix the holder by fastening the 2 screws firmly with a screwdriver.3. Slide the remote control into the holder.Point the remote control towards the signal receiver at the bottom of the air conditioner to operate it.OPERATING METHOD*The feature can be changed according a type of model.10USING THE REMOTE CONTROLUsING THE REMOTE CONTROL You can operate the air conditioner more conveniently with the remote control. Array WIRELEss REMOTECONTROLRev : 01 (01T15)11BASIC FUNCTIONS- is displayed on the display screen.tion operation.- is displayed on the display screen.- The temperature range is 16°C-30°CThis mode removes excess moisture from an envi -ronment with high humidity or in the rainy season, in order to prevent mold. This mode adjusts the room temperature and the fan speed automatically REMOVING HUMIDITY(DEHUMIDIFYING OPERATION)12BASIC FUNCTIONS- The AM/pM icon flickers at the bottom of thedisplay screen.You can use the timer function to save energy and to use the air conditioner more efficiently.sETTING THE TIMERdisplay screen.display screen.icon are displayed on the display screen indicat-ing that the desired time is set.icon are displayed on the display screen indicat-ing that the desired time is set.TURNING ON THE AIR CONDITIONER AUTOMATICALLY AT A sET TIMETURNING OFF THE AIR CONDITIONER1. To adjust the direction of the air flow verti -cally, press change the air flow direction automatically.2. To adjust the direction of the air flow horizon -tally, press change the air flow direction automatically.ADJUsTING THE AIR FLOW DIRECTION13ADVANCED FUNCTIONS Use the sleep mode to turn off the air conditionersETTING sLEEP MODE- is displayed on the display screen.ADVANCEDFUNCTIONsThe air conditioner offers some additional advancedfunctions.- In jet cooling mode, strong air blows out at a temperature of 18°C for 30 minutes.Rev : 01 (01T15)14ADVANCED FUNCTIONSIn the cooling and dehumidifying operations, moisture is generated inside the indoor unit. Use the auto cleaning function to remove suchmoisture.1. Press and hold it for longer than 3 seconds.- is displayed on the display screen.- If you turn off the power, the fan operates for30 minutes and clean the inside of the indoor INDOOR AIR PURIFICATION (AUTO CLEAN OPERATION)In this mode, the fan speed and the tempera-ture adjust automatically , based on the roomAUTO OPERATION(ARTIFICIAL INTELLIGENCE)you can adjust the brightness of the indoor unit display screen.1. press to turn on/off the lamp on the front cover.DIsPLAY sCREEN BRIGHTNEssRev : 01 (01T15)15ADVANCED FUNCTIONS MOsqUITO AWAY OPERATIONMosquito Away is a device to radiate frequencymosquitoes don’t like.1. Press- Mosquito Away leD light up on the display.2. Press again to finish.The comfort vane option conveniently sets the vane to a preset position that deflects the supply air away from blowing directly onto room- or is displayed on the display screen.1 TOUCH sOFT AIR OPERATION (COMFORT VANE OPERATION) (OPTIONAL)16ADVANCED FUNCTIONSThis mode reduces power input from rated power input during the cooling mode.*Active energy control operation : 80% / 60% / operation.3. Press to select - and are displayed on the screen.ACTIVE ENERGY CONTROL OPERATION4. Press one more time to select - and are displayed on the screen.5. Press one more time to select - and are displayed on the screen.Displayed on the Indoor unit(The display on the unit depending on the model)Displayed on the Indoor unit(The display on the unit depending on the model)Version 1Version 1Version 2Version 2cooling operation.17 ADVANCED FUNCTIONSOPERATING THE AIR CONDITIONER WITHOUT THE REMOTE CONTROL REsTARTING THE AIR CONDITIONER AUTOMATICALLYDIsABLING AUTO REsTARTyou can use the on/off button of the indoor unit to operation the air conditioner when the remote control is unavailable. However, the fan speed is set to high.1. Open the front cover.- Lift up both side of the cover slightly.When the air conditioner is turned on again after a power failure, this function restores the previous settings. This function is a factory default setting.1. Open the front cover.- Lift up both side of the cover slightly.2. press the On/Off button and hold it for 6 seconds.*The feature can be changed according a typeof model.*The feature can be changed according a typeof model.2. press the On/Off button.18MAINTENANCEMAINTENANCEClean the product regularly to maintain optimal performance and to prevent possible breakdown.* The feature can be changed according a type of model.TYPE 1TYPE 2Air filter3M filter (Optional)Triple filter (Optional)Air filter 3M filter (Optional) Triple filter (Optional)3M filter (Optional)3M filter (Optional)19MAINTENANCE CLEANING THE AIR FILTERCleaning the Air filter once every 2 weeks or more if necessary.1. Turn off the power and unplug the power cord.2. Open the front cover.- Lift up both sides of the cover slightly.* The feature can be changed according a type of model.3. Hold the knob of the Air filter, lift it up slightly and remove it from the unit.* The feature can be changed according a type of model.4. Clean the filter with a vacuum cleaner or with warm water.- If dirt is difficult to remove, wash the filter in lukewarm water with detergent.5. Dry the filter in the shade.TYPE 1TYPE 2CLEANING ALLERGY FREE FILTERAND TRIPLE FILTER (OPTIONAL)1. Turn off the power and unplug the power cord.2. Open the front cover and remove Air filter (See “Cleaning Air filter").3. Pull out the Allergy free filter or Triple filter.* The feature can be changed according a typeof model.4. Dry the filer in direct sunlight for 2 hours.20MAINTENANCECLEANING 3M FILTER (OPTIONAL) Clean the filter once every 1 months and change the new filter once every 6 months.1. Turn off the power and unplug the power cord.2. Open the front cover and remove Air filter. (See “Cleaning Air filter”).3. Pull out 3M filter.TYPE 1TYPE 2* The feature can be changed according a type of model.4. Use a vacuum cleaner to remove any dirt. Do not wash the filter with water may be makes damage to the filter.21TrOUBleSHOOTINg TROUBLEsHOOTINGThis product has a built-in self-diagnosis function. If an error occurs, the lamp of the indoor unit will blink in 2 second intervals. If this occurs, contact your local dealer or service center.please check the following before you contact the service center. If the problem persists, contact yourlocal service center.sELF-DIAGNOsIs FUNCTIONBEFORE REqUEsTING sERVICE22TrOUBleSHOOTINgN OTERev : 01 (01T15)。
LG 型号 LP0814WNR 的移动空调用户手册说明书
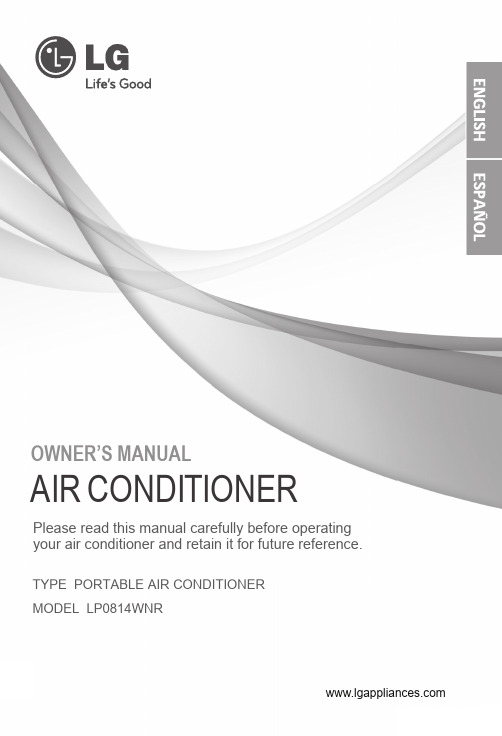
OWNER’S MANUALAIR CONDITIONERPlease read this manual carefully before operating your air conditioner and retain it for future reference.TYPE PORTABLE AIR CONDITIONERMODEL LP0814WNRINTRODUCTIONIMPORTANT SAFETY INSTRUCTIONS Basic Safety Precautions . . . . . . . . . . . . . . . . . . 3 - 6Electrical Safety. . . . . . . . . . . . . . . . . . . . . . . . . . . 6, 7CARE AND CLEANINGBefore Calling for Service TROUBLESHOOTINGProduct Registration Information Water Drainage . . . . . . . . . . . . . . . .. . . . . . . . . . . .20Storing the Air Conditioner WARRANTYWindow Vent Panel and Extensions Installation in Vertical Sliding Windows. . . . . . . 16,17Installation in Casement Style Windows. . . . . . .18,19INSTALLATION INSTRUCTIONSSelection of Installation Location Attaching the Hose and Diffuser PARTS AND FEATURES Key Parts and Components . . . . . . . . . . . . . . . . . . . 8. . . . . . . . . . . 22.. .. . . . . . . Cleaning the Case. . . . . . . . . . . . . . . . . . . . . . . . . . 21Cleaning the Air Filter . . . . . . . . . . . . . . . . . . . . . . . 21HOW TO USE Before Using Your Air Conditioner Control Panel and Remote . . . . . . . . . . . . . . . . 11,12Preparing for Installation . . . . . . . . . . . . . . . . . . . . . 13. . . . . . . . . . . . . . . 14. . . . . . . . . . . . . . . 14. . . . . . . . . . . . 15. . . . . .. . . .. . . . . .23,24. . . . . . . . . . . . .252. . . . . . . . . . . 9, 10IMPORTANT SAFETY INSTRUCTIONS3E n g l i h E n g l i shBASIC SAFETY PRECAUTIONSIMPORTANT SAFETY INSTRUCTIONS4Unplug the unit when notusing it for a long time.IMPORTANT SAFETY INSTRUCTIONS5E n g l i h En g l i s hIMPORTANT SAFETY INSTRUCTIONS 6yy ELECTRICAL SAFETYFailure to follow these instructions can result in death, fire, or electrical shock.•This unit must be properly grounded.•Do not, under any circumstances, cut or remove the ground prong.•If you do not have a properly grounded outlet, or if there is any doubt that the outlet is not properly grounded, a qualified electrician should check the outlet and circuit, and, if necessary, install a properly grounded outlet.•This air conditioner must be plugged into a grounded 60 Hz, 120 VAC outlet protected by a 15 amp time delay fuse or circuit breaker.•This air conditioner must be installed in accordance with national wiring codes.•Do not alter or modify the plug or cord of this air conditioner. If the power cord becomes worn or damaged, the cord should only be replaced by a qualified service technician using genuine replacement parts.•Do not use an extension cord.7E n g l i s h IMPORTANT SAFETY INSTRUCTIONSREAD ALL INSTRUCTIONS BEFORE USEELECTRICAL SAFETYDue to potential safety hazards, the use ofan adapter plug is strongly discouraged.For temporary connections, use only aUL-listed adapter. Ensure that the large slotin the adapter is aligned with the large slotin the outlet.To prevent damage to the adapter’s groundterminal, hold the adapter in place whileplugging in or unplugging the air conditioner.•Attaching the adapter ground terminal tothe wall receptacle cover screw does notground the appliance unless the coverscrew is metal and not insulated, and thewall receptacle is grounded through thehouse wiring.•Frequent connection and disconnection can damage the ground terminal on the adapter. Never use a broken or damagedadapter.SAVE THESE INSTRUCTIONS8PARTS AND FEATURESKEY PARTS AND COMPONENTS 1234SWIVELING CASTERS INFRARED REMOTE CONTROLLER 5POWER SUPPLY CORD HOLDER Swiveling casters allow you to move the air conditioner easily on most floor surfaces.The remote controller allows you to adjust the temperature and operate most functions of the air conditioner from across the room.AIR DISCHARGE HOSE Use the di AND DIFFUSER window installation kit to vent exhaust air outside.CONTROL PANEL AND DISPLAY Easy-to-read digital display shows the set temperature and indicator lights show the operating mode. Simple push buttons make changing settings quick and easy.The direction of air can be controlled wherever you want to cool by adjusting the horizontal louver.86BOTTOM DRAIN PORT Before moving the air conditioner , drain the internal water in the collection tank completely by using bottom drain port.7AIR FILTER Wrap the power supply cord around the holders for your convenience.The horizontal direction is adjusted by moving the lever to the left or right.Touching the horizontal louvers adjusts the air direction up or down.Refer to the Installation Instructions included inthis manual before using the air conditioner.Once the air conditioner has been properlyassembled and installed:Plug the power cord into its own dedicated properly grounded outlet. Do not plug other it could overload the outlet and create ae hazard.Make sure the air conditioner and cord is positioned where it does not create a tripping hazard and will receive adequate ventilation.Do not place it directly next to furniture or objects that could block the vent openings.Make sure that any items that could be blown over or damaged by the airflow from the fan are out of the airflow path.PREPARING FOR OPERATION 12co dedicate o not plugappliances into the same outlet;fir 3•Do not remain in the direct airflow from the air conditioner for extended periods of time.•When used at the same time as stoves,fireplaces,and other combustion devices,make sure there is a sufficient flow of fresh air into the room.Do not use in tightly enclosed spaces with these types of devices.•This air conditioner is intended for household use as a consumer comfort appliance.Do not use it as a precision climate control system,or for purposes such as cooling precision equipment,food,pets,plants,artwork,etc.Such items could be damaged.•Do not bend the hose downward when window installation kit is not applied.It may cause failure of air conditioner or performance deterioration.IMPORTANT:Remove and store packing materials for reuse.Remove any shipping tape before using the air conditioner.If the tape leaves behind any adhesive,rub a small amount of liquid dish soap onto it and wipe with a damp cloth.Do NOT use sharp instruments,alcohol,thinners,or abrasive cleaners to remove adhesive.They could damage the finish.UNPACKING THE AIR CONDI TIONER BEFORE USING YOUR AIR CONDITIONERHOW TO USE 9BEFORE USING YOUR AIR CONDITIONER INSERTING BATTERIES IN THE REMOTEBefore using your remote, install the providedAAA batteries.Press and glide the battery cover on the backof the remote, then you can remove the cover.Insert two new alkaline AAA batteries intothe battery compartment, being sure to notethe proper polarity.Reattach the battery cover.NOTE :Use only alkaline batteries. Do not userechargeable batteries.When replacing batteries, always replace bothbatteries with new batteries. Do not mix oldand new batteries.If the air conditioner will not be used for anextended period of time, remove the batteriesfrom the remote.HOW TO USE10123Iftheliquidfromthebatteriesgetsontoyourskinorclothes,washitwellwithcleanwater.Do not use the remote if the batteries have leaked.• Ifyoueattheliquidfromthebatteries,brushyourteethandseedoctor.The chemicals in batteries could cause burns or other health hazards.POWERPress the POWER button to turn the air conditioner ON or OFF. Any control settings such as Cool, Dry,Fan, and Fan Speed will be retained in memory when the power is off. When turned on after being unplugged, the air conditioner will automatically reset. Any settings will need to be re-entered.MODEPress this button to select the operating mode suchas Cool, Dry (Dehumidify), or Fan for the air conditioner. And you can see the active mode through the indicator lights. The default setting is Cool. Press theFANAdjusts the circulation fan speed between High and Low fan speed. The selected fan speed will beshown through the indicator lights. The function can be used in Cool and Fan modes. When changing fan speeds, there is a brief delay before the fan motor changes speed.Operation of functions is the same when using the remote or the control panel, unless otherwise stated.11NOTE:The remote sensor is located under the LED display.Point the remote anywhere at the sensor. The remote may not work if the sensor is in bright light or if there is not a clear path between the remote and the sensor.TIMER4When the TIMER function is selected, you can set the air conditioner to either automatically turn OFF or turn ON after a delay of up to 24 hours. The display will show 0. Use the buttons to adjust the delay time from 1 to 24 hours, in one hour increments.To set an automatic off delay, press the TIMER button while the air conditioner is running and use the buttons to adjust the delay time.air conditioner will automatically turn off after the set delay.number is flickering.To cancel the Timer function, press the TIMER button and adjust the number to 0 when the number is flickering, then the function will be canceled in a few seconds.Another better method is press the TIMER button and press this button again when the number is still flickering.12HOW TO USEE n g l i s h3Plug in, the LED display will light When you plug the power cord into grounded outlet,LED display will show room temperature.132 Type A Screws1 Type B Screw 1 Type C ScrewThe following components are used for window venting. Not all components are used for every installation.EXHAUST COMPONENTSWindow Installation Kit (includes 1 WindowVent Panel and 3 Extension Panels)Flexible Venting Hose 2 Type A Foam Seals(Adhesive)DiffuserSecurity Bracket 1 Type B Foam Seal(Non-adhesive)2 Type C Foam Seals(Adhesive type-Shorter)E n g l i s hINSTALLATION INSTRUCTIONSPREPARING FOR INSTALLATIONThe air conditioner is heavy! Use two or more people to1 Window Vent PanelPanel A (18’’) 3 Extension PanelsPanel C (17’’)Panel D (17’’)Panel B (9’’)INSTALLATION INSTRUCTIONSSELECTION OF INSTALLATION LOCATIONPlace the unit on a level floor.For best performance,allow at least 20 inof air space on all sides of the unit for good air circulation.12The length of the exhaust hose is specially designed according to the specification of this product. Do not replace or extend it with your own private hose as this could cause malfunction.14ATTACHING THE HOSE AND DIFFUSERGrasp and lift to open the holder. Rotate the holder to open it completely.Insert the vent hose into the by pushing it downward.Place the unit near a window. The hoseand diffuser will be used to connect the airconditioner to the window installation kit to vent exhaust air outside.3INSTALLATION INSTRUCTIONSWINDOW VENT PANEL AND EXTENSIONSThe window installation kit allows you to install the air conditioner in most vertical-sliding windows18"to 50" wide, or casement-style windows from 18"to 50" high.For an 18"window opening, use the window vent panel by itself.For window openings from 19"to 26", use the window vent panel (Panel A) and a extension panel (Panel B).use the window vent panel (Panel A) and a extension panel (Panel C).e h t e s u ,"05 o t " 53 m o rf sg n i n e p o w o d n i w r o F window vent panel and two extension panels (Panel C and Panel D).Fig. “a”Fig. “b”Fig. “c”Fig. “d”3 o t " 72 m o r f s g n i n e p o w o d n i w r o F 4", 1INSTALLATION IN VERTICAL SLIDING WINDOWSINSTALLATION INSTRUC TIONS17E n g l i s hIf you want fix the diffuser more firmly, use the type C screw.First insert to the vent panel fully and then slide for locking.between the glass and the window toprevent air and insects from getting into the room.INSTALLATION IN CASEMENT STYLE WINDOWSNOTE :The window installation kit can be used with casement windows between 18″and 50″tall.INSTALLATION INST RU CTIONS18INSTALLATION IN CASEMENT STYLE WINDOWSINSTALLATION INSTRUCTIONS19E n g l i s hIf you want fix the diffuser more firmly, use the type C screw.First insert to the vent panel fully and then slide for locking.CARE AND CLEANINGEMPTYING THE WATER COLLECTION TANKWhen the internal water collection tank is full,FL will appear in the display and the air conditioner will turn off until the tank is emptied.Unplug the air conditioner,disconnectthe exhaust hose from the back,and move the air conditioner to a suitable drain location or outdoors.You may also place a pan under the drain that will hold up to 3 pints of water.Remove the drain cap and the rubber plug from the drain outlet.Once the water collection tank is drained,reinstall the rubber plug and the drain cap,making sure it is on securely.Place the air conditioner in the desired location, reconnect the exhaust hose, and plug in the air conditioner.When need running in high humidity, or during the DRY mode remove the drain cap and theexhaust from the back of the unit.NOTES:When turned on after being unplugged,the air conditioner will automatically reset toCOOL mode,with a temperature setting of 75°F .2134Using the bottom drain port1Install a drain hose (18mm [11/16"] inside diameter) and place the open end of the hose a suitabledrain location or outdoors.2FL apperars in the displayThe water collection tank is full, drain the tank and restart the air conditioner.Use Drain hose when use the DRY mode20CARE AND CLEANING21CLEANING THE CASEWipe the case with a slightly damp cloth, then wipe dry with a dry cloth or towel.CLEANING THE AIR FILTERThe air filter should be cleaned every two weeks; depending on indoor air quality, morefrequent cleaning may be needed. A dirty air filter will decrease airflow and reduce efficiency.Do not operate the air conditioner withoutthe air filter in place.Pull out the air filter by the handle.1Use a vacuum cleaner to clean the filter. If the filter isheavily soiled, it can be washed in warm water using a mild detergent.Do not use harsh cleaners or very hot water.Do not wash in a dishwasher.Allow the filter to dry completely before reinstalling. Reinsert the filter.234E n g l i s h• To prevent damage to the finish, do not us e gasoline,benzene, thinner, etc., or any abrasive cleansers to clean the air conditioner; they may damage the finish.• Never pour water onto or into the air conditioner. It coul d damage internal components and create a shock and fire hazard.12312344STORING THE AIR CONDITIONERIf the air conditioner will not be used for an extened period of time:To drain the water collection tank completely,leave the bottom drain cap off long enough to allow any residual water to drain out. Once the tank is completely drained and no more water flows out, reinstall the cap.Remove and clean the filter, allow it to dry completely, then reinstall it.Store the air conditioner in a cool, drylocation, away from direct sunlight, extreme temperatures, and excessive dust.Remove the batteries from the remote.Before using the air conditioner again: Make sure the filter and drain cap arein place Check the power cord to make sure it is in good condition, with no cracks or damage. Place new batteries in the remote.Install the air conditioner as described in the Installation Instructions.CARE AND CLEANING22BEFORE CALLING FOR SERVICETROUBLESHOOTINGBefore you call for service, review this list. It may save you time and expense. This list includes common occurrences that are not the result of a defect in workmanship or materials..23E n g l i s hTROUBLESHOOTINGBEFORE CALLING FOR SERVICE24INSTALLATION INSTRUCTIONSLG PORTABLE AIR CONDITIONER LIMITED WARRANTY-USA WHAT THIS WARRANTY COVERS:LG Electronics U.S.A., Inc. (“LG”) warrants your LG Portable Air Conditioner ("product") against defect in materials or workmanship under normal household use, during the warranty period set forth below, LG will, at its option, repair or replace the product. This limited warranty is valid only to the original retail purchaser of the product, is not assignable or transferrable to any subsequent purchaser or user, and applies only when the product is purchased through an LG authorized dealer or distributor and used within the United States (“U.S.”) including U.S. Territories.Note: Replacement products and repair parts may be new or factory-remanufactured and are warranted for the remaining portion of the original unit’s warranty period or ninety (90) days, whichever is longer. Please retain dated receipt or delivery ticket as evidence of the Date of Purchase for proof of warranty (you may be required to submit a copy to LG or authorized representative). WARRANTY PERIOD:1 year from the Date of Purchase: Any internal/ functional Parts and Labor.HOW SERVICE IS HANDLED: In-Home ServiceIn-home service will be provided during the warranty period subject to availability within the United States. In-home service maynot be available in all areas. To receive in-home service, the product must be unobstructed and accessible to service personnel. If during in-home service repair cannot be completed, it may be necessary to remove, repair and return the product. If in-home service is unavailable, LG may elect, at our option, to provide for transportation of our choice to and from a LG authorized service center.THIS LIMITED WARRANTY DOES NOT COVER:1.Service trips to deliver, pick up, or install the product orfor instruction on product use.2.Replacing house fuses or resetting of circuit breakers,correction of house wiring or plumbing, or correction ofproduct installation.3.Damage or failure caused by leaky/ broken/ frozen waterpipes, restricted drain lines, inadequate or interruptedwater supply or inadequate supply of air.4.Damage or failure caused by accidents, pests and vermin,lightning, wind, fire, floods or acts of God.5.Damage or failure resulting from misuse, abuse, improperinstallation, repair or maintenance. Improper repairincludes use of parts not approved or specified by LG.6.Damage or failure caused by unauthorized modification oralteration to the product.7.Damage or failure caused by incorrect electrical current,voltage, or plumbing codes. 8. Cosmetic damage, including scratches, dents, chips orother damage to the finish of the product, unless suchdamage results from defects in materials orworkmanship and is reported to LG within seven (7)calendar days from the date of delivery.9. Damage or missing items to any display, open box,discounted, or refurbished product.10. Product where the original factory serial numbers have been removed, defaced or changed in any way.11. Repairs when product is used in other than normal and usual household use (e.g. rental, commercial use,offices, or recreational facilities) or contrary to theinstructions outlined in the owner’s manual.12.The removal and reinstallation of the Product if it isinstalled in an inaccessible location.THIS WARRANTY IS IN LIEU OF ANY OTHER WARRANTY, EXPRESS OR IMPLIED, INCLUDING AND WITHOUT LIMITATION TO, ANY WARRANTY OF MERCHANTABILITY OR FITNESS FOR A PARTICULAR PURPOSE. TO THE EXTENT ANY IMPLIED WARRANTY IS REQUIRED BY LAW, THIS WARRANTY IS LIMITED IN DURATION TO THE TERM PERIOD EXPRESSED ABOVE. REPAIR OR REPLACEMENT AS PROVIDED UNDER THIS WARRANTY IS THE EXCLUSIVE REMEDY FOR THE CUSTOMER. NEITHER THE MANUFACTURER NOR ITS U.S. DISTRIBUTOR SHALL BE LIABLE FOR ANY INCIDENTAL, CONSEQUENTIAL, INDIRECT, SPECIAL, OR PUNITIVE DAMAGES OF ANY NATURE, INCLUDING AND WITHOUT LIMITATION TO, LOST REVENUES OR PROFITS, OR ANY OTHER DAMAGE, WHETHER BASED IN CONTRACT, TORT, OR OTHERWISE.SOME STATES DO NOT ALLOW THE EXCLUSION OR LIMITATION OF INCIDENTAL OR CONSEQUENTIAL DAMAGES OR LIMITATIONS ON HOW LONG AN IMPLIED WARRANTY LASTS, SO THE ABOVE EXCLUSION OR LIMITATION MAY NOT APPLY TO YOU. THIS WARRANTY GIVES YOU SPECIFIC LEGAL RIGHTS AND YOU MAY ALSO HAVE OTHER RIGHTS THAT VARY FROM STATE TO STATE.HOW TO OBTAIN WARRANTY SERVICE & ADDITIONAL INFORMATION:Call 1-800-243-0000 or visit our website at .Mail to: LG Customer Information Center (ATTN: CIC)201 James Record Road, Huntsville, AL 358241-800-243-0000LG ELECTRONICS,INC.1000 Sylvan Ave.,Englewood Cliffs,NJ 07632。
LG 空调外机用户手册说明书

ESPAÑOL MANUAL DE PROPIETARIOAIRE ACONDICIONADOAntes de operar su producto, lea atentamente este manualde instrucciones y guárdelo para futuras referencias.TIPO :Precauciones de seguridadPrecauciones de seguridad■El significado de los símbolos utilizados en este manual es el siguiente.el trabajo eléctrico no se realiza correctamente, se puede provocar una descarga eléctrica o un incendio.generar fugas de agua, descargas eléctricas o un incen-dio.Ponga siempre el producto a tierra.• Existe riesgo de fuego o descarga eléctrica.Instale siempre un circuito e interruptor dedicados para el producto.• Una instalación o cableado incorrectos pueden ser motivo de fuego o descarga eléctrica.Para volver a instalar un producto ya instalado, con-tacte siempre con el distribuidor o con un centro de servicio autorizado.• Existe riesgo de fuego, descarga eléctrica, explosión o lesiones.No instale, desmonte, ni vuelva a instalar la unidad usted mismo (cliente).• Existe riesgo de fuego, descarga eléctrica, explosión o lesiones.No almacene ni utilice gases o combustibles inflam-ables cerca del aire acondicionado.• Existe riesgo de fuego o averías en el producto.Utilice un interruptor o fusible con una capacidad ade-cuada.• Existe riesgo de fuego o descarga eléctrica.Tenga en cuenta los vientos fuertes o los terremotos e instale la unidad en el lugar especificado.• La instalación incorrecta puede hacer que la unidad se caiga y ocasione daños.No instale el producto sobre un soporte de instalación defectuoso.• Podría causar lesiones, accidentes o daños en el produc-to.Precauciones de seguridadCuando instale o cambie el aire acondicionado de lugar, no utilice un refrigerante diferente al especifica-do para esta unidad.• Si se utiliza un refrigerante diferente o se mezcla aire con el refrigerante original, el ciclo de refrigeración puede no funcionar con normalidad ocasionando daños en la unidad.No intente cambiar los ajustes de los dispositivos de protección.• Si el interruptor de presión, el interruptor térmico u otro dispositivo de protección se cortocircuita o se acciona con fuerza, o si se utilizan piezas diferentes a las especifi-cadas por LGE, se puede provocar un incendio o una explosión.En caso de fugas de gas, ventile la habitación antes de utilizar el sistema de aire acondicionado.• Podría ser motivo de explosión, incendio o quemaduras.Instale correctamente la cubierta del panel y de la caja de control.• Si la cubierta y el panel no se colocan correctamente,puede que entre polvo o agua en la unidad exterior siendo motivo de incendio o descarga eléctrica.Si el aire acondicionado se instala en una habitación pequeña, deberán adoptarse medidas para evitar la concen-tración de refrigerante y que éste exceda los límites de seguridad cuando haya fugas de refrigerante. • Consulte al distribuidor respecto a las medidas adecuadas para evitar que se exceda el límite de seguridad. De haber una fuga de refrigerante tras exceder el límite de seguridad, podría haber daños debido a la falta de oxígeno en la habitación.No utilice el medidor del colector con el refrigerante R22.• Utilice el medidor del colector para presiones elevadas (R410A) además de para el llenado estable de refriger-ante.No mezcle ni utilice el conducto R22 o los dispositivos de instalación utilizados hasta el momento.• La mezcla del aceite de R22 y de R410A puede deteriorar el funcionamiento de la unidad debido a la hidrólisis.No abra la rejilla de entrada del producto durante su funcionamiento. (No toque el filtro electrostático, de incluirse en la unidad).• Existe riesgo de lesiones físicas, descarga eléctrica o averías en el producto.Tenga cuidado y durante la instalación no toque los bordes cortantes.• Podría hacerse daño.Tenga cuidado y asegúrese de que nadie camine por encima de, o pueda caerse sobre, la unidad exterior.• Esto podría causar lesiones personales y daños en el pro-ducto.lesiones.Tenga cuidado y evite la entrada de agua en el produc-to.• Existe el riesgo de fuego, descarga eléctrica o daños en el producto.No toque el interruptor de alimentación con las manos mojadas.• Existe riesgo de fuego, descarga eléctrica, explosión o lesiones.Tenga cuidado y evite que los niños jueguen con el mando a distancia por cable.• Si se cambia con frecuencia del modo de frío a calor se puede deteriorar el funcionamiento de la unidad.Si el producto se moja (inundado o sumergido), con-tacte con un centro de servicio autorizado.• Existe riesgo de fuego o descarga eléctrica.Precauciones de seguridadcionamiento del producto.Mantenga el producto nivelado, incluso durante la instalación.• Para evitar vibraciones o fugas de agua.No instale la unidad donde pueda haber fugas de gas combustible.• Las fugas de gas y su acumulación en torno a la unidad pueden ser motivo de explosión.Utilice cables de alimentación con suficiente capaci-dad de corriente y potencia de servicio.• Los cables demasiado pequeños pueden tener pérdidas,irradiar calor y ocasionar un incendio.No utilice el producto con propósitos especiales,como la conservación de alimentos, obras de arte, etc.Se trata de un sistema de aire acondicionado comer-cial, no de un sistema de refrigeración de precisión. • Existe riesgo de daños o pérdida de la propiedad.Mantenga la unidad fuera del alcance de los niños. El intercambiador de calor es muy cortante. • Puede ocasionar daños, como cortes en la mano. Además, las aletas dañadas pueden degradar el rendimiento de la unidad.Cuando instale la unidad en un hospital, en unaestación de comunicación o en un lugar similar, ofrez-ca suficiente protección frente a las interferencias.• El equipo de inversión, el generador de potencia privado,el equipamiento médico de alta frecuencia o los equipos de comunicación por radio pueden hacer que el sistema de aire acondicionado no funcione con normalidad, llegan-do incluso a no funcionar. Por otro lado, el sistema de aire acondicionado puede afectar a estos equipos generando interferencias que distorsionen los tratamientos médicos o la transferencia de imágenes.No instale el producto en lugares directamente expuestos al viento del mar (salitre).• El producto podría oxidarse. La oxidación, especialmente en las aletas del condensador y del evaporador puede deterio-rar el funcionamiento del producto o desencadenar un funcionamiento ineficaz.vamente el rendimiento del aire acondicionado o dañar sus piezas.un accidente.Fije las conexiones correctamente para que la fuerza exterior del cable no se aplique a los terminales. • Una conexión y/o apriete inadecuados puede ser motivo de incendio, debido al calor generado. Asegúrese de que el área de instalación no se deterio-rará con el tiempo.• Si se derrumbara la base, el aire acondicionado podría caer con ésta, provocando daños materiales, averías en el producto y lesiones personales.Precauciones de seguridadInstale y aísle la manguera de drenaje para asegurarse de que el agua se drena correctamente, según las indica-ciones del manual de instalación.• Una mala conexión puede provocar fugas de agua.Tenga cuidado al transportar el producto.• Si el producto pesa más de 20 kg éste no debería ser manipulado por una sola persona.• Algunos productos utilizan bandas de polipropileno en el embalaje. No utilice ninguna de estas bandas como medio para transportar la unidad. Es peligroso.• No toque las aletas del intercambiador de calor. Si lo hace, se podría cortar en la mano.• Al transportar la unidad exterior, déjela en suspensión sobre la base de la unidad, según las posiciones especificadas.También puede sujetar la unidad exterior por cuatro puntos de manera que no se deslice hacia ninguno de los lados. Deshágase del material de embalaje, procediendo de forma segura.• Los materiales de embalaje, como las puntas o cualquier otra pieza de madera o metal, pueden ser peligrosos y ocasionar daños.• Deshágase de las bolsas de plástico del embalaje evitan-do que los niños las utilicen para jugar. Si los niños juegan con una bolsa de plástico que no hayamos tirado, corren el riesgo de asfixiarse.Conecte la corriente al menos 6 horas antes de iniciar el funcionamiento. (Siempre que la temperatura exteri-or sea inferior a 10°C).• Si inicia el funcionamiento inmediatamente después de conectar el interruptor principal de alimentación, las piezas internas podrían sufrir daños importantes. Mantenga el interruptor de alimentación conectado durante el período operativo.No toque ningún conducto de refrigeración durante o después del funcionamiento.• Podría sufrir daños por quemaduras o congelación. No accione el sistema de aire acondicionado si ha reti-rado los dispositivos de protección.• Las piezas giratorias, calientes o de alto voltaje pueden ocasionar daños.No desconecte directamente el interruptor principal de alimentación después de detener la unidad.• Espere al menos 5 minutos antes de desconectar el interruptor principal de alimentación. De lo contrario, podría haber fugas de agua u otros problemas.El direccionamiento automático debería hacerse además de la conexión de todas las unidades interiores y exteri-ores. Este direccionamiento también debería realizarse en caso de cambiar la PCI de la unidad interior.Utilice un taburete seguro o una escalera firme al realizar tareas de limpieza o mantenimiento del aire acondicionado.• Tenga cuidado y evite las lesiones personales.No introduzca las manos ni otros objetos a través de la entrada o salida de aire mientras el aire acondi-cionado permanezca enchufado.• Existen piezas cortantes y móviles que podrían causar daños personales.Evite los lugares expuestos a la lluvia ya que la unidad de recuperación del calor está pensada para su uso en interiores.• Existe riesgo de daños materiales, averías en el producto o descarga eléctrica.Instale la unidad de recuperación del calor en un lugar donde no afecte el ruido producido al cambiar de modo de funcionamiento.• Si, por ejemplo, se instala en una sala de reunionespodría interferir en el curso de los negocios debido al ruido generado.ESPECIFICACIONES ELÉCTRICAS220 V~ 60 Hz para verificar el consumo de su modelo en específico revise la etiqueta adherida en su productoMODELSARUN40GS2, ARUN50GS2, ARUN60GS2ARUV40GS2, ARUV50GS2, ARUV60GS2ARUN40LS2, ARUN50LS2, ARUN60LS2ARUV40GS2A, ARUV50GS2A, ARUV60GS2AARUN40GS2A, ARUN50GS2A, ARUN60GS2AARUV40LS2A, ARUV50LS2A, ARUV60LS2AARUV40LS2B, ARUV50LS2B, ARUV60LS2BARUN40LS2A, ARUN50LS2A, ARUN60LS2AARUN40LS2B, ARUN50LS2B, ARUN60LS2BSor Juana lnés de la Cruz No. 555Col. San Lorenzo IndustrialTlalnepantla de Baz, Estado de MéxicoC.P. 54033Tel. 5321 1919Teléfono sin costo 01 800 347 1919Página web .mx。
LG LP0711WNR 迷你空调产品说明说明书

Model : LP0711WNRLG Electronics’ strategic direction for products with greener features is to reduce the environmental load at every stage of the product lifecycle. Our efforts to improve the performance of green features are based on designing for better energy efficiency, reductions in raw material usage, improvements in product recyclability and increased use of recycled materials.LG Electronics Environmental Declarations give information on environmental aspects of our products.Document created on : 2013.11.12Product type and model Portable / LP0711WNRDimension (W×H ×D) 13 7/8" x 29 3/4" x 11 13/16"Weight48.5 IbsDimension (W×H×D) 21 3/4" x 33 1/16" x 14"Weight8.8 IbsMode Watts DescriptionCooling820Heating N/ACapacity (BTU/h)7,000Energy Efficiency Ratio (EER)8.5* BTU : British Thermal Units, A higher Btu/hr means the product offers a greater cooling capability.* EER : The higher the EER, the more efficient the room air conditioner.The metric has units: Btu/hr/W, and is calculated as the quotient of the cooling capacity divided by theaverage rate of electrical energy consumed by the air conditioner.This product complies with the below mentioned directives and regulations.EU RoHS DirectiveDirective 2011/65/ECEU REACH RegulationRegulation 1907/2006/ECOtherOzone Depleting Substances as banned in the Montreal Protocol>> Further information on the LG Electronics hazardous substance management system, hazardous substance phase out program and REACH compliance can be found at :/global/sustainability/environment/management-of-hazardous-substances/details-of-hazardous-substances1)Mechanical plastics parts heavier than 25g are labeled with material codes in accordance with ISO 11469 and ISO 1043-1~4 to facilitate plastic recycling.Recycling in the EU: LG Electronics has fulfilled the WEEE directive demands in all EU countries. The following are recycling firms to which LG Electronics has subscribed athttp:// /global/sustainability/environment/take-back-recycling/global-network-europe1)Recycling in the US and Canada: LG Electronics complies with electronic waste regulations in each state in the US and in provinces of Canada in which it does business . In addition, LG Electronics has voluntary collection sites and holds periodic collection events even in states without e-waste laws in place. LG Electronics is also a proud sponsor of Keep America Beautiful’s Great American Cleanup. The following are recycling firms to which LG Electronics has subscribed at/global/sustainability/environment/take-back-recycling/global-network-north-americ a1) Recycling in other regions: LG Electronics also operates take-back and recycling programs for unwanted products in countries where local take-back regulations do not exits. Customers are advised to contact the local LG service center for further information.•The product packaging complies with the below mentioned directives and regulations :EU Packaging Directive 94/62/ECOzone Depleting Substances as banned in the Montreal Protocol•LG Electronics has phased out the using of Polyvinylchloride (PVC) from this product packaging.•Plastic packaging material is marked in accordance with ISO 11469 and ISO 1043-1 to 4 or the relative regulation in Korea, Japan and China.•Electronic devices should not be treated as household wastes; check with your local and state solid waste officials or your LGE service center for availability of recycling in your area.•Please separate the packaging material according to responsible waste disposal practices and sort forsound recycling; contact your local LGE service center or check local regulations for correct disposal ofhousehold electronics.•This product provides the user guide printed with soy ink for reducing emissions of VOCs(Volatile Organic Compounds) and reduction of metal pigments. To download a copy of LP0711WNR user guide, visit/us/suppor t1)•Further Environmental information is presented in LG Electronics’ Sustainability Report (PDF form), available online at :/global/sustainability/communications/sustainability-reports.jsp1)•If you have questions, Please contact *****************Label/Certification Category Name Organization ----1) This link is to a website outside the control of LG Electronics USA (“LGEUS”) which is intended for international viewing.The information contained in this website may not apply in the U.S.You should refer to and only rely on the marketing and informational materials distributed by LGEUS in the United States.This website may also contain “forward-looking statements;” that is, statements related to future events.Forward-looking statements by their nature address matters that are, to different degrees, uncertain.These uncertainties may cause LG’s actual future results to be materially different from those expressed in the forward-looking statements on the website.。
LG 空调产品说明书
P/NO:MFL30265820IMPORTANTE• Por favor, lea este manual del propietario cuidadosamente y a fondo antes de instalar y hacer funcionar su aire acondicionado.• Por favor, conserve el manual del propietario para referencias futuras tras su lectura a fondo.Estimado usuarioGracias por instalar el aire acondicionado (**)Su mejor selección le garantiza un fantástico rendimiento y el nivel de servicio másadecuado para hacer su vida más cómoda y agradable. MODELOSTS-C096EML0 TS-C126EML0 TS-C1868ML0 TS-C2468ML0TS-H096EML0 TS-H126EML0 TS-H1868ML0 TS-H2468ML0TS-C096YDL0 TS-H096YDL0 TS-C096YDA0 TS-H096YDA0 TS-H096EML1TS-C096YMA1TS-C126YMA1TS-C1865MA1TS-C2465MA1 TS-H096YMA1TS-H126YMA1TS-H1865MA1TS TS-C096YTA1TS-C126YTA1TS-C1865TA1TS-C2465TA1-H2465MA1 TS-H126EML1TS-H1868ML1TS-H2468ML1TS-H126TDA0TS-H1865DA0TS-H2465DA0TS-C126TDA0TS-C1865DA0TS-C2465DA0 TS-H126TDL0TS-H1865DL0TS-H2465DL0 TS-C126TDL0TS-C1865DL0TS-C2465DL0 ESPAÑOLLGAire acondicionadoMANUAL DEL PROPIETARIO2Aire acondicionadoPARA SUS ARCHIVOSEscriba el número de modelo y el de serie aquí:Nº de modelo Nº de seriePodrá encontrarlos en una etiqueta en el lateral de cada unidad.Nombre del distribuidor Fecha de compraAdjunte y grape su recibo a esta página en casi de necesitar probar la fecha de compra o por motivos de la garantía.LEA ESTE MANUALDentro encontrará muchas sugerencias útiles sobre el uso y mantenimiento corrector del aire acondicionado. Apenas unos simples cuidados preventivos de su parte pueden ahorrarle mucho tiempo y dinero a lo largo de la vida útil de su aire acondicionado. Encontrará muchas respuestas a los problemas comunes en el gráfico de sugerencias para la solución de averías. Si examina antes su tabla deSugerencias para la solución de averías,puede que no necesite llamar al servicio técnico.PRECAUCIÓN• Entre en contacto con un técnico de servicio autorizado para realizar la reparación o el mantenimiento de esta unidad.• Entre en contacto con el instalador para la instalación de esta unidad.• El aire acondicionado no está diseñado para su uso por niños pequeños o personas discapacitadas sin supervisión.• Los niños pequeños deben estar supervisados para asegurarse que no juegan con el aire acondicionado.• La sustitución del cable de alimentación debe realizarla el personal autorizado utilizando únicamente piezas de repuesto genuinas.A. Medidas de seguridad ...................................3B. Seguridad eléctrica ........................................6Uso temporal de un adaptador........................6Uso temporal de un alargadorde alimentación...............................................6Símbolos utilizados en este manual................6C. Presentación del producto ............................7Unidades interiores.........................................7Luces indicadoras de operación......................8Unidad exterior................................................8D. Instrucciones de funcionamiento .................9Inserción de pilas............................................9Mando a distancia inalámbricoMantenimiento.................................................9Método operativo.............................................9Mando a distancia inalámbrico......................10Modo operativo..............................................11Operación de deshumidificación sana ..........12Funcionamiento automático(Modelo sólo enfriamiento.............................12Operación de cambio automático(Modelo bomba de calor)...............................12Operación del enfriamiento por chorro de aire frío/caliente....................................................13Modo de enfriamiento Ahorro de energía (Opcional)......................................................14Funcionamiento Forzado...............................14Modo de reposo............................................15Ajuste de hora actual.....................................15Ajuste del temporizador.................................15Dirección vertical/horizontal del flujo de aire Control (opcional)..........................................16Modo circulación de aire...............................16Función de reinicio automático......................16E. Mantenimiento y servicioUnidad interior...............................................17Unidad exterior..............................................19Consejos operativos......................................19Función de auto-diagnóstico.........................19Consejos de solución de averías¡Ahorre tiempo y dinero!................................20Solicite servicio inmediatamente en lassiguientes circunstancias (20)Manual del propietario 5Precauciones de seguridadNo utilice el producto con propósitos especiales, como la preservación de alimentos, obras de arte, etc. Este es un aire acondicionado de consumidor, no un sistema de refrigeración de precisión.• Existe el riesgo de daños o pérdidas de propiedad.No bloquee la entrada o salida del flujo de aire.• Podría provocar averías en el producto.Emplee un paño suave para limpiar la unidad. No utilice detergentes fuertes,disolventes, etc.• Existe el riesgo de fuego, descarga eléctrica o daños a las piezas plásticas del producto.No toque las piezas metálicas del producto al desmontar el filtro de aire.• Existe el riesgo de lesiones personales.No pise ni coloque nada sobre el producto. (Unidades de exterior)• Existe el riesgo de lesiones personales y averías en el producto.Inserte siempre el filtro de forma segura tras su limpieza. Limpie el filtro cada dos semanas o más a menudo en caso de necesidad.• Un filtro sucio reducirá la eficacia del producto.No introduzca las manos u otros objetos en la entrada o la salida de aire mientras el producto esté en funcionamiento.• Existen piezas afiladas y móviles que podrían causar lesiones personales.Tenga cuidado al desempaquetar e instalar el producto.• Los bordes afilados podrían causar lesiones.Si el producto sufriera fugas de gas refrigerante durante las labores de reparación, no entre en contacto con el refrigerante.• El gas refrigerante puede causar lesiones por congelación (quemaduras por frío)No incline la unidad durante los procesos de desmontaje o desinstalación. • El agua condensada del interior podría verterse.No realice mezclas distintas a lasespecificadas por el refrigerante utilizado en el sistema.• Si el aire entrara en el sistema de refrigeración, podría causar una presión excesivamente alta, provocando daños en el equipo o lesiones personales.Si el gas refrigerante sufriera fugas durante la instalación, ventile inmediatamente el área.• De lo contrario podría resultar perjudicial para su salud.El desmontaje de la unidad, el tratamiento del aceite refrigerante y de distintas piezas, deberá realizarse conforme a las normativas locales y nacionales.Sustituya las pilas del mando a distancia por otras nuevas del mismo tipo.No mezcle pilas viejas y nuevas o de distintos tipos.• Existe riesgo de incendio o averías en el producto.No recargue ni abra las pilas. No las tire al fuego.• Pueden quemarse o explotar.Si el líquido de las pilas entra en contacto con su piel o ropas, lávese bien con agua limpia. No utilice el mando a distancia si las pilas han experimentado fugas.• Los productos químicos de las pilas podrían causar quemaduras u otros peligros para la salud.No deje el aire acondicionado enfuncionamiento durante mucho tiempo cuando la humedad sea muy alta y haya dejado abierta una puerta o ventana.• La humedad podría condensarse y mojar o dañar el mobiliario.No exponga a los niños, plantas, o su propia piel, directamente a la corriente de aire frío o caliente.• Esto podría resultar perjudicial para su salud.No beba el agua de desagüe del producto.• No es potable y podría causar problemas serios de salud.Utilice un taburete o escalera firme al realizar labores delimpieza, mantenimiento, o reparación del producto desde una cierta altura.• Tenga cuidado y evite las lesiones personales.Modo funcionamientoModo funcionamientoFuncionamiento automático o cambio automáticoESPAÑOLMantenimiento y servicioUnidad interiorAntes de realizar labores de mantenimiento, desconecte la alimentaci ón del sistema, cierre el interruptor y desenchufe el cable de alimentaci ón.Limpie la unidad con un pa ño seco y suave. No utilice lej ía o sustancias abrasivas.No utilice nunca los siguientes elementos:• Agua caliente por encima de los 40°C. Podr ía causar la deformaci ón y/odecoloraci ón de la unidad.• Sustancias vol átiles. Podr ían da ñar la superficie del aire acondicionado.Filtros de aire Los filtros de aire tras el panel/rejilla frontal deber án revisarse y limpiarse una vezcada 2 semanas o m ás a menudo si es necesario. Consulte los diagramasauto-explicativos para cada tipo de modelo a fin de saber c ómo retirar los filtros.Limpie los filtros con una aspiradora o con agua templada y jabonosa. Si la suciedada ún resulta notable, lave el producto con una soluci ón de detergente y aguatemplada. D éjelos secar a la sombra y vuelva a instalar los filtros en su lugar, una vezsecos.Filtros desodorantes Retire los filtros desodorantes tras el filtro de aire y exp óngalos a la luz directa del soldurante 2 horas. A continuaci ón, vuelva a insertar los filtros en su posici ón original.Mantenimiento y servicioLG Electronics Argentina,S.A. P/No.:MFL30265820。
LG PQCPC22型号空调用户手册说明书
P/NO : MFL68006016www QUICK GUIDETYPE : ACPMODEL : PQCPC22A0, PQCPC22A1, PQCPC22N0, PQCPC22N1• Make sure to read the cautions for safety before installation and use, and use it correctly.• It is intended to keep protect the safety of the installer and user and to prevent the property damage, etc.• After reading the user manual, please keep it at a place where user can access any time.• For more information, please read the manual in the CD.ENGLISH• Do not cool excessively indoors. This may be harmful for your health and may consume more electricity.• Block sunlight with blinds or curtains while you are operating the air conditioner.• Keep doors or windows closed tightly while you are operating the air conditioner.• Adjust the direction of the air flow vertically or horizontally to circulate indoor air.• Speed up the fan to cool or warm indoor air quickly, in a short period of time.• Open windows regularly for ventilation as the indoor air quality may deteriorate if the air condi-tioner is used for many hours.• Clean the air filter once every 2 weeks. Dust and impurities collected in the air filter may block the air flow or weaken the cooling / dehumidifying functions.For your recordsStaple your receipt to this page in case you need it to prove the date of purchase or for warranty purposes. Write the model number and the serial number here:Model number :Serial number :You can find them on a label on the side of each unit.Dealer’s name :Date of purchase :Here are some tips that will help you minimize the power consumption when you use the air conditioner. You can use your air conditioner more efficiently by referring to the instructions below:TIPS FOR SAVING ENERGYTIPS FOR SAVING ENERGY23IMPORTANT SAFETY INSTRUCTIONSREAD ALL INSTRUCTIONS BEFORE USING THE APPLIANCE.Always comply with the following precautions to avoid dangerous situations and ensure peak perform-ance of your product WARNINGIt can result in serious injury or death when the directions are ignored CAUTIONIt can result in minor injury or product damage when the directions are ignored WARNING• Installation or repairs made by unqualified persons can result in hazards to you and others.• Installation MUST conform with local building codes or, in the absence of local codes, with the Na-tion Electrical Code NFPA 70/ANSI C1-1003 or current edition and Canadian Electrical Code Part1CSA C.22.1.• The information contained in the manual is intended for use by a qualified service technician famil-iar with safety procedures and equipped with the proper tools and test instruments.• Failure to carefully read and follow all instructions in this manual can result in equipment malfunc-tion, property damage, personal injury and/or death.Installation• Any question about the product installation should be asked to the service center or the professional in-stallation agency.- It may cause fire, electric shock, explosion or injury.• Consult the service center or the professional installation agency about reinstalling the installed product. - It may cause fire, electric shock, explosion or injury.• Please use the standardized parts.- It may cause fire, electric shock, explosion, injury, or failure.• Do not keep or use combustible gas or inflammable material near the product.- IT may cause fire or electric shock.• Do not disassemble, repair or modify the product at random.- It may cause failure of the product.• Do not install where raindrop can fall.- It may cause failure of the product.• Do not install the product at wet place.- It may cause failure of the product.• Provided product and adaptor shall only be installed and used inside a building.- It may cause fire or failure of the product.*Do not install or use outside.• Install stably in a place that can endure the weight of the ACP.- If the installation place is not strong enough, the ACP may fall and damaged.• Make sure to enquire to the specialty store of the product purchase or service center for electric works.- It may cause fire or electric shock.• Do not damage the power cord or bend it by force.- It may cause fire or electric shock.• You need to use a safely insulated power supply which follows IEC61558-2-6 and NEC Class2- If you do not follow, It may cause fire, electric shock, explosion or injury.!IMPORTANT SAFETY INSTRUCTIONS• Do not connetion 220V power to 24V products- If you do not follow, It may cause fire, electric shock, explosion or injury.• Do not connect power cord to the control signal connector. - It may cause fire or explosion.Operation• Do not change or extend the power cord with your own discretion.- It may cause fire or electric shock• Do not place any heating device near the product.- It may cause fire.• Do not use any heating device near the power cord.- It may cause fire or electric shock.• Do not let water flow into the product.- It may cause electric shock or failure.• Do not put heavy weight on the power cord.- It may cause fire or electric shock.• Do not put heavy weight on the product.- It may cause the failure of the product.• If the product is flooded, consult the service center or the professional installation agency.- It may cause fire or electric shock.• Let the children or the old and the weak be controlled by the guardian to use.- It may cause accident or failure.• Do not give any shock to the product.- Any shock to the product may cause failure.• Grab the head of the plug of the power cord to pull when disconnecting the plug, and do not touch the plug with wet hands.- It may cause fire or to deform the product.• Do not use the product in certain environments as follows.- If the product is used in a place with oil, steam, or sulfuric acid gas, performance may be degraded or product may be damaged.• Do not press the switch or button with sharp objects.- It may cause electric shock or failure of the product.• Please check the operation temperature.- If the product is used in an environment with the temperature exceeding the operation boundary, it may cause a severe damage.Please check the usage temperature boundary in the manual. If there is no specified temperature,please use the product within the boundary of 0~40°C.• Do not put a container, etc. with water on the product.- It may cause fire or electric shock.• Do not touch the switch with wet hand.- It may cause electric shock or failure of the product.• Please read installation and user manual for connection with PC or peripheral devices.- It may cause fire or failure of the product.• If a warning window appears on PC, product stops, or it does not work, immediately stop the usage.- It may cause fire or failure of the product. CAUTION Operation• Do not use strong detergent such as solvent, but a soft cloth. - It may cause fire or to deform the product.• Please check the rated capacity of the power. - It may cause fire or failure of the product.!SAFETY PRECAUTIONS4Installin g ACP5Installing ACPInstalling ACPThis chapter describes how to install the ACP to use.In order to use the ACP, the installation should be performed by the following order.STEP 1. Check the cautions during the ACP installationBefore installing the ACP, check the cautions.STEP 2. Study the cable connections diagram of the entire systemStudy the cable connection diagram of the site where the ACP is installed.STEP 3. Set the indoor unit addressSet the address of the ACP not to be overlapped with the connecting indoorunit.STEP 4. Set PI485 and connect cablesSet DIP switch of PI485 correctly, and connect RS-485 communicationcable.STEP 5. Install ACP and connect cablesInstall the ACP, and set network and other settings.STEP 6. Set ACP network addressSet the network address to be able to access the ACP through internet.STEP 7. Set ACP functionsSet language, peak/demand, whether to use schedule, whether to usepower display, etc.STEP 8. Set web GUI access environmentSet the access environment in web GUI, which is the operation program ofthe ACP.STEP 9. Input indoor unit and ventilator informationSet the access environment in web GUI, which is the operation program ofthe ACP.STEP 10. Verify and check ACP installationVerify and check whether the ACP is properly installed.Check points during the ACP installation- The number of PI485 connected to one RS-485 communication lineACP provides 4 RS-485 ports for indoor unit connection. (CH 1~4)Up to 16 PI485 for outdoor unit can be connected to one RS-485 port, and up to 31 PI485 for SINGLE/ERV can be connected.- The number of the indoor units that can be connected to one ACPOne ACP can be connected up to 256 indoor units. To one RS-485 port, all of 256 indoor units,which is the maximum number that can be connected to the ACP, may be connected.But, to improve the communication performance of RS-485, it is recommended to be divided and connected to 4 ports.- RS-485 communication cable connectionThere is a polarity in RS-485 communication cable connection, so be careful not to reverse the connection of the two cables.Do not let the length of RS-485 communication cable exceed total of 1 Km.RS-485 communication cable must be connected with BUS type.- IP address of the ACPIP address of the ACP, address of Gateway, and Net mask must be requested to the person in charge of the network of the corresponding site.Installin g ACP6Setting the indoor unit addressBy considering the entire installation configuration connecting to one ACP, set the address to each indoor unit not to be overlapped. 00~FF in hexadecimal can be set to the indoor unit ad-dress.The following example sets the address to the indoor unit. When the ACP is interconnected with the AC Manager, the ERV can be installed together and controlled.The above figure shows the example that sets the addresses of 30 and 31 to the ERV and con-nects to the ACP.ERVERV7Installin g ACP8Installin g ACPInstalling ACP and connecting cablesAfter setting PI485, the ACP shall be installed in an adequate place, and RS-485 cable shall be connected for the communication with PI485.And, Ethernet cable (LAN cable) shall be connected for the connection with internet or AC Man-ager.To fix the ACP, the following 2 methods may be used.Install in DIN RAIL or fix to the wall considering the environment of the site.LAN cableRS-485 cableInstallin g ACP9Fixing the ACP to the wallACP can be installed by fixing to the wall. To install the ACP in an adequate place, proceed ac-cording to the following explanation. It explains here on how to install the ACP with the example of installing the ACP on the wall.- Decide the space to install the ACP.Before installing the ACP, check if it is the adequate place to connect the ACP with the power, RS-485, and LAN cable.- Fix to the wall using the driver. It can be fixed as in the following figure according to the loca-tion to install.Connecting RS-485 cable to the ACPAfter fixing the ACP in the installation place, RS-485 cable that was connected to PI485 shall be connected to the ACP. To connect RS-485 cable to the ACP, proceed as the following order.- First, among the connectors that can be connected to the ACP, connect the end of RS-485 cable connected to BUS-A of PI485 to Tx part. Next, connect the end of RS-485 cable connect-ed to BUS-B of PI485 to Rx part.- RS-485 cable that was connected to PI485 shall be connected to CH port (RS-485 port) of the ACP.Plug the connector connecting RS-485 cable into one of CH1 ~ CH4 ports.There are 1~6 CH ports, and it must be plugged into one of 1~4 ports for use.Installin g ACPSetting the ACP network addressAfter connecting the ACP to various devices via the cable, the network environment of the ACP should be set by driving the ACP. The following information should be set for using the ACP. - IP address of the ACP- Gateway address- Net maskBefore configuring the ACP environmentThe network environment of the ACP can be set by the LCD and the buttons at the front side of the ACP.▲,▼,◀,▶)buttons.10Installin g ACP11 Turning on the ACPTurn on the ACP to set the network environment of the ACP.When the power switch is turned on, the ACP booting screen is displayed on the LCD as shownat the following figure, and when booting is completed, the initial ACP screen is displayed.12Installin g ACP Class A deviceVer.1.0.1。
LG 壁挂式空调用户手册说明书
wwwMANUEL D’UTILISATIONCLIMATISEURVeuillez lire attentivement ce manuel avant d’utiliservotre appareil, et le conserver pour toute consultation ultérieure.2Climatiseur MuralPOUR VOS DOSSIERSÉcrivez les numéros de modèle et de série ci-après :Nº de modèle Nº de sérieVous les trouverez sur une étiquette dans la partie latérale de chaque unité.Nom du revendeur Date d’achatI Agrafez votre reçu à cette page au cas où vous enauriez besoin pour prouver la date d’achat ou pour vous prévaloir de la garantie.LISEZ CE MANUELVous y trouverez plusieurs conseils utiles sur la manière d'utiliser et d'entretenir correctement votre climatiseur.Quelques petites mesures préventives vous permettront d’épargner beaucoup de temps et d’argent pendant la durée de vie de votre climatiseur.Vous trouverez une série de réponses aux problèmes les plus fréquents dans le tableau du guide de dépannage. Si vous passez en revue notre Guide de dépannage d'abord, il se peut que vous n’ayez pas du tout besoin d’appeler le Service Après-Vente.PRÉCAUTION• Contactez le service technique agréé pour la réparation ou l'entretien de cette unité.• Contactez un technicien autorisé pour l'installation de cette unité.• Ce climatiseur ne doit pas être actionné par des petits enfants ou par des personnes infirmes sans surveillance.• Les petits enfants doivent être surveillés afin devous assurer qu'ils ne jouent pas avec le climatiseur.• Si le cordon d’alimentation doit être remplacé, ce travail ne doit être confié qu'à du personnel autoriséet il ne doit être effectué qu'en utilisant des pièces de rechange authentiques.A. Précautions de sécurité .....................3B. Sécurité électrique ..............................6Utilisation temporaire d'un adaptateur...6Utilisation temporaire d'une rallonge.....6Symboles utilisés dans ce manuel........6C. Description du produit .......................7Unité intérieure......................................7Voyants de fonctionnement ..................8Unité extérieure.....................................8D. Instructions d’utilisation ....................9Comment insérer les piles.....................9Entretien de la télécommande sans fils .....9Méthode de fonctionnement..................9Télécommande sans fils......................10Mode de fonctionnement.....................11Fonctionnement en modedéshumidification saine.......................12Fonctionnement automatique (modèle refroidissement uniquement)...............12Fonctionnement en mode Commutation automatique (modèle pompe à chaleur)..12Mode refroidissement/chauffage rapide..13Fonctionnement du purificateur d’air NEO PLASMA (en option) ...........................13Nettoyage automatique (en option).....13Économie d’énergie en moderefroidissement (en option)..................14Funzionamento Manuale.....................14Mode sommeil.....................................15Réglage de l’heure..............................15Réglage de la minuterie......................15Commande de la direction horizontale/verticale du flux d’air (en option)............................16Mode circulation d’air..........................16Redémarrage automatique..................16E. Entretien et service ...........................17Unité intérieure....................................17Comment remplacer l'image et la photo ....20Unité extérieure...................................21Conseils d’utilisation............................21Fonction d’autodiagnostic....................21Conseils de dépannage! Pourépargner du temps et de l’argent !.......22Contactez immédiatement le servicetechnique dans les situations suivantes : (22)Tournez l'image vers le bas et retournez le napperon puissif protecteur fixéPlacez l'image/photo entreée et le napperon. (taille de la photo/imageRecouvrez le napperon et appuyez avec les mains pour un contact ferme. Poussez les deux maillons de la partie inférieure du panneau l'intérieur et fixez-les. Puis mettez sous tension.450mm450mm522mmSi aucun tapis n’est utilis, la taille recommand la photo/image est de:522mm x 522mmAu moment de la mise sous tension et aprplace le filtre et l’image, le panneau avant n。
LG 空调用户手册说明书
USER MANUAL35IMPORT ANT SAFETY INSTRUCTIONSWARNING: When using electric products, basic cautions should always be followed, including the following.1. Read all safety and operating instructions before using this product2. The product should be powered by a three pin `grounded (or earthed) plug connected to a power socket with a grounded earth outlet.3. All safety and operating instructions should be retained for future reference4. Obey all cautions in the Operating instructions and on the back of the unit5. All operating instructions should be followed6. This product should not be used near water, i.e. a bathtub, sink, swimming pool, wet basement, etc.7. This product should be located so that its position does not interfere with its proper ventilation. It should not be placed flat against a wall or placed in a built up enclosure that will impede the flow of cooling air.8. This product should not be placed near a source of heat such as stove, radiator, or another heat producing amplifier.9. Connect only to a power supply of the type marker on the unit adjacent to the power supply cord.10.Never break off the ground pin on a power supply cord.11.Power supply cords should always be handled carefully. Never walk or place equipment on power supply cords. Periodically check cords for cuts or signs of stress, especially at the plug and the point where the chord exits the unit.12.The power supply cord should be unplugged when the unit is to be unused for long periods of time.13.If this product is to be mounted in an equipment rack, rear support should be provided.14.The user should allow easy access to any mains plug, mains coupler and mains switch used in conjunction with this unit thus making it readily operable.15.Metal parts can be cleaned with a damp cloth. The vinyl covering used on some units can be cleaned with a damp cloth or ammonia based household cleaner if necessary. Disconnect the unit from the power supply before cleaning.16.Care should be taken so that objects do not fall and liquids are not spilled into the unit through any ventilation holes or openings. On no account place drinks on the unit.17. A qualified service technician should check the unit if:18.The user should not attempt to service the equipment. All service work is done by a qualified service technician.19. Exposure to extremely high noise levels may cause a permanent hearing gloss. Individuals vary considerably in susceptibility to noise induced hearing loss, but nearly everyone will lose some hearing if exposed to sufficiently intense noise for a sufficient time. The U.S. Government's Occupational Safety and Health Administration (OSHA) has specified the following permissible noise level exposure. Duration Per Day In Hours Sound Level dBA, slow response8 9069249539721001 ½1021105½110¼ or less 115According to OSHA, any exposure in excess of the above permissible limits could result in some hearing loss. Ear plugs or protectors in the ear canals or over the ears must beworn when operating this amplification system in order to prevent a permanent hearing loss if exposure exceeds the limits set forth above. T o ensure against potentially dangerous exposure to high sound pressure levels it is recommended that all persons exposed to equipment capable of producing high sound pressure levels such as this amplification system be protected by hearing protectors while this unit is in operation.The power cord has been damagedAnything has fallen or spilled into the unit The unit does not appear to operate correctlyThe unit has been dropped or the enclosure damaged.BEFORE SWITCHING ONAfter unpacking your amplifier check that it is factory fitted with a three pin 'grounded' (or earthed) plug. Before plugging into the power supply ensure you are connecting to a grounded earth outlet.If you should wish to change the factory fitted plug yourself, ensure that the wiring convention applicable to the country where the amplifier is to be used is strictly conformed to. A s an example in the United Kingdom the cable colour code for connections are as follows.NOTEThis manual has been written for easy access of information. The front and rear panels are graphically illustrated, with each control and feature numbered. For a description of the function of each control feature, simply check the number with the explanations adjacent to each panel.Y our Laney amplifier has undergone a thorough two stage, pre-delivery inspection, involving actual play testing.When you first receive your Laney guitar amplifier, follow these simple procedures:(i) Ensure that the amplifier is the correct voltage for the country it is to be used in.ii) Connect your instrument with a high quality shielded instrument cable. Y ou have probably spent con siderable money on your amplifier and guitar - don’t use poor quality cable it won’t do your gear justice.Please retain your original carton and packaging so in the unlikely event that some time in the future your amplifier should require servicing you will be able to return it to your dealer securely packed.Care of your Laney amplifier will prolong it's life.....and yours!EARTH OR GROUND - GREEN/YELLOW NEUTRAL - BLUELIVE - BROWNINTRODUCTIONThe LG35R is an open back guitar combo loaded with a 10 inch loudspeaker. It is a retro styled cabinet with the controls on the top face for ease of use. It has a split channel preamp layout, which gives you separate clean and drive level controls through a shared master EQ with bass, mid and treble. It features a headphone socket for private listening; CD/Line in socket should you need to play along to a CD/MP3; an external loudspeaker socket and a headphone socket for some private time without waking the neighbours. Finally it features a built in foot-switchable spring line reverb with level control.An explanation of these features follows on pages 6-8.Dear Player,Thank you very much for purchasing your new Laney product and becoming part of the worldwide Laney family. Each and every Laney unit is designed and built with the utmost attention to care and detail, so I trust yours will give you many years of ney products have a heritage which stretches back to 1967 when I first began building valve amplifiers in my parent’s garage. Since then we have moved on from strength to strength developing an extensive range of guitar, bass, public address and keyboard amplification products along with a list of Laney endorsees that includes some of the world’s most famous and respected musicians. At the same time we believe we have not lost sight of the reason Laney was founded in the first place - a dedication to building great sounding amplification for working musicians. Warm Regards,Lyndon Laney CEOVOLUMEBASS M ID T REBLE R EVERB CD/L INE I P HONESP OWERLG35RD RIVE M ASTER S COOP E XT .S PKR OOTSWITCH O N This socket should be used for connecting your instrument to the amplifier. Only use a good quality screened cable.Controls the overall volume level for the clean channel.When lit, indicates that the drive channel is active.Switch in to apply a scooped mid tone to the drive channel. Also boosts certain key frequencies and ‘thickens’ up the sound Controls the amount of bass or bottom end present on the clean channel.Controls the amount of mid present on the clean channel.ANEL CONTROLSControls the amount of treble present on the clean channel.Don’t want to wake your neighbours? Connect your headphones here. The internal loudspeaker is automatically switched off. When ‘on’ indicates that power is connected to the unit and it is ready to go.(Always switch off and disconnect the power cord when not in use)Main power switch for the unit.Displays the model number, power requirements and serial number of the unit.19QUICK ST ART SETTINGS - Suggestions only, experiment!V OLUME B ASS M ID T REBLE R EVERB CD/L INE I N P HONESP OWER1LG35RD RIVE M ASTER S COOP E XT .S PKRF OOTSWITCH ON OUTCLEAN SETTINGSThe mains lead protudes from the underside of the chassis for connectionto your power source.(Always switch off and unplug the power cord from the wall socket when not in use)Make sure the specified voltage is correct for your country! The correct mains voltage is indicated on the rear panel This drawer contains the main safety fuse for the unit.USE ONLY THE CORRECT SIZE AND RATING OF FUSE AS SPECIFIED ON THE PANEL.The mains fuse ratings are detailed in the specs section at the rear of this manua l191820QUICK START SETTINGS - CONTINUEDV OLUME B ASS M ID T REBLE R EVERB CD/L INE I N P HONESP OWER1LG35RD RIVE M ASTER S COOP E XT .S PKRF OOTSWITCH O N INV OLUME B ASS M ID T REBLE R EVERB CD/L INE I N P HONESP OWER1LG35RD RIVE M ASTER S COOP E XT .S PKRF OOTSWITCH O N VOLUME B ASS M ID T REBLE R EVERB CD/L INE I N P HONESP OWER1LG35RD RIVE M ASTER S COOP E XT .S PKRF OOTSWITCH O N BLUES SETTINGSROCK SETTINGSMET AL SETTINGSININ INGeneral NotesAmplifier connection: In order to avoid damage, it is advisable to establish and follow a pattern for turning on and off yourequipment. With all system parts connected, turn on source equipment, tape decks, cd players, mixers, effects processors etc. BEFORE turning on your guitar amplifier. Many products have large transient surges at turn on and off which can cause damage to your speakers. By turning on your guitar amplifier LAST and making sure its Volume controls are set to minimum any transients from other equipment will not reach your loudspeakers. Wait until all system parts have stabilised; usually a couple of seconds. Similarly when turning off your system always turn down the Volume controls on your guitar amplifier and then turn off its power before turning off other equipment. Cables: never use shielded or microphone cable for any speaker connections as this will not be substantial enough to handle the amplifier load and could cause damage to your amplifier system.Caution: These professional loudspeaker systems are capable of generating very high sound pressure levels. Use care with placement and operation to avoid exposure to excessive levels that can cause permanent hearing damage. (Refer to guidelines on page 2)Servicing: The user should not attempt to service these products. Refer all servicing to qualified service personnel.Supply Voltage~100V , ~120V , ~220V , ~230V , ~240V 50/60Hz Factory Option Mains FusePower Consumption50W Output Power Rating30W Loudspeaker10” Custom Designed Driver TEC - T ube Emulating Circuitry Switchable Scoop preshape (Drive channel)Headphone socket, CD In (10K Input impedance)(Nominal 300mV Input level)External loudpspeaker socket (Drives 4 Ohms minimum impedance)EQPassive Bass, Middle and T reble Input Impedance1MOhm/47pF Size395*448*212(H*W*D)Unit Weight10.25 Kg Packing Weight 11.00 Kg~220V>~240V = T250mA L. ~100V>~120V = T500mA L Features This product conforms to: European EMC directive(2004/108/EC), Low Voltage Directive (72/23/EEC) and CE mark Directive (93/68/EEC)Page 11 /12Laney OPERATING INSTRUCTIONSSPECIFICATIONSIn the interest of continued product development, Laney Reserves the right to amend product specification without prior notification.POWER TO THE MUSICLaney@BLOCK DIAGRAMEXTERNAL LOUDSPEAKER。
- 1、下载文档前请自行甄别文档内容的完整性,平台不提供额外的编辑、内容补充、找答案等附加服务。
- 2、"仅部分预览"的文档,不可在线预览部分如存在完整性等问题,可反馈申请退款(可完整预览的文档不适用该条件!)。
- 3、如文档侵犯您的权益,请联系客服反馈,我们会尽快为您处理(人工客服工作时间:9:00-18:30)。
LG空调产品名录(变频S2挂机)
LG LS-E2515APW LG LS-E3515APW
• 拥有世界顶级设计的 直流变频空调
• 时尚钢化玻璃面板 • 自动清洁 • 健康除湿 • 舒适睡眠模式
• 采用防腐蚀金翅片, 延长寿命,提高热交 换效率
• 超低噪音19dB
LG空调产品名录(定速3级挂机)
LG LS-Y2525DT LG LS-Y3225DT LG LS-T3523DT
LG空调产品名录(定速2级柜机)
• 全新三维出风,360度 循环改善空气质量
• 钢化玻璃盛唐纹印花 工艺
• 大LED触摸显示屏 • 易清洗三色除菌除尘
除味过滤网 • 健康除湿 • 舒适睡眠模式
LG LP-W5081DTR
LG空调产品名录(定速2级柜机)
• 全新双面出风,极速 改善空气质量
• 钢化玻璃荷花印花工 艺
LG 空调产品形象(整体)
• 空调展台分左右摆开 • 一边是挂机,一边是
柜机 • 在挂机下面摆放35定
速机一台 • 挂机按价格从高到低
进行安装展示 • 销售价统一张贴在右
边
LG空调产品形象(挂机)
• 挂机出样标准为三台 一列
• 变频摆上面,定速摆 下面
• 上样机型以35和32为 主
• 可以适当的添加一些 装饰物修饰产品
• 极速制冷功能快速降 温,创造舒适环境
• 斜纹贯流静音风扇, 降噪32%
• 电辅助加热全面提升 制热效果
• 健康除湿
• 舒适睡眠模式
LG空调产品名录(定速2级挂机)
LG LS-B2543DT LG LS-B3543DT
• 三层过滤网强力去尘 除菌
• 极速制冷功能快速降 温,创造舒适环境
• 斜纹贯流静音风扇, 降噪32%
除味过滤网 • 健康除湿 • 舒适睡眠模式
LG空调江西总代理:南昌市瀚森贸易有限公司 诚招全省各级代理
经典PPT模版 欢迎下载
经典PPT模版 欢迎下载
经典PPT模版 欢迎下载
经典PPT模版 欢迎下载
经典PPT模版 欢迎下载
• 大LED触摸显示屏 • 易清洗三色除菌除尘
除味过滤网 • 健康除湿 • 舒适睡眠模式
LG LP-A5012AAW LG LP-A7216AAW
LG空调产品名录(变频S2级柜机)
• 拥有世界顶级设计的 双转子直流变频空调
• 全新三维出风,360度 循环改善空气质量
• 钢化玻璃盛唐纹印花 工艺
• 大LED触摸显示屏 • 易清洗三色除菌除尘
• 电辅助加热全面提升 制热效果
• 健康除湿 • 舒适睡眠模式
LG LP-S5012DT LG LP-S7212DT
LG空调产品名录(定速3级柜机)
• 强效节能,双转子压 缩机设计
• 极速制冷功能快速降 温,创造舒适环境
• 电辅助加热全面提升 制热效果
• 健康除湿 • 舒适睡眠模式
LG LP-A7218DAG