
S-TUNE软件调试说明
→[S-TUNE]图标或者点击桌面
起动软件
a
4
④
2、软件起动 通信设定
①选择通信端口和通信地址
显示“成功打开串口通信” 表示已经建立连接
②按【连接】按钮建立通信
a
5⑤
3、参数
参数取得
参数列表、修改
驱动器操作区
文件操作区 a
参数初始化
6⑥
3、参数 参数比较
①选择比较对象
②执行比较
③返回编辑界面
a
点击初始化编码器数据 和清除报警
显示编码器的报警状态 显示编码器的角度数据 a
24
24
a
25
a
13
⑬
5、自动调整 自动调整前后比较
自动调整后 后
自动调整前
自动调整后,惯量比由初始值 250自动设定为推定的负载惯量 比2176,波形平滑,整定时间 缩短
前
a
14
⑭
6、个别调整举例① 缩短整定时间
第1增益FF补偿 10000,负过冲
第1增益FF补偿 10045,过冲
a
15
⑮
6、个别调整举例① 缩短整定时间
S-TUNE软件说明
①
目录
1、接线
2、通信设定
3、参数
4、波形 5、自动调整 6、个别调整 7、制振调整
8、状态显示
9、辅助功能 a
2
②
1、接线 下图1所示为驱动器与PC的接线图
请使用带对应USB2.0, 带有屏蔽线且有噪声 对策的带有铁氧体磁
芯USB电缆
a
3
③
2、软件起动
顺序打开Windows的[开始]→[程序] →[nidec-sankyo]
调整后
a
调整前
19
⑲
7、制振调整 使用指令平滑化滤波
未使用平滑滤波,停止后位置偏差波形和转矩指令波 形震荡,周期39ms(0.039S)
a
20
7、制振调整 使用指令平滑化滤波
使用平滑滤波1 =6250*0.039=243次,停止后位置偏差波 形和转矩指令波形平滑
平滑次数计算方法: 750W以下=6250*振动周期 1KW以上=5000*振动周期
a
21
7、制振调整 调整前后效果比较
下图视频中上方的滑台没有使用平滑滤波器。 下方的滑台使用了平滑滤波器
a
22
22
8、状测数据 停止自动监测
*发生报警时,请记录报 警内容和报警代码
可选监测项目
固定监测项目 a
23
23
9、辅助功能
点击取得编码器当前的 状态
⑩
4、波形 波形比较-2
分开画面上比较
当前取得的波形
用于比较的波形
a
11
⑪
5、自动调整 简易调整
⑤按【开始】按钮 ①读取驱动器的参数
a
②设定控制增益等级
④手动输入惯量比 时,设定到RAM
③选择是否设定值 更新
⑥按【停止】按钮 ⑦按【写入】按钮将调整参 数写入驱动器 12
⑫
5、自动调整 微调整
可以对右侧的参数进行 设定,一般在波形监测 界面上实施
7⑦
3、参数 基本参数设定
参数设定步骤&必要设定项目
以位置控制模式说明 控制模式:位置控制,脉冲+方向; 输入指令:4096个脉冲电机转1圈 编码器反馈:电机转1圈反馈10000个脉冲
NO. 项目
初始值
设定值 说明
2.0 控制模式
0
3.0 指令模式选择
1
32.0 输入脉冲序列输入模式
0
0 [基本设定]控制模式选择:位置控 制模式
1000 8000
2500
32678 a
分子:编码器每圈输出脉冲数/4 分母:编码器分辨率/4
8
⑧
4、波形 波形取得
①选择状态项目
②记录条件设定
可以对此处的参数 进行设定
③记录开始 a
④保存波形数据
9
⑨
4、波形
波形比较-1
在一个画面上比较
当前波形
比较波形
①选择波形比较
②打开要比较的波形文件
a
10
1 [基本设定]指令模式选择:脉冲序 列指令
0 脉冲+方向
34.0 位置指令分倍频(分子) 1000 32678 分子:编码器分辨率/4
分母:电机每转1圈对应的指令脉
36.0 位置指令分倍频(分母) 1000 1024
冲数/4
276.0 278.0
编码器输出分倍频(分 子)
编码器输出分倍频(分 母)
第1增益FF补偿 10031,调整完成
a
16
⑯
6、个别调整举例② 减小位置偏差
积分增益400,整 定时位置偏差大
a
17
6、个别调整举例② 减小位置偏差
增大积分增益,整 定时位置偏减小
a
18
⑱
6、个别调整举例③ 改善轨迹精度
调整前
调整前,动作中位 置偏差大,轨迹精 度误差大
调整后
增大第2增益FF补偿, 动作中位置偏差减小, 轨迹精度提高
Tune软件操作说明-LTQ Series

LTQ Tune点击桌面上的图标,进入L TQ Tune的主界面or :仪器On or Standby 切换键:Tune键,调谐某m/z的离子或TIC强度:仪器校正:记录谱图:定义各扫描参数:打开一个Tune文件:保存当前的参数为Tune文件:显示曲线:Profile和Centroid 图的切换:正负离子检测模式的切换:图谱平均:LC的设置(U 3000由DC MSLink设置,Accela液相可由此键设置泵的参数):注射泵的开启及参数设置:质谱仪上六通阀的切换:质谱仪硬件各参数设置(注意:做实验时只需要修改离子源区参数,其他参数可不用修改)采集样品谱图1.连接管路,注射器吸取样品溶液后,将注射器安装至注射泵;2.打开扫描:点击,使该键切换为,仪器开始扫描;3.打开注射泵,点击,出现右图界面:选择“On”“Flow Rate”中键入流速在“Type”中选择注射器的类型“Volume”中下拉选择注射器的容量点击“OK”4.点击,设置需要采集的离子模式;5.点击,设置离子源区各参数,点击“Apply”,如下图:Heater Temp:加热温度Sheath Gas Flow Rate:鞘气流速Aux Gas Flow Rate:辅助气流速Sweep Gas Flow Rate:吹扫气流速I Spray Voltage:喷雾电压Capillary Temp:离子传输管的温度Capillary Voltage:离子传输管的电压Tube Lens:Tube Lens电压6.定义扫描模式,点击,进入如下界面:全扫描(Full Scan):Mass Range:选择质量范围,选NormalScan Rate:选择扫描速率,选NormalScan Type:选择扫描类型,选Full设置扫描范围:First Mass:扫描起始质荷比Last Mass:扫描末端质荷比设置好后点击“Apply”,应用设置的参数点击“OK”,关闭此设置参数窗口选择离子扫描(SIM):Mass Range:选择质量范围,选NormalScan Rate:选择扫描速率,选NormalScan Type:选择扫描类型,选SIM设置扫描范围:Center Mass:中心质荷比Width:扫描窗口宽度设置好后点击“Apply”,应用设置的参数点击“OK”,关闭此设置参数窗口多级质谱扫描(MS n):Mass Range:选择质量范围,选NormalScan Rate:选择扫描速率,选NormalScan Type:选择扫描类型,选Full做二级质谱(MS2),在n为2这一行中,“Parent Mass”中输入母离子的质荷比,“Act.Type”中选择碰撞模式CID,“Iso. Width”中输入提取母离子的隔离宽度,“Normalized Collision Energy”中输入碰撞能量;做三级质谱(MS3),在n为3这一行中,“Parent Mass”中输入三级母离子(二级子离子)的质荷比,“Act. Type”中选择碰撞模式CID,“Iso. Width”中输入提取三级母离子的隔离宽度,“Normalized Collision Energy”中输入碰撞能量;若还要做更多级质谱,以此类推。
钢琴调律软件Tunelab4.0forPC使用介绍

钢琴调律软件Tunelab4.0forPC使⽤介绍⾃⼰动⼿调律!调律软件Tunelab使⽤介绍钢琴⾃产⽣之初就注定了它的不完美,律制,⾳准等等,但它仍然是不折不扣的乐器之王。
喜欢钢琴的朋友,特别是对于钢琴调律稍有了解的朋友,会经常对⾃⼰钢琴的声⾳不满意——刚调过时间不长,⼜觉得有⼀点稍稍不准了。
于是想⾃⼰动⼿调⼀下,但是⼜没有经过钢琴调律的专业培训,会不会出什么问题呢?我的看法,只要有动⼿能⼒,再加上好的乐感,使⽤Tunelab软件来辅助,没有经验的朋友⾃⼰尝试调⼀下钢琴还是可⾏的。
(当然,如果出现什么意外,我可不负责任的)。
这个软件本⼈已使⽤过相当⼀段时间,不错。
英⽂好的朋友,查看⼀下软件的帮助⽂件,应该基本可掌握基本的操作⽅法. 英⽂不好的朋友,可参考下⾯的汉英版(译者⽔平有限,基本能够表述原⽂的含义)Using this tutorial 如何使⽤此指南This tutorial is meant to be used as a step‐by‐step guide to certain operations in TuneLab Pro. 本指南将⼀步⼀步的指导您在TuneLab Pro中的操作. Many of these operations involve the keyboard.有相当⼀部分操作涉及到键盘的使⽤。
However, the keys that you press when this tutorial is displayed do not always go to TuneLab Pro.然⽽,当此帮助页⾯显⽰时,您按下键盘键并不总是能够回到TuneLab Pro操作界⾯。
In fact, every time you call this tutorial and every time you click in it, the tutorial acquires the "focus" of the keyboard.实际上,每当您查看本指南或者在本指南显⽰的区域内操作⿏标时,焦点总是被当前的指南页⾯获得的。
PreSonus ATOM SQ 控制器使用指南说明书
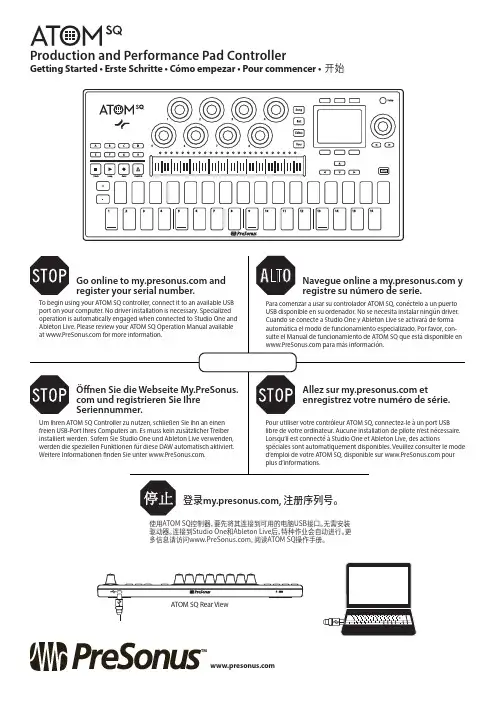
Production and Performance Pad ControllerGetting Started • Erste Schritte • Cómo empezar • Pour commencer • 开始登录, 注册序列号。
要先将其连接到可用的电脑USB接口。
无需安装驱动器。
连接到Studio One和Ableton Live后,特种作业会自动进行。
更多信息请访问, 阅读ATOM SQ操作手册。
™Screen Controls • Controles de la pantalla • Screen-Bedienelemente • Commandes d‘écran • 屏幕控制。
Use the encoder to change parameter values. Press the button above or below aparameter to change the value. Use the left and right arrow buttons to go to the next orprevious screen for any of the menu options.Utilice el codificador para cambiar los valores de los parámetros. Pulse el botón encimao debajo de un parámetro para cambiar el valor. Utilice los botones de flecha izquierda yderecha para ir a la pantalla siguiente o anterior para cualquiera de las opciones de menúÄndern Sie Parameter-Werte mit dem Endlosregler. Drücken Sie die Taste über oder untereinem Parameter, um den Wert zu ändern. Mit den rechten und linken Pfeiltasten blätternSie in den Menüoptionen vor- und zurück.Utilisez l’encodeur pour changer les valeurs de paramètre. Pressez la touche au-dessus ouau-dessous d’un paramètre pour changer de valeur. Utilisez les touches flèches gauche etdroite pour passer à l’écran précédent ou suivant de n’importe quelle option du menu使用编码器更改参数。
Tune 软件操作说明-TSQ Quantum series

1 打开 Tune 软件双击桌面上的图标,打开 Tune 软件;2 Tune 软件界面整体介绍功能快捷图标介绍如下:(1) 开扫描 点击 仪器开始扫描(2) 化合物优化图标 点击 进入化合物优化界面(3) 扫描参数设置图标 点击 设置扫描参数,分为 Full scan、SIM、SRM 三种扫描方式;Full Scan Q1MS 参数设置如下图:Entry Mode 可选择 FM/LM(分别输入扫描范围起止的质荷比)或者 Center Mass(输入 center mass 和 scan width 一般用 20,表示以 center mass 为中心正负 10amu 的扫描范 围) b) Scan Time:扫描时间输入 1s c) Peak Width Q1:选择 0.7 d) Data Processing:选择 Average,输入 10 Full Scan Q3MS 参数设置如下图(具体设置同 Full Scan Q1MS) : a)MS/MS Parent 参数设置如下图:a) Entry Mode 可选择 FM/LM(分别输入扫描范围起止的质荷比)或者 Center Mass(输入 center mass 和 scan width 一般用 20, 表示以 center mass 为中心正负 10amu 的扫描范围) b) Scan Time:扫描时间输入 1 或 0.5s c) Peak Width Q1:选择 0.7 d) Charge State:输入 1e) Product Mass 输入要检测的子离子碎片的质荷比 f) Collision Energy:输入碰撞能量,一般用 25~35 g) Q2 CID Gas:输入 1.5 MS/MS Product 参数设置如下图:a) Entry Mode 可选择 FM/LM(分别输入扫描范围起止的质荷比)或者 Center Mass(输入 center mass 和 scan width 一般用 20, 表示以 center mass 为中心正负 10amu 的扫描范围) b) Scan Time:扫描时间输入 1 或 0.5s c) Peak Width Q1:选择 0.7 d) Charge State/Product Ion:输入 1 e) Parent Mass 输入要检测的母离子的质荷比 f) Collision Energy:输入碰撞能量,一般用 25~35 g) Q2 CID Gas:输入 1.5 h) Energy Ramp:输入 10~15 MS/MS Neutral Loss 参数设置如下图:a) Entry Mode 可选择 FM/LM(分别输入扫描范围起止的质荷比)或者 Center Mass(输入 center mass 和 scan width 一般用 20, 表示以 center mass 为中心正负 10amu 的扫描范围) b) Scan Time:扫描时间输入 1 或 0.5s c) Peak Width Q1:选择 0.7 d) Charge State/Product Ion:输入 1e) Neutral Loss Mass 输入中性丢失的分子量 f) Collision Energy:输入碰撞能量,一般用 25~35 g) Q2 CID Gas:输入 1.5 SIM 参数设置如下图:a) b) c) d) e)Scan Width:输入 2.0 Scan Time:扫描时间输入 1 或 0.5s Peak Width Q1:选择 0.7 Use Tuned Tube Lens Value:打钩 Mass:输入要检测的离子的质荷比SRM 参数设置如下图:a) b) c) d)Scan Width:输入 0.01 Scan Time:扫描时间输入 0.1s Peak Width Q1:选择 0.7 在表格中输入母离子质荷比、子离子质荷比、碰撞能量和 tube lens(4) 质量轴校正图标 (5) 仪器参数诊断图标 (6) TIC 图扫描图标 (7) TIC 图暂停扫描图标 (8) 谱图平均及噪音过滤图标 ,具体设置如下图:average 是指的谱图平均,Chrom Filter 指的是过滤电噪音,这两个参数可都用 10 (9) 谱图采集方式设置 Centriod (10) 正负扫描模式设置 (11) 注射泵开关 点击 打开注射泵,点击菜单栏 Setup 中的 Syringe Pump & Sample Loop 进入流速更改界 分为 Profile 和 Centriod 两种,一般一级用 Profile,二级用面,Flow Rate:5ul/min;Syringe Type:Hamliton;Volume:500ul。
RSTune快速入门

RSTune快速入门1.RSTune软件安装完成后,首先要在RSLinx里配置PLC的OPC服务,需要在线配置,具体如下:在这里是以我的模拟器为例,实际使用时选择你的CPU,鼠标右键—》选择图中所示项(配置新的DDE/OPC 主题),弹出如下对话框:左手边回自动生成新建立的话题的名称,可以自己更改,退出时,单击“是”按钮,确认并更新话题的数据,以后的数据传递自动进行。
2.完成RSLinx的配置以后,启动RSTune软件,单击“New loop”按钮,新建一个PID回路的配置,列表框中以前就有的配置不用管,在上图中,随便取一个名字保存配置,弹出下面的画面:解释一下画面的内容:z Processor Type:CPU类型,选择 ControlLogix 项;z在右下角的ControlLogix Loop 中,把复选框勾上,表示要指定我们的PID模块在整个控制程序中的位置,注意看左手边的画面背景,我的PID模块在MY_PID下面的PID_TEST里面,所以Program file 就填MY_PID,Tag Name是PID模块的名称,写上你想调整的PID模块的名称,在我的程序中是LC1;z再看中间的RSLinx Communications项:Topic里面的就是前面RSLinx通讯配置时建立的OPC通讯主题名称,下面一行的Sample Interval表示RSTune软件和PLC之间交换数据的速度,这里设置为没0.1秒交换一次数据z上面的配置完成以后,单击中间的“Test”按钮,测试一下通讯是否正常,如果正常,则弹出如下对话框:z通讯正常以后,关闭测试画面及设置画面,在下图中,双击刚才的配置,开始参数整定:下面是RSTune的主画面:z左边白色及黄色的是过程值PV及给定值SP,绿色的是PID控制模块的输出CO,中间黑色的部分是PV、SP、CO曲线记录区;z左边PV、SP棒图下面的“AUTO”表示PID模块处于自动模式,再下面的是PID参数,左边的是已经设置的,右边的是重新计算出来的,因为还没有进行整定,所以显示“N/A”;z单击画面中的“Auto Tune….(自动整定)”按钮,接下来有三个步骤:z可以通过记录区上面的“Span”按钮调节记录区显示值的范围,上面例子中的SP、PV值的显示范围为0-25,CO值的范围:0-100,如果PV值超过25,就看不见了,可以根据你的需要调整;z下一步中,PID整定软件要重新调整给定值SP,你需要根据工艺情况选择升降的幅度,系统默认的是增加7%,如果你的系统不可能有如此大的变动,例如:你要控制的工艺过程变量为浓度,并且浓度仪检测的浓度在3%-7%之间,目前的浓度为4%,则SP升高1。
trustsystem麦克风频响测试校准说明
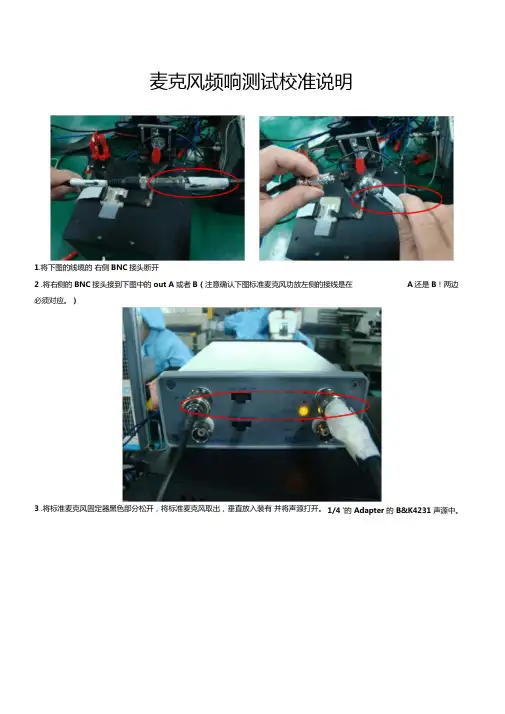
麦克风频响测试校准说明1.将下图的线缆的右侧BNC接头断开2 .将右侧的BNC接头接到下图中的out A或者B(注意确认下图标准麦克风功放左侧的接线是在A还是B!两边必须对应。
)3 .将标准麦克风固定器黑色部分松开,将标准麦克风取出,垂直放入装有并将声源打开。
1/4 '的Adapter 的B&K4231 声源中。
4 .用鼠标双击下图软件左侧中的Microphone Cal.出现下图右侧的对话框。
点击下面的Calibration按钮,5 .等待上图中跳动的数值相对稳定后(一般在-29.1~-28.5dB范围),点击下图中的Stop按钮。
再点击Save保存。
最后退出当前对话框。
6 •将标准麦克风从声源里拿出来,重新放入麦克风固定器中,并拧紧固定。
7 .接着双击击软件左侧的Mouth Cal按钮,出现下图的对话框8 .点击Setup按钮,弹出一个新的对话框,9 .直接点击Save,然后退出EXIT。
10 .点击下图中的Calibration按钮开始校准夹具。
等到左侧的一个显示框中跳动的数值稳定在94左右,点击EQ 按钮12 •连续校准,直到曲线几乎成一直线,点击Save按钮保存。
点击下图中的Exit按钮退出。
13 .点击File下拉菜单-Save选项。
点击Start按钮测试一次来验证校准是否有效!14.点击下图的Y轴的坐标刻度,将最大值和最小值分别改为5和-5 (可以改成其他数据,两者相差大于10), 如果能看到下图类似的一条直线,说明校准有效!16.将产品按照WI和夹具连接好。
开始测试。
下图分别为Pass和Fail的测试界面。
17•维修注意点:(重点检查夹具上连接和泡棉是否压坏)17. 1如果出现和Pass界面类似的曲线,只是某一段的曲线超出了图中的上下限。
说明产品有正常工作。
17. 1 . 1请检查下图中的位置泡棉是否完好,是否不平整。
有损坏的请更换!17. 1 . 2请检查转接板是否有损坏。
汇川伺服性能调试指导
工业自动化 | 电梯 | 新能源汽车 | 工业机器人 | 轨道 交通
第二部分
汇川伺服调试流程--惯量辨识
不同应用场合的推荐惯量比:
(1) 在要求高响应的场合,惯量比要控制在5倍以下,最高不要超过10倍, 一般来讲: 皮带轮或齿轮齿条: 10倍以内(连接刚性不太高,精度要求不太高) 丝杠或联轴器直连: 5倍以内(连接刚性较好,精度要求较高) 定位精度或响应要求高的情况: 2倍以内
PB是丝杆导程
— 8—
工业自动化 | 电梯 | 新能源汽车 | 工业机器人 | 轨道 交通
第二部分
汇川伺服调试流程--惯量辨识
可以让伺服驱动器 通过快速的加减速运动自动辨识出惯量, 方便且准确。注意:惯量辨识无法静态 实现。惯量辨识基本原理:
整体转动惯量J
=
加速转矩T 角加速度
离线惯量辨识(手动惯量辨识)
惯量”,功能码是H0815。
如果电机轴上不连接任何负载, H0815应设为0.00 如果电机轴上连接一个同样的电机,H0815应设为1.00
— 7—
工业自动化 | 电梯 | 新能源汽车 | 工业机器人 | 轨道 交通
第二部分
汇川伺服调试流程--惯量辨识
如何计算出惯量:
可以根据机械的类型和参数手工计算,优点是可以预估, 便于选型;缺点是需要了解很多机械参数,计算复杂。
离线惯量辨识方式1:即使用H0d02进入离线 惯量辨识模式。注意: 1、电机有正反各1圈以上的可运动行程; 2、实际负载惯量比必须小于120倍以下;
3、电机处于不使能状态;
4、机械刚性较高或传动机构背隙较小。
— 9—
开始 伺服使能OFF 进入H0D-02
长按“UP/DOWN” 键
Presonus QMix-UC 软件参考手册说明书
QMix-UC Software Reference Manual ®1 In — 1n troductio1.1 About This Manual — 12 QMix-UC — 32.1 Launching QMix-UC — 32.2 Aux Mix Page — 42.2.1Channel Grouping — 52.3 Wheel of Me — 62.4 Settings Page — 83 Setting Device Permissions(StudioLive AI Console Mixers) — 91QMix-UC for iOS (iPhone and iPod touch) and Android™ puts eachmusician’s monitor (aux) mix in their own hands. With QMix-UC, you canadjust each StudioLive channel’s aux-send level to taste and can createup to four groups of channels that you simultaneously control with theamazing Wheel of Me. All you need is a wireless router and a mobile iOS orAndroid device, and you’re ready to take control of your own destiny.Note: Please visit for a list of supported Android devices.1.1 About This ManualWe suggest that you use this manual to familiarize yourself withQMix-UC before trying to use it to control your mixer. This guideassumes that you have followed the networking procedures outlinedin the Networking for StudioLive Remote Control Guide.Throughout this manual you will find Power User Tips. Thesetips provide useful hints on how to best use QMix-UC and takeadvantage of unique workflow functions and features.For the most part, StudioLive Series III and AI-series console and rackmixers behave identically. Because of fundamental architecturaldifferences, some functionality is not available in every series and styleof mixer. When these differences occur, it will be noted as follows:•StudioLive Series III console mixers: StudioLive 64S, StudioLive 32S, StudioLive32SX, StudioLive 32SC, StudioLive 32, StudioLive 24, and StudioLive 16•StudioLive Series III rack mixers: StudioLive 16R,StudioLive 24R, and StudioLive 32R•StudioLive AI-Series mixers: 16.4.2AI, 24.4.2AI, 32.4.2AI,RM16AI, RM32AI, RML16AI, and RML32AI•StudioLive AI-Series console mixers: 16.4.2AI, 24.4.2AI, and 32.4.2AI•StudioLive AI-Series RM/RML mixers: RM16AI, RM32AI, RML16AI, and RML32AIThis guide explains the functions and basic routing features of the audio interfaceonboard your StudioLive mixer. The following companion guides are also available: Hardware Guides:•StudioLive Series III Console Mixer Owner’s Manual. Use this referenceguide to understand all the hardware functions on your StudioLiveSeries III console mixer (StudioLive 64S, StudioLive 32S, StudioLive32SX, StudioLive 32SC, StudioLive 32, StudioLive 24, StudioLive 16).•StudioLive Series III Rackmount Mixer Owner’s Manual. Use this referenceguide to understand all the hardware functions on your StudioLive Series IIIrackmount mixer (StudioLive 32R, StudioLive 24R, StudioLive 16R).•StudioLive AI-Series Console Mixer Owner’s Manual. Use this referenceguide to understand all the hardware functions on your StudioLive AI-Seriesconsole mixer (StudioLive 32.4.2AI, StudioLive 24.4.2AI, StudioLive 16.4.2AI).•StudioLive AI-Series Rackmount Mixer Owner’s Manual. Use this referenceguide to understand all the hardware functions on your StudioLive AI-Series rackmount mixer (StudioLive RM/RML32, StudioLive RM/RML16). Software Guides:•Capture 3 Reference Manual. Included with StudioLive mixersis Capture, a digital-audio multitrack-recording applicationdesigned to make recording quick and easy.•Networking for StudioLive Remote Control. This guide willassist you in creating a LAN network to remote control yourStudioLive from a computer, tablet, or mobile device.•Studio One Integration Reference Manual. Studio One Artistis included with every StudioLive mixer. In addition to being apowerful DAW, Studio One provides unique routing and integrationfeatures. This manual will help you get the most from your StudioLivemixer when used with Studio One or Studio One Artist.•UC Surface Reference Manual. This guide describes the features andfunctions of UC Surface with every StudioLive mixer model. UC Surfacecan be used to remotely control ever function on your StudioLivemixer or specific functions, depending on the set permissions, orto turn your tablet into additional screens for your mixer.•Using Your StudioLive as an Audio Interface with UniversalControl Reference Guide. This guide describes the features andfunctions Universal Control as well as how to use your StudioLivemixer as an audio interface with your favorite DAW application.Additional Resources:•StudioLive Series III AVB Networking Guide. This manual covers advancedAVB audio networking configuration for the StudioLive Series III mixers.•StudioLive Series III Stage box Mode Addendum. The StudioLiveSeries III rackmount mixers (StudioLive 32R, StudioLive 24R, StudioLive16R) can be used as advanced stageboxes for StudioLive Series IIIconsole mixers (StudioLive 64S, StudioLive 32S, StudioLive 32SX,StudioLive 32SC, StudioLive 32, StudioLive 24, StudioLive 16).•StudioLive Series III Studio One DAW Control Addendum. StudioLiveSeries III console mixers (StudioLive 64S, StudioLive 32S, StudioLive32SX, StudioLive 32SC, StudioLive 32, StudioLive 24, StudioLive16) can be used to control Studio One and Studio One Artist.2Mobile iOS and Android devices offer two viewing options: Landscape and Portrait.These two orientations open different windows. When you hold your mobile devicein Landscape view, the Aux Mix window will open. When you hold your mobiledevice in Portrait view, the Wheel of Me and Group Masters windows will be visible.2.1 Launching QMix-UCTo launch QMix-UC, tap on the QMix-UC icon on your mobile device. When youlaunch QMix-UC, you will be taken to the Start page.On the Start page, you will see a list of every StudioLive Series III andAI-series mixer on the network. You can also view QMix-UC usingDemo Mixer simulations. These offline simulations enable you topractice your finger control away from your StudioLive.Note: Classic StudioLive mixers (16.0.2, 16.4.2, 24.4.2, and 32.4.2) provide monitor mixcontrol with the free QMix application. This mixers are not compatible with QMix-UC.To connect to your mixer, tap on the StudioLive device icon to openQMix-UC and control the mixer from your mobile device.Tapping the Reconnect button will automatically scan the network for the lastStudioLive mixer to which QMix-UC was connected.2.2 Aux Mix PageThe Aux Mix page shows the send level for each channel on each aux towhich your device has access. It corresponds directly to the aux mixes on yourStudioLive and has been streamlined to show only the send levels. To openthe Aux Mix page, simply hold your mobile device in Landscape view:1. Home. Returns to the Start page and the available device list.2. Channel Send Levels. Sets the Channel Send Levels to theSelected Aux Bus. To adjust the send levels for any channel, tapanywhere in the channel’s level control and move your finger upor down while maintaining constant contact with the screen.Power User Tip: The aux sends support off-axis movement. Once you have toucheda send-level control to select it, you can slide your finger anywhere in the screen andmake an up/down movement to control the send level.3. Settings. Opens the Settings menu. (See Section 2.4.)4. Lock Orientation. Enabling the Lock Orientation button will lockyour mobile device in Landscape view. While this button is enabled,you cannot open the Wheel of Me. Locking the view will also removethe Start page button. Until this option is disabled, QMix-UC willlaunch in this view when connected to the current mixer.Power User Tip: If QMix-UC doesn’t change pages when you change your mobiledevice’s orientation, make sure that Lock Orientation is not enabled.5. Channel Pan. When a stereo mix is selected, you find pan modules aboveeach channel to control the channel’s relative pan position in the mix.6. Aux Mix Select. Displays channel send levels to Aux bus. Tonavigate right or left, touch anywhere in the Aux tabs and swipeyour finger to the left or right. Swiping left scrolls the screento the left. Swiping right scrolls the screen to the right.Note: Your device’s access to aux mixes is determined from your StudioLive mixer. Ifyou only have access to one aux mix, verify your device’s permissions in UC Surfaceor in the System menu on your mixer.7. Channel Meter. Displays the channel’s current signal level. Usethis meter to determine if a particular channel has signal andto see how hot a signal is before you set the send level.8. Groups. QMix-UC allows you to create four groups of channels for easier mixmanagement. This button enables / disables this functionality. See Section 2.2.1.9. Edit Groups. Tap this button to view the four groupsand add channels to each. See Section 2.2.1.2.2.1 Channel GroupingChannel grouping is a great way to easily manage your mix. Creating a group will letyou organize groups of channels and manage the overall volume of the entire groupwithout changing the relative level of each channel in the group. For instance, youcan create a group of all your drum channels so that once you dial in just the rightdrum mix, you can turn your drums up or down with one fader instead of twelve.1. To create a group (or four), tap on the arrow next to the Groups button.2. This will reveal the Group Edit buttons.3. Tap on the Group Edit button to add or remove channels.4. Tap on the channels you’d like to add to your group. As you select channels,their color will change to match the currently selected group’s color.5. When you done editing groups, tap the arrow again to hide the group editor.6. Once you have created groups, you will be able to globallyenable/disable them using the Groups On / Off button.To manage your Group masters, flip your mobile device to Portrait modeand swipe to the third screen. This will open the Group Masters view andallow you to control the overall level of each group in your mix.2.3 Wheel of MeQMix-UC’s Wheel of Me provides you with an easy and effective way to controlall of the channels that contain your voice and instruments. To open the Wheelof Me, turn your mobile device to the Portrait view. The Wheel of Me will openfor the currently selected aux mix, so if you have Aux Mix 3 selected on the AuxMix page, Aux Mix 3 will still be selected when you open the Wheel of Me.To begin, set up your monitor mix using the Aux Mix page in QMix-UC, UCSurface, or on your StudioLive. Once you have your monitor mix dialedin to taste, you simply need to identify which channels are yours. Afterthis, the Wheel of Me will control the volume of all your channels as agroup, preserving the volume of each channel relative to the others.To select your “Me” channels, swipe to the left.From the Me page, you can identify which channels are yours in any aux mix.For example, if you sing backup vocals and play bass, you probably wantto hear more of those channels, so you would identify those channels as “Me.” As a bass player, you might also want the kick-drum level to increase in proportion to your bass, in which case identify that channel as “Me” as well.Once you’ve identified these channels as Me channels, the Wheel of Me will increase or decrease the level of these channels concurrently, allowing youto create a DCA group of your most critical channels in your monitor mix.To return to the Wheel of Me, swipe to the right.The Wheel of Me increases or decreases the level of your Me channels as a mix relative to the rest of the channels (the Band). If you increase the level of your Me channels beyond the top level, rather than further raising the Me level, the Band channels will decrease in volume, producing the illusion of “even more me.”On either side of the Wheel of Me, you will find Me and Band mix indicators. These level displays show the balance between the Me channels and the Band channels. The Band channels consist of any channels not identified as Me channels. These indicators will adjust automatically as you move the Wheel of Me up or down. Power User Tip: The Band indicator will not show a level until you create an aux mix on the Aux Mix page. The Me indicator won’t show a level until at least one channel is selected on the Me Channels page. If all channels in the aux mix are selected on the Me Channels page, level will only be shown in the Me indicator, and no level will be shown in the Band indicator.Lock Orientation. Enabling the Lock Orientation button will lock your mobile devicein Portrait view. While this button is enabled, you cannot open the Aux Mix page. Locking the view will also remove the Start Page button. Until this option is disabled, QMix-UC will launch in this view connected to the current mixer.Power User Tip: If QMix-UC doesn’t change pages when you change your mobile device’s orientation, make sure that Lock Orientation is not enabled.2.4 Settings PageTo open the Settings page, tap on the Settings button on the Aux Mix page or Wheelof Me page. From the Settings page, you can customize QMix-UC scrolling and createcustom names for each channel and aux mix.Scroll by Page. Turning this option off will allow you to scrollone channel at a time, offering more granular control.Peak Hold Metering. When Peak Hold Metering is enabled, each meterin QMix-UC will continue to display the most recent signal peak.3Controlling your StudioLive remotely with QMix-UC for mobile devicesallows you to move about the venue freely. However, it can also putthe full power of the StudioLive in multiple hands—some more adeptthan others. Therefore, your StudioLive enables you to limit eachdevice’s access to the mixer features by setting permissions.Once a mobile device is connected to your wireless network and haslaunched QMix-UC, the device will be displayed in the Remote Devices list2. Page down to navigate to Page 3: iOS Setup.When setting permissions for QMix-UC users, you will choose between providing full access to all aux mixes, providing access to only a singleaux mix, and limiting the user to just the Wheel of Me functions.Mix Permissions. Sets the level of functionality in QMix-UC.•None. QMix-UC on the select iPhone/iPod Touch willnot be able to control your StudioLive mixer.•All Auxes. QMix-UC will control the channel send levels for all aux mixes. •Individual Aux Mixes. QMix-UC will only control thechannel send levels for the specified aux mix.Other Permissions. Choose between Wheel Only or None. Wheel Only disables the Aux Mix page in QMix-UC. When this is enabled, the user will only be able to use the Wheel of Me on the single aux to which you’ve provided access. When Wheel Only is enabled, you can only give access to one aux mix.© 2019 PreSonus Audio Electronics, Inc. All Rights Reserved. AudioBox, CoActual, DigiMax, Eris, FireStudio, Nimbit, PreSonus, QMix, Riff to Release, Sceptre, StudioLive, Active Integration, and XMAX are trademarks or registered trademarks of PreSonus Audio Electronics, Inc. Capture, Impact, Mixverb Presence, RedLightDist, SampleOne, Studio One, and Tricomp are trademarks or registered trademarks of PreSonus Software Ltd. Mac and Mac OS are registered trademarks of Apple, Inc., in the U.S. and other countries. Windows is a registered trademark of Microsoft, Inc., in the U.S. and other countries. Other product names mentioned herein may be trademarks of their respective companies. All specifications subject to change without notice...except the recipe, which is a classic.Dinner is ServedAdded bonus: PreSonus’ previously Top Secret recipe for…Chicken and Andouille GumboIngredients:• 1 C All-Purpose flour•¾ C Vegetable Oil• 1 large onion (diced)• 1 small onion (quartered)• 6 celery stalks (diced)• 1 large green bell pepper (diced)• 3 cloves garlic (2 minced, 1 whole)• 1 lb link Andouille sausage• 4 Chicken leg quarters• 4 qt water• 4 bay leaves• 1 tsp thyme• 1 tsp Old Bay seasoning•1-2 C frozen okra, sliced•¼ C fresh parsley, minced • 6-8 eggs (optional)Cooking Instructions:1. In a large pot, combine whole chicken leg quarters, water, quartered onion, Old Bay, 2 bay leaves and 1 whole clove garlic. Cover and bring to a low boil. Simmer stock until chicken is falling off the bone. Remove the chicken and set aside. Discard the onion, bay leaves, and garlic, reserving the liquid.2. In a heavy saucepan, heat 1 Tbsp of the oil on medium high heat and brown the andouille until it is cooked through. Set aside sausage for later.3. In the same saucepan, add and heat remaining oil. Slowly add flour 1-2 Tbsp at a time, stirring continuously. Continue cooking and stirring the roux until it is a dark brown (it should look like melted dark chocolate). Be careful to not to get the oil too hot or the flour will burn and you’ll have to start over.4. Once roux has reached the correct color, add diced onion, celery, green pepper, and minced garlic. Cook until vegetables are very tender. Do not cover.5. Slowly add 1 quart of chicken broth and bring to a low boil, stirring constantly.6. Transfer roux mixture to a soup pot and bring to low boil. Do not cover, the roux will settle on the bottom of the pot and burn.7. Add remaining chicken broth, bay leaves, and thyme. Simmer for 30 minutes.8. While gumbo is simmering, debone and shred chicken and slice the andouille.9. Add chicken and andouille to gumbo and return to a simmer. Simmer for 30-45 minutes.10. Stir in frozen okra and parsley and bring to a rolling boil.11. Optional: Crack one egg into a teacup and quickly pour into the boiling gumbo. Repeat with the other eggs being careful not to cluster them too closely. After all the eggs have risen back to the surface, reduce heat and simmer.12. Correct seasoning with salt and pepper (red, white and/or black) if necessary.13. Serve over rice with potato salad.Serves 1218011 Grand Bay Ct. • Baton Rouge,Louisiana 70809 USA• 1-225-216-7887®QMix-UCSoftware Reference Manual。
S-TUNE软件调试说明
7、制振调整 调整前后效果比较
下图视频中上方的滑台没有使用平滑滤波器。 下方的滑台使用了平滑滤波器
22
8、状态显示
点击时状态新一次 点击时状态动态更新
勾选时可以保存监测数据 停止自动监测
*发生报警时,请记录报警内容和 报警代码
分子:编码器分辨率/4 分母:电机每转1圈对应的指令脉
冲数/4
276.0 编码器输出分倍频(分子) 1000 278.0 编码器输出分倍频(分母) 8000
2500 32678
分子:编码器每圈输出脉冲数/4 分母:编码器分辨率/4
⑧
4、波形 波形取得
①选择状态项目
②记录条件设定
可以对此处的参数 进行设定
⑥按【停止】按钮
⑦按【写入】按钮将调整参 数写入驱动器
⑫
5、自动调整 微调整
可以对右侧的参数进行 设定,一般在波形监测 界面上实施
⑬
5、自动调整 自动调整前后比较
自动调整后 后
自动调整前
自动调整后,惯量比由初始值 250自动设定为推定的负载惯量 比2176,波形平滑,整定时间 缩短
前
⑭
6、个别调整举例① 缩短整定时间
可选监测项目 固定监测项目
23
9、辅助功能
点击取得编码器当前的 状态
显示编码器的报警状态
点击初始化编码器数据 和清除报警
显示编码器的角度数据
24
S-TUNE软件说明
①
目录
1、接线 2、通信设定 3、参数 4、波形 5、自动调整 6、个别调整 7、制振调整 8、状态显示 9、辅助功能
②
Tune软件操作说明-Q-Exactive series
1 打开 Tune 软件 2 界面及图标介绍 界面及图标介绍(1)ON、Standby、Off,启动扫描时选择 On,待机选择是 Standby(2)打开 tune 方法(3) (4)保存 tune 方法 六通阀的切换,只用 a,1 是 waste,2 是 inject(5) (6)质谱注射泵,可以更改流速 三个灯都为绿色是正常状态,第 1 灯:指示仪器通讯是否正常,第 2个灯:指示仪器硬件状态是否正常,第 3 个灯:指示仪器的性能状态是否正常。
典型的变黄 原因有:校正过期。
建议重新校正,校正完成之后可恢复绿色。
将鼠标放在上述的灯上即可 显示变黄的信息提示。
3Instrument control 各项参数3.1 Scan parameters(1) Scan type:分为 Full MS-SIM 和 AIF-MS/MS; Full MS:一级全扫,要求 Last mass≤15*first mass SIM:当 full mass 的扫描范围小于 50 个质量数时,自动变为 SIM。
AIF:所有的离子全部碎裂,没有母离子的选择性,现在软件无法识别二级子离子是由哪个 母离子产生的,所以暂时不用这种方法。
MS/MS:设定 center/width,或者 scan range,这里设置的是母离子的质荷比; (2) Scan range:参考 scan type,scan type 中设置的是 full scan 时,这里设置全扫的质荷 比范围,如果 scan type 中选择的是 MS/MS,此处应设置子离子的扫描范围。
(3) Fragmentation:分为 source CID 和 NCE,一般做 full scan 时此项是关闭状态 Source CID:源内裂解,主要用于打开二聚体等非共价结合的键。
NCE:归一化碰撞能量。
仪器校正后,每个特定质荷比的离子都有一个对应将其打碎的能量 值,做小分子设为 35; (4) Resolution:分辨率代表仪器将不同质量数离子分开的能力,QE 可以达到 14 万,最 低分辨率为 1750。