juniper 常用配置命令
Juniper DX常用维护命令

Juniper DX常用维护命令1.使用CONFIGURE命令完成对ETH0的配置2.使用HTTP://IP地址:8090登陆设备;admin / admin3.通过WEB界面来对EHT2进行配置:admin---network---4.在SHARE SETTING里可设置DEFAULT GA TEW AY,DNSNAME,DNSIP 5.在services里可配置负载均衡和加速:Cluster:对HTTP和HTTPS来实现负载均衡和加速Forward:对非HTTP协议实现SSL终结和负载均衡SLB:对TCP/UDP协议实现负载均衡Redirector:实现重定向服务6.点击NEW CLUSTER7.ADMIN-----FAILOVER,配置FAILOVER服务在配置failover服务时,要注意以下三个关键参数:1.Failover: Enabled 启用failover服务2.Discovery Interface: ether2 选择侦听对端DX状态的物理端口3.Static Peers: 配置对端DX地址以及监听对端DX的端口IP Address 10.126.1.27Listen Port 9500List file 显示证书文件名SHOW FILE 《文件名》显示证书文件的内容CAPTURE FILE 《文件名》创建证书文件Show boot显示OSSet boot <1或2>选择使用哪个OS启动Install (机器上有UPGRADE FILE 的相应文件,并开启FTTP服务)常用命令:Show capacity 1 每几秒一次,显示CPU,MEM的利用率Show netstat 1看流量ERR不能出现数字,有的话就是接口的匹配问题Show ether 2看断口的MEDIA是什么?Set ether 0 + tab或问号media (数字)Show server status看状态没有FAILOVER的情况,可能FAILOVER与异常1.Show server status2.Tsdump 向TFTP送数据3.Show system debug4.Show failover stats; show activen stats5.Set failover disable6.Set activen disable7.Set server down8.Write9.Set failover enable10.Set activen enable11.Set server upCluster 如果起用STICKY,那么在做ACTIVEN的时候要ENABLE STICKYSYNC同步的时候:1.手工修改DX2上的FAILOVER参数2.先DISABLE FORCE MASTER(防止切换)3.增加FAILOVER PEER:IP OF ANOTHER DX4.SHOW SYNC GROUP (名字)5.SHOW ACTIVEN BLADETSDUMPtcpdumpApplication layer:Show cluster cisapp-http (stats –(http io)Show server stats (io http ssl )dx2% show cluster cisapp-http sticky clientip entriesThere are 3253 sticky entries, it may take a long time to display all the entries Are you sure you want to continue (y/n)? [n] yTotal entries: 3251Timeout IdleClient Sticky Target (sec) (sec)--------------------------------------------------------10.148.0.10 10.137.249.3 3660 90210.148.0.13 10.137.249.3 3660 244010.136.128.16 10.137.249.67 3660 310.148.0.18 10.137.249.62 3660 298010.148.0.19 10.137.249.63 3660 510.148.0.21 10.137.249.66 3660 242910.148.0.23 10.137.249.64 3660 710.148.0.29 10.137.249.5 3660 179810.148.0.31 10.137.249.66 3660 24010.148.0.32 10.137.249.67 3660 23910.148.0.34 10.137.249.6 3660 124610.148.0.38 10.137.249.5 3660 27510.148.0.39 10.137.249.63 3660 109610.148.0.40 10.137.249.64 3660 23810.148.0.41 10.137.249.65 3660 010.148.0.45 10.137.249.67 3660 57010.148.0.51 10.137.249.4 3660 710.148.0.53 10.137.249.5 3660 2310.148.0.59 10.137.249.63 3660 39710.148.0.63 10.137.249.68 3660 257310.148.0.74 10.137.249.6 3660 2610.148.0.82 10.137.249.5 3660 31010.148.0.92 10.137.249.4 3660 15610.148.0.99 10.137.249.64 3660 1010.147.128.104 10.137.249.6 3660 2810.147.128.108 10.137.249.3 3660 7510.137.128.134 10.137.249.63 3660 155110.147.129.147 10.137.249.65 3660 18110.147.129.155 10.137.249.5 3660 1210.147.129.159 10.137.249.68 3660 200810.147.129.177 10.137.249.4 3660 010.137.129.203 10.137.249.64 3660 58910.137.129.205 10.137.249.4 3660 229710.147.129.209 10.137.249.68 3660 172710.147.129.216 10.137.249.67 3660 237510.147.129.217 10.137.249.5 3660 192310.147.129.220 10.137.249.3 3660 241110.147.129.223 10.137.249.3 3660 16810.147.129.225 10.137.249.68 3660 108 10.147.129.227 10.137.249.6 3660 1923 10.147.129.228 10.137.249.62 3660 2219 10.147.129.232 10.137.249.63 3660 1756 10.147.129.233 10.137.249.66 3660 105 10.147.129.234 10.137.249.3 3660 6 10.147.129.235 10.137.249.66 3660 4 10.147.129.239 10.137.249.65 3660 931 10.147.129.241 10.137.249.62 3660 193 10.147.129.243 10.137.249.67 3660 125dx2% show server stats ioIO Statistics - server listenBytes In (Req from Clients) 23.84GBBytes Out (Resp to Clients) 149.97GBCurrent Client Connections 1.50KTotal Client Connections 6.08MRefused Client Connections 34Client IP Sticky To Dead Target 447Client IP Sticky To Deleted Target 54IO Statistics - server service allBytes In (Resp from Servers) 276.47GBBytes Out (Req to Servers) 26.41GBClient IP Sticky To Down Target Service 1.38KIO Statistics - server physical target allCurrent Active Server Conns 58Current Idle Server Conns 233Total Server Connections 33.55MTotal Server Connections Failures 380.65KConsecutive Connection Successes 19.58MConsecutive Connection Failures 334.57KTotal SSL Successes 0 Total SSL Failures 0Maximum Connection Limit Reached 0 Passed Connect Health Chks (Server OK) 2.67MFailed Connect Health Chks (Server Down) 64.68K Passed Request Health Chks (Server OK) 286.57KFailed Request Health Chks (Server Down) 40dx2% show cluster cisapp-http stats ioIO Statistics - cluster cisapp-http listenCurrent State UpBytes In (Req from Clients) 5.70GBBytes Out (Resp to Clients) 33.77GBCurrent Client Connections 1.21KTotal Client Connections 1.39MRefused Client Connections 0Client IP Sticky To Deleted Target 0Client IP Sticky To Dead Target 1IO Statistics - cluster cisapp-http service allBytes In (Resp from Servers) 64.56GBBytes Out (Req to Servers) 6.31GBClient IP Sticky To Down Target Service 0IO Statistics - cluster cisapp-http physical target allCurrent Active Server Conns 24Current Idle Server Conns 53Total Server Connections 24.27MTotal Server Connections Failures 185.45KConsecutive Connection Successes 17.80MConsecutive Connection Failures 167.49KTotal SSL Successes 0 Total SSL Failures 0Maximum Connection Limit Reached 0Passed Connect Health Chks (Server OK) 0Failed Connect Health Chks (Server Down) 29.28KPassed Request Health Chks (Server OK) 87.23KFailed Request Health Chks (Server Down) 0dx1% tcpdump -i ether2Byte counter will be refeshed after 16KB chunks are read.^Ctes processed: 884736Closing tcpdump...Done.Successfully wrote 'tcpdump.0802190435-67' (866KB)dx1% copy tcpdump tcpdump.0802190435-67 tftp://10.137.249.52/tcpdumptestnegotiated TFTP blocksize is 8192 bytes...Done. 887148 bytes transferred.dx1% show tcpdumpdx1% copy tcpdump tcpdump.0802190435-67 tftp://X.X.X.X/filenameAvailable files:tcpdump.0802190435-67 (866KB)Usage: show tcpdump [<tcpdump file>] [-s <keyfile>]dx1% show tcpdump tcpdump.0802190435-6719:04:25.875748 10.137.249.60.22 > 10.136.33.72.3758: P 4022673374:4022673394(20) ack 355801474 win 58400 (DF) [tos 0x10]19:04:25.993984 10.137.249.64.7028 > 10.137.249.60.45048: F 408258459:408258459(0) ack 2621470207 win 2044 <nop,nop,timestamp 1819819:04:25.994012 10.137.249.60.45048 > 10.137.249.64.7028: . ack 1 win 56967 <nop,nop,timestamp 903590 1819827395> (DF)19:04:25.994058 10.137.249.60.45048 > 10.137.249.64.7028: F 1:1(0) ack 1 win 56967 <nop,nop,timestamp 903590 1819827395> (DF)19:04:25.994106 10.137.249.60.45317 > 10.137.249.64.7028: S 1519898316:1519898316(0) win 57344 <mss 1460,nop,nop,sackOK,nop,wscale19:04:25.994233 10.137.249.64.7028 > 10.137.249.60.45048: . ack 2 win 2044 <nop,nop,timestamp 1819827395 903590> (DF)19:04:25.994238 10.137.249.64.7028 > 10.137.249.60.45317: S 463799572:463799572(0) ack 1519898317 win 5792 <mss 1460,sackOK,timesta19:04:25.994258 10.137.249.60.45317 > 10.137.249.64.7028: . ack 1 win 57344 <nop,nop,timestamp 903590 1819827395> (DF)19:04:25.994606 10.137.249.64.7028 > 10.137.249.60.45263: F 453024392:453024392(0) ack 516116623 win 1448 <nop,nop,timestamp 18198219:04:25.994616 10.137.249.60.45263 > 10.137.249.64.7028: . ack 1 win 57343 <nop,nop,timestamp 903590 1819827396> (DF)19:04:25.994650 10.137.249.60.45263 > 10.137.249.64.7028: F 1:1(0) ack 1 win 57343 <nop,nop,timestamp 903590 1819827396> (DF)19:04:25.994683 10.137.249.60.45318 > 10.137.249.64.7028: S 877407194:877407194(0) win 57344 <mss 1460,nop,nop,sackOK,nop,wscale 0,19:04:25.994732 10.137.249.64.7028 > 10.137.249.60.45262: F 447649295:447649295(0) ack 4009036855 win 1448 <nop,nop,timestamp 1819819:04:25.994736 10.137.249.64.7028 > 10.137.249.60.45263: . ack 2 win 1448 <nop,nop,timestamp 1819827396 903590> (DF)19:04:25.994746 10.137.249.60.45262 > 10.137.249.64.7028: . ack 1 win 57343 <nop,nop,timestamp 903590 1819827396> (DF)19:04:25.994766 10.137.249.60.45262 > 10.137.249.64.7028: F 1:1(0) ack 1 win 57343 <nop,nop,timestamp 903590 1819827396> (DF)19:04:25.994786 10.137.249.60.45319 > 10.137.249.64.7028: S 3792145687:3792145687(0) win 57344 <mss 1460,nop,nop,sackOK,nop,wscale19:04:25.994856 10.137.249.64.7028 > 10.137.249.60.45318: S 452566851:452566851(0) ack 877407195 win 5792 <mss 1460,sackOK,timestam19:04:25.994861 10.137.249.64.7028 > 10.137.249.60.45262: . ack 2 win 1448 <nop,nop,timestamp 1819827396 903590> (DF)19:04:25.994872 10.137.249.60.45318 > 10.137.249.64.7028: . ack 1 win 57344 <nop,nop,timestamp 903590 1819827396> (DF)19:04:25.994981 10.137.249.64.7028 > 10.137.249.60.45319: S 452116455:452116455(0) ack 3792145688 win 5792 <mss 1460,sackOK,timesta19:04:25.994991 10.137.249.60.45319 > 10.137.249.64.7028: . ack 1 win 57344 <nop,nop,timestamp 903590 1819827396> (DF)19:04:26.090673 10.136.33.72.3758 > 10.137.249.60.22: . ack 20 win 15600 (DF)。
Juniper SRX路由器命令配置手册

Juniper SRX配置手册目录一、JUNOS操作系统介绍 (3)1.1 层次化配置结构 (3)1.2 JunOS配置管理 (3)1.3 SRX主要配置内容 (4)二、SRX防火墙配置对照说明 (5)2.1 初始安装 (5)2.1.1 登陆 (5)2.1.2 设置root用户口令 (5)2.1.3 设置远程登陆管理用户 (5)2.1.4 远程管理SRX相关配置 (6)2.2 Policy (6)2.3 NAT (7)2.3.1 Interface based NAT (7)2.3.2 Pool based Source NAT (8)2.3.3 Pool base destination NAT (9)2.3.4 Pool base Static NAT (10)2.4 IPSEC VPN (10)2.5 Application and ALG (12)2.6 JSRP (12)三、SRX防火墙常规操作与维护 (14)3.1 设备关机 (14)3.2 设备重启 (15)3.3 操作系统升级 (15)3.4 密码恢复 (15)3.5 常用监控维护命令 (16)Juniper SRX防火墙简明配置手册SRX系列防火墙是Juniper公司基于JUNOS操作系统的安全系列产品,JUNOS集成了路由、交换、安全性和一系列丰富的网络服务。
目前Juniper公司的全系列路由器产品、交换机产品和SRX安全产品均采用统一源代码的JUNOS操作系统,JUNOS是全球首款将转发与控制功能相隔离,并采用模块化软件架构的网络操作系统。
JUNOS作为电信级产品的精髓是Juniper真正成功的基石,它让企业级产品同样具有电信级的不间断运营特性,更好的安全性和管理特性,JUNOS软件创新的分布式架构为高性能、高可用、高可扩展的网络奠定了基础。
基于NP架构的SRX系列产品产品同时提供性能优异的防火墙、NAT、IPSEC、IPS、SSL VPN和UTM等全系列安全功能,其安全功能主要来源于已被广泛证明的ScreenOS操作系统。
Juniper--Juniper的基本配置
set interfaces se-0/0/3 unit 0 family inet address 10.0.16.1/24
set interfaces lo0 unit 0 family inet address 192.168.13.1/32
Wrote 433 lines of configuration to 'configuration-march02'
#察看保存过的文件用run file list命令
aviva@router1# run file list
/var/home/aviva:
.ssh/
configuration-march02
#配置fxp0 unit 0的接口地址,fxp0代表管理接口,unit 0代表子接口,inet代表是ipv4地址。
root@# set system backup-router 192.168.15.2
#backup-router是本路由器的直连路由器,在路由器启动的时候,
#JUNOS路由软件(routing protocol process, RPD)没有立即启动,
}
file interactive-commands {
interactive-commands any;
}
}
}
interfaces {
fxp0 {
unit 0 {
family inet {
address 10.1.1.1/24;
}
}
}
}
下面一种是interface视图,不同视图下,用show命令show出来的结果是不一样的。
Juniper防火墙基本命令
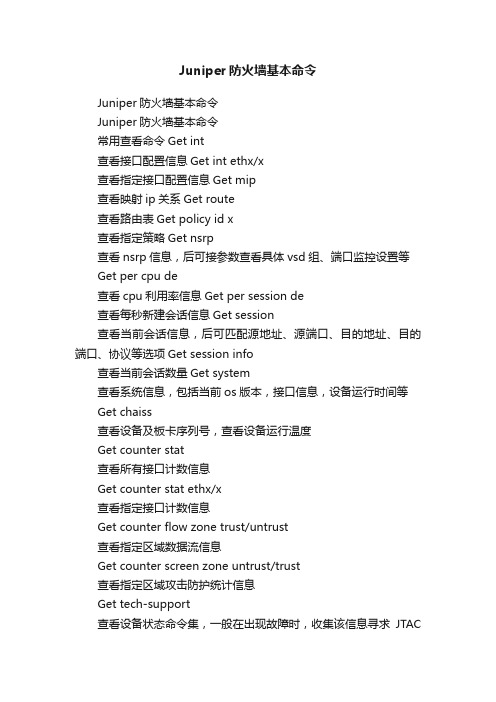
Juniper防火墙基本命令Juniper防火墙基本命令Juniper防火墙基本命令常用查看命令Get int查看接口配置信息Get int ethx/x查看指定接口配置信息Get mip查看映射ip关系Get route查看路由表Get policy id x查看指定策略Get nsrp查看nsrp信息,后可接参数查看具体vsd组、端口监控设置等Get per cpu de查看cpu利用率信息Get per session de查看每秒新建会话信息Get session查看当前会话信息,后可匹配源地址、源端口、目的地址、目的端口、协议等选项Get session info查看当前会话数量Get system查看系统信息,包括当前os版本,接口信息,设备运行时间等Get chaiss查看设备及板卡序列号,查看设备运行温度Get counter stat查看所有接口计数信息Get counter stat ethx/x查看指定接口计数信息Get counter flow zone trust/untrust查看指定区域数据流信息Get counter screen zone untrust/trust查看指定区域攻击防护统计信息Get tech-support查看设备状态命令集,一般在出现故障时,收集该信息寻求JTAC支持常用设置命令Set int ethx/x zone trust/untrust/dmz/ha配置指定接口进入指定区域(trust/untrust/dmz/ha等)Set int ethx/x ip x.x.x.x/xx配置指定接口ip地址Set int ethx/x manage配置指定接口管理选项,打开所有管理选项Set int ethx/x manage web/telnet/ssl/ssh配置指定接口指定管理选项Set int ethx/x phy full 100mb配置指定接口速率及双工方式Set int ethx/x phy link-down配置指定接口shutdownSet nsrp vsd id 0 monitor interface ethx/x配置ha监控端口,如此端口断开,则设备发生主/备切换Exec nsrp vsd 0 mode backup手工进行设备主/备切换,在当前的主设备上执行set route 0.0.0.0/0 interface ethernet1/3 gateway 222.92.116.33配置路由,需同时指定下一跳接口及ip地址所有set命令,都可以通过unset命令来取消,相当于cisco中的no所有命令都可以通过“TAB”键进行命令补全,通过“?”来查看后续支持的命令防火墙基本配置create account [admin | user] 回车输入密码:再次输入密码:configure account admin 回车输入密码:再次输入密码:2.port配置config ports auto off {speed [10 | 100 | 1000]} duplex [half | full] auto off3.Vlan配置无论是核心还是接入层,都要先创建三个Vlan,并且将所有归于Default Vlan的端口删除:config vlan default del port all create vlan Servercreate vlan Usercreate vlan Manger定义802.1q标记config vlan Server tag 10config vlan User tag 20config vlan Manger tag 30设定Vlan网关地址:config vlan Server ipa 192.168.41.1/24config vlan User ipa 192.168.40.1/24config vlan Manger ipa 192.168.*.*/24Enable ipforwarding 启用ip路由转发,即vlan间路由Trunk 配置config vlan Server add port 1-3 tconfig vlan User add port 1-3 tconfig vlan manger add port 1-3 t4.VRRP配置enable vrrpconfigure vrrp add vlan UserVlanconfigure vrrp vlan UserVlan add master vrid 10 192.168.6.254configure vrrp vlan UserVlan authentication simple-password extremeconfigure vrrp vlan UserVlan vrid 10 priority 200configure vrrp vlan UserVlan vrid 10 advertisement-interval15configure vrrp vlan UserVlan vrid 10 preempt5.端口镜像配置首先将端口从VLAN中删除enable mirroring to port 3 #选择3作为镜像口config mirroring add port 1 #把端口1的流量发送到3config mirroring add port 1 vlan default #把1和vlan default 的流量都发送到36.port-channel配置enable sharing grouping {port-based | address-based | round-robin}show port sharing //查看配置7.stp配置enable stpd //启动生成树create stpd stp-name //创建一个生成树configure stpd add vlan {ports [dot1d | emistp | pvst-plus]} configure stpd stpd1 priority 16384configure vlan marketing add ports 2-3 stpd stpd1 emistp8.DHCP 中继配置enable bootprelayconfig bootprelay add9.NA T配置Enable nat #启用natStatic NA T Rule Exampleconfig nat add out_vlan_1 map source 192.168.1.12/32 to 216.52.8.32/32Dynamic NA T Rule Exampleconfig nat add out_vlan_1 map source 192.168.1.0/24 to 216.52.8.1 - 216.52.8.31Portmap NA T Rule Exampleconfig nat add out_vlan_2 map source 192.168.2.0/25 to 216.52.8.32 /28 both portmapPortmap Min-Max Exampleconfig nat add out_vlan_2 map source 192.168.2.128/25 to 216.52.8.64/28 tcp portmap 1024 - 819210.OSPF配置enable ospf 启用OSPF进程create ospf area 创建OSPF区域configure ospf routerid [automatic | ] 配置Routeridconfigure ospf add vlan [ | all] area {passive} 把某个vlan加到某个Area中去,相当于Cisco中的network的作用configure ospf area add range [advertise | noadvertise] {type-3 | type-7} 把某个网段加到某个Area中去,相当于Cisco中的network的作用configure ospf vlan neighbor addOSPF中路由重发布配置enable ospf export direct [cost [ase-type-1 | ase-type-2] {tag } | ]enable ospf export static [cost [ase-type-1 | ase-type-2] {tag } | ]enable ospf originate-default {always} cost [ase-type-1 | ase-type-2] {tag } enable ospf originate-router-id11.SNMP配置enable snmp accessenable snmp trapscreate access-profile type [ipaddress | vlan]config snmp access-profile readonly [ | none]配置snmp的只读访问列表,none 是去除config snmp access-profile readwrite [ | none] 这是控制读写控制config snmp add trapreceiver {port } community {from } 配置snmp接收host和团体字符串12.安全配置disable ip-option loose-source-routedisable ip-option strict-source-routedisable ip-option record-routedisable ip-option record-timestampdisable ipforwarding broadcastdisable udp-echo-serverdisable irdp vlandisable icmp redirectdisable web 关闭web方式访问交换机enable cpu-dos-protect13.Access-Lists配置create access-list icmp destination sourcecreate access-list ip destination source portscreate access-list tcp destination source portscreate access-list udp destination source ports14.默认路由配置config iproute add default15.恢复出厂值,但不包括用户改的时间和用户帐号信息unconfig switch {all}16.检查配置show versionshow configshow sessionshow management 查看管理信息,以及snmp信息show bannershow ports configurationshow ports utilization ?show memory/show cpu-monitoringshow ospfshow access-list { | port }show access-list-monitorshow ospf areashow ospf area detailshow ospf ase-summaryshow ospf interfaces {vlan | area } unconfigure ospf {vlan | area }switchshow switchshow configshow diagshow iparpshow iprouteshow ipstatshow logshow tech allshow version detail17.备份和升级软件download image [ | ] {primary | secondary}upload image [ | ] {primary | secondary}use image [primary | secondary]18.密码恢复。
juniperSRX常用命令
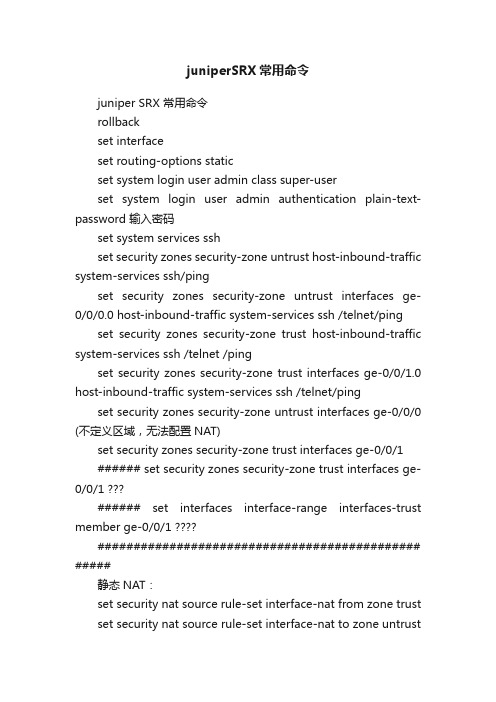
juniperSRX常用命令juniper SRX 常用命令rollbackset interfaceset routing-options staticset system login user admin class super-userset system login user admin authentication plain-text-password 输入密码set system services sshset security zones security-zone untrust host-inbound-traffic system-services ssh/pingset security zones security-zone untrust interfaces ge-0/0/0.0 host-inbound-traffic system-services ssh /telnet/ping set security zones security-zone trust host-inbound-traffic system-services ssh /telnet /pingset security zones security-zone trust interfaces ge-0/0/1.0 host-inbound-traffic system-services ssh /telnet/ping set security zones security-zone untrust interfaces ge-0/0/0 (不定义区域,无法配置NAT)set security zones security-zone trust interfaces ge-0/0/1###### set security zones security-zone trust interfaces ge-0/0/1###### set interfaces interface-range interfaces-trust member ge-0/0/1############################################# #####静态NAT:set security nat source rule-set interface-nat from zone trust set security nat source rule-set interface-nat to zone untrustset security nat source rule-set interface-nat rule rule1 match source-address 192.168.0.0/23 set security nat source rule-set interface-nat rule rule1 match destination-address 0.0.0.0/0 set security nat source rule-set interface-nat rule rule1 then source-nat interfaceset security zones security-zone trust address-book address 192 192.168.0.0/23set security zones security-zone trust address-book address-set 192nat address 192set security policies from-zone trust to-zone untrust policy 192nat match source-address anyset security policies from-zone trust to-zone untrust policy 192nat match destination-address any set security policies from-zone trust to-zone untrust policy 192nat match application any set security policies from-zone trust to-zone untrust policy 192nat then permit############################################# ##########强制172.16.0.12走150出去(默认走物理接口146出去)set security nat source pool pool-1 address 121.9.255.112set security nat source rule-set sou-nat rule rule-mail match source-address 172.16.0.12/32set security nat source rule-set sou-nat rule rule-mail match destination-address 0.0.0.0/0set security nat source rule-set sou-nat rule rule-mail then source-nat pool pool-1insert security nat source rule-set sou-nat rule rule-mail before rule rule-sou############################################# #############端口映射静态PAT: 从外到内set security nat proxy-arp interface ge-0/0/0.0 address 10.1.1.100/24set security nat proxy-arp interface ge-0/0/3.0 address 10.1.2.100/24set security nat destination pool dnat-pool-1 address 192.168.0.9/32set security nat destination pool dnat-pool-2 address 172.16.0.12/32set security nat destination rule-set dst-nat from zone untrustset security nat destination rule-set dst-nat rule rule3 match destination-address 10.1.1.100/24 set security nat destination rule-set dst-nat rule rule3 match destination-port 21 set security nat destination rule-set dst-nat rule rule3 then destination-nat pool dnat-pool-1set security nat destination rule-set dst-nat rule rule2 match destination-address 10.1.2.100/24 set security nat destination rule-set dst-nat rule rule2 match destination-port 443 set security nat destination rule-set dst-nat rule rule2 then destination-nat pool dnat-pool-2set security zones security-zone trust address-book address ftpserver 192.168.0.9set security zones security-zone trust address-book address mailserver 172.16.0.12set security zones security-zone trust address-book address-set servergroup address ftpserver set security zones security-zone trust address-book address-set servergroup address mailserverset security policies from-zone untrust to-zone trust policystatic-nat match source-address any destination-address servergroup application junos-httpset security policies from-zone untrust to-zone trust policy static-nat match application junos-pop3set security policies from-zone untrust to-zone trust policy static-nat then permitset applications application 443 protocol tcpset applications application 443 destination-port 443############################################# #################set security nat source rule-set sou-nat from zone trustset security nat source rule-set sou-nat to zone untrustset security nat source rule-set sou-nat rule rule-mail match source-address 172.16.0.30/32set security nat source rule-set sou-nat rule rule-mail match destination-address 0.0.0.0/0set security nat source rule-set sou-nat rule rule-mail then source-nat pool pool-1############################################# #################管理端口:set system services web-management httpsset system services web-management httpset system services web-management http port 8084set system services web-management http interface allset system services web-management https system-generated-certificateset system services web-management http interface ge-0/0/0.0set system services web-management https interface ge-0/0/0.0############################################# ##############################定义端口地址池XXX_group:set applications application smtp_25 destination-port 25 protocol tcpset applications application pop3_110 destination-port 110 protocol tcpset applications application exchange_135 destination-port 135 protocol tcpset applications application smtp_465 destination-port 465 protocol tcpset applications application imap_993 destination-port 993 protocol tcpset applications application pop3_995 destination-port 995 protocol tcpset applications application-set mail_port_group application smtp_25set applications application-set XXX_group application smtp set applications application-set XXX_group application pop3 引用XXX_group:set security policies from-zone untrust to-zone trust policy mail-policy match application XXX_group############################################# ################################# 反向静态NAT:从外到内set security nat static rule-set mail-static-nat from zone untrustset security nat static rule-set mail-static-nat rule mail1 match destination-address 121.9.255.150/32set security nat static rule-set mail-static-nat rule mail1 then static-nat prefix 172.16.0.12/32返回的安全Policy:set security policies from-zone untrust to-zone trust policy mail-policy match source-address any set security policies from-zone untrust to-zone trust policy mail-policy match destination-address Mail_serset security policies from-zone untrust to-zone trust policy mail-policy match application any(XXX_group)set security policies from-zone untrust to-zone trust policy mail-policy then permit插入insert Policy:set security zones security-zone trust address-book address deny_172 172.16.0.155set security policies from-zone trust to-zone untrust policy deny_172 match source-address deny_172set security policies from-zone trust to-zone untrust policy deny_172 match destination-address anyset security policies from-zone trust to-zone untrust policy deny_172 match application anyset security policies from-zone trust to-zone untrust policy deny_172 then denyinsert security policies from-zone trust to-zone untrust policy deny_172 before policy Trust2Utrust (Trust2Utrust允许上公网策略)############################################# ########禁止192网段上网,只允许192.168.0.2,192.168.0.121上网set security zones security-zone trust address-book addressdeny_192 192.168.0.0/23set security zones security-zone trust address-book address permit_host_2 192.168.0.2/32set security zones security-zone trust address-book address permit_host_121 192.168.0.121/32 set security zones security-zone trust address-book address-set permit_192_online address FTP_serset security zones security-zone trust address-book address-set permit_192_online address permit_host_2set security zones security-zone trust address-book address-set permit_192_online address permit_host_121set security zones security-zone trust address-book address-set deny_192_online address deny_192返回的安全Policy:set security policies from-zone trust to-zone untrust policy permit_192_online match source-address permit_192_online set security policies from-zone trust to-zone untrust policy permit_192_online match destination-address anyset security policies from-zone trust to-zone untrust policy permit_192_online match application anyset security policies from-zone trust to-zone untrust policy permit_192_online then permitset security policies from-zone trust to-zone untrust policy deny_192_online match source-address deny_192_online set security policies from-zone trust to-zone untrust policy deny_192_online match destination-address anyset security policies from-zone trust to-zone untrust policy deny_192_online match application anyset security policies from-zone trust to-zone untrust policy deny_192_online then denyinsert security policies from-zone trust to-zone untrust policy permit_192_online before policy deny_172insert security policies from-zone trust to-zone untrust policy deny_192_online before policy deny_172############################################# ##############################配置WEB管理set system host-name Testset system root-authentication encrypted-password "$1$XKPZUqwc$/WdxM1Cc1GAB8gJ0nNCOt."set system name-server 202.96.128.166set system name-server 202.96.128.86set system login user admin uid 2001set system login user admin class super-userset system login user admin authentication encrypted-password HJuZerSULPfkAset system services sshset system services web-management http port 8084set system services web-management http interface allset system services web-management http interface ge-0/0/0.0set system services web-management https system-generated-certificateset system services web-management https interface ge-0/0/0.0set interfaces ge-0/0/0 unit 0 family inet address 192.168.8.125/24set interfaces ge-0/0/1 unit 0 family inet address 192.168.1.1/24set security zones security-zone untrust host-inbound-trafficsystem-services httpset security zones security-zone untrust interfaces ge-0/0/0.0 host-inbound-traffic system-services http############################################# ##############################开放Untrust服务端口set security zones security-zone untrust interfaces ge-0/0/0.0set security zones security-zone untrust host-inbound-traffic system-services allset security zones security-zone untrust interfaces ge-0/0/0.0 host-inbound-traffic system-services allset security zones security-zone trust interfaces ge-0/0/1.0 set security zones security-zone trust host-inbound-traffic system-services allset security zones security-zone trust interfaces ge-0/0/1.0 host-inbound-traffic system-services all配置默认路由+NATset routing-options static route 0.0.0.0/0 next-hop 192.168.8.1set security nat source rule-set sou-nat from zone trustset security nat source rule-set sou-nat to zone untrustset security nat source rule-set sou-nat rule rule-sou match source-address 0.0.0.0/0set security nat source rule-set sou-nat rule rule-sou match destination-address 0.0.0.0/0set security nat source rule-set sou-nat rule rule-sou then source-nat interface内网放行策略:set security policies from-zone trust to-zone untrust policyin_out match source-address any set security policies from-zone trust to-zone untrust policy in_out match destination-address anyset security policies from-zone trust to-zone untrust policy in_out match application anyset security policies from-zone trust to-zone untrust policy in_out then permit############################################# ############################## UTM 功能中防病毒功能set security utm utm-policy test-policy anti-virus http-profile junos-av-defaultsset security utm utm-policy test-policy anti-virus ftp upload-profile junos-av-defaultsset security utm utm-policy test-policy anti-virus ftp download-profile junos-av-defaultsset security utm utm-policy test-policy anti-virus smtp-profile junos-av-defaultsset security utm utm-policy test-policy anti-virus pop3-profile junos-av-defaultsset security utm utm-policy test-policy anti-virus imap-profile junos-av-defaultsset security utm utm-policy test-policy anti-spam smtp-profile junos-as-defaultsset security utm utm-policy test-policy traffic-options sessions-per-client over-limit log-and-permitset security utm utm-policy web-policy anti-virus http-profile junos-av-defaultsset security utm utm-policy web-policy traffic-options sessions-per-client over-limit log-and-permitset security policies from-zone trust to-zone untrust policypermit_192_online match source-address permit_192_online set security policies from-zone trust to-zone untrust policy permit_192_online match destination-address anyset security policies from-zone trust to-zone untrust policy permit_192_online match application anyset security policies from-zone trust to-zone untrust policy permit_192_online then permit application-services utm-policy web-policyset security policies from-zone untrust to-zone trust policy mail-policy match source-address any set security policies from-zone untrust to-zone trust policy mail-policy match destination-address Mail_serset security policies from-zone untrust to-zone trust policy mail-policy match application mail_port_groupset security policies from-zone untrust to-zone trust policy mail-policy then permit application-services utm-policy test-policyset security policies from-zone untrust to-zone trust policy Ftp-Policy match source-address any set security policies from-zone untrust to-zone trust policy Ftp-Policy match destination-address FTP_serset security policies from-zone untrust to-zone trust policy Ftp-Policy match application junos-ftp set security policies from-zone untrust to-zone trust policy Ftpmservices utm-policy test-policyadmin@KDS_FW> show security utm anti-spam statistics############################################# #############dynamic VPN功能配置:run show chassis routing-engine (查看CPU使用user、空闲idle)show config |dis set| match utmshow log utmd-av | lastclear log utmd-av############################################# ##############抓包功能配置:Could you please configure the following traceoption and send the log file.You can create the packet filter as followed#set security flow traceoption file debug#set security flow traceoption flag basic-datapath#set security flow traceoption packet-filter filter1 source-prefix destination-prefixdestination-port 80#set security flow traceoption packet-filter filter2 source-prefix destination-prefix destination-port 80#committhe second one is for the return traffic.show log debugrequest system license update。
Juniper防火墙基本命令

Juniper防火墙基本命令Juniper防火墙基本命令常用查看命令Get int查看接口配置信息Get int ethx/x查看指定接口配置信息Get mip查看映射ip关系Get route查看路由表Get policy id x查看指定策略Get nsrp查看nsrp信息,后可接参数查看具体vsd组、端口监控设置等Get per cpu de查看cpu利用率信息Get per sessionde查看每秒新建会话信息Get session查看当前会话信息,后可匹配源地址、源端口、目的地址、目的端口、协议等选项Get session info查看当前会话数量Get system查看系统信息,包括当前os版本,接口信息,设备运行时间等Get chaiss查看设备及板卡序列号,查看设备运行温度Get counter stat查看所有接口计数信息Get counter stat ethx/x查看指定接口计数信息Get counter flow zone trust/untrust查看指定区域数据流信息Get counter screen zone untrust/trust查看指定区域攻击防护统计信息Get tech-support查看设备状态命令集,一般在出现故障时,收集该信息寻求JTAC 支持常用设置命令Set int ethx/x zone trust/untrust/dmz/ha配置指定接口进入指定区域(trust/untrust/dmz/ha等)Set int ethx/x ip x.x.x.x/xx配置指定接口ip地址Set int ethx/x manage配置指定接口管理选项,打开所有管理选项Set int ethx/x manage web/telnet/ssl/ssh配置指定接口指定管理选项Set int ethx/x phy full 100mb配置指定接口速率及双工方式Set int ethx/x phy link-down配置指定接口shutdownSet nsrp vsd id 0 monitor interface ethx/x配置ha监控端口,如此端口断开,则设备发生主/备切换Exec nsrp vsd 0 mode backup手工进行设备主/备切换,在当前的主设备上执行set route 0.0.0.0/0 interface ethernet1/3 gateway 222.92.116.33配置路由,需同时指定下一跳接口及ip地址所有set命令,都可以通过unset命令来取消,相当于cisco中的no所有命令都可以通过“TAB”键进行命令补全,通过“?”来查看后续支持的命令防火墙基本配置create account [admin | user] 回车输入密码:再次输入密码:configure account admin 回车输入密码:再次输入密码:2.port配置config ports auto off{speed [10 | 100 | 1000]} duplex [half |full] auto off3.Vlan配置无论是核心还是接入层,都要先创建三个Vlan,并且将所有归于Default Vlan的端口删除:config vlan default del port all create vlan Servercreate vlan Usercreate vlan Manger定义802.1q标记config vlan Server tag 10config vlan User tag 20config vlan Manger tag 30设定Vlan网关地址:config vlan Server ipa 192.168.41.1/24config vlan User ipa 192.168.40.1/24config vlan Manger ipa 192.168.*.*/24Enable ipforwarding 启用ip路由转发,即vlan间路由Trunk 配置config vlan Server add port 1-3 tconfig vlan User add port 1-3 tconfig vlan manger add port 1-3 t4.VRRP配置enable vrrpconfigure vrrp add vlan UserVlanconfigure vrrp vlan UserVlan add master vrid 10192.168.6.254configure vrrp vlan UserVlan authentication simple-passwordextremeconfigure vrrp vlan UserVlan vrid 10 priority 200configure vrrp vlan UserVlan vrid 10 advertisement-interval15configure vrrp vlan UserVlan vrid 10 preempt5.端口镜像配置首先将端口从VLAN中删除enable mirroring to port 3 #选择3作为镜像口config mirroring add port 1 #把端口1的流量发送到3config mirroring add port 1 vlan default #把1和vlandefault 的流量都发送到36.port-channel配置enable sharing grouping {port-based |address-based | round-robin} show port sharing //查看配置7.stp配置enable stpd //启动生成树create stpd stp-name //创建一个生成树configure stpd add vlan {ports [dot1d | emistp |pvst-plus]} configure stpd stpd1 priority 16384configure vlan marketing add ports 2-3 stpd stpd1 emistp8.DHCP 中继配置enable bootprelayconfig bootprelay add9.NAT配置Enable nat #启用natStatic NAT Rule Exampleconfig nat add out_vlan_1 map source 192.168.1.12/32 to216.52.8.32/32Dynamic NAT Rule Exampleconfig nat add out_vlan_1 map source 192.168.1.0/24 to216.52.8.1 - 216.52.8.31 Portmap NAT Rule Example config nat add out_vlan_2 map source 192.168.2.0/25 to216.52.8.32 /28 both portmap Portmap Min-Max Example config nat add out_vlan_2 map source 192.168.2.128/25to216.52.8.64/28 tcp portmap 1024 - 819210.OSPF配置enable ospf 启用OSPF进程create ospf area 创建OSPF区域configure ospf routerid [automatic |] 配置Routeridconfigure ospf add vlan [ | all] area {passive}把某个vlan加到某个Area中去,相当于Cisco中的network的作用configure ospf area add range [advertise | noadvertise]{type-3 | type-7} 把某个网段加到某个Area中去,相当于Cisco中的network的作用configure ospf vlan neighbor addOSPF中路由重发布配置enable ospf export direct [cost [ase-type-1 | ase-type-2]{tag } |]enable ospf export static [cost [ase-type-1 | ase-type-2]{tag } |]enable ospf originate-default {always} cost [ase-type-1 | ase-type-2]{tag}enable ospf originate-router-id11.SNMP配置enable snmp accessenable snmp trapscreate access-profile type [ipaddress | vlan]config snmp access-profile readonly[ |none]配置snmp的只读访问列表,none是去除config snmp access-profile readwrite[ | none]这是控制读写控制config snmp add trapreceiver {port}community {from} 配置snmp接收host和团体字符串12.安全配置disable ip-option loose-source-routedisable ip-option strict-source-routedisable ip-option record-routedisable ip-option record-timestampdisable ipforwarding broadcastdisable udp-echo-serverdisable irdp vlandisable icmp redirectdisable web 关闭web方式访问交换机enable cpu-dos-protect13.Access-Lists配置create access-list icmp destination sourcecreate access-list ip destination source ports create access-list tcp destination source ports create access-list udp destination source ports 14.默认路由配置config iproute add default15.恢复出厂值,但不包括用户改的时间和用户帐号信息unconfig switch {all}16.检查配置show versionshow configshow sessionshow management 查看管理信息,以及snmp信息show bannershow ports configurationshow ports utilization ?show memory/show cpu-monitoringshow ospfshow access-list { | port}show access-list-monitorshow ospf areashow ospf area detailshow ospf ase-summaryshow ospf interfaces {vlan | area }unconfigure ospf {vlan | area }switchshow switchshow configshow diagshow iparpshow iprouteshow ipstatshow logshow tech allshow version detail17.备份和升级软件download image [ |] {primary | secondary} upload image [ |] {primary | secondary}use image [primary | secondary]18.密码恢复。
juniper命令注解
juniper命令注解netscreen 设备管理配置netscreen 设备管理配置8实例分析:NETSCREEN 现有配置1.1时间设定set clock dst-off /自动调整时间关set clock ntp /设置NTP时间同步set clock timezone 9 /设置时区set vrouter trust-vr sharable /设置虑拟路由器trust-vr可以为其他VSYS系统共享1.2路由导出及自定义服务设定unset vrouter "trust-vr" auto-route-export /禁止路由器trust-vr的路由自动导出set service "CVS" protocol tcp src-port 0-65535 dst-port 2401-2401/自定义CVS服务协议为TCP 源端口为0-65535 目地端口为24011.3认证的设定set auth-server "Local" id 0 /设置认证SERVER为本地认证set auth-server "Local" server-name "Local" /设置本地认证SERVER名为LOCAL set auth default auth server "Local" /设置默认认证服务器为LOCAL1.4管理员的设定set admin name "netscreen" /设置管理员用户名set admin password "XXXXXX" /设置管理员密码set admin user "livedoorcn" password "XXXXXXX" privilege "all"/添加管理员用户livedoorcn及其权限为R-W1.5管理IP的设定set admin manager-ip xxx.174.65.0 255.255.255.0 /设置管理IPset admin manager-ip 10.0.71.136 255.255.255.255 /设置管理IPset admin manager-ip xxx.xxx.xxx.141 255.255.255.192 /设置管理IPset admin manager-ip xxx.xxx.xxx.246 255.255.255.255 /设置管理IPset admin manager-ip 10.0.71.139 255.255.255.255 /设置管理IPset admin manager-ip xxx.xxx.xxx.0 255.255.255.0 /设置管理IP1.6SSH及区域设定set admin scs password disable username netscreen /禁止用户的SSH密码认证set admin scs password disable username livedoorcn /禁止用户的SSH密码认证set admin auth timeout 10 /设置认证时间超时set admin auth server "Local" /设置管理认证服务器set zone "Trust" vrouter "trust-vr" /设置信任区域set zone "Untrust" vrouter "trust-vr" /设置非信任区域set zone "VLAN" vrouter "trust-vr" /设置VLAN区域set zone "Trust" tcp-rst /设置TRUST安全区超时回应RESET信息set zone "Untrust" block /封锁同一安全区中主机之间的信息流unset zone "Untrust" tcp-rst /设置UNTRUST安全区超时不回应RESET信息set zone "MGT" block /封锁同一安全区中主机之间的信息流set zone "VLAN" block /封锁同一安全区中主机之间的信息流set zone "VLAN" tcp-rst /设置TRUST安全区超时回应RESET信息1.7网络攻击保护选项的设定set zone "Trust" screen alarm-without-drop /设置告警但并不丢弃数据包set zone "Trust" screen icmp-flood /设置ICMP泛洪攻击保护set zone "Trust" screen udp-flood /设置UDP泛洪攻击保护set zone "Trust" screen winnuke /设置winnuke攻击保护set zone "Trust" screen port-scan /设置端口扫描攻击保护set zone "Trust" screen ip-sweep /设置IP地址扫描攻击保护set zone "Trust" screen tear-drop /设置tear-drop攻击保护set zone "Trust" screen syn-flood /设置SYN 泛滥攻击保护(DOS)set zone "Trust" screen ip-spoofing /设置IP欺骗攻击保护set zone "Trust" screen ping-death /设置PING-DEATH攻击保护set zone "Trust" screen ip-filter-src /设置禁示使用松散源路由或严格源路由选项set zone "Trust" screen land /设置陆地攻击保护set zone "Trust" screen tcp-no-flag /设置TCP无标志保护set zone "Trust" screen unknown-protocol /设置未知协议保护set zone "Trust" screen ip-bad-option /设置BAD选项保护set zone "Trust" screen ip-record-route /设置记录路由保护set zone "Trust" screen ip-timestamp-opt /设置时间戳保护set zone "Trust" screen ip-security-opt /设置IP安全选项保护(已不用)set zone "Trust" screen ip-loose-src-route /设置松散源路由(记录)set zone "Trust" screen ip-strict-src-route /设置严格源路由(记录)set zone "Trust" screen ip-stream-opt /设置IP选项流ID(费弃选项)set zone "Trust" screen icmp-large /设置icmp大包保护set zone "Trust" screen syn-fin /设置操作系统set zone "Trust" screen fin-no-ack /设置FIN但无ACK标志保护set zone "Trust" screen limit-session source-ip-based /设置源IP会话限制set zone "Trust" screen syn-ack-ack-proxy /设置同步代理泛滥保护set zone "Trust" screen block-frag /设置IP封包的碎片保护set zone "Trust" screen limit-session destination-ip-based /设置目的IP会话限制set zone "Untrust" screen tear-dropset zone "Untrust" screen syn-floodset zone "Untrust" screen ping-deathset zone "Untrust" screen ip-filter-srcset zone "Untrust" screen landset zone "V1-Untrust" screen tear-dropset zone "V1-Untrust" screen syn-floodset zone "V1-Untrust" screen ping-deathset zone "V1-Untrust" screen ip-filter-srcset zone "V1-Untrust" screen landset zone "Trust" screen limit-session destination-ip-based 1280 /设置目的IP会话限制1.8接口的设定set interface "trust" zone "Trust" /将接口trust绑定到trust安全区域set interface "untrust" zone "Untrust" /将接口untrust绑定到untrust安本区域unset interface vlan1 ip /没有设定VLAN IP地址set interface trust ip 10.0.71.1/24 /设置trust接口IP地址set interface trust nat /设置trust接口工作模式set interface untrust ip xxx.xxx.xxx.131/26 /设置untrust接口IP地址set interface untrust route /设置untrust接口工作模式set interface untrust gateway xxx.xxx.xxx.129 /设置untrust接口网关unset interface vlan1 bypass-others-ipsec /阻止NetScreen 设备通过IPSec信息流unset interface vlan1 bypass-non-ip /阻止所有非IP和非ARP 单点传送信息流set interface trust ip manageable /设置trust接口为可管理接口set interface untrust ip manageable /设置untrust接口为可管理接口set interface untrust manage ping /允许untrust接口PINGset interface untrust manage ssh /允许untrust接口可以SSH 管理set interface untrust manage web /允许untrust接口可以WEB 管理1.9MIP地址映射的设定set interface "untrust" mip xxx.xxx.xxx.135 host 10.0.71.135 netmask 255.255.255.255 vrouter "trust-vr" /设置MIP映射地址以下类同:set interface "untrust" mip xxx.xxx.xxx.133 host 10.0.71.133 netmask 255.255.255.255 vrouter "trust-vr"set interface "untrust" mip xxx.xxx.xxx.134 host 10.0.71.134 netmask 255.255.255.255 vrouter "trust-vr"set interface "untrust" mip xxx.xxx.xxx.136 host 10.0.71.136 netmask 255.255.255.255 vrouter "trust-vr"set interface "untrust" mip xxx.xxx.xxx.139 host 10.0.71.139 netmask 255.255.255.255 vrouter "trust-vr"set interface "untrust" mip xxx.xxx.xxx.140 host 10.0.71.140 netmask 255.255.255.255 vrouter "trust-vr"set interface "untrust" mip xxx.xxx.xxx.132 host 10.0.71.132 netmask 255.255.255.255 vrouter "trust-vr"set interface "untrust" mip xxx.xxx.xxx.142 host 10.0.71.142 netmask 255.255.255.255 vrouter "trust-vr"set interface "untrust" mip xxx.xxx.xxx.143 host 10.0.71.143 netmask 255.255.255.255 vrouter "trust-vr"。
Juniper SRX防火墙配置手册-命令行模式
Juniper SRX防火墙简明配置手册目录一、JUNOS操作系统介绍 (3)1.1 层次化配置结构 (3)1.2 JunOS配置管理 (4)1.3 SRX主要配置内容 (5)二、SRX防火墙配置对照说明 (6)2.1 初始安装 (6)2.1.1 登陆 (6)2.1.2 设置root用户口令 (6)2.1.3 设置远程登陆管理用户 (7)2.1.4 远程管理SRX相关配置 (7)2.2 Policy (8)2.3 NAT (8)2.3.1 Interface based NAT (9)2.3.2 Pool based Source NAT (10)2.3.3 Pool base destination NAT (11)2.3.4 Pool base Static NAT (12)2.4 IPSEC VPN (13)2.5 Application and ALG (15)2.6 JSRP (15)三、SRX防火墙常规操作与维护 (19)3.1 设备关机 (19)3.2设备重启 (20)3.3操作系统升级 (20)3.4密码恢复 (21)3.5常用监控维护命令 (22)Juniper SRX防火墙简明配置手册SRX系列防火墙是Juniper公司基于JUNOS操作系统的安全系列产品,JUNOS集成了路由、交换、安全性和一系列丰富的网络服务。
目前Juniper公司的全系列路由器产品、交换机产品和SRX安全产品均采用统一源代码的JUNOS操作系统,JUNOS是全球首款将转发与控制功能相隔离,并采用模块化软件架构的网络操作系统。
JUNOS作为电信级产品的精髓是Juniper真正成功的基石,它让企业级产品同样具有电信级的不间断运营特性,更好的安全性和管理特性,JUNOS软件创新的分布式架构为高性能、高可用、高可扩展的网络奠定了基础。
基于NP架构的SRX系列产品产品同时提供性能优异的防火墙、NAT、IPSEC、IPS、SSL VPN和UTM等全系列安全功能,其安全功能主要来源于已被广泛证明的ScreenOS操作系统。
Juniper交换机配置手册
Juniper交换机配置⼿册Juniper交换机配置⼿册⼀、交换机配置部分1.使⽤console线连接⾄交换机COM参数:2.使⽤root账号登陆,默认为空密码login: root--- JUNOS 9.1R2.10 built 2008-07-01 04:34:43 UTCroot@%开启交换机命令⾏:root@% cli //%为unix shell提⽰符root> //>为cli提⽰符3.进⼊configuration模式root> configure[edit]root#juniper 交换机有3种命令⾏模式Root模式:当以root密码登陆console时默认进⼊该模式⽤户模式:在root模式中输⼊cli命令进⼊该模式,该模式主要⽤于检查交换机配置、状态使⽤。
配置模式:在⽤户模式中输⼊configure 进⼊。
该模式下主要⽤于更改交换机配置。
4.设置交换机root账号密码[edit]root# set system root-authentication plain-text-passwordNew password:Retype new password:5.配置⽹络管理参数[edit]root# edit system[edit system]root# set services telnet //配置使⽤telnet服务登陆交换机[edit system]root# set services ssh[edit system]root# set services web-management http[edit system]root# commit and-quitcommit completeExiting configuration moderoot@switch>6.配置其他管理员账号密码,以添加⼀个admin账号为例[edit]Set system login user admin class super-user authentication plain-text-passwordNew password:Retype new password:7.提交配置⽂件使配置⽣效[edit]commit8. 配置VLAN,三层VLAN虚拟地址及VLAN接⼝以配置valn10 为例,下⾯为配置命令:[edit]set vlans vlan_10vlan-id10set vlans vlan_10 l3-interface vlan.10set interface vlan unit10family inet address192.192.0.167/24将接⼝划⼊到VLAN中set interface ge-0/0/10 unit 0 family ethernet-switching vlan members vlan_10 将接⼝配置成trunk ⽅法Set interface ge-0/0/23 unit 0 family ethernet-switching port-mode trunk vlan members all //将ge-0/0/23接⼝配置成为VLAN,并允许所有VLAN数据通过9. 配置链路捆绑具体命令如下:set chassis aggregated-devices ethernet device-count 5 //配置链路聚合端⼝数⽬为5个(ae0-ae4)set interface ae0 aggregated-ether-options lacp active //配置ae0接⼝链路聚合的模式set interface ae0 unit 0 family ethernet-switching port mode trunk vlan members all //配置ae0 为trunk并允许所有VLAN通过delete interface ge-0/0/4 //删除ge-0/0/4的默认配置delete interface ge-1/0/4set interface ge-0/0/4 ether-options 802.3ad ae0 //将ge-0/0/4接⼝绑定⾄ae0 set interface ge-1/0/4 ether-option 802.3ad ae0对端⼆层交换机配置使⽤相同⽅法ae接⼝后链路捆绑即⽣效10.配置路由添加⼀条默认路由⾄JUNIPER ISG1000set routing-options static route 0.0.0.0/0 next-hop 100.1.1.1;在hillstone防⽕墙上VPN切换时将分⽀点⽹段路由指向hillstone 5020Set routing-options static route 192.150.1.0/24 next-hop 100.1.2.1 //这条路由必须在切换VPN时添加,在切换前添加会造成VPN⽆法访问。
Juniper SRX防火墙配置手册-命令行模式
Juniper SRX防火墙简明配置手册目录一、JUNOS操作系统介绍 (3)1.1 层次化配置结构 (3)1.2 JunOS配置管理 (4)1.3 SRX主要配置内容 (5)二、SRX防火墙配置对照说明 (6)2.1 初始安装 (6)2.1.1 登陆 (6)2.1.2 设置root用户口令 (6)2.1.3 设置远程登陆管理用户 (7)2.1.4 远程管理SRX相关配置 (7)2.2 Policy (8)2.3 NAT (8)2.3.1 Interface based NAT (9)2.3.2 Pool based Source NAT (10)2.3.3 Pool base destination NAT (11)2.3.4 Pool base Static NAT (12)2.4 IPSEC VPN (13)2.5 Application and ALG (15)2.6 JSRP (15)三、SRX防火墙常规操作与维护 (19)3.1 设备关机 (19)3.2设备重启 (20)3.3操作系统升级 (20)3.4密码恢复 (21)3.5常用监控维护命令 (22)Juniper SRX防火墙简明配置手册SRX系列防火墙是Juniper公司基于JUNOS操作系统的安全系列产品,JUNOS集成了路由、交换、安全性和一系列丰富的网络服务。
目前Juniper公司的全系列路由器产品、交换机产品和SRX安全产品均采用统一源代码的JUNOS操作系统,JUNOS是全球首款将转发与控制功能相隔离,并采用模块化软件架构的网络操作系统。
JUNOS作为电信级产品的精髓是Juniper真正成功的基石,它让企业级产品同样具有电信级的不间断运营特性,更好的安全性和管理特性,JUNOS软件创新的分布式架构为高性能、高可用、高可扩展的网络奠定了基础。
基于NP架构的SRX系列产品产品同时提供性能优异的防火墙、NAT、IPSEC、IPS、SSL VPN和UTM等全系列安全功能,其安全功能主要来源于已被广泛证明的ScreenOS操作系统。
- 1、下载文档前请自行甄别文档内容的完整性,平台不提供额外的编辑、内容补充、找答案等附加服务。
- 2、"仅部分预览"的文档,不可在线预览部分如存在完整性等问题,可反馈申请退款(可完整预览的文档不适用该条件!)。
- 3、如文档侵犯您的权益,请联系客服反馈,我们会尽快为您处理(人工客服工作时间:9:00-18:30)。
1.〉模式进入#模式:configure
2.配置静态路由:>set route 10.1.10.0/24 int e1 gateway 10.1.1.254
3.查看接口的配置:>get interface
4.查看静态路由:>get route >get route ip 10.1.10.5
5.Ping 测试:>ping 10.1.10.5
6.Traceroute 测试:>trace 10.1.10.5
7.配置接口的模式(nat和route):>set interface e1 nat
8.保存:>save
9.配置文件备份:>save config from flash to tftp 1.1.7.250 15june03.cfg
10.配置文件恢复:>save config from tftp 1.1.3.250 15june03.cfg to flash
11.IOS备份:>save software from flash to tftp 1.1.7.250 ns208image.bin
12.IOS升级:>save software from tftp 1.1.7.250 newimage to flash
13.透明模式的配置:A.建立2层的安全区(在没有使用缺省安全区的情况下):>set zone
name L2-Demo L2 1 // set zone name <name> L2 <vlan_tag>
B.分配接口给2层安全区:>set int e3 zone L2-Demo
C.为vlan1配置管理地址:>set int vlan1 manage-ip 1.1.7.100/24
a.配置IP地址:>set int vlan1 ip 1.1.7.1/24
b.选择广播的方法:>set vlan1 broadcast flood
c.配置管理服务:(允许所有的管理服务)>set int vlan1 manage
D.(可选项)配置每个安全区的管理服务:>set zone v1-dmz manage web
E.在不同的安全区之间配置策略:
14.透明模式的检查工具:>get int
>get arp ,>get mac-learn,>get session
15.透明模式是一个非常灵活的防火墙部署解决方案,可以快速实现防火墙和VPN的功能,不需要修改网络结构,建立虚拟地址(NAT),就可以实现访问控制。
16.路由模式;
配置第三层的步骤:A.建立zones(如果没有使用默认的zone):>set zone name private B.分配接口给zone:>set int e8 zone untrust
C.分配IP地址给接口:>set int e8 ip 1.1.8.1/24
D.配置静态路由:>set route 10.1.10.0/24 int e1 gateway 10.1.1.254
17.清除接口IP:>unset interface Ethernet1 ip
18.将端口从路由模式修改为NAT模式:>set int ethernet2 NAT。