readme 安装自学指南
Redmine安装使用说明文档
Redmine安装使用说明文档Redmine是一个基于web的项目管理软件,是基于ROR(Ruby on Rails)框架开发的一套跨平台项目管理系统.,是项目管理系统的后起之秀,支持多种数据库,除了和DotProject的功能大致相当外,还有不少自己独特的功能,例如提供wiki、新闻台、时间跟踪、feed聚合、导出pdf等待,还可以集成其他版本管理系统和BUG跟踪系统,例如SVN、CVS、TD等等。
总体而言,Redmine 是一个轻型,便捷的项目管理系统,具备一般软件开发项目常用的功能,并且有良好的扩展性,非常适合于小型软件项目的开发管理。
一、Redmine的安装1.1 下载软件:本文所用的软件有:Redmine 0.8.4:bbb:///projects/redmine/InstantRails-2.0-win:bbb:///projects/instantrails/1.2 Remine的安装1.首先将下载后的InstantRails-2.0-win.zip文件解压,以下假设解压到C:\。
InstantRails是一个Rails应用的集成包括了Ruby运行时需要的Rails框架、PhpMyAdmin、Apache、MySql等,这样就不需要分别下载需要的东西。
其中Apache是用的1.3版本,主要用于运行PhpMyAdmin(MySql的管理工具),Redmine本身内置了一个Ruby写的bbb服务器:WEBrick 因此并不再需要Apache。
2.将下载后的redmine-0.8.4.zip文件解压缩,将解压缩后的文件夹直接复制到InstantRails目录的rails_apps目录下3.启动InstantRails(在C:\C:\InstantRails-2.0-win\下有个InstantRails.exe直接运行即可)会出现一个界面(见下图)上面可以控制Apache和MySql的停止和启动,请确保这两个都启动了。
Readme(安装参考方法二)

8.打开License Server Administrator,启动服务。
FEATURE ArcView3 ARCGIS 10.0 01-jan-0000 2048 ADBC8EF1F28B9DC18F96 \
vendor_info=TXDH42L7EY6Z4X4JE221 ck=174
FEATURE ArcView31 ARCGIS 10.0 01-jan-0000 2048 FDCC4EB18017443D6297 \
vendor_info=H2T570H3D291F1TGH254 ck=55
FEATURE ArcReader ARCGIS 10.0 01-jan-0000 2048 0D9CBE710E5695C37E6E \
vendor_info=758Y1G82MC96F90LD184 ck=78
4.如果你只想授权几个功能就选择相应的功能按添加,每添加一个就增加一个功能的授权(按移除可以移除上一个授权,按清除可清除所有已添加的授权),如果你想授权所有功能,按所有即可。
5生成了许可文件内容后,全选框内的文字复制这些内容,新建一个文本文档,粘贴这些文字,另存文件为service.txt。
6.也可将下面上下------------之间内容copy至service.txt,就不用注册机了,这个是长久注册的,要修改“此处为计算机名”内容为你的计算机名
ReadMe_Psychtoolbox安装
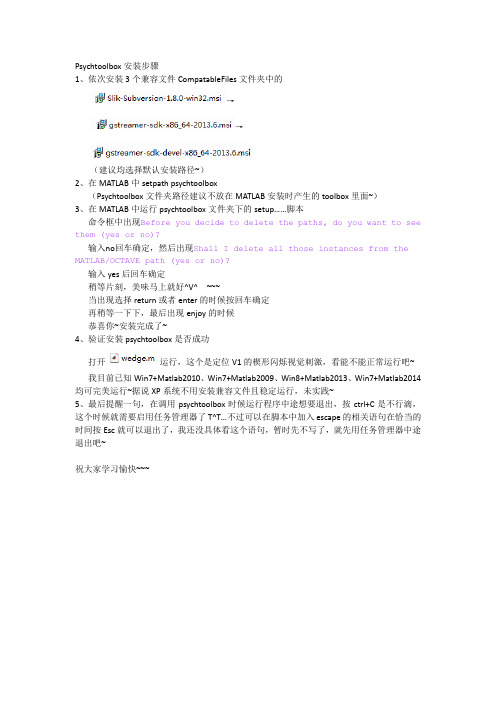
Psychtoolbox安装步骤1、依次安装3个兼容文件CompatableFiles文件夹中的→→(建议均选择默认安装路径~)2、在MATLAB中setpath psychtoolbox(Psychtoolbox文件夹路径建议不放在MATLAB安装时产生的toolbox里面~)3、在MATLAB中运行psychtoolbox文件夹下的setup……脚本命令框中出现Before you decide to delete the paths, do you want to see them (yes or no)?输入no回车确定,然后出现Shall I delete all those instances from the MATLAB/OCTAVE path (yes or no)?输入yes后回车确定稍等片刻,美味马上就好^V^ ~~~当出现选择return或者enter的时候按回车确定再稍等一下下,最后出现enjoy的时候恭喜你~安装完成了~4、验证安装psychtoolbox是否成功打开运行,这个是定位V1的楔形闪烁视觉刺激,看能不能正常运行吧~ 我目前已知Win7+Matlab2010、Win7+Matlab2009、Win8+Matlab2013、Win7+Matlab2014均可完美运行~据说XP系统不用安装兼容文件且稳定运行,未实践~5、最后提醒一句,在调用psychtoolbox时候运行程序中途想要退出,按ctrl+C是不行滴,这个时候就需要启用任务管理器了T^T…不过可以在脚本中加入escape的相关语句在恰当的时间按Esc就可以退出了,我还没具体看这个语句,暂时先不写了,就先用任务管理器中途退出吧~祝大家学习愉快~~~。
readme.md 编写规则
`readme.md` 文件是一个使用Markdown 语法编写的文件,它通常用于提供关于项目或软件的简要说明和指南。
以下是编写`readme.md` 文件的一些基本规则和指南:1. 简洁明了:确保`readme.md` 文件的内容简洁明了,易于理解。
不要在文件中包含无关紧要的信息,只提供关键的、有用的信息。
2. 使用标题:使用Markdown 的标题语法来组织内容。
标题可以使内容结构更清晰,更容易理解。
3. 解释项目或软件的功能:在`readme.md` 文件中,简要解释项目或软件的功能、用途和目的。
这有助于用户了解该项目的价值。
4. 提供安装和使用指南:如果项目是一个软件库或工具,提供安装和使用指南是非常重要的。
确保说明所需的依赖项、安装步骤以及如何使用该工具或库。
5. 列出示例或演示:如果可能的话,提供一些示例代码或演示,以便用户可以更直观地了解项目或软件的功能。
6. 提及可能的限制或注意事项:在`readme.md` 文件中提及任何限制或注意事项,例如版权、许可证、使用条款等。
7. 保持更新:确保`readme.md` 文件保持最新,以便新用户可以快速了解项目的最新状态和相关信息。
8. 使用清晰易读的字体和格式:在编写`readme.md` 文件时,使用清晰易读的字体和格式来增加可读性。
例如,可以使用列表、表格等来组织信息。
9. 链接到其他相关资源:如果存在其他相关资源,例如文档、示例代码或社区论坛等,请在`readme.md` 文件中提供链接,以便用户查找更多信息。
10. 遵守Markdown 语法规则:确保使用正确的Markdown 语法规则来格式化文本,例如使用`#` 来表示标题,使用`` 或`-` 来表示列表等。
这些是一些编写`readme.md` 文件的基本规则和指南。
根据您项目的需求和目的,您可以在`readme.md` 文件中包含其他相关信息。
debian下安装redmine

debian下安装redmine1.Debian6安装。
具体的安装步骤在这里不详细描述了,我用DVD安装的6.0.1a-amd64。
安装过程中请保证DVD光盘在光驱中且被加载。
2.准备工作:执行升级。
shell>sudo apt-get updateshell>sudo apt-get upgrade。
3.安装build-essentia安装包包含make和gcc,用来编译ruby 源代码。
shell>sudo apt-get install build-essential4.安装Debian6自带Mysql-5.1.49-3。
shell>sudo apt-get install mysql-server mysql-client(安装过程中需要输入管理员密码并确认)5.编译安装ruby。
进入Ruby源码所在目录,先将压缩包解压缩。
shell> tar zxvf ruby-1.8.7-p72.tar.gz之后进入解压缩后的目录shell> cd ruby-1.8.7-p72开始安装Ruby:shell>sudo ./configure --prefix=/usr/local/ruby --enable-install-docshell>sudo makeshell>sudo make install安装ruby完成!(注意:安装的目录是/usr/local/ruby,这个路径大家可以自己去调整)。
6.ruby加入系统PATH(etc/profile)shell> vi /etc/profile在语句export PATH 上面追加一行,如下:PATH=$PATH:/usr/local/ruby/bin※重新启动或手动将PATH导入到当前运行系统中※测试:ruby -v7.开始安装Rubygem。
进入Rubygem源码所在的目录,先将压缩包解压缩。
redmine1.2.1_安装指南

Redmine1.2.1 安装指南因为redmine是需要apache 和mysql的,所以正好我自己电脑的环境,已经安装好了apache和mysql。
此外,redmine使用ruby写的,所以还需要ruby的环境。
配置ruby 的环境我选用的是railsinstaller,目前railsinstaller的官网上/只有最新的2.0版本,集成的是ruby 1.9.2,而redmine 1.2.1只能兼容ruby 1.8.7.官网上又下载不了历史版本,费了好大的劲,满世界的找,终于在/user/alpha006名下找到了railsinstaller 1.1.1。
解压安装(当然有人需要的话,可以私下找我要)。
去redmine的官方网站下载所需要的版本-- 的我下载的的是redmine 1.2.1.弄清楚这个版本的需要的环境。
基本上就是我这里所描述的,后面会贴一个总的。
做好这些准备工作以后,可以配置redmine的运行环境了,如下步骤:1. 把redmine的解压到railsinstaller所产生的sites目录。
在dos窗口进入sites\redmine 目录下。
2. gem install rails -v=2.3.11 安装rails 2.3.11版本,这个redmine 1.2.1所要求的。
3. gem install rack -v=1.1.1 安装rack 1.1.1版本,这个redmine 1.2.1所要求的。
4. gem install -v=0.4.2 i18n 这个根据安装时返回的错误命令提示来决定。
比如的我就是提示Missing the i18n 0.4.2 gem. Please `gem install -v=0.4.2 i18n`5.进入mysql创建数据库。
执行以下几条sql 语句。
create database redmine character set utf8;create database redmine_development character set utf8;create database redmine_test character set utf8;create user 'redmine'@'localhost' identified by 'my_password';grant all privileges on redmine.* to 'redmine'@'localhost';6.拷贝config/database.yml.example文件到config/database.yml,修改database.yml的内容production:adapter: mysqldatabase: redminehost: localhostusername: redminepassword: my_passwordUsername 和password字段就是自己要设置的数据库的账号和密码,为了避免麻烦,把redmine_development和redmine_test的账户信息也设置好。
redmine安装部署
redmine安装使用一、安装redmine安装方法很多,下面介绍一种简单的安装方案:1.下载集成安装包,下载地址/stack/redmine2.安装包下载后,点击运行,安装步骤很简单,基本上一路执行下一步就可以,有几个地方需要注意:语言选择最好选择英文(项目运行后可以选择中文显示);创建密码的时候记住密码,这个密码是你数据库初始化时候admin账户的初始密码和登录数据库时候root账户的密码。
3.安装完成后,打开操作界面,如下图选择“Manager Servers”选项卡,如下图所有服务正常启动,则安装成功,如果没有启动则安装失败。
失败原因可能是端口占用、服务名称占用等原因,需要重新定义安装。
注:一件安装包内容如下:apache、redmine、php、ruby、mysql、phpadmin、svn。
二、集成插件使用bitnami-redmine一键安装的redmine项目集成普通插件十分简单。
1.首先需要到官网上下载支持所安装redmine版本的插件;2.将下载来的压缩包解压至%bitnami%/redmine-x.x.x-x/apps/redmine/htdocs/plugins目录下面。
3.将解压出来的文件夹名称由xxxxx-master改为xxxxx;4.打开“开始”—》“所有程序”—》“Bitnami Redmine Stack”—》使用“product fullname”,打开命令端。
5.cd命令切换到%bitnami%/redmine-x.x.x-x/apps/redmine/htdocs/plugins目录下面6.bundle install,安装集成插件需要的工具7.rake redmine:plugins:migrate RAILS_ENV=production,开始集成插件。
8.重启服务,再进如redmine,修改相关配置即可。
三、svn使用bitnami redmine意见安装默认启用svn服务,可以在本地新建svn仓库服务,也可以使用其他的svn仓库。
README-step7 v5.4 安装说明
SIMATICSTEP 7 V5.4 Programming Software for SIMATIC S7 / M7 / C7Notes on Installation and UsageThese notes should be considered more up-to-date than the information in other documents. Read the notes carefully, because they contain information on installing and using STEP 7 V5.4.Note when printing the file that the left and right margins are set to a width of 25 millimeters for A4 portrait format.ContentsNotes on Installation1 Contents of the Consignment2 Hardware Requirements3 Software Requirements3.1 Operating Environment3.2 Memory Requirements3.3 Compatibility with Other Software Products3.3.1 Rational ClearCase3.3.2 Network Settings when Using other Software Products3.3.3 Interdependency with An Installed S7 Fault-tolerant System3.4 Online Documentation3.5 Upgrading from an earlier STEP 7 version and changing over from STEP 7Lite3.5.1 STEP 7 V5.4 Upgrade3.5.2 STEP 7 V5.4 PowerPack4 Installation4.1 Installing STEP 7 V5.44.2 License Key of STEP 7 V5.44.3 Uninstalling STEP 7 V5.44.4 Additional Notes on Installation4.4.1 Using a Wheel-Mouse4.4.2 Notes on using Communication Cards in PCs/ PGs4.4.3 Installing on foreign-language operating systemsNotes on Usage (Release Notes)1 New Features and Changes in the New Version2 Notes on Configuring and Operating the Software2.1 How STEP 7 Fulfills the IEC Standard2.2 General Notes2.3 Using Network Drives2.4 Multi-user Operation2.5 Multiprojects2.6 Swapping Different Versions of STEP 72.7 Libraries and Sample Projects2.8 SIMATIC Manager2.9 Password Protection2.10 Using Symbolic Names (Upper and Lower Case for Symbols)2.11 Hardware Configuration (Central)2.12 Hardware Configuration (PROFIBUS DP)2.13 Hardware Configuration (PROFINET IO)2.14 Redundant I/O: Channel-granular Redundancy2.15 Diagnosing Hardware2.16 Configuring Connections2.17 MPI / PROFIBUS Network Settings2.18 SIMATIC M72.19 Ladder Logic, Function Block Diagram, and Statement List, Reference Data 2.20 Message Configuration2.21 Translating Texts2.22 Managing Multilingual Texts2.23 S7-PDIAG2.24 Converting S5 Programs to S7 Programs2.25 Converting TI Programs to S7 Programs2.26 Fault-tolerant Systems2.27 Note on Using Foreign-Language Character Sets2.28 Note on the use of SIMATIC Logon3 Notes on DocumentationNotes on InstallationThe installation notes contain important information that you will require in order to install STEP 7 V5.4 Read these notes before installing the software.1 Contents of the ConsignmentThe two CDs in the content of consignment contain a complete version of STEP 7 V5.4.This version is in 5 languages and can be run using the operating systems listed underChapter 3.1.STEP 7 V5.4 is currently supplied on two CDs "STEP 7 V5.4 CD1/2" and "STEP 7 V5.4CD2/2" " in the contents of consignment with a floating, upgrade, rental or trial license:STEP 7 V5.4 (Floating License)Order number: 6ES7810-4CC08-0YA5The following items are included in this package:∙ 2 CDs STEP 7 (CD1/2 and CD2/2)∙ 1 License Key Disk∙ 1 Certificate of License∙ 1 Product InformationSTEP 7 V5.4 (Floating License) (V3/V4/V5.x > V5.4)Order number: 6ES7810-4CC08-0YE5The following items are included in this package:∙ 2 CDs STEP 7 (CD1/2 and CD2/2)∙ 1 License Key Disk∙ 1 Certificate of License∙ 2 Product InformationsSTEP 7 V5.4 PowerPack (Floating License)Order number: 6ES7810-4CC08-0YC5The following items are included in this package:∙ 2 CDs STEP 7 (CD1/2 and CD2/2)∙ 1 License Key Disk∙ 1 Certificate of License∙ 2 Product InformationsSTEP 7 V5.4 Rental License (50h)Order number: 6ES7810-4CC08-0YA6The following items are included in this package:∙ 2 CDs STEP 7 (CD1/2 and CD2/2)∙ License Key Disk∙ 1 Certificate of License∙ 1 Product InformationSTEP 7 V5.4 Trial License (14 days)Order number: 6ES7810-4CC08-0YA7The following items are included in this package:∙ 2 CDs STEP 7 (CD1/2 and CD2/2)Contents of the STEP 7 CDsCD1/2 (Installation CD)∙ STEP 7 V5.4∙ Converter for the conversion of TI405 and TI 505 programs∙ Automation License ManagerCD2/2∙ Shareware version of Acrobat Reader in five languages, with which you can view and print the supplied manuals∙ Product Notes: "What's New"∙ Product Notes: "New Modules"∙ Product Notes: "Central Installation"∙ Manual: "Getting Started: Working with STEP 7"∙ Manual: "Programming with STEP 7"∙ Manual: "Configuring Hardware and Communication Connections with STEP 7"∙ Manual: "System Modification in RUN Mode via CiR"∙ Manual: "Automation System S7-400H - Fault-Tolerant Systems"∙ Manuals: "NCM S7"∙ Manual: "From S5 to S7"∙ Manual: "Ladder Logic (LAD) for S7-300/400"∙ Manual: "Statement List (STL) for S7-300/400"∙ Manual: "Function Block Diagram (FBD) for S7-300/400"∙ Manual: "Standard and System Functions for S7-300/400"∙ Manual: "Standard and System Functions for TI STEP 7 Converter"∙ Manual: "PID Control"∙ Manual: "PID Temperature Control"∙ Compatibility List∙ SIMATIC iMap STEP 7 Addon∙ Description of the Command InterfaceThe manuals are available in an installable form on CD1/2 and are optionally available on your computer after STEP 7 has been installed. If you do not install the manuals, you can also view at any time on CD2/2.In order to work with the STEP 7 V5.4software, you need a programming device or a PC with the following minimum requirements for processor speed/performance, RAM and graphics capability:Operating System Minimum Requirements for:Processor RAM Graphics--------------------------------------------------------------------------------------------------------------------------∙ MS Windows 2000 Professional 600 Mhz 512 MB*) XGA 1024x78616 Bit color depth ∙ MS Windows XP Professional 600 Mhz 512 MB*) XGA 1024x78616 Bit color depth ∙ MS Windows Server 2003 2.4 GHz 1 GB XGA 1024x76816 Bit color depth *) A minimum RAM of 1 GB MB is recommendedUse a programming device or PC with the latest performance capabilities if you are editing extensive STEP 7 projects or working with hardware configurations containing several hundred modules (CPUs, slaves, I/O devices, etc.).In addition, you will need an external prommer for SIMATIC memory cards / MMC if you are using a PC and want to save your user programs to EPROMs and a SIMATIC NET interface if you want to use online functions to the PLC system with your personal computer.3.1 Operating EnvironmentOperating SystemsSTEP 7 V5.4 is a 32-bit application that is released for the following operating systems: Operating System Service Pack------------------------------------------------------------------------------------------------------------------------∙ MS Windows 2000 Professional SP4∙ MS Windows XP Professional SP 1 (or SP1a) or SP2∙ MS Windows Server 2003 with or without SP1 as a workstation computer (Exception: SIMATIC M7, refer to Notes on Usage, Chapter 2.17)You can find information about the operating systems on the Internet at Microsoft.STEP 7 V5.4 will not run in:∙ MS Windows 3.1∙ MS Windows for Workgroups 3.11∙ MS Windows XP HomeThe operating systems MS Windows 95, MS Windows 98SE, MS Windows Millenniumand MS Windows NT 4.0 are no longer supported since STEP 7 V5.3.Internet ExplorerAll operating systems must be using MS Internet Explorer 6.0 (or higher).User RightsRegarding user rights as of STEP 7 V5.3 incl. SP2, please observe the following:To be able to work with STEP 7 in MS Windows 2000/2003/XP, you must have loggedon at least as the user (not as a guest). You must possess administrator's rights forinstalling the STEP 7 software and also for setting up modules using the "Setting thePG/PC Interface" application. When using optional packages please observe the rightsrequired by the respective optional packages.If projects are saved on NTFS drives, the users must be granted full access here. Thisalso applies to the folders with the HSP updates (default: C:/HWUPDATES). Accesswithin S7PROJ is automatically granted to all users.Note:∙ The executability under user rights is only enabled for STEP 7 itself. Operation under user rights for optional packages is not guaranteed. Administrator or primary userrights may be required here.∙ After installing / uninstalling new hardware, the computer must be run at least once under administrator rights.File SystemsSTEP 7 achieves a slightly lower performance when operating on a MS Windows NTfile system (NTFS) as opposed to a FAT file system.Hibernation ModeShifting to hibernation mode is generally allowed by STEP 7. However, hibernationmust not be triggered if online connections are open or projects are being accessed bySTEP 7 applications via a network.In such case, online connections could be unintentionally terminated, and open projects on networks may experience data loss.For these reasons, the energy options for the operating system in the Windows ControlPanel should be set so that hibernation is not automatically triggered (by timer).Hibernation should not be triggered manually by the user in the cases mentionedabove.3.2 Memory RequirementsMemory Requirements for STEP 7Depending on your installation requirements and the number of languages installed,STEP 7 V5.4 requires between approx. 650 MB and 900 MB of memory on your harddisk. The exact value also depends on your operating system and on the file systemused on your programming device/personal computer.MS Windows Swap FileThe supported Windows operating systems also require additional free space on thehard disk (typically C:) for their swap files, depending on the memory configuration. Youshould keep at least double the value of the RAM free. (Example: If you have 512Mbytes of RAM, you will require another 1024 Mbytes of free space on the hard disk forthe swap file after STEP 7 has been installed.) Depending on the size of the project, itmay be necessary to have a larger swap file, for example, when copying an entireproject (twice the size of the project on the hard drive in addition). If the free memoryarea for the swap file is too small, errors may occur (the program could possibly crash).Additional Windows applications which run parallel to STEP 7 V5.4 (such as MicrosoftWord) also require additional hard disk space for the swap file.In order to ensure that the required memory for the swap file is really available, theminimum size for the swap file should be set to the above value. This can be set inWindows (for example, Windows XP Professional) in the taskbar in Start > Settings >Control Panel (in System > Advanced > System Performance > Settings > Advanced).You must make certain that you have enough free memory on the drive where theproject data are located. If there is not enough memory on the drive, the project datamay be destroyed during an operation (for example, when compiling an STL source fileinto blocks). We also recommend that you do not store the project data on the samedrive as the Windows swap file.3.3 Compatibility with Other Software Products3.3.1 Rational ClearCaseSTEP 7 projects must not be stored on ClearCase drives; that is, drives that are linkedto a ClearCase View (MVFS).3.3.2 Network Settings when Using other Software ProductsIf you are using other software products (for example, mail providers) on a programmingdevice or PC with STEP 7, observe the additional notes on network settings in thesection "Using Network Drives" (in Notes on Usage) in the second half of this READMEfile.3.3.3 Interdependency with An Installed S7 Fault-tolerant SystemThe configuration of fault-tolerant systems (H system) is integrated as of STEP 7 V5.3.If STEP 7 V5.4 is installed on a PC on which the S7 H Systems add-on package isinstalled, this is removed. Do not install the “S7 H Systems” optional package again. It isno longer required.3.4 Online DocumentationThe online help in STEP 7 V5.4 is split into two sections.You can find notes on the current context in the same way as with the standardWindows help.The general section of the online help is based on the HTML format.You can find more information on the structure of the documentation in Chapter 3 (inNotes on Usage) in the second half of this README file.3.5 Upgrading from an earlier STEP 7 version and changingover from STEP 7 Lite3.5.1 STEP 7 V5.4 UpgradeTo install the upgrade package, you must have a valid license for STEP 7 V3.x, V4.x,V5.0, V5.1, V5.2 or V5.3.--------------------------------------------------------------------------------------------------------------------------NoteTake into account that an upgrade may require the operating system to be replaced,because as of STEP 7 V5.3 older operating systems are no longer supported (refer toChapter 3.1). Further information on the upgrade is contained in the productinformation.The existing authorization / License Key with the AuthorsW / Automation LicenseManager program has to be saved to a floppy disk before the operating system isreplaced.--------------------------------------------------------------------------------------------------------------------------3.5.2 STEP 7 V5.4 PowerPackThe PowerPack is used to upgrade from a STEP 7 Lite V2.0 installation to STEP 7 V5.4.To install the PowerPack, you must have a valid license for STEP 7 Lite.--------------------------------------------------------------------------------------------------------------------------NoteTake into account that an upgrade may require the operating system to be replaced, because as of STEP 7 V5.3 older operating systems are no longer supported (refer to Chapter 3.1). Further information is contained in the product information.If STEP 7 Lite is installed on a PC running MS Windows XP Home, you will also have to upgrade the operating system since STEP 7 is not released for use on Windows XP Home.The existing authorization / License Key with the AuthorsW / Automation License Manager program has to be saved to a floppy disk before the operating system is replaced.--------------------------------------------------------------------------------------------------------------------------4 Installation4.1 Installing STEP 7 V5.4When installing STEP 7 V5.4, you can overwrite existing installations of STEP 7 V5.1,V5.2 or V5.3 whilst observing the authorized operating systems (refer to Chapter 3.1).You do not have to uninstall these STEP 7 versions and optional packages prior to theinstallation. However, you must uninstall older versions and their optional packagesbeforehand.In order to obtain the optimum display of the information during the Setup, you shouldset the color scheme in the control panel of your programming device/personalcomputer to at least 65536 colors.Before starting the Setup program, close all applications (such as Microsoft Word, etc.)and the "Control Panel" window, since you will need to restart Windows following theinstallation of STEP 7 V5.4so that all system variables can be entered completely.Insert the STEP 7 CD 1/2 in the drive. The setup program will guide you through theinstallation. The setup program starts automatically after the STEP 7 CD is inserted inthe drive. If you have disabled this function on your computer, start the setup programby double-clicking the SETUP.EXE program in the root directory.In the component selection box, select the Acrobat Reader, STEP 7, the AutomationLicense Manager, Acrobat Reader and any other components that you wish to install.If you would like to change the installation path suggested in the setup during the STEP7 installation, please note that you cannot install it directly to a root directory (e.g. D:) onyour computer. There has to be at least one higher-level folder such as "STEP7", forexample, D:\STEP7.These components will then be installed and entries will be made in Microsoft Windowsfiles.The following notes are intended to help you make the correct user entries requiredduring the Setup program:∙ The drive on which you install your STEP 7 V5.4system can be selected freely. On some PCs/programming devices, you will not be able to select the drive via theselection list. In this case, simply enter the drive with its path in the appropriate inputbox (for example, "e:\Siemens/Step7"). Note that all STEP 7 optional packages mustalso be installed on this drive, so there must be sufficient space available (see the"Memory Requirements" section). Avoid installing STEP 7 on a SUBST drive.∙ Before you use STEP 7 V5.4, Windows must be restarted. Only then do all of the Microsoft Windows entries become active. If you do not restart Windows, STEP 7V5.4cannot run properly and data may be lost. If the installation procedure isaborted, you will also need to restart Windows.∙ Refer to the tables in the S7KOMP_B.PDF file (the directory "Step7" following installation) for information on which versions of the optional packages can run withSTEP 7 V5.4 under the respective operating systems.∙ STEP 7 must not be installed in a directory the path of which includes characters that are not listed in the A SCII character set (refer to Chapter 2.26, section “Notes onUsage”).Contact your Siemens representative for more up-to-date information or check ourwebsite: http://www.ad.siemens.de/support.If the required version is not available on the computer, Acrobat Reader is automaticallysuggested for installation. When prompted, the STEP 7 CD2/2 must be inserted duringthe installation.--------------------------------------------------------------------------------------------------------------------------NoteSTEP 7 registers itself in the system files of the MS Windows operating system. Youcannot move or rename STEP 7 files or folders using Microsoft Windows utilities suchas the Explorer or modify STEP 7 data in the Microsoft Windows registry. The programmay no longer run properly after such modifications.--------------------------------------------------------------------------------------------------------------------------4.2 License Key of STEP 7 V5.4Before you can start working with STEP 7, you must transfer the license key from thelicense key diskette to the computer. There are two ways of doing this:∙ While you are installing STEP 7, the Setup program displays a message if there is no suitable license key installed on your computer. You can then decide whether youwant the license key to be installed by the “Setup” program or whether you want toinstall the license key manually at a later time using the “Automation LicenseManager” program.∙ If the license key cannot be installed during setup, continue the Setup program without installing the license key. Then boot the computer and install the license keyusing the taskbar in "Start > SIMATIC\License Simatic > License Management >Automation License Manger."To operate STEP 7 as of V5.3, you must make sure the Automation License Manager is installed.After the upgrade from V5.3 to V5.4, the License Key for V5.4 has to be used.-----------------------------------------------------------------------------------------------------------------NoteAs of STEP 7 V5.3, the authorization/the license key can be installed on all local drives.The Automation License Manger prevents the authorizations/license keys from beinginstalled on invalid drives or media such as RAM drives, diskettes or compressed drives(i.e. DBLSPACE). If the drive in a device is reported as being a "removable medium"and not, as usual, as a "hard drive", it will be treated as a CD, which means that nolicense key may be installed on it.In the case of compressed drives, you can install the authorization on the associatedhost drive.Read the notes on the Automation License Manager in the ALM README.WRI file onthe STEP 7 installation CD under "Automation License Manager\disk1\".Hidden files are stored in the folder "<Drive, on which the authorization/license key isinstalled>:\AX NF ZZ". These files and the folder must not be deleted, moved, or copied.They contain data required for the licensing of your software.If you do not adhere to these guidelines, the authorization/license key may beirretrievably lost.--------------------------------------------------------------------------------------------------------------------------Notes on error-free use of the license keys∙ The license key diskette must not be read-only. Because the license key diskette is to be used without write protection, there is a danger that a virus could betransferred from the hard disk to the diskette. You should therefore run a virus checkon your PC or programming device every time you install or remove a license key.∙ If you use an optimizing program that enables you to move fixed blocks of memory, only use this option once you have moved the license key from the hard disk back tothe license key diskette.∙ With the License Key a specially marked cluster is shown on the target drive. Some check programs display this cluster as "defective". Do not try to restore it.∙ Do not forget to transfer the license key to the license key diskette before formatting, compressing, or restoring your hard disk or before installing a new operating system.∙ If a backup copy of your hard disk contains copies of license keys, there is a danger that these copies may overwrite the valid installed license keys when you restoreyour backup data to the hard disk, thereby destroying the valid license keys. Toprevent a valid license key from being overwritten by a backup copy, you mustremove all license keys before you make a backup copy or exclude the license keysfrom the backup.Using the trial license:If no valid license key is installed for STEP 7 V5.4, a trial license key is used, which issupplied and installed by default together with STEP 7. However, STEP 7 can only beused for 14 days with this license key. When STEP 7 is started the first time without avalid license key, activation of the trial license key is offered.4.3 Uninstalling STEP 7 V5.4--------------------------------------------------------------------------------------------------------------------------NoteSoftware products must be uninstalled according to Microsoft Windows conventions.Use the Microsoft Windows application "Add/Remove Programs" (in the taskbar inStart > Settings > Control Panel > Add/Remove Programs) to remove your softwarepackage (for example, "STEP 7").As an alternative, you can use the setup program to uninstall a program.--------------------------------------------------------------------------------------------------------------------------If you uninstall an older version of STEP 7 in order to install STEP 7 V5.4, you mustfirst uninstall any existing optional packages for STEP 7 as well.When uninstalling the software, device drivers (for EPROM or communication interfaces) are not removed. If you have not installed any other products that require these driverson your computer, you should uninstall the drivers for the communication interface byopening the "Setting the PG/PC Interface" application (Start > SIMATIC > STEP 7 >Setting the PG/PC Interface and clicking the "Select" button) and uninstall the driverfor the EPROM interface with the "Configure Memory Card" option (Start > SIMATIC >STEP 7 > Configure Memory Card and clicking on "No EPROM driver").4.4 Additional Notes on Installation4.4.1 Using a Wheel-MouseWhen using a wheel mouse, be sure that the driver supplied by the manufacturer isinstalled. If this is not the case, STEP 7 will not always support the wheel feature of themouse.4.4.2 Notes on using Communication Cards in PCs/ PGsCP5611/ CP5611 Onboard (SIMATIC NET PROFIBUS Interface Via PCI Bus)In order to use the CP5611 card you require a PC or a programming device with PCIbus. You can then address SIMATIC stations via MPI or PROFIBUS (9.6 Kbps to 12Mbps).If you install STEP 7 after the CP has been inserted in the computer, the Plug and Playmechanism enters the CP5611 in the Device Manager of the Control Panel\System in"Other Devices". Therefore, the CP is sometimes not recognized when installing STEP7.In such cases, remove the CP5611 in the Device Manager after installing STEP 7 andreboot your computer.Observe the notes in the online help under "Setting the PG/PC Interface."CP5511 (SIMATIC NET PROFIBUS Interface Via PCMCIA)The card and socket services required to operate the card form part of MS 2000/XP.The CP5511 has plug-and-play facilities, meaning that the card is recognized by MSWindows 2000/XP and is integrated automatically into the system, provided yourPC/programming device has sufficient free resources (interrupt, address area).The CP 5511 cannot be operated in notebooks that are equipped with a PCMCIAcontroller of the type Omega Bridge II or TI 1130.Note:∙ The CP 551 does not support ACPI (Advanced Configuration and Power Interface) completely.∙ The CP 5511 is not supported under MS Windows Server 2003 .CP5512 (SIMATIC NET PROFIBUS Interface Via PC Card)A PC or a programming device with PC card slot is required to use the CP5512. Youcan then address SIMATIC stations via MPI or PROFIBUS (9.6 Kbps to 12 Mbps).MPI-ISA Card/ MPI-ISA OnboardThe MPI-ISA card and the MPI-ISA Onboard are no longer supported under MS Windows 2000 / XP and under MS Windows Server 2003.CP5411The CP5411 is not supported since STEP 7 V5.2.Hardnet ModulesIf you use the Industrial Ethernet network card CP1613 or the PROFIBUS cardsCP5613/14, you require the optional package SIMATIC NET PC additionally in a version compatible with STEP 7 V5.4 (see Compatibility List S7KOMP_A.PDF in the installation directory "STEP7").You require the SIMATIC-Net software as of V6.2 (CD 11/2003) to operate CP5613A2 and CP5614A2.General PC/Programming Device SettingsCommissioning Plug-and-Play Compliant ModulesTo commission the Plug-and-Play compliant modules (e.g. CP 5511, CP 5512 and CP 5611) in MS Windows 2000/XP/Server 2003, please proceed as follows:1. Install STEP 7. Close the dialog "Set PG/PC Interface" which appears at the end ofthe Setup without entering anything.2. Close MS Windows, shut down the PC and install the card. The CP 5511 or CP5512 can also be inserted in during operation.3. The communication module is installed automatically after the restart (or after CP5511 or CP 5512 has been inserted).4. Under Windows 2000, the message "New hardware found" is displayed. Confirm thismessage and all following dialogs (do not click on CANCEL).5. Under WinXP/Server2003, the Hardware Wizard is displayed. In the first dialogshown, select the option "No, not this time". Confirm all following dialogs (do not click on CANCEL).6. Then check the settings or select the desired interface configuration in "Set PG/PCInterface" (Start > SIMATIC > STEP 7>Set PG/PC Interface).If STEP 7 is installed after the plug-and-play compliant CPs (for example CP5611) on the computer, the CP is not recognized under MS Windows 2000/XP/Server 2003 when STEP 7 is installed.In this case remove the CP (network controller) after the STEP 7 has been installed in the device manager of the Control Panel\System under "Other components" and reboot your computer.Observe the information in the online help under "Set programming device/personal computer interface".When STEP 7 is installed on programming devices, the communication drivers are installed automatically and the default settings are accepted.The CP5611 has to be installed in the case of programming devices 7x0 PII / PIII,PG8x0 and PCs with onboard MPI interfaces.Setting of Interrupt and AddressMS Windows 2000/XP/Server 2003:。
Redmine安装配置
项目管理工具Redmine 安装试用手记1.安装导向(官网)/wiki/redmine/RedmineInstall2.坏境配置1)安装Ruby/projects/rubyinstaller/这里是一键安装包,一路Next即可,比较适合像我这种菜鸟^_^【注意】安装中有一个选项,是说要把Ruby的命令行配置到坏境变量中,为了下面调用命令方便,建议选上O(∩_∩)O2)安装ROR运行安装命令:gem install rails -v=3.2.17这是在线安装,比较慢,不过比较简单,亦然是小菜我的选择:)3)下载SQLite/download.html这里使用SQLite3,下载解压后,把sqlite.exe拷贝到刚才Ruby安装目录的Bin目录下即可 4)下载Sqlite ruby驱动/projects/sqlite-ruby/下载最新支持Win的驱动sqlite3-ruby-1.2.3-mswin32.gem运行安装命令:gem install sqlite3-ruby5) 下载DevKit1) Download Ruby 1.9.3-p02) Download DevKit file from/progDownload/DevKit-Download-193050.html (DevKit-tdm-32-4.5.2-20110712-1620-sfx.exe)3) Extract DevKit to path C:\Ruby193\DevKit4) cd C:\Ruby192\DevKit5) ruby dk.rb init6) ruby dk.rb review7) ruby dk.rb install3.安装配置Redmine1)下载最新版本/frs/?group_id=1850【注意】解压出来的目录路径中请不要包含空格,不然后面的安装配置中有惊喜给你,至于是什么惊喜,建议不怕郁闷的同志自己试一试:)2)修改数据库配置文件1.把config目录下的database.yml.example文件改名为database.yml2.修改production这一节为production:adapter: sqlite3database: db/redmine.db3.配置数据库Bundle install –-without development test rmagick运行命令行:(在Redmine的根目录下)1)创建数据库Bundle exec rake db:migrate RAILS_ENV="production"2)指定运行环境Bundle exec rake redmine:load_default_data RAILS_ENV="production"【注意】这里会让你选择语言,它已经内置了中文,回答“zh”即可O(∩_∩)OBundle exec rake generate_session_store3)下载Theme,这里我用黑黑的BaseCamp的Style :)1.下载地址/stuff/redmine/themes/basecamp/stylesheets/application.css2.安装方法在public/themes下新建目录basecamp,加入样式目录stylesheets,再把css文件加入其中即可,至于如何选用,下面运行Redmine之后进去玩玩,就能找到了,很easy的:) 4)运行Redmine(这里直接用Ruby自带的WEBrick做服务器,仅仅测试而已嘛,就将就一下啦)ruby script/server -e production那么现在就可以在以下地址访问Redmine了http://localhost:3000/Admin帐号和密码都是:admin4.运行截图HowTo install rmagick gem on WindowsPrerequisiteYou need to have the DevKit installed.Installation of ImageMagickDownload last setup packagefrom /script/binary-releases.php#windows and run it.In the Select Additional Tasks page of the wizard, make sure that both Add application directory to your system path and Install development headers and libraries for C and C++ options are checked:Installation of the rmagick gem∙open a new command prompt∙set CPATH and LIBRARY_PATH environment variables to point respectively to ImageMagick installation directory include and lib subdirectories (so theDevKit will find them at build time)For example:∙actually install the gem, e.g. with gem install rmagick or bundle install --without=development test, etc.Result:rmagick_installation_prompt.jpg (82.4 KB) Etienne Massip, 2012-05-25 13:11 ImageMagick_setup_options.png (37.2 KB) Etienne Massip, 2012-05-25 13:11 redmine_informations.png (6.72 KB) Etienne Massip, 2012-05-25 13:28安裝thin web服務器gem install thin安裝目錄下thin start –e production。
github readme语法
github readme语法摘要:1.GitHub Readme简介2.Readme文件的基本结构3.如何编写一个优秀的Readme文件4.阅读和编写Readme的最佳实践5.结论正文:【1.GitHub Readme简介】GitHub是一个基于Web的版本控制系统,为广大开发者提供了便捷的代码托管服务。
在GitHub上,每个仓库都有一个Readme文件,它像是仓库的简介,向使用者介绍项目的背景、功能、用途等信息。
Readme文件对于项目的成功推广和传播至关重要,它能帮助用户更快地了解项目,提高项目的可见性。
【2.Readme文件的基本结构】一个典型的Readme文件包括以下几个部分:1.标题:简要描述项目名称和功能。
2.简介:介绍项目的背景、目标和适用场景。
3.功能列表:罗列项目的主要功能和特点。
4.安装和使用说明:指导用户如何获取、安装和运行项目。
5.贡献说明:鼓励用户参与项目,说明如何提交问题、建议和代码。
6.授权说明:阐述项目的授权方式和使用条款。
7.版权声明:声明版权所有和使用限制。
【3.如何编写一个优秀的Readme文件】1.简洁明了:避免冗长的描述,用简练的语言表达清晰。
2.重点突出:将项目的核心价值和优势凸显出来,吸引用户关注。
3.规范格式:遵循Readme文件的通用结构,便于阅读和理解。
4.适度详细:针对不同层次的用户,提供适量的详细信息。
5.示例代码:提供实例代码,让用户快速了解项目的实际应用。
【4.阅读和编写Readme的最佳实践】1.养成阅读Readme文件的习惯:在获取和参与项目时,先阅读Readme 文件,了解项目基本情况。
2.及时更新Readme文件:随着项目的发展,及时更新Readme文件,反映项目的最新状态。
3.善用Markdown语法:Markdown是一种轻量级的标记语言,能简化文本的排版和格式化,提高Readme文件的易读性。
【5.结论】GitHub Readme文件是项目的重要组成部分,它能帮助用户快速了解项目、参与项目和推广项目。
- 1、下载文档前请自行甄别文档内容的完整性,平台不提供额外的编辑、内容补充、找答案等附加服务。
- 2、"仅部分预览"的文档,不可在线预览部分如存在完整性等问题,可反馈申请退款(可完整预览的文档不适用该条件!)。
- 3、如文档侵犯您的权益,请联系客服反馈,我们会尽快为您处理(人工客服工作时间:9:00-18:30)。
江苏省会计从业资格考试
会计电算化安装自学指南
课外学习的同学练习请按下列步骤:
步骤一、安装以下软件
软件1:新中大运行环境
软件2:考试工作站
先安装运行环境,再安装考试工作站。
软件3:电算化补丁act_2K
软件4:计算机操作题
步骤二、练习
1、打开桌面“会计电算化模拟练习”软件,“选择题”、“判断题”、“Windows题”、“Word题”、“Excel 题”直接练习。
(如果你的电脑安装的不是office2000的版本,“Word题”、“Excel题”也可以直接在桌面“计算机操作题”文件夹中练习)
2、实务题请在选择某套试卷等待初始化试题结束后,运行“开始”->“程序”->“电算化补丁”->“电算化补丁”,选择与做模拟练习时同一套试卷号,等系统显示“OK,你可以做实务题”后,将电算化补丁程序退出再选择实务题。
3、实务题练习演示讲座在“demo”文件夹中的“安装与操作演示”。
步骤三、理论题复习(选择题、判断题)
部分选择题及判断题见“初级电算化考试理论600题”、“江苏电算化新题库”,主要是计算机等级考试的水平,请至少浏览一遍。
如何判断凭证类别 1.借方有现金或银行存款为收
2.贷方有现金或银行存款为付
3.借贷双方都无现金和银行存款为转
4.借贷双方都有现金和银行存款为付
1、资产负债表单元格取数规则:
2、损益表(利润表)单元格取数规则。