柯尼卡美能达185e说明书
美能达操作指导书

目的:帮助使用者熟悉设备并指导使用方法1指导书使用范围及方法1.1应用于柯尼卡美能达数码复印机1.2适用于诚栋营地及子公司所有员工2使用方法2.1预热按下电源开关,开始预热,面板上应有指示灯显示,并出现等待信号。
当预热时间达到,机器即可开始复印,这时会出现可以复印信号或以音频信号告知。
2.2检查原稿拿到需要复印的原稿后,应大致翻阅一下,需要注意以下几个方面:原稿的纸张尺寸、质地、颜色,原稿上的字迹色调,原稿装订方式、原稿张数以及有无图片等需要改变曝光量的原稿。
这些因素都与复印过程有关,必须做到心中有数。
对原稿上不清晰的字迹、线条应在复印前描写清楚,以免复印后返工。
可以拆开的原稿应拆开,以免复印时不平整出现阴影。
2.3检查机器显示机器预热完毕后,应看一下操作面板上的各项显示是否正常。
主要包括以下几项:可以复印信号显示、纸盒位置显示、复印数量显示为“l”、复印浓度调节显示、纸张尺寸显示,一切显示正常才可进行复印。
2.4检查机器显示机器预热完毕后,应看一下操作面板上的各项显示是否正常。
主要包括以下几项:可以复印信号显示、纸盒位置显示、复印数量显示为“l”、复印浓度调节显示、纸张尺寸显示,一切显示正常才可进行复印.2.5设定复印份数按下数字键设定复印份数。
若设定有误可按“C”键,然后重新设定。
2.6设定复印倍率一般复印机的放大仅有一档,按下放大键即可,缩小倍率多以A3-A4,B4-B5或百分比等表示,了解了复印纸尺寸,即可很容易地选定缩小倍率。
如果无需放大、缩小,可不按任何键。
2.7选择复印纸尺寸根据原稿尺寸,放大或缩小倍率按下纸盒选取健。
如机内装有所需尺寸纸盒,即可在面板上显示出来;如无显示,则需更换纸盒。
2.8调节复印浓度根据原稿纸张、字迹的色调深浅,适当调节复印浓度。
原稿纸张颜色较深的,如报纸,应将复印浓度调浅些,字迹浅条细、不十分清晰的,如复印品原稿是铅笔原稿等,则应将浓度调深些。
复印图片时一般应将浓度调谈。
柯美打印机用户使用教程精品课件

操作的情况下,1分钟将自动退出系统;1分钟内他人可接着您的权限下继续操作。
4
复印操作
5
基本复印
复印
1 刷卡后进入菜单
2 按「复印」 2
此处可查看碳 粉使用情况
4
3 复印初始界面 可以选择红色框. 设 置彩色或黑白复印(仅限彩机)
3
4 按「小键盘1」后输入需要复印的份数 按「开始」,完成后,按「访问」键退出
g
f
e
纸盒显示灯 闪烁:盒内纸张少 长亮:纸盒内缺纸
1 2 a b cd
1:传真/扫描键,按后可进入传真/扫描界 面,和频幕上的传真/扫面键相同
2:APP键,按后可进入打印作业界面,和 频幕上的APP键相同
a:按此键,在屏幕上打开10键小键盘
b:开始进行所需操作
c:停止正在进行的操作(又称插入键,停止 目前作业,让别人先操作)
1
正面
2
刷卡进入系统,选择 复印,将身份证正面 放在稿台上
选择『ID Card』,按『开始』
开始后进入扫描界面
反面
将身份证翻面位于相同位置, 再点击面板上的『开始』按钮
* 同时适用于护照,名片等复印
1 2
点击显示屏上的 『完成Hale Waihona Puke 再次按『开始』完成12
复印设定—原稿设定
①
复印
②
可以选择根据原稿性质选择复印质量和浓度
③
文本:原稿为全文字 文本/照片:原稿为文字+照片 照片:原稿为照片或杂志 地图:原稿为地图 点矩阵原稿:原稿为铅笔稿或图纸 复印纸:原稿为复印纸
13
打印操作
14
基本打印
打印
在机器前刷卡
普通打印
最新柯美185-184换载体、换硒鼓-按图一步步来傻瓜都会换资料

柯美185 184换载体、换硒鼓,按图一步一步来,傻瓜都会换。
1打开侧盖:用手扣住侧盖的凹槽,往外打开,角度要大于60度,如图所示:2打开前盖取出碳粉:扣住凹槽往外打开放平逆时针旋转碳粉盒约30度,感觉到受力,轻轻往外拉出,放在一边3取出套鼓:下卸下图中所示3个螺丝,放于安全处,捏住下图中这个小盖板,往上,然后往外取下,抓住露出的插头,轻轻晃动拔出,注意不要猛力扣住套鼓的图中标识处,水平缓缓向外拉出,注意保持水平,完全拉出后,不可翻转旋转,依然水平放于水平桌面上。
4 分离套鼓上下部分:按图中所示拆下4颗螺丝,套鼓两端各两颗。
小图所示是水平放置于桌面的套鼓然后两手轻轻扣住套鼓两端的壳体,往两边轻轻掰动,切不可猛力,壳体松动后,两手同时向后慢慢旋转翻动,5更换硒鼓:如果不更换硒鼓,只加载体跳过这一步卸下图中两颗螺丝,捏住鼓轴往外拔出,硒鼓就掉落了,拿新鼓按原样安装上即可,注意上螺丝的时候,千万不用大力气,感觉到螺丝受力即可,这套鼓的壳体太脆弱了,上不了几次就滑丝。
6加载体: 卸下图中3颗螺丝,向上掀起盖板,露出粉槽把载体放入粉槽,如果是旧鼓,建议把旧载体全部倒掉,新的载体可以分两次加入,加的时候注意加均匀,不要倒在一个地方。
加入一半后,按浅蓝箭头方向转动下齿轮,让载体均匀分布,然后再加入剩下的一半。
至此加粉完毕,按照拆卸的反顺序把套鼓组装好,注意上壳体上的螺丝的时候感觉到受力即可,不可用大力,以免螺丝滑丝。
最后注意,安装完套鼓后,需要进行载体初始化:1把粉盒拿出来,切记!侧盖和前盖都盖好。
2菜单停止0 0 停止 01进入维修模式3找到function - - tcr auto adjust --确认执行,等几分钟显示TCR数值。
4 关机重启,放入粉盒。
以上操作截图均为本人原创,费了一下午的时间,希望对大家有帮助!。
柯尼卡美能达bizhub c550中文说明书
中文簡易說明書 Bizhub C550如需詳細內容,請參閱隨機之操作手冊 [User Manual]Konica MinoltaC451/C550**如已選用共用用戶認證功能,請跟以下步驟進入使用版面彩色複印前: 1.按【User Name List 列表】選擇用戶名稱,按【OK 確定】2.按【Password 密碼】輸入密碼,按【OK 確定】,3.按【Access 】。
黑白複印:如影印機被鎖,請先按 [Public User Access 共同的使用者部門]複印後: (鎖機)請按【Access 】鍵2次1. Touch Panel 輕觸版面2. Main Power 總電源3. Power 電源4. Mode Memory 模式記憶5. Utility/Counter 公用設定/錶數6. Reset 還原7. Interrupt 插隊8. Stop 停止9. Proof Copy 版本複印Start 影印鍵10.11. Panel 版面12. “C” Clear 清除13. Keypad 數字鍵Help 輔助說明14.15. Enlarge Display 版面放大16. Accessibility 版面顯示設定17. Power Save 省電18. Access 密碼鍵19. Brightness 版面光度調教20. User Box 用戶信箱21. Fax / Scan 傳真/掃描22. Copy 影印Basic 基本設定 (I)-- Color Mode顏色本機設定為自動色彩,即自動探測原稿是彩色文件或黑色文件按 Color,選擇以下不同色彩設定1. Auto Color自動彩色– 自動探測原稿是彩色文件或黑白文件2. Full Color全彩– 列印彩色文件3. Black黑色– 列印黑白文件4. 2 Color兩色-- 如原稿圖案或文字分為黑色和彩色,可把原稿彩色的部份轉變為選擇的其中一種顏色,而黑色的部份則不變5. Single Color單色 – 可把文件的影像轉變為選擇的其中一種顏色Basic基本設定 (II)-- Paper 紙張更改手送紙紙張尺寸1 按 Basic基本的設定 中,按Paper紙張2 選擇手送紙盤3 按Change Tray Settings紙盤變更設定4 選擇紙張類型5 輸入適合的尺寸a 按 Standard Size尺寸設定,選擇標準尺寸b 按 Custom Size自定尺寸輸入長度X和寬度Y,例如90mm輸入0900(如要儲存尺寸,按Store儲存, 再選擇儲存位置Memory1 -5 )6 按OKBasic 基本設定 (III)-- 倍率 Zoom可放大或縮小原稿影像按 ZOOM 倍率可選擇以下設定1選擇一般定的變焦比率a 按預設的縮小 / 放大比率 例如︰A3 A4 設定數字為 0.707b 按 - + 加減號增加或減少變焦數字2 按 XY Zoom 軸微調倍率直接輸入變焦數字,按OK 確定如要把變焦數字儲存, 直接輸入變焦數字後,可按 Set Zoom 微調倍率,然後選擇要儲存的位置,按OK分頁/分類 Sort/Group1. 按Finishing 分頁機2. 可按Sort 分頁或Group 群組3. 如沒有其他設定,按Start 影印鍵位移功能 Offset1. 按Finishing 分頁機2. 在Offset位移功能項目中按Yes 是3. 如沒有其他設定,按Start 影印鍵(必需加裝配件才有以下功能)訂裝Staple1. 按Finishing分頁機2. 在Staple項目中按Corner或2 position3. 按position Setting設定訂裝位置4. 如沒有其他設定,按Start影印鍵打孔Punch1. 按Finishing分頁機2. 在Staple項目中按2 Hole或4 Hole3. 按position Setting設定打孔位置4. 如沒有其他設定,按Start影印鍵摺疊/書本訂裝 Fold/Bind1. 按Finishing分頁機2. 在Fold/Bind項目中按Yes啟動功能3. 按Half-Fold Center Staple & Fold或Tri-Fold4.如沒有其他設定,按Start影印鍵Basic基本設定(IV)--Duplex/Combine雙面/組合選擇Combine組合按2 in 12合1兩張原稿縮為一張或按4 in 1/ 8 in 14合1/8合1四張/八張原稿縮為一張選擇Original > Copy 原稿 > 影本a.單面原稿印雙面副本1-sided > 2-sided 單面 > 雙面b.雙面原稿印單面副本2-sided >1-sided 雙面 > 單面c.雙面原稿印雙面副本2-sided >2-sided 雙面 > 雙面Originals Setting原稿設定1. 按Mixed Original混合原稿啓動探測功能, 如放在自動送紙器的原稿有不同大小的混合2. 按Z-Folded Original Z摺疊原稿啓動摺紙功能(必需加裝配件才有此功能)3. 按Binding Direction原稿空白邊設定原稿內容的方向4. 按Original Direction原稿設定方向設定預留的訂裝位置5. 按Original Size原稿尺寸設定原稿大小,預設是自動探測原稿大小Quality/Density 品質濃淡度1. 可在Original Type原稿類型選擇適當的原稿類型2. 按Density濃淡度調校整份文件的深淺度3. 按Background Removal底色調整調校原稿背景的深淺度4. 按Text Enhancement文字增強調校原稿文字的深淺度5.選擇Glossy光澤面開動光面效果Application應用功能- OHP投影片插頁1. 按Application應用功能2. 按Sheet /Cover /Chapter Insert 插頁 / 封面 / 插入章節3. 按OHP Interleave OHP白紙插頁4. 選擇分隔紙的紙盤5. 把投射膠片放在手送紙盤6. 按OK7. 按Start影印鍵- Cover Mode封面1. 按Application應用功能2. 按Sheet /Cover /Chapter Insert插頁 / 封面 / 插入章節3. 按Cover Mode封面4. 選擇前封面有沒有影像或後封面有沒有影像5. 及哪一個紙盤放置前封面紙或後封面紙6. 按Ok7. 按Start- Insert Sheet頁面插入1. 按Application應用功能2. 按Sheet /Cover /Chapter Insert插頁 / 封面 / 插入章節3. 按Insert Sheet 頁面4. 按Copy複印或Blank空白選擇插入的頁數有沒有影像5. 輸入需插入的頁號和選擇插紙的紙盤6. 按Ok7. 按Start- Insert Image 插入影像1. 按Application應用功能2. 按Sheet /Cover /Chapter Insert插頁 / 封面 / 插入章節3. 按Insert Image畫像插入4. 輸入插入影像的頁號5. 按OK6. 按Start影印鍵7. 最後,按Finish再按Start- Chapter章節(只適用於雙面時)1. 按Application應用功能2. 按Sheet /Cover /Chapter Insert插頁 / 封面 / 插入章節3. 按Chapter章節4. 輸入插入影像的頁號5. 按Ok按Start影印鍵- Edit Color 色彩編輯1. 按Application應用功能2. 按Edit Color色彩編輯3. 按Neg. Pos. Reverse黑白反像4. 按Mirror Image鏡面畫像5. 按Background Color 底色色彩設定背景顏色- Book Copy 書本複印2. 按Book Copy / Repeat頁連寫/重覆3. 按Book Copy書本掃瞄4. 再按Separation,同時可選擇要不要Front Cover/Back Cover前封面或後封面5. 把書打開放在鏡面左上角,按Start6. 直至掃描整本書後,按Finish7. 再按Start- Image Adjustment畫像調整1. 按Application應用功能2. 按 Image Adjust畫像調整3. 可選擇Full Size全尺寸 / Center Zoom中間倍率或Centering僅有中間如按Centering僅有中間,選擇直接置中4. 按 Start- Image Repeat 畫像重複1. 按Application應用功能2. 按Book Copy / Repeat 頁連寫/重覆3. 按Image Repeat 畫像重複4. 選擇With Margin / Without Margin有空白邊/沒有空白邊5. 按Set Range範圍設定6. 按Custom Size自訂尺寸,按X輸入長度和按Y 輸入寬度7. 按OK8. 按Start- Poster Mode海報模式1. 按Application應用功能2. 按Book Copy / Repeat頁連寫/重覆3. 按Poster Mode海報模式4. 按Zoom倍率﹐選擇要放大的倍數5. 按OK6. 按Start- Booklet Original 原稿小冊子必須加裝配件才有此功能1. 按Application應用功能2. 按Book Copy/Repeat頁連寫/重覆3. 按Booklet Original書本掃瞄4. 按OK5. 如下圖般把原稿放在鏡面或自動送紙器6. 按Start- Page Margin 白邊1. 按Application應用功能2. 按Page Margin頁邊的空白邊3. 選擇要加裝釘線的位置Top頂端Left 左側或Right右側4. 於Adjust Value調整值畫像移位中輸入寬度5. 按OK6. 按Start- Frame Erase 消框1. 按Application應用功能2. 按 Frame Erase消框3. 選擇要刪除影像的位置及寬度4. 按 OK5. 按 Start- Booklet 小冊子1. 按Application應用功能2. 按Booklet小冊子3. 可選擇左邊裝訂或右邊裝訂Left Binding /Right Binding 4. 按Start- Date / Time日期時間1. 按Application應用功能2. 按 Stamp/Composition3. 按Date / Time日期/時間4. 按 Print Position 可選擇把日期打印在不同位置5. 按OK6. 按Start- Page # 頁碼1. 按Application應用功能2. 按 Stamp/Composition3. 按Page Number4. 在Starting Page Number中可輸入開始號碼5. 按 Print Position 可選擇把日期打印在不同位置6. 按OK7. 按Start- Copy Protect1. 按Application應用功能2. 按 Stamp/Composition3. 按Copy Protect 複印防護4. 按Preset Stamp預設戳記選擇水印,或按Date/Time選擇日期時間或可按Detail Setting 細節設定選擇顏色深淺等詳細資料5. 按OK停止正在等候的工作1. 按 Job Details 作業細節2. 按 Print 列印 畫面中的 Current Jobs 現有的作業3. 選擇正在等候的工作4. 按 Delete 刪除5. 按 Yes 是 確定清除工作的命令Address Book 地址簿 E-mail 傳送電郵/ Fax 傳真1. 按Utility/Counter2. 按1. One Touch/User Box Registration 目的地/信箱的登記3. 按1. Create One Touch Destination 地址簿4. 按1.Address Book 快速撥號目的地5. 按E-mail 電子送信/ Fax 傳真傳送6. 按New 新的7. 按Name 名稱,輸入名稱,按 OK8. 按Address 輸入電郵地址/傳真地址,按 OK 9. 按Index 索引,選擇要放在哪個索引中 10. 按 OK1.3.4.5.6.7.Group Registration1. 按Utility/Counter2. 按1. One Touch/User Box Registration目的地/信箱的登記3. 按1. Create One Touch Destination地址簿4. 按1.Group 群組5. 按New 新的6. 按Name名稱,輸入名稱,按OK7. 按Select Group目的地選擇分組類型(如類型是傳真,請選fax)8. 按OK 直至回到控制版面Scan To Email / Send Fax 掃瞄到電郵或傳送傳真1. 按Fax/Scan2. 按Address Book從登記目的地3. 選擇一按鍵的索引及名稱4. 按Scan Settings 掃描設定A. Original Type原稿型態(如原稿內容是鉛筆或較淺色文字,可選擇Dot Matrix點矩陣原稿)B. Simplex/Duplex單面/雙面設定原稿是單或雙面C. Resolution解晰度設定解像度D. File Type檔案類型設定掃瞄後的檔案類型式(不適用於Fax)E. Density濃淡度設定深淺度F.設定掃瞄色彩5. 可按檢查細節/登記查看或更改以下設定A. Destination Settings檢查位址/登記已選取的目的地B. Check Scan Settings檢查掃瞄設定C. Check Original Settings檢查原稿設定D. Check E-mail Setting電郵設定(例如Email的主題和內容)6. 最後,按Start注︰- 掃瞄或傳真時,可把原稿放在自動送紙器(FACE UP)或鏡面(FACE DOWN)- Compact PDF只適用於全彩模式Full Color- TIFF檔只適用黑白模式Black- 檔案類型設定不適用於Fax- Check E-mail Setting只適用於掃瞄到電郵Scan to EmailRemove Jammed Paper清除塞紙如出紙位置出現塞紙情況, 請參考以下步驟*版面顯示塞紙位1. 打開出紙位置之綠色鍵後, 拉出紙張2. 如雙面器塞紙, 請打開雙面器後拉出紙張3. 如手送紙盤或紙盤上紙位, 請參考以下步驟更換碳粉*當某碳粉接近不足時,版面會顯示右邊的提示,此時大約可印多1000張*版面會顯示需要更換之碳粉顏色- Toner Cartridge (Y) = 黃色碳粉- Toner Cartridge (M) = 紅色碳粉- Toner Cartridge (C) = 藍色碳粉- Toner Cartridge (K) = 黑色碳粉如版面顯示碳粉不足,請依照以下步驟更換碳粉: 1234Display the Job History List檢查傳送記錄1. 按Job Details 作業細節2. 按Send 傳送3. 按Job History 作業日誌4. 按Comm. List 通信清單5. 選擇要列印的報告A. Activity Report 動態式報表B. TX Report 傳送報表C. RX Report接收報表6. 按Start1235請每月報讀總咪錶數,完成列印後,傳真至 2565 21281. 按Utility / Counter2. 按Meter Count 計數器3. 按Check Details細節檢查4. 按Print List列印5. 選擇紙盤按Start大量文件列印時可使用 [機密列印 Secure Print] 縮短文件處理之時間於電腦輸出機密列印程序先從“檔案File "選擇“列印Print "後, 點選“內容Preferences "---1. 點選工具列之【紙張Setup 】2. 在輸出方式Output Method (圖1) 選擇【機密列印Secure Print 】3. 輸入機密列印Secure Print ID & 密碼Password (圖2)4. 按 [確定OK]5. 完成所有設定按 【確定OK 】於影印機列印文件程序1. 按【Box 】2. 按 [Use Document] (圖3)3. 按【系統BOX System User Box 】(圖4)4. 按【保密接收檔案箱Secure Print User Box 】(圖4)5. 輸入 [帳號Access ] (即機密列印Secure Print ID) 之後按【確定OK 】(圖5)6. 輸入 [密碼Password] 之後按【確定OK 】(圖5)7. 選擇所需文件之後按【列印Print 】(圖6)8. 按【Start 】列印文件(圖1)(圖2)(圖3)(圖4)(圖5)(圖6)部門熱線新號碼市務科銷售熱線查詢產品及銷售詳情電話: 2565 2111電郵 : ****************************.com.hk服務科維修熱線多功能產品之維修服務電話 :2565 2176 傳真 :2856 1024服務科產品之技術支援熱線軟件及網絡支援電話 :2565 2178 服務科客戶服務熱線保養合約查詢新客戶之產品培訓脹單查詢報錶電話系統報錶(此服務只適用於黒白影印機,及必須於合約生效日期前報讀。
柯尼卡数码复合机使用培训
2.3设置自定义尺寸纸张
①在纸盒1中装入自定义尺寸纸张,按菜单/选择键→ 复印作业设置]→ [第1纸盒纸张] →[尺寸]→ [尺寸输入]。 在手送纸盒中装入自定义尺寸纸张,按菜单/选择键→ [复印作业设置] →[手送纸盒纸张]→ [尺寸]→ [尺寸输入]。
②按△或▽, 键设置纸张的长度[X],按菜 单/选择键。 ③按△或▽键设置纸张的宽度[Y],按菜单 /选择键。 设置好的纸张尺寸将显示在显示屏上。
②打开定影单元顶盖。 抬起定影单元顶盖直到锁到位为止。
③缓慢拉出纸张。
④关闭定影单元顶盖。 ⑤关闭本机的第1侧盖板。
7.2排除搓纸部的卡纸
①打开本机的第1侧盖板。
②缓慢拉出纸张。
③关闭本机的第1侧盖板。 ④拉出纸盒1。
⑤从纸盒1 取出剩下所有的纸张,并重新设置。
⑥滑动横向导板,以适合装入的纸张尺寸。 备注:要保证横向导板顶住装入的纸张边缘 ⑦关闭纸盒1。
若要打开电源,请按电源开关上的I 。确认显示屏已打开。 若要关闭电源,请按电源开关上的O。
2.基本操作
2.1装入纸张
将原稿的放置方向和纸张的装入方向统一。方 向不一致时,可能会出现图像不完整。 ①拉出纸盒1。 ②按下纸张抬升板,直到锁到位为止。 备注:注意不要用手触摸1 ③滑动横向导板以适合装入的纸张尺寸。 若要装入自定义尺寸纸张,先装入纸张后在调整横向 导板。 ④将纸张装入纸盒,使进行打印的一面(纸张开封时 朝上的一面)朝上。 装入纸张时,纸堆的顶部不得超过▽ 标记。 如果纸张弯曲,装入前将纸弄平。 可装入普通纸250张,或厚纸20张。 ⑤关闭纸盒1。 ⑥配置纸盒1的纸张尺寸和纸张类型。 按菜单/选择键→[复印作业设置] → [第1纸盒 纸张]。
检查点 打印机控制器可能不支持发送打 印时指定的打印驱动程序。 USB电缆可能已断开。
Konica一体网络基本设置和如何安装打印机
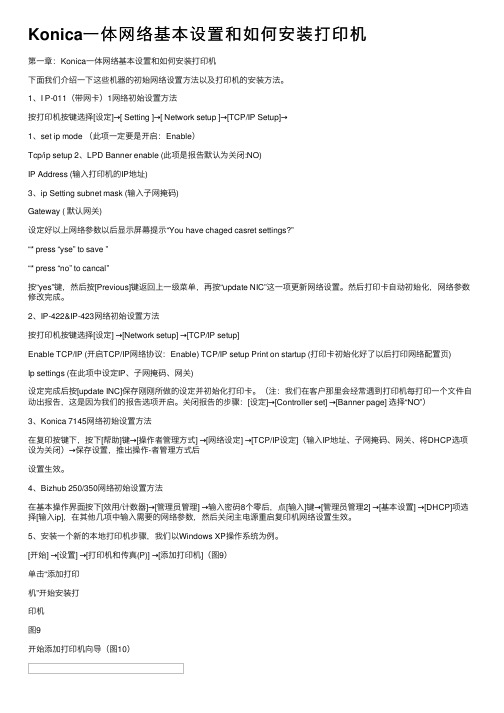
Konica⼀体⽹络基本设置和如何安装打印机第⼀章:Konica⼀体⽹络基本设置和如何安装打印机下⾯我们介绍⼀下这些机器的初始⽹络设置⽅法以及打印机的安装⽅法。
1、I P-011(带⽹卡)1⽹络初始设置⽅法按打印机按键选择[设定]→[ Setting ]→[ Network setup ]→[TCP/IP Setup]→1、set ip mode (此项⼀定要是开启:Enable)Tcp/ip setup 2、LPD Banner enable (此项是报告默认为关闭:NO)IP Address (输⼊打印机的IP地址)3、ip Setting subnet mask (输⼊⼦⽹掩码)Gateway ( 默认⽹关)设定好以上⽹络参数以后显⽰屏幕提⽰“You have chaged casret settings?”“* press “yse” to save ”“* press “no” to cancal”按“yes”键,然后按[Previous]键返回上⼀级菜单,再按“update NIC”这⼀项更新⽹络设置。
然后打印卡⾃动初始化,⽹络参数修改完成。
2、IP-422&IP-423⽹络初始设置⽅法按打印机按键选择[设定] →[Network setup] →[TCP/IP setup]Enable TCP/IP (开启TCP/IP⽹络协议:Enable) TCP/IP setup Print on startup (打印卡初始化好了以后打印⽹络配置页)Ip settings (在此项中设定IP、⼦⽹掩码、⽹关)设定完成后按[update INC]保存刚刚所做的设定并初始化打印卡。
(注:我们在客户那⾥会经常遇到打印机每打印⼀个⽂件⾃动出报告,这是因为我们的报告选项开启。
关闭报告的步骤:[设定]→[Controller set] →[Banner page] 选择“NO”)3、Konica 7145⽹络初始设置⽅法在复印按键下,按下[帮助]键→[操作者管理⽅式] →[⽹络设定] →[TCP/IP设定](输⼊IP地址、⼦⽹掩码、⽹关、将DHCP选项设为关闭)→保存设置,推出操作-者管理⽅式后设置⽣效。
U 185(PLC控制柜)

切换装置U 185操作和维护手册仔细阅读本手册并保存!不正确操作所造成的损害没有保修。
出版出版 切换装置切换装置U185U185U185 操作和维护手册操作和维护手册 出版: ALLDOS Eichler GmbH Reetzstraße 85 • 76327 Pfinztal (Söllingen) Postfach 1210 • 76318 Pfinztal Tel. (0 72 40) 61-0 / Fax (0 72 40) 61-177 Internet: E-Mail: alldos@ @ 2011 by ALLDOS Eichler GmbH 本手册如有更改,恕不通知。
安装参数 安装参数本页空白目录目录安装参数 (3)安装图 (3)1.概述 (7)1.1 文档结构 (7)1.2 手册使用 (7)1.3 质保条款 (7)2. 安全指导 (8)2.1 产品应用 (8)2.2 操作管理部门的职责 (8)2.3 避免伤害 (8)3. 技术数据 (9)3.1 一般数据 (9)3.2 电气数据 (10)3.2.1 电动阀门的伺服马达 (10)3.2.2 控制面板 (10)3.3 附件 (10)3.4 图形尺寸 (11)3.4.1 U 185-1 (11)3.4.2 U 185-2 (11)3.4.3 控制面板 (12)4. 安装 (13)4.1 运输和储藏 (13)4.2 开箱 (13)4.3 典型安装 (13)4.4 安装条件 (14)4.5 安装 (14)5 调试 (15)5.1 调试前准备 (15)5.1.1 气体连接 (15)5.1.2 电气连接 (16)5.2 调试前检查 (17)5.2.1 检查密封性和功能 (17)6. 操作 (19)6.1 设备描述 (19)6.1.1 切换装置U 185 (19)6.1.2 控制面板 (20)6.2 功能 (20)6.3 操作 (21)6.4 可能故障 (22)7 维护 (23)7.1 球阀 (23)8 图纸/备件清单 (24)8.1 切换装置U 185-1 (24)8.1.1 185-1备件清单 (25)8.2 切换装置U 185-2 (26)本页空白1.1.概述概述概述1.1 1.1 文档结构文档结构文档结构本手册包括所描述产品安全操作的信息: □ 技术参数 □ 调试、操作和操作指导 □ 安全指导 假如需进一步的信息而本手册未尽的事宜,请直接与ALLDOS 公司人员 联系。
柯尼卡美能达IWS用户指南说明书

KONICA MINOLTATable of contents∙Description of the solution (3)∙Installer Guide (4)∙Prerequisites (4)∙Configuring the IWS option on the Konica Minolta MFP (5)∙Installing KOMI IWS on the Konica Minolta MFP (9)∙Uninstalling KOMI IWS (16)∙Administrator Guide (20)∙KOMI IWS configuration (20)∙User Guide (24)∙Filing documents (24)∙Find documents filed with KOMI IWS (27)Browse through folders (27)Search your documents (28)∙Printing a document (28)Browse folders and files (29)Search folders and files (30)In the KOMI IWS user guide, you will find recommendations, tips and suggestions for using KOMI IWS in relation with KOMI Doc electronic management solution.In order to make the most of this one, please familiarize yourself with the concepts and procedures described here. Before starting the installation and setup of your KOMI IWS component, please make sure you are familiar with Konica Minolta multifunction solutions that you will use as well as installation, firmware update procedures and component configuration such as i-option.D e s c r i p t i o n o f t h e s o l u t i o nKOMI IWS is a solution that allows you to file scanned paper documents into an online KOMI Doc document management space and print documents from this space directly to your Konica Minolta multifunction solution.NB: The following formats can be printed: PDF, JPEG, TIFF, Text, OOXML (.docx/.xlsx/.pptx). For more details, please refer to the MFP documentation.I n s t a l l e r G u i d ePrerequisitesYou must have a Konica Minolta multifunction system with the i-Option Web Browser module and eventually a RAM (depending on model).Compatible MFP I-OptionWebBrowser MemoryextensionFirmware IWSversionFunctionversionBizhubC4050i/C4000i/C3350i/C3320i/C3300 i/C450i/C360i/C300i/C250i/5020i/4020i /5000i/4000i To activate NotindispensableNative 2.5.0 andaboveNativeBizhubC658/C558/C458/C368/C308/C258 To activate NotindispensableNative 2.5.0 andaboveNativeBizhub 958/808/758/PRO 958 To activate Notindispensable Native 2.5.0 andaboveNativeBizhub 558/458/368/308 To activate Notindispensable Native 2.5.0 andaboveNativeBizhub C227, C287 To activate Notindispensable Native 2.5.0 andaboveNativeBizhub C3851FS/C3851/C3351 To activate Notindispensable Native 2.5.0 andaboveNativeBizhub 227, 287, 367 To activate Notindispensable Native 2.5.0 andaboveNativeBizhub C224e, C284e, C364e LK-101v3 UK-204 G20-K9 andabove 2.0.4 andaboveFunctionversion 5 miniBizhub C454e, C554e LK-101v3 UK-204 G20-K9 andabove 2.0.4 andaboveFunctionversion 5 miniBizhub 654e, 754e LK-101v3 UK-204 G20-K9 andabove 2.0.4 andaboveFunctionversion 5 miniBizhub 224e, 284e, 364e, 454e, 554e LK-101v3 UK-204 G20-K9 andabove 2.0.4 andaboveFunctionversion 5 minibizhub C3850FS/C3850/C3350 LK-101v3 Additionalmemory9967003353 A516-W59and above2.0.2 andabove-bizhub 4750/4050 LK-101v3 No A516-W59and above 2.0.2 and above-The IWS option must be enabled/activated and configured. The multifunction firmware must be compatible with the IWS 2.0.2 version or higher. Similarly, the web browser must absolutely be activated.The application requires at least 4 MB of free space on the hard disk. This space represents the space required for storing application source files, depending on the size of the scanned or printed files you will need more free disk space.Configuring the IWS option on the Konica Minolta MFP1. Create an SSL certificate (the SSL certificate can be created from the MFP web configuration page (PWSC). Administrator mode (PSWC) -> Security -> PKI Settings -> Device Certificate Setting -> New Registration2. Enable the SSL communication for PSWC (This setting can be done from PSWC)Administrator mode (PWSC) -> Security -> PKI Settings -> Enable SSL -> Mode using SSL/TLS: « Administrator Mode and User Mode »3. Enable IWSFrom the MFP panel :Administrator mode -> Network Settings -> IWS Settings : « On », it is necessary to reboot the MFP after this configurationFrom PSWC:Administrator Mode -> Network Setting -> IWS Settings*: [ON], Connect IWS Apps to Network* [Permitted].The parameters marked with "*" will be activated after deactivation and reactivation of the main switch.4. Enable the http server from the MFP panelAdministrator Mode -> Network Settings -> HTTP Settings: « On »5. Enable the SSL communication for WebDAV serverFrom the MFP panel :Administrator Mode -> Network Settings -> WebDAV Settings -> WebDAV Server Settings -> SSL Settings : « SSL Only »From PSWC:Administrator Mode -> Network Settings -> WebDAV Settings -> WebDAV Server Settings -> WebDAV Settings [ON], SSL settings: [SSL Only]6. Enable the WebDAV clientFrom the MFP panel :Administrator Mode -> Network Settings -> WebDAV Settings -> WebDAV Client Settings : « On »From PSWC:Administrator Mode -> Network Settings -> WebDAV Settings -> WebDAV Client Settings -> Webdav Emission Setting: [ON]7. Change the System Auto reset time settings from the MFP panelAdministrator Mode -> System Settings -> Reset Settings -> System Auto Reset -> Web Browser : « Off » or 9 minutes8. Change the Auto Reset Time settings from the MFP panelAdministrator Mode -> System Settings -> Reset Settings > Auto Reset > Web Browser :« Off » or 9 minutes9. Proxy settings for MFP BrowserMFP Browser -> Menu -> Settings -> Scan Settings -> Proxy Settings -> No Proxy for following domain : « 127.0.0.1 » In the MFP Web Browser, open the « Menu » and press the « Settings » key.Then you must enter the MFP administrator password and confirm :Once you are in the « Scan Settings » menu, press the « Proxy Settings » button :In the next screen you must enter 127.0.0.1 in the box « No proxy for following domain » :10. Address for ScanToEmail, settings from the MFP panelAdministrator Mode -> System Settings -> Restrict User Access -> Restrict Program Function Settings : « Allow »11. For the IWS InstallTool operation , configuration from the MFP panelAdministrator Mode -> System Connection -> OpenAPI Settings -> Access Setting : « Allow »Administrator Mode -> System Connection -> OpenAPI Settings -> Authentication : « On » (Username and password can be left blank/empty)12. For the operation of the IWS InstallToolConnect the PC to the Internet : IWS InstallTool must be able to access the Internet while installing the application on the MFP.If the setting of steps 1 to 5 is not carried out, the installation of the application on the MFP will not be possible.If the setting of step 6 is not carried out, sending the file/upload function will not be possible .If the setting of steps 7 and 8 is not carried out, the reset will be triggered when the user does not touch the MFP screen for the specified time. This setting is a security setting, please pay particular attention to this operation when you are at the customer's site.In case the Reset Settings are not visible, please bring up the web browser button on the MFP screen by following the below procedure.Activation of the browser button :∙Log in as an administrator from the MFP panel∙Utility - Administrator - Network Settings - Web Browser Settings : « On »∙Utility - Administrator - System Settings - Custom Display Settings - Default Setting Main Menu∙Click on “Main Menu Key” where you want to add the Web Browser (example : Main Menu Button 5).∙Configure “Main Menu Key” select“On”.∙Click “Function” and select “Web Browser”.∙Click “OK”.Installing KOMI IWS on the Konica Minolta MFPYou must first install the installation tool « IWS Install Tool ».∙IWS Install Tool Installation PrerequisitesSupported operating systems :∙Windows 7 Professional (32 bit/64 bit) (SP1 or later)∙Windows 8.1 Pro (32 bit/64 bit)∙Windows 10 Pro (32bit/64bit)∙Windows Server 2008 Standard (32bit/64bit)∙Windows Server 2008 Enterprise (32bit/64bit)∙Windows Server 2008 R2 Standard∙Windows Server 2008 R2 Enterprise∙Windows Server 2012 Standard∙Windows Server 2012 R2 Standard∙Windows Server 2016 StandardFramework : Microsoft .NET Framework 3.5 SP1 or higherOnce the tool is installed, start it. The following screen will appear :Before the actual installation of the application you must add your MFP to the MFP list of the installation tool. Click on « Device List » and add your MFP to the MFPs list :Click on the « Add » button and enter the information of your MFP. Validate the MFP configuration by clicking on « OK ».Your MFP is now added to the MFP list of the « InstallTool » tool.Please return to the home screen and choose the « Install Applications » option.Click on the « Import » button. In the application import window click on « Browse » and choose the package address in iws format on your PC.In the following window, check the box and click on « Import » : Then click on « OK » :A window containing a line with the KOMI IWS application will be displayed, click on « Next » :The KOMI IWS package is now available in IWS InstallTool and ready for installation on your MFP.In the following screen you have to choose the MFP on which you want to install KOMI IWS and click on « Install ». The installation of the application will continue.Uninstalling KOMI IWSKOMI IWS uninstallation is possible using the IWS Install Tool.From the Home screen click on the « Uninstall Applications » button.The multifunction selection screen will be displayed. Select the multifunction from which you want to uninstall the application and click the « Next » button.The screen with the list of IWS applications available on the MFP will be displayed. Select the KOMI IWS application and click on the « Uninstall » button.Click on the « OK » button to validate the uninstallation of the application.The uninstall starts and you can follow the progress of the action.Once uninstalling is completed, the following screen will be displayed.Click on the « Close » button and you will be redirected to the IWS applications screen.The KOMI IWS application is no longer in the list of IWS applications installed on the MFP.A d m i n i s t r a t o r G u i d eKOMI IWS configurationOn the MFP click on the applications button, « Konica Minolta » in the following screen.In the application screen press the « KOMI IWS » button and you will be redirected to the first screen of the « KOMI IWS » application.The first time you use the application, you will be redirected to the « Advanced Settings » screen to fill in information about your KOMI Doc space.You must fill in :∙the Server Address (without http(s):// )∙the Port (443)∙and check the use of a secure connection : https∙press the proxy connection link if you have a configured proxy in your networkThe link will redirect you to the proxy configuration screen where you can enter the address, the port and possibly a user and his password if the proxy requests authentication.Click « Save » and you will arrive to the user login screen.In the login screen, enter your KOMI Doc username and password and click on the « Login » button.U s e r G u i d eFiling documentsOnce logged in, you arrive in the application Main Menu where you can choose among 2 features:∙Filing with automatic filing category∙Printing a documentTo archive scanned paper documents in your KOMI Doc document space, click on « Filing with filing category ». The screen displays the automatic filing categories.ATTENTION : To do this, please make sure that you have created KOMI Doc document space filing categories. Please refer to the KOMI Doc in the relevant chapter for more information.Choose the filing category of your choice and enter the index values. For date type indexes by clicking on the calendar icon, a calendar is displayed and you can choose a date directly.Before you file your document, you can have the option to choose some scan settings by pressing the « Scan Settings » link.Then by clicking on the « File » button the scanning and filing of your document will begin.You are informed at each stage of the filing :At the end of this operation, your document will be automatically filed in KOMI Doc :Find documents filed with KOMI IWSYou can find your documents filed with KOMI IWS by logging into your KOMI Doc document space. Enter your username and password and click on the « Login » button.The login and password are case sensitive. Make sure the « LOCK » key is not activatedbefore entering the information.Browse through foldersIn order to find your documents you can browse through folders :Folders and subfolders are generated automatically from the metadata entered at the MFP level from KOMI IWS.Search your documentsAnother way to find your documents is searchingYou can enter one or more keywords and click on the button .Please refer to the KOMI Doc documentation in the relevant chapter for more information.Printing a documentFrom the Main Menu click on the « Print a document » button. This allows you to explore the folder and subfolder trees of your KOMI Doc document space.Browse folders and filesYou can browse by clicking on the folders of your choice. To print a document, click on the desired document.By clicking on the document, the « Print Settings » screen is displayed :Once you have selected the settings click on « OK » and the printing of your document will take place on your Konica Minolta print system.Search folders and filesYou can also search according to the desired document. To do this you must enter a keyword in the search bar and click on the button .The folders and files resulting from the search will be displayed :Then, select the folder or file of your choice to browse the folder or print the file.。
- 1、下载文档前请自行甄别文档内容的完整性,平台不提供额外的编辑、内容补充、找答案等附加服务。
- 2、"仅部分预览"的文档,不可在线预览部分如存在完整性等问题,可反馈申请退款(可完整预览的文档不适用该条件!)。
- 3、如文档侵犯您的权益,请联系客服反馈,我们会尽快为您处理(人工客服工作时间:9:00-18:30)。
柯尼卡美能达185e说明书
1、“开始”—“打印机和传真”,点击左边窗格中“添加打印机”,打开“欢迎添加打印机向导”对话框,点击“下一步”,打开“本地或网络打印机”选择连接对话框;
2、选择第一项“连接到此计算机的本地打印机”,勾选“自动
检测并安装即插即用打印机”,点“下一步”,打开“新打印机检测”对话框;
3、检测后,打“下一步”,打开“选择打印机端口”对话框;
4、点选“使用以下端口”,在右边的下拉列表中
选择推荐的打印机端口“LPT1:”,点击“下一步”,打开“安装打印机软件”对话框;
5、在“厂商”列表中,点击厂商名,在“打印机”列表中,点
击打印机名,点击“下一步”,打开“命名打印机”对话框;
6、在“打印机名”文本框中输入打印机名,点击“下一步”,
打开“打印机共享”对话框;
7、点选“不共享这台打印机”,打“下一步”,打开“打印测
试页”对话框;
8、选否“否”,打“下一步”,统即日自动搜索电脑自带打印
机软件进行安装。