testo 830-T1红外温度计作业指导书
红外线测温试验作业指导书(DOC)
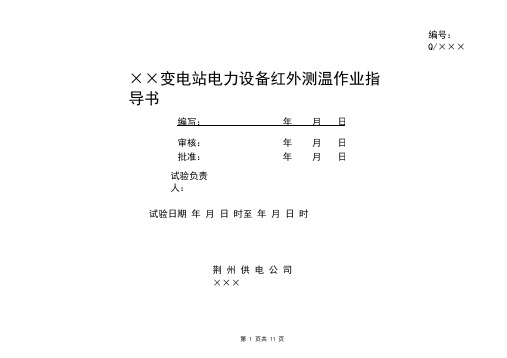
编号:Q/×××××变电站电力设备红外测温作业指导书编写:年月日审核:年月日批准:年月日试验负责人:试验日期年月日时至年月日时荆州供电公司×××1适用范围本作业指导书适用于××变电站运行电力设备红外测温工作。
2引用文件下列标准及技术资料所包含的条文,通过在本作业指导书中引用,而构成为本作业指导书的条文。
本作业指导书出版时,所有版本均为有效。
所有标准及技术资料都会被修订,使用本作业指导书的各方应探讨使用下列标准及技术资料最新版本的可能性。
DL/T 664 —1999 带电设备红外诊断技术应用导则DL/T 596 —1996 电力设备预防性试验规程国家电网公司电力安全工作规程(变电站和发电厂电气部分)(试行)国家电网安监[2005]83 号文3试验前准备工作安排3. 1 准备工作3. 2 人员要求3. 3 仪器、仪表和工具3. 4 危险点分析3. 5 安全措施3. 6 试验分工4试验程序4. 1 开工4.2 试验项目和操作标准4. 3 竣工5试验总结6作业指导书执行情况评估7附录a)附表上表的说明:说明1:按其功能,同一部件可以属于上表列出的几种类别。
在这种情况下,允许的最高温度和温升值是相关类别中最低值。
说明2:对真空开关装置,温度和温升各项极限值不适用于处在真空中的部件。
说明3:应注意保证周围的绝缘材料不遭到损坏。
说明4:当接合的零件具有不同的镀层或一个零件是裸露的材料制成的,允许的温度和温升应该是:a)对触头,上表项1 中有最低允许值的表面材料的值;b)对联结,上表项2 中有最高允许值的表面材料的值。
说明5:SF6是指纯SF6或SF6与其无氧气体的混合物。
说明6:按照设备有关的技术条件:a)在关合和开断试验(如果有的话)后;b)在短时耐受电流试验后;c)在机械耐受试验后;有镀层的触头在接触区应该有连续的镀层,不然触头应该被看作是“裸露”的。
testo 迷你红外测温仪 中文说明书
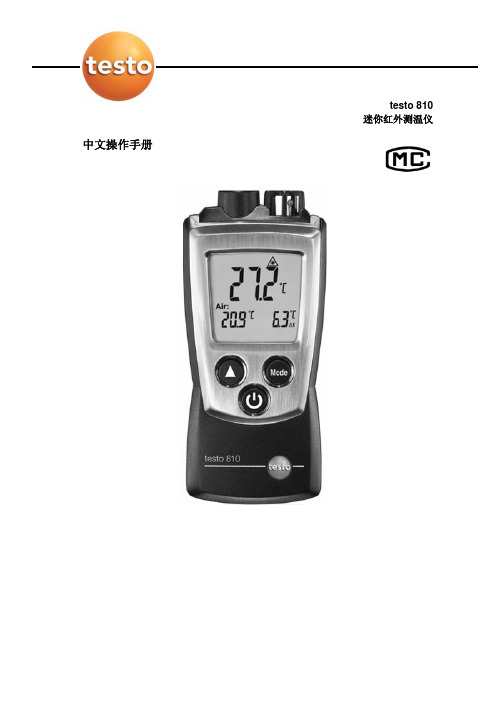
testo 810迷你红外测温仪中文操作手册产品描述①保护帽:安装位置②红外传感器③空气温度传感器④显示屏⑤控制按钮⑥电池盒(在仪器背面)基本设置关机 > 按键2秒 > 按选择键()> 按确认键()温度单位:°C, °F > 温差Δt: OFF(关),On(开)>发射率:ε> 自动关机:OFF(关),On(开)开机按住打开背光灯(按住10秒)在仪器打开的情况下,按住IR(红外)测量持续按键选择显示模式在仪器打开的情况下,用键来选择HOLD:读数被锁定了 > MAX:最大值 > MIN:最小值关闭仪器在仪器开着的情况下,按住2秒安全和环保提示¾请在使用本产品之前,仔细通读该操作手册,并熟悉本产品的操作。
请小心保管本文档,以便你在需要时可以查阅。
请把该操作手册提供给其他用户阅读。
¾请特别注意下列标识的提示信息:重要提示!避免人身伤害或仪器损坏的预防措施¾请在操作手册规定的用途范围,以及限定的技术参数内,正确操作仪器。
不要使用强力。
¾不要将仪器与溶剂、硫酸以及其他腐蚀性溶液存放在一起。
¾请务必按照操作手册中的描述来执行维护和修理工作。
请遵循规定的步骤。
为了确保仪器安全,请务必使用德图的原装备件。
环保回收¾将损坏的充电电池/废电池送到指定的电池回收点。
¾在仪器使用寿命结束时,将其寄回德图。
我们将保证以环境友好的方式处置这些产品。
规格和参数说明Testo 810是一款红外测量仪器,常用于测量表面温度,如散热器和发热器,同时测量周围的空气温度。
技术数据测量数据常规仪器数据·传感器:红外传感器NTC空气温度传感器·参数:°C, °F·量程:红外测温: -30~300°C, -20~575°F, 空气温度: -10~50°C, 14~122°F ·分辨率:0.1°C,0.1°F ·保护等级:IP 40·环境温度:-10~+50, +14℃~+122℉·存放/运输温度:-40~+70,℃-40~+158℉·电源:2节1.5V AAA电池·电池寿命:50小时(背光灯关闭)·尺寸:119×46×25 mm·重量:90g(包括电池和保护帽)·精度:红外测温:±2 °C(-30~+100°C)±3.6 °F(-22~212°F)±2 %测量值(其余量程)空气温度:±0.15°C;±0.9°F 标准和规范·EC标准:89/336/EEC·测量速率0.5 秒·光学分辨率6:1 保修保修期: 1 年保修条款:见保修卡产品描述概述①保护套:安装位置②红外传感器③空气温度传感器④显示屏⑤控制按钮⑥电池盒(在仪器背面)初始步骤¾安装电池1. 向下推动电池盒盖,打开电池盒2. 放入电池(2节1.5V AAA电池)。
(完整版)红外线测温仪操作规程作业指导书
红外线测温仪操作规程作业指导书
1、开机:按下“测量”键,仪器开机自检并自动测量显示温度值。
2、液晶显示:红外线测温仪开机后屏幕上显示详细功能说明符号。
3、测量:将探头对准目标,按下“测量”键进行单次测量,或按住“测量”
键进行连续测量(注:进行测量时按住“测量”键,时间不能少于约0。
8秒)。
4、关机:开机后,如超过15秒未操作红外线测量仪,仪器将自动关机。
注意:
1、不用于光亮或抛光金属表面(不锈钢、铝等)的测量.
2、测温仪不能透过玻璃类透明表面进行测定,它测量的将是玻璃的表面温度。
3、蒸汽、灰尘、烟雾等会影响测量的准确度。
4、使用红外线测温仪时勿将激光直接对准眼睛或从反射面间接照射.
5、在使用测温仪之前,请检查机壳,切勿使用损坏的仪器,查看是否有损坏或
缺少塑料件.
6、在显示屏上出现电池的图标,请尽快更换电池.
7、若仪器工作失常,请勿使用,仪器的保护措施可能已遭破坏,若有疑问,
应把仪器送去检修。
8、切勿在有爆炸性气体、蒸汽、灰尘附近使用测温仪。
9、为避免灼伤,请记住发射率高和物体上所测得温度要低于实际温度。
10、若未按本手册规定的方式使用仪器,设备提供的保护功能可能会失效.
保养:
1、镜头清洗方法:用污渍压缩空气吹掉松散颗粒,轻轻用柔软毛刷刷去残
留碎屑,再用潮湿棉花球小心擦洗(棉花球可用水湿润),注意不要用溶剂清洗镜头.
2、外壳清洗方法:用蘸有肥皂水的软布,注意不要将测温仪浸在水里。
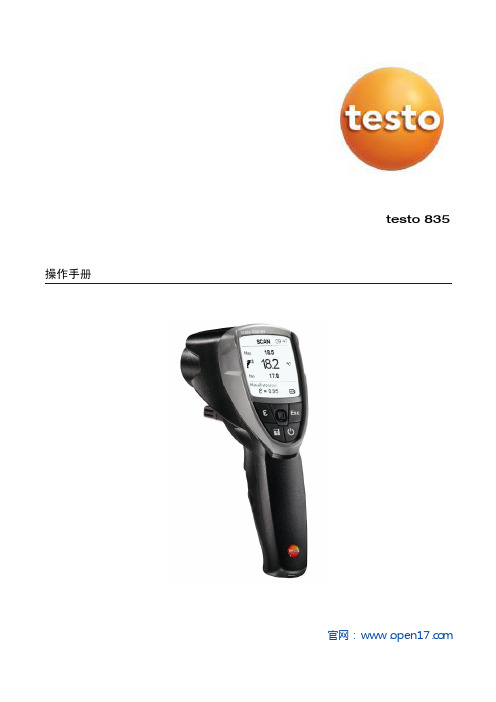
testo 835 操作手册说明书
testo 835操作手册红外/接触式测温仪官网:www.open17.com目录目录1.一般信息2.安全信息3.预定用途 (3)4.技术数据5.产品说明 (5)6.初始操作 (6)6.1 装入电池 (6)6.2 设定语言 (6)7.操作 (6)7.1 连接探头 (6)7.2 开关仪器 (6)7.3 更改显示 (7)7.4 测量 (7)8.设置 (8)8.1 执行设置 (8)8.2 详细说明:发射率 (9)8.3 详细说明:内存 (10)8.4 详细说明:报警 (11)9.连接PC软件 (11)10.保养与维护 (12)10.1 更换电池 (12)10.2 仪器的清洁 (12)11.问与答 (12)12.有关红外测量的信息12.1 测量方法 (13)12.2 发射率 (13)12.3 距离系数比 (14)13.有关接触式测量的信息 (14)在使用本产品前,请仔细通读本操作手册并熟悉产品的操作。
请妥善保管本手册,以便在需要时您可以参考。
2.避免电气危险不要在带电部件上或附近测量!产品安全/保修条款申明按照产品的预定用途,在规定的参数范围内正确操作本仪器。
不要太过用力!不要与溶剂(如丙酮)放在一起仅在文档中明确描述了用于维护目的时,才能打开仪器保证正确处置请把损坏的充电电池和废电池放到提供的收集点请在仪器报废时直接将仪器寄送给我们,我们保证以环保的方式处理它们3.德图testo 835是一款便携式的红外测温仪,适用于表面温度的非接触式测量。
在连接探头以后,该仪器也可用于进行接触式测量。
该仪器的H1版本还配有一个湿度探头,用于环境湿度的测量。
下列情况不宜使用本产品:●有爆破危险的区域●医疗诊断用途特性数值红外测量光学分辨率50:1 + 传感器的开口直径(24 mm /0.95”)激光瞄准4点激光瞄准输出/光谱范围< 1 mW / 8 ~ 14μm等级/标准 2 / EN 60825-1:2007测量范围T1 / H1: (-30 ~ +600) °CT2:(-10 ~ +1500) °C分辨力0.1°C仪器测量最大允许误差(±1数位) T1 / H1:±2.5 °C (-30.0 ~ -20.1) °C±1.5 °C (-20.0 ~ -0.1) °C±1.0 °C (0.0 ~ +99.9) °C±1 %测量值(其余量程)T2: ±2.0 °C或测量值的±1 % (使用其较大者)测量速率0.5 s接触式测量传感器类型K型热电偶(可连接)测量范围T1 / H1:(-50 ~ +600) °C T2: (-50 ~ +1000) °C分辨力0.1°C仪器测量最大允许误差(±1数位)± (0.5 °C + 测量值的0.5 %) 测量速率0.5 s湿度测量(仅H1)测量范围0 ~ 100 %RH分辨力0.1 % RH (湿度)0.1 °C (温度)0.1 °C td (露点温度)仪器测量最大允许误差(±1数位) ± 2 %RH ± 0.5 °C测量速率0.5 s仪器参数操作温度(-20 ~ +50) °C运输/存放温度(-30 ~ +50) °C电源 3 节AA型电池,或通过USB端口供电(仅结合EasyClimate 软件使用) 电池寿命25 h (温度保持在25 °C左右,不使用激光和背光灯)10 h (温度保持在25 °CF左右,激光瞄准,不使用背光灯)外壳ABS/PC 塑料尺寸193 x 166 x 63 mm / 7.6 x 6.5 x 2.5”重量T1 / T2:514 g / 1.13 lbs (含电池)H1:527 g / 1.16 lbs (含电池)EC指令2004/108/EC保修 1 年,保修条款:参见see /warranty1. 红外镜头2. 4-点激光瞄准器3. 湿度探头(仅H1)4. 测量按钮扳机(测量、开机)5. 电池仓6. USB端口、探头连接插口7. 控制按键:•[]: 开/关机•[]: 保存测量值•[]: 打开发射率菜单•[Esc]: 返回•[]: 5向手柄(按下、向上、向下、向左、向右):用于打开配置菜单、确认输入、导航等功能8. 显示屏6.1 装入电池1. 打开电池仓。
红外热像测温作业指导书模式
编号:Q/GSDL XXXX 变电站红外热像测温作业指导书
批准:年月日
审核:年月日
编写:年月日
试验负责人:
试验日期年月日时至年月日时
XX供电公司XX变
1 适用范围
本作业指导书针对变电站红外热像测温工作制定,仅适用于该设备红外热像测温工作。
本作业指导书规定了红外热像测温工作中的人员职责、安全、质量控制和标准化作业程序等内容
本作业指导书适用于XX供电公司所属供电企业,其他单位可参照执行。
2 试验任务、项目及环境条件
3 试验前准备工作安排3.1准备工作安排
3.2、人员要求
3.3仪器仪表和工具配置
3.4危险点分析及预控措施
3.5安全注意事项及措施
3.6试验分工
4 测试步骤、程序
4.1开工
4.2操作步骤及标准
4.3竣工及设备状态的恢复
5 试验记录及分析
红外测温记录
6 测试论结
第11页共11页。
testo 830红外测温仪的应用介绍
testo 830红外测温仪的应用介绍非接触式红外测温技术近十年来市场占有率不断增长,相对于测量的普及,红外测量仪技术在此期间也飞速发展,适用范围不断扩大,在产品质量控制和监测、设备故障诊断以及节约能源等方面发挥着重要作用,尤其在HVAC/R(供暖、通风、空调和制冷)行业中,红外测量仪是技术人员最得力的助手。
以下是红外测温仪在HVAC行业中一些典型应用:· 测量制热/ 冷冻水管道隔热层温度· 测试隔热回水管· 测试熔断器和母线接头· 测试电气接头· 测试轴承· 检查液体循环加热或冷却应用· 测试水加热器的隔热· 测量栏栅、出风口或散流器的排放温度· 检查固定式节流器或配备毛细管的蒸发器上的过热情况· 检查配备膨胀阀的蒸发器的空气-空气系统中的过冷情况目前红外测温市场的产品型号多样,那么如何准确选择到您所需要的仪器呢?选型的三个要点大致如下:1. 温度范围:测温范围是测温仪最重要的一个性能指标,建议按照测量需求选择相应范围的测温仪,基于测量精度的考量,温度范围一定要考虑准确、周全,既不要过窄,也不要过宽2. 发射率:根据客户的使用反馈信息,当使用红外测温仪时,经常会出现测量偏差,其中有50%的情况,发射率是导致误差产生的祸首。
由于红外测温仪适用于各种场合,被测物体表面的材料材质及颜色不同(尤其是HVAC系统中各种管道),其对外发射红外能量的能力就不一样。
通过发射率调节,可减少由于材料而产生的测量误差。
所以仪器是否具备这一功能至关重要。
3. 距离系数比:即光学分辨率,也指测温仪到目标之间的距离D与测量光斑直径S之比。
如在远离测量直径小的目标,就应选择高比率的测温仪。
而距离系数比越高, 测温仪的成本也越高。
结合以上三点要素,德的红外测温仪是不错的选择。
德图(Testo)在全球便携式测量技术领域有口皆碑。
测试设备说明手册(TESTO)说明书
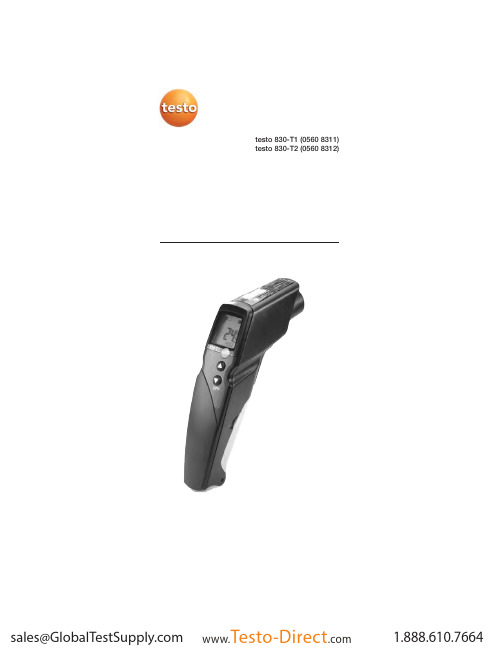
testo 830-T1 (0560 8311) testo 830-T2 (0560 8312)91. General Information Please read this document through carefully and familiarise yourself with the operation of the product before putting it to use.Keep this documentation to hand so that you can refer to it when necessary.2. Product Description3. Safety InformationContact measurement: Do not measure on or near live parts. Infrared measurement: Please adhere to the required safe distance when measuring on live parts.Operate the instrument properly and according to its intended purpose and within the parameters specified. Do not use force.Do not expose to electromagnetic radiation (e.g. microwaves,induction heating systems), static charge, heat or extreme fluctuations in temperature.Do not store together with solvents (e.g. acetone).Open the instrument only when this is expressly described in the documentation for maintenance purposes.Laser radiation! Do not look into laser beam. e n Accessories Name Item no.Water-tight immersion/penetration probe, -60 to +400°C/-76 to +752°F 0602 1293Quick-reaction surface probe, -60 to +300°C/-76 to +572°F 0602 0393Robust air probe, -60 to +400°C/-76 to +752°F 0602 1793Leather protection sleeve 0516 8302Emissivity adhesive tape ε=0.950554 0051Infrared sensor,laser Battery compartment DisplayOn/Off switch Contact measurement Measurement button:infrared measurement Infrared measurementProbe socket (testo 830-T2 only)10Ensure correct disposal:Dispose of defective rechargeable batteries and spentbatteries at the collection points provided.Send the instrument directly to us at the end of its life cycle.We will ensure that it is disposed of in an environmentallyfriendly manner.4. Intended Usetesto 830 is a compact infrared thermometer for the non-contact measurement of surface temperatures. Using testo830-T2, it is possible to carry out additional contact measurements byattaching probes.5. Technical DataFeature testo 830-T1testo 830-T2Parameter°C/°FInfrared measurement range-30 to +400°C/ -22 to +752°FInfrared resolution0.1°C/0.1°FInfrared accuracy±1.5°C/ 2.7°F or 1.5% of reading (+0.1 to +400°C/ +32 to +752°F)1;(at 23°C) +/- 1 digit±2°C/ 3.6°F or 2% of reading (-30 to 0°C/ -22 to +31.9°F)1Emissivity0.1 to 1.0 adjustableInfrared measurement rate0.5sTemp. sensor -Thermocouple Type K (attachable) Measurement range of temp sensor--50 to +500°C/ -58 to +932°F Resolution of temp. sensor-0.1°C/ 0.1°FAccuracy of temp. sensor-±0.5°C/0.9°F+0.5% of reading (±1 digit)at rated temperature 22°C/ 72°F Measuring rate of temp. sensor- 1.75sOptics (90% value)10:1212:12Laser type 1 x laser 2 x laserOperating temperature-20 to +50°C/ -4 to +122°FTransport /S torage temperature-40 to +70°C/ -40 to +158°FPower supply9V block batteryBattery life 20 h 15 hHousing ABSDimensions (LxHxB)190 x 75 x 38mm/ 7.5 x 3.0 x 1.5inCE guideline2004/108/EECWarranty 2 yearsLaserLaser type 1 x laser 2 x laserPower< 1 mWWavelength645 to 660 nmClass2Standard DIN NE 60825-1:2001-111the larger value applies2+ Opening diameter of the sensor (16mm/ 0.6in)6. Initial OperationInsert battery: See 9.1Changing the battery.117. Operation7.1 Connecting probe (testo 830-T2 only)Connect temperature probe to probe socket. Observe +/-!7.2 Switching on/offSwitch on instrument: Press measurement button.-lights up).The display light remains for 10 seconds every time a button is activated.pressed until display darkens.The device switches off automatically after 1 min (IR measure -ment view) or 10 mins (contact measurement view, only testo830-T2) without the button being pressed.7.3 Measuring/ measurement, this is done when the device is switched off orwhen you switch to the IR measurement view.-The instrument is switched on.Infrared measurement1Start measurement: Hold down measurement button.2Locate object to be measured using laser point.testo830-T1: laser marks the centre point of the measurement spot.testo830-T2: Laser marks the upper and lower end of themeasurement spot.-The current reading is shown (2 measurements per second)3End measurement: Release button.-HOLD lights up. The last measured value and min./max. value are saved until the next measurement.Restart measurement: Press measurement button.Contact measurement (testo 830-T2 only)-Temperature probe was connected before the measuring instrument was switched on.1-The instrument changes to the contact measurement mode (lights up). The current reading is shown.en122End the measurement: Press .-HOLD lights up. The last measured value and min./max. value are saved until the next measurement.Switch between min., max. and recorded value: Press .Restart measurement: Press .Back to infrared measurement view: Press measurementbutton.Setting the emissivity-Instrument is in the infrared measurement mode.If no button is pressed for 3 s in the emissivity mode, theinstrument switches to the infrared measurement mode.1Press for 3 s.2Set emissivity: Press or-The instrument switches to the infrared measurement mode.8. Settings-Instrument is switched off.If no button is activated in the setting mode for 3 s, theinstrument changes to the next mode.1Press for 3 s.-The device switches to settings mode.2Set lower alarm value (ALARM): Press or . Hold the button down to go forward quickly.3Set upper alarm value (ALARM): Press or . Hold the button down to go forward quickly.4Set alarm function on/oFF: Press or .5Select parameter (°C/ °F) : Press or .-The device returns to IR measurement view.The alarm function is only available for IR measurement. If theset alarm values are exceeded/not reached, a visual andacoustic alarm is output.9. Service and Maintenance9.1 Changing the batteryInstrument must be switched off!1Open battery compartment:Open up cover.2Remove used battery and insert newone. Observe +/-. The minus should bevisible once the battery is inserted.3Close battery compartment: Closecover.139.2 Clean instrument Do not use abrasive cleaning agents or solutions.Clean the housing with a damp cloth (soap water).Carefully clean the lens with water or cotton buds dipped in water or medical alcohol. 10. Questions and AnswersQueryPossible causes Possible solutionInfrared measurement mode: -Readings outside -- - -lights up.measurement range.Contact measurement mode: -Readings outside -If we have not answered your question, please contact your local distributor or Testo´s Customer Service.11. Information on infrared measurement 11.1 Measurement methodInfrared measurement is an optical measurementKeep lens clean.Do not measure with clouded lens.Keep measurement field (area between instrument and object being measured) free of interferences: no dust and dirtparticles, no moisture (rain, steam) or gases.Infrared measurement is a surface measurementIf there is dirt, dust, frost etc. on the surface, only the top layer will be measured, i.e. the dirt.In the case of shrinkwrapped foodstuffs, do not measure in air pockets.If values are critical, always subsequently measure using a contact thermometer. Particularly in the food sector, the core temperature should be measured with a penetration/immersion thermometer.Adaptation timeIf the ambient temperature changes (change of location, e.g.inside/outside measurement) the instrument needs an adaptation time of 15 minutes for infrared measurement.e n1411.2 EmissivityMaterials have different emissivities, i.e. they emit different levels of electromagnetic radiation. The emissivity of testo 830 is set in the factory to 0.95. This is the ideal value for measuring non-metals (paper, ceramics, plaster, wood, paints and varnishes),plastics and foodBright metals and metal oxides are only suited to a limited extent to infrared measurement on account of their low or nonuniform emissivity.Apply emissivity enhancing layers such as varnish or emission adhesive tape (Item no. 05540051) to the object being measured. If this is not possible, measure with the contact thermometer.Emissivity table of the most important materials(typical values)A specific spot is determined depending on the distance from the measuring instrument to the object being measured. Measurement optics (Ratio Distance : Measurement spot)500 mm1000 mm2000 mm5000 mmØ 516 mmØ 216 mmØ 116 mmØ 66 mmØ 16 mm testo 830-T1laser1512. Information on contactmeasurementObserve minimum penetration depth in immersion/penetration probes: 10 x probe diameterAvoid applications in corrosive acids or bases.Do not use spring-loaded surface probes on sharp edges.e n 500 mm 1000 mm2000 mm 5000 mm Ø 433 mm Ø 183 mmØ 100 mmØ 58 mm Ø 16 mm testo 830-T2laserlaser。
红外测温(一般检测)标准化作业指导书

2
下列文件对于本文件的应用是必不可少的。凡是注日期的引用文件,仅所注日期的版本适用于本文件。凡是不注日期的引用文件,其最新版本(包括所有的修改单)适用于本文件。
DL/T664—1999带电设备红外诊断技术应用导则
国家电网公司[2009] 664号国家电网公司电力安全工作规程(变电部分)
3
具备必要电气知识,熟悉变电站一、二次电气设备,了解被检测设备的结构特点、外部接线、运行状况和导致设备故障的基本因素。
4
了解红外成像诊断技术的基本条件和诊断程序,熟悉红外成像仪的工作原理、技术参数和性能、掌握所用仪器的工作原理、性能指标、操作程序和调试方法。
4
被检设备是带电运行设备,并尽量移开视线中的封闭遮挡物如玻璃窗、门或盖板。
3.3
拍摄结束
将镜头盖盖上,防止划伤镜头。
4
测温结束后工作
4.1
异常处理
1)把缺陷分析情况汇报给值班长和相关人员;
2)通知检修人员进行精确测温,判别缺陷性质并按缺陷流程进行处理。
缺陷诊断判据见附录B。
4.2
工器具和仪表归位
将工器具和仪器清点收拢,放归原位。
按定置图摆放。
4.3
生产管理系统维护
将测温记录录入生产管理系统。
2)作为一般检测,被测设备的辐射率一般取0.9左右。
3
测温工作
3.1
全面扫描
1)取下仪器镜头盖;
2)将机器的镜头对准要观察的设备,调节至合适焦距扫描设备。
3.2
异常拍摄
1)针对全面扫描中温度异常的设备进行红外图谱的拍摄;
2)记录环境温度、异常设备温度和负荷电流等数据(格式见附录A)。
- 1、下载文档前请自行甄别文档内容的完整性,平台不提供额外的编辑、内容补充、找答案等附加服务。
- 2、"仅部分预览"的文档,不可在线预览部分如存在完整性等问题,可反馈申请退款(可完整预览的文档不适用该条件!)。
- 3、如文档侵犯您的权益,请联系客服反馈,我们会尽快为您处理(人工客服工作时间:9:00-18:30)。
testo 830-T1、T2红外温度计作业指导书
(第一版)
文件控制状态:受控□非受控□
文件持有人:
版号:第一版
编制人:
批准人:
控制编号:
发布日期:年月日
实施日期:年月日
周口市锅炉压力容器检验所
1.目的
正确、规范使用testo 830-T1、T2红外温度计, 保证实验工作的顺利进行和仪器安全。
2.适用范围
适用于testo 830-T1、T2红外温度计的操作。
3.职责
使用人员:按照本规程,正确对仪器进行使用、维护,做使用登记。
保管人员:负责对仪器进行定期维护、保养。
科室负责人:负责仪器综合管理。
4.操作规程
4.1连接探头(仅testo830-T2)
将温度探头连接到探头插座上。
注意+/-!
4.2切换开/关
打开仪器:○▲或测量按钮。
—所有显示段短暂地点亮。
仪器切换到红外线方式(点亮)显
示在每次激活按钮时点亮15秒。
关闭仪器:按住○▼直到显示关闭。
如果不激活按钮,仪器在1分钟(testo 830-T1)或10分钟(testo830-T2)后关闭
4.3测量
打开仪器
4.3.1红外线测量
4.3.1.1开始测量:按住○▲或测量按钮。
4.3.1.2受用激光光点定位要测量的对象。
Testo 830-T1:激光投在测量点的中点上
Testo 830-T2:激光投在测量点的上端和下端
—当前的读数被显示(每秒测量2次)
4.3.1.3结束测量:松开按钮。
—HOLD(保持)灯亮。
最后的读数一直保持到下次测量。
4.3.2接触测量(仅testo830-T2)
连接温度探头。
将解除温度计定位在温度对象上/中,并激活:○▼。
—仪器切换到接触测量方式(点亮)。
当前读数被显示。
返回到红外线测量方式:○▲或测量按钮。
4.3.3设置辐射率
仪器在红外线测量方式
4.3.3.1同时按○▲和○▼。
4.3.3.2设置辐射率:○▲或○▼。
—仪器切换到红外线测量方式。
4.4设置
关闭仪器,如果在设置方式下3秒无按钮动作仪器切换到下一方式 4.4.1按住○▲和○▼。
所有显示段短暂点亮。
仪器切换到设置方式。
4.4.2选择参数(℃或℉):○▼。
4.4.3设置报警(ALARM):○▲或○▼。
一直按住按钮可以进得更快。
4.4.4设置报警标准(报警上冲:↑,报警下冲:↓)○▼。
所有段短暂点亮。
仪器切换到红外线测量方式。
如果超出设置报警值,就会发出视频和声频报警。
5.维护保养计划:
每次使用之后清洁仪器外表并把仪器恢复原始摆放位置。
用湿布(蘸肥皂液)清洁外壳,不要用腐蚀性清洁剂或溶液,用水或蘸水或蘸医用酒精的棉签仔细清洁镜头。
6.支持性文件:testo 830T1、T2红外湿度计使用说明书。