在SHAREPOINT 2010中部署RBS
sharepointserver2010安装部署
如果你的环境无法连接到Internet,也可以自己去下载相关的软件安装后再继续SharePoint Server 2010的安装。
相关下载连接请看本文最后。
下面开始安装的过程,在安装界面点击“安装必备软件”,跟着向导一步步操作即可下载安装必备软件。
安装后需要重启系统完成所有软件的安装。
Setp03:安装SharePoint Server 2010回到安装向导界面,点击“安装SharePoint Server”输入产品密钥后才可以继续安装。
下面的和MOSS 2007一样,我们一般还是选择“服务器场”进行安装。
选择“完整”。
如果有需要可以在这里改变安装文件位置。
进入安装过程。
安装完成后提示继续进入产品配置的步骤。
进入产品配置向导。
这是第一台服务器,所以选择“创建新的服务器场”。
输入数据库服务器名,同时在下面输入数据库访问帐户的用户名和密码(我这里设置了一个域用户)。
注:Sql Server 2008的安全性改进后,如果新创建的账号,需要单独设置该帐户在Sql中的权限。
输入一个SharePoint服务器场的密码,这个是2010的新功能。
可以给管理中心指定一个端口号,不指定的系统会随机分配一个,这里设置为9999。
最后的确认信息。
配置成功的提示。
默认完成后会进入SharePoint管理中心启动配置SharePoint场。
先出现一个“客户体验改善计划”的邀请,可以自己选择是否参加。
进入SharePoint管理中心的配置SharePoint场界面。
右上角是登陆帐户名,网站操作菜单转移到了左上角。
这个界面和Beta版本好像不一样了,不知道正式版出来会不会又变了,呵呵。
Setp04:配置SharePoint Server 2010安装成功后,和Moss 2007一样,SharePoint Server 2010还需要进行配置才可以正常使用。
一个方法是安装软件通过启动的“配置SharePoint场”页面启动向导。
sharepoint2010安装部署过程及可能出现的问题
Sharepoint2010安装部署注:域名必须和计算机名保持一直本文档是对上周部署sharepoint2010时遇到的问题及安装过程的技术总结,以利于今后其他人的安装及研究使用。
由于只有一台PC,所以要在这台PC上安装Windows Server 2008 R2 Enterprise x64,域控制器(AD),IIS,SQL Server 2008 SP1 x64,Sharepoint Server 2010 x64,这样的环境不能用微软所谓的“生产”环境,只是用来研究开发使用,以下是我的安装记录:1.sharepoint2010部署的硬件配置:微软提供的硬件建议配置为CPU:双核主频3.0G以上(64位),内存4G 以上,建议为8G。
我们现有服务器的配置为台式机,cpu为i5-3530 主频3.3G 赫兹,内存为8G。
sharepoint2010及各项必备软件全部部署完成以后,在sharepoint管理中心进行操作,反应速度一般,最高延迟为3~4秒,平均响应时间2.5秒。
因此在以后的硬件选择上不能低于目前的服务器配置。
(多台服务器部署暂时无条件尝试,仅对单台服务器而言)2.操作系统安装:操作系统必须为windows server 2008 R2或以上版本。
在安装过程中,我本想用虚拟光驱直接打开运行安装程序,但系统会提示操作系统版本不支持。
我用XP sp3,windows server 2003,windows 7 32位分别进行此方式安装均提示相同错误。
利用Ghost备份等方式也失败。
研究后发现原有系统为32位,不能直接利用虚拟光驱或Ghost备份的方式进行系统安装。
只有利用windows server2008安装盘或制作相应USB安装系统来进行。
(U盘启动系统的工具及使用说明放在我做好的安装包文件夹里,以后的制作可以自己根据该文档进行),如图:该系统光盘未提供网卡驱动,系统安装成功以后在安装包文件夹里找到Realtek_Driver_Win7_7061_07272012.rar,解压后进行安装。
SharePoint 2010 之企业信息管理的不二选择

——BPIOU 微软企业生产力大学
周松江 Jacky Zhou 合作伙伴技术顾问 合作伙伴支持部
SharePoint 2010 之企业信息管理的不二选择
第一季 : SharePoint 2010 产品概述
本期内容提要
• 究竟什么是 SharePoint?
• 信息高速下,当今企业所面临的挑战 • SharePoint 2010 的价值
1. 64 位操作系统 2. Stage Server Only 3. Stand-Alone
SharePoint 2010 快速入门
Farm Passphrase 安全性增强
SharePoint 2010 快速入门
Claims-based Authentication
SharePoint 2010 快速入门
在 Microsoft SharePoint Server 2010 中,您可以使用资产库 来存 储数字资产,并与用户共享这些资产。资产库是一种自定义的 SharePoint Server 2010 库模板,它使用专门为存储和编录富媒体资产而设计的内容 类型。
8. 更多在线商务的集成
SharePoint 部署 —— 架构设计
新特性
Windows PowerShell Scripted Install Service Applications Real-Time Edit Preview Web Edit Out-of-the-Box Web Parts Mobile Support
Cross-Browser Support
• 信息共享,企业业务协作的平台
更好的协同工作 全新的而又不失标准的操作界面,让我们可以更快的找到自己的 合作伙伴。 2. 工作更灵活 通过SharePoint 2010, 我们更容易找到我们所需要的信息。不论 这些信息是由谁共享,是谁创造,或者他们在哪里。 1.
SharePoint Server 2010中Secure Store Service服务的配置
配置Secure Store Service (SharePoint Server 2010)本文介绍Microsoft SharePoint Server 2010 Secure Store Service 操作,解决方案设计者使用这些操作可以创建将用户和组的凭据映射到外部数据源凭据的目标应用程序。
通过使用这些目标应用程序,Business Data Connectivity 服务中的外部内容类型将能够与其外部数据源交互,以读取、写入、创建和编辑存储在外部数据源中的数据。
有关Secure Store Service 的概述,请参阅规划Secure Store Service (SharePoint Server 2010)。
在使用Secure Store Service 创建目标应用程序之前,必须为其提供通行短语,它用于生成对存储在Secure Store Service 数据库中的凭据进行加密和解密的密钥。
如果必须提供初始通行短语,则在打开Secure Store Service 应用程序的实例时将会看到以下消息:“请为此Secure Store Service 应用程序生成一个新密钥”。
本文内容:∙初始化Secure Store Service 应用程序的实例∙刷新加密密钥∙生成新的加密密钥∙创建目标应用程序∙设置目标应用程序的凭据初始化Secure Store Service 应用程序的实例可以使用功能区的“编辑”组中的命令来初始化Secure Store Service 应用程序的实例。
初始化Secure Store Service 应用程序的实例1.确认您拥有以下管理凭据:∙您必须是Secure Store Service 实例的服务应用程序管理员。
2.在Secure Store Service 应用程序的实例中,单击“管理”选项卡。
3.在“密钥管理”组中,单击“生成新密钥”。
4.在“生成新密钥”页的“通行短语”框中键入通行短语字符串,然后在“确认通行短语”框中键入相同的字符串。
Sharepoint门户部署架构设计及功能特征介绍
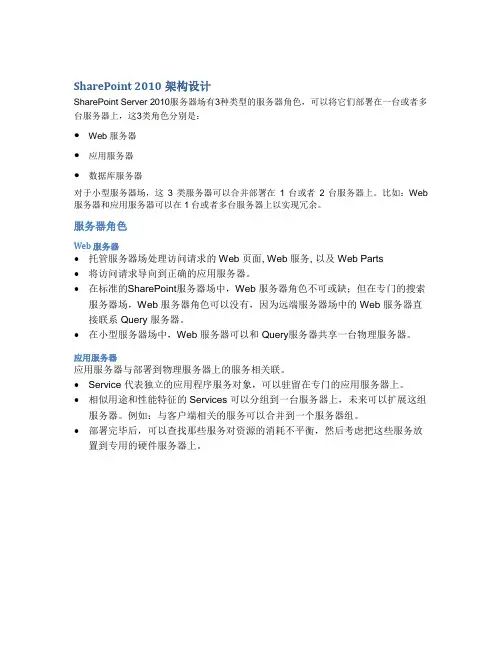
SharePoint 2010架构设计SharePoint Server 2010服务器场有3种类型的服务器角色,可以将它们部署在一台或者多台服务器上,这3类角色分别是:∙Web 服务器∙应用服务器∙数据库服务器对于小型服务器场,这3类服务器可以合并部署在1台或者2台服务器上。
比如:Web 服务器和应用服务器可以在1台或者多台服务器上以实现冗余。
服务器角色Web 服务器∙托管服务器场处理访问请求的 Web 页面, Web 服务, 以及 Web Parts∙将访问请求导向到正确的应用服务器。
∙在标准的SharePoint服务器场中,Web 服务器角色不可或缺;但在专门的搜索服务器场,Web 服务器角色可以没有,因为远端服务器场中的 Web 服务器直接联系 Query 服务器。
∙在小型服务器场中,Web 服务器可以和 Query服务器共享一台物理服务器。
应用服务器应用服务器与部署到物理服务器上的服务相关联。
∙Service 代表独立的应用程序服务对象,可以驻留在专门的应用服务器上。
∙相似用途和性能特征的 Services 可以分组到一台服务器上,未来可以扩展这组服务器。
例如:与客户端相关的服务可以合并到一个服务器组。
∙部署完毕后,可以查找那些服务对资源的消耗不平衡,然后考虑把这些服务放置到专用的硬件服务器上。
Query Crawl包含搜索管理组件和爬网器包含索引分区和查询组件客户端相关服务(单一场)Excel Calculation ServicesWord ViewingAccess Service Visio GraphicsServiceWord Services PowerPoint数据库服务器在小型场环境中,所有的数据库都可以部署到一台服务器上。
大型场中,需要根据数据库的角色进行分组,然后将其部署多个数据库服务器上。
服务应用程序服务应用程序是在服务器场内跨站点共享的服务,如:Search Services 和Excel CalculationServices),有些服务应用程序可以跨服务器场共享。
SharePoint Server 2010 单服务器配置指南说明书
Test Lab Guide: Configure SharePoint Server 2010 as a Single Server with Microsoft SQL ServerThis document is provided “as-is”. Information and views expressed in this document, including URL and other Internet Web site references, may change without notice. You bear the risk of using it.Some examples depicted herein are provided for illustration only and are fictitious. No real association or connection is intended or should be inferred.This document does not provide you with any legal rights to any intellectual property in any Microsoft product. You may copy and use this document for your internal, reference purposes. You may modify this document for your internal, reference purposes.© 2012 Microsoft Corporation. All rights reserved.Test Lab Guide: Configure SharePoint Server 2010 as a Single Server with Microsoft SQL ServerMicrosoft CorporationMarch 2012Summary: This paper contains a brief introduction to SharePoint 2010 Products and step-by-step instructions for configuring a single-server SharePoint Server 2010 test lab and demonstrating the facilities of a default team site.ContentsIntroduction (3)In this guide (3)Test lab overview (4)Hardware and software requirements (4)Steps for Configuring the SharePoint Server 2010 Single-Server Test Lab (5)Step 1: Set up the Base Configuration Test Lab (5)Step 2: Install SQL Server 2008 R2 (6)Step 3: Install the Prerequisites for SharePoint Server 2010 (6)Step 4: Install SharePoint Server 2010 (6)Step 5: Demonstrate the Facilities of the Default Contoso Team Site (8)Snapshot the Configuration (9)Additional Resources (10)3IntroductionMicrosoft® SharePoint® 2010 Products make it easier for people to work together. UsingSharePoint 2010 Products, you and your employees can set up Web sites to share information with others, manage documents from start to finish, and publish reports to help everyone make better decisions. SharePoint 2010 Products consist of SharePoint 2010 Foundation and SharePoint 2010 Server.SharePoint Server 2010 has the following capabilities:∙ Sites Provides a single infrastructure for all your business Web sites. Share documents withcolleagues, manage projects with partners, and publish information to customers.∙ Communities Delivers great collaboration tools —and a single platform to manage them.Make it easy for people to share ideas and work together the way they want.∙ Composites Offers tools and components for creating do-it-yourself business solutions.Build no-code solutions to rapidly respond to business needs.∙ Content M akes content management easy. Set up compliance measures ”behind thescenes”—with features like document types, retention polices, and automatic content sorting —and then let people work naturally in Microsoft Office.∙ Insights Gives everyone access to the information in databases, reports, and businessapplications. Help people locate the information they need to make good decisions.∙ Search Cuts through the clutter. A unique combination of relevance, refinement, and socialcues helps people find the information and contacts they need to get their jobs done. For more information about Microsoft SharePoint Server 2010, see the SharePoint Product Information site .In this guideThis paper contains instructions for setting up a test lab based on the Base Configuration test lab guide and the SQL Server 2008 R2 test lab guide and configuring SharePoint Server 2010 using two server computers and one client computer. The resulting SharePoint Server 2010 test lab demonstrates the default configuration of SharePoint Server 2010 on a single computer usingMicrosoft® SQL Server®.ImportantThe following instructions are for configuring a SharePoint Server 2010 test lab using the minimum number of computers. Individual computers are needed to separate the4services provided on the network and to clearly show the desired functionality. Thisconfiguration is neither designed to reflect best practices nor does it reflect a desired or recommended configuration for a production network. The configuration, including IP addresses and all other configuration parameters, is designed only to work on aseparate test lab network. Attempting to adapt this test lab configuration to a pilot or production deployment can result in configuration or functionality issues. For detailed design and planning information, see Planning and architecture for SharePoint Server 2010.Test lab overviewIn this test lab, single-server SharePoint Server 2010 functionality is deployed with:∙ One computer running Windows® Server® 2008 R2 Enterprise Edition named DC1 that isconfigured as an intranet domain controller, Domain Name System (DNS) server, DHCP server, and enterprise root certification authority (CA).∙ One intranet member server running Windows Server 2008 R2 Enterprise Edition namedAPP1 that is configured as a general application server, the SQL Server, the SharePoint Server 2010 application server, and the SharePoint front-end Web server.∙ One member client computer running Windows 7 Enterprise or Ultimate named CLIENT1. The SharePoint Server 2010 test lab consists of a single subnet named Corpnet (10.0.0.0/24) that simulates a private intranet. Computers on the Corpnet subnet connect using a hub orswitch. See the following figure.Hardware and software requirementsThe following are required components of the test lab:∙The product disc or files for Windows Server 2008 R2.∙The product disc or files for Windows 7.∙The product disc or files for Microsoft SQL Server 2008 R2. See SQL Server 2008 R2 Trial for a trial version of Microsoft SQL Server 2008 R2.∙The product disc or files for SharePoint Server 2010. See Download SharePoint 2010 Trial fora trial version of SharePoint Server 2010.∙Two computers that meet the minimum hardware requirements for Windows Server 2008 R2 Enterprise Edition.∙One computer that meets the minimum hardware requirements for Windows 7 Enterprise or Ultimate.Steps for Configuring the SharePoint Server 2010 Single-Server Test LabThere are five steps to follow when setting up the SharePoint Server 2010 single-server test lab.1. Set up the Base Configuration test lab.2. Set up SQL Server 2008 R2 on APP1.3. Install SharePoint Server 2010 prerequisites on APP1.4. Install SharePoint Server 2010 on APP1.5. Demonstrate the facilities of the default Contoso team site.NoteYou must be logged on as a member of the Domain Admins group or a member of theAdministrators group on each computer to complete the tasks described in this guide. If you cannot complete a task while you are logged on with an account that is a memberof the Administrators group, try performing the task while you are logged on with anaccount that is a member of the Domain Admins group.The following sections provide details about how to perform these steps.Step 1: Set up the Base Configuration Test LabSet up the Base Configuration test lab for the Corpnet subnet using the procedures in the “Steps for Configuring the Corpnet Subnet” section of the Test Lab Guide: Base Configuration.56Step 2: Install SQL Server 2008 R2Use the instructions in the Test Lab Guide: SQL Server 2008 R2 to configure SQL Server 2008 R2 on APP1.Step 3: Install the Prerequisites for SharePoint Server 2010In this procedure, you install the prerequisite software components for SharePoint Server 2010on APP1.To install the SharePoint Server 2010 prerequisite software1. On APP1, log on using the User1 user account.2. Connect APP1 to a network that has Internet access and configure the TCP/IP protocolon the Local Area Connection as needed. The SharePoint Server 2010 prerequisiteinstaller must download and install components from the Microsoft Download Center. For example, if the network that has access to the Internet uses DHCP, configure the Internet Protocol version 4 (TCP/IPv4) component from the properties of the Local Area Connection in the Network Connections folder to use automatic addressing and toautomatically configure a DNS server.3. On APP1, navigate to the drive or folder that contains the SharePoint Server 2010installation files and double-click default.hta .4. On the SharePoint Server 2010 Start page, click Install software prerequisites .5. On the Welcome to the Microsoft SharePoint Products Preparation Tool page, clickNext .6. On the License Terms for software product page, review the terms, select the I acceptthe terms of the License Agreement(s) check box, and then click Next .7. On the Installation Complete page, click Finish .Step 4: Install SharePoint Server 2010In this procedure, you install SharePoint Server 2010 on APP1.To install SharePoint Server 20101. On DC1, click Start , point to Administrative Tools , and then click Active Directory Usersand Computers .2. In the console tree, open , right-click Users , point to New , and thenclick User.3. In the New Object - User dialog box, in Full name, type SPFarmAdmin, and in Userlogon name, type SPFarmAdmin.4. Click Next.5. In Password and in Confirm password, type P@ssword1.6. Clear User must change password at next logon.7. Click Next, and then click Finish.8. Connect APP1 to the Corpnet subnet and configure the TCP/IP protocol on the LocalArea Connection as needed. For example, configure the Internet Protocol version 4(TCP/IPv4) component from the properties of the Local Area Connection in the Network Connections folder to use the address 10.0.0.3 with a subnet mask of 255.255.255.0 and the preferred DNS server of 10.0.0.1.9. On the SharePoint Server 2010 Start page, click Install SharePoint Server.10. On the Enter Your Product Key page, enter your product key as needed, and then clickContinue.11. On the Read the Microsoft Software License Terms page, review the terms, select the Iaccept the terms of this agreement check box, and then click Continue.12. On the Choose the installation you want page, click Server farm.13. On the Server Type tab, click Complete.14. Click Install Now.15. When Setup finishes, a dialog box prompts you to complete the configuration of yourserver. Ensure that the Run the SharePoint Products and Technologies Configuration Wizard now check box is selected.16. Click Close to start the configuration wizard.17. On the Welcome to SharePoint Products page, click Next.18. In the dialog box that notifies you that some services might need to be restarted duringconfiguration, click Yes.19. On the Connect to a server farm page, click Create a new server farm, and then click78Next .20. On the Specify Configuration Database Settings page, type APP1 in Database server ,type CORP\SPFarmAdmin in User name , P@ssword1 in Password , and then click Next .21. On the Specify Farm Security Settings page, type P@ssphrase in both Passphrase andConfirm passphrase , and then click Next .22. On the Configure SharePoint Central Administration Web Application page, click Next .23. On the Completing the SharePoint Products Configuration Wizard page, click Next .24. On the Configuration Successful page, click Finish . Internet Explorer launches with a tabnamed Initial Farm Configuration Wizard.25. In the Help Make SharePoint Better dialog box, click No, I don’t wish to partici pate , andthen click OK .26. For How do you want to configure your SharePoint farm?, click Start the Wizard .27. On the Configure your SharePoint farm page, in Service account , click Use existingmanaged account , and then click Next .28. On the second Configure your SharePoint farm page, in Title and description , typeContoso Corporation in Title , and then click OK . This step creates a team site at the URL http://app1/.29. On the This completes the Farm Configuration Wizard page, click Finish . The InternetExplorer tab shows the SharePoint 2010 Central Administration site, from which you can configure and manage the SharePoint server.29. Close the Internet Explorer window. On the SharePoint Server 2010 Start page, clickExit .Step 5: Demonstrate the Facilities of the Default Contoso Team Site In this procedure, you click through the default SharePoint facilities and resources for theContoso Corporation team site at http://app1/.To see the facilities of the default Contoso Corporation team site1. Attach CLIENT1 to the Corpnet subnet, and then log on with the User 1 account.2. Run Internet Explorer on CLIENT1.3. In the Address bar, type http://app1/ and then press ENTER. You should see aSharePoint team site for the Contoso Corporation.4. Under Libraries, click Site Pages. These Web pages can act as a team wiki library toshare information and ideas and collaborate among the members of your team. You can click Add new page to create a new site page. Click How To Use This Library to show the Wiki page that tells you how to use this wiki library.5. Under Libraries, click Shared Documents. This is a list of shared documents that you canwork on together. Each document can be worked on by multiple people in a centrallocation, which makes document collaboration much easier that sending files around in email. You can click Add document to add a new document to the list of shareddocuments.6. Under Lists, click Calendar. This is a shared team calendar that can be used to manageand share events across your team. You can point to a day and then click Add to add acalendar event.7. Under Lists, click Tasks. This is a simple task list from which you can add and edit tasksand track progress. You can click Add new item to add a new task to this list.8. Under Discussions, click Team Discussion. This is a simple newsgroup-style teamdiscussion forum from which you can ask questions and share information for issues and topics important to your team. You can click Add new discussion to add a new topic for discussion.9. Click Home to return to the home page of the Contoso Corporation team site. Snapshot the ConfigurationThis completes the SharePoint Server 2010 single-server test lab. To save this configuration so that you can quickly return to a working configuration from which you can test other SharePoint TLGs or test lab extensions or for your own experimentation and learning, do the following:1.On all physical computers or virtual machines in the test lab, close all windows and thenperform a graceful shutdown.2.If your lab is based on virtual machines, save a snapshot of each virtual machine and namethe snapshots SharePoint2010SingleServer. If your lab uses physical computers, create disk images to save the SharePoint Server 2010 single-server test lab configuration.9Additional ResourcesFor more information about SharePoint Server 2010, see the SharePoint 2010 product information web page.To submit your questions about this test lab or SharePoint Server 2010, see the Setup, Upgrade, Administration and Operation SharePoint 2010 Forum.To provide the authors of this guide with feedback or suggestions for improvement, send an email message to *******************.For a list of TLGs related to this test lab or extensions to demonstrate additional functionality, see SharePoint Server 2010 Test Lab in the TechNet Wiki.Microsoft strongly encourages you to develop and publish your own TLG content for SharePoint Server 2010, either in the TechNet Wiki (example: Test Lab Guide: Demonstrate Remote Access VPNs) or in your own publishing forum (example: Test Lab Guide (Part 1) - Demonstrate TMG PPTP, L2TP/IPsec and SSTP Remote Access VPN Server). If you want to publish your TLG content in the TechNet wiki, see the How to contribute series of TLG blog posts for information about the types of content you can create and for links to templates and guidance.For a list of additional Microsoft TLGs, see Test Lab Guides in the TechNet Wiki.10。
Microsoft SharePoint Server 2010 入门
Microsoft SharePoint Server 2010 入门Microsoft Corporation发布日期:2010 年 11 月作者:Microsoft Office 系统和服务器团队 (itspdocs@)摘要本书中的内容涵盖有关如何开始安装、配置和升级到 Microsoft SharePoint Server 2010 的信息。
本书的内容是SharePoint Server 2010 技术库(/fwlink/?linkid=181463&clcid=0x804) 中的精选内容在本书发布之日的副本。
有关最新内容,请参阅 Web 上的技术库。
1本文档按“原样”提供。
本文档表达的信息和观点(包括 URL 和其他 Internet 网站引用)可能随时发生更改,恕不另行通知。
使用本文档的风险由您自行承担。
本文档描述的一些示例仅供演示之用,纯属虚构。
无意进行真实的关联或联系,请勿据此妄加推测。
本文档并不为您提供对任何 Microsoft 产品中任何知识产权的任何法律权利。
您可以出于内部参考目的复制和使用本文档。
© 2010 Microsoft Corporation。
保留所有权利。
Microsoft、Access、Active Directory、Backstage、Excel、Groove、Hotmail、InfoPath、Internet Explorer、Outlook、PerformancePoint、PowerPoint、SharePoint、Silverlight、Windows、Windows Live、Windows Mobile、Windows PowerShell、Windows Server 和 Windows Vista 是 Microsoft Corporation 在美国和/或其他国家/地区的注册商标或商标。
本文档包含的信息代表 Microsoft Corporation 在本文档发布之日对所讨论问题的当前观点。
Project Server 2010安装和配置攻略
Project Server 2010安装和配置攻略Microsoft Project Server 是一个配套程序,与Microsoft Project Standard 和Microsoft Project Professional 一起使用,可以在项目经理、工作组成员和风险承担者之间进行有效的工作组协作。
本系列文章介绍在服务器场环境中安装Microsoft Project Server 2010 所需的步骤。
这些步骤包括:配置Microsoft SQL Server 和Analysis Services安装Microsoft SharePoint Server 2010安装Project Server 2010创建Microsoft Project Web Access 网站配置SQL Server 和Analysis Services配置SQL Server 和Analysis Services 包括以下步骤:配置SQL Server 网络设置为服务器场管理员帐户添加登录名启用公共语言运行库配置Analysis Services此外,根据您的需求,您可能还需要通过配置AUTO_CLOSE 和AUTO_UPDATE_STATISTICS_ASYNC 来实现一些建议的性能增强。
此外,您可能还要创建Project Web Access 数据库。
安装SharePoint Server 2010Project Server 2010 需要SharePoint Server 2010 Enterprise Edition。
在安装和配置Project Server 2010 之前,必须先安装SharePoint Server 2010 并创建服务器场。
本文指导您获取合适的SharePoint Server 2010 资源以配置服务器场。
安装和配置Project Server 2010建立SharePoint Server 2010 服务器场之后,便可以安装Project Server 2010。
SharePoint 2010 管理中心创建Web应用程序
使用SharePoint 2010管理中心可对SharePoint 2010的所有Web应用程序进行管理。
在SharePoint 2010里。
一个IIS应用程序就对应一个Web应用程序,包括SharePoint 2010管理中心也是一个Web应用程序。
打开SharePoint 2010管理中心,如图1所示:图1点击图1左侧的“应用程序管理”,如图2所示:图2在图2的“Web应用程序”中点击“管理Web应用程序”链接,如图3所示:图3在图3中,可以看到整个SharePoint站点下有两个Web应用程序,其中“SharePoint Central Administration v4”就是此站点的SharePoint 2010管理中心的Web应用程序。
进入图3的界面就可以对SharePoint的Web应用程序进行管理了。
在图3中当前没有选中任何Web应用程序,顶部工具栏只有“新建”处于可用状态,点击它,如图4所示:图4-1上图是在SharePoint 2010管理中心创建Web应用程序的第一个图,“验证”一栏中可以选择两种验证模式,一个是“基于声明的身份验证”,一个是“经典模式身份验证”。
我们常用的也是推荐的是“经典模式身份验证”。
“IIS网站”一样主要是配置与IIS相关的设置。
微软的解释如下内容:选择使用现有IIS 网站或创建一个新网站,为Microsoft SharePoint Foundation 应用程序提供服务。
如果选择使用现有IIS 网站,则此网站必须位于服务器场中的所有服务器上,并且必须具有相同的名称,否则此操作将不会成功。
如果选择新建IIS 网站,将自动在服务器场中的所有服务器上创建此网站。
如果此处未显示要更改的IIS 设置,那么可以使用该选项创建一个基本网站,然后通过标准IIS 工具对其进行更新。
我们大多数都会创建一个新IIS网站,输入IIS网站的端口号和路径即可。
一般路径最后的文件夹要与端口号相同,这样便于以后的维护。
SharePoint2010安装配置-
SharePoint 2010安装配置目录SharePoint 2010安装配置 (1)1. 综述 (2)2. 操作说明 (4)3. 参考资料 (40)附注: (40)1. 综述SharePoint是一个基于.NET/技术的Web应用平台。
SharePoint 2010基于.NET Framework 3.5 SP1版本。
SharePoint 2010默认包含了SharePoint Foundation 2010和SharePoint Server 2010。
如果希望将现有的SharePoint 2007系统升级到SharePoint 2010,那么首先必须将SharePoint 2007系统迁移至x64环境,包括硬件、操作系统和数据库,然后才能顺利的将SharePoint 2007升级到2010版本。
SharePoint 2010完全基于x64架构,且不再包含x86版本。
这也就决定了SharePoint 2010所要求的硬件和软件环境:1. 服务器硬件必须支持x64;2. SharePoint 2010服务器的操作系统必须使用Windows Server 2008 x64或Windows Server 2008 R2 x64;3. SharePoint 2010服务器所使用的数据库必须是SQL Server 2005 SP2x64或SQL Server 2008 x64。
本次安装采用Windows Server 2008 R2 标准版,MS SQL Server 2008 R2企业版,与DNS、AD域服务等安装在同一台计算机上。
注:多台机器安装时,先将所有机器都加入一个域。
安装MS SQL2008时分别使用本机和域账户设置管理员,如下:在SharePoint2010服务器所在的机器上使用域管理账户登录,然后在SharePoint2010配置界面的数据库设置中输入域管理账户与密码。
2. 操作说明2.1 安装Windows Server 2008 R2 标准版(1)选择中文(简体)版。
- 1、下载文档前请自行甄别文档内容的完整性,平台不提供额外的编辑、内容补充、找答案等附加服务。
- 2、"仅部分预览"的文档,不可在线预览部分如存在完整性等问题,可反馈申请退款(可完整预览的文档不适用该条件!)。
- 3、如文档侵犯您的权益,请联系客服反馈,我们会尽快为您处理(人工客服工作时间:9:00-18:30)。
在SharePoint 2010中部署RBS
一、RBS(
Remote BLOB Storage)简介
在SharePoint的大部分企业应用案例中,SharePoint都是要承担着非常繁重的文件管理工作,这些文件类型包括了Word文档,Excel文档甚至是数据量庞大的音频、视频文件。
对于这些文件,SharePoint默认都是将它们以BLOB的数据形式存储在内容数据库当中。
这就很容易导致SharePoint的数据库容量被这些BLOB数据所快速消耗,而且用户在使用SharePoint进行文件的管理的时候,需要频繁地对这些大数据量的BLOB数据进行读写访问,很容易在SQL端造成性能瓶颈。
针对这一问题,MOSS 2007在SP1之后提供了ISPExternalBinaryProvider接口,用户可以通过这个接口开发自定义应用,将BLOB数据存储在Content DB之外,以减少SQL Server 的负载。
而在SharePoint 2010中,可以使用SQL Server 2008及其以上版本提供的Remote Blob Storage (RBS) 这一新特性。
通过RBS内置的FILESTREAM Provider,我们只需要通过简单的配置,就可以将BLOB数据存储在文件系统当中或者是存储在其他专门用于存储BLOB 数据的服务器上面,完全不需要做进行开发。
同时,这些存储在文件系统当中的BLOB数据还可以接受数据库的事务管理,可进行数据备份以及数据恢复。
RBS将SharePoint 中的BLOB数据分离存储
可见,RBS在不降低数据的可管理性的同时,还能为我们提高SharePoint数据服务的性能以及可拓展性,无疑是企业在部署SharePoint时一项必不可少的工具。
下文将主要介绍如何进行RBS的安装,如何启用RBS的垃圾文件回收,以及如何卸载RBS。