帮助说明文档
说明格式范本-概述说明以及解释

说明格式范本-范文模板及概述示例1:标题:说明格式范本引言:在日常工作和学习中,我们经常需要撰写说明文档,以便清晰准确地传达信息。
而一个合适的说明格式范本则可以帮助我们更好地组织和呈现内容。
本文将介绍一种通用的说明格式范本,希望能够为大家撰写说明文档提供一些参考。
一、标题和目录:一个明确的标题和目录是说明文档的重要组成部分。
标题应该简洁明了,并能够准确概括文档的主要内容;而目录则应该清晰列出文档中各个章节或部分的标题和页码,方便读者快速浏览和查找所需信息。
二、引言:说明文档的引言部分是向读者介绍文档主题和目的的关键部分。
在引言中,我们应该简要阐述所要说明的内容,并明确说明该文档的受众对象。
同时,我们也可以在引言中概述各个章节的内容,让读者对整个文档有一个整体的了解。
三、正文:正文是说明文档的主体部分,需要清晰地呈现各个要点和详细的解释。
在正文中,我们可以按照层次结构组织内容,采用条目或编号的方式列出主要的说明点。
同时,我们应该使用简练的语言,避免过于冗长和晦涩的表达,以确保读者能够轻松理解。
四、图表和示意图:如适用,我们可以在说明文档中插入一些图表和示意图,以辅助读者更好地理解和识别相关内容。
图表和示意图应该清晰可见,标注准确,并与文字内容相互配合。
在插入图表和示意图时,我们也需要提供相应的解释,以避免读者产生任何困惑。
五、注意事项和常见问题:有时候,说明文档还需要包含一些注意事项和常见问题供读者参考。
这些内容可以罗列在文档的最后一部分,提供一些与主题相关的特殊要求、常见疑问和解决方案。
在撰写这部分内容时,我们需要保持简洁明了,提供简单的解释和说明。
结尾:总结说明文档的主要内容,并再次强调主题和目标。
在结尾部分,我们还可以提供一些联系方式,以便读者在阅读过程中遇到问题时能够及时联系我们,从而达到更好的交流和沟通。
结论:一个良好的说明格式范本能够帮助我们更好地撰写相关文档,使信息传达更清晰明了。
在实际写作中,我们可以根据具体需求灵活运用这个范本,并根据读者反馈不断改进和优化。
MYSQL帮助文档
MYSQL帮助文档1.使用Nvicat对MySql进行数据迁移操作方法一:数据传输说明:通过数据传输机制可以实时的将某个指定服务器中的数据库信息同步到指定的目标数据中。
还原内容为原数据库当前表信息、记录信息及其他内容,也可以根据用户需要指定传输内容。
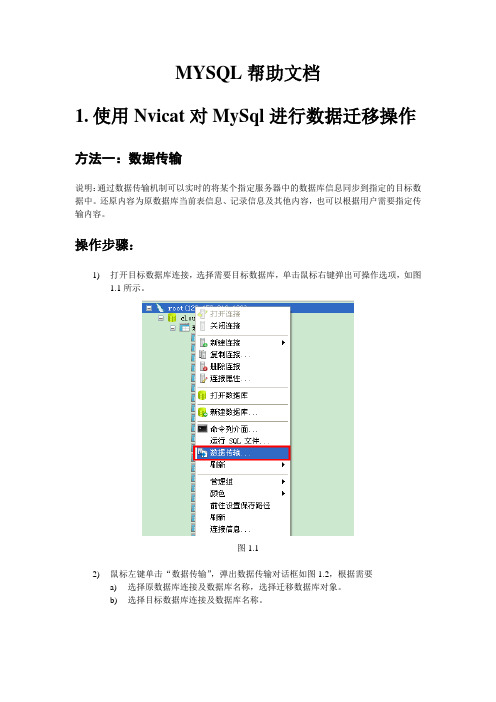
操作步骤:1)打开目标数据库连接,选择需要目标数据库,单击鼠标右键弹出可操作选项,如图1.1所示。
图1.12)鼠标左键单击“数据传输”,弹出数据传输对话框如图1.2,根据需要a)选择原数据库连接及数据库名称,选择迁移数据库对象。
b)选择目标数据库连接及数据库名称。
图1.23)点击【开始】,弹出用户确认对话框如图1.3,若确认有问题点击【取消】,则取消本次操作,用户可以重新编辑数据传输信息,若确认无误点击【确定】图1.34)确认数据传输,对话框自动切换到信息日志部分如图1.4,当日志下端提示“Finished- Successfully”,即表示数据传输已完成且操作成功。
图1.45)若只想迁移数据表结构则在开始数据传输前,在数据传输窗口中选择高级-记录选项如图1.5,将插入记录的复选框清空即可,根据窗体展示的内容用户可根据实际需要进行勾选。
图1.56)打开目标数据库,刷新数据表,打开相关数据表验证数据表结构及数据迁移结果。
方法二:数据备份、还原说明:通过数据备份还原机制可以还原某一时间备份文件中的的数据信息。
还原内容为原数据库备份时的表信息、记录信息及其他内容。
操作步骤:步骤一:备份数据1)打开Navicat Premium,打开原数据库连接,选择需要迁移的数据表结构,单击鼠标右键弹出可操作选项,如图2.1所示。
图2.12)鼠标左键单击“转储SQL文件”弹出另存为对话框如图2.2,选择保存路径并填写文件名称(系统会根据选择数据表默认填写一个文件名称)。
图2.23)点击【保存按钮】弹出执行转储操作对话框如图 2.3,当对话框下面提示“Finished-Successfully”则操作成功,点击【关闭】即可。
ROMS(Regional Ocean Modeling System)工具包的帮助文档说明书
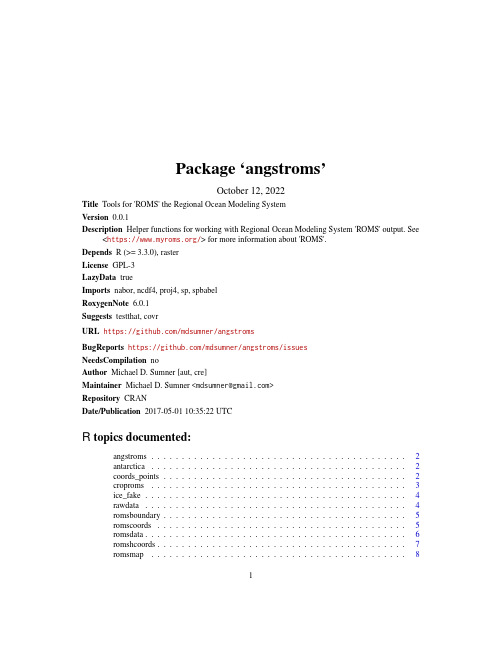
Package‘angstroms’October12,2022Title Tools for'ROMS'the Regional Ocean Modeling SystemVersion0.0.1Description Helper functions for working with Regional Ocean Modeling System'ROMS'output.See <https:///>for more information about'ROMS'.Depends R(>=3.3.0),rasterLicense GPL-3LazyData trueImports nabor,ncdf4,proj4,sp,spbabelRoxygenNote6.0.1Suggests testthat,covrURL https:///mdsumner/angstromsBugReports https:///mdsumner/angstroms/issuesNeedsCompilation noAuthor Michael D.Sumner[aut,cre]Maintainer Michael D.Sumner<******************>Repository CRANDate/Publication2017-05-0110:35:22UTCR topics documented:angstroms (2)antarctica (2)coords_points (2)croproms (3)ice_fake (4)rawdata (4)romsboundary (5)romscoords (5)romsdata (6)romshcoords (7)romsmap (8)12coords_pointsIndex10angstroms Tools for ROMS model output.DescriptionFacilities for easy access to Regional Ocean Modeling System(ROMS)output.Detailscoords_points produce sp::SpatialPoints from ROMS coordinate arrays croproms create a raster::extent by cropping a ROMS data layer rawdata read raw NetCDF variables by nameromsdata read data layers from4D variables by arbitrary sliceromsboundary generate the spatial boundary of the ROMS data set in x-y co romscoords extract the x-y(long-lat)coordinatesromshcoords extract the multi-layer’h’eight grid with S-coordinate stretch romsmap re-map a spatial layer(polygons,lines,points)into ROMS grantarctica Antarctica simple coastline.DescriptionTaken from"rnaturalearth::countries110"coords_points Create SpatialPoints.DescriptionConvenience wrapper around SpatialPoints for a two layer brick with longitude and latitudecoordinate arrays.Usagecoords_points(x,...)croproms3Argumentsx two layer RasterBrick with longitude and latitude values...ignoredValueSpatialPointsExamples##library(raadtools)##coords_points(romscoords(cpolarfiles()$fullname[1]))pts<-coords_points(ice_coords)croproms Crop a ROMS layerDescriptionCrop a ROMS data layer from romsdata with a raster extent.Usagecroproms(x,ext,...)Argumentsx ROMS xy-coordinates,see romscoordsext raster::extent in the coordinate system of x...ignoredDetailsThe spatial crop is performed in the coordinate space of roms data.Examples##notice that extent is in long-lat,but ice_local is in the grid##space of ice_coordsice_local<-croproms(ice_coords,extent(100,120,-75,-60))plot(ice_coords[[2]],col=grey(seq(0,1,length=20)))plot(crop(ice_fake,ice_local),add=TRUE)4rawdata ice_fake Fake model data.Descriptionice_coords and ice_fake are generated from a projected map of southern Ocean sea ice data.DetailsThe coords layer is the longitude and latitude values for the centres of the polar cells.This is veyr loosely analogous to the coordinate arrays used by ROMS data,included here for working examples,illustration and code tests.The proper metadata for these layers is"-3950000,3950000,-3950000,4350000(xmin,xmax, ymin,ymax)""+proj=stere+lat_0=-90+lat_ts=-70+lon_0=0+k=1+x_0=0+y_0=0+a=6378273+b=6356889.449 +units=m+no_defs"rawdata Read the variable as isDescriptionRead the variable as isUsagerawdata(x,varname)Argumentsx netcdffile pathvarname variable nameromsboundary5 romsboundary Boundary polygon from raster of coordinates.DescriptionCreate a boundary polygon by tracking around coordinates stored in a RasterStack.Usageromsboundary(cds)Argumentscds two-layer RasterDetailsThefirst layer in the stack is treated as the X coordinate,second as Y.Examplesice_grid_boundary<-romsboundary(ice_coords)plot(antarctica)##does not make sense in this spaceplot(ice_grid_boundary,add=TRUE,border="grey")##ok in this one#library(rgdal)#proj4string(ice_grid_boundary)<-CRS("+init=epsg:4326")#pweird<-"+proj=laea+lon_0=147+lat_0=-42+ellps=WGS84"#laea_world<-spTransform(antarctica,pweird)#plot(extent(laea_world)+8e6,type="n",asp=1)#plot(laea_world,add=TRUE)#plot(spTransform(ice_grid_boundary,pweird),add=TRUE,border="darkgrey") romscoords Extract coordinate arrays from ROMS.DescriptionReturns a RasterStack of the given variable names.Usageromscoords(x,spatial=c("lon_u","lat_u"),ncdf=TRUE,transpose=FALSE,...)6romsdataArgumentsx ROMSfile namespatial names of coordinate variables(e.g.lon_u,lat_u)ncdf default to NetCDF no matter whatfile nametranspose the extents(ROMS is FALSE,Access is TRUE)...unusedDetailsThe two layers from the model output are used to define the real-world space.This is used to createa boundary romsboundary,to map real-world objects into grid space romscoords and to generategraticules for mapping into the grid space with graphics::contour.ValueRasterStack with two layers of the2D-variablesExamples##Not run:coord<-romscoord("roms.nc")##End(Not run)##with in-built fake dataplot(ice_fake,asp=0.5)contour(ice_coords[[1]],add=TRUE,levels=seq(-165,165,by=15))contour(ice_coords[[2]],add=TRUE)romsdata ROMS single slice2D layer Extract a data layer from ROMS by nameand4-D slice.Descriptionromsdata always works in thefirst two dimensions(x-y),the more specialist functions will work in the space indicated by their name roms_xy,roms_xt and so on.Usageroms_xy(x,varname,slice=c(1L,1L),transpose=TRUE,...)roms_xz(x,varname,slice=c(1L,1L),transpose=TRUE,...)roms_xt(x,varname,slice=c(1L,1L),transpose=TRUE,...)roms_yz(x,varname,slice=c(1L,1L),transpose=TRUE,...)romshcoords7roms_yt(x,varname,slice=c(1L,1L),transpose=TRUE,...)roms_zt(x,varname,slice=c(1L,1L),transpose=TRUE,...)romsdata(x,varname,slice=c(1L,1L),ncdf=TRUE,transpose=TRUE,...)Argumentsx ROMSfile namevarname name of ROMS variableslice index in w and t(depth and time),defaults tofirst encounteredtranspose the extents(ROMS is FALSE,Access is TRUE)...unusedncdf default to TRUE,set to FALSE to allow raster format detection brickValueRasterLayerExamples#x<-raadtools:::cpolarfiles()$fullname[1]#plot(roms_xy(x,"u"))#plot(roms_xz(x,"u",slice=c(392L,1L)),asp=NA)#plot(roms_xt(x,"u",slice=c(392L,1L)),asp=NA)#plot(roms_yz(x,"u"))#plot(roms_yt(x,"u",slice=c(1L,1L)),asp=NA)#plot(roms_zt(x,"u",slice=c(1L,392L)),asp=NA)romshcoords Coordinates at depthDescriptionExtract the multi-layer’h’eight grid with S-coordinate stretching appliedUsageromshcoords(x,S="Cs_r",depth="h")Argumentsx ROMSfile nameS of S-coordinate stretching curve at RHO-pointsdepth depth thingDetailsS and h are the names of the appropriate variablesValueRasterStack with a layer for every depthromsmap Remap an object to the ROMS grid.DescriptionFind the nearest-neighbour coordinates of x in the coordinate arrays of coords.Usageromsmap(x,...)##S3method for class SpatialPolygonsDataFrameromsmap(x,coords,crop=FALSE,lonlat=TRUE,...)##S3method for class SpatialLinesDataFrameromsmap(x,coords,crop=FALSE,lonlat=TRUE,...)##S3method for class SpatialPointsDataFrameromsmap(x,coords,crop=FALSE,lonlat=TRUE,...)Argumentsx object to transform to the grid space,e.g.a Spatial object...unusedcoords romscoords RasterStackcrop logical,if TRUE crop x to the extent of the boundary of the values in coords lonlat logical,if TRUE check for need to back-transform to longitude/latitude and do it DetailsThe input coords is a assumed to be a2-layer RasterStack or RasterBrick and using nabor::knn the nearest matching position of the coordinates of x is found in the grid space of coords.The motivating use-case is the curvilinear longitude and latitude arrays of ROMS model output.No account is made for the details of a ROMS cell,though this may be included in future.We tested only with the"lon_u"and"lat_u"arrays.Valueinput object with coordinates transformed to space of the coordsNoteDo not use this for extraction purposes without checking the output,this is best used for exploration and visualization.Re-mapping ROMS data is better done by looking up the coords_points within spatial objects,and transferring via the grid index.Examplesant_ice_coords<-romsmap(antarctica,ice_coords)plot(ice_fake,main="sea ice in pure grid space")plot(ant_ice_coords,add=TRUE)Indexangstroms,2angstroms-package(angstroms),2 antarctica,2coords_points,2,2croproms,2,3ice_coords(ice_fake),4ice_fake,4raster::extent,2rawdata,2,4roms_xt(romsdata),6roms_xy(romsdata),6roms_xz(romsdata),6roms_yt(romsdata),6roms_yz(romsdata),6roms_zt(romsdata),6romsboundary,2,5romscoords,2,5romsdata,2,6romshcoords,2,7romsmap,2,8sp::SpatialPoints,2Spatial,810。
apdl帮助文档使用方法
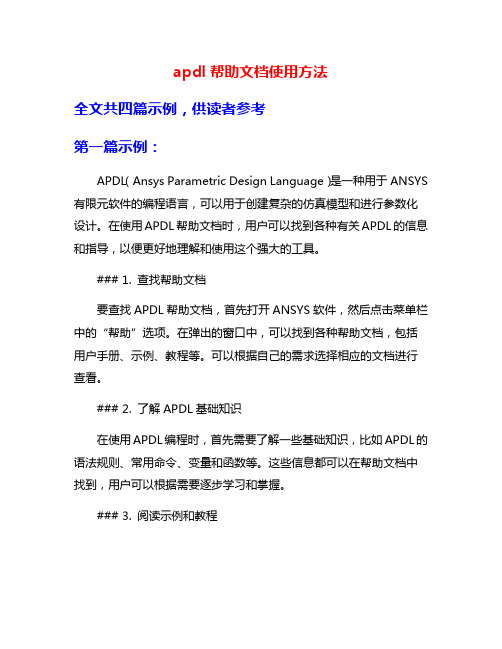
apdl帮助文档使用方法全文共四篇示例,供读者参考第一篇示例:APDL(Ansys Parametric Design Language)是一种用于ANSYS 有限元软件的编程语言,可以用于创建复杂的仿真模型和进行参数化设计。
在使用APDL帮助文档时,用户可以找到各种有关APDL的信息和指导,以便更好地理解和使用这个强大的工具。
### 1. 查找帮助文档要查找APDL帮助文档,首先打开ANSYS软件,然后点击菜单栏中的“帮助”选项。
在弹出的窗口中,可以找到各种帮助文档,包括用户手册、示例、教程等。
可以根据自己的需求选择相应的文档进行查看。
### 2. 了解APDL基础知识在使用APDL编程时,首先需要了解一些基础知识,比如APDL的语法规则、常用命令、变量和函数等。
这些信息都可以在帮助文档中找到,用户可以根据需要逐步学习和掌握。
### 3. 阅读示例和教程帮助文档中通常会提供各种示例和教程,用户可以通过阅读这些示例和教程来了解如何使用APDL创建模型、定义边界条件、设置参数等。
这些示例和教程将帮助用户更快地上手并掌握APDL编程技巧。
### 4. 使用搜索功能帮助文档通常会提供一个搜索功能,用户可以通过关键词快速定位到自己需要的信息。
在搜索框中输入相关关键词,就可以找到相关的文档和帮助信息,在使用APDL时更加方便快捷。
### 5. 参考命令手册APDL帮助文档中还包括了详细的命令手册,用户可以查阅命令手册来了解每个APDL命令的用法、参数和示例。
在编程过程中遇到问题时,可以通过查阅命令手册来解决。
### 6. 参与社区和论坛除了帮助文档,用户还可以参与APDL的社区和论坛,与其他APDL用户交流经验和技巧。
在社区中,用户可以提出问题、分享解决方案,获取更多的帮助和支持。
APDL帮助文档是使用APDL进行仿真和参数化设计的重要工具,用户可以通过查阅文档、阅读示例、搜索信息等方式来更好地掌握APDL编程技巧。
JabRef 中文帮助文档
说明:本文译自JabRef帮助文档,也可查看:/help/Contents.php。
------------------------------------------------------------------------------------------------------------------- JabRef中文手册:一、域关于bibtexJabRef能帮你处理bibtex数据库。
但须注意,在编辑文献题录时要确保你的数据库能被bibtex程序正确处理。
Bibtex域bibtex中有许多不同的域,JabRef也能设定一些附加的域。
通常,你可在包含文本的域内使用LaTex命令。
Bibtex会自动格式化你的文献列表,根据你的参考文献风格将列表中某些域转成大写或小写。
为保证特定的字符保持大写,请把它们用大括号包含起来,例如{B}elgium。
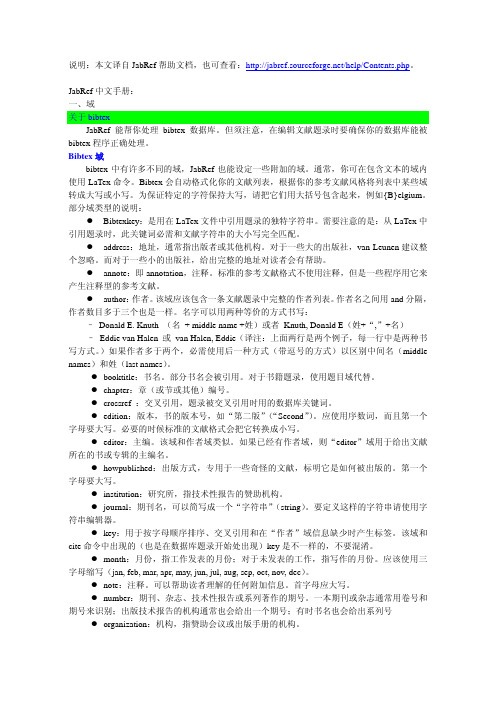
部分域类型的说明:z Bibtexkey:是用在LaTex文件中引用题录的独特字符串。
需要注意的是:从LaTex中引用题录时,此关键词必需和文献字符串的大小写完全匹配。
z address:地址,通常指出版者或其他机构。
对于一些大的出版社,van Leunen建议整个忽略。
而对于一些小的出版社,给出完整的地址对读者会有帮助。
z annote:即annotation,注释。
标准的参考文献格式不使用注释,但是一些程序用它来产生注释型的参考文献。
z author:作者。
该域应该包含一条文献题录中完整的作者列表。
作者名之间用and分隔,作者数目多于三个也是一样。
名字可以用两种等价的方式书写:–Donald E. Knuth (名+ middle name +姓)或者 Knuth, Donald E(姓+“,”+名)– Eddie van Halen 或van Halen, Eddie(译注:上面两行是两个例子,每一行中是两种书写方式。
)如果作者多于两个,必需使用后一种方式(带逗号的方式)以区别中间名(middle names)和姓(last names)。
易薪产品帮助文档

易薪产品帮助文档上海易路软件有限公司目录人事篇 (4)一、如何创建部门 (4)二、如何录入员工 (7)三、如何录批量导入员工 (10)四、如何查看员工档案 (12)薪酬篇 (15)一、我有Excel工资单,如何用易薪发送给员工 (15)二、如何查看已发布成功的工资单 (23)三、如何帮我计算工资 (24)四、什么是工资单结构 (33)五、如何设置工资单结构 (33)六、如何设置固定工资? (35)七、如何设置津补贴 (38)九、如何设置税费 (39)十、如何让银行代发工资 (40)休假篇 (43)一、如何为员工开通假期 (43)二、如何查看员工的休假情况 (45)待办事项篇 (47)一、如何处理待办事项 (47)加班篇 (49)一、员工要在微信上提出加班申请,HR需要怎么做? (49)二、如何查看员工的加班规则? (54)三、有多个假期规则时,如何将某员工调整至另外的假期规则 (55)四、如何查看员工的加班记录? (56)考勤篇 (58)一、如何设置考勤点,如何设置考勤工资? (58)二、如何查看员工的考勤记录 (64)人事篇一、如何创建部门1.登陆易薪后,进入「人事」模块。
2.首次进入「人事」时会进入「设置部门」页图片待更新:3.点击创建部门后弹出「新增部门」窗口,你可以输入部门名称和选择上级部门。
4.新建完部门后就会在列表中显示。
你可以单击已创建的部门修改名称,或拖动部门来更换部门结构。
5.如果要在已创建的部门下新建子部门,则可选中部门后在右端点击「添加子部门」完成操作。
图待改6.当创建完成后点击「下一步」便可以去录入员工了(录入员工相关介绍见【人事篇-如何录入员】)。
7.此外,你还能在「人事」应用中新建、编辑、删除和查看部门。
8.也可以在「人事」应用中点击「新增部门」去创建、编辑部门。
9.进入「新增部门」页面后,可以在本页面进行新建和编辑,操作与之前一致。
二、如何录入员工1.登陆易薪后,进入「人事」模块。
MPLAB Harmony 帮助文档说明书
Using the MPLAB Harmony Help MPLAB Harmony Integrated Software Framework2013-2015 Microchip Technology Inc. All rights reserved.Using the MPLAB Harmony Help Help FeaturesUsing the MPLAB Harmony HelpThis topic contains general information that is useful to know before using the MPLAB Harmony help. DescriptionHelp FormatsMPLAB Harmony Help is provided in three formats:• Stand-alone HyperText Markup Language (HTML)• Microsoft Compiled HTML Help (CHM)• Adobe® Portable Document Format (PDF)Help File LocationsEach of these help files are included in your installation of MPLAB Harmony in the following locations: • HTML - <install-dir>/doc/html/index.html• CHM - <install-dir>/doc/help_harmony.chm• PDF - <install-dir>/doc/help_harmony.pdfRefer to Help Features for more information on using each output format.Help FeaturesDescribes the features available in the Help files provided in MPLAB Harmony.CHM Help FeaturesProvides detailed information on the features available in the CHM Help file.DescriptionThe MPLAB Harmony CHM file (<install-dir>/doc/help_harmony.chm) provides many useful features for accessing Help content. Figure 1 shows the initial Help window.Figure 1: Initial CHM Help ViewHelp IconsSeveral icons are provided in the interface of the Help, which aid in accessing the Help content.Table 1: Help Icon FeaturesHelp Icon DescriptionUse the Hide icon to turn off the left Help pane. Once the Hide icon is selected, it is replaced with the Show icon.Clicking the Show icon restores the left Help pane.Use the Locate icon to visually locate the H elp topic you are viewing in the Contents. Clicking the Locate iconcauses the current topic to be highlighted in blue in the Contents pane.Use the Back icon to move back through the previously viewed topics in the order in which they were viewed.Use the Forward icon to move forward through the previously viewed topics in the order in which they were viewed.Use the Home icon to return to the first topic in the Help.Use the Print icon to print the current topic or the selected heading and all subtopics.Use the Options icon to:• Hide tabs• Locate a topic• Go Back, Forward, and Home• Stop• Refresh• Set Internet Explorer options• Print topics• Turn Search Highlight Off and OnTopic WindowThe Topic Window displays the current topic. In addition to the Help content, special links are provided in the upper portion of the window, as shown in Figure 2. Table 2 lists and describes the different links by their categoryFigure 2: Help LinksTable 2: Help LinksLink Category DescriptionBreadcrumb TrailThe path (i.e., trail) of the current topic is provided at the top and bottom of each topic, beginningwith the top-level section name.Support and Feedback Links: • Documentation Feedback• Microchip Support Click this link to send feedback in the form of an email (see Note 1). Click this link to open the Microchip Support Web page. Main Help Links: • Contents• Index • HomeClick this link to open the Contents in the left pane. Click this link to open the Index in the left pane (see Note 2). Click this link to go to the initial Help topic (see Note 2). Navigation Links: • Previous • Up • NextClick this link to go back to the previously viewed topic. Click this link to go to the parent section of the topic. Click this link to go to the next topic.Notes:1. To use the Documentation Feedback link, you must have an email system such as Outlook configured. Clicking the link automatically opens a new email window and populates the recipient and subject lines.2. The Home and Index links do not appear initially. Once you begin traversing the topics, they dynamically appear.TabsThe CHM Help provides four Tabbed windows: Contents, Index, Search, and Favorites.ContentsThe Contents tab displays the top-level topics/sections. Figure 3 shows the initial view when the CHM Help is first opened.Figure 3: Initial Contents Tab ViewAs topics are explored, the information in the Contents tab dynamically updates. For example, by clicking Prebuilt Libraries Help and using the Next link in the current topic to traverse through this section, the collapsed section automatically expands and the current topic is highlighted in light gray, as shown in Figure 4.Figure 4: Current Topic HighlightingIndexClicking the Index tab results in an alphabetic list of all Help index entries. Figure 5 shows the default Index interface.Figure 5: Default Index Interface• To locate a specific entry, enter the keyword in the Type in the keyword to find: box. As you type, the index list dynamically updates.• To display the desired item in the list, select the item and click Display, or double-click the desired item. The related content appears in the Help window.SearchClicking the Search tab provides an efficient way to find specific information. Figure 6 shows the default Search interface.Figure 6: Default Search Interface• Enter the specific word or words in the Type in the word(s) to search for: box• Clicking the drop-down arrow provides the list of previously searched words• The right arrow provides Advanced Search options: AND, OR, NEAR, and NOT• Located at the bottom left of the Search window, three options are provided to narrow-down your search. By default, Match similar words is selected. To reduce the number of returned words, clear this box and select Search titles only, which restricts the search to only the topic titles in the Help, as shown in Figure 7.Figure 7: Search Titles Only• The Title column provides the list of related topics• The Location column lists in which Help system the topic was found (see Note)• The Rank column determines to search result that most closely matches the specified wordNote: The Legend column is automatically included in the CH M H elp when the Advanced Search features are implemented and cannot be excluded. Its purpose is to provide the name of the Help system in which the topic islocated for Help output that is generated from multiple sources. Since the MPLAB Harmony Help is contained withina single Help system, this information is the same for all searches. Do not confuse this column to mean the actualtopic location.FavoritesUse the Favorites tab to create a custom list of topics that you may want to repeatedly access. Figure 8 shows the default Favorites interface.Figure 8: Default Favorites Interface• The title of the current topic is shown in the Current topic: box.• Click Add to add the topic to the Topics: list, as shown in Figure 9.• Click Display to view the selected topic.• Click Remove to remove the selected topic from the list of favorites.Figure 9: Adding a Favorite TopicUsing the MPLAB Harmony Help Help FeaturesHTML Help FeaturesProvides detailed information on the features available in the stand-alone HTML Help.DescriptionThe HTML Help output for MPLAB Harmony has two purposes. First, it can be used as "stand-alone" Help. Second, the HTML files are used by the MPLAB Harmony Configurator (MHC) when using MHC in MPLAB X IDE.Stand-alone HTML HelpTo use the HTML Help in a "stand-alone" manner. Open the file, <install-dir>/doc/index.html, in your browser of choice.The following figure shows the initial view after opening the HTML Help.The following links are provided:•Topic Breadcrumb Trail - At the top and bottom of each topic, the help path is listed•Contents - The Contents topic is a static file, which lists the major sections available in the Help. Due to a restriction with the Help browser used by the MHC, a dynamic Contents topic cannot be used.•Index - The Index provides the ability to dynamically search for and display related keywords (see Note 1)•Home - This link returns to the Introduction topic (see Note 1)•Previous and Next navigation links - Use these links to traverse through the Help topics•Documentation Feedback - Use this link to provide feedback in the form of an email (see Note 2)•Microchip Support - Use this link to open the Support page of the Microchip websiteNotes: 1.The Home and Index links do not appear initially. Once you begin traversing the topics, they dynamically appear.2.To use the Documentation Feedback link, you must have an email system such as Outlook configured. Clickingthe link automatically opens a new email window and populates the recipient and subject lines.HTML Help FeaturesProvides detailed information on the features available in the PDF version of the Help.DescriptionThe MPLAB Harmony Help provided in Portable Document Format (PDF) provides many useful features. By default, PDFbookmarks should be visible when opening the file. If PDF bookmarks are not visible, click the PDF Bookmark icon, which is located near the top of the left navigation pane or by selecting View > Show/Hide > Navigation Panes > Bookmarks.To make full use of the PDF features, it is recommended that Adobe products be used to view the documentation (see Note ). Help on how to use the PDF output is available through your copy of Acrobat (or Acrobat Reader) by clicking Help in the main menu.Note: The MPLAB H armony H elp PDF file can be viewed using a PDF viewer or reader that is compatible with Adobe PDF Version 7.0 or later. PDF Help FeaturesUsing the MPLAB Harmony Help Help Features PDF Help FeaturesUsing the MPLAB Harmony HelpTypographic ConventionsThis topic describes the typographic conventions used in the MPLAB Harmony Help.DescriptionThe MPLAB Harmony Help uses the following typographic conventions: DescriptionRepresentsExample Italic CharactersReferenced documentation and emphasized text •MPLAB X IDE User's Guide •...is the only option.InitialCapitalization • A window • A dialog• A menu selection•the Output window •the SaveAs dialog •the Enable Programmer menu Indicates a process step thatis automated by the MPLABHarmony Configurator (MHC)TIP!Provides helpful information to assist the user Note: Provides useful information tothe userImportant! Provides important informationto the userWarningWarns the user of a potentiallyharmful issue Quotation Marks A field name in a window or dialog"Save project before build"Italic text with right anglebracketA menu pathFile > Save Bold Characters •Topic headings• A dialog button •Prerequisites •Click OKText enclosed in angle brackets A key on the keyboard Press <Ctrl><V>Courier New text •Sample source code •File names •#define START•system_config.hSquare Brackets Optional arguments command [options] file [options]Curly Bracesand PipeC Choice of mutually exclusive arguments; an ORerrorlevel {0|1} Typographic ConventionsUsing the MPLAB Harmony Help Recommended ReadingRecommended ReadingThe following Microchip documents are available and recommended as supplemental reference resources.DescriptionUsing the MPLAB Harmony Help DocumentationIf you are new to MPLAB Harmony, read the Understanding MPLAB Harmony section and follow the Creating an Application tutorial to create your first MPLAB Harmony application.For an overview of the libraries, demonstration projects, and other resources provided in the MPLAB Harmony installation, review the tables in the Release Contents section.Refer to the Applications Help section for more information on the demonstration projects and the Framework Help section for more information on the libraries that make up the MPLAB Harmony framework. There are also help sections available for the third-party material, board support packages, and prebuilt libraries that you should review for more information on each of those items.The help documentation for each MPLAB Harmony library is organized into common topics. The "Introduction" section provides a brief description of the library for those who are new to it. "Release Notes" and "Software License Agreement" provide the latest release information about the library and its license terms. Read the "Using the Library" section to understand the library's usage model and see examples of how to use the library's interface functions to create the solutions you need. The "Files", "Building the Library", and "Configuring the Library" sections describe how to add the library to your project and configure it for your desired usage. The "Library Interface" section provides a convenient programmer's reference dictionary of the library's interface functions, data types, and constants with a convenient hyper-linked summary table. Use it while you are developing your own applications. PIC32 Family Reference Manual SectionsPIC32 Family Reference Manual sections are available, which explain the operation of the PIC32 microcontroller familyarchitecture and peripheral modules. The specifics of each device family are discussed in the individual family’s device data sheet.To access this documentation, please visit, /pic32/, and click Documentation. Then, expand Reference Manual to see the list of available sections.PIC32 Device Data SheetsRefer to the appropriate device data sheet for device-specific information and specifications.Reference information found in these data sheets includes:•Device memory maps•Device pin out and packaging details•Device electrical specifications•List of peripherals included on the devicesTo access this documentation, please visit, /pic32/, and click Documentation. Then, expand Data Sheets to see the list of available documents.MPLAB® XC32 C/C++ Compiler User’s Guide (DS50001686)This document details the use of Microchip’s MPLAB XC32 Compiler for PIC32 microcontrollers to develop 32-bit applications.Please visit the Microchip website to access the latest version of this document.MPLAB® X IDE User’s Guide (DS50002027)Consult this document for more information pertaining to the installation and implementation of the MPLAB X IDE software. Please visit the Microchip website to access the latest version of this document.Using the MPLAB Harmony Help Documentation FeedbackDocumentation FeedbackThis topic includes information on how to provide feedback on this documentation.DescriptionYour valuable feedback can be provided to Microchip in several ways. Regardless of the method you use to provide feedback, please include the following information whenever possible:•The Help platform you are viewing:•Adobe® PDF•Windows® Compiled Help (CHM)•HTML•The title of the topic and the section in which it resides• A clear description of the issue or improvementHow To Send Your FeedbackIt is preferred that you use one of the following two methods to provide your feedback:•Through the Documentation Feedback link, which is available in the header and footer of each topic when viewing compiled Help (CHM) or HTML Help•By email at: ***********************If either of the two previous methods are inconvenient, you may also provide your feedback by:•Contacting your local Field Applications Engineer•Contacting Customer Support at: 。
nsoft中文帮助文档
1.文档介绍和说明本文档介绍了FE-fatigue软件产品基于有限元应力计算结果进行疲劳寿命估计。
有关nCode软件的基础理论信息,请查询nSoft在线疲劳分析理论手册。
像这样加粗的文本,表示输入表单的名称,文件名,或在选择列表上的选项等,这些来提醒您注意一些注意事项。
1.1.FE-fatigue功能FE-fatigue能实现在设计过程的早期阶段对零部件进行疲劳计算,从而使设计分析师对设计的耐久性方面性能进行评估。
只要进行结构应力计算,疲劳计算通常也是必要的。
当部件、材料和制造工艺的类型适当时,FE-fatigue提供更多有价值的设计信息,这些信息可以减少产品上市时间、节省资金,同时在设计过程中更快提供最优的设计方案。
FE-fatigue将有限元分析的应力或应变数据结果作为输入文件,然后将这些信息和循环变化负荷和材料数据相结合。
通过这个组合文件估计有限元模型每个节点或单元的疲劳损伤。
为了支持市场上许多FE软件,并提供一个一致的有限元疲劳分析界面,有限元数据从其原本的形式转换成一个通用的文件格式(.fes文件),其细节在theory.pdf文件中提供。
一个软件的能力取决于编译模块以正确格式提供数据给求解器的能力。
不同的疲劳计算方法需要不同的有限元分析结果,编译模块必须能够提供正确的数据以完成链接和分析。
疲劳分析的结果以适合寿命及损伤云图显示的形式返回给后处理器。
1.2.系统流程图基本的系统流程如图 1.1所示:输入文件类型如下:部分FES文件—由有限元软件产生;全部文件—NCODE软件所需要的分析文件;结果文件—适合之际导入前、后处理器的文件格式。
如果前后处理器不支持FES文件,可以使用以下的流程,如图 1.2所示:图 1.2不支持FES文件系统流程图2.快速开始实例实例在以下文件夹中给出:Windows和Unix系统*.ncx文件在$安装路径\nsdata*.ncl文件在$安装路径\demo每个FE-fatigue实例都有一个相对应的宏文件(见图 2.1),它能将实例所需要的所有文件拷贝到挡墙的工作目录下,宏运行可以通过prompt或是via菜单进入(如下)。
速达5000系列培训手册帮助文档使用说明
速达5000系列培训手册速达软件客户技术部2012.05目录1.速达5000系列市场定位--------------------------------------------------4 2.产品特点----------------------------------------------------------------4 3.产品价格----------------------------------------------------------------5 4.功能对比---------------------------------------------------------------5 5.ERP基础知识5.1ERP发展史5.2生产管理概念6.软件基本知识-----------------------------------------------------------6 6.1存货计价方法---------------------------------------------66.2固定资产折旧方法---------------------------------------------------6 6.4产品成本构成6.5成本费用分摊方法6、6财务分析常用指标7.流程简介----------------------------------------------------------------7 8.容详解----------------------------------------------------------------8 8.1新建帐套---------------------------------------------------------8 8.2初始化要点---------------------------------------------------------8 8.3采购系统-----------------------------------------------------------9 8.4仓库系统----------------------------------------------------------13 8.5销售系统----------------------------------------------------------17 8.生产系统-----------------------------------------------------------23 8.7应收应付----------------------------------------------------------23 8.8现金银行----------------------------------------------------------25 8.9企业信息----------------------------------------------------------29 8.10审核中心---------------------------------------------------------34 8.11开票管理---------------------------------------------------------35 统计分析-------------------------------------------------------------38 进销存月未处理-------------------------------------------------------40 帐务系统-------------------------------------------------------------41 单据模板与打印样式的设计---------------------------------------------44 日常维护-------------------------------------------------46用户自定义报表-------------------------------------------------50升级---------------------------------------------------531、速达5000系列市场定位速达5000系列广泛适用于中型工业加工企业及商品流通企业。
NUMECA帮助文档(六)
第十二章跨叶片截面模块12.1绪言本章针对透平机械讲述快速三维跨叶片截面模块的分析过程。
这个模块是全自动完成的并且利用一些NUMECA工具。
此外,附加模块FINE™/Design2D这些工具联系起来,可以进行叶片重新设计,改善叶片表面压力分布,关于这些详见第13章。
这个模块假设流动是轴对称的,并且流面形状和厚度也由用户提供或由参数自动生成(利用根部和顶部边界)。
几何输入数据必须由用户提供:1、流面及叶片这个流面上的截面或2、完整的叶片轮廓及端壁本模块由网格自动生成与NS湍流方程组成。
在下一节讲述这个跨叶片截面模块的界面及对用户的建议。
12-4节讲述自动生成网格的理论和求解方程。
12-5节讲述几何数据和输出结果。
12-6讲述实例。
12-2跨叶片截面模块的界面在FINE™/Design2D界面之下运行跨叶片截面模块,这些可以高速,简单,交互式求解。
所有参数可以在用户界面中选取,并自动创建输入文件及求解。
监视工具,MonitorTurbo,可以在计算中和计算后检查收敛情况及结果。
它可以实时查看叶片表面压力分布的收敛过程及叶片几何形状。
结果分析利用NUMECA CFViwe™后处理工具进行,自动进入跨叶片截面模式。
几何数据以ASCII输入文件列出,但是求解参数定义及边界条件在这个界面中列出。
这个截面的描述由FINE™/Design2D界面中的菜单创建。
更详细的说明见12-5.12.2.1开始新的或打开现存S1面计算在开始界面下,Project Selection窗口允许创建新工程或打开现存工程。
对于创建新的跨叶片截面工程,按如下操作:1、单击按扭Create a New Project2、选取工程保存路径及输入文件名3、关闭Grid File Selection窗口,Design 2D不需要输入网格文件4、进入S1流面模块,菜单Modules/Design 2D如果要打开现存工程,在Project Selection窗口中单击Open an Existing Project 按扭,并在File chooser窗口中选取一个文件。