恐龙工具箱使用说明
国油瓦洛尔·简单包器捞鱼工具说明书
Instruction Manual 2710Bowen Simplex Packer RetrieversIndexGeneral Description (3)Use (3)Construction (3)Accessories (3)Operation (4)To Release the Retriever (4)To Reset the Retriever in the Hole (5)Maintenance (5)Disassembly of Simplex Packer Retriever (5)Reassembly of Simplex Packer Retriever (5)Strength Data (5)Specifications and Replacement Parts .......................................................7 – 9Range Tables ................................................................................................10 – 11The designs and specifications for the tools described in this instruction manual were in effect at the time this manual was approved for printing. National Oilwell Varco, whose policy is one of continuous improvement, reserves the right to discontinue models at any time, or to change designs and specifications without notice or without incurring obligation.Bowen Simplex Packer RetrieversGeneral Description The Bowen™ Simplex packer retriever is an internally engaging fishing tool especially designed for the retrieving of drillable type production packers. With its accessory components (stinger, bushing and mill shoe), the Bowen Simplex packer retriever passes through the bore of the packer, prevents loss of the packer during milling and pulls the packer after it has been milled over, all inone trip. If necessary, the Bowen Simplex packer retriever can be released and reset to catching position — all without coming out of the hole.UseThe Bowen Simplex packer retriever is used to retrieve all types of drillable production packers from the wellbore. Types and sizes of production packers recoverable with Bowen Simplex packer retrievers are listed in the range tables on the following pages.ConstructionThe Bowen Simplex packer retriever consists of a top sub, lock pin, cage, mandrel and bottom nut. The top sub connects the retriever to a stinger or extension. The cage is installed on the mandrel which is threaded into the top sub and secured at assembly with the lock pin. The bottom nut is a bullnose type and is furnished with the tool unless an alternate is specified. It may be removed so that a tool or other type nut may be run below the retriever if required.The cage has two automatic J slots with internal lug keyways, friction wickers, lifting shoulder, and a tapered ID at the bottom with milled slots so that the lifting shoulder can expand. The mandrel has two J slot lugs and a taperedcone which makes the cage liftingshoulder expand.The retriever also has a small borefor high velocity jetting in case thepacker has been sanded over.AccessoriesStingerBowen Simplex packer retrieverstingers are simply extensions thatpermit the retriever to be loweredcompletely through the packerduring the milling operation.BushingThe bushing is provided with abox connection at its lower endfor attaching the stinger, also a pinconnection at the lower end forattaching a mill shoe and a boxconnection at its upper end forconnection to the run-in or fishingstring. Bushings are providedwith circulation ports that maydirect some fluid down around theoutside of the retriever.Mill shoesMill shoes for Bowen Simplexpacker retrievers are of sufficientlength to completely mill awaythe slips of the packer and containthe packer within its length. Themill shoe is faced with BowenItcoloy (sintered tungsten carbide)on its leading edge and on itsinternal diameter. The loweroutside diameter may be dressedwith hard-facing material toreduce wear. Mill shoes are madewith additional length to permitredressing with Bowen Itcoloyseveral times. The mill shoe mustbe of a length which will shroudthe packer.When more length is needed, a shortmill shoe may be used with a pieceof washpipe of sufficient length inplace of the long mill shoe. (Seeassembly illustrated on next page.)MandrelAutomatic J slotCageBottom nutFriction wickersLifting shoulderBox connectionTop subLock pinBowen Simplex packer retrieverBowen Simplex Packer RetrieversOperationMake up a complete Bowen Simplex packer retriever assembly consisting of retriever, stinger, bushing and mill shoe. Make sure to determine the following:1. That the retriever is the correct size for the packer to be caught.2. That the stinger is sufficiently long to permit the retrieverto pass completely through the packer.3. That the bushing and mill shoe are the correct size for the casing specifications.Refer to the specification tables and range tables on the following pages.Make up the complete assembly to the fishing string.Lower the retriever into the hole on the fishing string and passit through the packer. As the retriever passes through the packer, the cage is free to ride up on the mandrel while the lugs are in the bottom of its internal keyways, and the friction wickers and lifting shoulder are free to collapse to permit passage. After the friction wickers pass through, the cage will fall onto the tapered cone of the mandrel which expands the lifting shoulder. The mandrel lugs are then near the top of the internal keyways. Now, raise the fishing string slowly and carefully until it takes weight. This ensures that the retriever will engage the packer seat.Lower the fishing string until the mill shoe contacts the slips of the packer. Start circulation and right-hand rotation to mill away the slips and sealing element of the packer. When the packer begins to slide down the hole, stop rotation, raise the fishing string to engage itwith the lifting shoulder and thenpull the assembly and the fishfrom the hole. Procedure steps areshown on page 6.To Release the RetrieverIf for any reason you wish torelease the retriever from thepacker, observe the followingprocedure.1. Elevate the fishing string untilweight is indicated.2. Lower the fishing string aboutthree inches.3. Rotate about 90° to the right.4. Slowly elevate the string towithdraw the retriever from thepacker.When the fishing string is loweredthree inches, the friction wickersdrag on the packer ID causingthe mandrel lugs to ride downthe keyways into the J slots. Asthis occurs, the cage slides off themandrel tapered cone. The frictionwickers remain in the packer andstill provide slight drag enoughto hold the cage stationary whilethe 90° right-hand turn is appliedwhich moves the lugs out of thekeyways and into the J slots.When the string is raised, thelugs engage the top of the J slots,leaving the lifting shoulder free tocollapse and to be removed fromthe packer.WashpipeShort mill shoeBushingSimplex packerretrieverStingerComplete retrieving unitwith bushing, shoe, and stingerBowen Simplex Packer RetrieversTo Reset the Retriever in the Hole After releasing from the packer and it is desirable to reset the retriever, observe the following procedure. Refer to fourth view of procedure figure on page 6.1. Lower the fishing string until the retriever passes through the packer bore. As it passes through, the drag of the friction wickers on the packer bore makes the lugs ride on the bottom of the J slots and back into the keyways. Once through, the cage falls back onto the tapered cone of the mandrel, which again expands the lifting shoulder.2. Elevate the fishing string until weight is indicated, demonstrating that the retriever is in the catch position and is engaging the packer seat.3. Continue elevating and pull the assembly and fish from thehole. MaintenanceTo guard against misruns andto prolong the life of the Bowen Simplex packer retriever, it should be completely disassembled, thoroughly cleaned, lubricated and reassembled before storing. Exterior surfaces may be either painted or lubricated to prevent rust and deterioration.Disassembly ofSimplex Packer Retriever1. Rest top sub in vise or clamp so that the lock pin is in a position where it can be driven out. Drive lock pin out. This pin must be removed first.2. Reposition assembly in viseto clamp on mandrel just above bottom nut. Rest top end of mandrel (between the cage and top sub) on paddedsupport so that assembly willnot flex when applying torqueto top sub. Using wrench, breakout and remove top sub.3. Remove cage by manuallyaligning mandrel lugs with theinternal cage keyways and slidecage off threaded end ofmandrel.4. Using wrench, remove bottomnut to make sure there is nodebris inside which couldobstruct the bore.Reassembly ofSimplex Packer Retriever1. Clamp mandrel’s largestdiameter in vise and coat allthreads with grease.Using wrench, make up bottomnut to threads near vise.2. Coat mandrel between taperedcone and lug area and ID ofcage generously with grease.Slip lifting shoulder and frictionwicker end of cage onto otherend of mandrel. When mandrellugs near J slot area of cage,manually align and entermandrel lugs into cage internalkeyways.3. Position padded support undermandrel between threads andcage so that when making uptop sub to mandrel, theassembly will not flex. Make uptop sub to mandrel.4. Reposition in vise and clampso that lock pin can be driveninto hole on top sub. Make surelight can be seen through thishole before installing pin. If nolight can be seen, the top sub isnot made up far enough forgroove in mandrel end to alignwith lock pin.* The strengths shown are theoretical calculations based on yield strength of the material usedin each case. The strengths shown are only plus or minus 20% accurate of the figure shown.These figures do not constitute a guarantee, actual or implied. They are meant to serve as aguide only, and appropriate allowance must be made in use, as a safety factor.Bowen Simplex Packer RetrieversPass Through PackerMill Away Slipsand Sealing ElementEngage andPull PackerLower and Rotateto ReleaseBowen Simplex Packer RetrieversHow to OrderSpecify:(1) Name and number of assembly or part(2) Make, model, and ID of packer to be caught Recommended Spare Parts:(1) 1 Cage, each catch sizeBowen Simplex Packer RetrieversHow to OrderSpecify:(1) Name and number of assembly or part(2) Make, model, and ID of packer to be caught Recommended Spare Parts: (1) 1 Cage, each catch sizeBowen Simplex Packer RetrieversHow to OrderSpecify:(1) Name and number of assembly or part(2) Casing size (OD and weight)(3) Top connection of bushing(4) Make, model, and number of packer to be caughtPrices quoted on request.Bowen Simplex Packer RetrieversBowen Simplex Packer Retriever Assembly part no. 69035Dressed with cage part no. 69038 — Standard Catch size 1.968 in. IDBowen Simplex Packer Retriever Assembly part no. 69040Dressed with cage part no. 69043 — Standard Catch size 2.375 in. IDBowen Simplex Packer RetrieversBowen Simplex Packer Retriever Assembly Part no. 69050Dressed with cage Part no. 69053 — Standard Catch size 3.250 in. IDBowen Simplex Packer Retriever Assembly part no. 69045Dressed with cage part no. 69048 — Standard Catch size 2.688 in. IDBowen Simplex Packer Retriever Assembly part no. 69055Dressed with cage part no. 69058 — Standard Catch size 3.875 in. ID/ downholelocations。
MRAS6中文操作手册
V 1.0目录操作须知 (3)仪器介绍 (4)安全通则 (5)密闭微波消解中不适消解的物质 (6)高温下化学物质的安全要点 (6)安装 (7)工具 (7)安装地点 (7)开箱 (8)检查 (8)仪器描述 (9)软件图标和按键指引 (13)创建传统方法 (14)编辑方法 (19)删除方法 (20)运行方法 (21)系统菜单 (25)工具 (25)系统 (25)诊断 (26)功率 (26)红外 (26)压力 (27)升级管理 (27)设置 (28)维护、故障解决及服务 (37)清洁 (37)微波泄漏测试 (37)微波功率测试 (37)温度标定(红外传感器) (40)红外温度传感器的校验 (42)压力标定 (43)升级固件 (43)故障解决指南 (44)规格 (47)保修 (48)操作须知MARS6仪器所使用电源必须具有良好接地,以防电源短路对仪器造成严重伤害。
仪器配备了接地插头,必须插入正常接地的插座中。
如果接地要求不能达到或者怀疑仪器没有正常接地,请咨询电工或者相关认证部门。
如果需要使用延长线,仅适用3插头延长线,并保证插入3插头接地插座。
延长线的标号必须等于或者高于仪器原装线指标。
仪器不应该放置在易受电磁干扰的设备旁边。
仪器应远离磁场,微波泄漏量应小于5 mW/cm 2。
本仪器如果选配有磁力搅拌功能会产生一定的磁场,患有心脏病或体内有心脏起搏器的人员请勿操作使用仪器。
仪器发生问题时,维修应由CEM 公司专业工作人员来完成。
本仪器所通过美国、加拿大、欧共体相关安全标准。
本手册中使用的Teflon 为E.I. DuPont 公司注册商标。
仪器介绍微波加速反应系统(MARS6)是一种应用于消解、萃取、蛋白水解浓缩、干燥、合成等实验室工作的仪器。
它的主要功能是为AA(原子吸收)、ICP(电感耦合等离子发射光谱)和LC(液相色谱)等分析的前处理加速样品反应,缩短处理时间,从而提高工作效率。
MARS 组成:◆磁控管(输出功率:0~1800W±15%,IEC)◆防腐内腔◆排风扇及排气管◆数字化电脑编程,每个程序最高可达5步◆自动转盘◆三个内锁开关和一个检测开关保护仪器在开门时停止微波发射MARS 使用微波能量加热样品。
恐龙工具箱使用说明
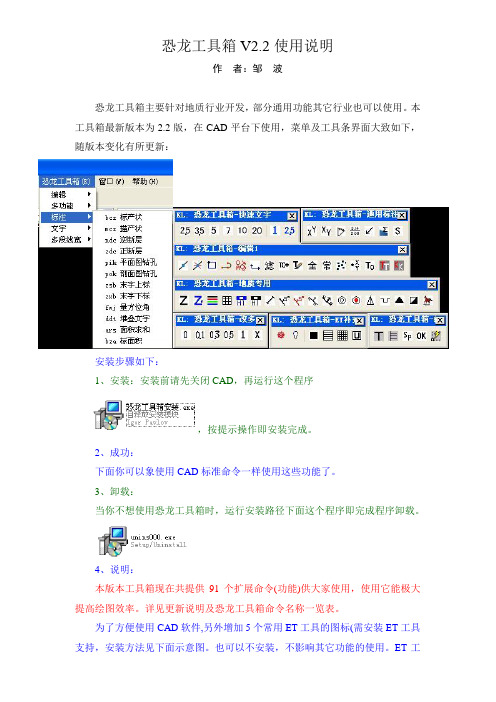
恐龙工具箱V2.2使用说明作者:邹波恐龙工具箱主要针对地质行业开发,部分通用功能其它行业也可以使用。
本工具箱最新版本为2.2版,在CAD平台下使用,菜单及工具条界面大致如下,随版本变化有所更新:安装步骤如下:1、安装:安装前请先关闭CAD,再运行这个程序,按提示操作即安装完成。
2、成功:下面你可以象使用CAD标准命令一样使用这些功能了。
3、卸载:当你不想使用恐龙工具箱时,运行安装路径下面这个程序即完成程序卸载。
4、说明:本版本工具箱现在共提供91个扩展命令(功能)供大家使用,使用它能极大提高绘图效率。
详见更新说明及恐龙工具箱命令名称一览表。
为了方便使用CAD软件,另外增加5个常用ET工具的图标(需安装ET工具支持,安装方法见下面示意图。
也可以不安装,不影响其它功能的使用。
ET工具附带图层管理等功能,将让你操作图层得心应手,推荐安装。
),增加9个CAD 默认设置没有显示出来,但又常用的图标。
本工具箱是在XP系统及CAD2004环境下开发制作的,在与该环境相近的环境下能达到最优的效果。
理论上在所有CAD版本下均可使用。
至于是CASS、天正、理正等环境下能否使用,请自行试验。
安装前,请参看《安装演示图》;使用前,请参看《功能演示》里各个命令的操作示范。
本程序还自带了570种岩石花纹,你也可以自行添加其它岩石花纹。
本程序附带了部分功能的演示数据或数据模板,请在安装路径下查看。
本工具箱功能全部免费使用,欢迎大家下载使用,有任何问题及建议请与我联系。
联系方式:QQ群:74906452,273920298。
验证请填:恐龙工具箱。
本程序中部分功能为网络上收集,版权归相应的个人或公司。
大部分功能为本人编写,版权属邹波所有,欢迎大家使用!邹波在此对帮助、支持过我的朋友表示感谢!2013.5.25。
恐龙T-RACKS插件做母带处理使用指南
《恐龙归来----用T-RACKS软件做母带处理快速入门使用指南》序提到母带处理软件我想很多朋友立刻就会想到IKMultimedia公司出品的T-RACKS软件,也就是大家经常所说的“恐龙”。
是的,T-RACKS软件就是一款使用非常方便,操作界面非常直观友好的母带处理软件,T-RACKS也是目前各类音频编辑处理软件中使用频率非常高、非常具有实用价值的一款母带处理软件。
虽然现在优秀的音频编辑处理软件中并非只有T-RACKS一款母带处理软件,其他诸如Waves公司出品的 L3、臭氧(OZONE)等等也都是非常优秀的母带处理软件,但T-RACKS以他的使用方便、上手快、操作界面直观友好、处理音频文件温暖柔和、饱满有力等优点早已在广大用户心目中形成了非常良好的口碑和及其广泛的用户群.我们可以把学习使用T-RACKS软件作为我们了解和使用母带处理软件的一个良好的开端,特别是那些刚开始用母带处理软件的朋友们更可以把学习使用T-RACKS软件作为了解和使用母带处理软件的一个窗口,。
同时也为我们将来触类旁通的使用其他优秀的各类音频编辑处理软件打好一个牢固坚实的基础,也同时起到事半功倍、精一通百的良好作用。
[第一章]T—RACKS软件简要论述首先大家需要了解的是,什么是“母带处理”.“母带处理”是我们音乐制作过程中的最后一道工序,也是我们最终提高所制作的音乐作品整体质量非常重要的一环.它是我们所制作的音乐作品在编辑制作之后,在做正式交付使用之前所针对于声音的频响特征、动态范围和立体声声场等所做的最后的一种处理. 它的目的就是通过使用均衡、压缩和限制等技术手段,把原始的混音素材中获得尽可能高的声音质量,以使的我们所制作的音乐作品在整体质量上变得更加甜美、温暖柔和、饱满有力。
而T—RACKS软件就是这样一款用来进行母带处理的优秀软件. T—RACKS软件本身即可以作为一个独立工作的软件,也可以作为DX、VST插件在cubaseSX、NUENDO等宿主音乐制作软件中使用.通过T—RACKS软件所提供的多段均衡、电子管压缩和多段限幅等母带处理工具可以对立体声的波形文件进行母带处理。
海洛斯操作手册(说明书)
HIROSS恒温恒湿机房精密空调操作手册HIMOD系列北京****科技有限公司技术部2009年01月01日目录第一章HIMOD系列海洛斯空调概述 (2)型号多 (3)控制技术先进 (3)制冷系统 (3)送风系统 (3)加湿系统 (3)加热系统 (4)1.7其它 (4)第二章HIMOD系列海洛斯空调型号含义 (4)第三章有关空调的一些资料 (5)气流组织方式(详见下图) (5)盖板纽开启方式(详见下图) (5)空调重量(单位:Kg) (5)机组尺寸及维护空间 (6)第四章制冷循环管路示意图 (7)风冷却(A型) (7)水冷却(W型) (8)双冷源(D型) (9)单系统(C型) (10)双系统(C型) (10)第五章调速风机调速接线示意图 (11)第六章MICROF ACE概述 (12)概述 (12)面板简介液晶显示屏 (13)液晶显示屏介绍 (13)第七章MICROF ACE面板的操作 (13)第八章控制器的使用 (14)控制器(HIROMATIC)概述 (14)控制器的操作 (15)菜单结构 (17)第九章日常维护及特殊维护 (18)日常维护 (18)特殊维护 (19)第十章常见报警及处理 (20)低压报警 (20)高压报警 (21)加湿报警 (21)失风报警 (21)电加热过热报警 (22)显示器发黑 (22)空调不制冷 (22)附录1:参数列表 (22)附录2:报警内容列表 (26)附录3:各菜单项含义: (28)第一章HIMOD系列海洛斯空调概述HIMOD系列海洛斯空调(HIMOD空调)是当今世界上最先进的机房专用恒温恒湿机房专用精密空调。
随着IT业的突飞猛进的发展,各种布局、面积差别很大的机房如雨后春笋般纷纷出现了,使用环境也不一而同。
为适应各种不同要求的机房,新开发的海洛斯HIMOD系列空调应运而生。
她是在保留她的前一代产品HIRANGE系列机房空调的优点,又应用了当今世界上提高了的制冷技术及制冷部件制造工艺,使用当今最先进的模块化设计理念生产出来的高科技机房空调产品。
世纪天成 CROSU3 用户手册说明书

CROSU3 使用説明書■尺寸【产品规格】■型号 ■产品名称:CROSU3:裸族の硬盘座 USB3.0■界面 :USB3.0 ■ USB 连接器 :Standard B ■重量■适用温度、湿度范围 :546g (不包含硬盤):長 134mm × 高さ 68mm × 寬 94mm (突起部位除外):温度 5 〜 35 度 湿度 20 〜 80%■电源规格 :AC 输入 100–240V 、DC 输出 12V 2.5A ※本产品不包含硬盘。
【包装内容对象】・CROSU3 本体 ・専用 AC 电源 × 1 ・専用 AC 电源线 × 1 ・USB3.0 连接线 × 1専用 AC 电源 専用 AC 电源线・使用说明书 / 保证书(本手册) ※请自行准备一个内接式硬盘。
CROSU3 本体専用 USB3.0 连接线使用说明书 / 保证书【各部位名称】・Power LED (电源/蓝色闪烁)・Access LED (讯息读写 / 红色闪烁)【对应 HDD/SSD 型式】< HDD >■ 适用2.5吋/3.5吋 Serial ATA (SATA Ⅰ/Ⅱ) HDD※ 不适用IDE(PATA) 型式的 HDD/SSD 。
< SSD >■ 适用MLC 型式 5V 驱动 2.5吋 SATA SSD※ 不适用 ZIF 连接器、3.3V 驱动 特殊形状(ASUS EeePC 内建 SSD 等)的 SSD 。
另、不建议使用SLC 型式的 SSD 。
■本公司确认运作良好的 SSD・CFD CSSD-SM64NP (PHISON 制 控制芯片 MLC ) ・OCZ OCZSSD - VTXT30G (INDILINX 制 控制芯片 MLC ) ・创见 TS32GSSD25S-M (Jmicron 制 控制芯片 MLC )【对应计算机型式】< Windows >・USB3.0 接口接口的 PC/AT 兼容计算机(USB3.0模式) ・USB 2 .0接口接口的 PC/AT 兼容计算机(USB3.0模式) ・CPU 运算速度 2GHz / 内存容量 1GB 以上※ 推荐使用Intel 芯片型式※ 使用SIS7000/7001/7002. PCI to USB Host Controller 的计算机、 USB Host Controller 有无法正常运作的可能性。
恐龙TRACKS插件做母带处理使用指南word资料54页
《恐龙归来----用T-RACKS软件做母带处理快速入门使用指南》序提到母带处理软件我想很多朋友立刻就会想到IKMultimedia公司出品的T-RACKS软件,也就是大家经常所说的“恐龙”。
是的,T-RACKS软件就是一款使用非常方便,操作界面非常直观友好的母带处理软件,T-RACKS 也是目前各类音频编辑处理软件中使用频率非常高、非常具有实用价值的一款母带处理软件。
虽然现在优秀的音频编辑处理软件中并非只有T-RACKS一款母带处理软件,其他诸如Waves公司出品的L3、臭氧(OZONE)等等也都是非常优秀的母带处理软件,但T-RACKS以他的使用方便、上手快、操作界面直观友好、处理音频文件温暖柔和、饱满有力等优点早已在广大用户心目中形成了非常良好的口碑和及其广泛的用户群.我们可以把学习使用T-RACKS软件作为我们了解和使用母带处理软件的一个良好的开端,特别是那些刚开始用母带处理软件的朋友们更可以把学习使用T-RACKS软件作为了解和使用母带处理软件的一个窗口,。
同时也为我们将来触类旁通的使用其他优秀的各类音频编辑处理软件打好一个牢固坚实的基础,也同时起到事半功倍、精一通百的良好作用。
[第一章]T—RACKS软件简要论述首先大家需要了解的是,什么是“母带处理”.“母带处理”是我们音乐制作过程中的最后一道工序,也是我们最终提高所制作的音乐作品整体质量非常重要的一环.它是我们所制作的音乐作品在编辑制作之后,在做正式交付使用之前所针对于声音的频响特征、动态范围和立体声声场等所做的最后的一种处理. 它的目的就是通过使用均衡、压缩和限制等技术手段,把原始的混音素材中获得尽可能高的声音质量,以使的我们所制作的音乐作品在整体质量上变得更加甜美、温暖柔和、饱满有力。
而T—RACKS软件就是这样一款用来进行母带处理的优秀软件. T—RACKS 软件本身即可以作为一个独立工作的软件,也可以作为DX、VST插件在cubaseSX、NUENDO等宿主音乐制作软件中使用.通过T—RACKS软件所提供的多段均衡、电子管压缩和多段限幅等母带处理工具可以对立体声的波形文件进行母带处理。
易用操作指南说明书
Trouble ShootingOperating InstructionsProblem:Tank not holding pressure Solution:•Tighten tank capProblem:Tank not getting air pressureSolution:•Inspect compressor hose and quick connection•Inspect On/Off switch on compressor •Inspect power cord •Replace compressor Problem:Sprays only air,no liquid or aerosol Solution:•Tank empty,add liquid insecticide•Turn valve lever to On position•Inspect and clean filter between hose and valveFilling and Mixing•To ensure adequate air pressure in tank,add only 2gal.liq-uid to tank.•Make sure switch on compressor is in the OFF position,and unit is unplugged from wall connection.•Mix all insecticides according to label directions.Pressurizing the Tank•Connect unit to wall outlet with grounded electric cord.•Start compressor by depressing the On/Off switch on top.•Compressor maintains pressure in the tank by automatically cycling on and off during normal use.IMPORTANTApplication of dust for an extended period of time with this unit can result in a small electric charge accumulating in the on/off switch.Touching the metal switch can result in a mild shock.OperationAir Only (Flushing)•Turn lever to ON position,do not depress trigger Liquid Only (C+C)•Turn lever to OFF position,depress trigger.95138497Rev 12/10BeforeStartingPORTABLE AEROSOL SYSTEM -CART MODELUSER’S MANUAL•Secure all quick-connect hose connections.•Lever on the valve must be in the OFF position.•Tighten tank cap until snug.•Flush tank,valve,and extension with clean water regularly.•Inspect hoses and hose connections for wear.•Clean the filter at the hose/valve connection regularly.•Protect application tip when not in useWarning:Do not attempt to remove the valve extension for any reason.Care and MaintenanceAdjustment of Liquid•The liquid application rate can be changed by turning the adjustment knob right or left.•The spray can be changed from a ULV fog (small droplets)to a power mist (large drops).Note:Do not attempt to adjust the liquid with the valve lever;it should be either in the completely On or completely Offposition.Safety Precautions•Do not connect this unit to external air or gas source;use only with supplied compressor.•Do not pressurize an empty tank.•Open tank cap slowly to release air.•Do not transport the unit while tank is pressurized.•Do not treat voids with electrical outlets or cables.•Always use a grounded (3terminal)extension cord.Air +Liquid (Fogging)•Turn lever to ON position,depress valve trigger.Note:Air valve lever must be either in the ON or OFF position;failure to do so may damage the unit.VERY IMPORTANTBetween liquid or air spraying,move valve lever to OFF position.This will shut off the airOFF#Part #Description116400118Valve assembly,18”Extension 21640164315’Coiled hose322070850Elbow,1/8”(not shown)424000026Ball valve164001280-ring 616400129Nozzle716400111Gauge assembly 830113779Compressor,110V 16400112Compressor,220VPORTABLE AEROSOL SYSTEMCART MODEL135REGION SOUTH DRIVE •JACKSON,GA 30233Toll Free 800-544-8811•Phone 678-688-5601 •Fax 678-688-5633B&G Help Line800-544-881134561287。
恐龙工具箱命令名称一览表
mco xsc ywsf qss qbz cbz kgs bka zz0 dpy spy qyx pcc xzd xzx xzy xzz xzh xzk xzbz fwj ddt hjt ars bza bzb z25 z35 z5 z7 z1Q z2Q gh1 gh2 ghx swz rwz wQQ wQ3 wQ5 wQ6 w1Q wXQ hst hzx hwg huu hbj zzz pua
连续复制 XY不同比例缩放 原位缩放 过滤选择 全部捕捉 常用捕捉 图块改颜色 交点处打断 Z轴归0 双向偏移 超级偏移 取圆心坐标 点圆互转 过滤选择点 过滤选择线 过滤选择圆 过滤选择字 过滤选择填充 过滤选择块 过滤选择标注 量方位角 堆叠文字 画箭头 面积求和 标面积 标注当前坐标 写宋体,正中,字高2.5 写宋体,正中,字高3.5 写宋体,正中,字高5 写宋体,居中,字高7 写宋体,居中,字高10 写宋体,居中,字高20 改字高为1mm 改字高为2.5mm 改字高为X mm 写竖排文字 写罗马数字 多段线宽0.0mm 多段线宽0.3mm 多段线宽0.5mm 多段线宽0.6mm 多段线宽1.0mm 多段线宽X.0mm 快速填充实体 快速填充直线 快速填充网格 快速填充自定义花纹(可 重建填充边界并求总面 65 66 67 68 69 70 71 72 73 74 75 76 77 78 79 80 81 82 83 84 85 86 87 88 89 90 91 92 93 94 95 96 97 98 99 100 101 102 103 104 105 106 107 108 109
分类
1、地 质专用 1
2、地 质专用 2
3、线 编辑
4、文 字编辑
序号 命令名 功 能 1 zzt 柱状图 2 zky 钻孔轴线及上样 3 hkd 画坑道素描图框 4 dtc 地质图层 5 cpm 实测地质剖面成图 5、编 6 cew 测网坐标生成 辑 7 cly 储量圆(方块)生成 8 ktk 图框 9 sdy 单段快速画样 10 ddy 多段连续画样 11 kpm 图切剖面 12 qzb 提取坐标 13 zzd 展点及展钻孔 14 blc 绘比例尺符号 15 hbc 画标尺 6、过 16 bcz 标产状 滤选择 17 pcz 批量标产状 18 mcz 描产状 19 ndc 逆断层 20 zdc 正断层 21 pik 平面图钻孔 7、通 22 jkk 见矿钻孔 用标注 23 tyk 统一钻孔内外径分别为1 24 pok 剖面图钻孔 25 btc 标注探槽 26 hsx 画探槽、坑道双线 27 bbb 标本标注 28 btj 标注天井 29 sxb 上下标书写工具 30 kcx 勘查线画端点垂线 8、快 31 ad 多段线加点 速文字 32 ded 多段线删点 33 bhc 多段线闭合 34 gf 转多段线 35 ppl 多段线提取坐标 36 scd 长度求和 37 djd 等距点导出 38 jzx 井字线打断 9、改 39 qjd 提取交点坐标 多段线 40 spl 样条曲线转多段线 宽 41 nhx 拟合曲线转多段线 42 gst 改字体样式为宋体 43 ssz 数字求和 44 jiat 单行文字加一个数 10、快 45 chet 单行文字乘一个数 速填充 46 tgs 多行文字颜色改为随层 47 dql 文字左对齐 48 dqm 文字中间对齐 11、综 49 dqr 文字右对齐 合 50 ydq 文字垂直对齐 51 wz0 文字旋转归零 52 xwz 文字旋转与线平行 53 tca 末数字母递增复制 54 wzs 单行文字格式刷 55 crq 插入当前日期 56 hwz 按行提取文字 57 lwz 按列提取文字 58 zqz 文字加前缀 59 zhz 文字加后缀
C00369 重型手工具使用说明书
C00369 Heavy DutyHand ToolInstruction ManualSafety Practices:1. Read this manual and become familiar with the tool before use.2. Protective eyewear should be worn during use.3. Wear appropriate gloves for handling steel.4. When applying clamps, care should be taken to insure fingers are not in contact with the clamp during installation.5. Never attempt to clamp objects which have the potential to burst, shatter or otherwise cause bodily harm.6. Do not use tool on live electrical sources.Introduction:The C00369 Tool installs any BAND-IT Band of .030" thickness or less and 3/4" Giant Band of .044" thickness.Table of Contents:1. Introduction & Safety Practices2. Operating Instructions3. Tool Assembly Parts List4. Cleaning & WarrantyC00369 Heavy DutyHand ToolOperatingInstructions1. Slide buckle on band as shown.Bring tip of band around workpieceand again through buckle.Note: Band may be used from bulk rollas this completely eliminates waste ofband.2. Insert band around workpieceagain and through buckle. Doublewrapping develops much more radialcompression than single wrapping.Bend end of band under buckle.3. Place band in opening of tool noseand Gripper Block. Move into slot asfar as possible, to avoid buckle slidinginto Tool Nose. Tighten band clamp byturning the Tension Handle clockwisewhile holding Band Gripper tight againstband. NOTE: The spring load of theband gripper is not intended to secureand prevent the band from slippingduring tension process.4. Place finger on BAND-IT Band atbuckle bridge while tensioning. Whenyou observe the band stops movingthrough the buckle, maximum pressureis being exerted around the workpiece.Stop turning handle.5. Roll tool over buckle, backing offwith Tension Handle 1 - 1½ turnsthroughout entire rolling operation.Failure to back off tension with tensionhandle throughout roll-over may resultin breaking the band. There is no lossof tension as band released is used upin this process.6. Rotate Cutting Handle forward to cutthe band. When applying Giant Bandclamps, prior to cutting off clamp,release Band Gripper and push ToolNose away from buckle approx. ¼”.7. Remove tool, holdingstub of band down.8. Hammer down buckle earsto complete BAND-IT clamp.Tool NoseGripper BlockBand GripperC00369 Heavy DutyHand Tool1. To assist in removing threaded parts,apply heat to soften locking compound.2. When connecting item 13 (Set Screw) to item 14 (Cutter Bar), clean threads (male and female) of foreign matter, then apply one drop of medium strength locking compound (Loctite 242 or equiv.) onto male thread and connect parts together.3. Kit # C01899 contains one each Band Gripper, one Gripper Spring and one Pin. Replace all parts as a set to maximize tool performance. Periodic cleaning of band gripper teeth will improve tool performance.3410211121415 15679813Tool Assembly Parts ListC00369 Heavy DutyHand ToolCleaning &Warranty1. To remove Gripper, alignGripper Pin hole with notch tool frame. Using a punch and hammer, punch Pin out Slide Block.2. Using a wire brush, clean all foreign matter from teeth.3. To replace Pin, Gripper Spring must be seated Tension Screw hole. Align Gripper hole with Slide Block hole and insert Pin using hammer.NOTE : Periodically apply food-grade white lubricant or equivalent to Tension Screw thread (item 10 on page 3) to prevent excessive wear.If tool fails to securely grip tail of clamp, follow Gripper cleaning instructions above.。
- 1、下载文档前请自行甄别文档内容的完整性,平台不提供额外的编辑、内容补充、找答案等附加服务。
- 2、"仅部分预览"的文档,不可在线预览部分如存在完整性等问题,可反馈申请退款(可完整预览的文档不适用该条件!)。
- 3、如文档侵犯您的权益,请联系客服反馈,我们会尽快为您处理(人工客服工作时间:9:00-18:30)。
恐龙工具箱V2.2使用说明
作者:邹波
恐龙工具箱主要针对地质行业开发,部分通用功能其它行业也可以使用。
本工具箱最新版本为2.2版,在CAD平台下使用,菜单及工具条界面大致如下,随版本变化有所更新:
安装步骤如下:
1、安装:安装前请先关闭CAD,再运行这个程序
,按提示操作即安装完成。
2、成功:
下面你可以象使用CAD标准命令一样使用这些功能了。
3、卸载:
当你不想使用恐龙工具箱时,运行安装路径下面这个程序即完成程序卸载。
4、说明:
本版本工具箱现在共提供91个扩展命令(功能)供大家使用,使用它能极大提高绘图效率。
详见更新说明及恐龙工具箱命令名称一览表。
为了方便使用CAD软件,另外增加5个常用ET工具的图标(需安装ET工具支持,安装方法见下面示意图。
也可以不安装,不影响其它功能的使用。
ET工
具附带图层管理等功能,将让你操作图层得心应手,推荐安装。
),增加9个CAD 默认设置没有显示出来,但又常用的图标。
本工具箱是在XP系统及CAD2004环境下开发制作的,在与该环境相近的环境下能达到最优的效果。
理论上在所有CAD版本下均可使用。
至于是CASS、天正、理正等环境下能否使用,请自行试验。
安装前,请参看《安装演示图》;使用前,请参看《功能演示》里各个命令的操作示范。
本程序还自带了570种岩石花纹,你也可以自行添加其它岩石花纹。
本程序附带了部分功能的演示数据或数据模板,请在安装路径下查看。
本工具箱功能全部免费使用,欢迎大家下载使用,有任何问题及建议请与我联系。
联系方式:QQ群:74906452,273920298。
验证请填:恐龙工具箱。
本程序中部分功能为网络上收集,版权归相应的个人或公司。
大部分功能为本人编写,版权属邹波所有,欢迎大家使用!邹波在此对帮助、支持过我的朋友表示感谢!
2013.5.25。