Title Graphical Web-Interface with Human-Interface Objects for Databases Subtitle Principle
Adobe FrameMaker Publishing Server 产品简介说明书
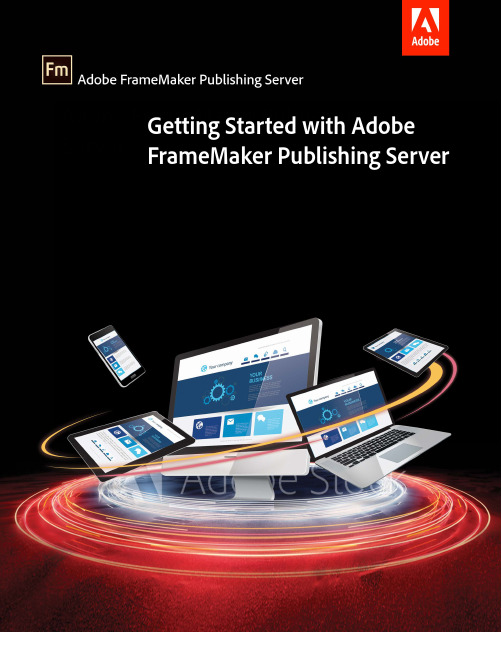
Adobe FrameMaker Publishing ServerAdobe FrameMaker Publishing Server Getting Started with Adobe FrameMaker Publishing Serveri Table of ContentsFrameMaker Publishing Server . . . . . . . . . . . . . . . . . . . . . . . . . . . . . . . . . . . . . . . . . . . . . . . 1 Product overview (1)How to get Adobe FrameMaker Publishing Server (3)Publishing Dashboard (3)Your automated, multi-device publishing solution (5)Reusable publishing through presets (7)Additional resources . . . . . . . . . . . . . . . . . . . . . . . . . . . . . . . . . . . . . . . . . . . . . . . . . . . . . . . . . .9 Product site (9)User guides and Help hub pages (9)Legal notices . . . . . . . . . . . . . . . . . . . . . . . . . . . . . . . . . . . . . . . . . . . . . . . . . . . . . . . . . . . . . . . . 11iiFrameMaker Publishing ServerFrameMaker Publishing ServerProduct overviewFrameMaker Publishing Server keeps you on top of your publishing tasks, always. Experience significant boost in performance with support for the latest release of Adobe FameMaker. With a host of new and enhanced features in FrameMaker, publishing a large set of documents is faster than ever. Access FMPS from anywhere over the web to schedule publishing tasks. Work with your team and access FMPS at the same time and create tasks and presets to be reused later on in developing publishing tasks.FrameMaker Publishing Server comes with the following features:Horizontal and vertical server scalingNow you can effortlessly run multiple instances of Adobe FrameMaker (as part of FrameMaker Publishing Server) on the same machine or multiple machines. The horizontal and vertical scalability allows you to manage a large number of automation jobs more efficiently.WYSIWYG PDF for DITA contentLeverage enhancements in the powerful DITA engine as well as DITA template customizations to publish a WYSIWYG PDF for your DITA content (DITA map or bookmap). Import and export, make changes, and apply DITA templates for PDF output by storing them as a part of the set -tings file itself.Reimagined architectureGet superior performance and queue management with a completely rewritten server compo -nent incorporating the latest technologies.FrameMaker Publishing ServerProduct overview 2Close integration with XML Documentation for Adobe Experience ManagerXML Documentation for Adobe Experience Manager is an authoring and publishing solution that works with DITA/XML content. You can publish DITA content to Experience Manager Sites and Experience Manager Mobile. However, publishing to other formats, like Responsive HTML5, PDF, EPUB, and Kindle, is done using FrameMaker Publishing Server.Streamline publishing toolsThe Dashboard keeps your publishing tools in one centralized location and at your fingertips.View Dashboard notificationsLet the Dashboard notifications keep you informed on pending jobs as you turn your attention to other tasks.Specify output settings from the DashboardAdjust settings directly from the Dashboard to customize your outputs.Schedule publishing tasksPublish content at off-peak times and on a regular schedule to ensure that published content is always current.Save time by configuring publishing settings onceConfigure your settings, and then reuse the same settings for future publications.Publish from anywhere and at any timePublish remotely from a server without having FrameMaker installed on your local machine. Web publishing allows you to publish content whenever you need to, even if you aren’t in the office.Publish from your Content Management System interfaceSet up integration services to publish through FrameMaker directly from your CMS.FrameMaker Publishing ServerHow to get Adobe FrameMaker Publishing Server3How to get Adobe FrameMaker Publishing ServerTo try FrameMaker Publishing Server before buying, download a fully functional, 30-day com -plimentary trial version. Learn about the various ways to buy Adobe FrameMaker Publishing Server here .Publishing DashboardThe publishing Dashboard centralizes publishing tasks and displays the information in a web-based environment — the status of publishing tasks, logs, and outputs can be found in one place.Visually identify exactly what is happening on the serverPublishing task status is updated in real time and with color coding to identify publishing tasks that are running (orange), have failed (red), or have successfully executed (green) making it easy to know where any publishing task stands.Set up the Dashboard the way you want to workThe Dashboard keeps your publishing tools in one place. Adjust the Dashboard settings to cus -tomize outputs for your specific needs.Do more in less time by connecting from anywhere, anytimePublish remotely using web-based access and review the active list to see what’s been pub -lished and what hasn’t. Keep content flowing by taking advantage of the fact that multiple users can access the publishing server simultaneously.Schedule publishing tasks to run remotely on a defined schedulePublish at off-peak times and on a regular schedule to ensure that published content is always current. Let Dashboard notifications keep you informed about pending jobs as you turn your attention to other publishing tasks.Use the following procedures to display the output information.FrameMaker Publishing ServerPublishing Dashboard 4Display last run information1.Under the Last Run column, click on a date and time link.2.Review the Loginformation.FrameMaker Publishing ServerYour automated, multi-device publishing solution5Display output information1.Under the Last Run column, click on a generated (successfully or without success) output.2.Review the Output information.Your automated, multi-device publishing solu -tionFrameMaker Publishing Server is accessible remotely, and do not require access to the desktop application, letting you publish content from any machine, anywhere, at any time. Publishing tasks can also be automated and run based on a schedule.Multiple users can connect and publish from anywhere at any timePublish content from any machine — even if FrameMaker isn’t installed locally. Web publishing support lets multiple users connect from any location at any time in order to publish content remotely.Automate the publishing processConfigure scheduling to automatically produce weekly or monthly output, or set up a single job in advance. Automate your timeline to prevent missed deadlines and set up the software tonotify you after your work has been published.FrameMaker Publishing ServerYour automated, multi-device publishing solution 6Publish content stored in your CMSPublish content from Microsoft SharePoint, OpenText Documentum, DitaExchange, or Adobe Experience Manager out of the box. Using Web APIs almost any CMS can be configured to work with FrameMaker Publishing Server.Use the following procedure to create a publishing task.Create a publishing task1.Click Add New Task .The Task dialog appears.2.Enter a publishing task Name .3.Select an Input Source .4.If the input source is a book, configure book settings.5.Configure Output Settings .6.Specify any pre- or post-publish scripts.FrameMaker Publishing ServerReusable publishing through presets 77.Set up any required Scheduling .8.Specify an email address to send a log to.9.Configure any log file settings.10.Click Save .Reusable publishing through presetsFrameMaker Publishing Server presets are reusable settings that can be applied across multi -ple output types, letting you set up your ideal output and use the same configuration for future publications.Work with publishing presetsCreate a publishing preset that can be used by multiple publishing tasks ensuring content is published exactly as needed, every time.Increase productivity by configuring settings onceSave time by configuring output settings and reusing them for future publications.Out-of-the-box support for Microsoft SharePoint, OpenText Documentum, DitaExchange, and Adobe Experience ManagerPublish content from Microsoft SharePoint, OpenText Documentum, DitaExchange, or Adobe Experience Manager out of the box. Using Web APIs almost any CMS can be configured to work with FrameMaker Publishing Server.Use the following procedures to get started with presets.Create a PDF preset1.Click the Preset tab.FrameMaker Publishing ServerReusable publishing through presets 82.Click Add New PDF Preset .The PDF Preset dialog appears.3.Configure options as needed.4.Click Save .Modify a preset1.Click the Preset tab.2.Click on an existing preset.3.Modify the preset as needed.4.Click Save.Additional resourcesAdditional resourcesMore information on the full Adobe Technical Communication Suite and the tools it provides can be found online.Product site•Adobe Technical Communications•Adobe FrameMaker Publishing Server•Adobe FrameMaker•Adobe RoboHelpUser guides and Help hub pages•Adobe FrameMaker Publishing Server User Guide•Adobe FrameMaker Publishing Server Learn & Support•Adobe FrameMaker User Guide•Adobe FrameMaker Learn & Support•Adobe RoboHelp User Guide•Adobe RoboHelp Learn & SupportAdditional resourcesUser guides and Help hub pages10Legal noticesLegal notices Follow this link: Legal NoticesLegal notices12。
大模型生成urlapi提示词

大模型生成urlapi提示词
1. 图片生成:生成逼真的图片、图像合成等功能。
2. 语音生成:生成逼真的语音、文本转语音等功能。
3. 文章生成:生成具有逻辑关联和语义合理的文章、写作帮助等功能。
4. 代码生成:生成代码片段、自动编写程序等功能。
5. 视频生成:生成电影、动画片段、视频剪辑等功能。
6. 音乐生成:生成音乐作品、音乐合成等功能。
7. 游戏生成:生成游戏场景、角色、任务等功能。
8. 行为生成:生成人物行为、动作、姿势等功能。
9. 建模生成:生成建筑模型、车辆模型、人体模型等功能。
10. 设计生成:生成设计稿、平面设计、UI设计等功能。
注:"大模型"是一个模糊的概念,请根据实际情况选择相应的描述词。
CFD 计算对计算网格有特殊的要求

CFD 计算对计算网格有特殊的要求,一是考虑到近壁粘性效应采用较密的贴体网格,二是网格的疏密程度与流场参数的变化梯度大体一致。
对于面网格,可以设置平行于给定边的边界层网格,可以指定第二层与第一层的间距比,及总的层数。
对于体网格,也可以设置垂直于壁面方向的边界层,从而可以划分出高质量的贴体网格。
而其它通用的CAE 前处理器主要是根据结构强度分析的需要而设计的,在结构分析中不存在边界层问题,因而采用这种工具生成的网格难以满足CFD 计算要求,而Gambit 软件解决了这个特殊要求。
如果先在一条边上画密网格再在之上画边界层,边界层与网格能很好的对应起来如果直接在一条边上画边界层,则边界层横向之间的距离很宽怎么设置边界层横向之间的距离,即不用先画网格也能画出横向距离很密的边界层来?在划分边界层网格之前,用粘性网格间距计算器,计算出想要的y+值对应的第一层网格高度;第一层高度出来之后,关于网格的纵横向网格间距之比,也就是边界层第一层网格高度与横向间距之比,大概在1/sqrt(Re),最为适宜;先在你要划边界层网格的边上划分线网格,然后再划分边界层。
gambit本人也用了一段时间,六面体网格四面体网格我都画过,但是最头疼的还是三维边界层网格的生成。
用gambit自带的边界层网格生成功能画出来的边界层网格经常达不到好的效果,或者对于复杂的外形根本就无法生成边界层网格。
为此我就采用手动设置边界层,但是比较费时间,效果还一般。
不知道大家是不是也遇到相似的问题,或者有更好的方法,请指点一下,先谢谢了!22 什么叫松弛因子?松弛因子对计算结果有什么样的影响?它对计算的收敛情况又有什么样的影响?1、亚松驰(Under Relaxation):所谓亚松驰就是将本层次计算结果与上一层次结果的差值作适当缩减,以避免由于差值过大而引起非线性迭代过程的发散。
用通用变量来写出时,为松驰因子(Relaxati on Factors)。
Acterna SDA-5000系列Stealth数字分析器的中文名字说明书

800-404-ATEC (2832) E s t a b l i s h e d1981Acterna SDA-5000 SeriesStealth Digital AnalyzerForward and reverse non-interfering Sweep enableseasy preparation of networks for interactive services 23Reverse ingress spectrum displayConstellation display with MER and pre/post FEC BERReverse Alignment mode prepares network for cable modem deploymentOne button, in-service C/N measurements on TDMA return path cable modem signals(DOCSIS, EuroDOCSIS, EuroModem) Zero span/time domain expert mode, showing the TDMA bursty return path cable modem power ramp of 3.5 msIn-service ingress spectrum showing CTB/CSO-intermodulation problems due to analog-TV channels4Time domain view of ingress in the Zero Span mode captures elusive ingress PathTrak Field View option compares headendnode spectrum with field testpoint spectrumGraphical reverse testpoint compensation5The single-channel level display shows both video and audio levels(either single or dual sound/ NICAM) and the difference between the two Digital channel average power measurements can be made using the digiCheck™featureThe Navigator user interface, common on all Acterna SDA meters6Automated tests can be scheduled to perform either 24-hour FCC compliance tests, or initiated immediately to log performance at individual nodes, amplifiers, or other testpoints. A wide range of tests can be performed auto-matically, including signal levels,C/N, hum, and depth of modulation. The operator designates which tests to perform on which channels. Because these tests are non-intrusive, it is easy to test all parameters on all channels at any time.After a test is performed, the results can be displayed on the SDA screen.A PASS/FAIL indication on a varietyof limits can be set for FCC/CENELECor other government standards,or system preferences. Data taken during any automated test, or sequence of automated tests, can be viewed immediately with a PASS/FAIL indication for each of the limits. Specific stored measurement results may be viewed on demand. Data analysis with StealthWareTest results can be printed directly to aserial printer or uploaded to a PC usingActerna StealthWare, a Microsoft®Windows®-based data managementpackage, to store and include in cus-tom reports. Stored sweep, scan, orspectrum screens can be viewed onthe PC and analyzed with marker move-ment and readout information in justthe same way as on the actual instru-ment. A sweep graph overlay functionallows comparison of multiple RFresponse variations over time. Oldsweep graphs may be downloadedback into the SDA instrument for real-time comparison.Powerful and intuitive standardizedgraphical displaysAll measurement results are presentedto the user in clear, highly informative,summary displays. The graphicspresent the information the way thetechnician wants to see the results,with no further interpretation required.For example, testpoint compensationvalues are entered at the start oftesting. Displays then calculate actuallevels automatically, minimizingfield errors.Reduced training timeWith SDA Series products, all levels ofinstruments are familiar to the tech-nician, regardless of which is learnedfirst, because the same user interfaceconventions are used across all prod-uct families. The time needed for atrainee technician to learn to use theinstrument is considerably shorterthan with alternative test equipment.This means urgent upgrade projectsmake the most efficient use of limitedresources when SDA Series productsare used.7 Limit checks can be instantly viewed afteridentifying channel of interest with a markerin Scan mode displayIn-service carrier-to-noiseTilt mode performs automatic tilt calculations between any two of nine designated carriersDepth of modulation In-service “HUM” (PAL and NTSC compatible)Detailed forward/ reverse sweep graph offers adjustable markers, scale, reference level and tilt. Users can clearly distinguish between previous and current sweep measurements for easy891011Worldwide Headquarters12410 Milestone Center Dr. Germantown, Maryland 20876-7100USAActerna is present in more than 80 countries.To find your local sales office go to: Regional SalesHeadquartersNorth America12410 Milestone Center Dr.Germantown, Maryland20876-7100USAToll Free:1866ACTERNAToll Free:186********Tel:+13013531560x2850Fax: +1301353 9216Latin AmericaAv.Eng.Luis Carlos Berrini936/8°e 9°andares04571-000 São PauloSP-BrazilTel:+551155033800Fax:+55 11 5505 1598Asia Pacific42 Clarendon StreetPO Box 141South MelbourneVictoria 3205AustraliaTel:+61 3 9690 6700Fax:+61 3 9690 6750Western EuropeArbachtalstrasse 672800 Eningen u.A.GermanyTel:+49 7121 86 2222Fax:+49 7121 86 1222Eastern Europe,Middle East & AfricaElisabethstrasse 362500 BadenAustriaTel:+43 2252 85 521 0Fax:+43 2252 80 7271st Neopalimovskiy Per.15/7 (4th floor)RF 119121 MoscowRussiaTel:+7 095 248 2508Fax:+7 095 248 4189© Copyright 2002Acterna, LLC.All rights reserved.Acterna, The Keepers ofCommunications, andits logo are trademarksof Acterna, LLC. Allother trademarks andregistered trademarksare the property of theirrespective owners. MajorActerna operations sitesare IS0 9001 registered.Note: Specifications,terms and conditionsare subject to changewithout notice.SDA-5000/DS/CAB/07-02/AE/ACT00392Acterna Advantage SM–adding value with global services and solutionsFrom basic instrument support for your field technicians to management of complex, company-wide initiatives, Acterna’s service professionals are committed to helping you maximize your return on investment. Whatever your needs– product support, system management, education services, or business planning and consulting – we offer programs that will give you the competitive edge. This is the foundation of Acterna Advantage.Acterna is the world’s largest provider of test and management solutions for optical transport, access and cable networks, and the second largest communications test company overall. Focused entirely on providing equipment, software, systems and services, Acterna helps customers develop, install, manufacture and maintain optical transport, access, cable, data/IP and wireless networks.。
BMW-i INTERFACE BOARD 说明书

Confidential
2
Features
Supported BMW Series
Built-in LVDS QVGA/WVGA LCD monitors BMW 1, 3, 5, 6, 7, X Series and Z4 BMW Mini-Coopers
Supported PIP and Zoom-In/Out functions Supported Parking Guide Line on Rear
USB x 1 HSD x 1 HSD x 1
HSD x 1
Remarks Composite Video Input with Stereo Audio Input (for Mobile TV) Composite Video Input with Stereo Audio Input Composite Video Input without Audio Input (for Front Camera) Composite Video Input without Audio Input Video Input for Analog RGB Navigation Touch In/Out For Charging the iPhone Video Input from the Original LCD monitor Video Output for displaying on the Original LCD monitor Current Car Model Video Input for LVDS Navigation T-DMB, 1/Full-Seg etc
Confidential
11
Functions Usage
Parking Adjustments
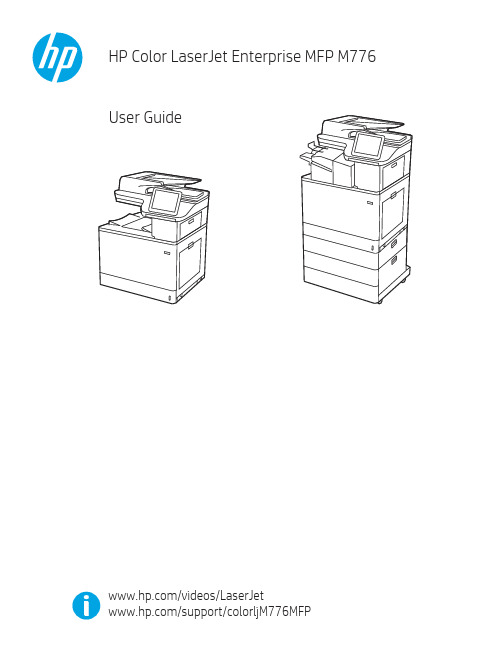
HP Color LaserJet Enterprise MFP M776用户指南说明书
Legal informationCopyright and License© Copyright 2019 HP Development Company, L.P.Reproduction, adaptation, or translation without prior written permission is prohibited, except as allowedunder the copyright laws.The information contained herein is subject to change without notice.The only warranties for HP products and services are set forth in the express warranty statementsaccompanying such products and services. Nothing herein should be construed as constituting anadditional warranty. HP shall not be liable for technical or editorial errors or omissions contained herein.Edition 1, 10/2019Trademark CreditsAdobe®, Adobe Photoshop®, Acrobat®, and PostScript® are trademarks of Adobe Systems Incorporated.Apple and the Apple logo are trademarks of Apple Inc., registered in the U.S. and other countries.macOS is a trademark of Apple Inc., registered in the U.S. and other countries.AirPrint is a trademark of Apple Inc., registered in the U.S. and other countries.Google™ is a trademark of Google Inc.Microsoft®, Windows®, Windows® XP, and Windows Vista® are U.S. registered trademarks of MicrosoftCorporation.UNIX® is a registered trademark of The Open Group.iiiT able of contents1 Printer overview (1)Warning icons (1)Potential shock hazard (2)Printer views (2)Printer front view (2)Printer back view (4)Interface ports (4)Control-panel view (5)How to use the touchscreen control panel (7)Printer specifications (8)T echnical specifications (8)Supported operating systems (11)Mobile printing solutions (12)Printer dimensions (13)Power consumption, electrical specifications, and acoustic emissions (15)Operating-environment range (15)Printer hardware setup and software installation (16)2 Paper trays (17)Introduction (17)Load paper to Tray 1 (multipurpose tray) (17)Load Tray 1 (multipurpose tray) (18)Tray 1 paper orientation (19)Use alternative letterhead mode (24)Enable Alternative Letterhead Mode by using the printer control-panel menus (24)Load paper to Tray 2 (24)Load Tray 2 (24)Tray 2 paper orientation (26)Use alternative letterhead mode (29)Enable Alternative Letterhead Mode by using the printer control-panel menus (29)Load paper to the 550-sheet paper tray (30)Load paper to the 550-sheet paper tray (30)550-sheet paper tray paper orientation (32)Use alternative letterhead mode (35)Enable Alternative Letterhead Mode by using the printer control-panel menus (35)ivLoad paper to the 2 x 550-sheet paper trays (36)Load paper to the 2 x 550-sheet paper trays (36)2 x 550-sheet paper tray paper orientation (38)Use alternative letterhead mode (41)Enable Alternative Letterhead Mode by using the printer control-panel menus (41)Load paper to the 2,700-sheet high-capacity input paper trays (41)Load paper to the 2,700-sheet high-capacity input paper trays (41)2,700-sheet HCI paper tray paper orientation (43)Use alternative letterhead mode (45)Enable Alternative Letterhead Mode by using the printer control-panel menus (45)Load and print envelopes (46)Print envelopes (46)Envelope orientation (46)Load and print labels (47)Manually feed labels (47)Label orientation (48)3 Supplies, accessories, and parts (49)Order supplies, accessories, and parts (49)Ordering (49)Supplies and accessories (50)Maintenance/long-life consumables (51)Customer self-repair parts (51)Dynamic security (52)Configure the HP toner-cartridge-protection supply settings (53)Introduction (53)Enable or disable the Cartridge Policy feature (53)Use the printer control panel to enable the Cartridge Policy feature (54)Use the printer control panel to disable the Cartridge Policy feature (54)Use the HP Embedded Web Server (EWS) to enable the Cartridge Policy feature (54)Use the HP Embedded Web Server (EWS) to disable the Cartridge Policy feature (55)Troubleshoot Cartridge Policy control panel error messages (55)Enable or disable the Cartridge Protection feature (55)Use the printer control panel to enable the Cartridge Protection feature (56)Use the printer control panel to disable the Cartridge Protection feature (56)Use the HP Embedded Web Server (EWS) to enable the Cartridge Protection feature (56)Use the HP Embedded Web Server (EWS) to disable the Cartridge Protection feature (57)Troubleshoot Cartridge Protection control panel error messages (57)Replace the toner cartridges (58)T oner-cartridge information (58)Remove and replace the cartridges (59)Replace the imaging drums (62)Imaging drum information (62)Remove and replace the imaging drums (63)Replace the toner-collection unit (66)T oner-collection unit information (66)vRemove and replace the toner-collection unit (67)Replace the staple cartridge (M776zs model only) (70)Staple cartridge information (70)Remove and replace the staple cartridge (71)4 Print (73)Print tasks (Windows) (73)How to print (Windows) (73)Automatically print on both sides (Windows) (74)Manually print on both sides (Windows) (74)Print multiple pages per sheet (Windows) (75)Select the paper type (Windows) (75)Additional print tasks (76)Print tasks (macOS) (77)How to print (macOS) (77)Automatically print on both sides (macOS) (77)Manually print on both sides (macOS) (77)Print multiple pages per sheet (macOS) (78)Select the paper type (macOS) (78)Additional print tasks (79)Store print jobs on the printer to print later or print privately (79)Introduction (79)Create a stored job (Windows) (79)Create a stored job (macOS) (80)Print a stored job (81)Delete a stored job (81)Delete a job that is stored on the printer (81)Change the job storage limit (82)Information sent to printer for Job Accounting purposes (82)Mobile printing (82)Introduction (82)Wi-Fi, Wi-Fi Direct Print, NFC, and BLE printing (82)Enable wireless printing (83)Change the Wi-Fi Direct name (83)HP ePrint via email (83)AirPrint (84)Android embedded printing (85)Print from a USB flash drive (85)Enable the USB port for printing (85)Method one: Enable the USB port from the printer control panel (85)Method two: Enable the USB port from the HP Embedded Web Server (network-connectedprinters only) (85)Print USB documents (86)Print using high-speed USB 2.0 port (wired) (86)Method one: Enable the high-speed USB 2.0 port from the printer control panel menus (86)Method two: Enable the high-speed USB 2.0 port from the HP Embedded Web Server (network-connected printers only) (87)vi5 Copy (88)Make a copy (88)Copy on both sides (duplex) (90)Additional copy tasks (92)6 Scan (93)Set up Scan to Email (93)Introduction (93)Before you begin (93)Step one: Access the HP Embedded Web Server (EWS) (94)Step two: Configure the Network Identification settings (95)Step three: Configure the Send to Email feature (96)Method one: Basic configuration using the Email Setup Wizard (96)Method two: Advanced configuration using the Email Setup (100)Step four: Configure the Quick Sets (optional) (104)Step five: Set up Send to Email to use Office 365 Outlook (optional) (105)Introduction (105)Configure the outgoing email server (SMTP) to send an email from an Office 365 Outlookaccount (105)Set up Scan to Network Folder (108)Introduction (108)Before you begin (108)Step one: Access the HP Embedded Web Server (EWS) (108)Step two: Set up Scan to Network Folder (109)Method one: Use the Scan to Network Folder Wizard (109)Method two: Use Scan to Network Folder Setup (110)Step one: Begin the configuration (110)Step two: Configure the Scan to Network Folder settings (111)Step three: Complete the configuration (118)Set up Scan to SharePoint (118)Introduction (118)Before you begin (118)Step one: Access the HP Embedded Web Server (EWS) (118)Step two: Enable Scan to SharePoint and create a Scan to SharePoint Quick Set (119)Scan a file directly to a SharePoint site (121)Quick Set scan settings and options for Scan to SharePoint (122)Set up Scan to USB Drive (123)Introduction (124)Step one: Access the HP Embedded Web Server (EWS) (124)Step two: Enable Scan to USB Drive (124)Step three: Configure the Quick Sets (optional) (125)Default scan settings for Scan to USB Drive setup (126)Default file settings for Save to USB setup (126)Scan to email (127)Introduction (127)Scan to email (127)Scan to job storage (129)viiIntroduction (129)Scan to job storage on the printer (130)Print from job storage on the printer (132)Scan to network folder (132)Introduction (132)Scan to network folder (132)Scan to SharePoint (134)Introduction (134)Scan to SharePoint (134)Scan to USB drive (136)Introduction (136)Scan to USB drive (136)Use HP JetAdvantage business solutions (138)Additional scan tasks (138)7 Fax (140)Set up fax (140)Introduction (140)Set up fax by using the printer control panel (140)Change fax configurations (141)Fax dialing settings (141)General fax send settings (142)Fax receive settings (143)Send a fax (144)Additional fax tasks (146)8 Manage the printer (147)Advanced configuration with the HP Embedded Web Server (EWS) (147)Introduction (147)How to access the HP Embedded Web Server (EWS) (148)HP Embedded Web Server features (149)Information tab (149)General tab (149)Copy/Print tab (150)Scan/Digital Send tab (151)Fax tab (152)Supplies tab (153)Troubleshooting tab (153)Security tab (153)HP Web Services tab (154)Networking tab (154)Other Links list (156)Configure IP network settings (157)Printer sharing disclaimer (157)View or change network settings (157)Rename the printer on a network (157)viiiManually configure IPv4 TCP/IP parameters from the control panel (158)Manually configure IPv6 TCP/IP parameters from the control panel (158)Link speed and duplex settings (159)Printer security features (160)Introduction (160)Security statements (160)Assign an administrator password (160)Use the HP Embedded Web Server (EWS) to set the password (160)Provide user access credentials at the printer control panel (161)IP Security (161)Encryption support: HP High Performance Secure Hard Disks (161)Lock the formatter (161)Energy-conservation settings (161)Set the sleep timer and configure the printer to use 1 watt or less of power (161)Set the sleep schedule (162)Set the idle settings (162)HP Web Jetadmin (163)Software and firmware updates (163)9 Solve problems (164)Customer support (164)Control panel help system (165)Reset factory settings (165)Introduction (165)Method one: Reset factory settings from the printer control panel (165)Method two: Reset factory settings from the HP Embedded Web Server (network-connectedprinters only) (166)A “Cartridge is low” or “Cartridge is very low” message displays on the printer control panel (166)Change the “Very Low” settings (166)Change the “Very Low” settings at the control panel (166)For printers with fax capability (167)Order supplies (167)Printer does not pick up paper or misfeeds (167)Introduction (167)The printer does not pick up paper (167)The printer picks up multiple sheets of paper (171)The document feeder jams, skews, or picks up multiple sheets of paper (174)Clear paper jams (174)Introduction (174)Paper jam locations (174)Auto-navigation for clearing paper jams (175)Experiencing frequent or recurring paper jams? (175)Clear paper jams in the document feeder - 31.13.yz (176)Clear paper jams in Tray 1 (13.A1) (177)Clear paper jams in Tray 2 (13.A2) (182)Clear paper jams in the fuser (13.B9, 13.B2, 13.FF) (188)ixClear paper jams in the duplex area (13.D3) (194)Clear paper jams in the 550-sheet trays (13.A3, 13.A4) (199)Clear paper jams in the 2 x 550 paper trays (13.A4, 13.A5) (206)Clear paper jams in the 2,700-sheet high-capacity input paper trays (13.A3, 13.A4, 13.A5, 13.A7) (213)Resolving color print quality problems (220)Introduction (220)Troubleshoot print quality (221)Update the printer firmware (221)Print from a different software program (221)Check the paper-type setting for the print job (221)Check the paper type setting on the printer (221)Check the paper type setting (Windows) (221)Check the paper type setting (macOS) (222)Check toner-cartridge status (222)Step one: Print the Supplies Status Page (222)Step two: Check supplies status (222)Print a cleaning page (222)Visually inspect the toner cartridge or cartridges (223)Check paper and the printing environment (223)Step one: Use paper that meets HP specifications (223)Step two: Check the environment (223)Step three: Set the individual tray alignment (224)Try a different print driver (224)Troubleshoot color quality (225)Calibrate the printer to align the colors (225)Troubleshoot image defects (225)Improve copy image quality (233)Check the scanner glass for dirt and smudges (233)Calibrate the scanner (234)Check the paper settings (235)Check the paper selection options (235)Check the image-adjustment settings (235)Optimize copy quality for text or pictures (236)Edge-to-edge copying (236)Improve scan image quality (236)Check the scanner glass for dirt and smudges (237)Check the resolution settings (238)Check the color settings (238)Check the image-adjustment settings (239)Optimize scan quality for text or pictures (239)Check the output-quality settings (240)Improve fax image quality (240)Check the scanner glass for dirt and smudges (240)Check the send-fax resolution settings (242)Check the image-adjustment settings (242)Optimize fax quality for text or pictures (242)Check the error-correction setting (243)xSend to a different fax machine (243)Check the sender's fax machine (243)Solve wired network problems (244)Introduction (244)Poor physical connection (244)The computer is unable to communicate with the printer (244)The printer is using incorrect link and duplex settings for the network (245)New software programs might be causing compatibility problems (245)The computer or workstation might be set up incorrectly (245)The printer is disabled, or other network settings are incorrect (245)Solve wireless network problems (245)Introduction (245)Wireless connectivity checklist (245)The printer does not print after the wireless configuration completes (246)The printer does not print, and the computer has a third-party firewall installed (246)The wireless connection does not work after moving the wireless router or printer (247)Cannot connect more computers to the wireless printer (247)The wireless printer loses communication when connected to a VPN (247)The network does not appear in the wireless networks list (247)The wireless network is not functioning (247)Reduce interference on a wireless network (248)Solve fax problems (248)Checklist for solving fax problems (248)What type of phone line are you using? (249)Are you using a surge-protection device? (249)Are you using a phone company voice-messaging service or an answering machine? (249)Does your phone line have a call-waiting feature? (249)Check fax accessory status (249)General fax problems (250)The fax failed to send (250)No fax address book button displays (250)Not able to locate the Fax settings in HP Web Jetadmin (250)The header is appended to the top of the page when the overlay option is enabled (251)A mix of names and numbers is in the recipients box (251)A one-page fax prints as two pages (251)A document stops in the document feeder in the middle of faxing (251)The volume for sounds coming from the fax accessory is too high or too low (251)Index (252)xiPrinter overview1Review the location of features on the printer, the physical and technical specifications of the printer,and where to locate setup information.For video assistance, see /videos/LaserJet.The following information is correct at the time of publication. For current information, see /support/colorljM776MFP.For more information:HP's all-inclusive help for the printer includes the following information:●Install and configure●Learn and use●Solve problems●Download software and firmware updates●Join support forums●Find warranty and regulatory informationWarning iconsUse caution if you see a warning icon on your HP printer, as indicated in the icon definitions.●Caution: Electric shock●Caution: Hot surface●Caution: Keep body parts away from moving partsPrinter overview1●Caution: Sharp edge in close proximity●WarningPotential shock hazardReview this important safety information.●Read and understand these safety statements to avoid an electrical shock hazard.●Always follow basic safety precautions when using this product to reduce risk of injury from fire orelectric shock.●Read and understand all instructions in the user guide.●Observe all warnings and instructions marked on the product.●Use only a grounded electrical outlet when connecting the product to a power source. If you do notknow whether the outlet is grounded, check with a qualified electrician.●Do not touch the contacts on any of the sockets on the product. Replace damaged cordsimmediately.●Unplug this product from wall outlets before cleaning.●Do not install or use this product near water or when you are wet.●Install the product securely on a stable surface.●Install the product in a protected location where no one can step on or trip over the power cord.Printer viewsIdentify certain parts of the printer and the control panel.Printer front viewLocate features on the front of the printer.2Chapter 1 Printer overviewPrinter front view3Printer back viewLocate features on the back of the printer.Interface portsLocate the interface ports on the printer formatter. 4Chapter 1 Printer overviewControl-panel viewThe control panel provides access to the printer features and indicates the current status of the printer.NOTE:Tilt the control panel for easier viewing.The Home screen provides access to the printer features and indicates the current status of the printer.screens.NOTE:The features that appear on the Home screen can vary, depending on the printerconfiguration.Control-panel view5Figure 1-1Control-panel view?i 12:42 PM6Chapter 1 Printer overviewHow to use the touchscreen control panelPerform the following actions to use the printer touchscreen control panel.T ouchT ouch an item on the screen to select that item or open that menu. Also, when scrolling T ouch the Settings icon to open the Settings app.How to use the touchscreen control panel 7SwipeT ouch the screen and then move your finger horizontally to scroll the screen sideways.Swipe until the Settings app displays.Printer specificationsDetermine the specifications for your printer model.IMPORTANT:The following specifications are correct at the time of publication, but they are subject to change. For current information, see /support/colorljM776MFP .T echnical specificationsReview the printer technical specifications.Product numbers for each model ●M776dn - #T3U55A ●Flow M776z - #3WT91A ●Flow M776zs - #T3U56APaper handling specificationsPaper handling features Tray 1 (100-sheet capacity)Included Included Included Tray 2 (550-sheet capacity)IncludedIncludedIncluded8Chapter 1 Printer overview550-sheet paper trayOptional Included Not included NOTE:The M776dn models accept one optional550-sheet tray.Optional Included Included2 x 550-sheet paper tray and standNOTE:The M776dn models accept one optional550-sheet tray that may be installed on top of thestand.Optional Not included Not included2,700-sheet high-capacity input (HCI) paper trayand standNOTE:The M776dn models accept one optional550-sheet tray that may be installed on top of theoptional printer stand.Printer standOptional Not included Not included NOTE:The M776dn models accept one optional550-sheet tray that may be installed on top of theoptional printer stand.Inner finisher accessory Not included Not included Included Automatic duplex printing Included IncludedIncludedIncluded Included Included10/100/1000 Ethernet LAN connection with IPv4and IPv6Hi-Speed USB 2.0Included Included IncludedIncluded Included IncludedEasy-access USB port for printing from a USBflash drive or upgrading the firmwareIncluded Included Included Hardware Integration Pocket for connectingaccessory and third-party devicesHP Internal USB Ports Optional Optional OptionalOptional Optional OptionalHP Jetdirect 2900nw Print Server accessory forWi-Fi connectivity and an additional Ethernet portOptional IncludedIncludedHP Jetdirect 3100w accessory for Wi-Fi, BLE, NFC,and proximity badge readingPrints 45 pages per minute (ppm) on Letter-sizepaper and 46 ppm on A4-size paperEasy-access USB printing for printing from a USBIncluded Included Includedflash driveT echnical specifications9Included Included Included Store jobs in the printer memory to print later orprint privatelyScans 100 pages per minute (ppm) on A4 andIncluded Included Included letter-size paper one-sidedIncluded Included Included 200-page document feeder with dual-headscanning for single-pass duplex copying andscanningNot included Included Included HP EveryPage T echnologies including ultrasonicmulti-feed detectionNot included Included Included Embedded optical character recognition (OCR)provides the ability to convert printed pages intotext that can be edited or searched using acomputerIncluded Included Included SMART Label feature provides paper-edgedetection for automatic page croppingIncluded Included Included Automatic page orientation for pages that haveat least 100 characters of textIncluded Automatic tone adjustment sets contrast,Included Includedbrightness, and background removal for eachpageIncluded Included Includedfolders on a networkIncludedSend documents to SharePoint®Included IncludedIncluded Included Included NOTE:Memory reported on the configurationpage will change from 2.5 GB to 3 GB with theoptional 1 GB SODIMM installed.Mass storage: 500 GB hard disk drive Included Included IncludedSecurity: HP Trusted Platform Module (TPM)Included Included IncludedT ouchscreen control panel Included Included IncludedRetractable keyboard Not included Included Included 10Chapter 1 Printer overviewFax Optional Included IncludedSupported operating systemsUse the following information to ensure printer compatibility with your computer operating system.Linux: For information and print drivers for Linux, go to /go/linuxprinting.UNIX: For information and print drivers for UNIX®, go to /go/unixmodelscripts.The following information applies to the printer-specific Windows HP PCL 6 print drivers, HP print driversfor macOS, and to the software installer.Windows: Download HP Easy Start from /LaserJet to install the HP print driver. Or, go tothe printer-support website for this printer: /support/colorljM776MFP to download the printdriver or the software installer to install the HP print driver.macOS: Mac computers are supported with this printer. Download HP Easy Start either from /LaserJet or from the Printer Support page, and then use HP Easy Start to install the HP print driver.1.Go to /LaserJet.2.Follow the steps provided to download the printer software.Windows 7, 32-bit and 64-bit The “HP PCL 6” printer-specific print driver is installed for this operating system aspart of the software installation.Windows 8.1, 32-bit and 64-bit The “HP PCL-6” V4 printer-specific print driver is installed for this operating systemas part of the software installation.Windows 10, 32-bit and 64-bit The “HP PCL-6” V4 printer-specific print driver is installed for this operating systemas part of the software installation.Windows Server 2008 R2, SP 1, 64-bit The PCL 6 printer-specific print driver is available for download from the printer-support website. Download the driver, and then use the Microsoft Add Printer tool toinstall it.Windows Server 2012, 64-bit The PCL 6 printer-specific print driver is available for download from the printer-support website. Download the driver, and then use the Microsoft Add Printer tool toinstall it.Windows Server 2012 R2, 64-bit The PCL 6 printer-specific print driver is available for download from the printer-support website. Download the driver, and then use the Microsoft Add Printer tool toinstall it.Windows Server 2016, 64-bit The PCL 6 printer-specific print driver is available for download from the printer-support website. Download the driver, and then use the Microsoft Add Printer tool toinstall it.Windows Server 2019, 64-bit The PCL 6 printer-specific print driver is available for download from the printer-support website. Download the driver, and then use the Microsoft Add Printer tool toinstall it.Supported operating systems11macOS 10.13 High Sierra, macOS 10.14 MojaveDownload HP Easy Start from /LaserJet , and then use it to install the print driver.NOTE:Supported operating systems can change.NOTE:For a current list of supported operating systems and HP’s all-inclusive help for the printer, go to /support/colorljM776MFP .NOTE:For details on client and server operating systems and for HP UPD driver support for this printer, go to /go/upd . Under Additional information , click Specifications .●Internet connection●Dedicated USB 1.1 or 2.0 connection or a network connection● 2 GB of available hard-disk space ●1 GB RAM (32-bit) or2 GB RAM (64-bit)●Internet connection●Dedicated USB 1.1 or 2.0 connection or a network connection●1.5 GB of available hard-disk spaceNOTE:The Windows software installer installs the HP Smart Device Agent Base service. The file size is less than 100 kb. Its only function is to check for printers connected via USB hourly. No data is collected. If a USB printer is found, it then tries to locate a JetAdvantage Management Connector (JAMc) instance on the network. If a JAMc is found, the HP Smart Device Agent Base is securelyupgraded to a full Smart Device Agent from JAMc, which will then allow printed pages to be accounted for in a Managed Print Services (MPS) account. The driver-only web packs downloaded from for the printer and installed through the Add Printer wizard do not install this service.T o uninstall the service, open the Control Panel , select Programs or Programs and Features , and then select Add/Remove Programs or Uninstall a Programto remove the service. The file name isHPSmartDeviceAgentBase.Mobile printing solutionsHP offers multiple mobile printing solutions to enable easy printing to an HP printer from a laptop, tablet, smartphone, or other mobile device.T o see the full list and to determine the best choice, go to /go/MobilePrinting .NOTE:Update the printer firmware to ensure all mobile printing capabilities are supported.●Wi-Fi Direct (wireless models only, with HP Jetdirect 3100w BLE/NFC/Wireless accessory installed)●HP ePrint via email (Requires HP Web Services to be enabled and the printer to be registered with HP Connected)●HP Smart app ●Google Cloud Print12Chapter 1 Printer overview。
音响名词中英文对照表GHI

GG gate 门(电路)G ground 接地GA general average 总平均值Gain 增益,提衰量Game 卡拉OK音响效果Gamut 音域Gap 间隔,通道Gate 噪声门,门,选通Gated Rev 选通混响(开门的时间内有混响效果) GB 吉字节Gear 风格,格调GEN generator (信号)发生器General 综合效果Generator 信号发生器GEQ graphie equalizier 图示均衡器GD ground 接地Girth 激励器的低音强度调节Glide strip 滑奏条(演奏装置)GLLS-sando 滑降(演奏的效果)Global 总体设计GM genertal MIDI 通用乐器数字接器GND ground 地线,接地端GP group 编组GPR general purpose RECEIVER 通用接收机GPI general purpose interface 通用接口设备Govern 调整,控制,操作,运转GR group 组合Gramophone 留声机,唱机Graphic equalizer 图示均衡器,图表均衡器GRND ground 接地Groove 光盘螺旋道的槽Group 编组(调音台),组Growler 线圈短路测试仪GT gate 门,噪声门GT gauge template 样板GTE gate 门(电路)GTR gate reverb 门混响Guard 保护,防护装置GUI graphical user interface 图形用户接口Guitar 吉它Guy 拉线Gymnasium 体育馆效果Gyrator 回旋器HHQAD high quality audio disc 高品位音频光盘HR handing room 操作室HR high resistance 高阻抗(信号端子的阻抗特性) HRTF head-related transfer function 人脑相关转换功能HS head set 头戴式耳机HS hybrid SYSTEM 混合系统HT home theater 家庭影院,家庭剧场Hubrid 混合网络,桥接岔路Hum 交流哼声,交流低频(50Hz)噪声Hum and Noise 哼杂声,交流噪声HUMIDITY 湿度,湿气HUT homes using TV 家用电视HVDS Hi-visual dramatic sound 高保真现场感音响系统HX headroom extension 动态余量扩展(系统)(一种杜比降噪系统),净空延伸H horizonal 水平(状态)H hot 热(平衡信号端口的“热端”)Hall 厅堂效果Handle 手柄,控制HAR harmonec 谐波Hard knee 硬拐点(压限器)Harmonic 谐波Harmonic distortion 谐波失真Harmonic Generator 谐波发生器Harmonize (使)和谐,校音Harmony 和谐Harp 竖琴Hash 杂乱脉冲干扰Hass effect 哈斯效应HD harmonic distortion 谐波失真HDCD high definition compatible DIGITAL 高分辨率兼容性数字技术HDTV hight definiton television 高清晰度电视Head 录音机磁头,前置的,唱头Head azimuth 磁头方位角Head gap 磁头缝隙Headroom 动态余量,动态范围上限,电平储备Headphone 头戴式耳机Headset 头带式耳机Heavy metel 重金属HeiFin 垂直微调Hearing 听到,听觉Heat sink 散热板Help (对程序的)解释HF high frequency 高频,高音Hi hign 高频,高音HI band 高频带Hi-end 最高品质,顶级Hi-BLEND 高频混合指示High cut 高切High pass 高通Highway 总线,信息通道Hi-Fi high fidelity 高保真,高保真音响Hiss 咝声Hi-Z 高阻抗HL half reverb 大厅混响Hoghorn 抛物面喇叭Hoisting 提升Hold 保持,无限延续,保持时间Holder 支架,固定架Hold-off 解除保持Home 家庭,实用Home theatre 家庭影院Horizontal 水平的,横向的Horn 高音号角,号筒,圆号Hornloaded 号角处理Hot 热端,高电位端Hour 小时Howling 啸叫声Howlround 啸叫H.P headphone 头戴式耳机HPA haas pan allochthonous 哈斯声像漂移HPF high pass FILTER 高通滤波器HQ high quality 高质量,高品位Hyper Condenser 超心型的HZ hertz 赫兹H hard 硬的音响效果特征IIC integrated CIRCUIT 集成电路ID identification 识别ID identify 标志Idle 空载的,无效果的IDTV improved definition television 改进清晰度电视系统IEC international electrical commission 国际电工委员会IEEE institute of electrical&electronic engineers 电气及电子工程师学会IF intermidiate frequency 中频的I/F interface 接口IHF the institute of high fidelity 高保真学会IIR infinite-duration impulse response 无限冲激响应IKA Interactive knee adapt 互调拐点适配,软拐点I/O input/output 输入/输出IM impulse modulation 脉冲调剂IM image 影象IMD intermodulation distortion 互调失真IMP impedance 阻抗IMP impedence 阻抗IMP interface message processor 接口信息处理机Improper 错误的IN INDUCTOR 感应器IN input 输入IN INVERTER 反演器,倒相器Inactive 暂停,失效的INC incoming 引入线INC increase 增高INCOM intercom 内部通话(系统)In phase 同相IND index 索引,标志,指数IND indicator 指示器Indicator 显示器,指示器Indirect 间接Inductance 电感Induction 感应,引入INF infinite 无限大Infrared 红外线的Infra-red remote CONTROL 红外线遥控INH inhibit 抑制,禁止Initial 声母,初始化In/Out 加与不加选择(相当于旁路)开关,接通开关Infinite 无限的,非限定的Increase 增加Initial Delay 早期延时,初次延时Inject 注入,置入Inlead 引入线Inlet 引入线,插入In-line 串联的,在线的INP input 输入(端口)INV invertor 倒相器,翻转器,反相器,变换器Inverse 倒相Inverseve Rev 颠倒式混响效果Invert 轮流,反转I/O in/out 输入/输出(接口),信号插入接口I/O instead of 替代IPE integrated parameter editing 综合参量编辑IR infrared sensor 红外线传感器IROA impulse response optimum algorithm 脉冲响应最佳算法IS information separators 信息分隔字符IS in service 不中断服务ISO International Standardization Organization 国际标准化组织Input 输入Indicator 显示器,指示灯INS insert 插入(信号),插入接口INSEL input select 输入选择INST instant 直接的,实时INST institution 建立,设置INST INSTRUMENT 仪器,乐器INSTRUMENT 乐器Insulator 绝缘体INT intake 进入,入口INT intensity 强度,烈度INT interior 内部INT interrupter 断路器Integrated 组合的Integrated amplifier 前置-功率放大器,综合功率放大器Intelligate 智能化噪声门Intelligibility 可懂度Interactie 相互作用,人机对话,软拐点Interval 音高差别Integrated 集成的,完全的Intercom 对讲,通话Interconnect 互相联系Inter cut 插播Interface 接口,对话装置Interference 干扰,干涉,串扰Interim 临时的,过渡特征Intermodulation 互调,内调制Intermodulation distortion 交越失真Internal 内存,对讲机Internally 在内部,内存Inter parameter 内部参数Interval 音高差别Interplay 相互作用,内部播放Interval shifter 音歇移相器Intimacy 亲切感Intonation 声调INTRO introduction 介绍,浏览,引入,(乐曲的)前奏INTRO sacn 曲头检索(节目搜索)INTRO sensor 曲头读出器(节目查询)Introskip 内移,内跳ISS insertion test signal 插入切换信号ISS interference suppression SWITCH 干扰抑制开关ITS insertion test signal 插入测试信号IV interval 间隔搜索IV INVERTER 倒相器IWC interrupted wave 断续波IX index 标盘,指针,索引。
GraphHopper R Interface 说明书

Package‘graphhopper’October13,2022Title An R Interface to the'GraphHopper'Directions APIVersion0.1.2Date2021-02-06Maintainer Stefan Kuethe<***********************>Description Provides a quick and easy access to the'GraphHopper'Directions API.'GraphHopper'<https:///>itself is a routing engine based on'OpenStreetMap'data.API responses can be converted to simple feature(sf)objects in a convenient way.License MIT+file LICENSEEncoding UTF-8LazyData trueImports magrittr,httr,googlePolylines,jsonlite,tibble,dplyrSuggests sf,geojsonsf,ggplot2,testthatRoxygenNote6.1.1URL https:///crazycapivara/graphhopper-rBugReports https:///crazycapivara/graphhopper-r/issues NeedsCompilation noAuthor Stefan Kuethe[aut,cre]Repository CRANDate/Publication2021-02-0616:50:02UTCR topics documented:gh_as_sf (2)gh_available_spt_columns (3)gh_bbox (3)gh_get_info (4)gh_get_isochrone (4)gh_get_route (5)gh_get_routes (6)12gh_as_sf gh_get_spt (7)gh_instructions (8)gh_points (8)gh_set_api_url (9)gh_spt_as_linestrings_sf (9)gh_spt_columns (10)gh_time_distance (11)Index12 gh_as_sf Convert a gh object into an sf objectDescriptionConvert a gh object into an sf objectUsagegh_as_sf(data,...)##S3method for class gh_routegh_as_sf(data,...,geom_type=c("linestring","point"))##S3method for class gh_sptgh_as_sf(data,...)##S3method for class gh_isochronegh_as_sf(data,...)Argumentsdata A gh_route or gh_spt object....ignoredgeom_type Use geom_type=point to return the points of the route with ids corresponding to the instruction ids.Examplesif(FALSE){start_point<-c(52.592204,13.414307)end_point<-c(52.539614,13.364868)route_sf<-gh_get_route(list(start_point,end_point))%>%gh_as_sf()}gh_available_spt_columns3 gh_available_spt_columnsGet a vector with available columns of the spt endpointDescriptionGet a vector with available columns of the spt endpointUsagegh_available_spt_columns()gh_bbox Extract the bounding box from a gh objectDescriptionExtract the bounding box from a gh objectUsagegh_bbox(data)##S3method for class gh_routegh_bbox(data)##S3method for class gh_infogh_bbox(data)Argumentsdata A gh_route or gh_info object.4gh_get_isochrone gh_get_info Get information about the GraphHopper instanceDescriptionGet information about the GraphHopper instanceUsagegh_get_info()Examplesif(FALSE){info<-gh_get_info()message(info$version)message(info$data_date)print(gh_bbox(info))}gh_get_isochrone Get isochrones for a given start pointDescriptionGet isochrones for a given start pointUsagegh_get_isochrone(start_point,time_limit=180,distance_limit=-1,...)Argumentsstart_point The start point as(lat,lon)pair.time_limit The travel time limit in seconds.Ignored if distance_limit>0.distance_limit The distance limit in meters....Additonal parameters.See https:///#operation/ getIsochrone.Examplesif(FALSE){start_point<-c(52.53961,13.36487)isochrone_sf<-gh_get_isochrone(start_point,time_limit=180)%>%gh_as_sf()}gh_get_route Get a route for a given set of pointsDescriptionGet a route for a given set of pointsUsagegh_get_route(points,...,response_only=FALSE)Argumentspoints A list of2or more points as(lat,lon)pairs....Optional parameters that are passed to the query.response_only Whether to return the raw response object instead of just its content. See Alsohttps:///#tag/Routing-API for optional parameters. Examplesif(FALSE){start_point<-c(52.592204,13.414307)end_point<-c(52.539614,13.364868)route_sf<-gh_get_route(list(start_point,end_point))%>%gh_as_sf()}gh_get_routes Get multiple routesDescriptionInternally it just calls gh_get_route sevaral times.See also gh_get_spt.Usagegh_get_routes(x,y,...,callback=NULL)Argumentsx A single start point as(lat,lon)pairy A matrix or a data frame containing columns with latitudes and longitudes that are used as endpoints.Needs(lat,lon)order....Parameters that are passed to gh_get_route.callback A callback function that is applied to every calculated route.Examplesif(FALSE){start_point<-c(52.519772,13.392334)end_points<-rbind(c(52.564665,13.42083),c(52.564456,13.342724),c(52.489261,13.324871),c(52.48738,13.454647))time_distance_table<-gh_get_routes(start_point,end_points,calc_points=FALSE,callback=gh_time_distance)%>%dplyr::bind_rows()routes_sf<-gh_get_routes(start_point,end_points,callback=gh_as_sf)%>%do.call(rbind,.)}gh_get_spt7 gh_get_spt Get the shortest path tree for a given start pointDescriptionGet the shortest path tree for a given start pointUsagegh_get_spt(start_point,time_limit=600,distance_limit=-1,columns=gh_spt_columns(),reverse_flow=FALSE,profile="car") Argumentsstart_point The start point as(lat,lon)pair.time_limit The travel time limit in seconds.Ignored if distance_limit>0.distance_limit The distance limit in meters.columns The columns to be returned.See gh_spt_columns and gh_available_spt_columns for available columns.reverse_flow Use reverse_flow=TRUE to change theflow direction.profile The profile for which the spt should be calculated.Examplesif(FALSE){start_point<-c(52.53961,13.36487)columns<-gh_spt_columns(prev_longitude=TRUE,prev_latitude=TRUE,prev_time=TRUE)points_sf<-gh_get_spt(start_point,time_limit=180,columns=columns)%>%gh_as_sf()}8gh_points gh_instructions Extract the instructions from a gh route objectDescriptionExtract the instructions from a gh route objectUsagegh_instructions(data,instructions_only=FALSE)Argumentsdata A gh_route object.instructions_onlyWhether to return the instructions without the corresponding points.See Alsogh_get_routegh_points Extract the points from a gh route objectDescriptionExtract the points from a gh route objectUsagegh_points(data)Argumentsdata A gh_route object.gh_set_api_url9 gh_set_api_url Set gh API base urlDescriptionSet gh API base urlUsagegh_set_api_url(api_url)Argumentsapi_url API base urlNoteInternally it calls Sys.setenv to store the API url in an environment variable called GH_API_URL.Examplesgh_set_api_url("http://localhost:8989")gh_spt_as_linestrings_sfBuild lines from a gh spt objectDescriptionBuild lines from a gh spt objectUsagegh_spt_as_linestrings_sf(data)Argumentsdata A gh_spt object.10gh_spt_columnsExamplesif(FALSE){start_point<-c(52.53961,13.36487)columns<-gh_spt_columns(prev_longitude=TRUE,prev_latitude=TRUE,prev_time=TRUE)lines_sf<-gh_get_spt(start_point,time_limit=180,columns=columns)%>%gh_spt_as_linestrings_sf()}gh_spt_columns Select the columns to be returned by a spt requestDescriptionTimes are returned in milliseconds and distances in meters.Usagegh_spt_columns(longitude=TRUE,latitude=TRUE,time=TRUE,distance=TRUE,prev_longitude=FALSE,prev_latitude=FALSE,prev_time=FALSE,prev_distance=FALSE,node_id=FALSE,prev_node_id=FALSE,edge_id=FALSE,prev_edge_id=FALSE)Argumentslongitude,latitudeThe longitude,latitude of the node.time,distance The travel time,distance to the node.prev_longitude,prev_latitudeThe longitude,latitude of the previous node.prev_time,prev_distanceThe travel time,distance to the previous node.node_id,prev_node_idThe ID of the node,previous node.edge_id,prev_edge_idThe ID of the edge,previous edge.gh_time_distance11 gh_time_distance Extract time and distance from a gh route objectDescriptionExtract time and distance from a gh route objectUsagegh_time_distance(data)Argumentsdata A gh_route object.Indexgh_as_sf,2gh_available_spt_columns,3,7gh_bbox,3gh_get_info,4gh_get_isochrone,4gh_get_route,5,6,8gh_get_routes,6gh_get_spt,6,7gh_instructions,8gh_points,8gh_set_api_url,9gh_spt_as_linestrings_sf,9gh_spt_columns,7,10gh_time_distance,1112。
- 1、下载文档前请自行甄别文档内容的完整性,平台不提供额外的编辑、内容补充、找答案等附加服务。
- 2、"仅部分预览"的文档,不可在线预览部分如存在完整性等问题,可反馈申请退款(可完整预览的文档不适用该条件!)。
- 3、如文档侵犯您的权益,请联系客服反馈,我们会尽快为您处理(人工客服工作时间:9:00-18:30)。
School of Mathematics and Systems EngineeringReports from MSI - Rapporter från MSI”Graphical Web-Interface with Human-Interface Objects for Databases”Principles for a generic moduleJohannes EckerdalJuni 2001 MSI Report 01069Växjö Universi ty ISSN 1650-2647SE-351 95 VÄXJÖISRN VXU/MSI/IV/E/--01069/--SEThesis summaryTitle: Graphical Web-Interface with Human-Interface Objects for DatabasesSubtitle: Principles for a generic moduleAuthor: Johannes EckerdalTutor: Lars-Eric LjungExaminer: Per FlensburgAbstract: Usability and functionality are fundamental when designing human-computer interfaces. The graphical user interfaces with use of metaphorical concepts –suchas use of human-interface objects – are today common in most applications. Abasic idea is for instance the one of direct manipulation; often manipulations oficons with a pointer. In most systems today we have a database as foundation, notat least when creating dynamic and powerful Internet sites. A problem with thismay be the usability issue of creating information visualisations and easymanipulation of the data.The aim of this thesis was to find principles of how to build a system for usingdirect manipulation of a database. The system is a web-interface where themetaphorical thinking of mapping between reality and the computer system i sessential. The principles also address the issue of reuse. The system may beplaced upon any database and can improve the usability and easiness, especiallyfor novice users.The result is nine principles and an example of how a system built upon these maylook like. There are also two instances of the system; an office map system and anInternet shop.Keywords: direct manipulation, usability, metaphor, human-interface objects, interactionAcknowledgementsThe past spring has been most interesting and evolving. I have had the opportunity of combining both theory and practice. I have been able work with issues that appeal to my heart and have hopefully come to a result that can be useful here and now and into the future.First of all, I would like to thank my wife for the patience and support during the months that this thesis has been in my mind 24-7. It has been a great time and lots of fun, but I guess that the work sometimes has had a too great impact on my social life. Thank you for putting up with me!I would also like to thank Sörman Information AB for having me. Thank you Jonas Nilsson for your tutorship, Andreas Thordin for making my days enjoyable, and Peter Nilsson for some great contributions. A special greeting goes to John Twisk for fruitful discussions, inspiration, and constructive critique.Thanks to Owen Evans for the linguistic examination and Tobias Andersson for the review of the frame of reference.Finally, I thank my tutor Lars-Eric Ljung for believing in me, Per Flensburg for examining my work, and the opponents for interesting and constructive objections.Contents1. Introduction (1)1.1. Research question (2)1.2. Methodological issues (2)1.2.1. Research methods (2)1.2.2. Selection of research method (4)2. Frame of reference (5)2.1. Human-Computer Interaction (HCI) (5)2.1.1. Definition of HCI (5)2.1.2. Usability (6)2.1.2.1. Main users and the need for usability (7)2.1.2.2. Usability and system acceptability (8)2.1.2.3. Measure and test usability (9)2.1.3. Cognition (10)2.1.4. Metaphors (12)2.1.5. User Interfaces (13)2.1.5.1. Graphical user interfaces (14)2.1.5.2. The use of icons (17)2.1.5.3. Interaction (17)2.1.5.4. Direct manipulation (19)2.1.5.5. Human-Interface Objects (21)2.1.5.6. Information Visualisation (24)2.2. Generality - Reusability (26)2.2.1. Generic modules (27)2.3. Databases and Web Technology (27)2.3.1. Multi-tier architecture (28)2.3.2. Interaction with databases via web-browsers (29)2.4. Possibilities of Web Browsers (30)2.4.1. Dynamical HTML (31)3. Principles for the system (33)3.1. Possible ways of usage (33)3.1.1. The Internet shop (33)3.1.2. The office location sy stem (33)3.1.3. The visual search tool (34)3.2. Examples of such systems (34)3.3. Identifying the principles (36)3.3.1. Use of images as metaphors (36)3.3.1.1. Principles (38)3.3.2. Positioning of human-interface objects (38)3.3.2.1. Principle (41)3.3.3. Direct manipulation of human-interface objects (42)3.3.3.1. Principles (44)3.3.4. Event-catchers (44)3.3.4.1. Events caught on objects (44)3.3.4.2. Events caught on areas (44)3.3.4.3. Events caught on background image (44)3.3.4.4. Principle (45)3.3.5. Validation and Event-handlers (45)3.3.5.1. Principle (46)3.3.6. Multi-tier architecture (46)3.3.6.1. Principle (48)3.3.7. Template-system (48)3.3.7.1. Principle (48)4. Building of the system (49)4.1. Analysis and design (49)4.2. Implementation (52)5. Instances of the system (55)5.1. Choice of instances (55)5.2. Case 1 – The office map system (55)5.2.1. Prerequisites, Analysis and Design (55)5.2.2. Implementation (59)5.3. Case 2 – The Internet shop (60)5.3.1. Prerequisites, Analysis and Design (60)5.3.2. Implementation (61)6. Discussion (63)6.1. Have we found the principles? (63)6.2. Is the system really generic? (65)6.3. Will the system improve usability? (65)6.4. Other possible ways of building (66)7. Conclusions (67)8. References (69)Appendix A (73)Example – JavaScript Positioning and Direct Manipulation (73)Example – JavaScript and Event catching (74)Appendix B (75)Document Type Definition for the System (75)Example of XML instance of the system DTD (76)Appendix C (77)Code example of the system (map.asp) (77)Code example of style sheet (map.css) (81)Code example of JavaScript file with event handling and validation (map.js) (82)Figures and TablesFigure 1 The building process, modified from Järvinen 1999 (3)Figure 2 Growth of digital computers and user issues (from Shackel 1989) (7)Figure 3 A model of the attributes of system acceptability (Nielsen 1993, p. 25) (8)Figure 4 Levels of an interactive system (Löwgren 1993, p.14) (9)Figure 5 ISO 9241 Metrics, as from Hart 1998 (10)Figure 6 Stage model of major human performance processes (Bailey 1989, p.93) (11)Figure 7 Dependent of your expectations, you perceive this as the letter B or the number 13 (11)Figure 8 The pre-cognitive-science view of the interface (as from Laurel 1998, p. 12) (14)Figure 9 The mental-models view (as from Laurel 1998, p.13) (14)Figure 10 Summary of the generations of computers and user interfaces (as from Nielsen 1996). (15)Figure 11 Example of menus in a WIMP system (16)Figure 12 Interaction cycle (Murray et al. 1998, p.430) (18)Figure 13 Advantages and disadvantages of the five primary interaction styles (from Shneiderman 1998, p.72) (19)Figure 14 Examples of direct manipulation (20)Figure 15 A simple model of icon processing (from Barker & Schaik 2000, p. 164) (21)Figure 16 The Object Action Interface (Shneiderman 1998, p. 62) (23)Figure 17 Tasks that need to be supported, when dealing with information visualisation (Shneiderman 1998, p. 524) (25)Figure 18 A simple example of a generic linked list (27)Figure 19 Overview of two- and three-tier architectures (Gartner 1997) (29)Figure 20 An example of a HTML document (30)Figure 21 The HTML-document is shown in a browser (30)Figure 22 Example of direct manipulation (Appendix A: Example – JavaScript Positioning and Direct Manipulation) (31)Figure 23 The Blair Witch Project Store (Artisan Entertainment 2001) (34)Figure 24 The Process of Dragging and Dropping an Annotation on a Photo (Kang & Shneiderman 2000) (35)Figure 25 Dynamic HTML map (Phillips & Rodden, 2001) (35)Figure 26 Use of office map as metaphor (37)Figure 27 Use of image of room with table and chairs as metaphor (image from Sundelin 2000) (37)Figure 28 Use of geographic profile as metaphor (image from Vätternrundan 2001) (38)Figure 29 The value of an object is determined by its position (39)Figure 30 Object positioning on the office map (39)Figure 31 Object positioning on the geographical profile (image from Vätternrundan 2001) (40)Figure 32 Office map showing some areas and objects (41)Figure 33 Overview of positioning of areas and objects (41)Figure 34 Example of direct manipulation (42)Figure 35 The Internet shop system with areas (43)Figure 36 Office map with areas (43)Figure 37 Validation before event handler (45)Figure 38 Event handler before validation (45)Figure 39 Validation both before and after event handling (45)Figure 40 Validation in two steps before event handling (45)Figure 41 Multi-tier architecture with bridge to get a generic system (46)Figure 42 Multi-tier architecture (as in Figure 19 from Gartner 1997) (47)Figure 43 Overview of the entire multi-tier system (47)Figure 44 The system in its context (48)Figure 45 The module, here referred as "The system" (as from Figure 44) (49)Figure 46 The items to present and information of these (49)Figure 47 Overview of what the presentation logic is to produce (50)Figure 48 Document layers of the presentation (50)Figure 49 Data Flow of the presentation logic for building the web page (51)Figure 50 Data Flow of "Write code for areas" (51)Figure 51 The event functions for each thing in the presentation (52)Figure 52 Functional model over the employee system with “our module” (56)Figure 53 Entity-Relationship diagram (57)Figure 54 Overview of the files that the system contains and their relationships (58)Figure 55 Window dump of the office map system (59)Figure 56 Entity-Relationship diagram of Internet shop (61)Figure 57 Overview of the files in the Internet shop system (61)Figure 58 The food department: dragging a grocery into the cart (62)Figure 59 The entrance and the tools department of the Internet shop (62)Note that figures without reference are made by the author.1. IntroductionUsability, functionality and effective interfaces are fundamental for well-working human-computer interacting. There are several principles proposed to be followed when designing and implementing interfaces both in traditional applications and in information/applications for the Internet. Published results in the research area are numerous and a lot of usability design guides are to be found, not at least on the web. Though, there is still a great lot to do in the area. This is shown by among other factors that the research area of human-computer interaction (often abbreviated HCI) is attracting more and more funding, journals, and researchers. This thesis is not another proposal of design principles, but a use of instant principles for a special area, namely the web-interface for databases.One significant of effective interfaces that we might see is the use of human-interface objects (Tognazzini, 1998). When developing graphical user interfaces (often abbreviated GUI) one models the real world on the screen. For example: if you want to delete a document, you simply drag it t o the trashcan. This and other use of symbols and metaphors is effective and used in most applications today. The design of communicative icons to use in metaphors has benefited a lot from the research field of cognitive science and symbolic/pictorial systems. It seems like HCI can be improved with the use of graphical notation and metaphors.Another significant ought to be the use of graphical tools to increase effectiveness. This is clearly seen in the development of programming tools. They have progressed from being text-editors, to automated text-editors and today there are tools with which developers do not need to use the formal syntax of the language. As a developer you just drag and drop windows, buttons and functions until you are satisfied with the result. This is partly to model the real world directly in your programming tool, but also increases the effectiveness of programming and reduces errors. Some would disagree with this saying that ”real” programmers still use text-editors and that we in s ome way lose control over the code with graphical tools. This might be true, but still most users of computers are not “real” programmers and instead of forcing the users into use of text-editors and poor interfaces our scope is to create well functioning, easy to use HCI tools.At the Internet today many web sites are dynamically generated. A database system with an application on top generates pages depending on the criteria of the client’s request, personalised pages, etc. It is also possible to develop pages with formulas where you, depending on permission, may manipulate the database. This is often used in Intranet solutions. But if we take an analogy from the development of programming tools, we might just say that the web-interface for databases is still like a text-editor or maybe an automated text-editor. If we continue the analogy, a natural development would be a graphical web-interface where entities in the database are shown on the screen and manipulated when clicking, dragging and dropping. For example: the employee is shown as a happy face in his/her office and when dragging him/her to the trashcan he/she is deleted from the database (i.e. fired). This ought to improve the users understanding and interacting with the database, through the web. The users then don’t need to master a formal database language (such as SQL in relational DBMS).What the future holds in hand is hard to predict, but we might identify possible ways of usage. We might also be able to find out the conceptual principles for such an interface. With the principles we could build a generic module for handling this graphical interface. If it is generic enough, the nature of the entities or attributes should not matter; it should just be to instantiate the system on top of any d atabase-system. Surely it is not possible to include every way of use in such a module, but there ought to be possible to build an interface module with principles for general functions. The events triggered are then caught and dealt with in underlying structures that are dependent of the particular context.11.1. Research questionThe discussion in the preceding part about the problem area leads us to a definition of the research question of this thesis, as following:Upon which principles can we build a generic system, for manipulating adatabase through a web-interface with graphical human-interface objects?The main interest is to identify the principles beyond the artefact, the web-interface. Hopefully one result will still be the artefact, but this will in some manner be dependent to one platform.1.2. Methodological issuesThe choice of research method is by the formulation of the research question the most important in a scientific research. The choice of method is the choice of scientific approach in order to solve the particular problem that is in hand. Backman (1998) writes that a well-detailed section about the research method is necessary in order to replicate and evaluate the research. These concepts are proper to demand of scientific work. Another researcher would then be able to replicate the method, hopefully with the same result.1.2.1. Research methodsThere are a great variety of different research methods and presumably there are several methods we may use. Flensburg (2000) states that the overall five scientific approaches are case and action studies, literature surveys, developing research and hypothesis testing.Case studies and action research are great when studying processes and changes. Patel & Davidson (1994) define it as a study of a small, well-limited group. It may also be an organisation or a situation. In this research the process or change are not in focus, but the principles of an artefact. Therefore we leave them without further reasoning.The literature survey is a method more appropriate in this particular research. As my research question proposes I am to find the principles beyond. In some manner all I am going to do is 1) a database-interface, 2) with graphical human-interface objects, 3) as a generic system. For all these areas there o ught to be a lot of literature and my contribution will then be the connection of these in order to find the principles. As a literature survey only, I should do a profound survey with a great deal of energy laid on evaluation of relevant documents, as proposed by Backman (1998).When examining the research question we find out that we shall build something (…can we build…). This building of an artefact should end up in a web-interface for manipulating a database. In the book by Järvinen (1999), the author proposes a constructive research approach that may be appropriate in this case. This constructive research approach is in my opinion similar to the developing research as proposed by Flensburg (2000). Järvinen says that the purpose of a constructive process is to move from an initial state to a desired state, the target state. This movement from the initial towards target state is the building process. The use of “towards” instead of “to” in the previous sentence is because the state we achieve when finished with the building process is the final state and this is not necessarily the same as the target state. The Figure 1 is slightly modified from Järvinen’s figures and shows the distinction between the target and final state. These may be more or less the same and that is one scope to find out in the evaluation part of the research.2Figure 1 The building process, modified from Järvinen 1999The initial state is mostly known and that is the starting point. Often one also knows the desired target state, at least at a contemporary view, e.g. how the built artefact would function. Though, this is not always the fact and the two alternatives Järvinen proposes are to first specify the target and then build or to specify parallel to the implementation during the building process.The target state would, with the research question in mind and in generally words, be a web-interface with graphical human-interface objects with which we could manipulate a database. The specification would then be appropriate to make before implementing. At the particular company within which I do my thesis, they have one ‘big wish’ with the work; they want a database with the locations of their employees and a graphical web-interface. The i n itial state is a database with the employee data and static images over the offices with the employee’s names written directly on the images. The desired state is a database with all information and a web-interface where the location of an employee dynamically is shown in a picture of an office. With easy drag and drop functionality the employees’ changes of locations can be performed. So far the constructive research approach seems applicable.The research question defined also says that it should be generic in order to be reusable. With reusable we should not only mean that certain parts (sub-functions, etc) are reusable. The module or system itself should be generic in order to function as an interface for manipulating any database, not dependent on being office-location-database or an Internet store. Of course we can state this in the specifications of the target state, but which metrics should we use? The evaluation of the final state against target and initial state should be based upon the specifications made at the initial work with the artefact. The company in this case has certain functionality that it needs, which could be used as metrics. The question of generality is then more or less left aside.Järvinen (1999) says that questions within the area of constructive research might be: “Can we build a certain artefact and how useful is a particular artefact?” These are questions that it should not take long to answer. It is relatively easy to build an artefact as described above in this section and I do not hesitate to say that, according to readings in HCI, it ought to be useful. Therefore the scope should not lie on this particular artefact but - as the problem definition states - on the principles and on generic (reusable) systems.Now we leave the constructive research approach for a while and look at the last research methods proposed by Flensburg (2000), the hypothesis testing approach. If our aim lies on the principles for this generic web-interface with human-interface objects, the building is no longer in focus. The principles are of major interest and these seem to belong to a wide area of theories. In an examination of the problem definition we might find key-words like generic, system, database, (web-)interface, graphics, and human-objects. To this list one could add reuse, HCI, interface designing, communication, metaphors, direct manipulation, and cognition among others. Our conclusion is that the research question seems to more or less adjoin, or overlap a lot of research fields.Based upon existing theories in areas of concern we might make our own hypothesis or theory. Patel & Davidson (1994) write that hypothesis testing approach prerequisites that we have enough knowledge in an area. From this area one then derives measurable assumptions about thereality. Their description of the hypothesis testing approach seems to fit our purpose, except for the detail that the assumptions should be about reality. Instead of creating and testing a hypothesis, maybe we should say that we create and evaluate a theory instead. Järvinen (1999) describes this research method and means that it is very suitable for exploratory investigations, i.e. when there is no prior knowledge of a part of reality or a phenomenon. Though, in our case there are prior knowledge, and the contribution of this thesis is a way of combining existing knowledge in a new way. Thus, as the hypothesis testing approach is described by Patel & Davidson (1994), the creating and evaluation of a hypothesis seems to fit our purpose the best.A possible way of working (method) would then be to read literature and articles, evaluate and study existing artefacts, and by this derive assumptions of which principles we would build our system on. If there are to be a hypothesis testing approach we also need to test the derived assumptions. If the object of study was a part of the reality we could empirically test it with studies of the reality. In this context it ought to mean that we have a number of principles that together form a hypothesis and in order to evaluate this it might be appropriate to build a system to test the principles upon. Mainly because of the claim for generality we then have to test it against at least two instances of applications. The complexity of the instances ought to differ a lot and in the search for the appropriate ones, it might be interesting to find out possible usefulness of such a system our principles shall contribute to.1.2.2. Selection of research methodWhen comparing the research methods (constructive research, theory creating and hypothesis testing) they all have their strengths and weaknesses, but the latter seems to have a slight advantage. The constructive research in some way fails when talking about the principles for a generic system. In a particular practical context this method might have been better. The constructive approach also in some way proposes that we have an initial state and are able to specify a desired state. If the desired state is the principles, then we cannot reach them with trying to build an artefact. The questions “Can we?” and “Is it useful?” are, as stated above, easy to answer, but do not scope within the research question. Therefore the hypothesis testing approach ought to be more appropriate.In the hypothesis testing approach, the building of an artefact is used just to test the principles, but the aim is still the principles as proposed by the research question. There are a lot of theories in bordering areas of research and when deriving assumptions from these we might find the desired principles.The first thing to do is to identify possible ways of usage. Without interesting ways of usage the results would seem to be rather worthless. Data acquisition method then should be document studies, e.g. articles and books in the research areas. Data and theories are collected and then structured in order to make general conclusions from it. Järvinen (1999) also proposes the study of physical artefacts that already exists. Information about existing solutions resides within the artefacts (prototypes) themselves, as Järvinen expresses himself. Functions and principles used in other artefacts can guide us in our search for the principles within our scope. Appropriate key words in order to find bordering research fields are HCI, GUI, usability, metaphors, databases and web technology, graphical presentation, and generality (reusability).When suitable theories are collected assumptions are derived and a hypothesis is stated. The hypothesis should be a set of proposed principles and this hypothesis is then tested with the building of a system based on those principles. Because of that the module is an interface to a database, it ought to be evaluated against such. The generality is tested against at least two ranges of usage identified in the above part about possible ways of usage.The conclusion then would be a series of principles and an example of a system built upon these principles.2. Frame of referenceIn this chapter the research areas - that more or less overlap or adjoin the research question of the thesis - are briefed. Interesting theories in the areas are treated and as a result we get a general overview of the area of concern. The research areas treated may be hard to distinguish from each other. This is not the purpose, but it is to m ake them fill in for each other in order to make the ‘bigger picture’ more complete. The frame of reference also functions as a summary of central concepts and definitions that will figure through this thesis.2.1. Human-Computer Interaction (HCI)As the name itself implies the study of human-computer interaction is a multidisciplinary research field, bringing together experts and researchers from areas like psychology, ergonomy, linguistics, organisational theory, sociology, computer science, and engineering. The common interest that brings them together is ways to develop more usable computer systems. As we will see there are several different approaches and views within the area and neither do all researchers agree with the previous definition of the common interest.The need for studies within HCI can be exemplified with the analogy of a standard office desk applied on the computer screen. If you spread a selected amount of your papers containing information on the desk, you would get an overview of the information. To view the same amount of information on the computer you would, according to Henderson & Card (in Lif 1998, pp. 2-3), approximately need 22 standard PC displays. Such examples tell us that there are a great deal of design decisions to make in order to enable usability and utility.Carlshamre (1994, pp. 11-12) mean that we can see HCI at a micro- and a macro-level. On a micro-level the relevant fields of study would be cognition, perception, sensory functions and motorics. From the field of computer science we get the development of more powerful interaction techniques. On a macro-level we are interested in the development and introduction of computer systems, and this is done as a collaborative work between system analysts, software engineers, psychologists, anthropologists, sociologists, etc. We may say that on the micro-level we focus upon the individual user and on the macro-level we try to imagine the ‘big picture’ and include the individual user along with the users organisation and the developers organisation. Researchers from all areas mentioned above contribute with their approach to the HCI field of study and it is difficult to capture and describe all relevant previous efforts done. This is also evident when searching for literature of the area; there are quite a number of published works available. Thus, as the main aim in this thesis is the principles for the interface and not the building process, the focus will be on the micro-level of HCI. Carlshamre gives us an example of issues focused in HCI on micro-level with the question “What characterizes a system … which is ‘good’ for the individual user?”. That example of question is what we can have in mind in the following.2.1.1. Definition of HCIIn the search for one widely accepted definition of the concept HCI, we soon realise that there is no such concept. Hewett et al (1992, p.5) proposes the following definition:“HCI is a discipline concerned with the design, evaluation and implementationof interactive computer systems for human use and with the study of mayorphenomena surrounding them.”Dix et al. (1993, p. Xiii) have the following definition:“HCI is, put simply, the study of people, computer technology and the waysthese influence each other. We study HCI to determine how we can make thiscomputer technology more usable by people.”。