Teamviewer使用方法(视频会议用)
teamviewer ipad用法
TeamViewer是一个功能强大的远程控制和桌面共享工具,它可以帮助用户在任何地方使用任何设备进行远程控制,并且可以在不同设备之间进行文件传输和桌面共享。
而iPad作为一款流行的移动设备,它的灵活性和便携性使其成为了很多人的首选,那么TeamViewer如何在iPad上使用呢?接下来我们将会介绍iPad上TeamViewer的用法。
一、下载和安装要在iPad上使用TeamViewer,请首先下载并安装TeamViewer for Remote Control这款应用。
在App Store中搜索TeamViewer即可找到,并进行安装。
二、添加设备1. 打开TeamViewer应用,在主界面点击右上角的“添加设备”按钮。
2. 输入要连接设备的TeamViewer ID和密码,即可连接远程设备。
三、远程控制1. 在连接远程设备后,可以在iPad上直接操作远程设备,包括鼠标点击、键盘输入等操作。
2. 可以进行文件传输,将iPad上的文件传输到远程设备或者将远程设备的文件传输到iPad上。
四、桌面共享1. 在连接远程设备后,在iPad上可以查看远程设备的桌面,进行实时的桌面共享操作。
2. 可以进行语音通话或视瓶通话,方便进行远程协作和交流。
五、其他功能1. 远程打印:可以通过TeamViewer在iPad上远程连接设备后进行打印操作。
2. 远程会议:可以通过TeamViewer进行远程会议,在不同地点的人员进行视瓶和语音会议。
总结:通过使用TeamViewer在iPad上进行远程连接和控制,可以方便快捷地实现远程办公、远程协作以及远程支持等功能。
TeamViewer的安全加密和稳定性能也保障了远程操作的安全和可靠性。
iPad上的TeamViewer用法是非常实用和便捷的,可以帮助用户更加高效地进行工作和生活。
六、安全性和隐私保护方面在使用iPad上的TeamViewer时,安全性和隐私保护是非常重要的。
TeamViewer远程连接软件的使用
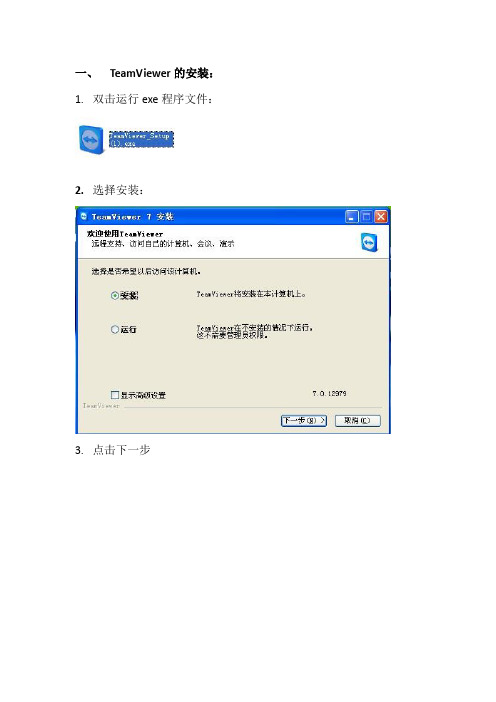
一、T eamViewer的安装:
1.双击运行exe程序文件:
2.选择安装:
3.点击下一步
4.选择个人/非商务用途点击下一步:
5.勾选同意安装条款及仅用做非商业使用选项框点击下一步:
6.选择无(缺省)点击完成:
7.如下安装成功正在激活
8.如下成功激活:
二、T eam Viewer的使用:
1.双击如下图标:
2.出现如下会话框,输入id号如下:
3.查看左下角查看是否连接准备已就绪,如下显示连接已就绪:
4.点击连接到伙伴如下:
5.如下显示正在连接:
6.出现如下会话框时输入密码
7.点击登录如下:
8.出现如下会话框表示连接成功:
9.点击右上角的Ctrl+Alt+Del
10.输入远程计算机用户名及密码如下:
11.如下显示远程连接成功:。
第三方远程控制工具TeamViewer的安装和使用教程
第三方远程控制工具TeamViewer的安装和使用教程TeamViewer是一个能在任何防火墙和NAT代理的后台用于远程控制,桌面共享和文件传输的简单且快速的解决方案。
为了连接到另一台计算机,只需要在两台计算机上同时运行 TeamViewer 即可,而不需要进行安装(也可以选择安装,安装后可以设置开机运行)。
该软件第一次启动在两台计算机上自动生成伙伴 ID。
只需要输入你的伙伴的ID到TeamViewer,然后就会立即建立起连接.软件类型:国外软件 / 网络辅助运行环境:Win2000/WinXP/Win2003/WindowsVista/Windows7/MacOS/Linux/iphone/Android软件语言:中文(官方中文版)工具/原料∙TeamViewer完整版 - Windows v7.0.13852∙windows系统步骤/方法1.进入TeamViewer中国站下载。
2.根据自己的系统下载符合的软件版本,这里暂时用windows XP 做演示:下载如图:3.下载完成之后,点击TeamViewer_Setup.exe 进行安装,点击下一步选择你是什么用途来使用TeamViewer,这里我们选择个人使用就足够了,勾选个人/非商务用途,点击下一步如图:5.勾选条款和我同意:点击下一步:如图:6.为了本机安全,这里我们建议随机密码(勾选“无(缺省)”),如果你要长期使用本工具勾选(是),点击完成就可以进行安装了!这里我们选择无(缺省)。
7.安装完成之后会自动打开TeamViewer 远程控制工具,打开之后会自动生产一个您的ID和一个随机密码,如图。
8.这时你就可以在其他电脑按照以上的步骤安装TeamViewer 远程控制工具安装完成之后,你可以在伙伴标ID输入随机生产的ID 选择你要进行的任务(比如:远程控制;文件传输),点击链接到伙伴,如图:9.点击链接伙伴,后会弹出要求你输入连接伙伴的密码,如图:注意事项∙你希望如何使用TeamViewer,这一步如果你勾选公司/商务用途,下面的安装方法不经相同。
teamviewer8怎么用
Teamviewer8怎么用
Teamviewer8 怎么用?在使用一款软件前我们需要做的就是去了解这款软件是怎样的软件,在去想teamviewer怎么用。
TeamViewer8是TeamViewer以V8.0开头的版本,也是最新的版本了。
TeamViewer8是一个能穿透公司内部局域网的远程控制软件,是在任何防火墙和NAT代理的后台用于远程控制、桌面共享和文件传输的简单且快速的解决方案。
双方都安装这个软件,使用时只需要同时运行TeamViewer8并且接受连接即可,最大优势在于此软件任何一方都不需要拥有固定IP地址,双方都可以相互控制,只要连入Internet即可,不受防火墙影响。
Teamviewer8 怎么用?在第一次下载使用时还是遇到不少麻烦,看了半天才看明白,不是因为别的,英文版的啊,除了认得那26个字母……英语不好的就是不方便啊。
用了没多久,只好放弃了。
然后在网上找了款国内的网络人,而且国内的网络人远程控制软件在连接时就不需要对方接受就可以连接。
同样不需要知道双方的IP,只要注册一个账号登录控制端和被控端,还可以设置自动登录和自启动。
安装和操作都是非常方便。
看到这亲切的方块字别提多高兴了。
同时也为国内也有一款与teamviewer功能一样强大的远程控制软件感到高兴。
TeamViewer怎么用TeamViewer安装卸载使用教程大全(图文)
TeamViewer怎么用?TeamViewer安装卸载使用教程大全TeamViewer是一个能在任何防火墙和NAT代理的后台用于远程控制的应用程序,桌面共享和文件传输的简单且快速的解决方案。
为了连接到另一台计算机,只需要在两台计算机上同时运行TeamViewer 即可,而不需要进行安装(也可以选择安装,安装后可以设置开机运行)。
该软件第一次启动在两台计算机上自动生成伙伴ID。
只需要输入你的伙伴的ID到TeamViewer,然后就会立即建立起连接。
小编今天给大家推荐一款强大的远程控制软件——TeamViewer,可以让你的手机连接你自己的电脑,不管你身处何处,只要电脑和手机都能联网,那么你就可以在手机上控制你的电脑了。
TeamViewer远程控制软件详细介jiè绍shào:1.QQ远程的前提是必须被远程的电脑有人操控接受才可以实现远程,teamviewer 这款软件可以通过账号密码来实现无人操控另一台计算机,而且不受网速影响,一点都不卡。
2.穿透内网进行远程控制:teamviewer绿色版可穿透内网以及各种防火墙完成连接,只要连入Internet即可不受防火墙影响;3.无需固定IP地址:最大优势在于此软件任何一方都不需要拥有固定IP地址,软件第一次启动后会自动生成伙伴ID,只要双方连入Internet即可连接;4.双方可以互相控制:不同于其他软件的单向控制,通过TeamViewer连接起来的两台计算机可以进行互相控制。
5.TeamViewer 针对macOS 10.14 Mojave 操作系统作了优化。
通过优化图像质量及更为智能的资源配置,TeamViewer 为您提供了市场上最具创造性和最为强大的远程控制会话解决方案。
6.自定义设备信息:请在您的计算机& 联系人列表中为设备添加日常工作需要的信息:操作系统、制造商、部门、公司——各类信息均可添加。
7.低带宽时性能优化:平均而言,5 个TeamViewer 连接当中就有1 个处于低带宽状态(<1 Mbit / s)。
手机端使用TeamViewer教程
手机端使用TeamViewer教程
下载手机端TeamViewer到手机存储卡里,然后安装。
按照如下教程设置选项。
1.打开手机端TeamViewer
2.输入电脑端给出的远程连接ID和密码(刚才记下的ID和密码)
注意:这里输完了密码后,直接按Enter键开始连接
按Enter键后,开始连接
按Enter键后,开始连接
3.用3G或WIFI网络,很快就连接成功,并弹出使用说明。
点确定后,便可以用手机远程操控你的电脑了。
TeamViewer使用教程到此结束。
小贴士:为了方便,介绍一个手机端小软件给大家:Quick拍和条码扫描器
有了二维码扫描后,我们可以轻松把软件下载自己手机上,脱离频繁数据线的烦恼
倚窗远眺,目光目光尽处必有一座山,那影影绰绰的黛绿色的影,是春天的颜色。
周遭流岚升腾,没露出那真实的面孔。
面对那流转的薄雾,我会幻想,那里有一个世外桃源。
在天阶夜色凉如水的夏夜,我会静静地,静静地,等待一场流星雨的来临…
许下一个愿望,不乞求去实现,至少,曾经,有那么一刻,我那还未枯萎的,青春的,诗意的心,在我最美的年华里,同星空做了一次灵魂的交流…
秋日里,阳光并不刺眼,天空是一碧如洗的蓝,点缀着飘逸的流云。
偶尔,一片飞舞的落叶,会飘到我的窗前。
斑驳的印迹里,携刻着深秋的颜色。
在一个落雪的晨,这纷纷扬扬的雪,飘落着一如千年前的洁白。
窗外,是未被污染的银白色世界。
我会去迎接,这人间的圣洁。
在这流转的岁月里,有着流转的四季,还有一颗流转的心,亘古不变的心。
TeamViewer11 远程会议手册-en
TeamViewer 11Manual MeetingRev11.1-201601Table of contents1About TeamViewer4 1.1About the software4 1.2About the manual42Basics6 2.1How TeamViewer works6 2.2Description of the main TeamViewer window63Meeting11 3.1Meeting functions-overview11 3.2Hosting a meeting3.3Joining a meeting15 3.4Schedule meetings17 3.5The role distribution in a meeting23 3.6Meeting Room25 3.7Overview of the TeamViewer Panel25 3.8Record meeting36 3.9Transmitting sound and video37 3.10Lock meeting4Computers&Contacts–Managing Contacts39 4.1The TeamViewer account41 4.2Computers&Contacts options445TeamViewer modules605.1The TeamViewer full version60 5.2The TeamViewer QuickJoin module60 5.3TeamViewer Portable61 5.4The TeamViewer MSI Package62 5.5TeamViewer on mobile devices62 5.6Customizable modules6Installation&configuration6.1Installing the TeamViewer full version63 6.2Using TeamViewer on a terminal server6.3Activating the TeamViewer license667Options68 7.1Category General68 7.2Category Security70 7.3Category Remote control71 7.4Category Meeting72 7.5Category Computers&Contacts7.6Category Audio conferencing78 7.7Category Video79 7.8Category Custom invitation80 7.9Category Advanced81 7.10TeamViewer setting policies891About TeamViewer1.1About the softwareTeamViewer is an intuitive,fast and secure application for remote control and meetings.As anall-in-one solution,TeamViewer can be used to:l Show your desktop for meetings,presentations or collaboration.l Use the TeamViewer meeting function,e.g.for training sessions.l Use the meeting apps for Android and iOS to participate in a meeting while being on theroad.l Provide ad-hoc remote support to colleagues,friends or customers.l Establish a connection between computers with different operating systems.TeamViewer runs under Windows,Mac OS,Linux or Google Chrome OS.1.2About the manualThis manual describes the use of TeamViewer for meetings.Unless stated otherwise,the described functionality always refers to the TeamViewer fullversion for Microsoft Windows.Instructions are given on the assumption that the TeamViewer full version is already installedon your computer.If you need help installing the program,read Section 6,page 63first.If you are looking for help about the TeamViewer remote control functions,please read theTeamViewer Manual–Remote Control available separately on our website.The Mac OS and Linux versions are mostly identical to the Windows version,although some ofthe functions are not yet available.Feel free to use our free trial versions to get an idea of thevarious functions and contact our Support team if you need further assistance.Mac OS,iPhone and iPad are trademarks of Apple Inc.Linux®is a registered trademark ofLinus Torvalds in the US and other countries.Android is a trademark of Google Inc.Windows,Microsoft,and Outlook are registered trademarks of Microsoft Corporation in the US andother countries.For simplification purposes,this manual refers to the operating systemsMicrosoft®Windows®XP,Microsoft®Windows®Vista,Microsoft®Windows®7,Microsoft®Windows®8and Microsoft®Windows®10simply as“Windows”.All supported Windows Operation Systems can be found on our website https:///en/kb/38-Which-operating-systems-are-supported.aspx.2Basics2.1How TeamViewer worksWith TeamViewer,you can easily and quickly start meetings or join them.With the use of aMeeting ID(which is automatically generated by TeamViewer and forwarded by the initiator),participants can connect to a meeting.The minimum requirement for connecting is theTeamViewer full version or a corresponding module and the Meeting ID.All TeamViewer connections are highly encrypted and are thus protected from being accessedby third parties.For detailed technical information regarding connections,security and dataprivacy in TeamViewer,see the security statement on our website at https://team-/products/security.aspx.2.2Description of the main TeamViewer windowThe main TeamViewer window is divided into the Remote Control and Meeting tabs.The main TeamViewer window.2.2.1The Remote Control tabMore Information about the use of TeamViewer for remote control,support or home officecan be found in the TeamViewer Manual–Remote Control.2.2.2The Meeting tabThe Meeting tab is divided into the following two areas:Host MeetingTo host an Online Meeting with TeamViewer,select from the following options.DescriptionPresentation:Click the icon to host an instant meeting(see Section 3.2.1,page 12).Video call:Click the icon to host a video conference(see Section 3.7.4,page 31).Phone:Click the icon to host a conference call(see Section 3.7.7,page 33).The Host Meetings area.With the links Schedule a meeting and My meetings,you can create meetings for later use (see Section 3.4,page 17)and manage planned meetings(see Section 3.4.3,page 20).Join MeetingIn the text fields Meeting ID and Your name,you can enter a Meeting ID and your name.The Meeting ID is a unique number that is being created individually for every meeting and serves for joining meetings.During a meeting,your name is visible to all participants(see Section 3.7.2, page 28).The Join Meeting area.To join a meeting,enter the aforementioned data in the text fields and click the Join meeting button.If the initiator of the meeting specified a password,it must be entered in the dialog that will open.Otherwise,you are connected directly to the meeting(see Section 3.3,page 15).2.2.3The menu bar of the main TeamViewer windowThe menu bar is located along the upper edge of the main TeamViewer window and containsthe menu items Connection,Extras and Help.The menu bar of the main TeamViewer window.ConnectionThe Connection menu features the options Invite Partner...and Setup unattendedaccess....These two options are not relevant to hosting or joining a meeting.You can findfurther information in the Tea mViewer Manual–Remote Control.To quit TeamViewer,click Exit TeamViewer.ExtrasThe Extras menu contains the following options:l To access the settings(see Section 7,page 68)click Options.l To play or convert videos of recorded TeamViewer sessions(see Section 3.8.1,page 36),click Play or convert recorded session....l To recommend TeamViewer to others,click Tell-A-Friend.l To access the log files created by TeamViewer(especially if needed by the TeamViewerSupport team for analysis purposes),click Open log files....l To activate your license key on this computer,click Activate license(see Section 6.3,page 66).l To display available license updates,click Check for license updates.HelpThe Help menu contains the following options:l If you need help with TeamViewer,you can access our Support website by clickingTeamViewer web help.l To open up the TeamViewer website,click TeamViewer website.l To view a brief introduction in TeamViewer,click How it works….l To provide feedback on TeamViewer,click Feedback.l To check whether you are running the latest version of TeamViewer,click Check for newversion.l To obtain information about TeamViewer and the currently active license,click About. 2.2.4The status bar of the main TeamViewer windowThe status bar is located along the bottom edge of the main TeamViewer window.It contains astatus light indicating the status of your connection as well as a button for accessingComputers&Contacts(see Section 4,page 39).The status bar of the TeamViewer main window.The status light has the following three positions:l Green:Ready to connect.You can start or join a meeting.l Yellow:Authenticating.The authentication process for setting up a TeamViewer sessionhas started.You or your partner must enter a password.l Red:The connection was aborted or no connection could be established.3MeetingThis section describes the use of the meeting function of TeamViewer using the TeamViewerfull version as an example.You can use this function to present your screen to other people via the Internet.To start a meeting,you need the TeamViewer full version.To join meetings,you can use theTeamViewer full version,the QuickJoin module,a web browser or the TeamViewer for meet-ings app for iOS and Android.For more detailed information about the TeamViewer modules,see Section 5,page 60.Recommendation:To participate in meetings,it is recommended to connect directly to themeeting via a dynamic link.The link is available in an invitation message from the initiator of themeeting.By following the link,you are automatically connected to the meeting without theneed to enter further data.For more information,see Section 3.3.1,page 16.3.1Meeting functions-overviewThe Meeting function provides the following options:l Start instant meetings with up to25participants or present your screen to individual per-sons.l Plan meetings in advance and export them as a meeting request to Microsoft Outlookwhere you can conveniently invite participants.l Managing meetings:Manage scheduled meetings using the My meetings function integ-rated in TeamViewer.l Join meetings without TeamViewer software via web browser.l Start meetings via the TeamViewer QuickConnect button to present individual windows(see Section 3.2.2,page 14).l Join meetings while you are on the road using the Android and iOS app TeamViewer formeetings.l Start a video conference or conference call with contacts without prior connection set-up.Examplesl Use the Meeting function for training sessions.l Present individual applications to demonstrate their handling to participants.l Give your PowerPoint presentation via the Internet to customers all over the world.l Exchange ideas with colleagues at other e the different communicationmeans offered by TeamViewer(e.g.chat,video conferencing or Voice over IP).3.2Hosting a meetingYou can start instant meetings with TeamViewer to exchange ideas with colleagues or custom-ers on a short notice or to present your screen to them.If you just want to present individualwindows,you can also start a meeting via the TeamViewer QuickConnect button.In addition,you can schedule meetings to start them at a later point in time.3.2.1Hosting an instant meetingIn this section,you learn how to start an instant meeting and then how to invite participants tothis meeting.Start a meeting with a single click.To host an instant meeting,follow these steps:1.Start TeamViewer.2.Click the Meeting tab.3.In the Host meeting area click the icon.4.You just started a meeting.The TeamViewer Panel will open(see Section 3.7,page 25).5.Invite participants and make additional adjustments before you transfer your screen. To invite participants to a meeting that has already started,follow these steps:1.In the Participants widget within the TeamViewer Panel(see Section 3.7.2,page 28),clickthe button.2.If you're logged into your TeamViewer account,continue with step3,if not,continue withstep3.1.3.Invite participants to the meeting.l Select the contact you wish to invite from the list.The contact will receive an invitation message,which he must confirm.l Click on By e-mail or phone….The Invite participants dialog will open.1.If necessary,change the invitation message in the dialog according to yourdemands.l To send the message with your standard email program,click on the Open ase-mail button.l To send the invitation text via other communication channels,such as socialnetworks,chats,or intranet,click the Copy to clipboard button.3.2.2Hosting a meeting via the QuickConnect buttonWith the QuickConnect function,you can present any application window or folder to acomputer or contact in your Computers&Contacts list or even collaborate with the partner inthis window.The QuickConnect button is displayed at the upper side of all windows.The QuickConnect button in an application window.To establish a connection to a contact using the QuickConnect button,follow thesesteps:1.Start TeamViewer.2.Log in to your TeamViewer account(see Section 4.1.3,page 43).3.Open the application that you would like to present to your computer/contact.4.Click the QuickConnect button in the title bar of the application window.5.Select the computer/contact to which you would like to present the application windowto.Activate the Allow partner to interact option if you would like to allow your partnerto control the respective application as well.Your contact receives a message about the desired connection request that must beconfirmed.6.If your contact agrees the connection,only the selected application is transmitted.Otherwindows or applications are not visible to your contact.With a click on the QuickConnect button,all available connection contacts are displayed.The QuickConnect button can be deactivated for all or only individual applications,if needed.Likewise,you can change the position of the button.These settings are available in theTeamViewer options in the category Advanced(see Section 7.9,page 81).The QuickConnect button can also be deactivated directly via the button itself as describedbelow.To deactivate the QuickConnect button in a window,follow these steps:1.Click the QuickConnect button of an opened window.2.In the lower area,click the Disable this feature link.A dialog with the option of disabling the button in all applications or just this applic-ation will open.3.If you want to deactivate the QuickConnect button only for this application,activate theDisable the QuickConnect button only for this application button.4.Click the Disable button.5.The QuickConnect button is deactivated.This setting can be undone in the advancedoptions of TeamViewer(see Section 7.9,page 81).3.3Joining a meetingIf you want to join a meeting,you have several options:Use eitherl the link for joining meetings which you received from the initiator,l the TeamViewer QuickJoin module,l the TeamViewer full version,l or your web browser.The easiest and quickest way to join a meeting is to use the link from an invitation message.Noadditional data has to be entered and you are connected directly to the meeting.3.3.1Joining a meeting via a link/web browserYou received an invitation message with a link for participating in a meeting.If you received an invitation message for a meeting,it contains a link in the formhttps:///mXXXXXXXX(each"X"corresponds to a number between1-9).By following the link,the web browser will open and you are connected to the meetingwithout the need to enter additional data.In this process,the TeamViewer QuickJoin module is temporarily executed on yourcomputer.It already contains the Meeting ID and,if necessary,the meeting password andconnects automatically to the meeting.Please find more information under Section 5.2"TheTeamViewer QuickJoin module",page 60.You received a Meeting ID and want to connect to the meeting via web browser.To join a meeting via a web browser,follow these steps:1.Open the following URL in your web browser:https://.2.Enter the Meeting ID in the Meeting-ID text field.3.Click the Join meeting button.4.If the initiator specified a meeting password,enter the meeting password in the sub-sequent dialog.Confirm your entry by clicking on the Log On button.The Meeting window will open.5.You see the screen of the presenter and can interact with the participants via theTeamViewer Panel(see Section 3.7,page 25).3.3.2Joining a meeting with the TeamViewer QuickJoin moduleWith the TeamViewer QuickJoin module,you can easily and quickly join meetings.To join a meeting with the TeamViewer QuickJoin module,follow these steps:1.Start the QuickJoin module.2.Enter the Meeting ID in the Meeting ID text field.3.Underneath it,enter your name in the Your name text field.4.Click the Join button.5.If the initiator specified a meeting password,enter it in the subsequent dialog.Confirmyour entry by clicking on the Log On button.The Meeting Room window will open.If the initiator starts the meeting or it is already started,the screen of the presenterwill be shown.6.You can see the screen of the presenter and can interact with the participants using theTeamViewer Panel.3.3.3Joining a meeting with the TeamViewer full versionAnother option of joining meetings is to use the TeamViewer full version.As a meeting parti-cipant,it does not offer any additional functions compared to the QuickJoin module.To join a meeting with the TeamViewer full version,follow these steps:1.Start TeamViewer.2.Click the Meeting tab.3.In the Join Meeting area,enter the Meeting ID in the Meeting ID text field.4.Underneath it,enter your name in the Your name text field.5.Click the Join meeting button.6.If the initiator specified a meeting password,enter it in the subsequent dialog.Confirmyour entry by clicking on the Log On button.The Meeting Room window will open.If the initiator starts the meeting or it is already started,the screen of the presenterwill be shown.7.You can see the screen of the presenter and can interact with the participants using theTeamViewer Panel.3.4Schedule meetingsTeamViewer provides the option of scheduling meetings in advance.These meetings arestored in your TeamViewer account so they are available at any time.Microsoft Outlook can beused to conveniently invite participants and manage scheduling dates via its calendar function.In the following section,you can learn more about this function.Simple schedule a meeting.3.4.1Schedule meetings in Microsoft OutlookYou have the option to schedule meetings directly in Microsoft Outlook.During the installationprocess of TeamViewer,the TeamViewer Meeting Add-In is installed to Microsoft Outlook.Using this Add-In,you can quickly and easily schedule TeamViewer meetings without the needto leave Outlook and switching to the TeamViewer application.The TeamViewer Add-In can be called up in the Microsoft Outlook menu under Start|New Meeting.The TeamViewer Meeting Add-In for Microsoft Outlook.To schedule a meeting in Microsoft Outlook,follow these steps:1.Open Microsoft Outlook.2.Click the New Meeting icon in the Start tab.A new meeting invitation will open.If you are not logged into your TeamVieweraccount already,a dialog box will open where you must log in(see Section 4.1.3,page 43).3.You can now invite participants and use further functions offered by Outlook.You can make changes to the meeting data at any time.These will synchronize bidirectionallybetween Microsoft Outlook and TeamViewer.Afterwards,you can then send updated meetingchanges via Outlook.All TeamViewer meetings will still be saved in My Meetings(see Section 3.4.3,page 20)and canbe called up or managed in any TeamViewer full version.Outlook and3.4.2Schedule meetings in TeamViewerTo schedule a meeting,follow these steps:1.Start TeamViewer.2.Click the Meeting tab.3.In the Host Meeting area,click the Schedule a meeting link.(If you are already loggedin to TeamViewer with your TeamViewer account,proceed with step6.)The TeamViewer-Sign In dialog will open.4.Log in to your TeamViewer account by entering your username and password.The Schedule a Meeting dialog will open.5.Enter the desired data.6.Click the Save button.The My Meetings dialog(see Section 3.4.3,page 20)dialog will open.7.If Microsoft Outlook is installed on your computer,a new meeting request is opened inOutlook.8.You can now use Outlook to invite participants or use other functions offered by Outlook.The Schedule a Meeting dialogThis dialog provides the options described below.Options DescriptionSubject Enter a title for your meeting in the text field.Start Set a date and time as well as the time zone for the start of your meeting.End Set a date and time for the end of your meeting.Options DescriptionPassword(optional)If you want to assign a password for the meeting,enter it in the text field.Save meet-ing for later reuse If activated,the meeting is retained in My Meetings after its start.You do not have to re-invite participants and can start the meeting directly(see Section 3.4.4,page 22).Otherwise,you cannot use the meeting again.Configure Conference Call To define conference call data for the meeting,click the link. You can select from:l No conference data for audio.l Use TeamViewer conference data for audio.l Use custom conference data foraudio.In the Schedule a Meeting dialog,you can create scheduled meetings.3.4.3Managing scheduled meetingsYou can easily manage your scheduled meetings from anywhere using your TeamVieweraccount.Scheduled meetings are linked to a TeamViewer account and are not stored locally ona computer.This means that all your scheduled meetings are available as soon as you log in toany TeamViewer using your account.Centrally managing all scheduled meetings.Example:You are scheduling a meeting on your desktop computer.However,you want to use your laptop to host it since it features a webcam.For this reason,log in to TeamViewer with your TeamViewer account on your laptop and the meeting scheduled on your desktop computer will be available.That is,you can start a meeting from any computer,regardless of the computer on which it was scheduled.To manage your scheduled meetings,follow these steps:1.Start TeamViewer.2.Click the Meeting tab.3.In the Host Meeting area,click the My meetings link.The TeamViewer-Sign In dialog will open.4.Log in with your TeamViewer account(see Section 4.1.3,page 43).The My Meetings dialog will open.The My Meetings dialogThis dialog contains your scheduled meetings with Subject,Start and Meeting ID.In addition, it provides the options described below.Button DescriptionNew Meeting To schedule a new meeting,click the New Meeting…button.The Sched-ule a Meeting dialog will open(see Section 3.4.1,page 18).Button DescriptionStart To start a scheduled meeting,select it and click the Start button.TheMeeting window will open.Edit...To edit a scheduled meeting,select it and click the Edit...button.Delete To delete a scheduled meeting,select it and click the Delete button.Invite...To invite participants to the selected meeting,click the Invite...button.The Invite Participants dialog will open.Close To close the My Meetings dialog,click the Close button.In the My Meetings dialog,you can schedule and manage meetings.3.4.4Recurring meetingsA useful function for the scheduling of a meeting is the Save meeting for later reuse optionin the Schedule a Meeting dialog.Scheduling recurring meetings.If this option is activated for a meeting,the meeting is permanently retained in My Meetings.Hence,the settings you performed and the Meeting ID are being saved.This offers the following advantages:l Participants have to be invited only once.l The Meeting ID does not have to be communicated repeatedly.l Regular meetings can be started faster.If the option is not activated,the meeting cannot be used again and is removed from My Meet-ings after a certain period of time.Example:To discuss the tasks for the week and exchange information,you want to host anonline meeting in your department at the beginning of every week.Hence,you are schedulinga meeting for next Monday and activate the Save meeting for later reuse check box.At theend,you send an invitation to your department.In the future,all the participants can connectto your meeting at any time using the same link and Meeting ID in each case.3.5The role distribution in a meetingThere are different roles in a meeting.TeamViewer differentiates between Organizer,Presenter and Participant.3.5.1The organizersThe organizer takes over the control in a meeting.The initiator of a meeting is always an organ-izer.The organizer can assign most of the rights that provides him/her with the opportunity toensure that the meeting runs smoothly.The organizer role cannot be dropped(i.e.participantswho have been named as organizers remain organizers until the end of the meeting).Within ameeting it is also possible to name several organizers.3.5.2The presenterThe presenter transfers his or her screen in a meeting.The initiator of a meeting is always anorganizer.The presenter role can be passed on to any meeting participant by the organizer orpresenter.Each meeting always has only one presenter since only one participant can transferhis or her screen at a time.3.5.3The participantsA participant in a meeting is anyone who connects to a meeting.Each participant can be assigned another role as well as certain rights by the presenter andorganizers.3.5.4The rights of meeting participantsDuring a meeting,the presenter and the organizers have the option of assigning rights to indi-vidual ing the Participants widget allows restricting the actions of participantsor assigning additional rights to them.Click the display name of the participants and enable or disable the desired option.The organizer,presenter or a participant has the following rights and possibilities:ParticipantParticipant3.6Meeting RoomThe Meeting Room appears after you connected to a meeting as a participant and it has not yetbeen started by the initiator.If no screen contents are transferred,theMeeting Room is shown.As a participant,you also see the waiting room if the presenter stopped the transmission of hisor her screen(see Section 3.7.3,page 29).The Meeting Room contains information about the current meeting( of presenter,subject,date,time,Meeting ID or conference call data).3.7Overview of the TeamViewer PanelThe TeamViewer Panel provides different functions during a meeting.After the start of a meeting,it will open on the side of the initiator as well as on the side of the participants.The TeamViewer Panel.The available functions and widgets are described in detail in the following sections.The TeamViewer Panel itself has the following properties:l It can be placed anywhere on the screen.As a result,important parts of the screen are not being hidden.l It is transparent.If you present your screen,the panel is not visible to the participants.l Individual widgets can be detached from the panel.Drag the widgets from the panel and adjust the size and position individually.Alternatively,click the icon to detach therespective widget from the TeamViewer Panel.l The panel can be minimized to the edge of the screen using the icon on the left side of the panel.l With the icon at the left side of the panel,all participants except for the presenter can display the meeting window in full-screen mode.l The presenter can lock it into position in the top right corner of the screen.This way,the panel does not overly any transferred screen content.Drag the panel to the upper right corner of your screen.。
teamviewer的使用方法
teamviewer的使用方法TeamViewer是一款远程控制软件,可以帮助用户远程访问和控制另一台电脑。
它可以在不同操作系统之间进行远程控制,如Windows、Mac、Linux等。
本文将详细介绍TeamViewer的使用方法,帮助用户更好地了解和使用这款软件。
第一步:下载和安装用户需要在官方网站上下载TeamViewer的安装程序。
安装程序根据用户的操作系统进行选择,下载后双击运行即可开始安装。
在安装过程中,用户需要按照提示进行操作,直到安装完成。
第二步:设置和注册安装完成后,用户需要进行一些设置和注册操作。
首次运行TeamViewer时,系统会要求用户选择是否为个人使用或商业使用,用户需要根据自己的情况选择相应选项。
然后,用户需要创建一个TeamViewer账户,填写相应的信息并完成注册。
第三步:远程访问在TeamViewer主界面上,用户可以看到两个核心功能:远程控制和远程会议。
远程控制用于远程访问和控制另一台电脑,而远程会议则用于多人协作和在线会议。
要进行远程控制,用户需要知道对方电脑的TeamViewer ID和密码。
对方电脑上也需要安装并运行TeamViewer,并将TeamViewer ID和密码告知用户。
用户在自己的TeamViewer主界面上输入对方的ID 和密码,然后点击“连接”按钮,即可建立远程连接。
连接建立后,用户可以通过TeamViewer界面对对方电脑进行控制,就像是亲临现场一样。
第四步:远程会议要进行远程会议,用户需要点击主界面上的“远程会议”选项。
然后,用户可以选择创建一个新的会议,或者加入一个已有的会议。
创建新会议时,用户可以设置会议的名称和密码,并将会议信息分享给其他参与者。
加入已有会议时,用户需要输入会议的名称和密码,然后点击“加入会议”按钮。
在远程会议中,用户可以与其他参与者进行语音通话、视频通话和文件共享。
用户可以在会议期间共享自己的屏幕,展示自己的操作或内容。
Teamviewer中文使用手册
QuickJoin
或主持人/演示者“邀请参与者”,通过邮件告知对方通过 web 访问的方式: 连接后系统提示等待演示者开始演示过程
主持人/演示者 的界面上可以看到当前已经进入等待状态的人数。
人员到齐后可启动演示。
2.2.2. 会议/演示操作
2.2.2.1. 主持人/演示者操作
演示启动后界面如下: 主界面
选择“远程控制”: 1) 左侧等待会话界面,显示的是你的客户端的 ID 和密码,如你需要其他人连接到
你的机器上进行远程支持,需要提供此处的 ID 和密码给对方; 2) 右侧为创建会话界面,知晓你要连接的终端的 ID 后,可在此输入对方的 ID,根
据需要选择你是要远程控制对方的桌面还是要和对方进行文件传输,然后点击 “连接到伙伴”进行连接。 (VPN 模式需要商业注册版才能支持,可允许双方建立一个 vpn 连接,提供更 好的安全性。)
2. 操作指南
2.1. 远程控制
要进行远程控制,首先两方电脑都必须执行 TeamViewer。 可以选择运行完整版或 QuickSupport。在双方都运行完整版时,双方都可以发起控制请 求以连接对方或被对方连接,运行 QuickSupport 的一方只能等待对方主动连接。 无论运行哪个版本,在运行 TeamViewer 后,TeamViewer 的服务器会自动分配一个 ID 和密码给你,ID 是固定的,但密码是随机的,每次执行都会不同。左边是您的 ID 和密码(若 是对方要主动连你,要将此告诉对方),在右边输入对方的 ID (连续输入不用空格)就可以连 到对方了。 下面就具体使用过程进行说明。
2.1.1.1.2. QuickSupport
运行 QuickSupport 后无具体提示即进入软件界面:
远程协助工具TeamViewer使用说明
密 级:【中密】版 本:【1.0】文档作者:【李小翔】提交时间:【2008-07-17】【远程协助工具TeamViewer使用说明】1 概述¾简介:TeamViewer是一个在任何防火墙和NAT代理的后台用于远程控制,桌面共享和文件传输的简单且快速的解决方案。
为了连接到另一台计算机,只需要在两台计算机上同时运行TeamViewer即可而不需要进行一个安装的过程。
该软件第一次启动在两台计算机上自动生成伙伴ID。
只需要输入你的伙伴的ID 到TeamViewer,然后就会立即建立起连接。
这款软件是至今唯一的一款能穿透内网的远程控制软件,可以穿透各种防火墙,要求双方都安装这个软件,使用时要求双开打开软件并且接受连接即可,最大优势在于此软件任何一方都不需要拥有固定IP地址,双方都可以相互控制,只要连入 Internet即可,不受防火墙影响!TeamViewer不仅完全支持Windows Vista,还支持在Vista安全桌面(UAC)下远程控制应用程序。
网站:/index.aspx¾使用方式独立安装或者直接使用运行后,会自动生成一个ID和Password在右侧面板选择连接类型,输入对方的ID和密码即可¾优点基本上可以穿越任何内网,可以使用IE的或者自定义的HTTP代理色深可调整为黑白模式,极大利用网络带宽View / Quality / Edit custom settings,将Colors设置未Grayscale选择View / Quality / Custom settings支持多人同时进行远程协助(可以用来开远程会议,不过记得连接时Access Control选择View and Show) 录像功能Extras / Record录制完成后,使用TeamViewer主窗口的菜单Extras / Play recorded sessions功能播放 可建立VPN,配合代理软件,可以直接访问内网中的其他资源(慎用)支持直接进行文件传输每次启动会自动生成随机密码,保证安全个头小,安装包只有1.2M,安装完仅3.4M¾缺点操作较复杂英文版(网上有汉化版下载)个人用户免费,商业用户收费2 与同类工具对比3 下载TeamViewer的官方主页是/,可以访问主页或直接通过下面的链接下载:¾/download/TeamViewer_Setup.exe4 安装如果只是临时使用,完全版无需安装,双击可执行文件后,选择Run即可。
- 1、下载文档前请自行甄别文档内容的完整性,平台不提供额外的编辑、内容补充、找答案等附加服务。
- 2、"仅部分预览"的文档,不可在线预览部分如存在完整性等问题,可反馈申请退款(可完整预览的文档不适用该条件!)。
- 3、如文档侵犯您的权益,请联系客服反馈,我们会尽快为您处理(人工客服工作时间:9:00-18:30)。
TeamViewer使用方法
一、安装与配置
1.从网络上下载最新版本的TeamViewer,地址
/zhCN/index.aspx
2.下载完成此时安装,注意在安装的第一步中,务必选中“显示高级设置”,选择“安装”“个人/非商务用途”,单击“下一步”继续:
3.此处显示高级设置,可以按照你的需求进行选择,默认如下,直接下一步:
4.安装完成。
此时显示如下,会默认出现您的ID和密码,各项目经理需在右侧申请帐号并登录。
二、主持会议
1.即时会议(常用)
1.启动TeamViewer,单击会议选项卡。
2.在主持会议区域中,单击召开即时会议按钮。
3.会议随机召开。
a) TeamViewer面板将会打开,选择第一项,演示。
4.邀请其他参加者
1)在TeamViewer面板的参加者控件中,单击“邀请按钮,或者通过QQ等将
会议ID发送给对方。
2)2此时登录TeamViewer账户,如果没有帐号,自己注册。
3)从联系人列表中选择您想要邀请的联系人。
该联系人将收到一份其必须确认
的邀请信息
4)单击“通过电子邮件或者电话……”,邀请参加者对话框将会打开。
5)a)要使用您的默认电子邮件程序发送邀请信息,单击以电子邮件形式打开按
钮。
b)要通过其他通信渠道分发邀请信息,如社交网络,聊天窗口或者内网,单
击复制到剪贴板按钮。
2.预约会议(非常用)
在TeamViewer中安排会议
1.启动TeamViewer,单击会议选项卡。
2.在主持会议区域中,单击“安排会议”链接。
(如果您已经账户登录,安排
会议对话框讲话打开。
如果没有登录,请登录,输入您的用户名和密码)3.输入所需数据,单击“保存”按钮。
i.
4.会议对话框将会打开。
5.如果您的计算机上安装了Microsoft Outlook,新建会议请求会在Outlook
中打开。
6.现在,您可使用Outlook邀请参加者或使用Outlook的其他功能。
三、加入会议(重要)
1.通过链接或Web浏览器加入会议
您收到了带有加入会议链接的邀请消息。
如果您收到了会议邀请消息,其中会含有类似
/v9/mXXXXXXXX(每个“X”表示1-9之间的一个数)的链接。
点击该链接将会打开Web浏览器,您无需输入其他数据即可连接至会议,看到共享画面。
2. 通过TeamViewer完整版加入会议(请使用此项)
要通过TeamViewer完整版加入会议,请按照下列步骤操作:
1.启动TeamViewer,单击“会议”选项卡,在会议ID文本域中输入会议ID。
2.在下方的您的姓名文本域中输入您的姓名(中文名或公司名)。
3.单击加入会议按钮。
4.如果发起者指定了会议密码,在接下来出现的对话框中输入密码。
确认您的
输入内容,并单击“登录”按钮。
a)→会议室窗口就会打开。
b)→如果发起者召开会议或者会议已经开始,将会显示演示者的屏幕画面。
5.您可看到演示者的屏幕画面,并可使用TeamViewer面板与参加者互动。
四、会议设置(重要)
1.角色分配
会议中可以有不同的角色。
TeamViewer将其分为组织者、演示者和参加者。
1.组织者
组织者接管会议控制权。
会议的发起者通常就是组织者。
组织者能够分配绝大多数权限,以确保会议顺利进行。
您无法放弃组织者角色(也就是说,被任命为组织者的参加者将保持组织者身份直至会议结束)。
会议中可指定多名组织者
2.演示者
演示者在会议过程中传送其屏幕画面。
在会议开始时,其始终作为发起者。
演示者角色可由组织者或演示者提交给任意一名会议参加者。
由于一次仅可发送一名参加者的屏幕画面,因此每次会议始终仅有一名演示者。
3.参加者
连接到会议的任何人员均为参加者。
演示者和组织者可为每个参加者分配其他角色及某些权限。
2.画面共享
如果会议已经开始,参加者可以看到演示者的画面。
画面共享可以显示我的桌面,或者显示其中一个应用。
3.文件共享
如果我们要给对方传输文件,我们将文件拉至文件框,
或者直接拖到对方的屏幕中。
显示传输事件日志。
4.音频设置
更改为IP语音,注意麦克风设置是否被静音
5.我的视频
此项可启动我方摄像头显示我方参与人员画面
6.白板功能
7.面板会议ID下方,演示者选项可设置当前会议参与者权限
4.录制会议
1.录制会议
会议期间,您可选择录制会议视频。
录像以TeamViewer 自有的TVS 文件格式录制。
演示者的屏幕内容、声音以及网络摄像头视频和IP 语音都将被录制。
要录制会议,请按照以下步骤操作:
1.会议期间,单击画面共享控件标题中的图标。
2.在下拉菜单中,单击记录会议| 开始记录。
a) 您的会议进入录制过程。
3.要结束录制,单击下拉菜单中的录制会议| 停止。
另外,您还可结束会议。
4.会议录制停止。
保存文件对话框将会打开。
2.播放录制的会议
要播放录制的会议,请按照以下步骤操作:
1.在TeamViewer主窗口的菜单栏单击其他| 播放或转换录制的会话...将出
现打开对话框。
2.选择所需文件。
3.单击打开按钮。
a)→将在TeamViewer 中回放视频片段。
您将看到播放视频文件的常规
选项。
3.将录制的会议转换为AVI视频格式
录制的会议可转换为AVI视频格式,以便进行进一步的处理。
要转换录制的会议,请按照以下步骤操作。
1.按照上述说明播放录制的会议
2.在录制的回话窗口中单击图标
i.→将出现打开对话框
3.根据需要配置设置。
为此,可使用下拉列表和配置…或浏览…按钮
4.单击开始转换按钮
5.所选的视频即被转换
4.传送语音和视频
通过TeamViewer,您可将演示者计算机上的语音和视频传送给参加者。
当显示快速移动的图像时,TeamViewer 就能加以识别,继而优化视频传输。
例如,如果演示期间正在播放一段视频,所有参加者均可在各自的计算机上实时观看该视频。
语音传输能够让参加者听到演示者计算机上正在播放的系统声音或音乐等。
作为演示者,您可在会议期间单击画面共享控件中的图标,并禁用共享计算机声音和音乐选项,从而停止计算机声音传送,或者在相关设置中默认关闭该功能
五、其他功能
1.远程协助
1.首先,让对方也安装一个Teamviewer,或运行一个绿色的Teamviewer,并保证网络可通。
然后我们在“伙伴ID”中输入对方的“您的ID”号,再单击“连接到伙伴”按钮即可:
2.稍等一会,若连接成功,会再次要求输入对方的“密码”,输入后单击“登录”按钮即可
3.再稍等一会,若密码验证通过且网络正常,则可看到对方的桌面了
2.移动设备支持
1.计算机下载TeamViewer完整版,启动软件,记录唯一的ID和密。
2.移动设备安装并启动兼容的TeamViewer App,想要了解更多信息和所有App。
请访问/mobile
3.连接。
只需在移动设备上输入远程计算机的ID和密码,即可身临其境地操控您的计算机。