echsop 购物车实现淘宝ajax效果
用javascript实现的购物车实例

⽤javascript实现的购物车实例基于javascript实现的购物车实例:⾸先是效果和功能,如下图所⽰,具有购物车的基本功能。
包括1、选中和全选商品;2、商品数量的增减;3、单个商品价格的计算;4、总价的计算;5、删除商品。
⼀、界⾯布局使⽤的是table来进⾏布局,由于⽤js来获取tr 和 td节点的时候,可以获取带下标的元素集合,操作起来较为便利。
html+css的代码如下:1 <!DOCTYPE html>2 <html lang="en">3 <head>4 <meta charset="UTF-8">5 <title>购物车</title>6 <style>7 *{margin:0px; padding:0px;}8 table,td,td{9 border:1px solid #000000;10 font-size:10px;11 }12 table{13 display: block;14 }1516 img{17float:left;18 }19 tr{20 text-align: center;21 }22 #box{23 width:900px;24 }2526 #cart{27float:left;28 border-collapse:collapse;29 }30 #head{31 background:#F0FFFF;32 }33 #settlement{34 margin-top:20px;35 width:805px;36 height:30px;37 border:1px solid #EBEBEB;38float:left;39 background: #EBEBEB;4041 font-size:10px;42 line-height:30px ;43 }44 #settlement div{45float:left;46 }47 #addupto{48 color:#ff0000;49 font-weight:700;50 }51 #NumofGoods{52 color:#ff0000;53 font-weight:700;54 }5556 .goods{57 padding:5px;58 text-align: left;59 }60 .number{61 position:relative;62 left:19px;63 width:60px;64 height:10px;65 border:1px solid #cccccc;66 }6768 .acc{69 width:40px;70 height:10px;71 border-left:0px solid #cccccc;72 border-right:0px solid #cccccc;73 line-height: 10px;74float:left;75 }76 .desymbol{77 width:10px;78 height:10px;79 line-height: 10px;80 background:#ccc;81float:left;82 cursor:pointer;83 }84 .adsymbol{85 width:10px;86 height:10px;87 line-height: 10px;88 background:#ccc;89float:right;90 cursor: pointer;91 }92/*.dele{93 cursor: pointer;94 }*/95 .total{96 color:#ff0000;97 font-weight:700;98 }99 </style>100 </head>101 <body>102 <div id="box">103 <table id="cart">104 <tr id="head">105 <td width="50px"><input class="allSelect" type="checkbox"> 全选</td>106 <td width="400px;">商品</td>107 <td width="100px">单价</td>108 <td width="100px">数量</td>109 <td width="100px">⼩计</td>110 <td width="50px">操作</td>111 </tr>112 <tr>113 <td><input class="select" type="checkbox"></td>114 <td class="goods"><img src="img/goods1.jpg">外星⼈笔记本电脑17 R4 15R3 13⼨ 17⼨ alienware今晚吃鸡游戏本</td> 115 <td class="price">12888.00</td>116 <td>117 <div class="number">118 <div class="desymbol">-</div>119 <div class="acc">1</div>120 <div class="adsymbol">+</div>121 </div>122 </td>123 <td class="total"></td>124 <td class="dele">删除</td>125 </tr>126 <tr>127 <td><input class="select" type="checkbox"></td>128 <td class="goods"><img src="img/goods2.jpg">任天堂(Nintendo)Switch 家⽤游戏机掌机NS智能体感游戏主机</td> 129 <td class="price">2258.00</td>130 <td>131 <div class="number">132 <div class="desymbol">-</div>133 <div class="acc">1</div>134 <div class="adsymbol">+</div>135 </div>136 </td>137 <td class="total"></td>138 <td class="dele">删除</td>139 </tr>140 <tr>141 <td><input class="select" type="checkbox"></td>142 <td class="goods"><img src="img/goods3.jpg">Microsoft/微软 Surface Pro i5 8G 256G 笔记本平板电脑⼆合⼀</td> 143 <td class="price">4999.00</td>144 <td>145 <div class="number">146 <div class="desymbol">-</div>147 <div class="acc">1</div>148 <div class="adsymbol">+</div>149 </div>150 </td>151 <td class="total"></td>152 <td class="dele">删除</td>153 </tr>154 <tr>155 <td><input class="select" type="checkbox"></td>156 <td class="goods"><img src="img/goods4.jpg">Apple/苹果10.5英⼨ iPad Pro</td>157 <td class="price">3666.00</td>158 <td>159 <div class="number">160 <div class="desymbol">-</div>161 <div class="acc">1</div>162 <div class="adsymbol">+</div>163 </div>164 </td>165 <td class="total"></td>166 <td class="dele">删除</td>167 </tr>168 </table>169170 <div id="settlement">171 <div style="width:550px"><input class="allSelect" type="checkbox"> 全选</div>172 <div style="width:120px">全选商品<span id="NumofGoods"></span><span>件^</span></div>173 <div style="width:80px">合计:¥<span id="addupto"></span></div>174 <div style="width:50px;text-align: center;border-left:1px solid #000000;">结算</div>175 </div>176177 </div>178179 <script src="cart.js"></script>180 </body>181 </html>View Code⼆、javascript代码⾃⾏封装了getClasses()函数,避免兼容性问题。
基于Ajax的购物车模块的设计与实现

( 1)有一 个 根据用户输入的数是来更新的 按钮 , 用以重新计算总! 和价格. (2 呐物 车中的商品条目 会 都 提供一个链 接以提供产品详细信息的页面。 传统购物车只有当用户点击按钮时才会 更新, 而用户不得不转入其他页面以浏览产品 的详细描述。 而在Ajax 的帮助下 , 用户体验 可以得到大幅改进, 因为只要敌量发生变化 . 总量就会自动更新, 而产品详细信息可以在局 一页面中得到显 (也许在指定区域, 也许在一 个弹出窗口中) 二 ",1 发送一个xa f 咖s quest 首先, 从浏览器创建并发送一个 XMLH 吐pR 阂ne st , va r xr IHt Ip ‘ n
问题 如当更新数据时 需要刷新整个页面。 实现整体数据与胀务器的通信, 这样一来 , 会 影响到系统的响应速度 因为许多无用的数据 也要被更新一次。其次 使用同步方式与服 务器通信, 需要打断用户的操作 , 大大的影响 了响应能力。再有 , 由于应用由许多页面组 成的, 大部分交互都需要进行页面之间交换来 完成 , 需要切换整个页面。在一个 旧式的典 型购物车场景 中页面会显示用户浏览站点时 加人的产品列表, 有可以改变数量的输入栏 . 结帐按钮等等。各种各样的购物车 。 至少有
! 了技 术
so r 口胜 占 仁
注 CH 以 0 口、
基 于
Aja x 的 购 物
车 模 块 的设 计 与 实现
邹 晓静
万硕
( 解放军信息工程大华伯息技术学院
诃南郑州
4500047ห้องสมุดไป่ตู้
摘 要: 本文详细介绍一种方法 - 一A jax 技术, 使用它可以构建更为动态和响应更为灵饭的 Web 应用程序。该方法的关键在子对栩览 器端的J avaScript, DH TML与服务器异步通信的组合。文章通过将Ajax 应用于商务网 站的购物车部分, 克眼了以翻 认浦!在购物时需要 不断刷新页面等待结果的一些映陷 使得用户可以更好的得到的物体验 提高了用户的积极性. 关傲词:Ajax Web 应用 购物车 中图分类号:TP 3 11. 1 文献标识码; A 文. 编号, 1672- 3791(2007)08(a卜0047- 02 1 引言 目 前.Web应用程序正在以几何速度数I 级增长,Web 应用程序的解决技术也正 逐步成 熟。 2005 年2月, Ajax 技术的出现让业界重新 申视Web 应用程序的通信模式, 对Web 应用 程序的数据传0 速度和用户体验提出了更高 的要隶和期望, 也使Web应用程序继承了桌面 应用程序反应灵敏, 胖客户端 , 优秀客户体脸
网上购物系统的实现
摘要随着社会经济的迅速发展和科学技术的全面进步,尤其是计算机事业的飞速发展,以计算机与网络技术为基础的信息系统迎来了蓬勃发展的时期。
网上购物也作为一种潮流步入了我们的生活中。
网络购物不仅降低了商场的运营成本,并且也避免了消费者挑选商品的烦琐过程,使消费者的购物过程变得轻松、快捷、方便,很适合现代人快节奏的生活,也开辟了一个新的销售方式。
本系统是一个小型的电子商务系统,本网上购物系统是根据现有的网上购物系统的现状而设计开发的电子商务平台。
可以为各类用户提供方便的在线购物环境,符合目前国内流行的电子商务模式。
该论文主要介绍了网上购物系统的开发背景、前台系统的分析设计与实现,后台系统的分析设计与实现。
用户可以在系统中实现注册、登录、分类查询商品信息、购物、管理购物车、结账等功能。
通过后台管理模块可以实现对后台商品、订单和系统的管理功能。
本系统采用JA V A开发环境,利用MVC的开发模式,以MySQL为系统数据库,以Tomcat作为服务器,整个系统操作简便、界面友好、灵活实用。
关键词:网上购物系统;系统管理;JA V A;MVC;Tomcat;MySQLAbstractWith the rapid development of social economy and the overall progress of science and technology, especially the rapid development of computer business, on the basis of computer and network technology of information system is in the booming period. Online shopping is also a kind of tide stepped into our life. Online shopping not only reduce the operation cost of mall, but also avoid the cumbersome process of choosing goods, it makes consumer’s shopping process easy, fast and convenient, it is very suitable for the modern fast rhythm of life and also has opened a new way of sales.This system is a small e-commerce systems, the online shopping system is designed according to the current situation of the current online shopping system development of e-commerce platform. It can provide convenience for all types of users of online shopping environment, compled with the current domestic popular e-commerce mode.The paper mainly introduced the online shopping system development background, the front desk system analysis and design and implementation, backend systems analysis and design and implementation. The user can be realized in the system register, login, query classification commodity information, shopping, management, shopping cart, checkout, and other functions. Through the background management module can realize the background of products, orders and management functions of the system.This system is based on JA V A development environment with the MVC development pattern, and it adopts the system database of MySQL, and Tomcat is the server, the whole system is simple, friendly interface, flexible and practical.Keywords: online shopping system; management; JA V A; MVC; Tomcat; MySQL目录1 前言 (1)2 系统开发的背景及意义 (2)2.1系统开发背景 (2)2.2系统的开发意义 (2)3 系统开发工具的介绍 (4)3.1MyEclipse简介 (4)3.2Servlet简介 (4)3.3JSP简介 (4)3.4Tomcat简介 (5)3.5MySQL简介 (5)4 网上购物系统分析 (6)4.1系统需求和可行性分析 (6)4.1.1 系统的需求分析 (6)4.1.2 系统的可行性分析 (6)4.2系统设计的总体规则 (7)4.3系统的主要架构及开发模式 (7)4.3.1 基于B/S的体系结构 (8)4.3.2 基于MVC的应用开发模型 (8)5 系统的功能和流程分析 (11)5.1网上商城购物系统基本功能描述 (11)5.2系统整体布局模块的结构分析 (11)5.3系统前台功能分析 (12)5.4系统后台模块功能分析 (13)6 系统功能的具体实现 (15)6.1系统数据库及表的设计 (15)6.1.1创建数据库 (15)6.1.2表的创建 (16)6.2用户登录模块 (19)6.3系统购物模块 (20)6.4购物车模块 (22)6.5订单模块 (25)6.6支付模块 (28)6.7管理员模块 (29)6.8后台管理界面 (29)6.9后台查看编辑已有分类模块 (31)6.10添加商品分类模块 (32)6.11后台添加商品模块 (35)6.12后台查看所有订单模块 (35)7 系统测试及总结 (38)7.1系统关键部分测试分析 (38)7.2测试分析总结及说明 (38)7.3系统的性能分析 (38)8 总结 (40)致谢 (41)参考文献 (42)1前言近年来,随着Internet的迅速崛起,计算机技术在各行各业日益广泛和深入的应用,网络的概念早已深入人心。
eclipse的web项目实现Javaweb购物车的方法
eclipse的web项⽬实现Javaweb购物车的⽅法本⽂将带领⼤家实现第⼀个⽤eclipse写的第⼀个Javaweb项⽬–简单购物车。
⽂章会在问题分析、具体实现和常见问题这三块为⼤家详细解说。
问题分析:⾸先我们要了解我们要完成的是什么----购物车。
然后那实现购物车的什么呢?是不是往购物车添加⼼仪商品呢。
那是不是还要实现价格的计算呢?既然我们了解问题本质了,那我们接下来就要进⾏具体实现了。
具体实现:⾸先我们要看⼀下项⽬整体的结构下⾯我们要先创建实体类,就是我们的商品、预购商品和购物车这三个实体类。
BeansCart类(这个类是购物车实体类,包含了购物车中添加的商品和总计两个属性。
)package Beans;import java.util.HashMap;public class Cart {private HashMap<String,CartItem> cartItems=new HashMap<String,CartItem>();//购物车中添加的商品private double total;//总计public HashMap<String, CartItem> getCartItems() {return cartItems;}public void setCartItems(HashMap<String, CartItem> cartItems) {this.cartItems = cartItems;}public double getTotal() {return total;}public void setTotal(double total) {this.total = total;}}CartItem类(这个是购物车中添加的商品类,包含有商品、商品个数和⼩计)package Beans;public class CartItem {private Product product;//商品private int buyNum;//个数private double subTotal;//⼩计public Product getProduct() {return product;}public void setProduct(Product product) {this.product = product;}public int getBuyNum() {return buyNum;}public void setBuyNum(int buyNum) {this.buyNum = buyNum;}public double getSubTotal() {return subTotal;}public void setSubTotal(double subTotal) {this.subTotal = subTotal;}}Product类(这⾥是具体的商品类,包含有商品编号、商品名和商品价格三个属性)package Beans;public class Product {private String pid;//商品编号private String name;//商品名private double price;//商品价格public String getPid() {return pid;}public void setPid(String pid) {this.pid = pid;}public String getName() {return name;}public void setName(String name) { = name;}public double getPrice() {return price;}public void setPrice(double price) {this.price = price;}public Product(String pid,String name,double price) {// TODO Auto-generated constructor stubthis.pid = pid; = name;this.price = price;}}Service这个包下⾯只有⼀个类,主要的作⽤是存⼊商品,并能根据商品编号找到商品。
Vue实现购物车实例代码两则
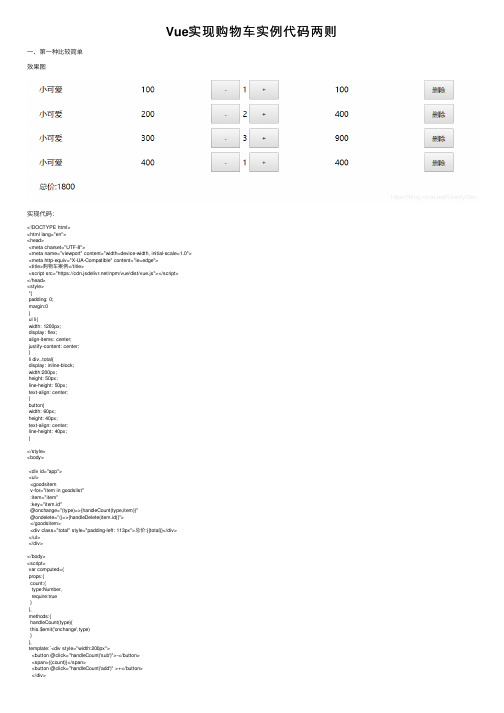
Vue实现购物车实例代码两则⼀、第⼀种⽐较简单效果图实现代码:<!DOCTYPE html><html lang="en"><head><meta charset="UTF-8"><meta name="viewport" content="width=device-width, initial-scale=1.0"><meta http-equiv="X-UA-Compatible" content="ie=edge"><title>购物车案例</title><script src="https:///npm/vue/dist/vue.js"></script></head><style>*{padding: 0;margin:0}ul li{width: 1200px;display: flex;align-items: center;justify-content: center;}li div,.total{display: inline-block;width:200px;height: 50px;line-height: 50px;text-align: center;}button{width: 60px;height: 40px;text-align: center;line-height: 40px;}</style><body><div id="app"><ul><goodsitemv-for="item in goodslist":item="item":key="item.id"@onchange="(type)=>{handleCount(type,item)}"@ondelete="()=>{handleDelete(item.id)}"></goodsitem><div class="total" style="padding-left: 113px">总价:{{total}}</div></ul></div></body><script>var computed={props:{count:{type:Number,require:true}},methods:{handleCount(type){this.$emit('onchange',type)}},template:`<div style="width:200px"><button @click="handleCount('sub')">-</button><span>{{count}}</span><button @click="handleCount('add')" >+</button></div>`}var goodsitem={props:{item:{type:Object,require:true}},methods:{handleCount(type){this.$emit('onchange',type)},handleDelete(){this.$emit('ondelete')}},components:{computed},template:`<li><div>{{item.goodsName}}</div><div>{{item.price}}</div><computed :count="item.count" @onchange="handleCount"></computed> <div>{{item.sum}}</div><div><button @click="handleDelete">删除</button></div></li>`}var app=new Vue({el:"#app",data:{goodslist:[{id:1,goodsName:"⼩可爱",price:100,count:1,sum:100},{id:2,goodsName:"⼩可爱",price:200,count:2,sum:400},{id:3,goodsName:"⼩可爱",price:300,count:3,sum:900},{id:4,goodsName:"⼩可爱",price:400,count:1,sum:400},]},methods:{handleCount(type,item){if(type=='add'){item.count+=1}else{if(item.count==1){this.handleDelete(item.id)return}item.count-=1}item.sum=item.count*item.price},handleDelete(id){return this.goodslist=this.goodslist.filter((item)=>{return id!=item.id})}},computed:{total(){return this.goodslist.reduce((total,item)=>{return total+=item.sum},0)}},components:{goodsitem}})</script></html>⼆、⼀个⽤vue实现的简单响应式购物车案例实现结果如上,所有书类数据存在数组⾥,遍历显⽰在表格中,点击+和-可以实现数量和总价格的响应式变化,其中,减号到1时便添加了disabled类型,⽆法点击。
基于Struts2和AJAX的网上汽车配件商城的设计与实现

3 页 面 交 互 和 动 态 展 示 : W 3 D cmet bet 列 化 。 因为对 数 据 库 的操 作共 分 为增 删 改查 四种 ,所 以系统 在 构 . C ou n O jc 建 D O操 作 层 时只 需要 关注 相应方 法 的编 写 , 时注 意这 些方法 A 同 Mo e D M) dl O ; (
WR 的 Jvsr t aaci 文件 ,包 括 egn. 和 ui s p n ies j t. ,之 后就 l j 方 法用 于根 据 对象 的 I 和 对 象类 型获取 实 体对 象信 息 。之后 建 后 导入 D D 可 以在 页面 实现 无 刷 新效 果 了 。本系 统 中 的很 多 页面 效果 ,比如 立 的具体 D O对 象 都继 承 自这个 基类 , A 自动 获取 基础 操 作方 法 , 查 找的 自动补 全 效果 ,就是 D WR 的贡献 。 实现 对汽 车配 件信 息数 据库 的操作 。 最 后通 过对 S us tt r 2配置 文件 sus ml t tx 的编 辑 , r . 来配 置 Aco tn i 中 me o 属 性与 rsl元素 的对 应关 系 , 要采 用通 配符 的方 式 , td h e t u 十 在业 务逻 辑层 , 系统 构建 一个 包含 业务 对象 基本 属性 和方 法 使 页面 更为 丰富 ,系统 更加 灵 活 。 的基 础业 务类 , 车 配件 商城 的每 一个 新建 的业 务对 象都 继承 这 汽 五 、结 束语
cr nnlgig a 都 复制 到 WE — Fl o ro- gn.r n o j BI /b下 ,修 改 w b ml N i e . 文件 x 保 证将 请求 转发 给 D WR 的核心 Srl , eve 同时在 w b rl 目录 下 t e .n 同 x 创建 d r ml w . ,用来 定义 Jv 类 和 Jv sr t 间 的对 应 关系 。然 x aa aaci 之 p
php购物车功能的实现

22.10 购物车购物车如图22.29所示,它的实现过程是本章的重点内容。
购物车的作用是用来临时储存用户的购物信息。
用户可以修改购物车中的商品数量、移除购物车中的某件商品、清空购物车。
购物车的实现和数据存储主要是依赖session来实现的,当用户退出购物系统时,购物车中的商品会被自动清空,这个原理与在超市选购商品是一样的。
下面将详细介绍购物车的实现过程。
图22.29 购物车22.10.1 添加商品至购物车主要技术:count、explode()用户看好一件商品后,但又没有确定买不买时,就可以将商品先放进购物车中。
下面将介绍如何将商品添加至购物车。
在介绍检测用户登录页面chkuser.php中已经介绍过,当每个用户登录成功后系统将为每个用户分配两个session变量$producelist和$quatity,分别用来存储用户放入购物车中的商品id和这些商品的数量,当然一个变量同一时刻只能有一个值,要实现将多个id值同时保存在一个$producelist变量中,首先将id 转变成字符型变量,并且这些变量用字符“@”进行连接,如用户分别将id为1、4、23的商品放入购物车中,这时session变量$producelist的值应该为“1@4@23@”,下面的操作只需用函数explode()和函数implode()就可以完成id的提取和连接。
实现该过程的代码如下:<!--*******************************addgouwuche.php************************** *****--><?phpsession_start();if($_SESSION[username]=="") //判断用户是否已经登录{echo "<script>alert('请先登录后购物!');history.back();</script>"; //如果用户还没登录,则提示用户先登录并返回到原来页面exit; //用exit语句停止循环的继续执行}$id=strval($_GET[id]); //获取商品id值$array=explode("@",$_SESSION[producelist]); //将session变量$producelist中的内容用字符“@”进行分割,并将结果保存在数组$array中for($i=0;$i<count($array)-1;$i++){if($array[$i]==$id) //如果$array数组中存在与$id相等的元素,说明该$id所对应的商品已经在购物车中{echo "<script>alert('该商品已经在您的购物车中!');history.back();</script>";exit;}}$_SESSION[producelist]=$_SESSION[producelist].$id."@"; //如果该商品不在购物车中,则将该商品的id值连接到session变量$producelist之后,并用“@”进行分割$_SESSION[quatity]=$_SESSION[quatity]."1@"; //同时将该商品的数量用“@”进行分割保存在session变量$quatity中,并将默认数量设置为1header("location:gouwu1.php"); //添加成功之后将该页定位到 gouwu1. php页面显示购物车中的内容>将商品添加至购物车的过程涉及到函数explode()、count()的用法,下面为这两个函数的描述:array explode(string separator,string str)此函数以字符串str中的子串separator作为分割符将字符串分割开来,分割后的一个或多个子串以数组的形式返回。
Ecshop_ajax应用

ecshop ajax应用例:点击购物按钮后立即更新购物车数量方案1、比如我们category.dwt 里有1.<a href='flow.php'><SPAN id='cart_count_all'>{insertname='cart_info'}</SPAN></A>复制代码同时此页面有1.<a onclick="javascript:addToCart_xaphp({$goods.goods_id});"style="cursor: pointer;">添加购物车</a复制代码我们现在需要实现点击按钮后页面不刷新去更新上面购物车数量2、首先我们需要调入系统1.{insert_scripts files='transport.js,utils.js'}复制代码这俩个js文件是有关ajax实现效果的类问题我们大可不去管只需要调入下来我们打开系统的common.js文件进行添加我们自己的添加购物车函数1.function addToCart_xaphp(goodsId, parentId)2.{3.var goods = new Object();4.var spec_arr = new Array();5.var fittings_arr = new Array();6.var number = 1;7.var formBuy = document.forms['ECS_FORMBUY'];8.var quick = 0;9.10.// 检查是否有商品规格11.12.goods.quick = quick;13.goods.spec = spec_arr;14.goods.goods_id = goodsId;15.goods.number = number;16.//goods.guige = guige;17.goods.parent = (typeof(parentId) == "undefined") ? 0 :parseInt(parentId);18.19.Ajax.call('flow.php?step=add_to_cart', 'goods=' +goods.toJSONString(), addToCartResponse_xaphp, 'POST', 'JSON');20.}复制代码解释;a.点击按钮首先执行这个函数获取我们的数据b. Ajax.call('flow.php?step=add_to_cart', 'goods=' +goods.toJSONString(), addToCartResponse_xaphp, 'POST', 'JSON'); 这是局部执行也就是无刷新执行flow.php?step=add_to+cart 同时把数据通过POST提交,有关json具体原理想研究的朋友可以去网上找资料。
- 1、下载文档前请自行甄别文档内容的完整性,平台不提供额外的编辑、内容补充、找答案等附加服务。
- 2、"仅部分预览"的文档,不可在线预览部分如存在完整性等问题,可反馈申请退款(可完整预览的文档不适用该条件!)。
- 3、如文档侵犯您的权益,请联系客服反馈,我们会尽快为您处理(人工客服工作时间:9:00-18:30)。
echsop 购物车实现淘宝ajax效果/viewthread.php?tid=109648&extra=page%3D2%26amp %3Bfilter%3Dtype%26amp%3Btypeid%3D16这几天做echsop改版,购物车想实现淘宝那样的效果,即点击购物车之后弹出对话框,显示购物车的商品件数和价格同时头部的购物车信息也一起更新具体见附件图片。
经过多方研究,终于得到答案,在此将代码分享,由于本人不会AJAX,所以如果不足之处还望指教,1 在goods.dwt页面增加弹出层的现实代码,我是写在商品数量的下面代码如下1.<div id="light" class="white_content">2.<table style="width:352px;">3.<tr>4.<td style="height:25px; border:none;padding-left:32px;padding-top:3px;" align="left">商品已经成功加入购物车!5.</td>6.<td align="right" style="padding-left:3px; border:none"> <ahref="javascript:void(0)" onFocus="this.blur()"onclick="document.getElementById('light').style.display='none';documen t.getElementById('fade').style.display='none'">7. </a>8.</td>9.</tr>10.<tr>11.<td colspan="2" style="border:none;">12.<div id="ECS_SHOWDIV" style=" clear:both;width:300px">13.</div>14.</td>15.</tr>16.<tr >17.<td ><a onFocus="this.blur()" href="flow.php">进入购物车</a>18.</td>19.<td>20.<a href="javascript:void(0)" onFocus="this.blur()"onclick="document.getElementById('light').style.display='none';document.getElementById('fade').style.display='none'">继续购物</a>21.</td>22.</tr>23.</table>24.</div>复制代码该效果使用图层实现的所以还要配合CSS一起使用,其中*html 和*+html是用来适应不同浏览器1.2..white_content { display: none; position: absolute; top: 100%;background-image:url(images/cart_info.gif); left: 60%;overflow:hidden; width: 352px; height: 101px; z-index:1002; }3.* html .white_content{ display: none; position: absolute; top: 105%;background-image:url(images/cart_info.gif); left: 60%;overflow:hidden; width: 352px; height: 101px; z-index:1002;}4.*+html .white_content { display: none; position: absolute; top: 95%;background-image:url(images/cart_info.gif); left: 60%;overflow:hidden; width: 352px; height: 101px; z-index:1002; }5. .white_content a{ text-decoration:none}复制代码2接下来修改common.js里面的函数addToCartResponse()主要是防止点击加入购物车之后直接跳入flow.php页面,我只是注释了部分跳转代码,然后新加了一个ajax.call 这里我把这个函数贴上去,改的不对,大家不要见笑1.function addToCartResponse(result)2.{3.4.Ajax.call('goods.php','act=recal&id=' + goodsId,callback, 'POST','JSON' );5.6.if (result.error > 0)7.{8.// 如果需要缺货登记,跳转9.if (result.error == 2)10.{11.if (confirm(result.message))12.{13.location.href = 'user.php?act=add_booking&id=' + result.goods_id;14.}15.}16.// 没选规格,弹出属性选择框17.else if (result.error == 6)18.{19.openSpeDiv(result.message, result.goods_id);20.}21.else22.{23.alert(result.message);24.}25.}26.else27.{28.29.var cartInfo = document.getElementById('ECS_CARTINFO');30.var cart_url = 'flow.php?step=cart';31.if (cartInfo)32.{33.cartInfo.innerHTML = result.content;34.}35.36.if (result.one_step_buy == '1')37.{38.location.href = cart_url;39.}40.else41.{42.43.switch(result.confirm_type)44.{45.case '1' :46.if (confirm(result.message));// location.href = cart_url;47.break;48.case '2' :49.if (!confirm(result.message));// location.href = cart_url;50.break;51.case '3' :52.//location.href = cart_url;53.break;54.default :55.56.break;57.}58.59.}60.61.}62.}复制代码3 然后添加自己的函数,有两个一个是用来响应上面ajax.call的,一个是用来控制dwt 页面层的显示1.2.function divshow()3.{4.document.getElementById('light').style.display='block';5.document.getElementById('fade').style.display='block';6.}7.function callback(res)8.{9.if (res.err_msg.length > 0)10.{11.alert(res.err_msg);12.}13.else14.{15.16.if (document.getElementById('ECS_SHOWDIV'))17.{18.document.getElementById('ECS_SHOWDIV').innerHTML = res.result;19.document.getElementById('ECS_SHOWDIV1').innerHTML = res.result;20.21.}22.23.}24.divshow();25.}复制代码4 然后在goods.php页面增加如下代码,主要是返回ajax刷新之后购物车的参数,即重新调用insert_cart_info函数重新计算,然后返回购物车最新信息1./*------------------------------------------------------ */2.//-- 点击购物按钮时改变购物车信息3./*------------------------------------------------------ */4.if (!empty($_REQUEST['act']) && $_REQUEST['act'] == 'recal')5.{6.include('includes/cls_json.php');7.8.$json = new JSON;9.$res = array('err_msg' => '');10.$res['result']=insert_cart_info();11.12.13.14.15.die($json->encode($res));16.17.}复制代码好了,我写的比较乱,大概就是这么几步,有想做的但我没写清楚的地方,可以来问我,呵呵cat.jpg (42.88 KB)购物车效果图1.gif (3.71 KB)头部购物车信息效果。