IT Client Manager Overview
HP Client Management Solutions用户指南说明书

Management and Printing User Guide© Copyright 2007 Hewlett-Packard Development Company, L.P.Windows is a U. S. registered trademark of Microsoft Corporation. Intel and Centrino are trademarks or registered trademarks of Intel Corporation or its subsidiaries in the United States and other countries.The information contained herein is subject to change without notice. The only warranties for HP products and services are set forth in the express warranty statements accompanying such products and services. Nothing herein should be construed as constituting an additional warranty. HP shall not be liable for technical or editorial errors or omissions contained herein.Second Edition: April 2007First Edition: March 2007Document Part Number: 443570-002Product noticeThis user guide describes features that are common to most models. Some features may not beavailable on your computer.ENWW iiiiv Product notice ENWWTable of contents1 Using Client Management SolutionsConfiguring and deploying a software image (2)Managing and updating software (2)HP Client Manager (2)HP OpenView Radia Management Solutions (select models only) (4)System Software Manager (5)2 Using Intel Active Management Technology (select models only)Enabling the iAMT solution (7)Using the MEBx setup utility menus (8)3 Using the Universal Print DriverIndex (10)ENWW vvi ENWW1Using Client Management Solutions Client Management Solutions provide standards-based solutions for managing client (user) desktop,workstation, notebook, and tablet computers in a networked environment.Client management includes the following key capabilities and features:●Initial software image deployment●Remote system software installation●Software management and updates●ROM updates●Tracking and security of computer assets (the hardware and software installed on the computer)●Fault notification and recovery of certain system software and hardware componentsNOTE:Support for specific features described in this section may vary, depending on computermodel and/or version of management software installed on the computer.ENWW1Configuring and deploying a software imageThe computer is shipped with a preinstalled system software image. The initial software image isconfigured during the first-time setup of the computer. After a brief software "unbundling" occurs, thecomputer is ready to be used.A customized software image can be deployed (distributed) in one of the following ways:●Installing additional software applications after unbundling the preinstalled software image●Using software deployment tools, such as Altiris Deployment Solutions, to replace the preinstalledsoftware with a customized software image●Using a disk-cloning process to copy the contents from one hard drive to anotherThe deployment method you use depends on your organization's technology environment andprocesses.NOTE:The HP Backup & Recovery Manager, Computer Setup utility, and other systemfeatures provide further assistance with configuration management and troubleshooting, powermanagement, and the recovery of system software.Managing and updating softwareHP provides several tools for managing and updating software on client computers:●HP Client Manager●HP OpenView Radia Management Solutions (select models only)●System Software ManagerHP Client ManagerHP Client Manager integrates Intelligent Manageability technology into Altiris software. HP ClientManager provides superior hardware management capabilities for HP devices:●Detailed views of hardware inventory for asset management●System Checkup monitoring and diagnostics●Web-accessible reporting of business-critical details such as thermal warnings and memory alerts●Remote updating of system software such as device drivers and the system BIOSNOTE:Additional functionality can be added when HP Client Manager is used with optionalAltiris Solutions software (purchased separately).2Chapter 1 Using Client Management Solutions ENWWWhen HP Client Manager (installed on a client computer) is used with Altiris Solutions software (installed on an administrator computer), HP Client Manager provides increased management functionality and centralized hardware management of HP client devices for the following IT life-cycle areas:●Inventory and asset management●Software license compliance●Computer tracking and reporting●Computer lease contract information and fixed asset tracking●System software deployment and migration●Windows® migration●System deployment●Personality (personal user settings) migration●Help desk and problem resolution●Management of help desk tickets●Remote troubleshooting●Remote problem resolution●Client disaster recovery●Software and operations management●Ongoing client management●HP system software deployment●Application self-healing (the ability to identify and repair certain application problems)Altiris Solutions software provides easy-to-use software distribution capabilities. HP Client Managerenables communication with the Altiris Solutions software, which can be used to complete new hardware deployment or personality migration to a new operating system using easy-to-follow wizards. HP Client Manager is available for download from the HP Web site.When Altiris Solutions software is used in conjunction with System Software Manager or HP ClientManager, administrators can also update the system BIOS and device driver software from a centralconsole.ENWW Managing and updating software3HP OpenView Radia Management Solutions (select models only) HP OpenView Radia Management Solutions automate the management of software such as operating systems, software, software updates, content, and configuration settings to ensure that each computer is maintained in the correct configuration. With these automated management solutions, you canmanage software throughout the life cycle of the computer.HP OpenView Radia Management Solutions enable you to perform the following tasks:●Collect hardware and software inventory across multiple platforms●Prepare a software package and conduct impact analysis prior to distribution●Target individual computers, workgroups, or entire populations of computers for deployment andmaintenance of software and content according to policies●Provision and manage operating systems, applications, and content on distributed computers fromany location●Integrate HP OpenView Radia Management Solutions with help desks and other systemmanagement tools for seamless operations●Leverage a common infrastructure for management of software and content on standard computingdevices across any network for all enterprise users●Scale to meet enterprise needs4Chapter 1 Using Client Management Solutions ENWWSystem Software ManagerSystem Software Manager (SSM) lets you remotely update system-level software on multiple systems simultaneously. When executed on a client computer, SSM detects versions of both hardware andsoftware, and then updates designated software from a central repository, known as a file store. Driver versions that are supported by SSM are denoted with a special icon on the HP driver download Website and on the Support Software CD. To download the SSM utility or to obtain more information onSSM, see the HP Web site at /go/ssm (English only).ENWW Managing and updating software52Using Intel Active ManagementTechnology (select models only)Intel® Active Management Technology (iAMT) allows discovery, repair, and protection of networkedcomputing assets. With iAMT, computers can be managed whether they are on or off. The iAMT solution is available on Intel Centrino® Pro computers.Features of iAMT include:●Hardware inventory information●Event notification●Power management●Remote diagnosis and repair●Hardware-based isolation and recovery—limit or cut off computer network access if virus-likeactivity is detected6Chapter 2 Using Intel Active Management Technology (select models only)ENWWEnabling the iAMT solutionTo configure iAMT settings:1.Turn on or restart the computer. If you are in Windows, click Start>Shut Down>Restart.2.When the monitor light turns green, press ctrl+P.NOTE:If you do not press ctrl+P at the appropriate time, you must repeat steps 1 and 2to access the MEBx utility.The MEBx setup utility opens. Use the arrow keys to navigate.3.Select the Intel ME Configuration, Intel AMT Configuration, or Change Intel ME Passwordmenu.4.Select Return to Previous Menu to return to the main menu.5.When you have made your selections, select Exit to close the MEBx setup utility.ENWW Enabling the iAMT solution7Using the MEBx setup utility menusNOTE:For an overview of Intel Pro technology for AMT, see the Intel Web site at/vpro.Intel ME Platform ConfigurationSelect To do thisIntel ME State Control Enable or disable the management engine.Intel ME Firmware Local Update Enable or disable local management of firmware updates.LAN Controller Enable or disable the integrated network controller.Intel ME Features Control Enable AMT or none.Intel ME Power Control Configure the management engine power policies.Intel AMT ConfigurationSelect To do thisHost Name Assign a host name to the computer.TCP/IP Assign an IP address, enable DHCP, or change the domainname.Un-Provision Reset the AMT configuration to factory defaults.VLAN Enable LAN virtualization support.SOL/IDE-R Enable remote boot and control sessions.Remote Firmware Update Enable or disable updating firmware remotely.Set PRTC Set the real-time clock.Change Intel ME Password8Chapter 2 Using Intel Active Management Technology (select models only)ENWW3Using the Universal Print DriverThe HP Universal Print Driver Series for Windows is a single intelligent driver that replaces individualdrivers for HP networked printers.NOTE:The HP Universal Print Driver is preinstalled on select HP computers.To print using the HP Universal Print Driver:1.Select File>Print from any application.2.Select HP Universal Print Driver from the list of printers.3.Click Print.4.Enter the printer's IP address or network path.NOTE:If you cannot identify the printer's IP address or network path, contact your ITadministrator for help.5.Select the Make a permanent instance of this printer in my Printers folder check box.6.Click Print.For more information on downloading and using the HP Universal Print Driver, see the HP Web siteat /go/universalprintdriver (English only).ENWW9IndexAActive Management Technology,Intel6Altiris Deployment Solutions2CClient Manager software2Computer Setup utility2Ddeployment, software2HHP OpenView Radia ManagementSolutions2, 4HP Universal Print Driver,using9Iimage, computer2Intel Centrino Pro technology8Ssoftwaredeployment2recovery2updates2System Software Manager5Uupdates, software2WWeb sitesHP Universal Print Driver9Intel Centrino Pro6Intel Pro technology forAMT8System Software Manager510Index ENWW。
装饰施工图报审流程

装饰施工图报审流程The process of submitting and obtaining approval for construction decoration drawings can be a complex and time-consuming task. It involves multiple steps and requires coordination between various stakeholders. The following paragraphs will provide an overview of the process from different perspectives, including that of the designer, the regulatory authority, the client, the contractor, and the project manager.From the perspective of the designer, the process of submitting decoration construction drawings for approval can be both exciting and challenging. It is an opportunity to see their creative vision come to life, but it also requires careful attention to detail and compliance with building codes and regulations. The designer must ensure that the drawings accurately reflect the intended design, while also meeting the requirements of the local regulatory authority. This may involve making revisions to the drawings based on feedback from the authority, which can bea time-consuming process.From the perspective of the regulatory authority, the review and approval of decoration construction drawings is an important responsibility. The authority must ensure that the proposed design complies with building codes and regulations to ensure the safety and integrity of the structure. This may involve a thorough review of the drawings, as well as coordination with other departments or agencies to address specific concerns. The authority may also require additional documentation or information from the designer or client to support the approval process.From the perspective of the client, the approval of decoration construction drawings is a critical milestone in the project timeline. It represents progress towards the realization of their vision for the space, and the client may be eager to see the project move forward. Delays in the approval process can be frustrating for the client, as they may be anxious to begin construction and see their design come to life. Effective communication between the client, designer, and regulatory authority is essential to manageexpectations and keep the client informed throughout the approval process.From the perspective of the contractor, the approval of decoration construction drawings is an important step in preparing for the construction phase. It allows the contractor to review the approved drawings and develop a detailed plan for executing the design. Delays in the approval process can impact the contractor's schedule and may require adjustments to the construction timeline. Effective coordination between the designer, client, and regulatory authority is essential to ensure a smooth transition from approval to construction.From the perspective of the project manager, the approval of decoration construction drawings is a critical aspect of project planning and execution. It represents a key milestone in the project timeline and may have implications for the overall schedule and budget. The project manager must coordinate the submission of the drawings, track the approval process, and communicate with all stakeholders to ensure that the project stays on track.Delays in the approval process may require adjustments to the project schedule and may impact other aspects of the project, such as procurement and resource allocation.In conclusion, the process of submitting and obtaining approval for decoration construction drawings is a complex and multi-faceted task that requires coordination and collaboration between multiple stakeholders. From the perspective of the designer, regulatory authority, client, contractor, and project manager, the approval process represents a critical milestone in the project timeline and requires careful attention to detail, effective communication, and proactive management to ensure a successful outcome. By understanding and addressing the perspectives of all stakeholders, the approval process can be managed effectively to support the realization of the design vision and the successful execution of the construction project.。
Alcatel-Lucent ENUM Manager 1.1释版说明说明书
V ITAL QIP®ENUM M ANAGER 1.1 R ELEASE N OTESTable of Contents1.Introduction (3)1.1.R ELEASE I NFORMATION (3)1.1.1.Electronic Availability (3)1.2.R ELEASE N OTES O VERVIEW (4)2.Installation Requirements (4)2.1.S UPPORTED P LATFORMS (4)2.2.S OFTWARE R EQUIREMENTS (4)2.3.S YSTEM R EQUIREMENTS (5)2.4.P RE-I NSTALLATION R EQUIREMENTS (5)3.Release Description (5)3.1.N EW F EATURES (5)3.1.1.Certification of ENUM Manager with VitalQIP 7.0 (5)3.2.P RODUCT C HANGES (6)3.2.1.Changes to the installation (6)3.2.2.New script to Set Environment Variables for CLIs on Windows (6)3.3.R ESOLVED C USTOMER P ROBLEMS (6)3.4.K NOWN I SSUES (7)4.Documentation (10)4.1.D OCUMENTATION C HANGE (10)4.1.1.Installing ENUM Manager (11)4.1.2.Issuing CLI commands (12)5.Installing ENUM Manager 1.1 (12)5.1.O BTAINING I NSTALLATION F ILES (12)5.2.I NSTALLING ENUM M ANAGER 1.1 (13)5.2.1.Pre-installation Requirement (13)5.2.2.Installation Instructions for Solaris (13)5.2.3.Installation Instructions for Windows (13)6.Uninstalling ENUM Manager 1.1 (14)6.1.1.Uninstall (14)7.Supporting Information (14)7.1.G LOSSARY-A CRONYMS AND D EFINITIONS (14)1.I NTRODUCTION1.1.Release InformationENUM Manager 1.1 was released in December, 2006.1.1.1.E LECTRONIC A VAILABILITYENUM Manager 1.1 installation files are available for download via LED (Lucent Electronic Delivery) services. LED uses secure HTTP and FTP to download files and documentation. In order to use LED, you must be registered with Alcatel-Lucent Global Support.If you are not registered with Alcatel-Lucent Global Support, visithttps:///release/SPRegistrantTypeSvlt. If you need assistance in registering, contact the Alcatel-Lucent Customer Support Services at:Inside the United States: 866-237-4448, prompt 7Outside the United States 630-218-7688You must have SSH installed and configured before downloading installation files. For more information about setting up secure FTP, visit https:///cgi-bin/ssh_ftp.cgi. After you have set up secure FTP, you can connect via secure FTP and access the Product|Version|Platform directory to download the product’s files. To download the product via secure HTTP, follow these steps:1.If you have not registered, register at https:///release/SPRegistrantTypeSvlt.2.Open a browser and go to https:///portal/olcsHome.do.3.Log in with your user name and password. The Customer Center is displayed4.From the Customer Support menu, select Documentation and Downloads.5.Click Product index. The Alphabetical listing is displayed.6.Click U-Z.7.Under V, click on VitalQIP®.8.Under Documentation and Downloads, click Downloads: Electronic Delivery.9.Click Next.10.Select the product.11.Click Next.12.Select the appropriate platform.13. Select the file to download. 14. Click Next .15. Specify the download directory on your local machine. 16. Click Download .1.2. Release Notes OverviewThis document provides important information about the contents of ENUM Manager 1.1. This document is intended to be cumulative. It covers new and enhanced features, system requirements, productinstallation and upgrades, and known issues. The document is intended to be read by all customers who plan on or are using ENUM Manager 1.1. Please read this document carefully and completely before installing and using ENUM Manager 1.1.Important! The content of this document is cumulative: it contains information already published tosupport previous builds. Resolved customer issues, for example, are organized by the build in which the fix occurred.2. I NSTALLATION R EQUIREMENTS2.1.Supported PlatformsENUM ServerWindows 2003 Enterprise (32 bit only)Solaris 92.2. Software RequirementsThe section lists the software requirements for ENUM Manager 1.1. Please note if you are not currently running on the supported platform version, you are strongly encouraged to upgrade to the supported version.Platform Software Package Version VitalQIP 7.0 Lucent DNS 4.0 ENUM Manager 1.1 Perl 5.6.x or laterOracle10gR2 Enterprise Edition 10gR2 Standard EditionSybase 15Windows 2003 Solaris 10 (Sparc)Axis 1.2.12.3.System RequirementsComponent Windows SolarisENUM Server 1GHz Pentium processor 500 MHz processor512 MB memory; more is strongly recommended 512 MB memory; more is strongly recommended160 MB disk space 160 MB disk space2.4.Pre-Installation RequirementsVitalQIP 7.0 B460 is a prerequisite for ENUM Manager 1.1. Therefore, all VitalQIP prerequisites apply to ENUM.3.R ELEASE D ESCRIPTIONVitalQIP® ENUM Manager is a centralized management solution enabling administration of ENUM domains and Naming Authority Pointer (NAPTR) records in VitalQIP and the Lucent DNS server. ENUM Manager provides the ability to update Lucent DNS servers with ENUM information. Lucent’s DNS server resolves queries for E.164 domain names to a URI.ENUM Manager 1.1 includes the northbound interface (known as the VitalQIP Web Service), which is a SOAP-based web service that enables SOAP clients to add, update, delete and retrieve NAPTR records. The VitalQIP Web Service works in asynchronous and synchronous modes. In synchronous mode, the VitalQIP Web Service client waits until the Web Service has completed processing the request and then receives the result of the operation. In asynchronous mode, the northbound system (the Web Service client) just waits for an immediate synchronous acknowledgement. Later, an asynchronous response is returned.ENUM Manager 1.1 is a maintenance release that addresses the issues listed in section 3.2.2.3.1.New Features3.1.1.C ERTIFICATION OF ENUM M ANAGER WITH V ITAL QIP7.0Feature ID/Abstract: Product certification with VitalQIP 7.0Description: ENUM Manager was certified for use with VitalQIP 7.0.Release Introduced: 1.1Feature Impacts:Actions Required:3.2.Product Changes3.2.1.C HANGES TO THE INSTALLATIONFeatureID/Abstract:Additional fields to the Port and Perl Information screenDescription: The installation collects the ports to be used by the NB Web Service and Tomcat WS. The Port and Perl Information screen has two additional fields that collect this information. ReleaseIntroduced:1.1Feature Impacts: The ENUM Manager installation.Actions Required: Changes occurred to the ENUM Manager 1.0 User’s Guide. See section 4.1.1 of thisdocument for more information.3.2.2.N EW SCRIPT TO S ET E NVIRONMENT V ARIABLES FOR CLI S ON W INDOWSFeatureID/Abstract:Script to set environment variables on WindowDescription: The SetEnv.Bat script was added to ENUM. The script sets environment variables needed for the CLI commands to run on Windows.ReleaseIntroduced:1.1Feature Impacts: CLI commandsActions Required: Changes occurred to the ENUM Manager 1.0 User’s Guide. See section 4.1.2 of thisdocument for more information.3.3.Resolved Customer ProblemsDefect Number ARNumberAbstract Release FixedVQIP00009808 CNAME can be added with the same name as a NAPTRRR and no warning message VitalQIP 6.2 B40VQIP000ENUM09815 qip-splitmergeenum splits ENUM domains and assignswrong parent ID VitalQIP 6.2 B40VQIP00009817 CNAME same as NAPTR error not thrown if CNAMEentered in domain RR tab where CNAME would notreside VitalQIP 6.2 B40ENUM00000118 N/A Delete operation does not add a trailing dot (“.”) to theDomainName or Replacement fields if missing, in orderto match existing naptr.ENUM 1.0 B16ENUM00000123 Add WebService port information to Documentation ENUM 1.0 P2Release Notes.Refer to section4.1.ENUM00000128 1-1348361 VitalQIP northbound interface requires !^*$! in regularexpression for delete. ENUM 1.0 P2 B16Defect Number ARNumberAbstract Release FixedENUM00000129 Make ENUM Manager Patch Backward Compatible(change it to ignore a dot sent in the Replacement fieldfor an Update or Delete operation, if theRegularExpression field is populated.). ENUM 1.0 P2 B16ENUM00000130 ENUM patch script does not extract enm.jar into classesdirectory. ENUM 1.0 P2 B16 Release Notes. Refer to section 5.2.2, and section 5.2.3.ENUM00000131 enum-patch.sh northbound install/patch script may notkeep the original enum.properties settings. ENUM 1.0 P2 B16 Release Notes. Refer to section 5.2.2, and section 5.2.3.3.4.Known IssuesThe following table includes a list of known issues that have been identified as customer impacting and/or outstanding customer problems not yet resolved.Defect Number AR No. Abstract ReleaseIdentifiedWork AroundENUM00000070 N/A Pathsinenum.propertiesmust includedoublebackslashes forWindows. 1.0 Change the ENUMHOME andLog4jConfigFile values in the%ENUMHOME\defaultroot\conf\enum.propertie s file to include doublebackslashes.For example, ifENUMHOME=e:\g62\enum, changethe entries appear as follows:ENUMHOME=e:\\q62\\enumLog4jConfigFile=e:\\q62\\enum\\defaultroot\\conf\\enum_log4jIdentifiedENUM00000073 N/A Installationfailsto report Sybasedatabase indexcreation failure. 1.0 Ensure that Sybase is installed correctlywith the logical page size set to 8K.After a successful ENUM installationwhere the database has been initialized,check the $ENUMHOME/log directory forthe following files:index.errindex.outsp.errsp.outtable.errtable.outtrigger.errtrigger.outInspect the contents of each file forpossible errors, and take appropriateaction. A sample error from the index.outfile is as follows:Rebuilding pk_naptr_rrsInstalling uk1_naptr_rrs ...Msg 1903, Level 16, State 1:Server 'QA2K3E82', Line 1:600 is the maximum allowablesize of an index. Compositeindex specified is 1034 bytes.Installing idx1_naptr_rrs ...Installing idx2_naptr_rrsThis error indicates the Sybase logicalpage size is not set to the recommendedsize of 8K. Please upgrade your Sybaseinstallation to match VitalQIP 6.2recommendations (refer to the VitalQIP6.2 Installation Guide), and re-installENUM Manager.ENUM00000091 N/A Class value fromenum.propertiesnot being used.All RRs arealways added asIN, regardless ofthe value of Classin theenum.propertiesfile.1.0 Patch 1 None.ENUM00000110 N/A NB_Server_log4j.properties file isinstalled withread onlypermissions andlogging level setto DEBUG. 1.0 Patch 1 After installation, as root, changedirectory to $ENUMHOME/axis/conf andchange the permissions on theNB_Server_log4j.properties to allow writepermission to at least the root user. Editthe file and change the logging levels toWARN or INFO as desired. The currentsetting of DEBUG generates detailedlogs and impacts performance of the WebService (northbound interface).IdentifiedENUM00000113 N/A Invalidnameused for creatingerror file fornorthboundinterface. Thisissue is specificto Windowsenvironment.1.0 Patch 1 None.ENUM00000114 N/A Delete does notwork fromsetnaptr CLI orfrom northboundinterface in casewhere Servicesfield is enclosedin double quotes. 1.0 Patch 1 Use requests where the value for theServices field is not enclosed in doublequotes.ENUM00000119 N/A Quotesnotstripped fromaround theSubscriberIDfield withNorthboundSOAP interface. 1.0 Patch 1 Do not use quotes around theSubscriberID field.ENUM00000121 N/A Replacementfield should becase-Insensitive.1.0 Patch 1 None.ENUM00000125 1-1329718 Unable to log intoENUM managerafter closingxterm due toTomcat servicesexit. 1.0 Patch 1 Use ksh to run the startup.sh script, asfollows:kshSHELL=/usr/bin/kshexport SHELLcd $ENUMHOME/etc. ./shrcENUM00000127 1-1342651 SOAPintefacereturns JavaexceptionNullpointerexception error ifthe parametersasyncInd,SendMultipleErrors orasynData are notpresent in theAddDelUpdRequest message.1.0 Patch 1 Include all necessary parameters.Identified ENUM00000143Windows Northbound installation installs/uses a copy ofenum.properties in%ENUMHOME %\axis\conf,while Unix uses a link to$ENUMHOME/d efaultroot/conf/en um.properties1.0 Patch 2None. Note that both enum.properties files should be kept in sync.VQIP00010098 N/ADynamic updates of NAPTR RRs may change the value of the RegularExpression field of the resource record RDATA, when there are backslashes (escaped characters) present in the field.1.0 Patch 1 For the northbound interface: 1. Turn off dynamic updates in theenum.properties file (setDDNSU_NB=false ), and then push to the DNS server when updates from the northbound interface are complete. 2. Follow similar steps for updatesfrom the GUI and CLI.VQIP00011457 1-1393032 Dynamic updates for naptr records from the ENUM GUI do not work if theorganization is not the default organization.1.0 Patch 1Use the default organization or create the same or necessary infrastructure in the default organization. A fix is scheduled for VitalQIP 6.2 B44.4. D OCUMENTATIONThe following table lists the documents that comprise the documentation set for ENUM Manager 1.1.GuidePart NumberDescriptionENUM Manager 1.0 User’s Guide 190-409-067R6.2This guide describes how to install and use ENUM Manager.4.1. Documentation ChangeThe documentation change applied in this section was made as a result of changes to ENUM Manager 1.1 installation. When possible, text from the document is used in this chapter. Any changes to the original text are shown; this change replaces the original text in the documentation. Documentation changes apply to the ENUM Manager 1.0 User’s Guide .4.1.1.I NSTALLING ENUM M ANAGEROn pages 7 and 8, the screen has changed in Step 12 and the directions have changed in Step 13. The following screen and test replace Steps 12 – 3:12. Click Next to continue. The Port and Perl Information screen opens.If you continue scrolling down, the screen looks as follows.13. If needed, change the HTTP Port, JK2 Connector Port (Apache server port), NB WebService Port,Tomcat GUI Shutdown Port, Tomcat WS Shutdown Port, and Path to Perl Executable.4.1.2.I SSUING CLI COMMANDSThe addition of the SetEnv.bat script required that the following section be added:Windows only. Set the environment variablesWhen running CLI commands on Windows, the following script must be ENUMHOME environment variable must be set. To do so:1.Open a command prompt. From the Start menu, select Run, type cmd, and click OK.2.Change the directory to where ENUM is installed. Execute:cd <path to the directory where ENUM is installed>3.Set the environment variables needed to run CLIcommands. Execute:SetEnv.bat4.Execute cli.bat with options. For more information, see the ENUM Manager User’s Guide.5.I NSTALLING ENUM M ANAGER 1.1The following sections include information on installing ENUM Manager 1.1. To install ENUM Manager 1.1, you need to have already installed VitalQIP 7.0, as described in VitalQIP 7.0 Install Guide.5.1.Obtaining Installation FilesTo obtain ENUM Manager software and documentation, contact technical support. Before installing any additional products, contact your sales representative to obtain a license key. If you encounter problems during the installation: contact technical support for assistance:For North America customers: 1-866-LUCENT8 (582-3688)For European and China technical support: 00 800 00 LUCENT or +353 1 692 4579For Central and South America support:o Mexico: 01 800 123 8705 or (52) 55 5278 7235o Brazil: 0800 89 19325 or (55) 193707 7900o Argentina************o Venezuela************o Costa Rica: 0800-012-2222 or 1800 58 58877Important! For other local CALA numbers, consult the web site http://www.alcatel-/support or contact your local sales representative.For Asia Pacific technical support:o1800-458-236 (toll free from within Australia)o(IDD) 800-5823-6888 (toll free from Asia Pacific - Hong Kong, Indonesia, South Korea, Malaysia, New Zealand, Philippines, Singapore, Taiwan, and Thailand)o(613) 9614-8530 (toll call from any country)5.2.Installing ENUM Manager 1.15.2.1.P RE-INSTALLATION R EQUIREMENTEnsure VitalQIP 7.0 is installed.5.2.2.I NSTALLATION I NSTRUCTIONS FOR S OLARISPerform the following steps as root:1.Copy enum11SetupSolaris.bin to the machine..2.Shutdown the ENUM Manager application (if running) by executing:$ENUMHOME/etc/shutdown.sh3.Begin the installation by executing:./enum11SetupSolaris.bin4.Follow the on-screen prompts.5.Verify $ENUMHOME/defaultroot/conf/enum.properties parameters are correct (for example, verifythe setting of the DDNSU_NB and DDNSU_CLI parameters). Make any necessary updates.6.Start the ENUM Manager application by executing:$ENUMHOME/etc/startup.sh5.2.3.I NSTALLATION I NSTRUCTIONS FOR W INDOWSTo run the Windows install:1.Copy enum11setupwin32.exe to the machine.2.Shutdown the ENUM Manager application (if running) from the Windows Services Controller.3.Begin the installation by executing:enum11setupwin32.exe4.Follow the on-screen prompts.5.Verify %ENUMHOME%\defaultroot\conf\enum.properties parameters are correct (for example,verify the setting of the DDNSU_NB and DDNSU_CLI parameters). Make any necessary updates.6.Start the ENUM Manager application from the Windows Services Controller. ( You can alsomanually add the ENUM Manager Services to the VitalQIP Services Controller)6.U NINSTALLING ENUM M ANAGER 1.16.1.1.U NINSTALL1.Stop all ENUM Manager services.2.Run the uninstaller program, as described in “Uninstalling ENUM Manager” in Chapter 1 of theVitalQIP ENUM Manager 1.0 User’s Guide.7.S UPPORTING I NFORMATION7.1.Glossary- Acronyms and DefinitionsDNS Acronym for Domain Name ServiceENUM Acronym for t E lephone NU mber M appingLED Acronym for Lucent Electronic DeliveryNAPTR Acronym and DNS type for N aming A uthority P oin T e RRFC Acronym for Request for CommentSOAP Acronym for Simple Object Access ProtocolSSH Acronym for Secure Shell ProtocolURI Acronym for Uniform Resource Identifier or Universal Resource Identifier。
工作综述 英文
工作综述英文以下是几篇工作综述的英文版示例,你可以根据自己的需要进行适当修改和调整。
Example 1:Job Overview: This report provides an overview of my work as a project manager. It includes project planning, team management, and stakeholder communication.I have successfully delivered multiple projects on time and within budget, while ensuring client satisfaction.Example 2:Work Summary: During my time as a sales representative, I was responsible for generating leads, building relationships with clients, and closing deals. I consistently met or exceeded monthly sales targets, and was recognized for my outstanding performance.Example 3:Professional Summary: As an account executive, I managed a portfolio of clients, providing exceptional customer service and developing strategic marketing plans.I协作with cross-functional teams to ensure client needs were met and projects were delivered successfully.Example 4:Career Overview: My career has focused on software development, with expertise in programming languages such as Java and Python. I have worked on various projects, ranging from web applications to mobile apps, and have gained valuable experience in Agile methodologies.Example 5:Job Summary Report: This report summarizes my work as a data analyst. I collected and analyzed large datasets, identified trends, and provided actionable insights to support business decisions. I also developed dashboards and reports to visualize data for stakeholders.希望以上示例对你有所帮助!。
用友NMC使用说明
功能概述 ......................................................................................... 33 参数 ................................................................................................. 33 详细功能介绍.................................................................................. 35 第八章:客户端监控 ..................................................................................................... 37
功能概述 ......................................................................................... 18 参数 ................................................................................................. 18 详细功能介绍.................................................................................. 20 第六章:线程监控......................................................................................................... 25
ClientManager 与 CM 数据库工具包说明书
/n
/s
CM
CM
/p
CM
CM
CM
/t
2880
0
3
/f
0 1
14-16
(CMAltClr)
CM
CM
CM ()
CMAltClr /m ClientID /t AlertType [/s ManagerName] [/p PortNo] CMAltClr / ClientID /t AlertType [/s ManagerName] [/p PortNo]
14.7
CmQuery
SQL
1
CMQUERY [/S Manager] [/P Port]
{ /Q QueryName | /QI QueryID | /SELECT SQL} [/F FileName] [/A]
[]
{}
/S Manager /P Port /Q QueryName
/QI QueryID /SELECT SQL
Oracle SQLServer
CM
14-32
/DB DataBaseName
/DU UserName /DP Password /M MachineID /F FileName
CM Oracle
/F ID /M
NNNNNNNN
ID
8
ID
SQLServer ID
NNNNNNNN : N
N [0xXXXXXXXX][ 0xXXXXXXXX]
(PowerOff.exe) OS (CMLogoff.exe)
/m
PowerOn.exe
/g /i IP
/n
/m
PowerOff.exe
GE Energy Infinity D DC能源系统概述说明书
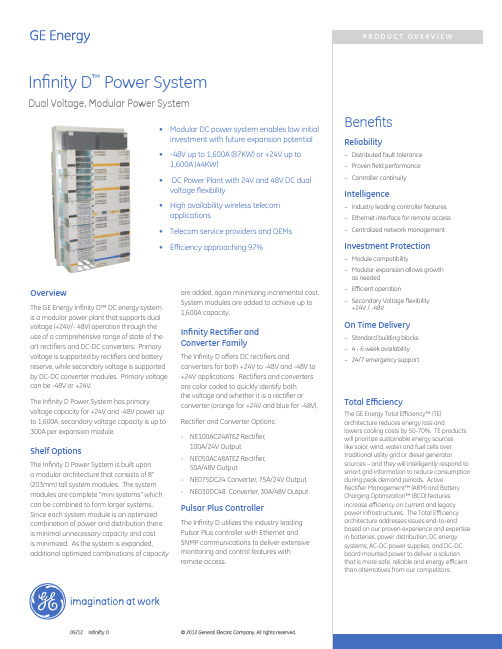
OverviewThe GE Energy Infinity D™ DC energy system is a modular power plant that supports dual voltage (+24V/- 48V) operation through the use of a comprehensive range of state of the art rectifiers and DC-DC converters. Primary voltage is supported by rectifiers and battery reserve, while secondary voltage is supported by DC-DC converter modules. Primary voltage can be -48V or +24V.The Infinity D Power System has primary voltage capacity for +24V and -48V power up to 1,600A; secondary voltage capacity is up to 300A per expansion module.Shelf OptionsThe Infinity D Power System is built upon a modular architecture that consists of 8” (203mm) tall system modules. The system modules are complete “mini systems” which can be combined to form larger systems. Since each system module is an optimized combination of power and distribution there is minimal unnecessary capacity and cost is minimized. As the system is expanded,additional optimized combinations of capacityare added, again minimizing incremental cost. System modules are added to achieve up to 1,600A capacity.Infinity Rectifier and Converter FamilyThe Infinity D offers DC rectifiers andconverters for both +24V to -48V and -48V to +24V applications. Rectifiers and converters are color coded to quickly identify both the voltage and whether it is a rectifier or converter (orange for +24V and blue for -48V).Rectifier and Converter Options:- NE100AC24ATEZ Rectifier, 100A/24V Output - NE050AC48ATEZ Rectifier, 50A/48V Output- NE075DC24 Converter, 75A/24V Output - NE030DC48 Converter, 30A/48V OutputPulsar Plus ControllerThe Infinity D utilizes the industry leading Pulsar Plus controller with Ethernet and SNMP communications to deliver extensive monitoring and control features with remote access.• Modular DC power system enables low initial investment with future expansion potential •-48V up to 1,600A (87KW) or +24V up to 1,600A (44KW)• DC Power Plant with 24V and 48V DC dual voltage flexibility • High availability wireless telecom applications • Telecom service providers and OEMs • Efficiency approaching 97%Infinity D ™ Power SystemDual Voltage, Modular Power SystemInfinity Rectifiers and ConvertersApplicationsKey FeaturesSpecifications• Compact – 1RU form factor providing high power density (24 W/in3)• Dual Voltage compatibility – the unique connector pin designation allows the rectifier to be used in a “universal” power shelf, alongside rectifiers or DC-DC converters with different output voltages.• Plug and Play – installation of the rectifier in a shelf connected to a compatible system controller initializes all set up parameters automatically. No adjustments are needed.• Extended service life – parallel operation with automatic load sharing ensures that parallel units are not unduly stressed even when a unit fails or is removed.• Monitoring / control – the built in microprocessor controls and monitors all critical rectifier functions and communicates with the system controller using the built in Galaxy Protocol serial interface. • Fail safe performance – hot insertion capabilities allow for converter replacement without system shutdown; soft start and inrush current protection prevent nuisance tripping of upstream breakers.• Telecommunications networks • Digital subscriber line (DSL)• Indoor/outdoor wireless• Routers/switches • Fiber in the loop • Transmission• Data networks • PBX• Extended temperature range • Redundant fan cooling • Front panel LED indicators• 1U height, hi power density • 220/110V AC input • Digital load sharing• Hot pluggable •RoHS compliantPulsar Plus ControllerApplications Key Features The Pulsar Plus family of controllers providessystem monitoring and control features forInfinity, CP, and other power systems. Thesecontrollers monitor and control systemcomponents including rectifiers, converters,and distribution modules via a multi-dropRS485 digital communications bus. Systemstatus, parameters, settings, and alarmthresholds can be viewed and configuredfrom the controller’s front panel display.Assignment and configuration of alarminputs and output relays can be performedfrom a laptop computer connected to alocal RS-232 or Ethernet port, or by remoteaccess is through a network connection to theWorld Wide Web (internet) or your enterprisenetwork (intranet). An optional modem is alsoavailable.This controller utilizes standard networkmanagement protocols allowing for advancednetwork supervision. The GE Energy GalaxyManager™ software is the centralized visibilityand control component of a comprehensivepower management system designed to meetengineering, operations and maintenanceneeds. The Galaxy Manager client-serverarchitecture enables remote access to systemcontrollers across the power network.• Telecommunications networks • Digital subscriber line (DSL) • Indoor/outdoor wireless • Routers/switches• Fiber in the loop• Transmission• Data networks• PBXRemote Access and Features• Integrated 10/100Base-T Ethernet Network - TCP/IP- SNMP V2c for management- SMTP for email- Telnet for command line interface- DHCP for plug-n-play- FTP for rapid backup and upgrades- HTTP for standard web pagesand browsers- Compatible with Galaxy Managerand other management packages - Shielded RJ-45 interface referencedto chassis ground• Password protected security levels: User, Super-User, Administrator for all access • Ground-referenced RS232 system port • ANSI T1.317 command-line interface• Modem access support- Remote via external modem- Callback security• EasyView2, Windows-based GUI software for local terminal or Modem access Standard System Features• Monitor and control of more than 40connected devices- Robust RS485 system bus• Standard and user defined alarms- Alarm test- Assignable alarm severity: Critical,Major, Minor, Warning, and record-only- 10 alarm relays (7 user assigned)• Rectifier management features- Automatic rectifier restart- Active Rectifier ManagementARM (energy efficiency)- Remote rectifier (on/off)- Reserve Operation- Automatic rectifier sequence control- N + X redundancy check• Multiple Low Voltage Load and Low VoltageBattery Disconnect thresholds• Configuration, statistics, and history- All stored in non-volatile memory- Remote/local backup and restore ofconfiguration data• Industry standard defaults- Customer specific configurationsavailable• Remote/ local software upgrade• Basic, busy hour, and trend statistics• Detailed event history• User defined events and derived channelsStandard Battery Management Features• Float/boost mode control- Manual boost- Manual timed boost locally, T1.317,and remotely initiated- Auto boost terminated by time orcurrent• Battery discharge testing- Manual (local/remote)- Periodic- Plant Battery Test (PBT) input driven- Configurable threshold or 20%algorithm- Graphical discharge data- Rectifiers on-line during test• Slope thermal compensation- High temperature- Low temperature- Step temperature- STC Enable/Disable, low temperatureEnable/Disable- Configurable mV/°C slopes• State of charge indication• High temperature disconnect setting• Reserve-time prediction• Recharge current limit•Emergency Power-Off input Integrated Monitoring Inputs/Outputs• System plant voltage (accuracy ±0.5%, resolution 0.01V)• One system shunt (accuracy ± 0.5% full scale, resolution 1A) - Battery or load- Mounted in the return side of DC bus• Up to 15 binary inputs- Six inputs close/open to battery- 9 input close/open to return- User assignable• Up to 7 Form-C output alarms (60VDC @ .5A)- User assignable• 1-Wire™ bus devices- Up to 16 temperature probes (QS873)- Up to 6 mid-string monitors (ES771) Galaxy Manager Compatible• Centralized web server and database with multiple user access to live or managed data with drill down to problem details• Monitor and control of more than 40 connected devices• Management information from polling or alarms received from alarm traps from multiple sites are available on one screen via the inter/ intranet• Trend user selected data over time• Automatic or manual report generation• Standard engineering tools like reserve time calculators and cablevoltage drop analyzerDual Voltage, Modular Power SystemFeaturesInfinity-D may be configured as a +24V or -48V single voltage power system or as a “dual voltage” power system that supports rectifiers and converters. The primary voltage is supported by +24V or -48V rectifiers and battery reserve, while secondary voltage is supported by DC/DC converters. The primary voltage capacity is 1,600A at both 24V and 48V. Secondary voltage capacity is up to 300A per system expansion module.Infinity-D systems may be equipped in 19”, 23” or 26” wide 7ftframeworks, a half height frame for mounting on battery stands, or supplied frameless for field install applications including outside cabinets.• Infinity Rectifiers for +24V and -48V applications. • Modular architecture for easy growth and low cost • DC/DC converter support for dual voltage systems• DC distribution in each system module for efficient scalability • Temperature hardened harsh environments. (-40°C to +75°C) • Compact size: 8” (203mm) high, 16.9” (429mm) deep. • Adjustable frame mounting for 19”, 23” and 26” applications • Battery panel for battery connection and LVBD option.• Plug-N-Play Pulsar Plus controller with Web based interface for local and remote (CO-LAN) access. • Distribution options include 3A-400A bullet style circuit breakers and GMT fusesOrdering Information – Infinity D Power SystemStep 1: Select the Base Power BaysStep 1: Select the Base Power Bays (cont.)Step 1: Select the Base Power Bays (cont.)Step 2: Select Mounting Frame & Battery TraysNote: Small systems above are configured WITHOUT a mounting frame to facilitate use in cabinets or frames. Large systems come pre-mounted in a 7ft relay rack frame. The following frame options are available for the small systems.Ordering Code DescriptionCC8488289387ft high relay rack for mounting 23” wide equipment (Zone 4 to 1800 lbs.)CC8488521867ft high relay rack for mounting 19” wide equipment (Zone 4 to 1800 Lbs.)84875113242” high relay rack for mounting 23” wide equipment on a ½ height battery stand or battery stackStep 3: Select any Power System expansion shelvesStep 4: Select Rectifiers and ConvertersStep 5: Select Alarm CablesStep 6: Select Distribution ComponentsNote: Infinity D shelves each support 10 plug-in (bullet style) breakers or fuse modules. To minimize the cost of surplus material, the cable termination adapters are supplied separately. These are listed below (on top of Page 16) and must be selected and ordered to match the breakers to be installed. On the 5 pole, 400A breaker the adapter is supplied attached to the breaker, so it does not have to be ordered separately.Step 6: Select Distribution Components (cont.)Step 6: Select Distribution Components (cont.)Step 7: Select Battery MonitoringProduct DocumentationH2007001: Ordering GuideA copy of the appropriate installation manuals below ship with each 848845223: Infinity D Installation Manual (+24V Rectifier Systems, -48V Converters)CC848853515: Infinity D Installation Manual (-48V Rectifier Systems, +24V Converters)CC848864834: Infinity D Single Shelf Power Plant Installation Guide (+24V and -48V Systems)CC848862433:Infinity D Stand Alone Converter Plant Installation Guide (+24V to -48V System)Shelf SpecificationsAdditional InformationNotes: .................................................................................................................................................................................................................................................................................................................... .................................................................................................................................................................................................................................................................................................................... .................................................................................................................................................................................................................................................................................................................... .................................................................................................................................................................................................................................................................................................................... .................................................................................................................................................................................................................................................................................................................... .................................................................................................................................................................................................................................................................................................................... .................................................................................................................................................................................................................................................................................................................... .................................................................................................................................................................................................................................................................................................................... .................................................................................................................................................................................................................................................................................................................... .................................................................................................................................................................................................................................................................................................................... .................................................................................................................................................................................................................................................................................................................... .................................................................................................................................................................................................................................................................................................................... .................................................................................................................................................................................................................................................................................................................... .................................................................................................................................................................................................................................................................................................................... .................................................................................................................................................................................................................................................................................................................... .................................................................................................................................................................................................................................................................................................................... .................................................................................................................................................................................................................................................................................................................... ....................................................................................................................................................................................................................................................................................................................Management VisibilityGalaxy Manager™ software is the centralized visibility and control component of a comprehensive power management system designed to meet engineering, operations and maintenance needs. The Galaxy Manager client-server architecture enables remote access to system controllers across the power network.• Dashboard display with one-click access to management information database• Trend analysis• Scheduled or on demand reports• Fault, configuration, asset, and performance management TrainingGE Energy offers on-site and classroom training options based on certification curriculum. Technical training can be tailored to individual customer needs. Training enables customers and partners to more effectively manage and support the power infrastructure. We have built our training program on practical learning objectives that are relevant to specific technologies or infrastructure design objectives.Service & SupportGE Energy field service and support personnel are trusted advisors to our customers – always available to answer questions and help with any project, large or small. Our certified professional services team consists of experts in every aspect of power conversion with the resources and experience to handle large turnkey projects along with custom approaches to complex challenges. Proven systems engineering and installation best practices are designed to safely deliver results that exceed our customers’ expectations. WarrantyGE Energy is committed to providing quality products and solutions. We have developed a comprehensive warranty that protects you and provides a simple way to get your products repaired or replaced as soon as possible.For full warranty terms and conditions please go to/powerelectronics.。
5-Installation

What is an Installation 什麼是系統安裝?
• Why do installations fail? 為何安裝系統會失敗?
Client name / running header 14pt
Installation 系統安裝
Installation
• Definition: 定義 :
Installation is the act or process of defining process and system requirements, setting the responsibility for conformance to those requirements, training the people to perform those requirements, and changing client behavior 安裝系統是一個行動或過程 : 它訂定流程及系 統的要求, 制定遵照這些要求的責任, 培訓員工去履行責任及改變客 戶的行為。
• What do we mean by a “wet run” and why is it important? 什麼是”濕試” ? 為什麼它很重要?
• List three critical items for a successful installation. 列出達到成功安裝的 3個重要的項目。
• Understand the operational goals: 了解運作的目的: The operating problems, the system design and what it will do for the work area 這部門的運作問題, 系統設計及將會做什麼。
- 1、下载文档前请自行甄别文档内容的完整性,平台不提供额外的编辑、内容补充、找答案等附加服务。
- 2、"仅部分预览"的文档,不可在线预览部分如存在完整性等问题,可反馈申请退款(可完整预览的文档不适用该条件!)。
- 3、如文档侵犯您的权益,请联系客服反馈,我们会尽快为您处理(人工客服工作时间:9:00-18:30)。
CA IT Client Manager
资产在库与发现
特性概述
◎copyright broadengate 2008
CA ITCM:资产发现和在库 :
在异构IT环境中主动管理 资产的强大的解决方案 在异构 环境中主动管理IT资产的强大的解决方案 环境中主动管理
◎copyright broadengate 2008
软件计量和审核
软件计量和审核为您IT环境中的 软件使用模式提供一个 准确实时的视图
> > > > > 主动控制或监测应用程序的使用 防止许可使用出现过度或不足 根据合同明确的责任, 根据合同明确的责任,在网络中管理许可证的数目 避免购买不必要的许可证 消除违反合同的行为
CA IT Client Manager: : IT资产管理的生命周期 资产管理的生命周期
◎copyright broadengate 2008
实现IT客户生命周期自动化 实现 客户生命周期自动化
通过一个单一产品,为所有企业客户机提供全自动盘存,记录,维护,移植和安全功能. 通过一个单一产品,为所有企业客户机提供全自动盘存,记录,维护,移植和安全功能.
>自动计划并发布报告 自动计划并发布报告
◎copyright broadengate 2008
CA IT Client Manager: :
软件分发
特性概述
◎copyright broadengate 2008
向具体小组宣传的软件
向所有人宣传的软件
◎copyright broadengate 2008
25
2009年3月19日 CA服务管理解决方案 CA机密与专有信息 Copyright 2008 CA.
Windows 98升级到 Windows XP时,CA客户管理解决方案就充分证明自己物有所值了." Mr. Harry Butler, EFW
"当仅凭两个技术人员在8小时之内就能把60台PC从Microsoft
> 资产管理的成本下降 资产管理的成本下降40%-50%
"我们估计使用过去的方法进行一次较大软件的升级,每台PC至少需要一个半小时...对
对安装的软件打补丁
◎copyright broadengate 2008
按计算机划分的软件细目
◎copyright broadengate 2008
按组划分的软件细目
>克服环境的复杂性 克服环境的复杂性
在异构业务环境中进行配置 支持笔记本电脑,台式电脑,服务器和 PDA系统
>根据环境中的危险漏洞进行保护 根据环境中的危险漏洞进行保护
轻松地得知作业的状态和进度,在 Unicenter软件交付中
◎copyright broadengate 2008
◎copyright broadengate 2008
4
Gartner市场展望报告 市场展望报告—ITAM 市场展望报告
◎copyright broadengate 2008
◎copyright broadengate 2008
自动化的管理
> 基于策略的管理
制定监测和加强 公司IT标准
– 检测并对库存变化告警 – 自动响应库存变化
> 自动化系统维护与 配置的变化
确保定期运行预防性 维修来维护系统 性能和可靠性 统一,持续地应用并 执行适当的配置变更
基于策略的分配
策略简化了在您的IT环境中保持一致的过程
> 实现软件升级分配的自动化 > 保证基线软件的维护
可将新计算机自动地提升到正确的软件水平上
> 确保公司软件标准得到维持 > 消除对软件配置进行重复调度的需求
◎copyright broadengate 2008
用户可通过软件目录订购所需软件 客户无须特殊许可
> 减少软件管理人员的负担 > 由软件交付系统管理分配
确保软件以一致,已知的方式进行配置
> 加格纳"宣传"每个软件应用程序 加格纳"宣传"
向所有用户"宣传" 向选出的分组用户"宣传" 向具体用户"宣传"
◎copyright broadengate 2008
于我们测试现场的225台PC来说,就需要112个小时以上.使用Unicenter 软件交付解 决方案,在每台PC上的安装时间只需要3-4分钟." Steve Lanzl, CIO, Bowater股份有限公司
> 因IT变更(如发布管理)导致的事故减少 变更( 变更 如发布管理)导致的事故减少60-70% > 补丁管理的管理成本减少 补丁管理的管理成本减少70% > 软件分发的管理成本减少40% 软件分发的管理成本减少
基于策略的 基于策略的分组 策略
◎copyright broadengate 2008
用户自服务
在限定的范围内,赋予用户在自己的 在限定的范围内, 台式机或笔记本中管理软件的权利
> 对所选择的用户自服务软件进行"宣传" 对所选择的用户自服务软件进行"宣传"
CA ITCM:软件分发 :
在异构IT环境中实现补丁和软件配置的自动化 在异构 环境中实现补丁和软件配置的自动化
>自动化软件配置,快速确定变更 自动化软件配置, 自动化软件配置
可进行信息打包,交付,安装,配置和重 新运行 可确保配置的一致性和可靠性
CA IT Client Manager: :
远程桌面控制
特性概述
◎copyright broadengate 2008
CA ITCM:远程桌面控制 :
可对远程台式电脑和服务器进行集中管理
>远程管理能力可以简化管理,这些 远程管理能力可以简化管理, 远程管理能力可以简化管理 远程功能包括: 远程功能包括:
CA ITCM:远程桌面控制 :
> 集中的,安全的访问管理和控制 集中的,
可配置的访问等级 终端用户授权(有密码或智能卡保护)
> 安全的远程访问
禁用键盘,鼠标和屏幕
> 集中的会议管理和审核 > 会议记录 > 内置
带宽使用管理 加密和压缩 聊天 同步交换文件
> 自动计划并发布报告
以多种格式发布或察看 输出为多种格式(包括ODBC)以供外部使用
◎copyright broadengate 2008
>全面的报告解决方案 全面的报告解决方案
◎copyright broadengate 2008
访问 检查 控制 管理
>同步交换文件 同步交换文件 >处理交互式会议 处理交互式会议 >执行远程应用程序 执行远程应用程序 >监测和记录活动 监测和记录活动 >剔除对台式电脑的不必要访问 剔除对台式电脑的不必要访问
为用户提供远程帮助, 无论他们位于何处,即使他们处于运行中
◎copyright broadengate 2008
◎copyright broadengate 2008
CA IT Client Manager
统一的产品架构可降低管理成本
>单一管理器,单一服务器和单一代 单一管理器, 单一管理器 理 >通用的用户界面和报告 通用的用户界面和报告 >共享的通用基础架构 共享的通用基础架构
◎copyright broadengate 2008
报告
> 全面的报告解决方案
盘存信息 软件分配信息 软件使用信息 远程控制信息 报告可以包括多种信息类型
> 预设 预设100多个即用性报告 多个即用性报告 > 轻松创建定制报告
点击式定义
发现
库存
配置
软件 使用 报告
智能
CA IT CLIENT MANAGER
升级 / 更新 软件 发布
移植
补丁 研究
补丁 管理
远程 访问
◎copyright broadengate 2008
带给客户的利益
> PC移植 升级效率提高 移植/升级效率提高 移植 升级效率提高60-70%
◎copyright broadengate 2008
◎copyright broadengate 2008
CA IT Client Manager:
补丁研究与管理
◎copyright broadengate 2008
◎copyright broadengate 2008
特性概述
◎copyright broadengate 2008
CA IT 客户管理器
> 资产在库与发现 > 软件分发 > 远程桌面控制 > 补丁研究和管理 > 桌面移植 > 资产智能
◎copyright broadengate 2008
一体化的客户管理
CA IT Client Manager 资产智能 远程控制 资产管理 连续的发现 移植管理 补丁管理 软件分发
通讯,服务控制器,追踪和故障排除能 力,加密,证书,压缩,事件,配置
>与用户目录的共同集成 与用户目录的共同集成 >面向任务的网络控制台 面向任务的网络控制台
轻松地得知作业的状态和进度
◎copyright broadengate 2008
>连续和主动的发现 连续和主动的发现
