RS232 编程指南
#RS232通信编程实验指导书

目录0 序言 21 理论背景 3串口通讯的见解及接口电路 3传输速率与传输距离 5波特率 5发送/接收时钟 6波特率因子 7传输距离 7奇偶校验 8网络通讯的数据包 <帧) 91.4.1 HDLC 的帧构造 10点对点协议PPP的帧构造111.5 调制解调器 <MODEM)和流控制 11调制解调器<MODEM)11流控制132 技术背景162.1 RS-23216电气特点17连结器的机械特点192.1.3 RS-232的接口信号202.2 远距离通讯 25采用Modem(DCE>和电话网通讯时的信号连结25采用专用电话线通讯262.3 近距离通讯 27零Modem的最简单连线<3线制)27零Modem标准连结283 设计过程303.1 串行通讯资料 30串行通讯端口30串口通讯线303.2 整体设计见解与功能描绘32整体设计见解32字节传输33文本文件传输344 设计成就与运行过程354.1 实时信息交互功能354.2 文本和文件的传输440序言在各样单片机应用系统设计中,如智能仪器仪表、各样手持设备、 GPS 接收器等,都会碰到怎样与PC 机进行通讯的问题。
在数据量不大、传输速率要求不高的情况下,一般都采用串行通讯方式,即经过与PC 机配置的RS-232标准串行接口COM1 、 COM2 等相连结来实现应用系统与PC 机之间的数据互换。
比方南天加密键盘,它是南天自主开发的新产品,采用扫描式16 键金属键盘,用单片机与DES 芯片实现管理和控制,经过RS232 通讯口与PC 机相连。
它是针对南天自助产品而研制的,可对键盘敲入的键码加密,以密文形式送到PC 机,保证通讯过程中的数据加密,有效地保护键盘交易信息的安全。
本课题以计算机科学与技术专业的理论知识为基础,以计算机通讯技术为支撑,在全面掌握计算机通讯基本理论和基本技术的基础上,利用RS— 232 接口接口规范,设计与实现一个计算机通讯系统。
用C编写的RS232串口通信程序

void main(){delayms(100);init(); //初始化系统delayms(100);init_wdt(); //初始化看门狗while(1){while(!RI_0) //是否收到数据{clr_wdt();}RI_0=0; //清除接收中断标志buffer=S0BUF;if(buffer==0x5a) //检测祯头0start0=1;if(buffer==0x54) //检测祯头1start1=1;if(buffer==0x5a) //检测祯尾0end0=1;if(buffer==0xfe) //检测祯尾1end1=1;if((start0==1)&(start1==1)){buff[i]=buffer; //从祯头1开始存储数据i++;}if((end0==1)&(end1==1)) //是否已经接收祯尾{count=i; //数据长度为count个i=1;if((buff[2]==0x03)&(count==107)) //是否422指令 {buff[0]=0x5a; //重填祯头0buff[count-4]=0; //校验和清零for(k=2;k<(count-4);k++) //计算校验和{buff[count-4]+=buff[k];}for(k=0;k<count;k++) //从祯头1开始循环发送{S0BUF=buff[k];while(!TI_0); //等待发送完成TI_0=0; //清除发送中断标志}reset();}else if((buff[2]==0x05)&(count==7)) //是否AD测试指令{sendad();reset();}else if((buff[2]==0x18)&(count==7)) //是否发送时序信号指令{sendpaulse();reset();}else //如果接收错误,则恢复各标志位为初始状态以便下次接收 {reset();}}}}void reset(){start0=0; //祯头祯尾标志位清零start1=0;end0=0;end1=0;for(k=0;k<count;k++){buff[k]=0x00; //缓冲区清零}count=0; //计数清零}。
RS232传输机床程序操作

RS232传输机床程序操作
RS232传输机床程序操作
1.更改机床参数:
a在MDI模式下,按面板SET(设定),写参数为1,I/O通道为1
b.按面板SYSTEM(系统),查看[所有I/O]页面:I/O通道 1,设备号 0,波特率 9600
2.面板SYSTEM(系统),[参数]页面对所有相关参数进行设置
0000#0:TVC是否进行TV检查 0
0000#1:ISO是否输出为ISO代码 1
0000#2:INI输入单位是否为INCH 0
0000#5:SEQ 是否在MDI模式下自动插入序号为1时设置NO3216
0001#1:FVC 是否为FS10/11格式 0
0020:I/O通道设置0,1为RS232串行口1,2为RS232串行口2,4为存储卡接口,6为运行DNC
0110#:IO4,I/O通道是否分别控制一般为0
0100#1:CTV程序注释文字是否TV校验 0
#2:CRF ISO代码中EOB输出是否为CF,LF 0
#3:NCR EOB输出是滞去除一个CR(#2为1时) 0
0102:IO SELECT CH0设置输入/输出设备,为0时为RS‐232
0101#0:SB2停止位的设定 0为1位,1为2位
0134#1:PRY奇偶检验是否使用
0138#7:MDN是否使用存储卡进行DNC操作
3.[编辑]模式‐>按[PROG]‐>[程序]选项卡‐>[操作]选项卡‐>[+]选项单‐>[输出入]选项卡‐>后输入程序名按[输出]按钮。
计算机网络实验 RS232串口通信程序的编写

实验二RS232串口通信程序的编写一.实验目的1.掌握串口通讯编程的编写2.实现两台计算机通过RS232通信二.编程环境Visual studio 2008三、实验原理1 概述在现代的各种实时监控系统和通信系统中,在Windows 9X/NT下利用VC++对RS-232串口编程是常用的手段。
Windows 9X/NT是抢先式的多任务操作系统,程序对CPU的占用时间由系统决定。
多任务指的是系统可以同时运行多个进程,每个进程又可以同时执行多个线程。
进程是应用程序的运行实例,拥有自己的地址空间。
每个进程拥有一个主线程,同时还可以建立其他的线程。
线程是操作系统分配CPU时间的基本实体,每个线程占用的CPU时间由系统分配,系统不停的在线程之间切换。
进程中的线程共享进程的虚拟地址空间,可以访问进程的资源,处于并行执行状态,这就是多线程的基本概念。
2 VC++对多线程的支持使用MFC开发是较普遍的VC++编程方法。
VC++把线程分为两种:用户界面线程和工作者线程。
用户界面线程能够提供界面和用户交互,通常用于处理用户输入并相应各种事件和消息;而工作者线程主要用来处理程序的后台任务。
程序一般不需要直接创建CWinThread对象,通过调用AfxBeginThread()函数就会自动创建一个CWinThread对象,从而开始一个进程。
创建上述的两种线程都利用这个函数。
线程的终止取决于下列事件之一:线程函数返回;线程调用ExitThread()退出;异常情况下用线程的句柄调用TerminateThread()退出;线程所属的进程被终止。
3 多线程在串口通信中的应用3.1 串口通信对线程同步的要求因为同一进程的所有线程共享进程的虚拟地址空间,而在Windows 9X/NT系统下线程是汇编级中断,所以有可能多个线程同时访问同一个对象。
这些对象可能是全局变量,MFC的对象,MFC的API等。
串口通信的几个特点决定了必须采用措施来同步线程的执行。
计算机网络实验RS232串口通信程序的编写
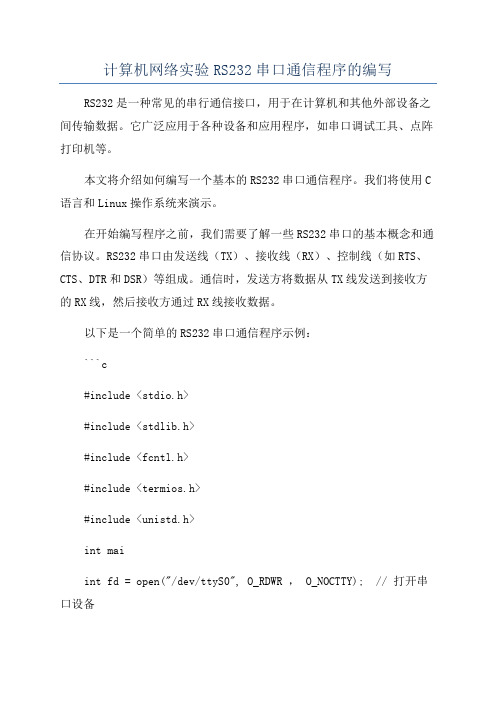
计算机网络实验RS232串口通信程序的编写RS232是一种常见的串行通信接口,用于在计算机和其他外部设备之间传输数据。
它广泛应用于各种设备和应用程序,如串口调试工具、点阵打印机等。
本文将介绍如何编写一个基本的RS232串口通信程序。
我们将使用C 语言和Linux操作系统来演示。
在开始编写程序之前,我们需要了解一些RS232串口的基本概念和通信协议。
RS232串口由发送线(TX)、接收线(RX)、控制线(如RTS、CTS、DTR和DSR)等组成。
通信时,发送方将数据从TX线发送到接收方的RX线,然后接收方通过RX线接收数据。
以下是一个简单的RS232串口通信程序示例:```c#include <stdio.h>#include <stdlib.h>#include <fcntl.h>#include <termios.h>#include <unistd.h>int maiint fd = open("/dev/ttyS0", O_RDWR , O_NOCTTY); // 打开串口设备if (fd == -1)perror("打开串口失败");exit(1);}struct termios options;tcgetattr(fd, &options); // 获取当前串口设置//设置波特率为9600cfsetispeed(&options, B9600);cfsetospeed(&options, B9600);//设置数据位为8位,无奇偶校验,停止位为1位options.c_cflag &= ~PARENB;options.c_cflag &= ~CSTOPB;options.c_cflag &= ~CSIZE;options.c_cflag ,= CS8;//更新串口设置tcsetattr(fd, TCSANOW, &options);char buffer[255];while (1)ssize_t len = read(fd, buffer, sizeof(buffer)); // 从串口读取数据if (len == -1)perror("读取串口失败");exit(1);}printf("接收到数据:%.*s\n", len, buffer);ssize_t nwrite = write(fd, buffer, len); // 向串口写入数据if (nwrite == -1)perror("写入串口失败");exit(1);}}close(fd);return 0;```该程序首先打开串口设备`/dev/ttyS0`,如果打开失败则会输出错误信息并退出。
RS232/RS485/RS422通信设计指南

RS232/RS485/RS422通信设计指南RS232是一种常见的串行通信标准,广泛应用于个人电脑和外设之间的数据传输。
RS232通信线路使用单端信号线,其中一条线负责传输数据,另一条线负责传输与数据相对应的信号。
为了消除数据传输过程中的干扰,RS232还定义了数据传输时序和电气特性。
与RS232相比,RS485是一种更灵活和可靠的串行通信标准,用于长距离、多节点数据传输。
RS485通过差分传输来抵抗电磁干扰,可以支持最多32个节点。
因此,RS485常用于工业自动化控制、楼宇自动化和智能家居等领域。
RS485通信系统的设计原则包括以下几个方面。
首先,选择合适的线缆,常用的有双绞线和屏蔽双绞线。
此外,设计时需要考虑通信距离和波特率的关系,通常距离越远,则波特率越低。
另外,还需要考虑终端电阻的设置,以确保信号质量和数据传输可靠性。
RS422是一种双向、差分传输的串行通信标准,用于高速数据传输和长距离通信。
RS422可以支持最多10个节点,是一种理想的通信标准,适用于对数据传输速度和抗干扰能力有较高要求的应用场景。
在RS422通信系统的设计过程中,需要考虑以下几个方面。
首先,选择合适的线缆和连接器,屏蔽双绞线和DB9连接器是常见的选择。
其次,应根据通信距离和波特率选择适当的终端电阻,并确保电缆主线和对称线的长度相等,以防止信号失真。
此外,由于RS422支持双向通信,需要考虑数据收发方向及数据格式的约定。
总结而言,RS232、RS485和RS422是常见的串行通信标准,用于不同应用场景的数据传输。
在设计这些通信系统时,需要考虑适当的线缆和连接器选择、通信距离、波特率、终端电阻设置以及数据收发方向等因素。
通过遵循这些设计原则,可以确保通信系统的稳定性、可靠性和性能。
RS232串行通信编程方法
RS232串行通信一、任务描述⋅⋅⋅⋅⋅⋅⋅⋅⋅⋅⋅⋅⋅⋅⋅⋅⋅⋅⋅⋅⋅⋅⋅⋅⋅⋅⋅⋅⋅⋅⋅⋅⋅⋅⋅⋅⋅⋅⋅⋅⋅⋅⋅⋅⋅⋅⋅⋅⋅⋅⋅⋅⋅⋅⋅⋅⋅⋅⋅⋅⋅⋅⋅⋅⋅⋅⋅⋅⋅⋅⋅⋅⋅⋅⋅⋅⋅⋅⋅⋅⋅⋅⋅⋅⋅⋅⋅⋅⋅⋅⋅⋅⋅⋅⋅⋅⋅⋅⋅⋅⋅⋅⋅⋅⋅⋅⋅⋅⋅⋅⋅RS-232应用范围广泛、价格便宜、编程容易并且可以比其它接口使用更长的导线,随着USB端口的越来越普遍,将会出现更多的把USB转换成RS-232或其它接口的转换装置。
但是RS-232和类似的接口仍将在诸如监视和控制系统这样的应用中得到普遍的应用。
RS232标准采用的接口是9针或25针的D型插头,常用的一般是9针插头。
本任务是STC89C52串行口经RS232电平转换后,与PC机串行口相连。
PC机可使用串口调试应用软件如:“WINDOWS 超级终端”、“串口调试助手”、“串口精灵”等,实现上位机与下位机的通讯任务目标:本实验使用串行中断法接收和发送资料。
上位机发出指定字符,下位机收到后,加一(+1)运算后回传给PC机。
波特率设为4800。
二、任务资讯⋅⋅⋅⋅⋅⋅⋅⋅⋅⋅⋅⋅⋅⋅⋅⋅⋅⋅⋅⋅⋅⋅⋅⋅⋅⋅⋅⋅⋅⋅⋅⋅⋅⋅⋅⋅⋅⋅⋅⋅⋅⋅⋅⋅⋅⋅⋅⋅⋅⋅⋅⋅⋅⋅⋅⋅⋅⋅⋅⋅⋅⋅⋅⋅⋅⋅⋅⋅⋅⋅⋅⋅⋅⋅⋅⋅⋅⋅⋅⋅⋅⋅⋅⋅⋅⋅⋅⋅⋅⋅⋅⋅⋅⋅⋅⋅⋅⋅⋅⋅⋅⋅⋅⋅⋅⋅⋅⋅⋅⋅⋅为了完成任务目标,提供的资讯信息包括:实训装置的RS232串行通信电路、单片机串行口工作原理、RS232串行通信编程方法及C51通用编程。
1.串行通信电路及接线图1 RS232串口通信电路图2 电源指示2.RS232串行口工作原理当PC机与单片机进行通信时,PC机的RS232接口的逻辑电平为:逻辑1= -3 ~ -15V;逻辑0=3~15V。
51单片机的逻辑电平(TTL电平标准)为:逻辑1>2.0V,逻辑0<0.8V 。
为了能够使PC机和单片机正常通信,需要电平转换芯片MAX232(如上图)。
RS232与modem通信编程
1.RS-232接口物理层规范 1.RS-232接口物理层规范
1. 1 RS232C 9 脚接头信号列表
引 脚 1. CD Carrier Detect 2. RD Receive Data 3. TD Transmit Data 4. DTR Data Terminate Ready 5. SG Singal Set Ready 6. DSR Data Set Ready 7. RTS Request To Send 8. CTS Clear To Send 9. RT Ring Indicate 意 义 数据载波侦测 接收数据 发送数据 数据终端准备好 地线 数据准备好 请求发送 清除发送 铃声指示器
2.1 MSComm控件的属性 MSComm控件的属性
(1) CommPort属性 属性 该属性用于设置或返回连接的串口编号。 该属性用于设置或返回连接的串口编号。 (2) Setting属性 属性 该属性用于设置或返回通信参数,属性值 该属性用于设置或返回通信参数, 用字符串表示,主要设定波特率、奇偶检验、 用字符串表示,主要设定波特率、奇偶检验、 数据位数,停止位等4个参数 组成格式为: 个参数。 数据位数,停止位等 个参数。组成格式为: “BBBB,P,D,S”, , , , 例如设置为“ 例如设置为“9600,n,8,1”时表示数据 , , , 时表示数据 传输速度为9600bits/s,没有奇偶校验,数据 传输速度为 ,没有奇偶校验, 位是8位 停止位1位 位是 位,停止位 位.
2.1 MSComm控件的属性 MSComm控件的属性
(12)Input属性 ) 属性 该属性表示从接收缓冲区移走一串字 将缓冲区中收到的数据读入变量。 符,将缓冲区中收到的数据读入变量。 (13)RThreshold属性 ) 属性 该属性为一阀值, 该属性为一阀值,当接收缓冲区内字 节个数达到或超过该值后就产生OnComm 节个数达到或超过该值后就产生 事件,并且CommEvent属性会被设定为 事件,并且 属性会被设定为 ComEvReceive。如果该值为 (默认值), 。如果该值为0(默认值), 则无论有多少数据输入缓冲区都不会产生 OnComm事件。 事件。 事件
rs232if使用手册
RS232接口是一种串行通信协议,常用于计算机与其他设备之间的数据传输。
以下是RS232接口的使用手册:一、接口定义RS232接口采用9针或25针的D型插头,通常在设备上会有DB9或DB25的标识。
其中,2脚为接地线(GND),3脚为发送线(TXD),5脚为数据终端设备线(DTR)和接收线(RXD)共用。
其他引脚功能因设备和协议而异。
二、连接方式1. 直连:用于近距离(小于15米)的设备间通信,如计算机与串口设备的连接。
2. 交叉连接:用于连接两个具有不同电气特性或端接电阻的设备,如PC与调制解调器或两个PC之间的连接。
3. 转换器连接:通过转换器实现不同电气特性的设备之间的通信,如通过RS232转USB转换器连接PC和串口设备。
三、通信参数1. 波特率:通信速率,常见的波特率有9600、19200、115200等,需要根据设备和协议的要求进行设置。
2. 数据位:用于传输数据的有效位数,常见的有5、6、7、8位。
3. 停止位:用于表示一个字符的结束,常见的停止位有1位和2位。
4. 奇偶校验:用于错误检测,可以选择奇校验或偶校验。
四、数据传输1. 发送数据:将需要发送的数据按照规定的通信参数进行格式化,通过TXD线发送出去。
2. 接收数据:从RXD线接收数据,并进行相应的格式化处理,得到需要的数据。
五、注意事项1. 在连接设备时,需要确保接口的引脚定义与设备的电气特性相匹配。
2. 在长时间未使用时,应将设备的电源关闭,以避免接口和设备损坏。
3. 在进行数据传输时,应确保设备的波特率、数据位、停止位和奇偶校验等参数设置正确。
西门子1200-RS232通讯编程
11
写入需要发送 的数据
yf6e
1.搜索空闲串口 2.选择当前串口, 填写串口参数 3.勾选16进制显示 4.填写完需要发送 的数据,按手动 发送。注意,程 序允许,发送起 始和结束字符为, FE,FF
西门子1200-RS232通讯编程
默认3线制,全双工 通讯,三根线全接。
流量控制:默认无, 如需带握手协议, 旋转硬件RTS始终打 开
2
定义起始字符
3
定义结束字符
4
建立接收数据块
5
第一步
第二步 第三步
6
建立发送数据块
7
第一步
第二步
第三步
8
两个数据块属性里,去掉优化的块 访问,前面的√
13
14
可以看到新的数据,并不是从rcv1开始 存的,而是继续之前的位置存下去。 所以,不建议每次发送不定长数据。 为了保证数据有效性,可以定义特殊 字符开始和结束,但是要保证,每次 发送定长数据列。
15
上升沿触发一 次发送指令
16
如果是电脑和PLC连接,电脑为DB9公头,PLC为DB9公头, 做交叉线即可。注意,5脚需要接线。 实践证明,5脚不接,电脑和PLC无法通讯。 短接电脑2脚和3脚,自发自收,验证电脑串口好坏 短接PLC的2脚和3脚,自发自收,验证PLC的串口好坏 推荐启用开始和结束字符,每次定长发送。 或者,不做任何定义,来什么收什么,数据的安全定义为 上位机定义起始字符,PLC来什么收什么,收完检测起始字 符。
17
感谢大家!
18
9
找到指令
10
EN_R=1,表示一直接收数据 PORT选硬件里的接口 BUFFER:表示的意思,将接收到的数据 存到DB1(新建的接收数据块),从 X0.0(第一个字符)开始存起,注意数 据错位,比如,以特殊字符开始和结 束,会和以太网指令一样,第一次收3 个数据,第二次收数据存到第4个数据 区里
- 1、下载文档前请自行甄别文档内容的完整性,平台不提供额外的编辑、内容补充、找答案等附加服务。
- 2、"仅部分预览"的文档,不可在线预览部分如存在完整性等问题,可反馈申请退款(可完整预览的文档不适用该条件!)。
- 3、如文档侵犯您的权益,请联系客服反馈,我们会尽快为您处理(人工客服工作时间:9:00-18:30)。
Windows Serial Port ProgrammingRobertson BayerMarch30,2008IntroThis paper covers the basics of opening,reading from,writing to,and managing serial port communications using the Windows API.The overall goal here is to give you a basic overview of how serial communications programming works and to at least get you started along the right track.For a fully rigorous treatment of the subject,check out Allen Denver’s“Serial Communications in Win32.”Also,for a look at some actual code that uses this stuff,I’d recommend downloading the source code to two of my old programs RoboGUI and RoboCon,both of which are available at my website,.This paper will assume you know some basic C/C++,are able to compile and run programs,and that your development environment is setup for using Windows API calls(Visual C++does this automatically).There are6sections to this document:opening the serial port,setting serial port properties,setting timeouts,reading and writing data,cleaning up after yourself,and advanced functions.1Opening the serial portOpening the serial port is very easy,especially if you’ve ever done Windowsfile I/O before.First,make sure you include windows.h.You can then use the following code to open it:HANDLE hSerial;hSerial=CreateFile("COM1",GENERIC_READ|GENERIC_WRITE,0,0,OPEN_EXISTING,FILE_ATTRIBUTE_NORMAL,0);if(hSerial==INVALID_HANDLE_VALUE){if(GetLastError()==ERROR_FILE_NOT_FOUND){//serial port does not rm user.}//some other error rm user.}So let’s walk through this.First,we declare a variable of type HANDLE and initialize it with a call to CreateFile.Thefirst argument to CreateFile is simply the name of thefile you want to open.In this case,we want to open a serial port,so we use"COM1","COM2",etc.The next argument tells Windows whether you want to read or write to the serial port.If you don’t need to do one of these,just leave it out.Arguments3and4should pretty much always be0.The next argument tells us that Windows should only open an existingfile,and since serial ports already exist,this is what we want.After this comes FILE ATTRIBUTE NORMAL,which just tells Windows we don’t want anything fancy here.Thefinal argument should also be zero.2Setting ParametersSo now that we have a HANDLE to the serial port,we need to set the parameters for it(baud rate,stop bits,etc).Windows does this through a struct called DCB:DCB dcbSerialParams={0};dcbSerial.DCBlength=sizeof(dcbSerialParams);if(!GetCommState(hSerial,&dcbSerialParams)){//error getting state}dcbSerialParams.BaudRate=CBR_19200;dcbSerialParams.ByteSize=8;dcbSerialParams.StopBits=ONESTOPBIT;dcbSerialParams.Parity=NOPARITY;if(!SetCommState(hSerial,&dcbSerialParams)){//error setting serial port state}Once again,we’ll walk through this line-by-line.First,we create a variable of type DCB,clear all its fields,and set its size parameter(this is required due to a strange quirk of Windows).We then use the GetCommState function,which takes in our serial port handle and the DCB struct,tofill in the parameters currently in use by the serial port.Anyway,once we have this,we just need to set the parameters we care about.Notably,baud rate,byte size,stop bits,and parity.For whatever reason,Windows requires that we use special constants to specify the baud rate.These constants are pretty straightforward:CBR19200for19200baud,CBR9600for9600 baud,CBR57600for57600baud,etc.Byte size we can just specify directly,but stop bits and parity once again require special constants.The options for StopBits are ONESTOPBIT,ONE5STOPBITS,TWOSTOPBITS.Similarly,the most commonly used options for Parity are EVENPARITY,NOPARITY,ODDPARITY.There are others,but these are quite obscure. See the MSDN library entry(do search for DCB)for full details.Similarly,there are loads of otherfields in a DCB struct that you can use for some other more obscure serial parameters.Once again,see the MSDN library.After we’ve set up the DCB struct how we want it,we need to apply these setting to the serial port. This is accomplished with the SetCommState function.3Setting timeoutsOne of the big problems with serial port communication is that if there isn’t any data coming into the serial port(if the serial port device gets disconnected or turned off,for example)then attempting to read from the port can cause your application to hang while waiting for data to show up.There are two ways of going aboutfixing this.First,you can use multithreading in your application with one thread dealing with the serial port stuffand the other doing the actual processing.This can get very messy and complex and really isn’t necessary.The other way is much simpler:just tell Windows not to wait for data to show up!This is accomplished quite simply:COMMTIMEOUTS timeouts={0};timeouts.ReadIntervalTimeout=50;timeouts.ReadTotalTimeoutConstant=50;timeouts.ReadTotalTimeoutMultiplier=10;timeouts.WriteTotalTimeoutConstant=50;timeouts.WriteTotalTimeoutMultiplier=10;if(!SetCommTimeouts(hSerial,&timeouts)){//error rm user}The COMMTIMEOUTS structure is pretty straightforward,and the abovefields are the only ones it has.A quick rundown:•ReadIntervalTimeout specifies how long(in milliseconds)to wait between receiving characters before timing out.•ReadTotalTimeoutConstant specifies how long to wait(in milliseconds)before returning.•ReadTotalTimeoutMultiplier specifies how much additional time to wait(in milliseconds)before returning for each byte that was requested in the read operation.•WriteTotalTimeoutConstant and WriteTotalTimeoutMultiplier do the same thing,just for writes instead of reads.One special case that comes up pretty often:Setting ReadIntervalTimeout to MAXDWORD and both ReadTotalTimeoutConstant and ReadTotalTimeoutMultiplier to zero will cause any read operations to return immediately with whatever characters are in the buffer(ie,have already been received),even if there aren’t any.After we’ve setup the COMMTIMEOUTS structure how we want it,we need to apply the settings to the serial port using the SetCommTimeouts function.4Reading/Writing dataAlright,so once you have an open serial port with the correct parameters and timeouts,you can start doing the actual reads.These are extremely simple.Suppose we want to read n bytes from the serial port.Then we just do:char szBuff[n+1]={0};DWORD dwBytesRead=0;if(!ReadFile(hSerial,szBuff,n,&dwBytesRead,NULL)){//error occurred.Report to user.}ReadFile takes in a HANDLE to afile(our serial port in this case),a buffer to store the data in,the number of bytes to read,a pointer to an integer that will be set to the number of bytes actually read,and NULL.Note that dwBytesRead will contain the number of bytes actually read by the ReadFile operation.Writing data is exactly the same,except the function is called WriteFile.5Closing downOnce you’re done using the serial port,make sure you close the handle.If you don’t weird things can happen, like nobody else being able to access the serial port until you reboot.In any event,it’s really simple to do, so just remember to do it:CloseHandle(hSerial);6ErrorsAs you’ve probably noticed,after each system-call,I’ve included a comment saying you should handle errors. This is ALWAYS good programming practice,but is especially important with I/O functions,since they do tend to fail more often that most functions.In any event,all the above functions return0whenever they fail and something other than0on success.Tofind out exactly what the error was,you can call the function GetLastError(),which returns the error code as a DWORD.To convert this into a string that makes sense, you can use the FormatMessage function as follows:char lastError[1024];FormatMessage(FORMAT_MESSAGE_FROM_SYSTEM|FORMAT_MESSAGE_IGNORE_INSERTS,NULL,GetLastError(),MAKELANGID(LANG_NEUTRAL,SUBLANG_DEFAULT),lastError,1024,NULL);7Advanced functionsFor the majority of people,this section will be completely irrelevant,so feel free to ignore it unless you know you need some advanced stuff(setting DTR lines,breaks,etc).Nearly all advanced functions are accomplished using the EscapeCommFunction function,which has pro-totype BOOL EscapeCommFunction(HANDLE,DWORD).In any event,thefirst parameter is just the HANDLE to the serial port you’re interested in,and the second is one of the following(self-explanatory)constants:1.CLRDTR2.SETDTR3.SETRTS4.CLRRTS5.SETBREAK6.CLRBREAKAbout the only other advanced thing I can think of is clearing the read/write buffers,which is done with a simple call to FlushFileBuffers,which takes just one argument,the HANDLE to thefile whose buffers you want toflush.Contacting meIf you have any questions,suggestions,or corrections for this document,please let me know via email at rob.bayer@.Also,the latest version of this document(and any others I’ve written)can be found at my website,.Sources1.Petzold,Charles.Programming Windows.5th edition.Redmond,WA:Microsoft Press,1999.2.Denver,Allen.”Serial Communications in Win32.”MSDN Online Library.11December1995./library/default.asp?url=/library/en-us/dnwbgen/html/msdn serial.asp.3 Jun2002.。